Limewashed Brick: How to Choose and Apply It
Learn what limewash does to brick, how to test compatibility, choose a finish, apply it safely, and avoid moisture or removal mistakes.
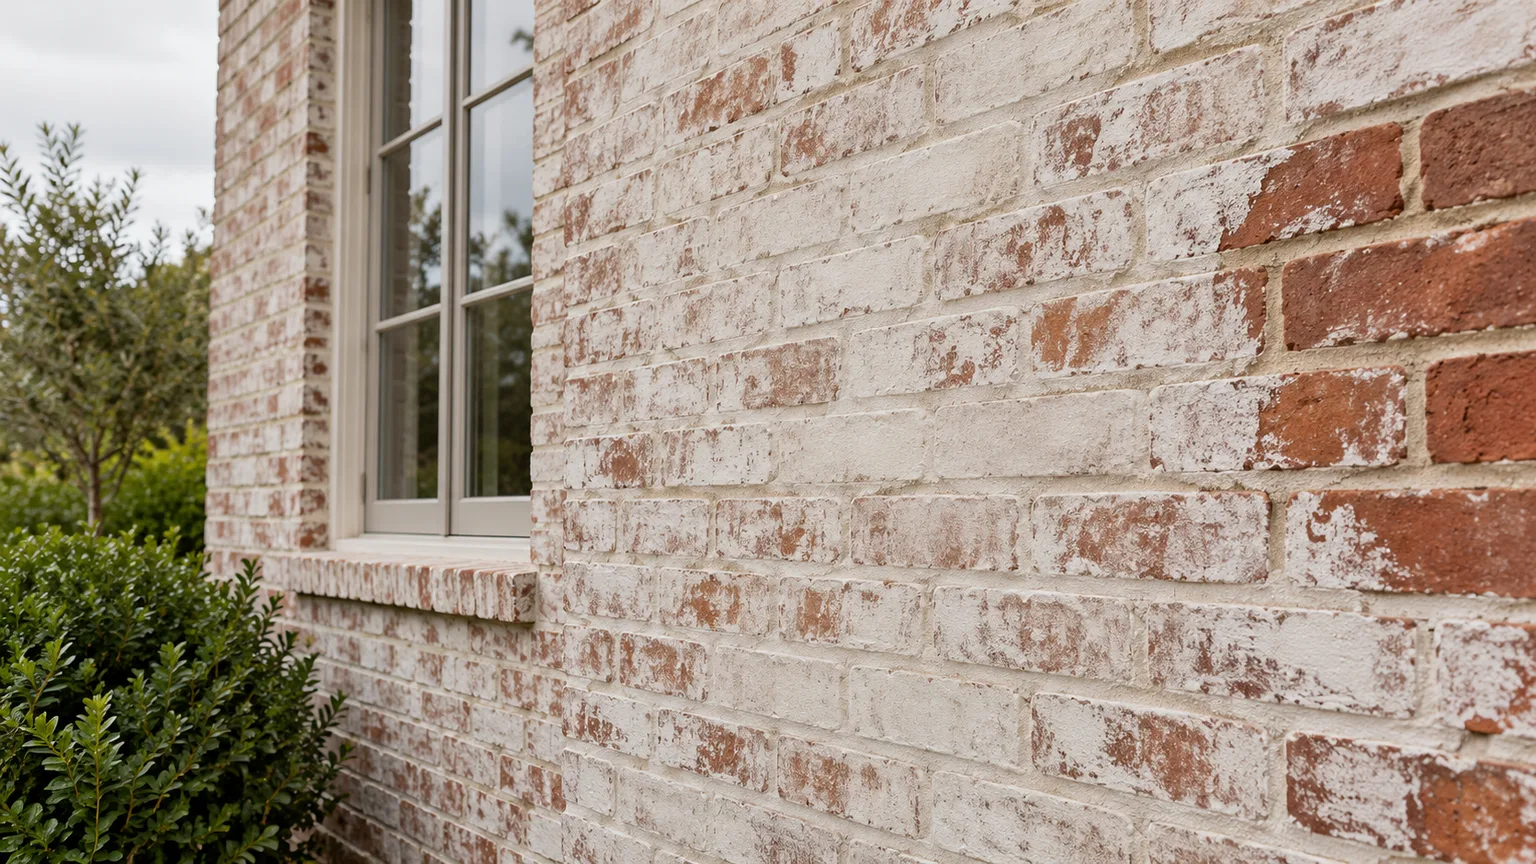
Limewashed brick has a soft, chalky finish that can brighten a wall without hiding every brick and mortar line. The look is appealing, but the right first question is not which shade to choose. It is whether your particular brick can accept the product you plan to use.
Traditional limewash is a mineral coating made from slaked or hydrated lime and water, sometimes with pigment. It bonds and weathers differently from a film-forming paint, and it is not a waterproofing treatment. Dense, smooth, sealed, painted, or moisture-damaged brick may need a different finish or professional assessment before any coating goes on.
What is limewashed brick?
Limewash is a thin, mineral-based finish traditionally made from lime and water. The National Park Service describes the historic cycle: limestone is heated to make quicklime, water is added to produce calcium hydroxide, and the limewash gradually returns toward limestone as it dries and reacts with carbon dioxide. The result is a matte surface that can show the texture and color variation of the masonry below.
A limewashed wall can look translucent after one application or much more uniform after additional coverage, depending on the product, brick, and technique. The finish is usually flat rather than glossy, and it may age with subtle variation instead of maintaining the factory-even appearance of a conventional paint film. “Limewash paint” is not a guarantee of one exact recipe: modern products may include pigments, binders, or other ingredients, so read the label and technical sheet rather than assuming every bucket behaves like a simple lime-and-water wash.
Limewash is also not a sealant. A vapor-permeable finish can allow moisture vapor to move through a wall, but it will not repair a leak, stop rising damp, or make a brick facade waterproof. Historic England’s materials-and-techniques guidance emphasizes matching finishes and repairs to the materials and behavior of the wall; the full wall assembly and source of moisture still matter.
First decide whether your brick can accept limewash
The most suitable surface is generally clean, absorbent masonry with sound mortar and no incompatible coating. Even then, the exact product matters. Some products are formulated specifically for brick and stone; others are intended for lime plaster, render, or different substrates.
Preservation guidance is especially cautious about assuming all brick is alike. Cornwall Council’s conservation guidance notes that limewash can suit certain traditional materials but is unsuitable on impervious materials such as hard brick and flint, and recommends small on-site cleaning trials because cleaning can damage masonry. That does not mean every modern brick is automatically off limits: it means you should test the actual wall and follow the instructions for the specific finish instead of relying on a generic recipe.
Check for existing coatings, repairs, and moisture
Look closely at the surface before buying supplies. Is it raw brick, painted brick, a clear water-repellent sealer, or a mix of old repairs and exposed masonry? Is there powdery white efflorescence, a damp patch, flaking coating, crumbling mortar, or a recurring stain below a window or roof edge? These are clues to pause and find the cause before decorating.
A drop of water can help you understand absorption: if a small amount darkens the brick and is drawn in, the surface is more absorbent than one where water beads or sits. This is only a screening check, not a laboratory test or a substitute for product directions. A Romabio product article, for example, says that when brick is too smooth and nonporous for its limewash, it recommends a different primer and mineral masonry coating. That guidance is specific to that product system, but it illustrates why a real test patch and the manufacturer’s substrate list matter.
Do not limewash over active damp or use a finish to conceal structural damage. Repair failed flashing, leaks, loose mortar, and other water-entry problems first. If the wall is historic, soft, unusually friable, already painted, or subject to preservation rules, consult a masonry conservator or experienced contractor before cleaning or coating; abrasive cleaning can remove a brick’s protective outer surface.
Limewash, whitewash, and brick paint compared
The word whitewash is used loosely. Some people mean diluted latex paint; others use it for a translucent mineral finish. Ask what is actually in the product. The label and technical data sheet are more useful than the style name.
| Finish | What it is | Typical look | Main decision point |
|---|---|---|---|
| Traditional limewash | Lime and water, sometimes pigment | Matte, mineral, variable; brick can show through | Needs a compatible, usually absorbent substrate and careful curing |
| Paint-based whitewash | Diluted paint or paint wash | Color choice and coverage depend on dilution | It behaves more like a paint film; verify the coating is suitable for masonry |
| Masonry paint | Coating formulated for masonry; chemistry varies | More even, opaque coverage | Check vapor permeability, primer needs, and compatibility with existing coatings |
| Leave brick bare | No new coating | Original brick and mortar remain visible | Best when the masonry is sound and its existing color suits the design |
Choose limewash for its mineral appearance and visible texture, not because it is automatically cheaper, permanent, maintenance-free, or protective in every situation. Paint may be the better choice when you need a consistent color or the brick is too dense for the limewash system. If you want the original brick fully visible and it is in good condition, leaving it bare avoids a coating decision altogether.
Choose the look with a real test panel
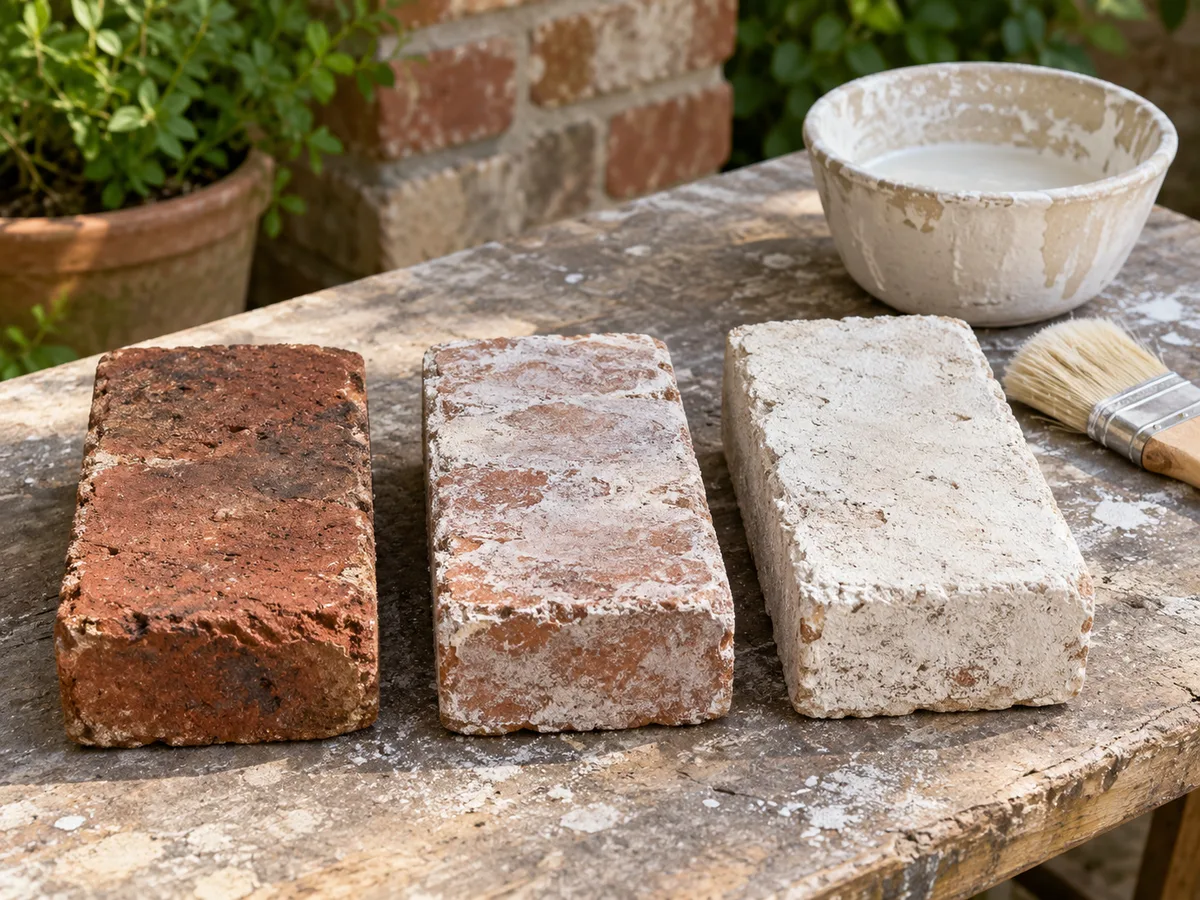
A tiny dab is a poor predictor of an entire facade. Test a patch large enough to include several bricks and mortar joints, using the exact product, dilution, brush, and technique you intend to use. For an exterior, choose an inconspicuous location that receives similar sun and weather; for an interior, check the sample in both daylight and evening light.
Allow the test to dry and cure for the time stated on the product label before judging the color. Lime finishes can look different while wet, and the amount that remains after any distressing or wash-off changes opacity. Stand back at the distance from which you normally see the wall, then inspect it in bright light and shade. Brick&Batten’s visual examples also underscore how much the surrounding trim, stone, and natural light affect the result; a color that looks creamy on one facade may read gray or stark on another.
Decide the finish before scaling up. One thin application may leave strong brick variation; additional coats generally move the look toward more coverage, but there is no universal coat count. If you want selective exposed-brick areas, practice that technique on the test panel too. A successful sample proves appearance and gives clues about adhesion, but it cannot guarantee long-term performance if the wall has hidden moisture or a coating that blocks absorption.
Tools, materials, and safety precautions
For a small project, the basic kit often includes the selected limewash or masonry product, a mixing container if required, a masonry brush, clean water if the label calls for it, a drop cloth, painter’s tape, and a soft brush for dry debris. Larger or elevated exterior work may require staging, ladders, and weather protection that are better handled by a professional. Do not buy a generic lime bag and assume a recipe found online will match the product you selected.
Lime products can be strongly alkaline, and dry powder can irritate or injure eyes and skin; a MyBuilder limewashing guide also flags eye and skin protection. Wear the eye, hand, clothing, and respiratory protection specified by your product label and safety data sheet, and avoid creating dust when opening or mixing powder. Keep children and pets away from the work zone, protect nearby plants and metal surfaces from splashes, and have clean water available for accidental contact. If the product contacts eyes or causes a burn, follow the product’s emergency directions and seek medical help.
How to limewash brick step by step
The exact sequence varies by product, so use these steps as a planning framework and let the manufacturer’s instructions control dilution, surface moisture, coat interval, and curing. This is particularly important when a commercial “limewash paint” includes ingredients beyond lime and water.
Repair and clean the wall without damaging it
Start only when the brick and mortar are sound and the cause of any dampness has been addressed. Remove loose dirt and dust with a soft brush; use a compatible mild cleaning method only if necessary and test it in a small area first. Rinse residue only when the product and masonry permit it, then give the wall enough time to dry or reach the moisture condition specified for application.
Do not default to pressure washing, sandblasting, acidic cleaners, or aggressive wire brushing. Cornwall Council warns that cleaning methods can damage brick or introduce moisture and staining, and recommends specialist advice and trials for masonry. Mask windows, trim, paving, fixtures, and plants before application; limewash splashes can be difficult to remove once they have dried.
Mix or prepare the product by its label
Some limewash products arrive ready to use; others require water, pigment, or careful stirring. Follow the label’s ratio, mixing tool, settling time, and re-stir schedule. There is no universal “whole milk” consistency or percentage that applies across raw lime, premixed washes, and branded limewash paints.
Mix enough product for a natural working section and keep the batch consistent. Lime and pigment can settle, so stir again regularly if the directions call for it. Do not add salt, glue, oil, or other folk-recipe ingredients unless the manufacturer expressly specifies them; untested additives can change adhesion, color, or permeability.
Dampen the brick only when the product calls for it
Traditional application often uses a pre-dampened surface to slow absorption, but not every commercial coating follows the same rule. If the product requires damp brick, mist an area evenly so it is cool and moist without a film of standing water. Work in a manageable section so the surface does not dry completely while you are coating it.
This step is easy to get wrong: a bone-dry, hot wall can pull water out of a wash too quickly, while an oversaturated surface may dilute or shed the coating. Use the product’s stated surface condition and weather limits instead of assuming that every brick wall should be soaked.
Apply a thin coat and keep a workable edge
Use the brush or applicator recommended for the product, working the wash into the face and mortar joints without flooding the wall. Start at the top and move across a section in a consistent pattern. Keep a wet edge where possible, but avoid repeatedly brushing material that has begun to set; overworking can create streaks and uneven texture.
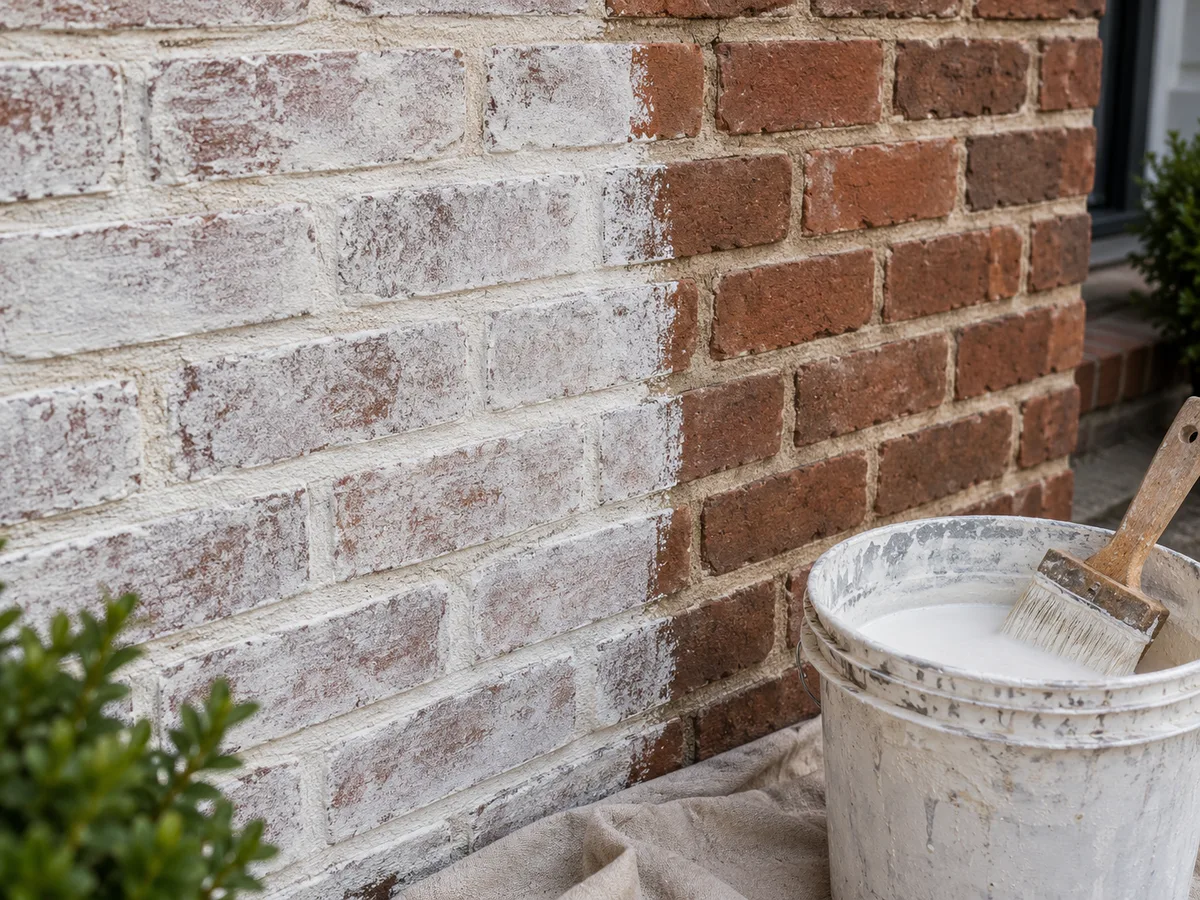
For a full facade, plan around corners, windows, and natural breaks so you can stop at a sensible edge. On a small wall, pause occasionally to step back and check the overall coverage rather than correcting each individual brick. The goal is the finish you tested, not an artificially uniform wall if the chosen product is designed to remain translucent.
Build coverage gradually and protect the cure
Let the first coat reach the recoat condition on the label before deciding whether another is needed. If the sample looked right but the wall now appears patchy, first determine whether the surface dried unevenly, the product settled, or the wall absorbed at different rates. A second coat may deepen coverage, but it can also make a previously subtle finish more opaque.
Protect fresh work from rain, freezing temperatures, strong wind, and rapid direct sun for the period stated by the manufacturer. Conditions vary by product and climate, so a fixed rule such as “wait one hour” or “it is safe after one day” is not reliable for every application. Do not judge the final shade while the coating is wet or rush to distress or wash it off unless that method is part of the product’s instructions.
Interior and exterior brick need different planning
An interior fireplace wall or accent wall is easier to protect from rain, frost, and wind, but you still need ventilation, floor protection, and a plan for overspray or dust. If the brick is part of a working fireplace or chimney, verify that the specific finish is intended for that location and keep it away from surfaces that must remain open, such as flues and vents. Do not assume a product is suitable for every heat-exposed surface simply because it can be used indoors.
Exterior work adds weather, landscaping, windows, runoff, and access. Avoid application when rain or freezing weather is expected during the product’s cure window, and work in conditions that will not flash-dry the coating. Check local historic-district, landmark, or homeowners-association rules before changing a prominent exterior; permission requirements vary by location and building status.
For either setting, photograph the wall and note the product, batch, dilution, and application conditions. Those notes help you reproduce a color or make a compatible touch-up later. They also make it easier to distinguish a normal aged patina from a new stain or moisture problem.
Common limewash problems and what to do
The wash beads up or wipes off. The brick may be too smooth, sealed, painted, dirty, or otherwise incompatible. Stop rather than applying thicker coats; confirm the substrate is allowed, test the recommended preparation, or select a masonry finish designed for that wall.
The color looks much more opaque than expected. The wall may have absorbed unevenly, or the mixture and coat thickness may differ from the sample. Let the finish reach the specified dry condition before making changes. If it is already cured, aggressive removal can damage the brick; ask the product maker or a masonry professional about safe options.
You see white powder or crystals. A coating can be confused with efflorescence, which is salt brought to the surface by moisture moving through masonry. Do not simply cover it. Identify and address the water source and get advice on cleaning before recoating, especially on historic or soft brick.
The finish streaks or has lap marks. A hot wall, fast drying, inconsistent stirring, or stopping mid-wall can all affect the appearance. Work smaller sections, maintain a consistent edge, and follow the product’s surface-moisture and weather guidance. A test panel helps reveal whether the product naturally shows brush movement.
The mortar looks weak or begins to crumble. Stop work. Coating is not a repair, and brushing or cleaning a deteriorated joint can make it worse. Have the masonry assessed and repointed with a compatible mortar before deciding on a finish.
Maintenance and removal
Limewash may weather, lighten, or develop a patina, particularly outdoors. That variation is part of the look for some homeowners and a drawback for others. There is no dependable universal lifespan: exposure, wall condition, product formulation, preparation, and desired appearance all affect when touch-up becomes worthwhile.
For routine dirt, start gently with a soft brush or the mild cleaning method approved for the product. A coating may be scuffed or washed off in high-contact areas, and cleaning can alter the appearance. If you need a more washable surface, choose a product system designed for that use before application rather than adding an unapproved sealer afterward.
Fresh limewash may be easier to remove than material that has cured, but removal from brick is not always simple or harmless. Avoid assuming that acid cleaners, pressure washing, or abrasive blasting are safe shortcuts; they can stain, erode, or expose softer brick beneath its fired outer face. For old, historic, or valuable masonry, consult a preservation specialist before attempting removal. If the wall is sound and the finish is simply no longer your preference, ask whether a compatible coating can go over it; removal may not be necessary.
Conclusion
Limewashed brick can give a wall a pale, textured finish while preserving more of the masonry’s character than an opaque paint coat. The best results start with the wall, not the bucket: identify old coatings and moisture, check whether the brick is absorbent and compatible, and test a full-size sample before committing.
Use a product made for the surface, follow its safety and application directions, and avoid aggressive cleaning or universal mix recipes. If the brick is hard, sealed, damaged, historically significant, or still damp, pause and get substrate-specific advice. That small decision can prevent a difficult coating failure and help you choose a finish that suits both the look and the building.



