How to Grow Longevity Spinach in Pots and Garden Beds
Grow longevity spinach in pots or beds with practical advice on light, watering, soil, stem cuttings, steady harvests, pest checks, and winter protection.
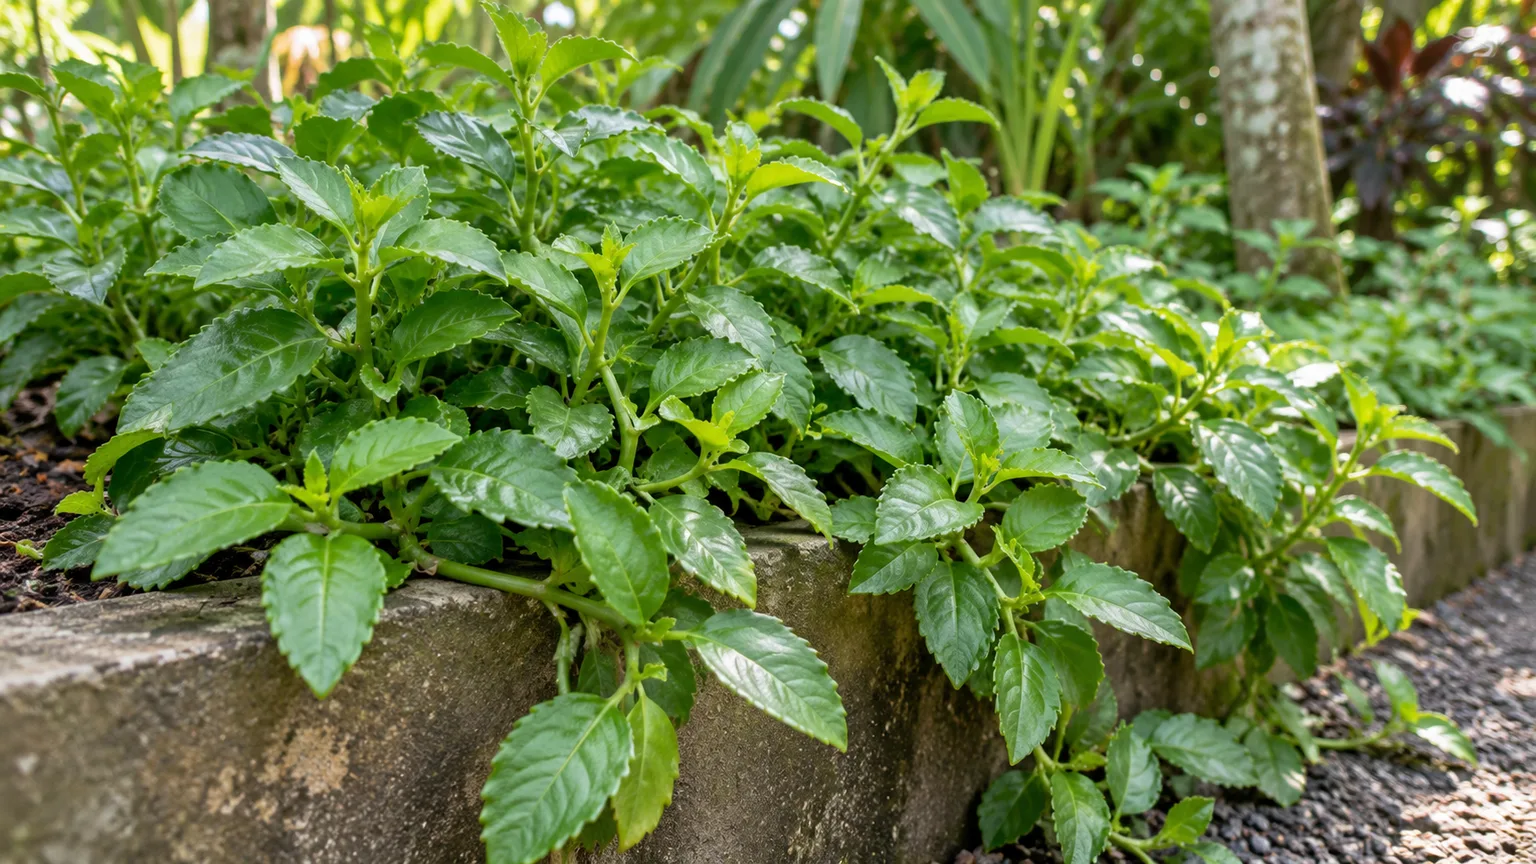
Longevity spinach (Gynura procumbens) is a warm-climate leafy perennial with thick green leaves and flexible stems that sprawl, trail, or scramble through nearby plants. Grow it in bright filtered light, keep its root zone evenly moist but well drained, and clip the soft growing tips often; in places with frost, a pot you can move indoors is the safest way to keep it year to year.
The name can be confusing. This is not ordinary spinach, and the growing calendar for a cool-season spinach crop does not apply. The plant is prized as a recurring edible green in tropical and subtropical gardens, but its tender leaves and stems need protection from hard cold and waterlogged soil.
What longevity spinach is
The botanical name is the most reliable way to identify it when buying a plant or cutting. The National Parks Board of Singapore’s GardeningSG resource lists Gynura procumbens under longevity spinach, scrambling gynura, and sambung nyawa, and describes it as a small perennial crop with fleshy leaves and a spreading habit. The Royal Horticultural Society’s genus profile describes Gynura as evergreen perennials or subshrubs, some of which scramble or trail, which helps explain why this plant behaves more like a groundcovering vine than a tidy upright spinach clump.
The tender leaves and young shoots are the parts most often harvested. They can be eaten raw when young or cooked, but their fleshy texture is different from the delicate leaves of common spinach. The name “longevity” is a common name, not a growing instruction or a promise about health effects, so choose the plant for its edible foliage and ability to keep producing in warm conditions.
A plant tag that only says “spinach” is not enough to confirm what you have. Check for Gynura procumbens on the label, especially if the seller offers several tropical greens with similar names, and use the leaf shape and growth habit as supporting clues rather than relying on a casual name alone.
Decide whether to grow it as a perennial or seasonal crop
In a warm, frost-free garden, longevity spinach can remain in place as a perennial. Plants For A Future lists it for USDA hardiness zones 9–11, but treat that range as a broad guide: zones summarize average annual extreme winter lows and cannot guarantee survival in a wet, exposed yard or a colder microclimate. The plant comes from tropical regions and is vulnerable to cold, so the practical test is whether your garden stays warm enough through winter, not the zone number by itself.
If your area has freezing nights, grow longevity spinach in a container and move it to shelter before frost arrives. You can also grow it outdoors for the warm part of the year and replace it the following spring, but keeping one mother plant inside gives you fresh cuttings and a head start. A pot makes the plant portable; a garden bed makes it easier to let the stems spread and fill a patch.
Plan this before planting rather than waiting for the first cold warning. A small rooted cutting is easy to move, while a wide groundcover with stems rooted at several nodes is much harder to lift without damage. Even in a mild climate, keep a backup cutting if the plant is important to your edible garden.
Give it bright, filtered light
Choose bright partial shade or dappled light as the safe starting point, particularly where afternoons are hot. The NParks growing guide recommends four to eight hours of indirect light and warns that plants can suffer sunburn after more than four hours of direct sun in its tropical conditions. That is useful guidance for a warm garden: filtered brightness supports leafy growth, while intense midday or afternoon exposure can mark or bleach the leaves.
In a cooler climate, a few hours of gentler morning sun may be tolerated, but introduce it gradually rather than moving a shade-grown plant straight into full sun. If leaves develop pale, dry patches on the side facing the sun, shift the pot to filtered light or add temporary shade. Do not respond to scorch by watering more unless the soil is also dry; bright heat and root drought can occur together, but they need different corrections.
Indoors, place the plant near a bright window with filtered light, or use a grow light when winter days are short. Rotate the pot periodically so one side does not stretch toward the window. Long, weak stems with wide gaps between leaves usually point to inadequate light; pinch them back after moving the plant to a brighter place so new growth develops more compactly.
Choose a garden bed or container
A garden bed is a good choice in a reliably warm climate if you want a patch of edible groundcover. Leave room around the plant for air movement and harvesting; the stems can spread beyond the original planting point. If you want to keep the bed orderly, place it at an edge where trailing growth can be clipped without tangling with neighboring crops.
A container is the better choice when winters are cold, garden space is limited, or you want to control the plant’s footprint. Because the roots are shallow and the stems can spill over a rim, choose a broad pot with drainage holes rather than a narrow, top-heavy planter. PFAF’s plant database lists a container of about three gallons (12 liters) or larger as suitable; a wider pot also gives you more room to train a small trellis or let the plant cascade.
Avoid a decorative pot with no drainage, even if you use it as an outer cachepot. After watering, empty standing water from the saucer so the root zone is not left submerged. If you are deciding between a hanging basket and a standard pot, choose a basket only if you can reach the stems easily for frequent harvest and keep the mix from drying completely in hot weather.
Prepare soil that holds moisture but drains freely
Longevity spinach needs steady moisture, but its roots still need air. NParks notes that the plant has a shallow root system and is vulnerable to root rot in waterlogged soil, recommending loamy or sandy soil with organic matter and good drainage. In a bed, loosen compacted soil and mix in mature compost; in a container, use a quality potting mix that drains readily rather than dense garden soil alone.
Think of the ideal mix as a sponge that releases excess water, not a bucket that stays saturated. If water sits on the surface or runs through a crack beside dry soil, improve the structure before planting; repeated watering cannot fix compacted or hydrophobic media. A potting mix amended with a modest amount of perlite or fine bark can help maintain air spaces, but do not add so much coarse material that the root ball dries within hours.
Depth matters less than drainage and width, but do not use a very shallow dish. NParks advises at least 10 centimeters of loamy soil for its container culture, while a larger pot provides a more forgiving moisture reserve in hot weather. Always use a container with open drainage holes and a saucer you can empty.
Plant after cold weather has passed
Set out a young plant or rooted cutting after frost risk has passed and nights have settled into warm conditions. A cold snap can damage tender growth even if the plant looked healthy the day before, so delay planting rather than gambling on a calendar date. In a variable spring, keep the plant in a movable pot until temperatures are consistently mild.
Choose a spot with bright shade and prepare the bed or pot first, then water the plant in after setting it at the same depth it was growing before. Avoid burying the crown or pressing wet soil tightly around the stem base. If you are planting a rooted cutting, handle the root ball gently and shade it for a few days while it adjusts.
For multiple plants, leave space for stems to spread and for your hands to reach in for harvest. A dense clump looks productive at first, but packed foliage is harder to inspect and dries more slowly after rain or overhead watering. If the plant will serve as a groundcover, define its edge with a path, container, or regular pruning boundary.
Water for even moisture, not soggy roots
Water when the top layer of mix begins to dry, then soak the root zone and let excess drain away. The goal is consistently moist soil, not a fixed schedule: a small pot in wind or strong light may need water much sooner than a large bed in filtered shade. Check the soil with a finger rather than watering automatically every day.
Plants in containers need closer attention because their limited soil volume dries faster than garden ground. During hot weather, check pots daily and water deeply when needed; in cool weather or indoors, wait longer between waterings. If the leaves droop in a dry pot and recover after watering, the plant was thirsty; if they droop while the mix is wet, more water can make the problem worse.
Water at the soil line when practical, and avoid keeping the foliage wet for long periods in a dense planting. Mulch can help stabilize moisture in a bed, but keep it a little away from the stems so the crown does not remain damp. If rain is frequent, prioritize drainage and airflow over adding more water.
Feed lightly to support leafy growth
Start with compost or a potting mix that contains some nutrients, then watch the plant’s growth before adding fertilizer. NParks says longevity spinach generally does not require fertilizer, but notes that a high-nitrogen feed about monthly or after harvest can encourage new foliage. That is a useful option for a frequently harvested plant, not a reason to fertilize by default.
If growth is healthy and the leaves are a good color, skip extra feeding. When new growth slows during the warm growing season despite appropriate light and moisture, use a diluted fertilizer suitable for edible plants and follow its label. Too much nitrogen can make soft, lush growth that is more difficult to support and more attractive to sap-feeding pests.
Reduce or stop feeding when growth slows in winter. Fertilizer cannot correct low light, cold roots, root rot, or a pot that has become crowded; check those conditions first. For container plants, occasional fresh potting mix or a small compost top-dress may be enough to support steady growth without accumulating excess salts.
Train trailing stems and keep growth contained
Longevity spinach naturally sprawls or trails, so it does not need a trellis to survive. A small support is useful when you want leaves off the soil, easier access for picking, or a compact vertical plant in a tight space. Install the support while stems are young and loosely guide them onto it; do not tie flexible stems tightly enough to pinch them.
If you prefer a bushier plant, pinch the growing tips above a pair of leaves. The cut prompts branching below the pinch and doubles as a small harvest. Repeat this selectively rather than shearing the whole plant at once, especially while it is still establishing.
Stems can root where they rest against moist soil, which helps the plant fill a bed but also lets it creep farther than expected. Lift or prune stems that cross a path, root in a neighboring container, or form a damp mat. Keep the area around the crown open enough to inspect leaves and soil, and avoid leaving piles of clipped stems in the bed where they can take root again.
Propagate stem cuttings directly in soil
Stem cuttings are the straightforward way to make another longevity spinach plant. NParks GardeningSG recommends soil propagation and cautions that cuttings rooted in water are likely to rot, so use a small pot of moist, free-draining mix rather than a jar of water. This also lets you move the cutting into its permanent container without handling a fragile water-rooted root system.
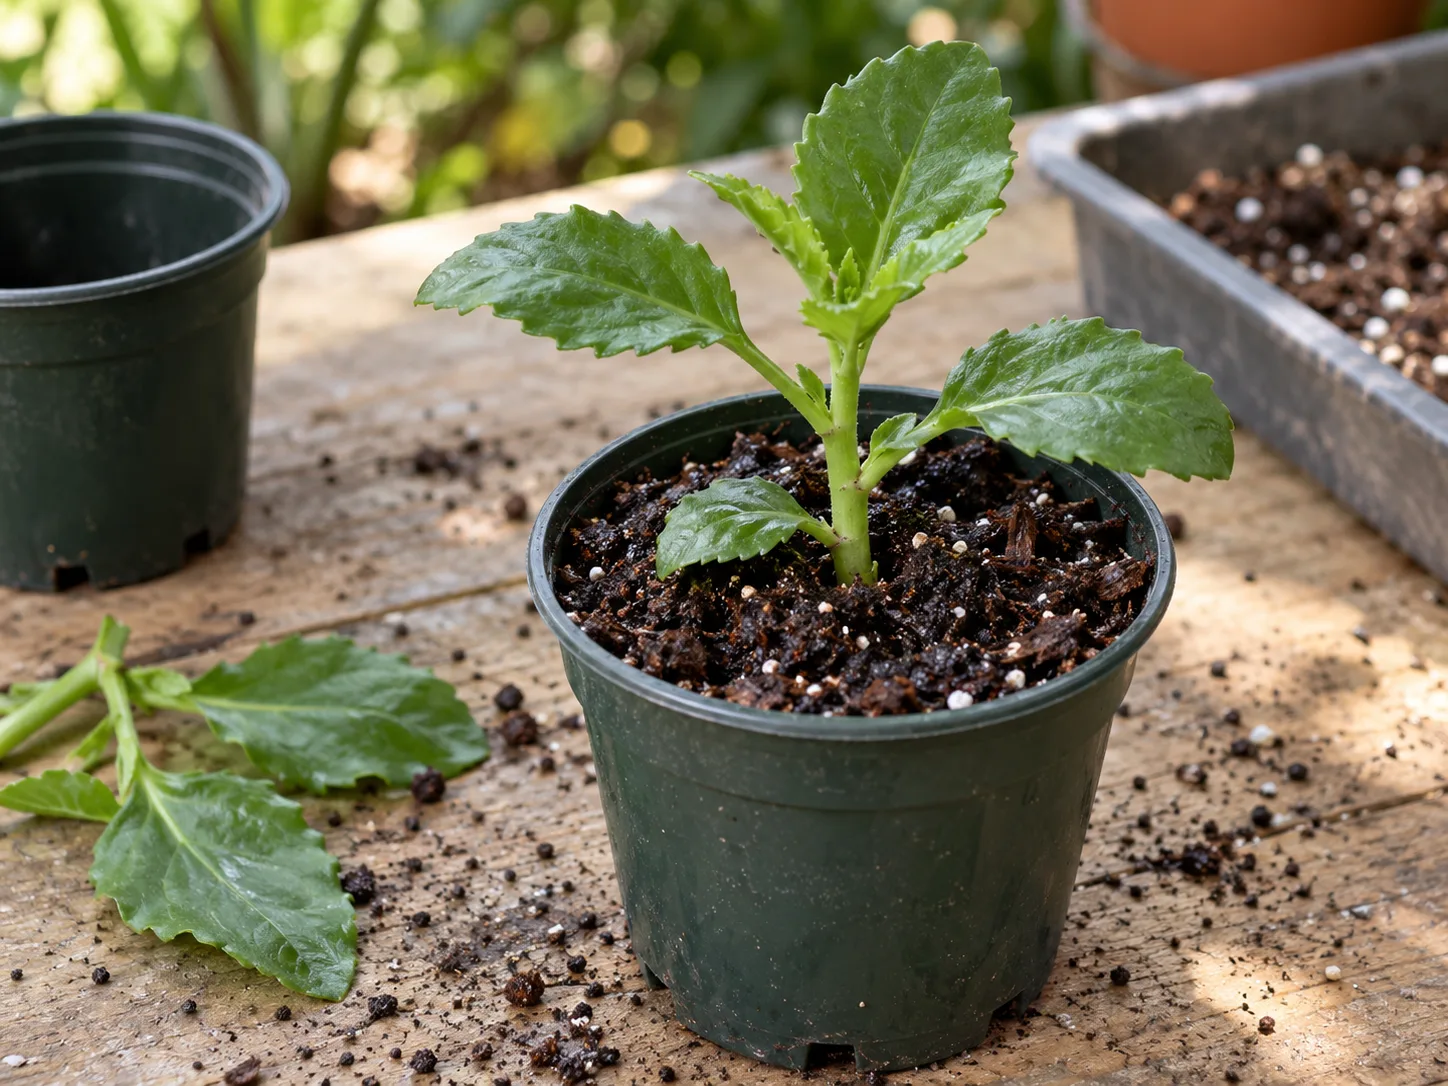
Choose a healthy, actively growing stem and cut a section several inches long just below a node, where leaves or roots emerge. Remove the lower leaves, leaving a few at the top, and place one or two bare nodes into the mix. Firm the medium gently around the stem so it stands upright, then water just enough to settle the mix without leaving the pot soggy.
Keep the pot in bright shade and maintain light, even moisture while the cutting roots. A clear cover can slow moisture loss, but leave some ventilation and remove it if condensation stays heavy or the cutting begins to soften. New leaf growth is a better sign that the cutting is established than a fixed number of days; once it is growing steadily, acclimate it to brighter light and transplant it if the small pot dries too quickly.
Take more than one cutting if you need a reliable backup. If one cutting rots, discard it, clean the tool, and start again with a firmer, healthier stem and a less saturated mix. Do not put a struggling cutting in stronger sun or add fertilizer before it has roots.
Harvest young tips for repeat growth
Begin light harvesting once the plant is rooted, actively growing, and has enough leafy stems to recover from a cut. Pick young leaves individually for a small meal, or snip the tips of long stems just above a leaf node to encourage branching. Regular cutting keeps the plant compact and gives you a steady supply of tender growth; the “cut-and-come-again” method is also recommended by NParks for this crop.
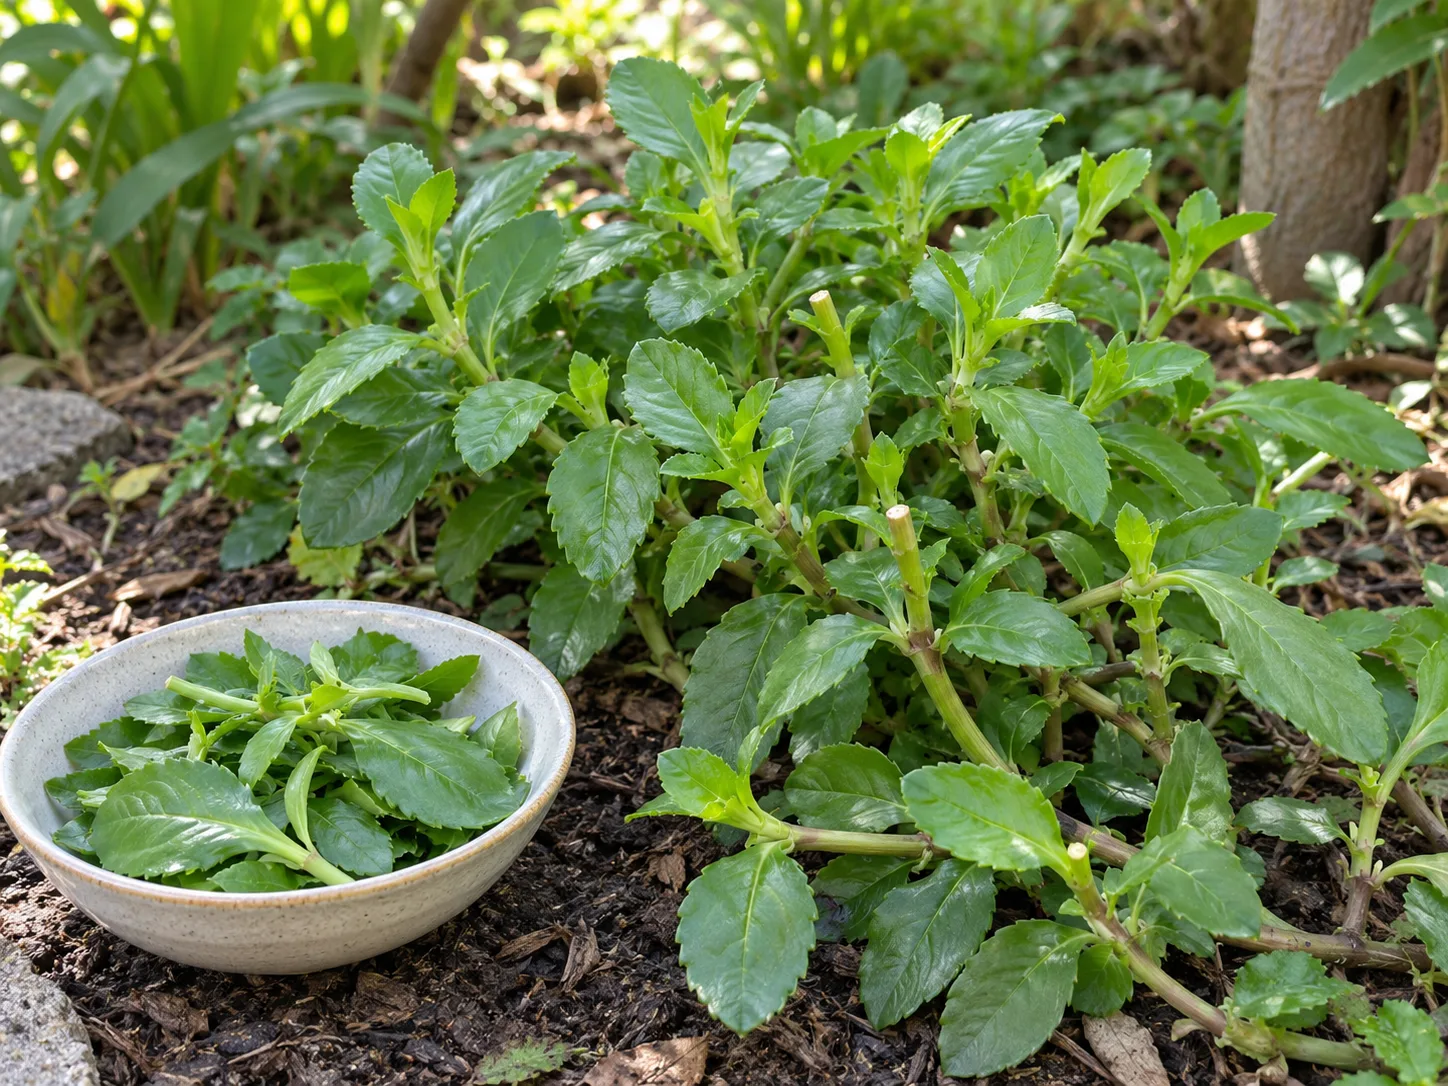
Take only what you can use and avoid removing most of the foliage in one session. A young plant needs its leaves to build roots and new branches, so harvest lightly until it has filled out. On an established plant, rotate among stems and leave several healthy nodes with leaves on each branch so the plant can keep photosynthesizing and producing new tips.
The newest leaves are generally more tender than older, thicker leaves. If growth becomes long and sparse, shorten selected stems to a healthy node instead of repeatedly plucking only the outermost leaves. If new growth is slow after a heavy harvest, pause cutting, confirm the plant has enough light and warmth, and keep the root zone evenly moist while it recovers.
Wash, cook, and store the leaves
Pick only clean, healthy foliage and rinse it under cool running water before eating. Small young leaves can be used raw if that is how you enjoy them, while older leaves and shoots are often better blanched, steamed, or added to soup. The Singapore National Parks Board lists these preparation methods for longevity spinach; the thicker leaves do not behave exactly like the thin leaves of common spinach.
Use fresh leaves soon after harvest for the best texture. If you need to store them, dry them gently after washing, wrap them loosely in a clean towel, and refrigerate in a ventilated container; excess surface moisture encourages decay. Discard leaves that are slimy, badly damaged, or showing signs of disease rather than trying to salvage them by cooking.
Harvesting a little at a time usually works better than cutting a large basketful and leaving it in the refrigerator. If the plant produces more than you can use, take a few healthy stems as cuttings for friends or prune the plant back in stages. Do not assume the common name makes the plant a treatment for a medical condition; the advice here is about growing and using a leafy vegetable.
Overwinter a potted plant indoors
Move the pot inside before frost or a run of cold nights reaches it. Inspect stems and both leaf surfaces for insects, remove damaged foliage, and rinse the plant outdoors before bringing it near other houseplants. A plant that has been growing in shade should stay in bright indoor light rather than being placed abruptly in a hot, south-facing window.
Growth usually slows in a cooler, darker room, so water less often while still preventing the root ball from drying completely. Let the surface begin to dry between waterings, empty the saucer, and stop feeding until active growth resumes. Avoid cold drafts near doors or windows and avoid warm heater vents that dry the foliage and mix quickly.
If the plant is too large to bring indoors, take several cuttings before temperatures fall and keep those small starts in bright warmth. This is often easier than pruning a sprawling outdoor specimen down to a manageable size at the last moment. In spring, return the plant outside gradually over several days and wait until frost risk has passed before leaving it outdoors overnight.
Troubleshoot stress before changing care
Read the whole plant and the soil together. A single drooping leaf does not identify the cause; check moisture, drainage, light exposure, airflow, and the newest growth before changing fertilizer or watering. Correct one likely cause at a time so you can tell whether the plant responds.
| What you see | First check | Practical response |
|---|---|---|
| Limp leaves and dry mix | Soil moisture and pot weight | Water thoroughly, then let it drain |
| Limp leaves and wet mix | Drainage holes, odor, and root condition | Empty the saucer, improve drainage, and let the surface dry slightly |
| Pale or scorched patches | Hours of direct sun and recent relocation | Move to filtered light or add afternoon shade |
| Long, widely spaced stems | Light level and recent pruning | Increase bright indirect light and pinch selected tips |
| Chewed young leaves | Snails, slugs, or birds | Inspect at dusk and use a physical barrier or netting |
| Sticky or stippled leaves | Undersides and stem joints for sap-feeders | Rinse pests away and repeat inspections |
Check the soil before reacting to wilt
Wilt can result from dry roots, damaged roots, or saturated soil that has stopped functioning well. Push a finger into the mix and check below the surface; if it feels dry, water and observe whether the leaves recover. If it feels wet and the plant stays limp, confirm that water can leave the pot, remove standing water, and inspect the root zone for soft or dark roots before adding more.
A container that has become root-bound can also dry unevenly, with water running down the sides instead of soaking the root ball. Slide the plant out gently if the whole pot dries unusually fast, look for dense circling roots, and move it to a wider container with fresh mix. Do not jump straight to a large amount of fertilizer when the actual problem is water movement or root damage.
Separate sun damage, pest damage, and weak growth
Sunburn tends to appear as bleached or crispy areas on the most exposed leaves, often after a change in location. Pest damage is more likely to include stippling, sticky residue, webbing, or irregular holes; inspect leaf undersides and tender tips closely. Remove badly affected leaves and rinse visible pests from the plant, then improve airflow and keep checking new growth.
If a plant is crowded, persistently wet, or lying in a dense groundcover mat, thin it and redirect stems before disease spreads. Small plants may be vulnerable to snails and birds, which NParks suggests protecting with a cloche or netting. Use any pesticide only if its label permits use on edible plants and follow the stated harvest interval; for a small home plant, physical removal and rinsing are often the simpler first steps.
Conclusion: keep roots airy and harvest regularly
Longevity spinach is easiest when you plan around its tropical, spreading habit: give it filtered light, use moisture-retentive but freely draining soil, and choose a container if frost or uncontrolled spread is a concern. Let the plant establish before taking much foliage, then clip soft tips just above nodes to keep it branching and productive.
In warm regions, it can become a recurring perennial crop; in colder regions, a movable pot or a few backup cuttings make winter manageable. When growth looks wrong, check the soil and light before changing your routine, and use Gynura procumbens on the label to make sure you are growing the plant you intended.



