How to Save an Orchid With No Roots and Help It Recover
Learn how to save an orchid with no roots: identify living tissue, trim rot safely, choose sphag-and-bag or above-water recovery, and spot new roots at home.
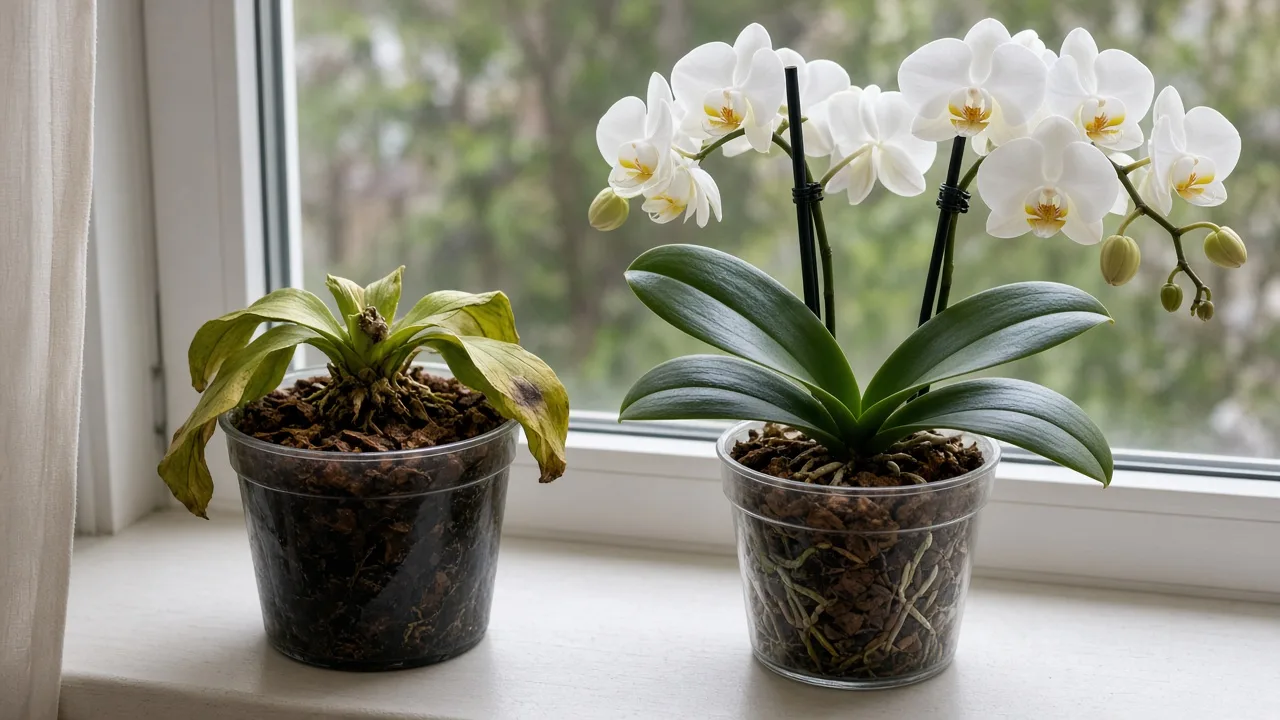
Sometimes, yes—but the orchid needs living tissue capable of making new roots. A firm crown or stem, at least one healthy leaf, and a base that is not advancing into rot give you something to work with. If the growing point has turned soft and black, or the entire base has dried to a hollow shell, a humidity trick cannot bring it back.
The first job is not to add water. It is to find out whether the plant is actually rootless, remove only tissue that is truly dead, and then reduce water loss while the orchid has no roots to replace it. For a typical grocery-store moth orchid, that usually means keeping the plant warm in bright indirect light and using a clean, lightly humid recovery setup—not plunging it into water or sealing it in a sunlit bag.
The short answer: sometimes, if the growing point is alive
An orchid cannot replace roots instantly, so a rootless plant is in a race between dehydration and new growth. Leaves continue to lose water into the surrounding air, while no roots are available to take it up from the pot. A humid enclosure can slow that loss and give a viable plant time to push roots, but it is a bridge, not a substitute for roots or a guarantee of recovery.
A rootless orchid is not automatically a dead orchid. Many common moth orchids, Phalaenopsis, have a short central stem hidden by overlapping leaves; if that growing point and the base remain firm, new roots may emerge from the lower stem. Orchids with pseudobulbs, such as many Cattleyas, store water and energy differently, so their rescue timeline and best setup can differ. The steps here focus mainly on Phalaenopsis, which is the orchid most people mean when they bring home a flowering windowsill plant.
The American Orchid Society’s Phalaenopsis guidance explains why root damage can make leaves droop even when the potting medium is wet: compromised roots cannot take up water normally. That is why pouring more water into a failing pot can worsen the original problem instead of correcting the limp leaves.
First check whether the roots are dead or merely dry
Take the orchid out of its decorative cover and look through the clear inner pot if it has one. If the medium smells sour, stays wet for days, or has broken down into a dense mass, unpot the plant over a clean surface so you can inspect the roots and crown. Do not start cutting just because leaves are wrinkled; root loss and dehydration can look similar from above.
Read root firmness and texture, not color alone
A healthy Phalaenopsis root is generally plump and firm, with a silvery or pale surface when dry and greener color after it is wet. The outer root covering, called velamen, can change appearance as it takes up water. A silver root is not necessarily dead. The Royal Horticultural Society’s Phalaenopsis guide describes healthy roots as firm and silvery-white, and lists brown, shriveled, mushy, or hollow roots among those to remove during repotting.
Feel is a better clue than color. A living root resists gentle pressure and remains substantial; a dead one may be papery and collapsed, or so soft that its outer layer slides off and leaves a thin thread. Some roots are naturally tan or yellow where they grew inside old medium, so do not cut them solely for being non-green. If you can still see a firm root tip or a firm section connected to the plant, preserve it.
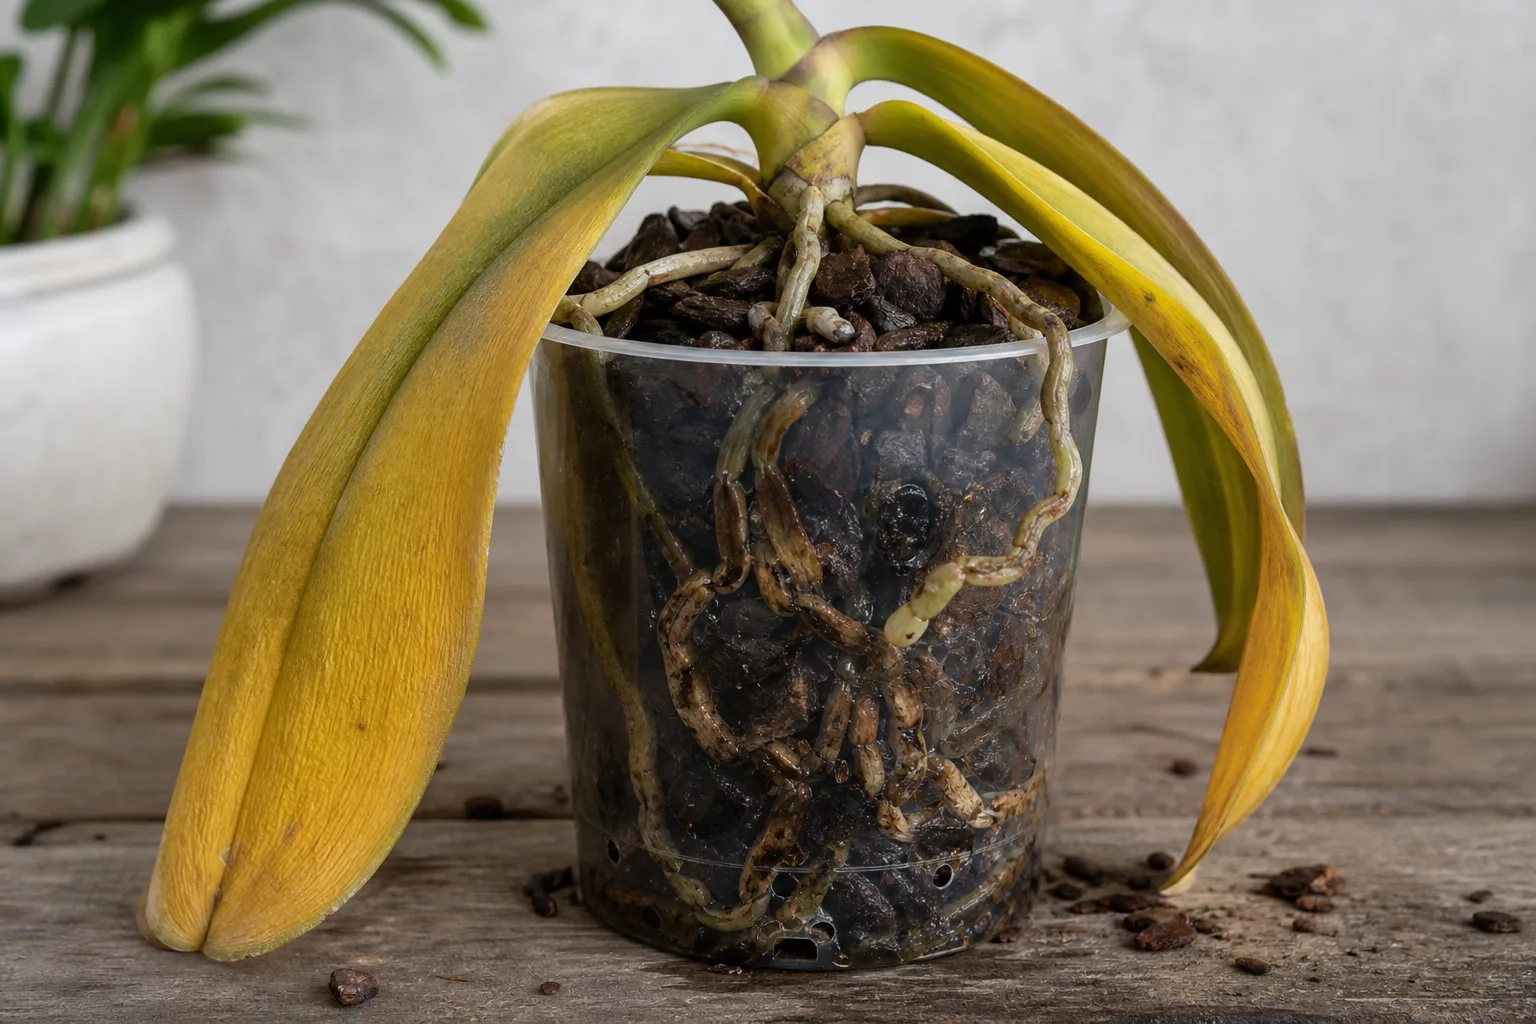
A plant with limp leaves may still have a few living roots hidden in bark. Conversely, wet-looking medium does not prove the roots are functioning: decayed bark and poor drainage can keep roots wet long enough for rot to take hold. The American Orchid Society notes that root rot is linked with overwatering or deteriorated medium, and recommends checking the root zone rather than assuming a dehydrated appearance means the plant needs more water.
Check the crown, stem, and remaining leaves
On a Phalaenopsis, inspect the center where the leaves meet and the short stem just below them. A usable crown is firm, not blackened, hollow, or wet and mushy. A soft, foul-smelling area that is spreading down the stem is a poor sign; crown rot can destroy the growing tip, and the American Orchid Society cautions that a Phalaenopsis with a rotted central growing point cannot produce replacement leaves from that tip, though a basal keiki may sometimes form.
Leaves are a clue to reserves, not a simple pass/fail test. Firm leaves give the plant more stored water to draw on; deeply wrinkled or limp leaves suggest prolonged stress, but one damaged leaf does not settle the question. If the base is firm and at least some leaves remain, a careful rescue is reasonable. If the crown and stem are both soft and collapsing, bagging the plant can trap moisture around tissue that is already rotting.
Clean up the orchid before starting recovery
Use a clean tray, fresh paper, or another surface that can be disinfected afterward. Remove old bark or moss gently; soak the root ball briefly in lukewarm water only if dry medium is stuck to the remaining roots, and keep water from pooling in the leaf crown. The goal is to see the plant clearly without tearing living root tissue off while you work.
Remove rotten tissue without sacrificing viable roots
Use sharp scissors or snips that have been cleaned before you begin. Cut away roots that are unmistakably mushy, hollow, or fully collapsed, and remove old medium clinging to the base. If you uncover suspicious soft or discolored stem tissue, clean the blade between cuts so you do not carry contaminated material across the plant; the American Orchid Society specifically recommends sterilizing the cutting tool between cuts when removing infected orchid tissue.
Do not trim a root just because it is short, brownish, or ugly. Leave firm roots, including aerial roots that grew outside the pot; Phalaenopsis is an epiphyte, and aerial roots are normal, useful roots rather than failed roots to bury or remove. After cleanup, let the cut surfaces dry in a shaded, airy spot while you prepare the recovery setup. Avoid coating every cut with household powders, cinnamon, or concentrated chemicals: if disease is suspected, use only a product labeled for orchids and follow its directions rather than improvising a treatment.
If there is still one or more firm roots, do not strip them off to make the plant fit a “rootless” method. A plant with viable roots can often go into a small, ventilated orchid pot with fresh bark-based medium and receive careful, measured watering while it regrows. The humid-air techniques below are most useful when there is no root capable of taking up water.
Choose the least risky recovery setup
Your choice depends on the plant, not on which method sounds more dramatic. A bag holds humidity close to the leaves but can become hot and stagnant; an orchid suspended above water is simple to inspect but may not hold humidity as evenly. Both should keep the plant itself out of standing water, and both need indirect light and routine checks.
If one healthy root remains, use an airy pot
A single firm root can still absorb water, so preserve it and pot the orchid in a small container with drainage and a loose orchid mix. Do not use a large pot to “give it room”: extra medium around a tiny root system stays wet longer and may start another rot cycle. Keep the base stable so new root tips are not knocked around, and water only when the medium is approaching dry rather than following a fixed weekly schedule.
If the root is very short or the leaves are badly dehydrated, you can place the potted orchid inside a clear, vented humidity box to reduce rapid water loss while keeping the roots in an airy medium. This is different from saturating a pot with moss or converting it to water culture. Check the pot as well as the leaves; a box can slow evaporation, so the normal watering interval will no longer apply.
If no usable roots remain, use a humid-air setup
For a plant with no functional roots, start with one recovery method and keep it consistent for several weeks. Do not alternate between a bag, water culture, repeated soaking, and a pot every few days. That constant handling can break fragile new root tips and makes it hard to learn whether the setup is helping.
Two options are practical at home: sphag-and-bag, in which damp moss humidifies a ventilated enclosure without touching the orchid, and the above-water method, in which the plant is supported over a shallow water reservoir. Choose the bag if you can inspect it and keep air moving; choose the glass if you prefer a simpler setup that is easier to clean. Neither method is “watering” the rootless plant. Both are attempts to slow dehydration until a new root can take over.
How to set up sphag-and-bag safely
You need a clean, clear plastic bag or small transparent container, fresh long-fiber sphagnum moss, and a way to keep the orchid above or away from the moss. Moisten the moss, then squeeze it firmly: it should feel like a wrung-out sponge, not drip when lifted. Set it in one corner or at the bottom of the enclosure, and support the orchid so its crown, stem, and cut base do not rest on the wet moss.
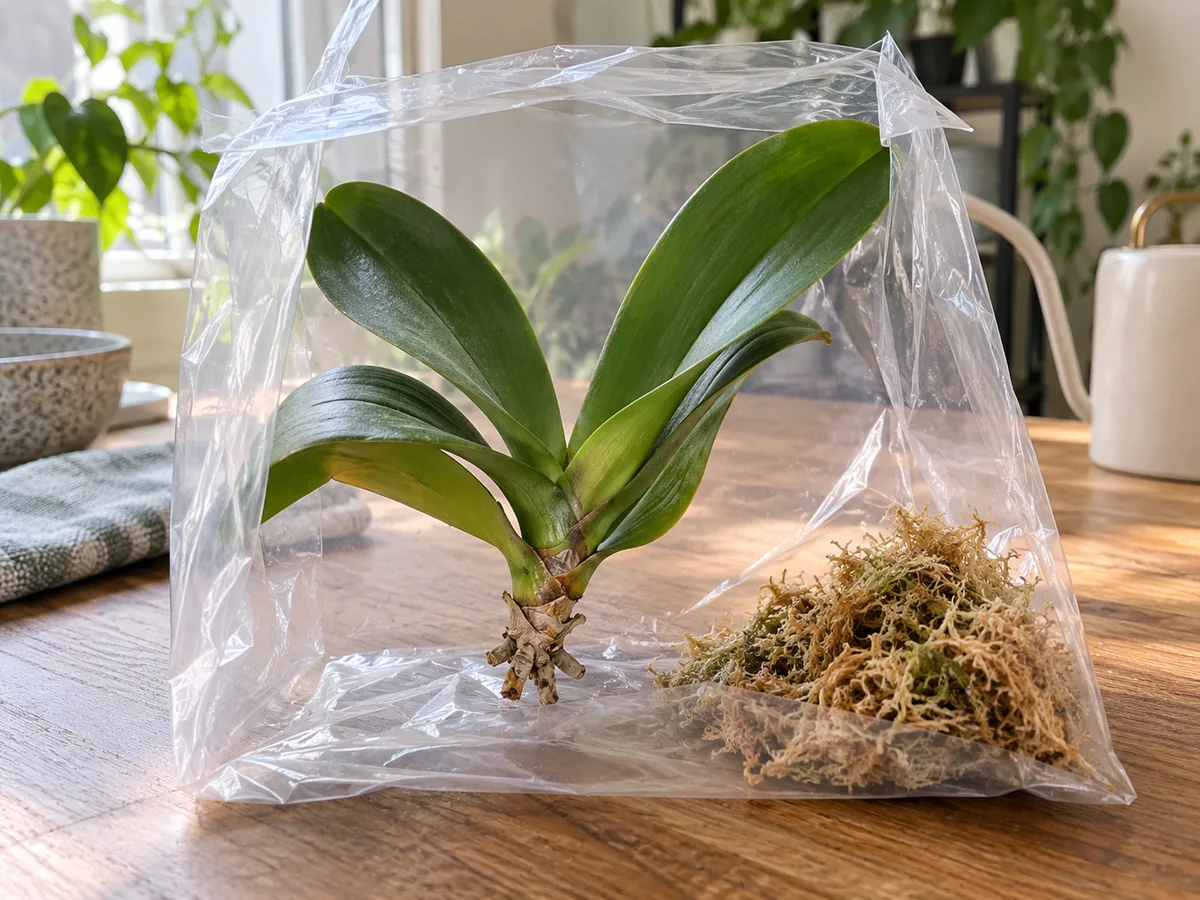
Leave the bag partly open or use a container with a small vent. Do not zip it airtight and do not place it in direct sun; sunlight can heat a closed bag far beyond the room temperature. Set it in a warm room with bright, filtered light, away from a radiator, air-conditioning vent, or cold draft. The moss is there to add humidity to the surrounding air, not to serve as a wet bed for the orchid.
A grower’s account at Everyday Orchids describes root buds appearing during a trial, followed by mold in a warm, poorly ventilated bag. That experience is useful precisely because it shows the trade-off: humidity may support recovery, but trapped heat and stagnant air can help mold at the same time. Keep a small gap for exchange, and inspect the enclosure rather than assuming a sealed bag is safer.
Check the moss every few days. If it is drying to a crisp, add water to the moss away from the plant; if it is soggy, dripping, or touching the orchid, remove excess moisture and reposition it. Wipe heavy condensation from the enclosure if it is running down onto the plant, and open the setup to air when you inspect it. If you see fuzzy growth spreading on the orchid itself, a wet, dark patch, or a sour smell, remove the plant from the enclosure and reassess before continuing.
How to use the above-water method
Put a small amount of clean water in a narrow glass or jar and secure the orchid so its base sits above the surface. The plant must not touch the water, and no leaf axil or crown should be submerged. A small gap between the base and water allows moisture to evaporate into the nearby air while avoiding direct contact that can keep vulnerable tissue wet.
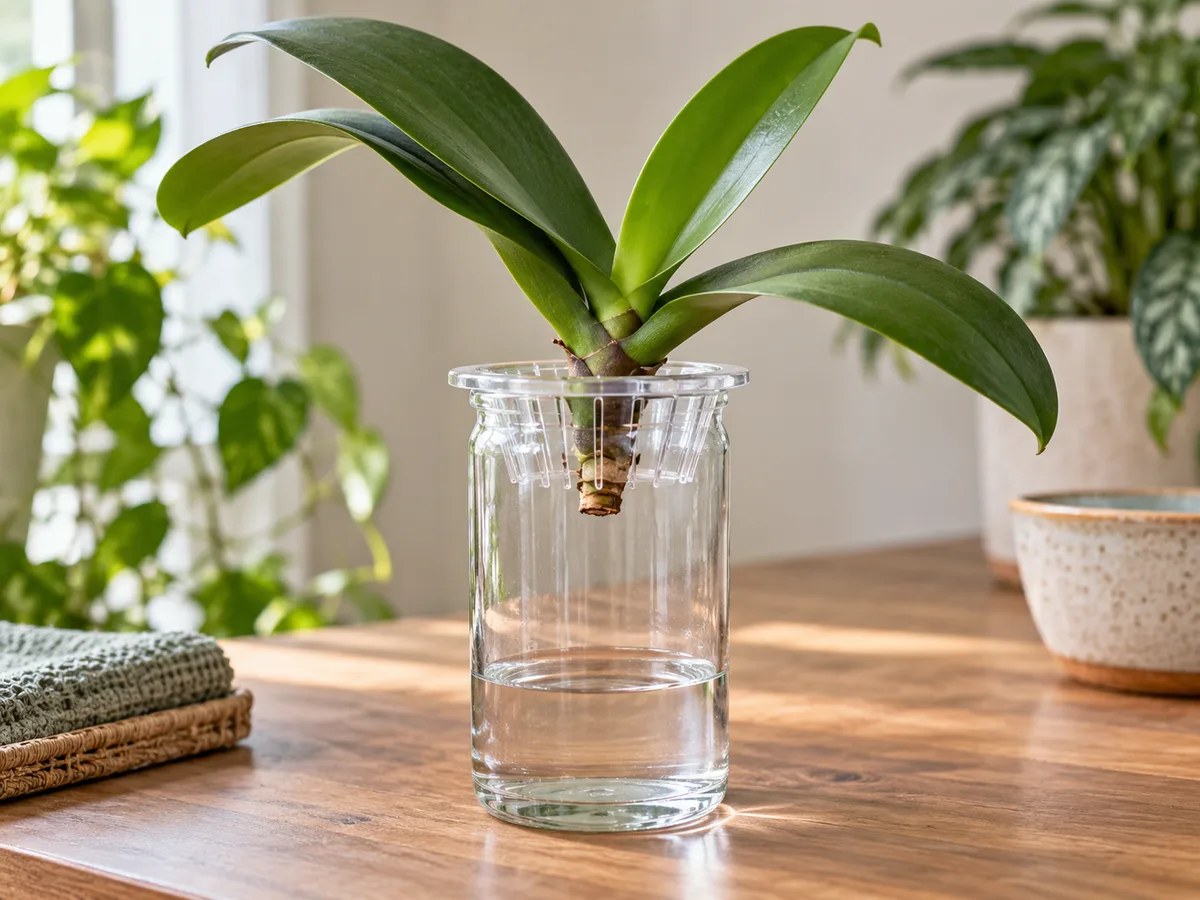
Use a stable support—a mesh top, a clean plastic cup with ventilation holes, or a chopstick bridge—so the orchid cannot slip into the jar. Keep the vessel clean and refresh the water if it becomes cloudy or develops an odor. Avoid adding fertilizer, honey, tea, or other kitchen ingredients; they do not replace roots and can make a simple, clean reservoir harder to manage.
This method is easier to observe than a bag but does not provide the same degree of humidity control in a dry room. If the leaves continue to lose firmness, do not respond by raising the water until the plant touches it. Instead, consider a vented humidity enclosure around the whole setup or switch once to sphag-and-bag, making sure the base stays dry. A small amount of leaf wrinkling may take time to improve even after roots begin to grow.
Give new roots stable light, warmth, and airflow
Treat the recovery setup like a temporary propagation station. Phalaenopsis grows best in warm, bright but filtered conditions; the RHS growing guide advises bright light without direct summer sun and steady warmth. A windowsill with strong midday sun may be too hot for a bag or clear box, even if the same spot would be acceptable for an unsealed plant.
Aim for an ordinary warm indoor room rather than trying to create tropical heat. Keep the setup away from cold nighttime glass, direct heater blasts, and sudden temperature swings. Some gentle room air movement helps surfaces dry, but do not aim a fan directly at a rootless orchid, which could increase water loss from already stressed leaves.
Humidity slows transpiration—the water vapor leaves lose to the air—so it can reduce the rate of dehydration while new roots form. It does not give the plant the same dependable water uptake as a functioning root system. Keep the crown dry, avoid routine misting that leaves water trapped between leaves, and do not trade airflow for a completely sealed environment. The RHS notes that Phalaenopsis roots can rot if kept too wet and that water should not collect in the crown; those cautions still matter in a rescue chamber.
What to monitor during recovery
Check the plant briefly each day or two without repeatedly lifting it out. Look for new, firm root tips emerging from the lower stem, a crown that stays firm, and leaves that stop deteriorating. Do not count a round bump, old root scar, or flower spike as a root; a new root develops a smooth, rounded tip and then lengthens.
The timeline varies. A stressed Phalaenopsis may show a root bud after several weeks, while a weaker plant may take longer or fail to restart. Grower reports differ: one Everyday Orchids trial noticed a few buds quickly on a plant that still had some roots, while Orchideria’s sphag-and-bag guide describes a slower recovery measured in weeks. Treat any estimate as a rough expectation, not a deadline or a promise.
Record a photo once a week from the same angle. This makes small changes easier to distinguish from wishful thinking and helps you notice a new tip before it is long enough to handle. If the plant remains stable, continue the same setup; avoid tugging a root to “test” it, because the growing tip is delicate and can snap before it anchors.
If the crown turns soft or black, the base continues to collapse, or the mold returns despite removing wet contact and improving ventilation, the rescue is not succeeding. A white film on old moss is not by itself proof the orchid is infected, but fuzzy growth on living tissue or a spreading wet lesion is a reason to isolate it and stop the humid chamber. When uncertain, take a clear photo to an orchid society or experienced local grower rather than applying a random fungicide.
Pot the orchid after new roots can handle the move
Wait until new roots are long enough to sit securely in the pot—roughly 1 to 2 inches is a practical target for many Phalaenopsis—rather than potting the first tiny nub. Very short roots are easy to break while arranging bark. If several roots are growing and the plant has begun to stabilize, transfer it gently; there is no prize for keeping it in a bag longer than necessary.
Choose a small clear orchid pot with drainage holes and fresh bark-based orchid medium. A transparent pot lets you monitor moisture and root condition, and it makes it easier to spot whether the medium has broken down. The RHS recommends open bark-based compost for Phalaenopsis and warns that deteriorated, dense medium can hold water too long. Use only enough medium to support the roots, and do not bury roots that naturally grow in the air.
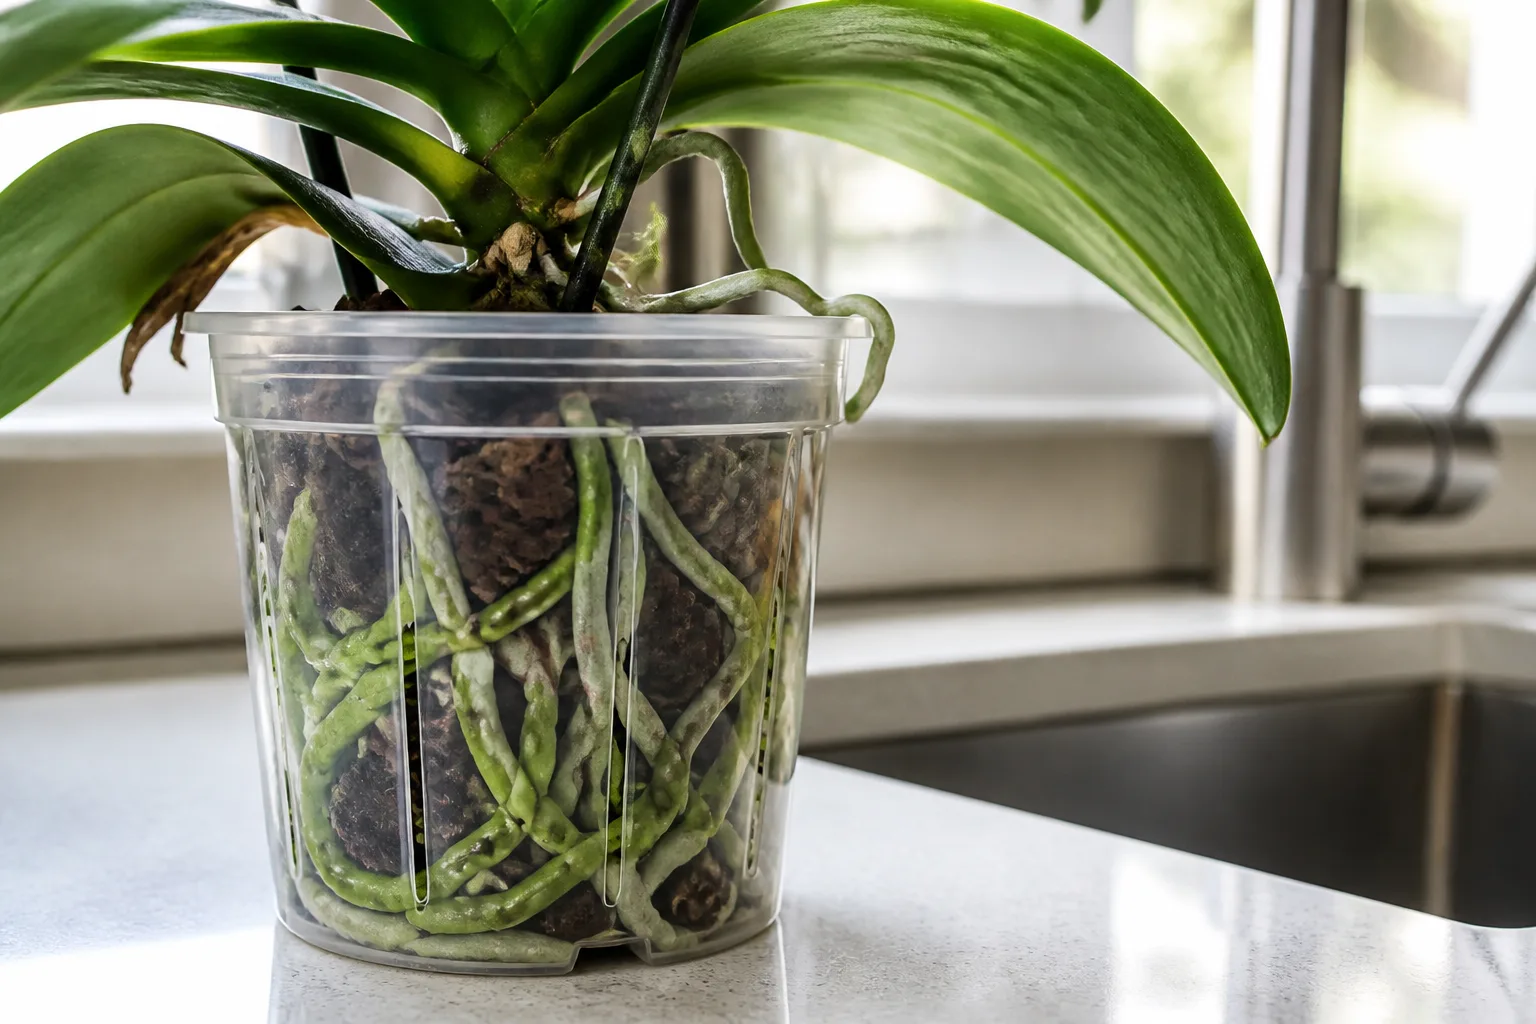
Set the plant at the same level it occupied during recovery, with the crown above the medium and the new root tips undamaged. If the orchid wobbles, use a stake or clip for support rather than packing the pot tightly. After repotting, let excess water drain completely; never leave the pot standing in a decorative sleeve full of water.
Adjust watering and feeding while roots settle
Once potted, water the bark thoroughly when it is close to dry, then let it drain. A clear pot is a useful indicator but not a timer: room temperature, pot size, bark grade, and airflow all change how quickly the medium dries. The RHS gives Phalaenopsis-specific advice to water with tepid water and let the medium drain, while the American Orchid Society’s root-rot guidance emphasizes avoiding stale, broken-down medium and overly wet roots.
Wait to fertilize until roots are growing actively and the plant is settling into the pot. A rootless orchid has no root system to benefit from a strong feed, and fertilizer salts can build up in a small amount of medium. When you resume, use an orchid fertilizer at the label rate or a dilute dose recommended for the product; do not compensate for slow growth by feeding more often. New roots and steady leaf condition matter more than flowers during recovery.
When saving the orchid is unlikely
A plant with a dry, firm stem and a living basal growth point may still be worth trying even if it has lost every root. But if the crown and base are both black, soft, or hollow, or rot continues to move through the stem, there may be no viable tissue left to produce roots. An orchid whose leaves and stem have completely dried out also has little reserve to support recovery.
For a Phalaenopsis whose central crown is gone, watch for a basal keiki only if there is still healthy tissue lower on the stem. The American Orchid Society notes that a new plantlet may sometimes emerge below a damaged crown; it is a possibility, not a dependable rescue plan. Keep the damaged plant isolated from a collection if rot or disease is suspected, and discard it if the stem is collapsing or the condition is spreading to neighboring plants.
Recovery mistakes that can undo progress
The most common error is cutting too much. A dry-looking but firm root, or an aerial root that grew beyond the pot, can still be useful; removing every imperfect-looking strand makes the plant’s job harder. If a root is questionable but not mushy or hollow, preserve it and monitor it rather than making a final cut based on color alone.
The second error is adding moisture in the wrong place. Wet moss touching the crown, water sitting between leaves, a sealed bag in sunlight, or a jar that lets the orchid slip into water all turn a humidity aid into a rot risk. Keep the water source physically separate from the plant, and maintain enough ventilation to prevent a stagnant, hot enclosure.
Other habits slow recovery: moving the plant between methods every few days, tugging new roots, applying fertilizer before roots form, or expecting a fixed two-week result. Choose one setup, make small corrections when you see a specific problem, and give the plant time. If conditions worsen, reassess root and crown health instead of escalating humidity or adding unverified treatments.
Conclusion
You may be able to save a rootless orchid if its crown or stem is still firm and capable of new growth. Confirm that the roots are truly dead, preserve any firm tissue, and keep the cleaned plant in warm, bright indirect light while a humid-air setup slows water loss. Sphag-and-bag and above-water recovery can both be tried, but neither works by submerging the plant or guaranteeing new roots.
Watch for root tips, not a calendar deadline. Once several roots can be handled without breaking, move the orchid to a small, airy pot and return gradually to normal watering and light care. If the growing point is rotten or the plant keeps collapsing, it may be time to stop; careful diagnosis gives a better chance than adding more water to a plant whose roots cannot use it.



