How to Make a Kokedama Moss Ball Step by Step
Make a kokedama moss ball with the right small plant, a peat-free mix, and a firm wrap. Follow clear steps and fix loose soil, dry moss, or a soggy core.
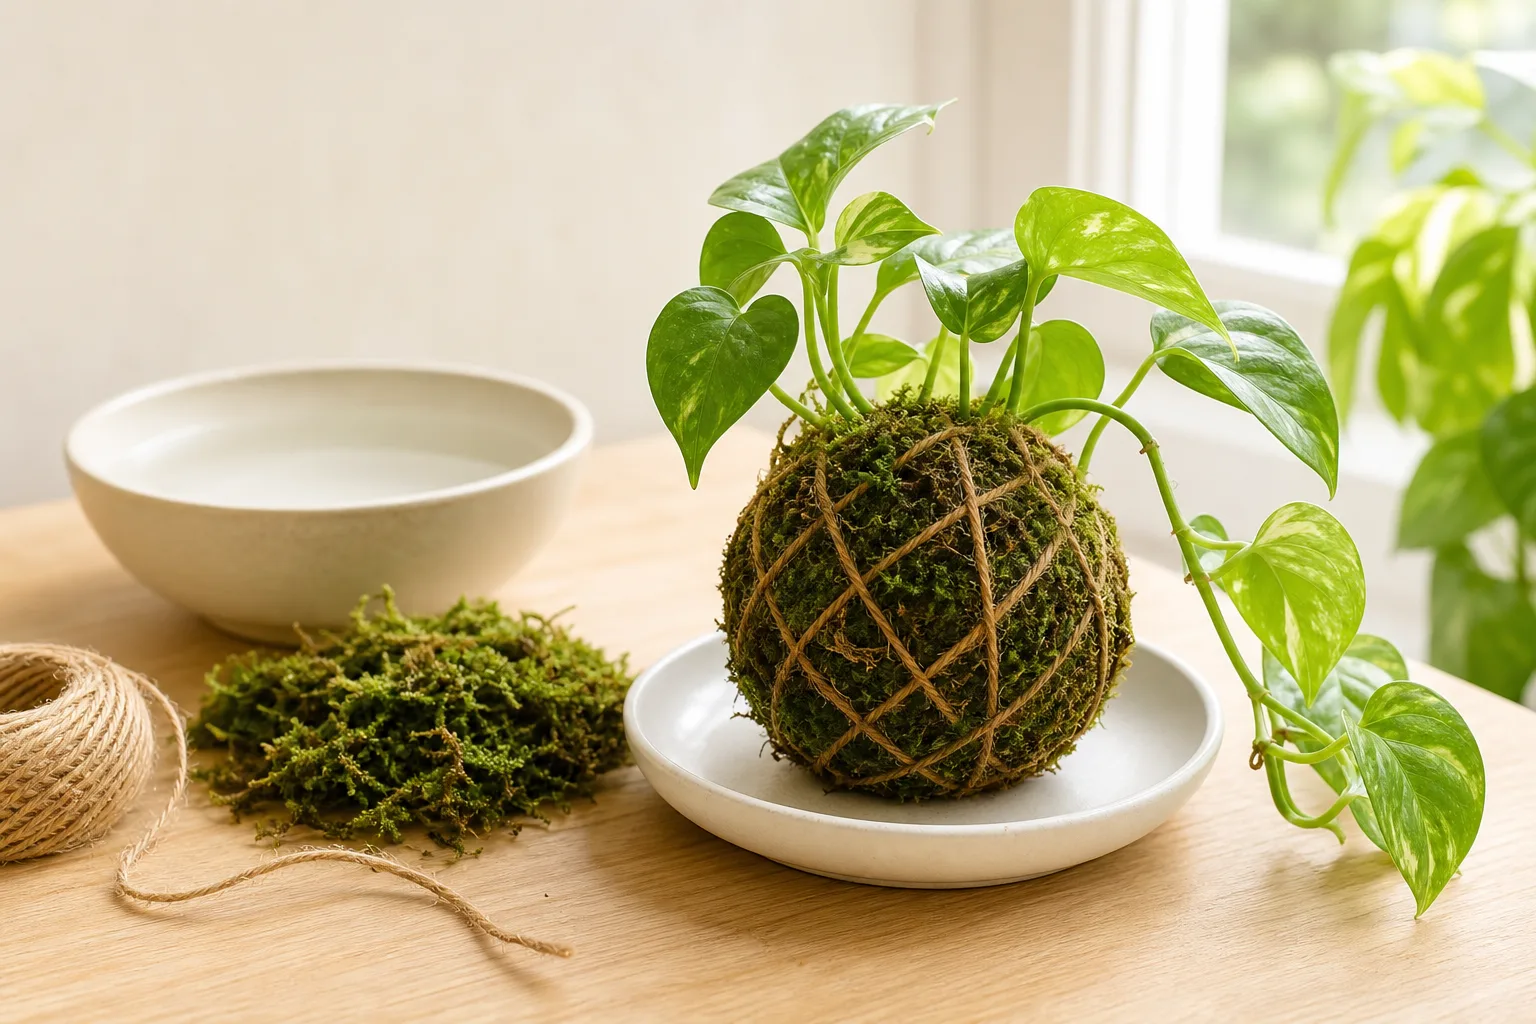
A kokedama turns a plant’s root zone into a hand-shaped soil ball wrapped in moss and held together with string. The craft is straightforward, but the finished plant is still a living houseplant with specific water, light, and root needs. The way to make one that lasts is to choose the plant first, build a ball that holds together without becoming a wet plug, and treat the moss cover as a finish—not as proof that the roots should stay soaked.
Plan on about an hour for your first small kokedama, plus time to let the plant settle afterward. A 3- to 4-inch nursery plant is easier to handle than a large specimen, and a low display dish is the sensible first setup. You can hang a stable ball later, after you know how heavy it becomes when fully watered.
What Kokedama Is—and What It Is Not
The Japanese word kokedama means “moss ball”: a plant grows in a shaped ball of growing medium rather than a conventional pot, while moss covers the outside and string keeps the layers in place. Penn State Extension describes it as related to the nearai style of bonsai display, in which a well-rooted plant and its soil hold together as a compact mass. It can sit on a dish, nest in a shallow bowl, or hang from a cord, but it still needs a functioning root zone and regular inspection.
It is not a sealed terrarium, a ball made entirely of moss, or a reason to keep every plant constantly wet. There is no rigid pot wall and no drainage hole, so excess water has to leave the ball after each soak. The plant’s roots are inside a small, compressed volume of substrate; if the center remains saturated and airless, the attractive green shell cannot prevent root decline.
Choose a Plant Before You Choose a Mix
Pick a modest, healthy plant with a compact root system and a water routine you can realistically maintain. It should fit the eventual ball: if the leaves and stems are already heavy enough to pull a small root mass sideways, the plant will be difficult to stabilize and the string will have to carry too much weight. Avoid plants that are sick, newly stressed, or dependent on a delicate root system you cannot disturb.
Light requirements also matter. Moss on the outside often looks best in bright, indirect light, but the plant determines whether the kokedama can live in a particular window. A moss ball in a dim bathroom is not automatically happy just because the room is humid; a plant that needs brighter light may weaken there.
Better first plants for a small ball
A compact nerve plant (Fittonia albivenis) is a useful candidate if you can keep its root zone evenly moist without leaving it waterlogged. NC State Extension describes it as a low, creeping houseplant with shallow roots that stays small, though it also notes that overwatering can cause root rot. That combination makes it easier to fit into a modest ball than a large, fast-growing specimen, but it still requires careful drainage after watering.
A small pothos can work when you want trailing stems, and its leaves tend to tolerate ordinary indoor conditions. NC State Extension recommends bright, indirect light and allowing its well-drained potting medium to dry between waterings; that is a reminder not to soak a pothos kokedama on a fixed schedule. Pothos is poisonous if ingested, so choose another species if pets or children are likely to chew it. A small fern can suit a humid, consistently monitored spot, but choose a species whose light and moisture needs match your home rather than assuming all ferns are interchangeable.
Plants that need a different approach
Succulents and cacti are poor first choices for a conventional moss-covered ball because their roots generally need a faster dry-down than a moisture-retentive core and living moss favor. Penn State Extension notes that plants tolerating drier conditions can be suitable, and its article includes a succulent example, so the category is not an absolute ban. The practical exception is a grower who deliberately uses a very open, quick-drying core, limits the moss layer, and waters according to the succulent—not a generic kokedama schedule.
Large woody plants, thirsty outdoor trees, newly divided plants, and orchids with specialized airy root needs are also harder to manage in a small compact ball. They may be possible as advanced display projects, but they demand a substrate and watering method designed around that species. For a first attempt, select a forgiving indoor plant rather than trying to make a fragile or valuable specimen tolerate a new root environment.
Gather Materials That Do a Specific Job
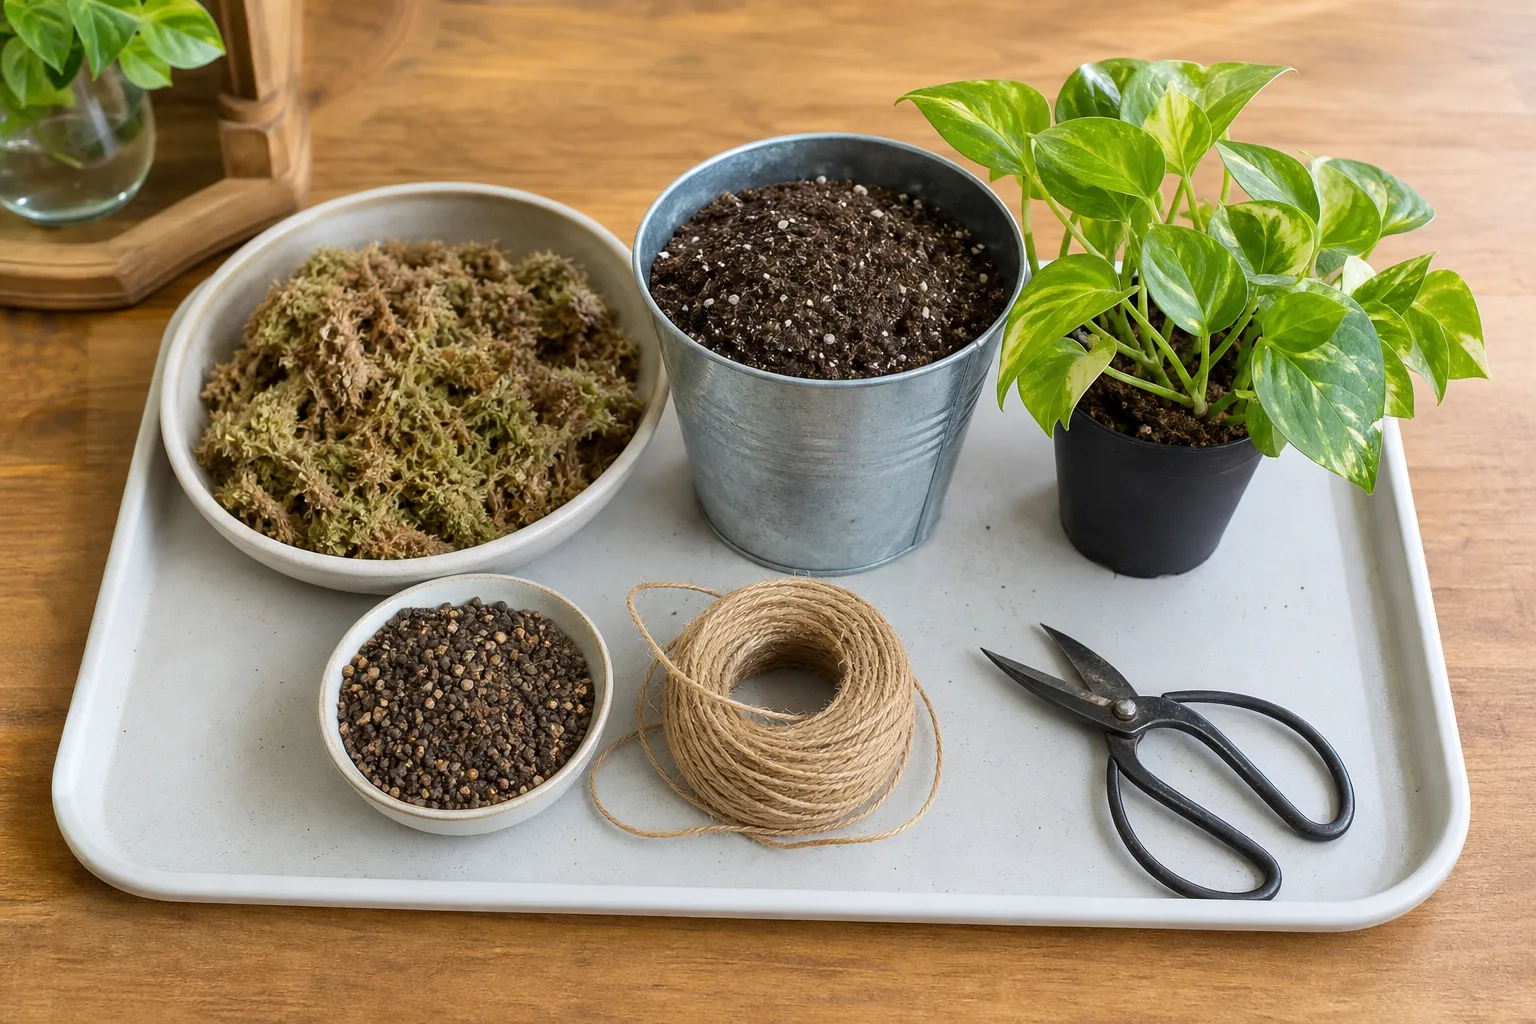
You need a small plant, a mixing bowl, a shallow water bowl, scissors, a towel or work tray, a growing-medium blend, sheet moss, and string. Garden Gate’s project uses akadama and sphagnum peat in the core, then adds sheet moss and a cross-wrap of string; the useful lesson is that the soil core and the decorative outer moss are separate materials with different jobs. You do not need floral wire, glue, plastic wrap, or a special hanging frame.
| Material | What it does | What to look for |
|---|---|---|
| Fine-textured houseplant mix | Supplies the main root medium | Peat-free if desired; remove large bark pieces and sticks |
| Akadama or bonsai substrate | Adds mineral structure and helps shape the core | Use horticultural material, not scented or treated litter |
| Coco coir, when needed | Adds fiber and moisture retention | Pre-moisten, then squeeze until damp rather than dripping |
| Sheet moss | Covers exposed soil and gives the ball its finish | Choose living or dried moss sold for planting or crafts |
| Cotton or jute twine | Holds the moss against the core | Use enough length for repeated, even wraps |
| Dish or tray | Catches residual water and protects furniture | Wider than the finished ball and easy to empty |
Pick the outer moss separately from the soil ingredients
“Sphagnum peat” is a soil ingredient; “sheet moss” is a surface covering. They are not interchangeable. Choose a clean sheet moss product and hydrate it if the package calls for it. Living moss may stay green when the environment suits it, but it can brown in a warm, dry, or dim room; dried sheet moss provides the look of a moss cover but will not grow back into a living carpet.
Avoid stripping large patches of moss from a woodland, park, or protected site. Besides harming a slow-growing patch, collection may be restricted where you live. Purchased horticultural sheet moss gives you a more predictable amount without disturbing a wild colony. Wear gloves if you have sensitive skin, and keep loose moss and potting material away from pets that chew plants.
Make a Mix That Holds Together Without Turning to Mud
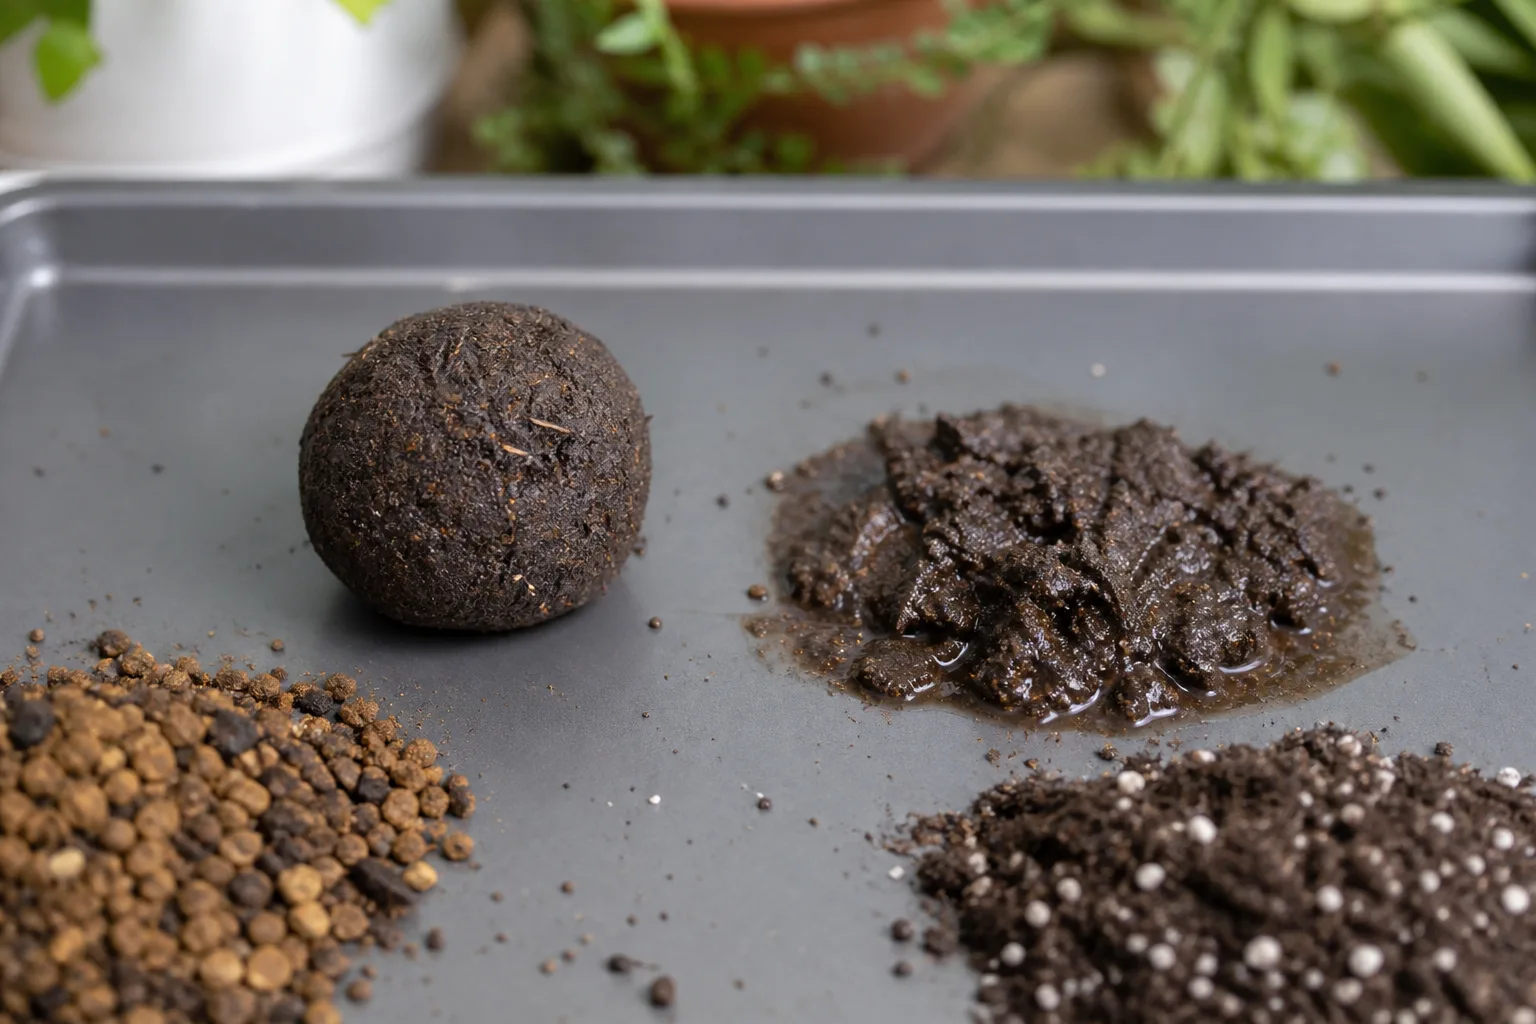
There is no one ratio that suits every plant and every watering style. Penn State Extension says ordinary potting soil works for many plants wrapped in moss and suggests adding about one-third bonsai soil or clay-based material for plants with greater water needs or a particularly tight root ball. Garden Gate uses an equal-volume blend of akadama and peat moss. A practical peat-free starting point is two parts fine, peat-free houseplant mix to one part akadama or bonsai substrate; add a small amount of damp coir only if your particular mix crumbles instead of binding.
This is a starting texture, not a magic formula. Blend the dry ingredients first, then add water in small increments and squeeze a handful. It should form a compact clump that stays together when you open your hand, but it should not shine, drip, or smear like wet clay. If it cracks immediately, add a teaspoon of water and mix again; if it slumps or leaves wet residue on your palm, fold in a little more dry mix.
Keep the core slightly more open than a dense clay ball. Roots need both moisture and oxygen, and a kokedama has no drainage hole to correct a saturated recipe. Do not use garden soil, which can be heavy and uneven indoors, or a chunky mix that leaves gaps too large to hold the sphere around the roots. If the selected plant needs an unusually fast-drying medium, that is a cue to reconsider the plant or the technique rather than keep adding clay.
Prepare the Plant and Protect Its Roots
Water the nursery plant a few hours before assembly if its mix is dry. A hydrated root system is easier to work with, and the plant is less likely to wilt immediately after you disturb it. Set the plant, moss, damp mix, string, and bowl within reach before removing it from its pot; an exposed root ball can dry while you search for scissors.
Slide the plant out by supporting the root ball, not pulling the stems. Gently loosen only enough potting mix to make space for the new core. You do not have to strip every particle from fine roots. Preserve a small central plug if the roots are delicate or tightly woven, and remove only loose material and any roots that are visibly black, mushy, or broken using clean scissors. If the plant has severe root rot or pests, postpone the craft and address that problem first.
The roots should fit into the ball without being folded into a tight knot or crushed against the stem. If the plant’s roots extend far beyond the ball size you prepared, make a larger ball or choose a smaller plant. Routine root pruning is not necessary to make a kokedama and can add avoidable stress.
Shape the Core Around the Roots
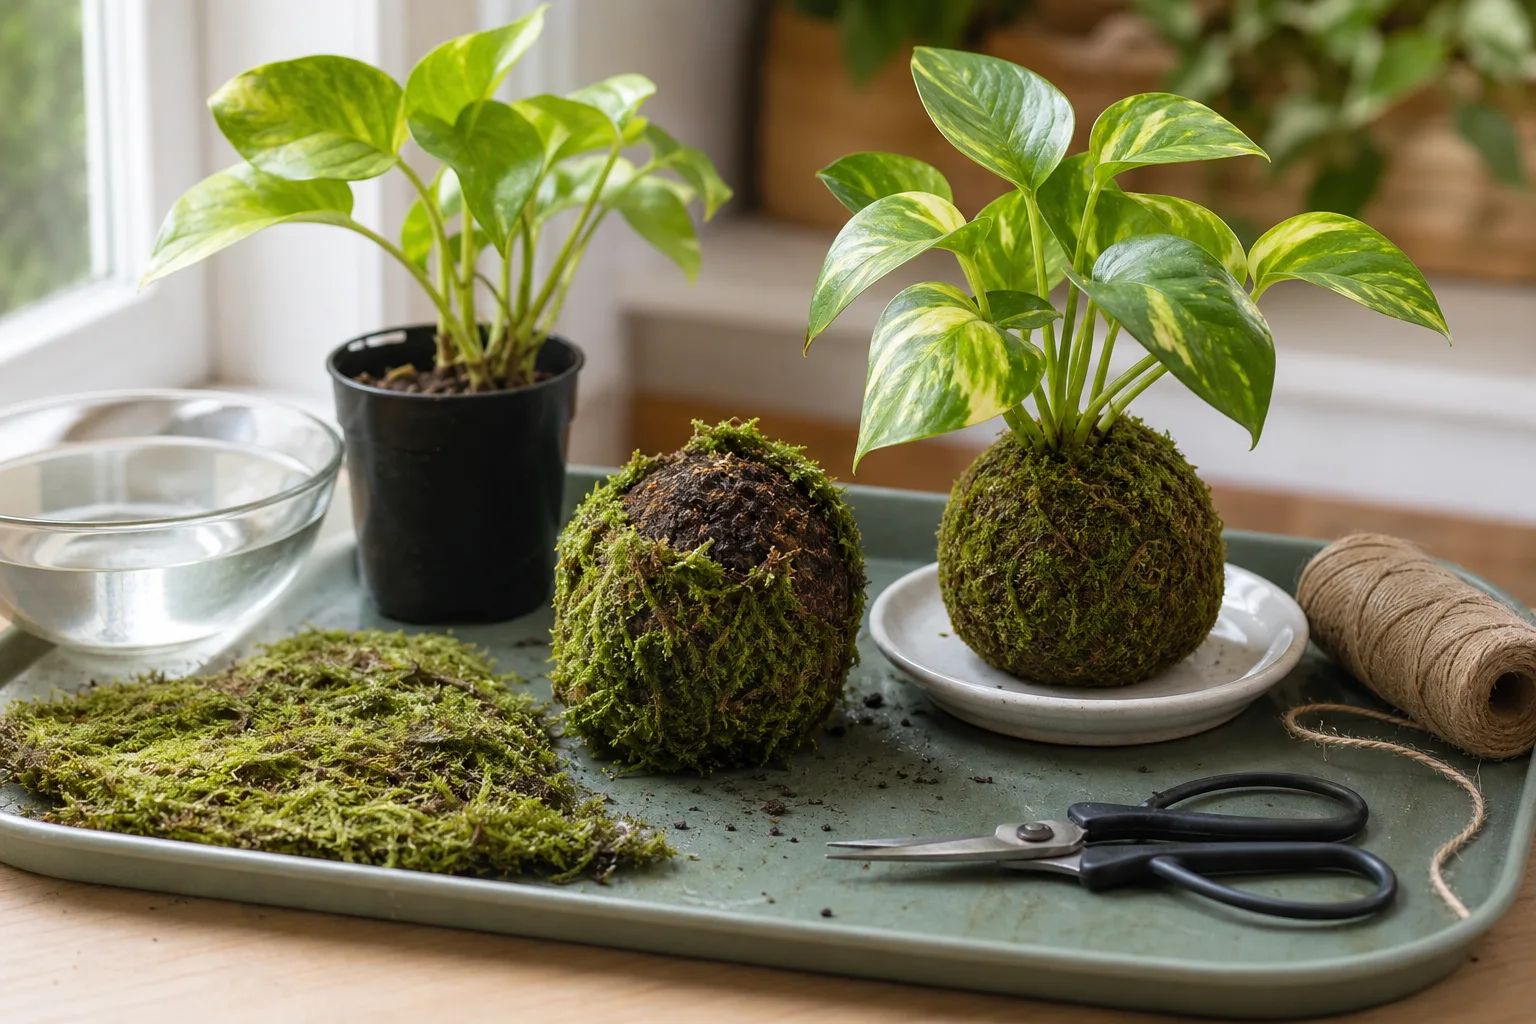
Take a handful of damp mix and make a shallow hollow in its center. Set the roots into the hollow with the crown and stem bases at their normal position, then add more mix around the sides and underneath. The foliage should emerge from the top naturally; do not bury a crown that would normally sit above soil, and do not leave large roots exposed between the soil core and moss.
Close the mix around the roots gradually, rotating the ball as you press. Use your palms to compress it enough to hold shape, but avoid squeezing so hard that the medium becomes a dense plug. A ball roughly the size of a grapefruit can support a small 3- to 4-inch houseplant, but plant size and root volume matter more than a fixed measurement. If the sphere will not hold without heavy pressure, adjust the moisture and texture before adding more force.
Check the shape from several sides. The plant should not wobble when you gently turn the ball, and there should be enough core beneath the root mass to make a rounded base. A squat, slightly flattened sphere is easier to set on a dish than a perfect ball, and it is a safer starting shape for a top-heavy plant.
Wrap the Soil Ball in Moss
Moisten the sheet moss until it bends without cracking, then squeeze out excess water. Lay a piece green-side out against the soil and work around the sphere in overlapping patches, like shingles on a roof. Cover the soil core as fully as possible, but do not pack thick moss into the crown or bury the stem bases under a wet wad.
Small pieces are easier to fit around a round ball than one oversized sheet. Overlap the edges enough that gaps will not open when the moss dries, and keep the moss layer thin and even. A thick cushion can look plush at first but may trap excess water against the core, hide the soil texture, and make the ball harder to dry. If a patch slips, hold it in place with the first few string wraps instead of gluing it.
Tie the Ball Firmly Without Cutting Into It
Cut a generous length of cotton or jute twine before you start; a ball can require more than a few decorative turns. Anchor one end by circling the stem base carefully or by trapping it under the first wrap. Then pass the string around the ball in different directions, turning the sphere in your hand so the strands cross and support one another rather than forming a single belt around the middle.
Pull until the moss lies snug against the soil, not until the string dents the core or pinches the plant. Even tension matters more than a set number of loops. If you see bare soil, slide another moss patch under the string and continue wrapping. When the moss stops shifting as you rotate the ball and the shape stays round under light handling, tie off the string with a firm knot and trim the tail.
For a decorative hanging loop, attach a second, stronger cord around the ball itself rather than relying on a short piece of moss string or the plant stem. Cotton and jute can weaken as they stay damp and age; inspect the cord and knot regularly. Monofilament lasts longer and nearly disappears, but it can cut into stems and is difficult to see when you handle or prune the plant. Do not use thin wire where it can bite into the plant or snag skin.
Set It on a Tray Before You Hang It
Let the finished ball sit on a rack or in a sink while loose water drains. Then place it on a shallow, washable dish or tray that will catch any later drips. A porous wood bowl may stain or soften as the moss stays damp, so use a waterproof liner or a nonporous dish if you want to protect a table or shelf.
Hanging is optional, not a requirement of the craft. A wet kokedama weighs more than a dry one, and the combined plant, soil, water, and moss load matters. Test the hanging ball over a sink, inspect the wrap, and use an anchor rated for the actual load in the ceiling or support; a curtain rod or weak adhesive hook is not a reliable substitute. Keep it away from a bed, walkway, electronics, and anything breakable, and use a dish below it if drips could damage the floor.
Water by Weight, Then Let the Ball Drain
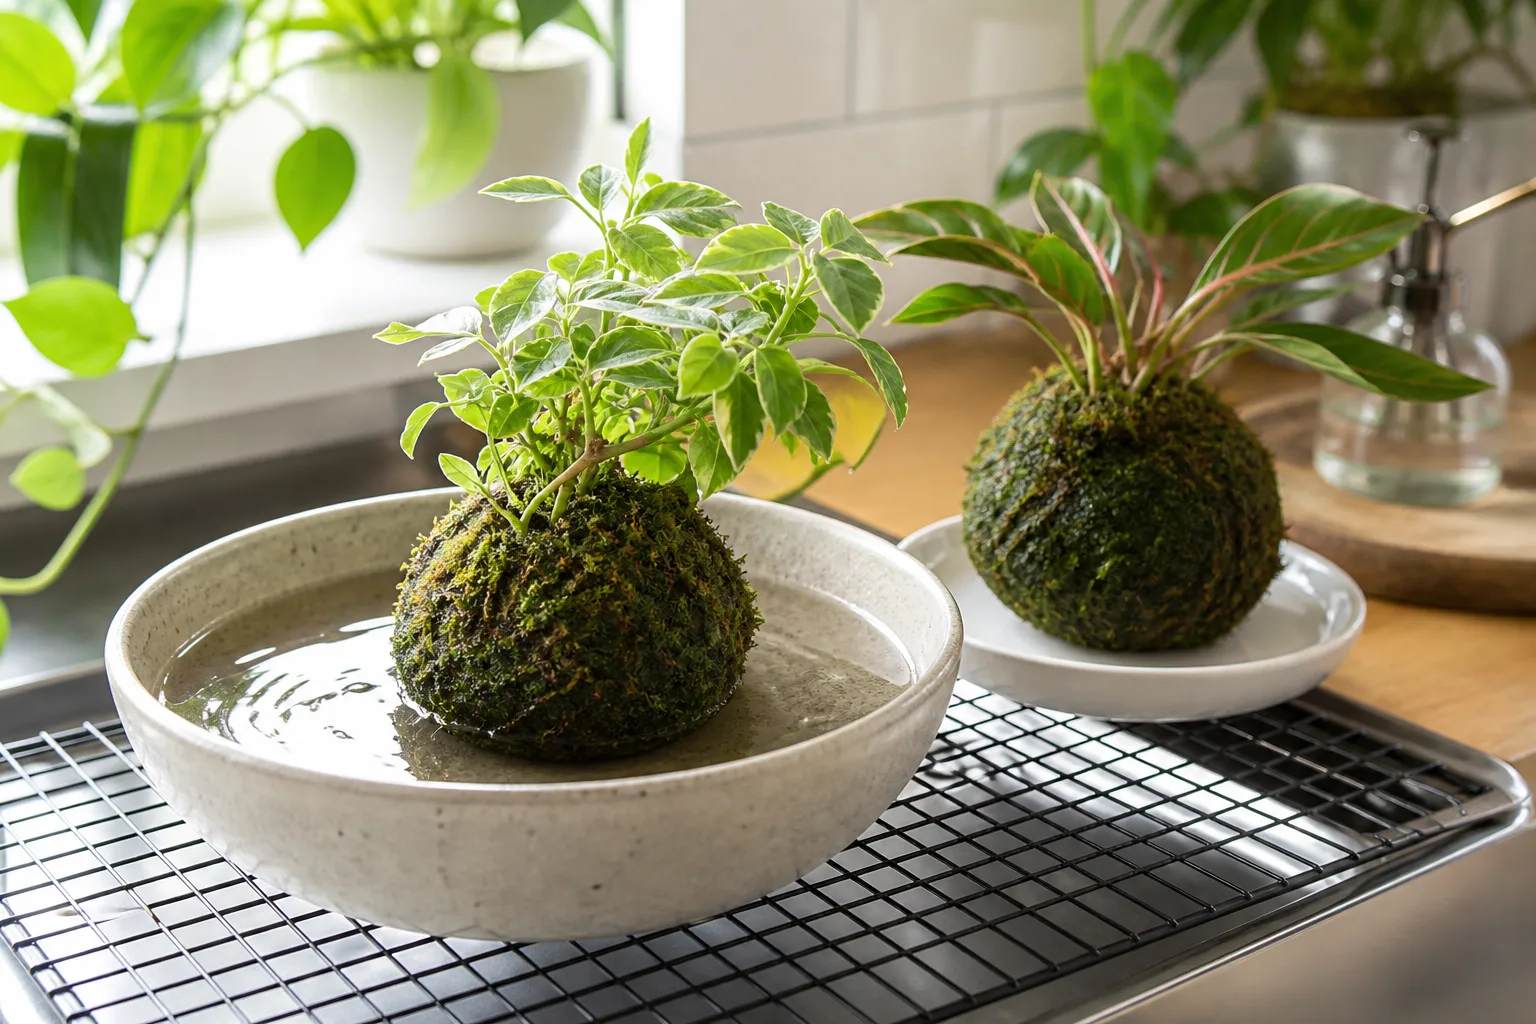
Watering is easier when you use two cues: weight and feel. Lift the ball just after it has drained and notice its weight. When it becomes distinctly lighter and the moss surface feels dry rather than cool and springy, check again the next day or water if the plant’s root zone is also drying. A light mist can freshen the outer moss, but misting alone does not reliably rewet the center of a compact ball.
For a soak, lower the ball slowly into a bowl of room-temperature water with the plant’s foliage held above the waterline as much as possible. Let it absorb water until it feels evenly heavy; several minutes may be enough for a small ball, while a dense core may take longer. Do not use “no more bubbles” as the only rule: air release varies by mix and how dry the center is. Lift the ball and let it drip over the bowl or sink until it stops streaming, then rest it on a rack or towel before returning it to its display.
You can also water gently over a sink if you can wet the core without washing soil from the moss or leaving dry pockets. Nature & Garden compares funnel, gentle pour, and immersion methods, and cautions that repeated dunking can wear down a fragile soil ball. If soaking makes the sphere soft or muddy, switch to a slow pour or improve the mix and binding at the next rewrap. Always empty the dish; do not let the base sit in standing water.
There is no reliable universal schedule. A warm, bright room, moving air, a small ball, or a thirsty plant can shorten the interval; a cool, humid room and a larger ball can extend it. During the first couple of weeks, check the ball daily so you learn how quickly it changes from heavy to light. After that, follow the cues rather than soaking every Monday because a label said “weekly.” If the plant droops while the ball still feels heavy, suspect root stress or poor aeration before adding more water.
Match Light and Humidity to Both Plant and Moss
Place most indoor kokedama in bright, indirect light while avoiding hot direct afternoon sun on the moss-covered ball. Direct sun can dry the exterior faster than the core, so the outside may look crisp while the roots remain wet. A north- or east-facing window can be a useful starting location in many homes, but the plant’s species-specific light preference takes priority; rotate the ball occasionally if growth leans toward the window.
Humidity can help living moss stay supple, but a steamy room with no air movement is not automatically ideal. Keep the plant away from heating vents and cold drafts, and allow air to move around the whole ball. If you choose a plant that needs a brighter window than the moss appears to prefer, prioritize the plant’s health and use dried moss as the cover, or choose another plant. It is better to have a healthy plant with a slowly browning decorative shell than to starve the roots of light to preserve the moss color.
Feed, Prune, and Keep the Surface Clean
The core contains far less growing medium than a regular pot, but adding fertilizer at every soak can quickly concentrate salts around the roots. Wait until the plant has settled and resumed growth. Then use a balanced liquid houseplant fertilizer at a weaker concentration than the label’s full rate, only during active growth and according to the product directions. Skip feeding a stressed, newly wrapped, dormant, or waterlogged plant; extra nutrients will not repair root damage.
Trim dead or badly damaged leaves with clean scissors, and shorten a vine only if the plant’s normal pruning needs call for it. Do not cut healthy moss simply to keep a perfect sphere. If the covering grows unevenly, rotate the ball and adjust the light before shaping it with scissors. Remove loose debris from the surface and wipe the display dish between waterings so damp organic material does not build up underneath.
Troubleshoot a Kokedama That Looks Unwell
Start by lifting the ball and checking the plant, not by adding water or fertilizer at random. Compare its weight with the weight just after a proper soak, smell near the moss surface, and look at the crown and leaves. A dry surface, a wet core, and a sick plant can look similar from across the room; these quick checks help separate them.
| Sign | Likely cause | First response |
|---|---|---|
| Crisp moss and a very light ball | The core has dried too far | Rehydrate slowly, drain fully, and shorten the check interval |
| Ball stays heavy for days; sour smell or soft roots | Core is staying saturated | Stop soaking, improve airflow, and inspect roots before watering again |
| Thin white fuzz on the outside | Surface mold on damp organic material | Improve airflow, remove loose dead leaves, and let the surface dry more between soaks |
| Plant wilts while the ball is heavy | Root stress, rot, or poor oxygen—not necessarily thirst | Inspect the core and roots; do not add water until you know which |
| Moss turns brown but the plant grows normally | The living moss is not suited to the room’s light or humidity | Keep caring for the plant; replace the cover with fresh sheet moss if desired |
| Soil cracks or falls away after watering | Loose packing, a low-fiber mix, or weak cross-wraps | Rewrap with evenly damp mix and better string coverage |
Separate harmless surface growth from a persistently wet core
A small patch of surface fuzz on dead moss is not the same as root rot. Remove loose, decaying material, give the ball better air movement, and wait until the ball is lighter before watering again. Avoid spraying household fungicide or soaking the whole ball with a home remedy; the product or mixture may injure the plant and will not correct a saturated center.
Persistent sour odor, black mushy roots, a ball that stays heavy far longer than before, or a plant declining despite a light surface points to deeper trouble. Unwrap it over a tray, examine the roots, remove only tissue that is clearly rotten with clean scissors, and rebuild in fresh, airy mix if the plant has enough healthy roots left. If most roots are lost, potting the plant into a standard container can be a better recovery path than trying to keep the display intact.
Rewrap, Pot Up, or Retire the Ball
There is no fixed one- or two-year expiration date. Rewrap when roots emerge through the moss, the plant has become too large for the ball, the core repeatedly breaks down, or you can no longer keep the plant watered without either flooding or rapidly drying it. These signs indicate the root volume or structure is no longer a good match for the display.
To rewrap, soak the ball just enough to loosen it, remove the old string and moss, and gently free the roots from spent mix. Make a fresh ball large enough to surround the healthy root mass without forcing it into a tight coil. If the plant has outgrown the form or needs a more specialized medium, place it in a conventional pot with drainage instead; kokedama is a display choice, not a test the plant must pass.
Conclusion
A successful kokedama starts with a plant whose root and moisture needs fit a small ball. Mix the core until it clumps without dripping, disturb the roots as little as possible, overlap damp sheet moss, and use even string tension to hold the sphere together. Afterward, let the ball’s weight and surface condition guide watering, drain it completely, and keep it in light that suits the plant.
You do not need an expensive tool kit or a perfect sphere. A stable, slightly flattened ball on a tray is easier to care for than a dramatic hanging display that stays wet or has a weak support. Make one small kokedama, observe how it dries in your home, and adjust the next step from what the plant actually shows you.



