Garden Plates for Pollinators: Water Station Guide
Old plates and saucers make cheap pollinator water stations. Learn how to set one up, build a butterfly puddling pool, place it safely, and keep it clean.
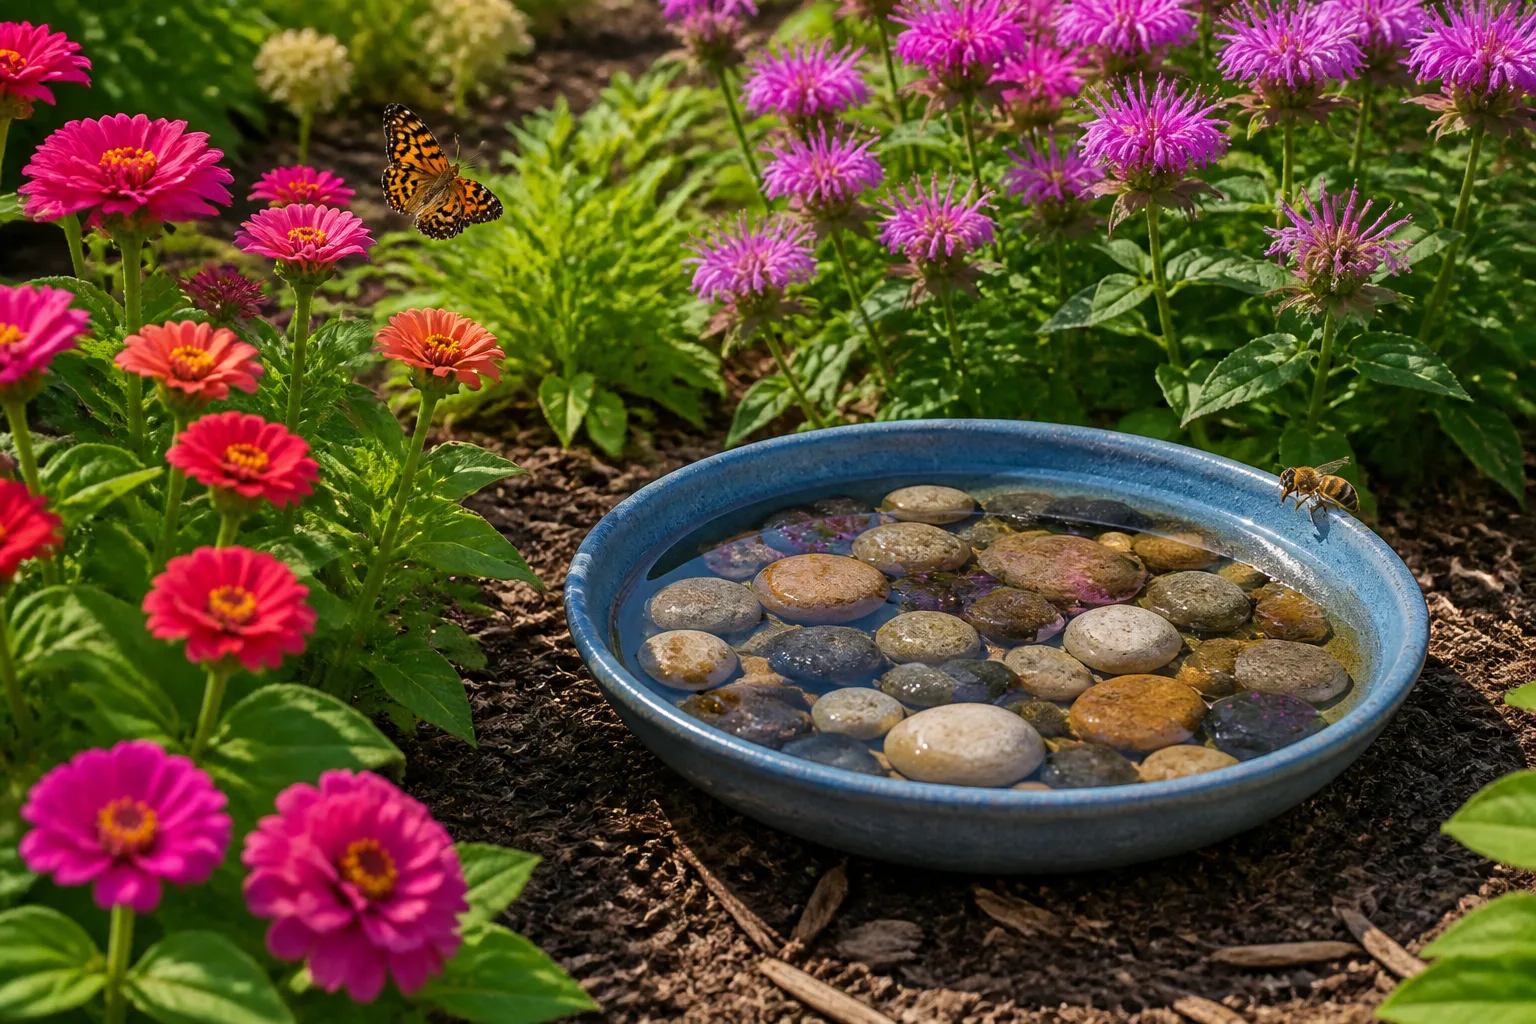
If you have seen chipped saucers, pie tins, or mismatched dinner plates tucked between flower pots on social media, the trend is not about quirky yard décor. Gardeners are turning old dishware into pollinator water stations—shallow drinking spots where bees, butterflies, and other beneficial insects can hydrate without drowning in a deep birdbath. A plate in the garden is basically a free, upcycled puddle with landing pads.
That matters more than it sounds. Pollinators burn enormous energy flying between flowers, and nectar alone does not supply all the moisture they need—especially during heat waves and dry spells when natural puddles disappear. Gardening Know How notes that accessible water is essential for pollinating insects and birds, and that stations should be shallow or otherwise designed to prevent drowning (Gardening Know How pollinator water station guide). A recycled dish filled with stones recreates the damp edges pollinators find in nature, only safer.
What a garden plate actually does for pollinators
A pollinator water station is any shallow container—ceramic saucer, terracotta drip tray, enamel pie plate, or even a thrift-store cereal bowl—filled with clean water and textured landing material. The goal is not to water plants. It is to give insects a reliable drink near the flowers they already visit.
Why bees and butterflies need water beyond nectar
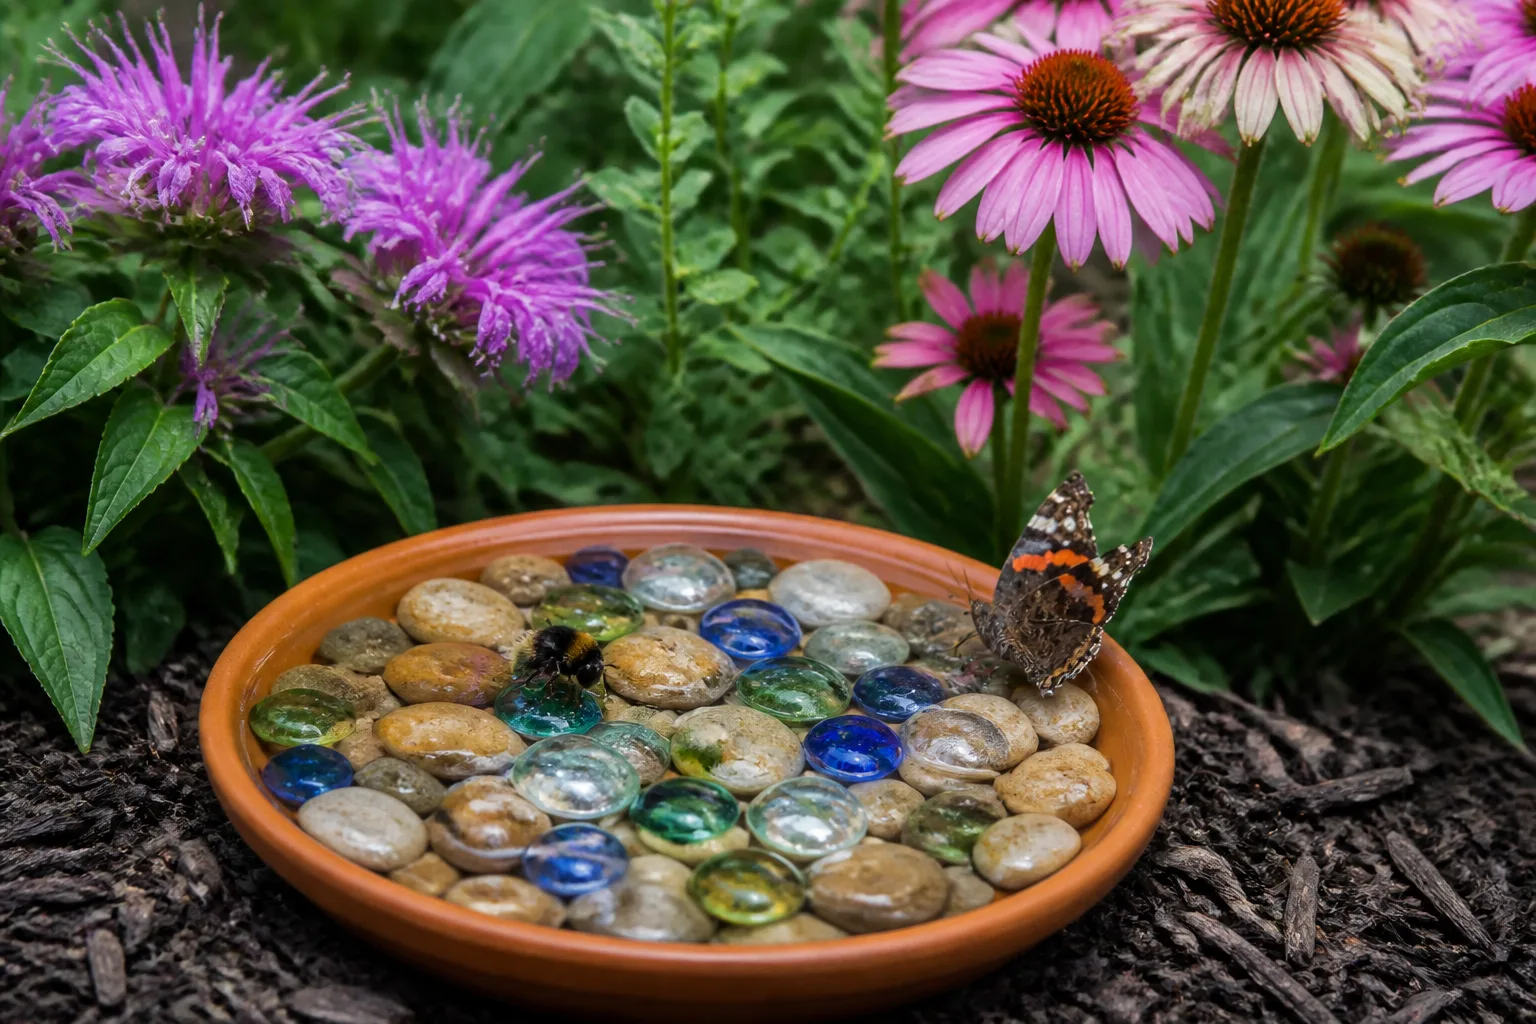
Honeybees famously haul water back to the hive for cooling and brood care. Native bees, sweat bees, and solitary species drink on their own as they forage. Butterflies sip standing water and damp soil to hydrate and, in many species, to absorb sodium and other minerals through a behavior called puddling. Frugal Gardening explains that without accessible moisture, pollinators may skip even nectar-rich gardens during dry weather—and that colonies and individual foragers both depend on steady water access (Frugal Gardening pollinator water station from recycled dishes).
Nectar is sugary fuel, not a complete hydration plan. On blazing afternoons when dew has burned off and rain is weeks away, a saucer of water beside your bee balm or coneflowers can keep foragers active instead of pushing them toward stressed, wilted blooms. Solitary native bees—mason bees, leafcutters, and tiny sweat bees—rarely get the press honeybees do, yet they visit the same flowers and need the same shallow water access during dry spells.
If you already run a drip irrigation system or soaker hoses, resist the urge to aim a micro-spray at pollinators. Insects drink from still or very slow water where they can perch. A misting nozzle cools leaves but does not replace a dish with stones.
Why shallow dishes beat deep birdbaths for insects
Standard birdbaths are built for birds with legs and wings strong enough to escape if they slip. For a tiny bee or moth, a smooth-sided bowl several inches deep is a trap. Pollinators need water shallow enough that their bodies stay above the surface while they drink, with rough landing zones so they do not slide under.
The Cornell Lab’s birdbath guidance focuses on bird safety, depth, and sloped edges for bathing (All About Birds birdbath guide)—useful context because the same deep basin that pleases cardinals can fail pollinators entirely. Gardening Know How recommends marbles, pebbles, or corks in a shallow dish so insects perch safely while sipping (Gardening Know How pollinator water station guide). Think puddle, not pool.
| Feature | Deep birdbath | Plate-style pollinator station |
|---|---|---|
| Depth | Often 2–3 inches or more | ½ inch or less above landing stones |
| Landing surface | Smooth basin | Gravel, marbles, corks, or sand |
| Best for | Birds | Bees, butterflies, beneficial wasps |
| Refill frequency | Weekly-ish | Every 1–3 days in summer |
Build a pollinator water station from old dishes
You do not need a kit. Hunt your kitchen cabinets, garage shelves, or a thrift-store dish rack for shallow vessels headed for the donate pile.
Choose the right plate, saucer, or pie tin
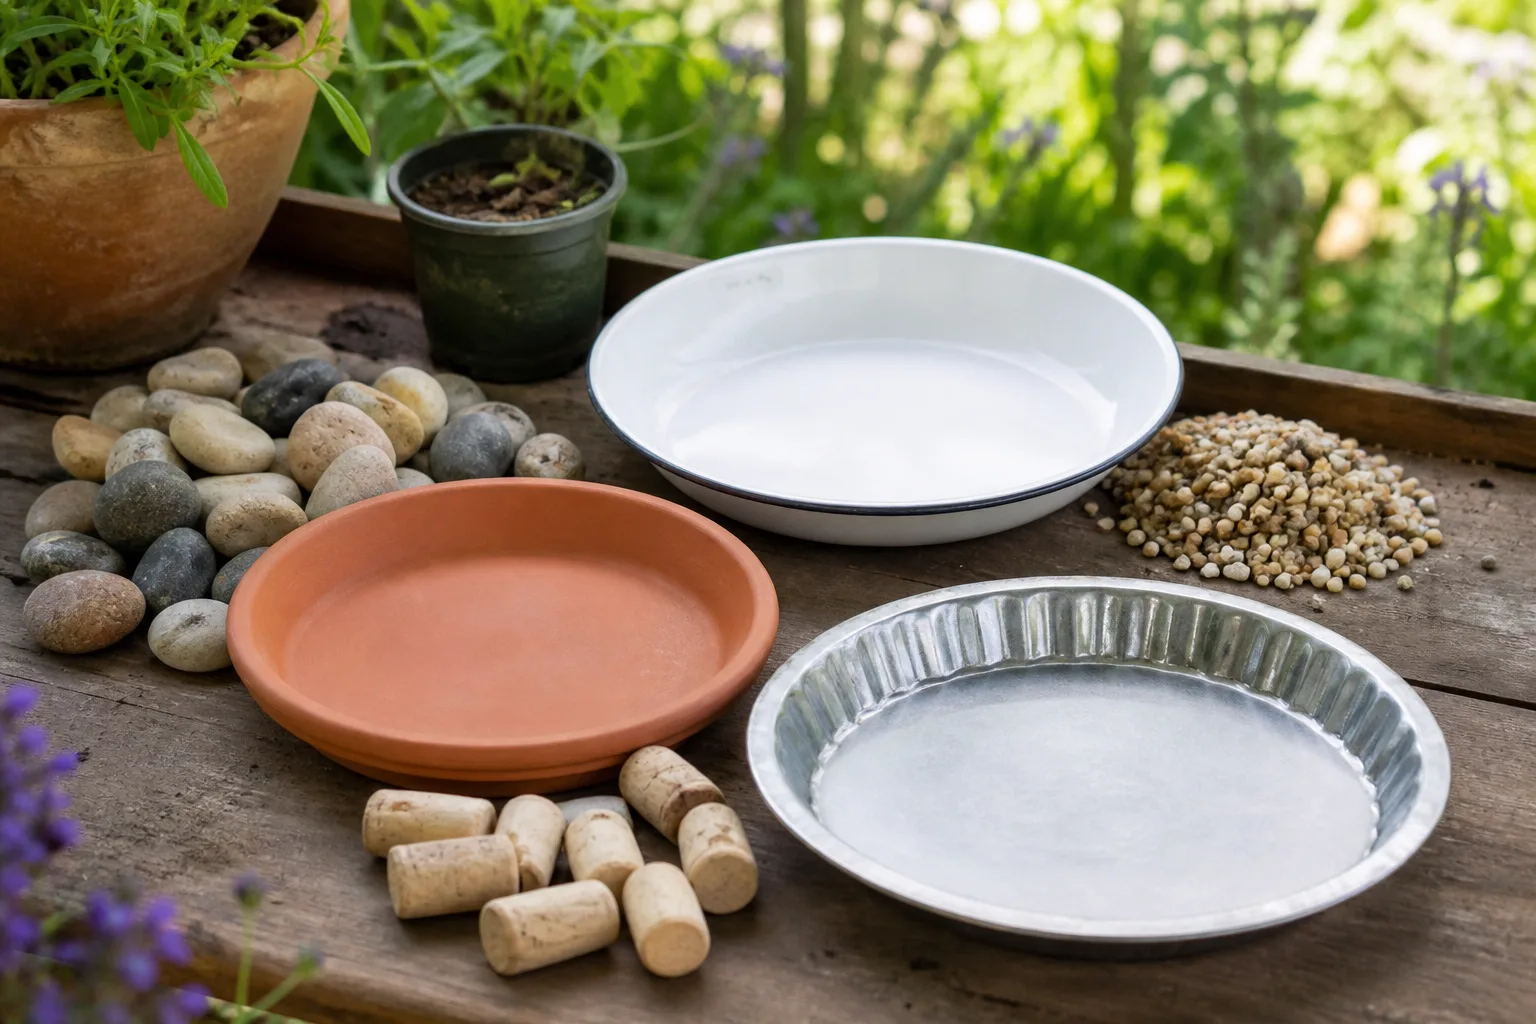
Depth and width beat pattern. A 8–12 inch saucer or pie tin holds enough water to last a day or two but stays shallow when you add stones. Heavy ceramic or stoneware resists tipping in wind better than flimsy plastic. Terracotta plant saucers already live in garden stacks and blend in naturally.
Material matters in sun. Dark metal trays heat fast and can warm water uncomfortably on 95°F afternoons—partial shade helps. Clear glass looks pretty but can concentrate heat; place it where it gets morning sun and afternoon shade. Glazed ceramic and enamel are middle-ground choices most gardeners already own.
Elevation is optional but smart. Set the dish on an upside-down pot, paver, or tree stump so crawling ants have a harder time claiming the station and you can see activity from a patio chair. Frugal Gardening suggests stacking dishes on stumps or pots for visibility and charm (Frugal Gardening pollinator water station from recycled dishes).
Add gravel, marbles, or corks so insects do not drown
Fill the dish with clean river stones, aquarium gravel, glass marbles, wine corks cut in half, or broken terracotta shards. Pour water until it barely kisses the tops of the stones—the insect should never need to stand in open water without a grip.
Gardening Know How advises that pebbles must be large enough to perch on, while corks can float as safety rafts in slightly deeper vessels (Gardening Know How pollinator water station guide). Mix heights so tiny sweat bees and larger swallowtails both find footing. If you can see a meniscus of water above the stone tops, drain a little.
For a plain hydration station, stop there. Refill when stones look dry. No additives required.
Quick build checklist: (1) Shallow dish, 8–12 inches wide. (2) Landing material to the rim. (3) Water just below stone tops. (4) Elevate on a pot or paver if ants swarm the rim. (5) Place within 10–20 feet of your busiest flower patch. You can assemble the whole project in ten minutes with materials already in the house.
How to make a butterfly puddling pool
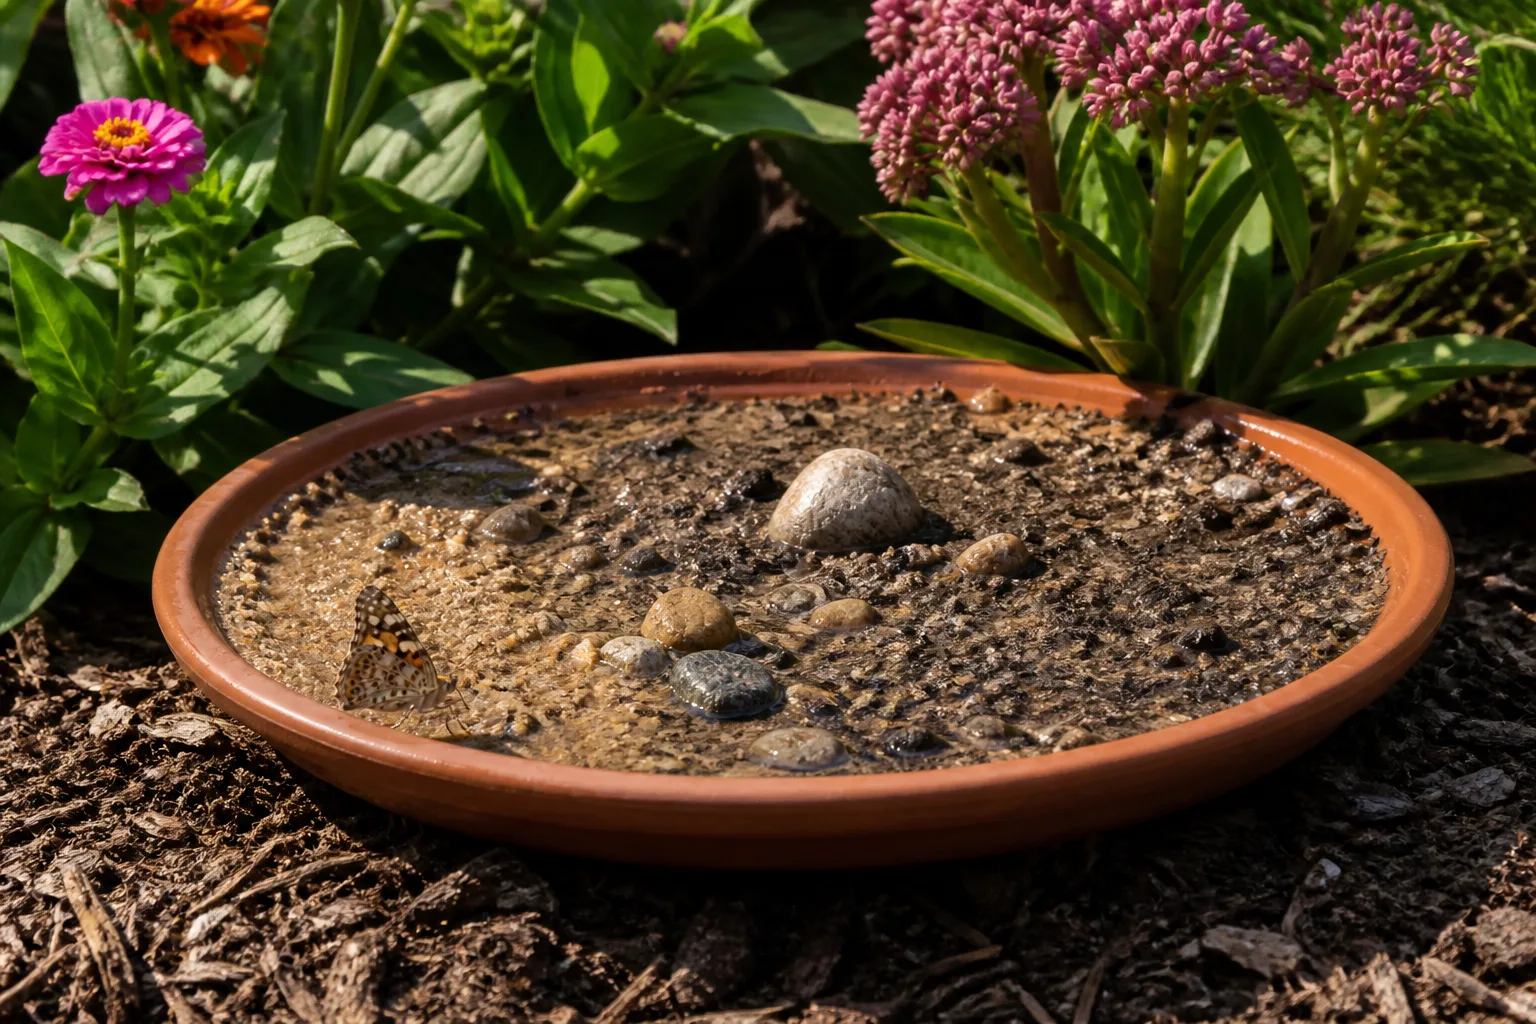
Butterflies often gather at muddy edges to drink and extract minerals—especially sodium—that are scarce in flower nectar. Epic Gardening describes how butterflies congregate at shallow muddy puddles to drink and absorb nutrients from wet soil, and that a tray of wet sand can attract puddling behavior (Epic Gardening butterfly garden guide).
The mineral mix—and what to skip
To mimic a natural puddle in a saucer:
- Add 1–2 inches of clean sand, garden soil, or a sand-soil mix to your dish.
- Moisten until mud forms at the surface but water does not pool above the sand.
- Sprinkle a pinch of fine sea salt or crushed eggshell—not tablespoons. Gardening Know How suggests tiny amounts of sea salt, crushed shell, or a little soil in water stations for minerals (Gardening Know How pollinator water station guide).
- Place the saucer in filtered sun near nectar flowers.
What to skip: Raw manure, pet waste, or heavy fertilizer in a puddling dish. Social posts sometimes recommend organic manure for minerals; that can introduce pathogens and overpower a small saucer. Compost tea or a teaspoon of finished compost mixed into sand is a safer middle ground if you want extra organic matter. If pets or toddlers access the garden, treat puddling stations like any outdoor water feature and refresh often.
Male butterflies puddle more visibly than females, but both sexes benefit from habitat-level plant diversity. A puddling pool supports adults; it does not replace host plants caterpillars need. Monarch caterpillars, for example, feed only on milkweed leaves—the National Park Service notes this exclusive relationship and milkweed’s role in monarch survival (National Park Service milkweed and monarchs overview).
Where to put your plate water station
Location can matter as much as design. Pollinators visit water near food, shelter, and safe flight paths.
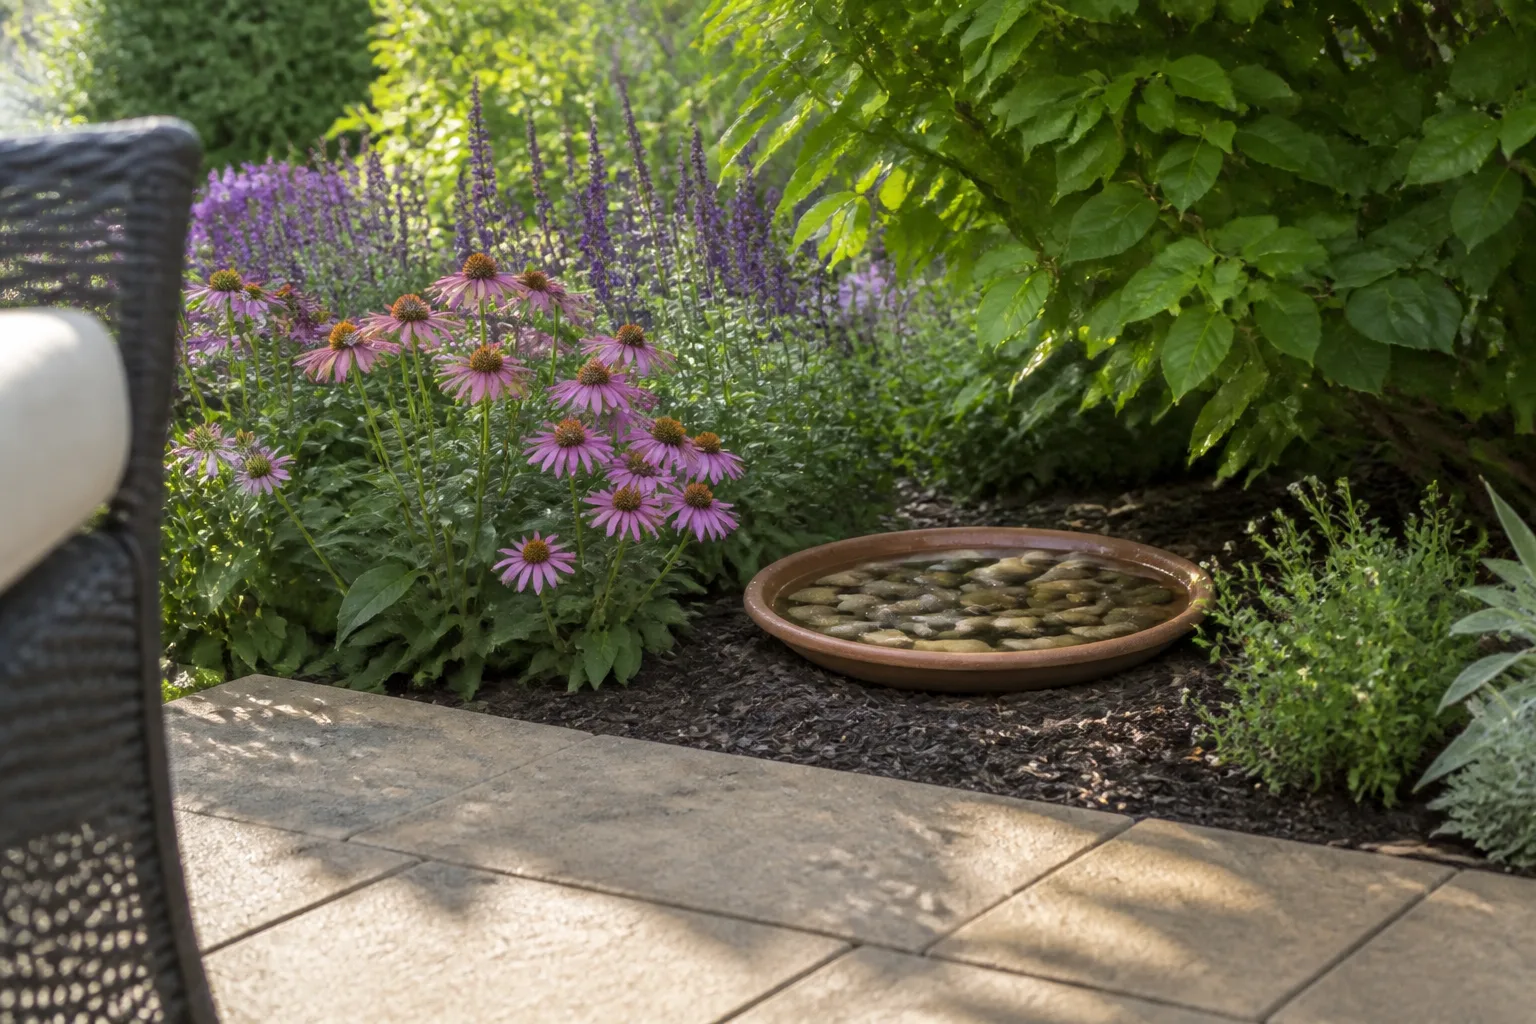
Near nectar, not in the middle of nowhere. Set the dish at the edge of a flower bed, herb patch, or vegetable row where bees already forage. Lavender, bee balm, zinnias, and native coneflowers are common anchor plants. Frugal Gardening recommends placing stations beside nectar-rich beds so pollinators encounter water during normal feeding routes (Frugal Gardening pollinator water station from recycled dishes).
Sun with an escape from extreme heat. Morning sun warms butterflies and speeds bee activity; afternoon shade slows evaporation on brutal days. A spot under a shrub overhang or beside a trellis often works better than open blazing pavement.
Shelter from wind. Butterflies struggle to drink on gusty corners. A fence line, hedge, or patio wall blocks wind while keeping the station visible to you for maintenance.
Pesticide-free zone. Never place a pollinator water station downwind of a lawn recently treated with insecticide or fungicide spray. Even organic contact sprays can harm non-target insects on flowers. If you must treat a problem plant, move the dish temporarily and wait until labeled re-entry intervals pass.
Balcony and small-space setups
A single teacup saucer on a railing planter can support balcony pollinators when paired with compact bloomers like dwarf zinnias, trailing lantana, or a pot of native asters. Weight the saucer with a stone underneath or use a heavy ceramic dish so wind does not flip it. Refresh daily—small volumes evaporate fast on concrete balconies that radiate heat.
Urban gardeners often underestimate how many native bees visit high-rise flowers once water exists. You will not host a meadow, but you can supply one missing resource in a fragmented landscape.
Keep the station clean and mosquito-free
Stagnant water breeds mosquitoes and algae that smell bad to you and may harbor bacteria harmful to insects. Maintenance is not optional.
Refill rhythm: In hot summer weather, empty and refill every one to two days. During cool spring or fall stretches, every two to three days may suffice. If water looks cloudy, green, or full of debris, dump it immediately, scrub the dish, and start fresh.
Cleaning method: Scrub with a stiff brush and rinse with water. Gardening Know How recommends occasional vinegar rinses and avoiding chemical cleaners that could leave residues toxic to pollinators (Gardening Know How pollinator water station guide). Let the dish dry in sun for an hour if algae builds up.
Mosquito reality check: Shallow dishes with daily refreshes rarely become major larval habitats compared with neglected buckets or clogged gutters. If you travel, dump the station dry rather than leaving standing water for a week. In mosquito-heavy regions, position the dish away from doors and consider a second station only if you can maintain both.
Winter storage: In freezing climates, dump dishes dry before hard frost, scrub them, and store indoors so glazed ceramic does not crack through freeze-thaw cycles. Set them back out when the first spring bulbs emerge and daytime insects begin flying again.
Six habitat upgrades that matter more than dishes alone
A plate helps pollinators drink. It does not replace flowers, nesting sites, or chemical-safe foraging. Treat the water station as one layer in a habitat stack.
Cut pesticide use where pollinators feed
Broad-spectrum insecticides—including many organic contact products—kill caterpillars, bees, and predatory wasps along with the pest you targeted. If Japanese beetles hit your roses, hand-pick in early morning, use row cover on vegetables, or spot-treat after dusk when fewer bees fly—never blanket-spray open blossoms. A water dish beside a recently sprayed bed invites insects into harm’s way.
Leave the leaves and delay spring cleanup
Many butterflies, moths, and native bees overwinter in leaf litter, hollow stems, or loose bark. The National Wildlife Federation’s leave-the-leaves guidance urges gardeners to let fallen leaves stay in beds as shelter rather than bagging everything each fall (National Wildlife Federation leave the leaves article). In spring, wait until daytime temperatures are consistently above about 55°F before raking beds bare, so overwintering insects can emerge. Remove only diseased or pest-infested material in fall.
Grow native flowers that bloom across the seasons
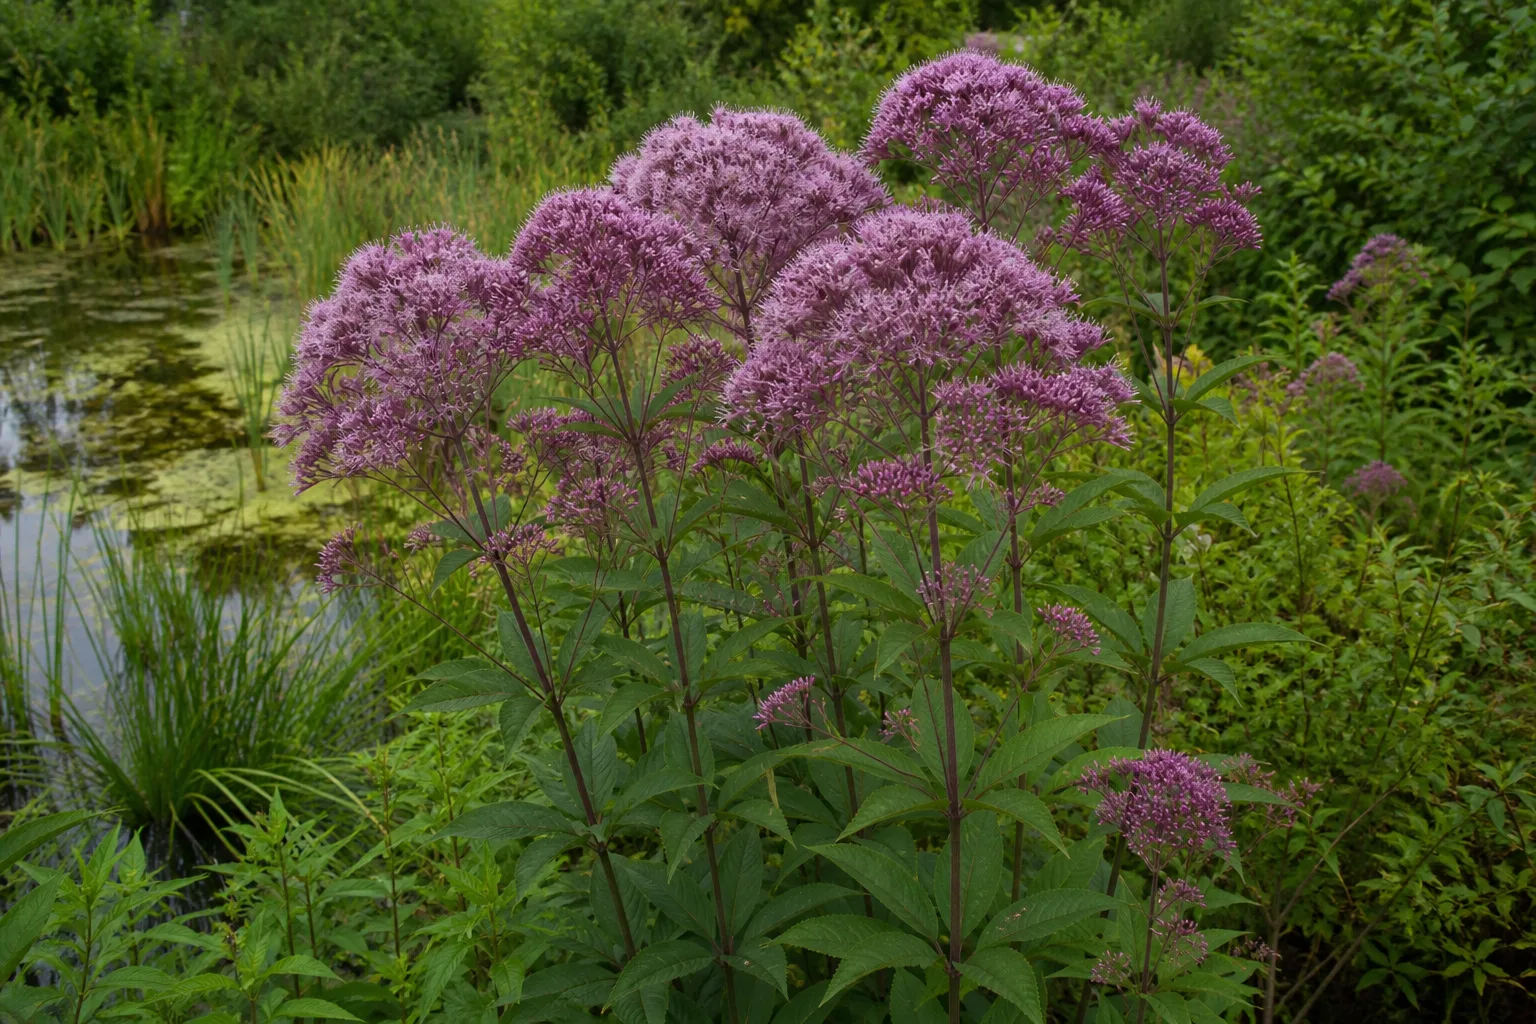
Water draws pollinators in; flowers keep them fed and support reproduction. Prioritize regionally native species with staggered bloom times:
| Plant | Bloom window | Who it feeds |
|---|---|---|
| Virginia bluebells | Early spring | Early bees, hummingbirds |
| Bee balm (Monarda) | Mid-summer | Bees, hummingbirds, butterflies |
| Milkweed (Asclepias) | Summer | Monarch host + many pollinators |
| Joe Pye weed | Late summer | Butterflies, bees |
| Asters | Fall | Late migrants, overwintering prep |
| Goldenrod | Fall | Bees, butterflies (not the allergy villain you think) |
Milkweed remains the non-negotiable host for monarch caterpillars (National Park Service milkweed and monarchs overview). Pair it with late-season asters and goldenrod so adults have nectar after milkweed finishes blooming.
Fruit feeders and bird boxes: A separate shallow dish of overripe banana, orange slices, or melon can supplement butterfly diets in hot weather—refresh daily and discard before fermentation attracts wasps. Birdhouses support a different slice of backyard ecology: cavity nesters like chickadees and wrens eat caterpillars and help control pest populations, but box dimensions and entrance-hole size must match the species in your region. Mount boxes on sturdy posts with predator guards, clean them in late winter, and never place a nest box directly above your pollinator water dish where droppings could contaminate the water.
Beyond planting: Let lawn areas grow slightly taller or overseed with white clover in low-traffic patches for nectar between mowings. Install a species-appropriate bird box if cavity nesters visit your region. Offer overripe fruit on a separate dish if you want a butterfly fruit feeder—but refresh daily so it does not ferment into a wasp magnet. Each tactic addresses a different wildlife need; the plate handles hydration only.
Common mistakes with garden plate water stations
Water too deep. If insects disappear beneath the surface, drain until only stone tops glisten.
Smooth, empty saucer. A slick plate without texture is a slip-and-drown hazard. Always add landing material.
Set-and-forget for weeks. Neglected water turns green and breeds mosquitoes. Tie refills to your morning coffee or evening watering routine.
Placing stations in pesticide drift zones. Water plus poisoned flowers is worse than no water at all.
Expecting instant crowds. Pollinators find new resources over days or weeks depending on local populations. Keep the dish clean and flowers blooming; activity builds as word spreads through foraging routes.
Using only a puddling pool without flowers. Minerals attract male butterflies briefly; nectar and host plants keep the garden alive with wings.
Conclusion
People put plates in the garden because a shallow dish—filled with stones and clean water—gives bees and butterflies a safe drink modern yards often lack. Build one from any chipped saucer or pie tin, add landing pads so insects stay above the waterline, and refresh it every couple of days in summer. Add a sand-based puddling pool if you want to support mineral-seeking butterflies, but keep additives light and skip raw manure in small dishes.
Place the station beside nectar flowers, out of pesticide spray paths, and where you will actually maintain it. Then stack the bigger wins: native blooms across seasons, reduced spraying, and gentler fall cleanup so overwintering insects survive. A plate alone will not transform a barren lawn—but paired with real habitat, that odd saucer by the zinnias becomes one of the most useful pieces of gardenware you own.



