5 Reasons Why You Should Prune Your Croton Right Now—And How to Do It
Learn why pruning helps a croton recover from leaf drop, grow fuller, stay compact, and produce cuttings—plus the safest cuts and aftercare.

A croton can go from lush to awkward surprisingly quickly. One side reaches toward a window, lower leaves drop after a move, or a tall stem keeps growing while the middle stays bare. Pruning can correct those problems, but the best cut depends on what you are trying to change.
The useful question is not simply “Can I cut this croton back?” It is what job should the cut do: remove dead tissue, encourage branching, control height, restart a sparse plant, or give you a cutting to propagate? Crotons (Codiaeum variegatum) respond best when the cut and the aftercare agree with the plant’s light, warmth, moisture, and current growth cycle.
The right time to prune a croton depends on the job
For major shaping or rejuvenation, the safest general window is spring or the beginning of the warm, bright growing season where you live. Wisconsin Horticulture and the RHS croton growing guide both point to spring pruning for a leggy plant because the plant is better positioned to replace shoots and leaves after the cut.
That does not mean every pruning cut must wait for a particular date. A fully brown leaf, a snapped branch, or a clearly dead section can be removed whenever you notice it. The distinction is scale: cleanup removes a liability, while a hard cut asks the croton to spend stored energy making new growth.
Spring shaping and rejuvenation
Use the active-growth window when you want to shorten several stems, rebuild a sparse canopy, or cut a bare plant back to a lower set of nodes. In a cool room with short winter days, the same cut may sit dormant for weeks and leave the exposed stem vulnerable to rot or further stress. If spring is not a meaningful season in your climate, choose a period when the plant is warm, receiving strong usable light, and already producing new leaves.
Warm outdoor crotons can have a longer pruning window than indoor plants, but they still need protection from cold snaps. Crotons are tropical plants; Wisconsin Extension notes that temperatures below about 50°F can trigger leaf loss, while the RHS recommends keeping codiaeums above roughly 55°F. Do not pair a hard prune with a forecasted chill, a move to a darker room, or a recent root problem.
Light cleanup can happen sooner
Dead or badly damaged leaves do not need to remain on the plant while you wait for spring. Snip the leaf stalk close to its point of attachment without gouging the main stem. If only the brown edge of a living leaf is unattractive, leave the green tissue in place; trimming a leaf into a new shape rarely improves the plant’s health.
Remove a broken or dead branch back to healthy tissue, then pause and reassess. A cut that exposes green, firm stem is different from a cut that reveals brown, hollow, or mushy tissue. If the damage came from pests, cold, sun scorch, or root trouble, pruning is the cleanup step—not the treatment that prevents the next round of damage.
Five reasons pruning earns a place in croton care
Pruning is not a monthly haircut for a croton. It is a targeted way to change where the plant invests growth. Make the smallest cut that accomplishes the goal, then give the plant time to show you how it responds.
1. Restart a plant after leaf drop
Crotons commonly shed leaves after abrupt changes in light, temperature, watering, humidity, or location. The University of Wisconsin–Madison’s croton guidance notes that plants can drop leaves when they stay too wet or too dry, encounter drafts, or experience a fast change in conditions. If the bare stem is still firm and the roots are healthy, pruning can redirect the plant toward new shoots instead of leaving a tall, leafless cane.
First correct the cause of the leaf drop. Move the croton into bright, stable light, keep it warm, and water when the upper layer of mix has dried without letting the root ball swing repeatedly between bone-dry and saturated. Only after the plant is no longer declining should you decide how much bare stem to remove.
A sparse but viable plant can tolerate a stronger reduction during active growth. Make a series of cuts rather than automatically reducing every stem to the same height. Keep at least a few healthy nodes on the remaining framework, because a leafless section will only branch where viable buds remain.
2. Turn leggy stems into a fuller canopy
“Leggy” means the distance between leaves has stretched and the plant has more bare stem than foliage. Low light is a common driver, so pruning alone can produce a brief flush of shoots followed by another stretched plant if the croton goes back to the same dim position. Wisconsin Extension notes that brighter light supports more compact growth and stronger color.
Shorten a long, healthy stem just above a leaf joint or node. The node is the point where a leaf or side branch joins the stem; it contains dormant buds that can break after the upper growth is removed. Orient the cut so the remaining stem does not collect water in a deep notch, and choose a node that points toward the open side of the plant when you want to guide the next shoot.
Do not cut every branch to one level. Staggering the cuts creates a more natural canopy and leaves enough foliage to keep photosynthesis going. Rotate the pot a quarter-turn every week or two after the plant begins recovering so new growth does not all lean toward the same window.
3. Keep the plant in scale with its room
Crotons can become substantial shrubs in warm outdoor conditions, and even container plants can outgrow a shelf or window. A height cut is useful when the plant is healthy but no longer fits its space. It is not a substitute for choosing a brighter, more stable location or a cultivar whose mature size suits the room.
Start with the tallest or most disruptive stem rather than taking a hedge trimmer to the whole plant. Cut it back by roughly one-third, watch for a new flush of growth, and then decide whether the next-tallest stem needs attention. This staged approach keeps the plant’s leaf area and energy supply more balanced than one severe, all-at-once reduction.
If a plant is repeatedly too tall, check the light before cutting again. A croton stretching toward a window may become shorter after pruning but not fuller. Better light, even rotation, and a pot that drains reliably are what make the new structure worth keeping.
4. Remove damaged or diseased growth
Pruning improves appearance and limits dead tissue that can harbor pests, but the cut line matters. Remove a dead leaf at the petiole, and remove a dead branch until the cut surface shows firm, living tissue. Wipe or disinfect the blade between plants, and between questionable sections of the same plant, so you do not drag a possible infection into a fresh wound.
Look closely before cutting. Fine webbing, cottony clusters, scale-like bumps, sticky residue, stippling, or distorted new leaves point toward pests rather than a simple shape problem. The RHS croton guide and UF/IFAS croton guide both note that crotons can be affected by common houseplant pests, including mealybugs, scale, mites, and thrips. Isolate the plant and identify the pest; removing a few leaves will not end an infestation hiding in leaf joints.
Do not prune sun-scorched or cold-damaged leaves wholesale while the plant is still being exposed to the cause. Leave partially green tissue until you have stabilized the location, then remove leaves that are fully dead. This preserves useful photosynthetic area during recovery.
5. Multiply a favorite cultivar
Pruning gives you a chance to make a second croton without sacrificing the parent plant. Vegetative propagation is the reliable way to preserve a cultivar’s leaf shape and color; seed-grown offspring do not necessarily match the parent. Wisconsin Extension describes air layering in spring and softwood cuttings in summer as propagation options, while UF/IFAS gives a practical cutting target of about 3 to 4 inches with 3 to 5 leaves.
Choose a firm, healthy stem tip rather than a section that is soft, pest-covered, or stripped of every leaf. A cutting that has a few leaves and at least one or two nodes can support rooting; a single leaf without a stem node cannot recreate a croton. Keep the removed pieces shaded while you finish pruning so they do not wilt before they reach their rooting medium.
Check the plant before you make the first cut
Stand back and decide what you want the plant to look like six weeks from now, not just where the nearest long stem happens to be. View it from all sides, identify the strongest branches, and mark the stems that are dead, crossing, bare, or growing away from the shape you want.
The one-third rule is a sensible ceiling for living growth: as a routine cut, avoid removing more than about one-third of a branch or one-third of the plant’s healthy canopy at one time. Gardening Know How’s croton pruning advice and Epic Gardening’s croton guide both recommend limiting cuts on living branches to reduce stress. A dead or diseased section is different; remove the compromised tissue back to healthy wood, even if that leaves a larger gap, then stop and reassess.
When pruning will not fix the real problem
Do not hard-prune a croton that is actively collapsing from waterlogged soil, root rot, severe pest pressure, cold damage, or a sudden move into weak light. Removing foliage may reduce demand on damaged roots, but it does not repair rotten roots or stop a mite population. Stabilize the problem first, then prune once the plant has firm stems and some sign of recovery.
Leaf drop after a move is especially easy to misread. If the stems remain green and firm, keep conditions steady rather than responding with repeated cuts. If the base is soft, the pot stays wet for a long time, or the plant smells sour, inspect the roots and correct drainage before you plan a new canopy.
Gather safe, clean tools
You need less equipment than most pruning lists suggest: sharp bypass pruners or clean scissors for thin stems, disposable or washable gloves, a clean surface, and a way to wipe the blades between cuts. Have a paper towel or damp cloth ready for sap, plus a small pot and airy mix if you are keeping cuttings.
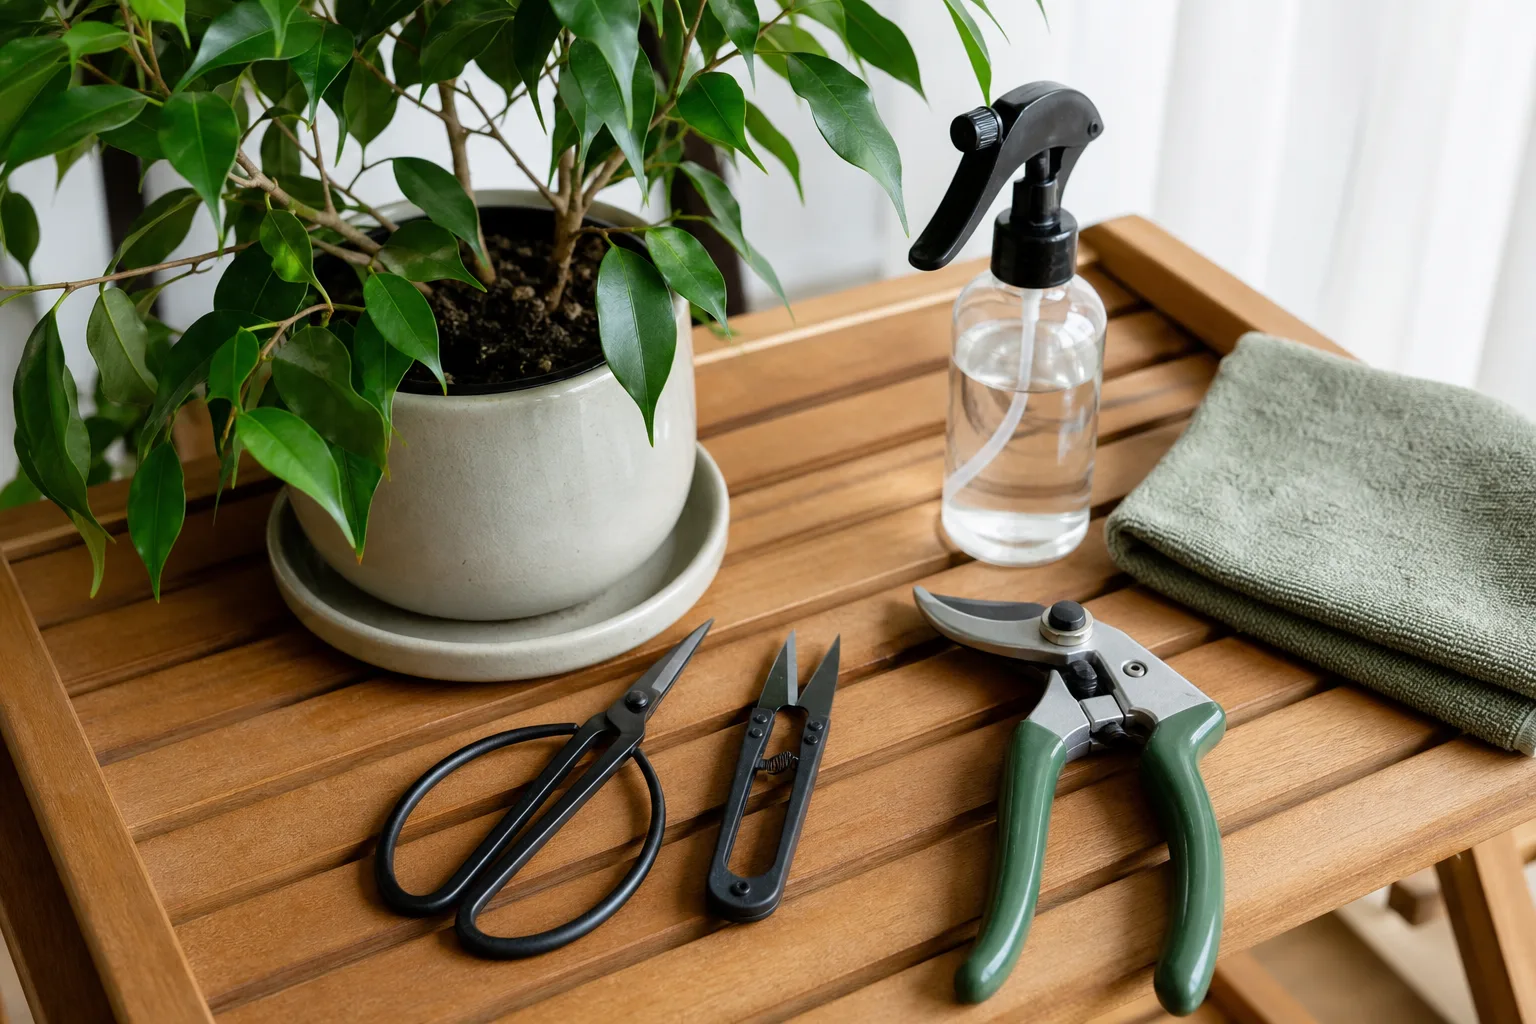
Croton sap is milky and can irritate skin and eyes; it can also stain. The RHS advises wearing gloves and avoiding contact with the sap, and UF/IFAS cautions that crotons have irritating and poisonous qualities if chewed. Keep the plant and fresh cuttings away from children and pets, wash exposed skin promptly with soap and water, and seek medical or veterinary advice if a person or animal ingests plant material.
Use a sharp blade that makes one clean cut instead of crushing the stem. Clean soil and plant debris off the blade first, then disinfect it with a household method appropriate to the tool and follow the product’s instructions. Alcohol wipes are convenient for home use; do not rely on a dirty blade simply because the cut looks small.
How to prune a croton step by step
Watering immediately before pruning is not mandatory, and soaking a stressed croton is a mistake. The plant should be hydrated enough that the stems are not limp, but the pot should still drain freely. If the mix is bone-dry, water it normally and let excess drain before cutting; if it is wet, address the root-zone problem instead of adding more moisture.
- Put on gloves and inspect the whole plant. Identify the purpose of each cut: cleanup, height control, branching, or propagation.
- Remove dead leaves first. This makes the structure easier to see and prevents you from cutting a healthy stem to solve a cosmetic leaf problem.
- Choose one or two priority stems. Begin with the tallest, sparsest, or most awkward branch rather than cutting everything at once.
- Make a clean cut above a node. Leave a short section above the node so the cut does not split or damage the bud.
- Step back and rotate the pot. Check the silhouette from the front, back, and sides before making the next cut.
- Pause at the one-third limit. Give the plant time to push new growth before repeating structural pruning.
- Wipe sap from the work area and dispose of diseased material. Do not compost suspicious pest- or disease-covered pieces with ordinary houseplant debris.
Make the first cut above a node
On a leafy branch, choose a node near the height where you want new branching to begin. The RHS recommends pruning codiaeums above a leaf joint, and that placement gives a dormant bud a nearby source of water and stored energy once the tip is removed.
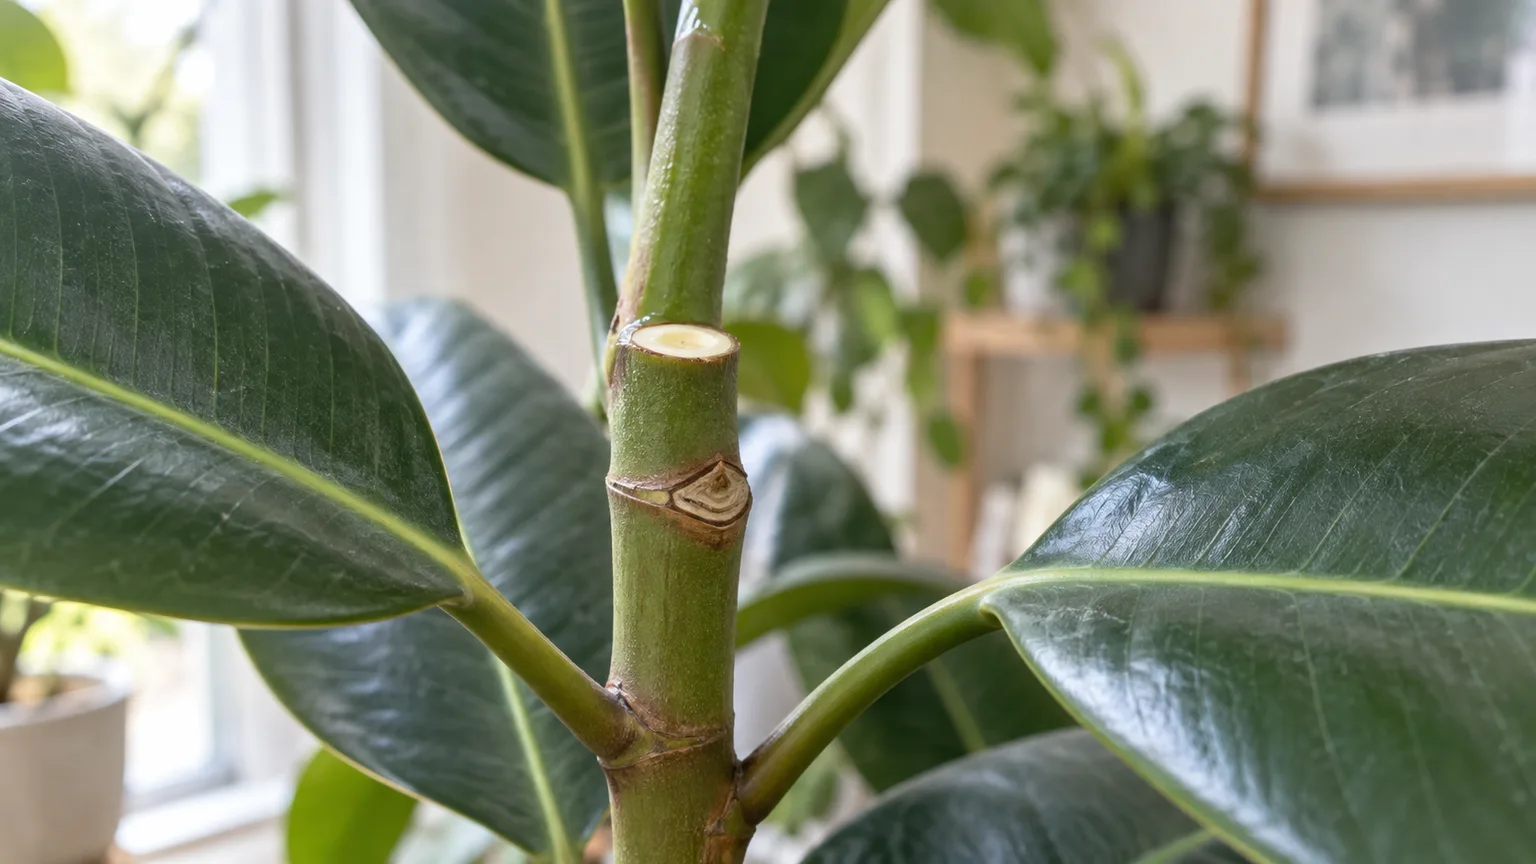
Make the cut slightly above the node, not flush against it and not several inches above a bare section. If the node points inward, choose another one when possible; the direction of the remaining bud influences how the new shoot fills the plant. For a completely dead stem, keep cutting down until the tissue is firm and alive rather than preserving a node that cannot grow.
The tip you remove can be a useful cutting if it is healthy, has several leaves, and includes nodes. Set it aside immediately, keep track of which end was closest to the roots, and prepare it before it wilts. Do not use a leafless, pest-riddled, or mushy tip just because it is the longest piece.
Shape in passes instead of giving one severe haircut
The first pass should solve the main structural issue. If the croton is leaning, shorten the longest branch; if it is bare at the base, reduce selected upper stems to viable lower nodes; if one side is crowded, open the interior with a single well-chosen cut. Wait for new buds before deciding whether the plant needs a second pass.
This restraint matters because every cut changes the plant’s leaf area. A croton that loses most of its leaves at once must rely on stored reserves while it regrows, and a plant in weak indoor light may not have enough energy to do that quickly. The goal is not the smallest possible plant today; it is a stable, branching plant that can support its next flush.
Root the cuttings you keep
Croton cuttings can root in water or a moist, airy medium. UF/IFAS recommends a 3- to 4-inch stem with 3 to 5 leaves, rooting hormone, moist soil, and temperatures around 70° to 80°F; the RHS identifies softwood cuttings in early summer as a standard method. Those details point to the same principle: warm tissue, high but not stagnant humidity, and a medium that stays lightly moist without starving the base of oxygen.
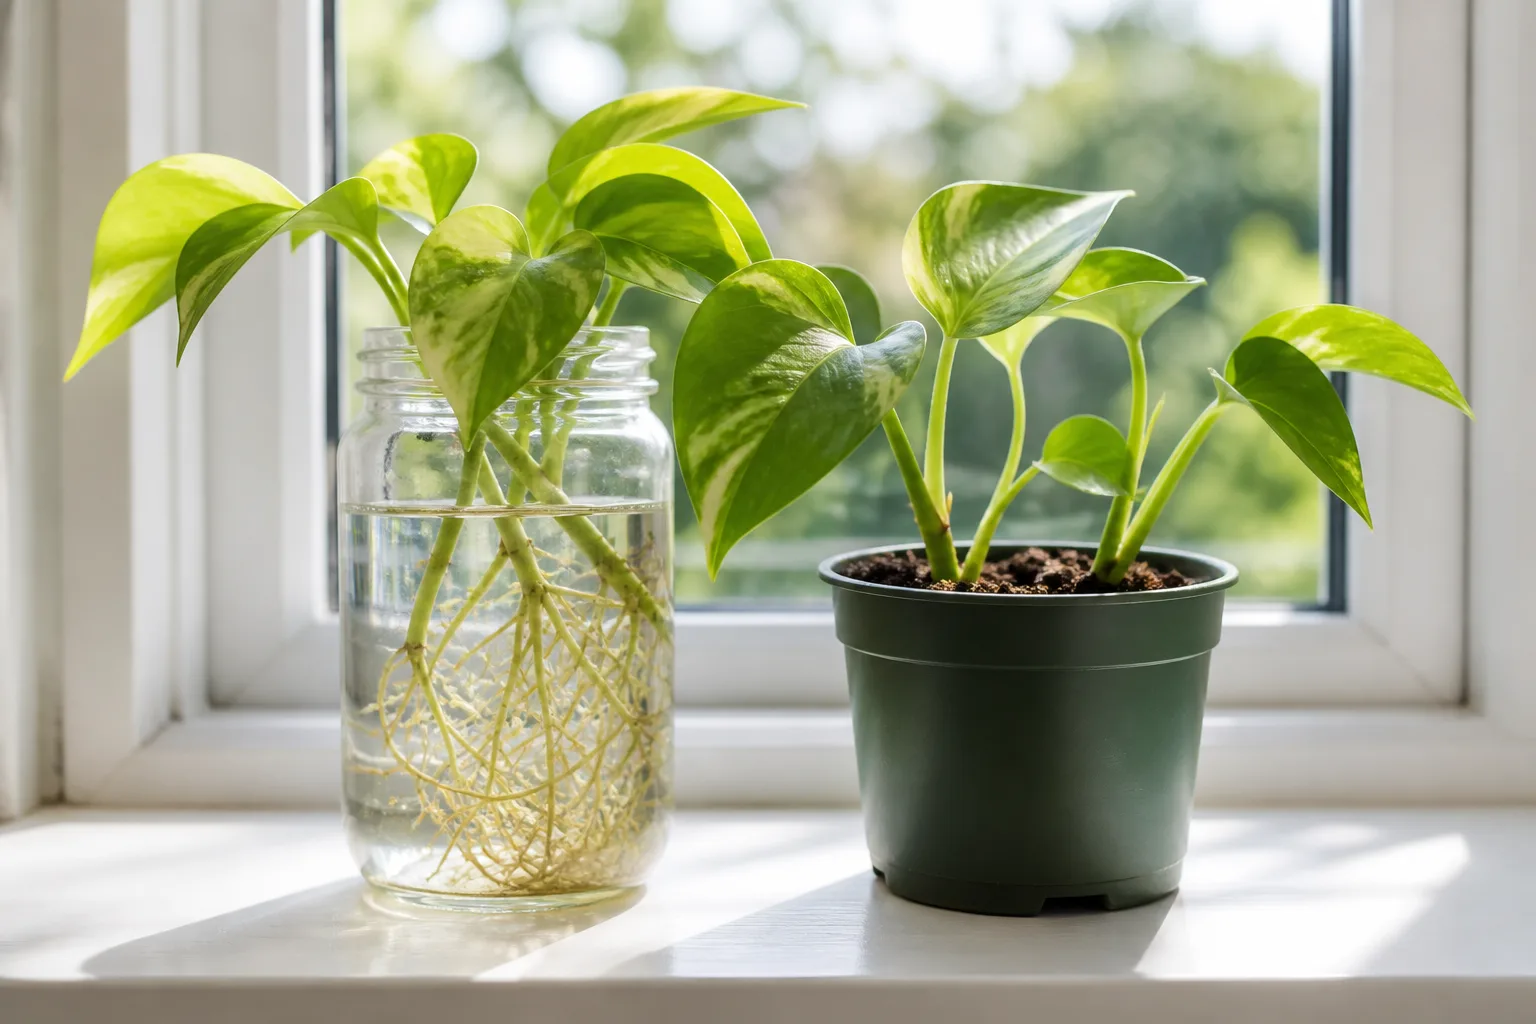
For soil propagation, remove leaves from the lower part of the stem and insert one or two nodes into a small pot of airy, pre-moistened mix. A blend based on quality potting mix and perlite is easier to manage than dense garden soil. Covering the cutting loosely with a clear bag can preserve humidity, but leave room for airflow and remove the cover if condensation stays heavy or the base begins to soften.
For water propagation, place only the lower node or two in clean water and keep the leaves above the surface. Change cloudy water, keep the jar in bright indirect light, and transfer the cutting once it has a small, firm root system rather than waiting for a tangled mass. Water roots are formed in a different environment, so the new plant may pause after potting; keep the mix evenly moist but not saturated while it adjusts.
Do not tug on a cutting every few days to check for roots. New growth is a better sign than a small amount of visible root, and UF/IFAS notes that croton cuttings may root in less than a month when warm conditions are maintained. If the base turns dark, soft, or foul-smelling, discard that piece and try again with a fresh, healthy stem.
Air layering is another option for a tall, valuable croton that you do not want to sever before roots form. Make a controlled wound on an attached stem, keep the rooting material moist, and wait for a root system before separating it. It is slower and more involved than a tip cutting, but it reduces the risk of losing the entire top of a prized plant.
Aftercare: help new shoots break
Place the pruned croton in bright, stable light without immediately exposing it to harsh afternoon sun through glass. Bright light supports compact growth and leaf color, but a freshly cut plant can be more vulnerable to a sudden change in heat or light. If the plant was pruned indoors, keep it away from cold drafts, heater blasts, and frequently opened exterior doors.
Water by checking the mix, not by trying to compensate for the lost leaves. With less foliage, the plant may use water more slowly, so the old watering interval can now be too frequent. Let the upper layer dry modestly, water thoroughly when needed, and empty the saucer; a wet pot is not a shortcut to faster regrowth.
Hold fertilizer until the plant is stable and beginning active growth, then use a balanced fertilizer at the label rate rather than a stronger dose. New croton leaves may emerge greener and develop stronger color as they mature. If there is no new growth after several weeks during a warm, bright season, recheck the nodes, roots, light, temperature, and pests before cutting again.
Common mistakes that set crotons back
Cutting on a calendar instead of reading the plant. “Right now” is not the same season for a bright, warm patio croton and a dim indoor croton in winter. Match the size of the cut to the plant’s active growth and your ability to provide warmth and light.
Removing more than one-third of healthy growth in one session. A dramatic reduction can leave too little leaf area to fuel regrowth. If the plant is genuinely too large, stage the work across flushes of new growth.
Cutting in the middle of a bare stem. A random cut can leave a long dead stub and no nearby bud to activate. Choose a viable node and cut just above it.
Pruning without fixing poor light. More light is often what makes a croton compact; a haircut only hides stretching temporarily. Move the plant gradually into brighter light rather than placing a low-light plant in hot direct sun overnight.
Watering more after pruning. Fewer leaves mean lower water use. Keep the root zone appropriately moist, but do not keep it wet in the hope of speeding up shoots.
Handling sap casually. Gloves, eye protection when working close to the face, and handwashing are simple precautions. Keep cuttings, fallen leaves, and pruning debris away from pets and children.
Using a sick cutting for propagation. Propagation multiplies the plant you choose, including its pests or rot. Start with a firm, clean, actively growing tip and isolate new cuttings while they establish.
Conclusion
Prune a croton when the cut has a clear job. Light cleanup can remove dead or damaged tissue, while spring or active-season shaping can shorten a leggy plant, encourage branching, keep a large specimen in scale, or supply healthy cuttings for propagation.
Before you cut, correct the condition that caused leaf drop or weak growth, protect yourself from the irritating sap, and identify the nodes that can produce the next shoots. Make clean, staged cuts above viable nodes, then give the plant steady warmth, bright usable light, and careful watering. That sequence turns pruning from a cosmetic gamble into a controlled way to build a fuller, healthier croton.



