How to Use Wasp Spray Safely: 5 Pre-Spray Rules
Before you pull the trigger on wasp spray, read these 5 pro-style checks: nest ID, reach, distance, spray technique, timing, and gear—so one treatment actually works.
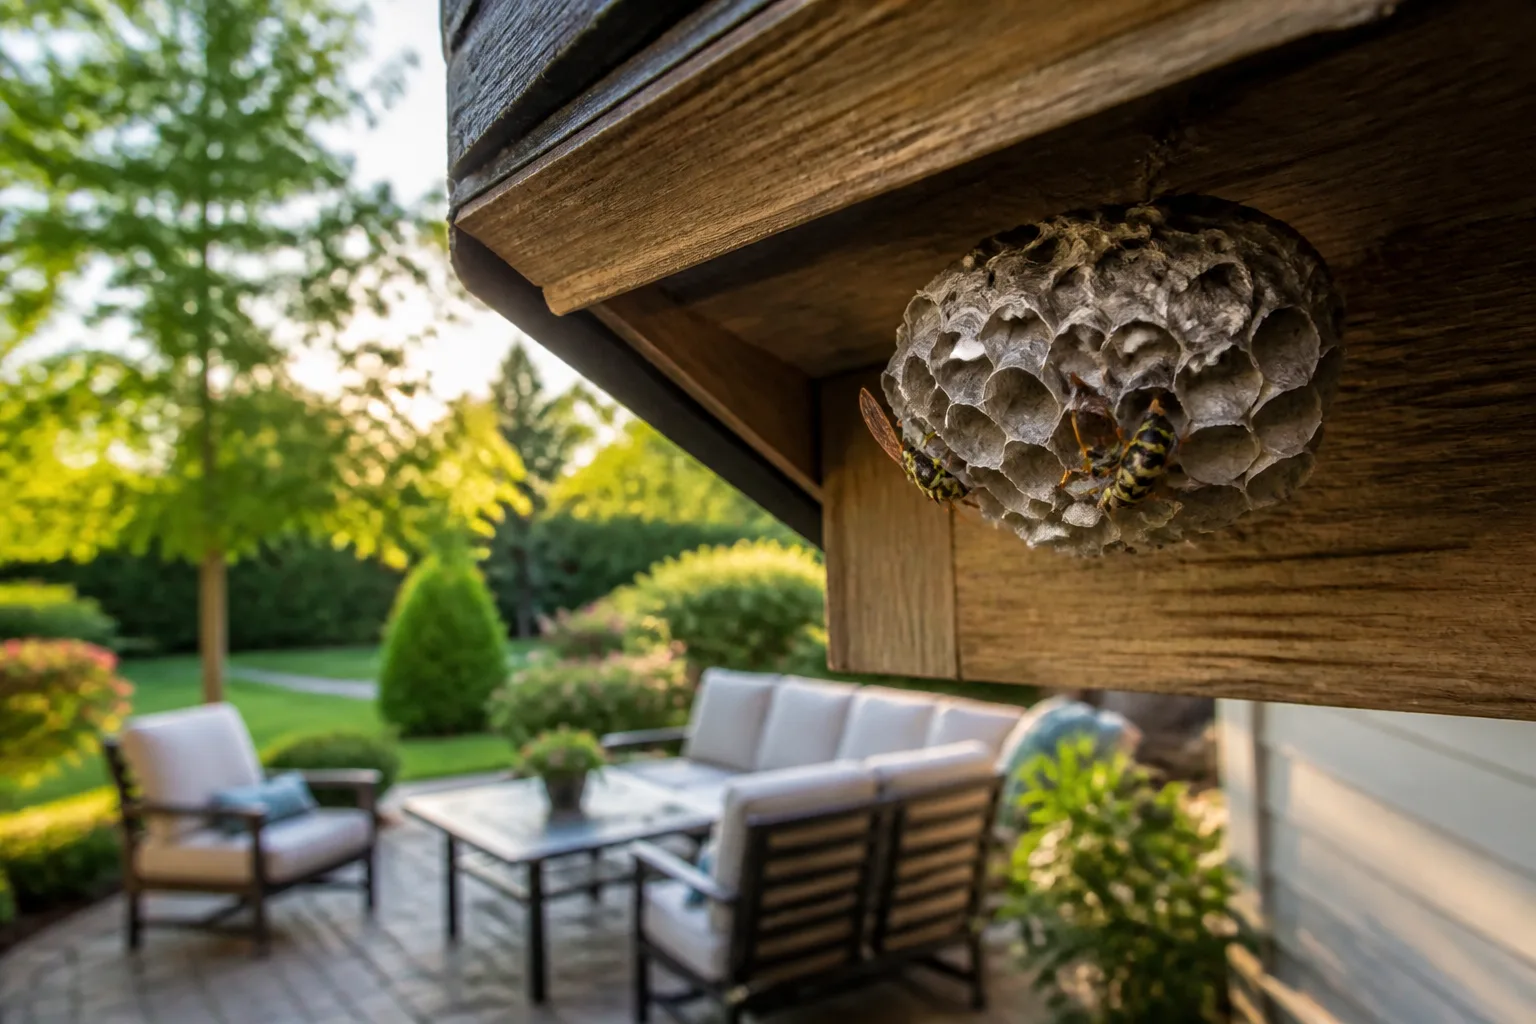
Commercial wasp spray looks like the fastest fix for a nest under your porch rail—and it can be, if you treat it like a small construction project instead of a reflex. Most failed first sprays are not bad luck. They are predictable mistakes: spraying the wrong insect, standing too close on a ladder, shooting upwind into your own face, or misting the visible edge of a nest that continues deep inside a wall. The five rules below are what pest pros mentally run through before they open a can. Nail them and you dramatically improve the odds that one dusk treatment finishes the job.
This page is about how to apply labeled wasp and hornet aerosols safely and effectively—distance, timing, technique, and gear. If you still need to compare soap spray, instant contact kills, or natural repellents, start with how to kill wasps instantly and natural wasp repellents after you read the safety sequence here.
The 60-Second Pre-Spray Checklist
Before you step outside with a can, answer these five yes/no questions. Any no means fix that item before you spray—not after you are already committed.
- Correct target? Open wasp or hornet nest you can see—or a ground yellowjacket entrance you can flood from a safe distance—not honey bees or a fuzzy bumble bee colony.
- Safe reach? You can treat from firm ground or a stable platform without leaning off a ladder rung.
- Distance and wind? You know the label’s maximum jet reach, you are standing several feet inside that range, wind carries spray toward the nest—not toward you—and you have a clear path indoors.
- Technique ready? You will aim at the main entrance first, then coat the entire exposed nest in one continuous pass.
- Timing and PPE? It is dusk or dawn, you are wearing long sleeves, pants, closed shoes, gloves, and eye protection, and you have read the product label for plant warnings and re-entry time.
If all five are yes, proceed. If one is no, scroll to the section that fixes it. Rushing this checklist is how people waste a full can, enrage a colony, and still need a pro visit on Monday.
Thing 1 — Confirm You Are Treating Wasps (Not Bees) and the Right Nest Type
Wasp spray is a contact insecticide, usually pyrethrins or pyrethroids plus a synergist, packaged in a pressurized can with a jet stream meant to reach hanging nests from a distance (EPA home pest guidance). It kills insects that the spray touches. That is excellent for exposed social wasp nests. It is a disaster if you point it at honey bees— pollinators that should be relocated by a beekeeper, not soaked with pesticide (UKY Entomology EF620).
Open Paper Combs vs Enclosed Hornet and Yellowjacket Nests
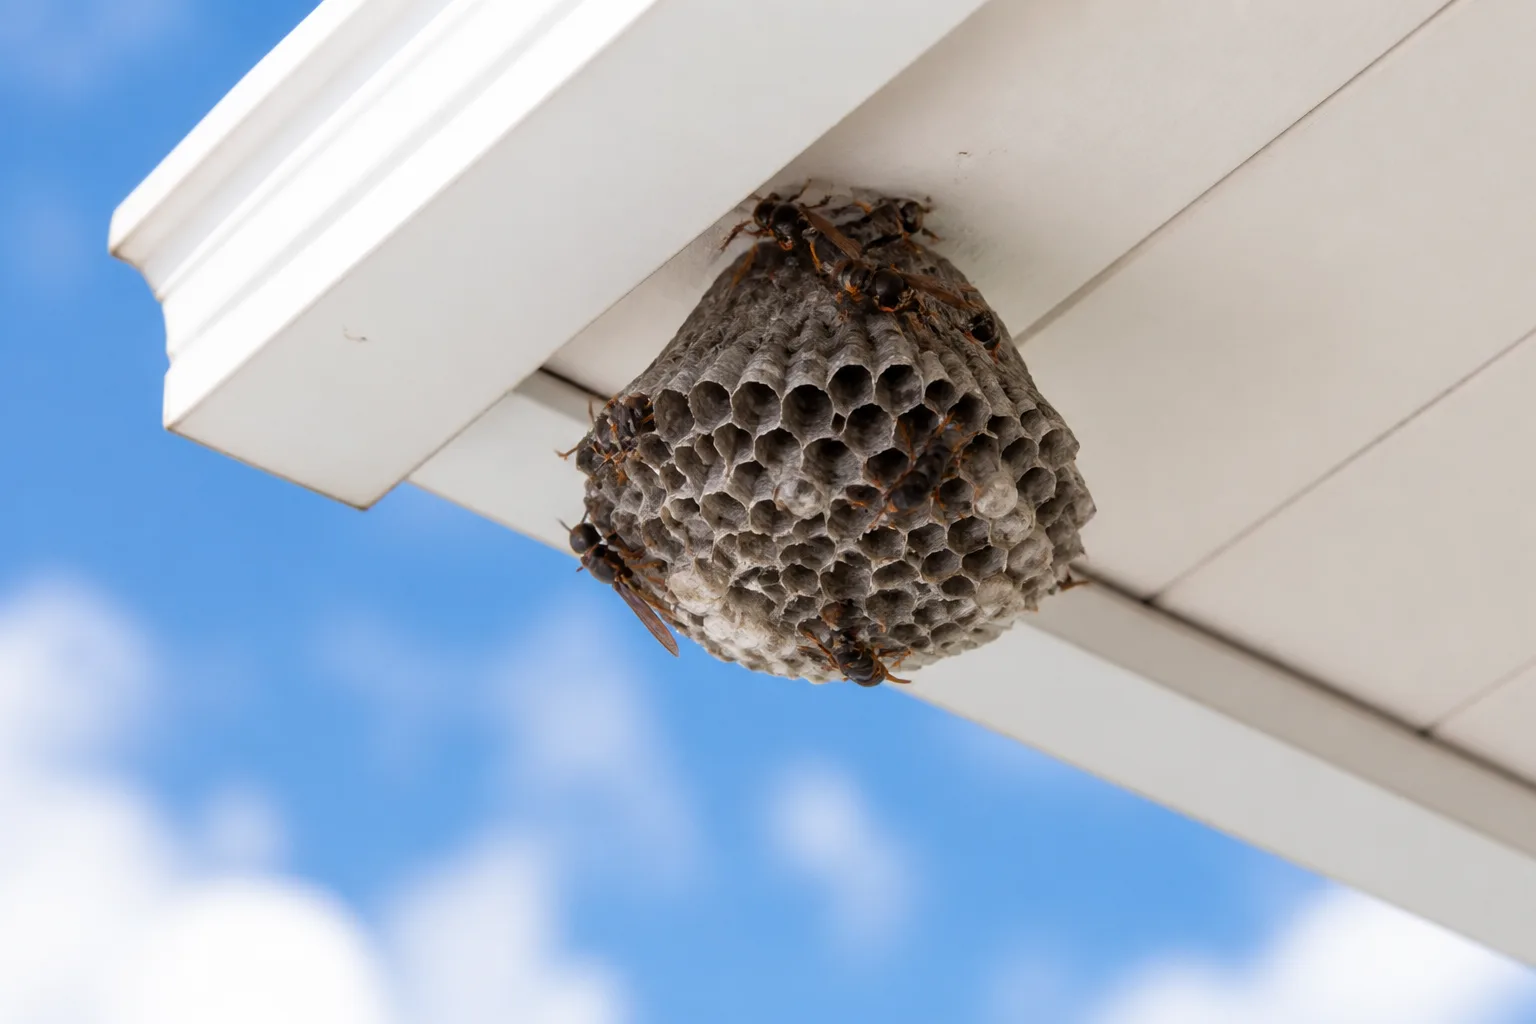
Paper wasps build open, umbrella-shaped combs under eaves, grill lids, and porch ceilings. You can see the hexagonal cells and often the main entrance hole along the bottom edge. Homeowner aerosols work well here because the spray can coat workers, larvae, and the queen directly.
Bald-faced hornets and many yellowjackets build enclosed paper balls—gray footballs in trees or rounded nests on structures. You cannot see the comb inside. Aerosols still work on many hanging enclosed nests if you saturate the outer shell until product runs down and soaks the entrance, but misidentification is common. A rounded nest around a cable may be yellowjackets; a pointed bottom often signals bald-faced hornets (UC IPM Pest Notes).
Ground yellowjackets nest in rodent burrows, compost edges, and lawn holes. Jet cans can treat some ground entrances, but the technique differs: you need to direct the stream into the hole while covering escape routes—many homeowners do better with a dusk soap drench or a pro with dust applicators (what will kill wasps instantly).
Quick ID cues: Wasps have a pinched waist; most bees look fuzzier and heavier. Wasps fly with legs tucked; many bees dangle legs in flight. When in doubt, photograph the nest from a safe distance and compare shape before you spray.
When Aerosol Spray Is the Wrong Tool
Do not use wasp spray as your first move when:
- The insects are bees (wax comb, heavy traffic at a single wall crack, orchard or clover foragers you want to keep).
- The nest is only partially visible inside a wall, soffit, or tree cavity—spraying the bit you see may drive the colony deeper into the structure (UKY Entomology EF620).
- The colony is larger than one consumer can should reasonably handle—basketball-size hornet nests and massive late-summer yellowjacket colonies need professional equipment.
- You are allergic to venom or unsure of your allergy status—one sting can become an emergency.
In those cases, stop at the checklist and jump to When to Put the Can Down and Call a Professional. Prevention for next year still belongs in your wasp repellent plan, but the active nest needs a different tool.
Thing 2 — Only Treat Nests You Can Fully See and Reach Without a Risky Ladder
Store-bought wasp sprays advertise 15- to 20-foot jet streams so you can treat from the ground. That reach only helps if the nest is fully visible and you can aim without blind spots. University of Kentucky guidance is blunt: treat nests within clear line of sight—roughly arm’s reach or a few feet beyond—not mystery colonies behind siding (UKY Entomology EF620).
The Ladder and Overhead Rule
A nest two stories up turns a “simple spray” into a fall plus sting compound risk. Wasps defend aggressively when jet spray hits the entrance; shaking a ladder is how homeowners get multiple stings while stuck overhead. If you cannot treat from firm ground with the can’s labeled reach—or a stable extension pole setup a pro would use—do not improvise on a wobbly ladder.
The same rule applies to nests above doorways you must use daily. Temporarily blocking a secondary exit is not worth treating a nest over the front steps at noon. Wait for dusk, or hire help.
Partially Hidden Nests in Walls and Soffits
Seeing a few wasps crawl through a crack is not the same as seeing a nest. Wall void and attic colonies may extend far beyond the opening you spot. Spraying the visible seam can kill some workers while the queen survives deeper inside—and angry survivors may find new routes into living spaces (Illinois DPH).
Do not plug entrance holes hoping to suffocate them. Trapped wasps chew alternate exits. If you hear buzzing inside drywall, put the aerosol away and call a licensed applicator with dust and void tools.
Thing 3 — Stand Back, Spray Downwind, and Plan Your Escape Route
Distance buys you time. Wind direction keeps product on the nest instead of in your eyes. An escape route keeps a failed first pass from becoming a trapped second act.
How Far to Stand From the Nest

Read the label on your specific can—reach varies by brand and nozzle. Most homeowner products claim roughly 15 to 20 feet of jet stream. Stand a few feet inside the maximum, not at the last inch of range. Too far and the stream disperses before it coats the nest; too close and defenders reach you before you finish saturating.
Position so you are not backed into a corner—fence line, garage door, hedge, or patio furniture. You want to retreat straight toward a door without tripping. Illinois DPH recommends treating social wasp nests when most workers are home but slow to fly—typically night or dusk—and planning the retreat before you press the nozzle (Illinois DPH).
Wind, Drift, and Safer Ways to Check Direction
Always spray downwind so the jet travels toward the nest and drift blows away from you. Light breeze is enough to move aerosol mist back into your face if you ignore direction.
You do not need a lighter flame to test wind—that introduces fire risk near eaves and dry mulch. Safer checks:
- Watch tall grass, a hanging flag, or tree leaves for a few seconds.
- Toss a pinch of flour or fine dust at shoulder height and see which way it drifts.
- Feel the breeze on your cheeks while facing the nest; adjust until your back is to the wind and the stream will carry forward.
Keep children, pets, and neighbors out of the drift zone. Most labels warn against spraying on windy days; if gusts keep shifting, pick a calmer evening.
Thing 4 — Hit the Entrance First, Then Saturate the Whole Nest
Aerosol wasp products are contact killers. They must land on insects and comb. The professional sequence is consistent: entrance first, then full envelope.
Aim the jet at the main entrance—usually on the lower portion of an open comb or the primary hole on an enclosed nest—for the first two to three seconds. That reduces the number of workers exiting while you treat. Then sweep the stream across every visible surface until the nest looks wet and product runs off edges. One continuous pass beats short puffs that alert the colony without delivering enough active ingredient.
How Long to Hold the Trigger
Size dictates duration, not fear. A golf-ball nest on a light fixture may need only three to five seconds total. A dinner-plate paper comb or small enclosed hornet nest may need ten to twenty seconds of steady spray. Your goal is complete coating, not foam for its own sake. Some cans deliver foam that expands; still cover the entire structure.
After spraying, leave immediately along your escape route. Do not stand under the nest watching. Workers that exit may be agitated even if they are dying.
When One Can Is Not Enough
If the nest is larger than a softball—or you are treating a dense enclosed hornet nest—assume one consumer can may not suffice. Running out mid-treatment leaves a half-poisoned colony that defends harder. Buy a second can before you start, keep it in your retreat path, and only reload if the first pass did not fully wet the structure.
If two full saturations at dusk 48 hours apart still show steady traffic, the colony is beyond DIY aerosol. That is not failure—it is biology telling you to escalate.
Thing 5 — Time It for Dusk or Dawn and Dress Like You Might Get Stung

Wasps fly less in cool low-light windows. Early morning and evening around dusk are the standard treatment times because most workers are inside the nest and sluggish (UKY Entomology EF620). Midday treatments fight foragers that were not even home at dawn—and they return angry.
Clothing checklist (CDC stinging-insect guidance):
- Long sleeves and long pants—smooth, light-colored fabric; skip floral prints and rough wool that can attract insects (CDC NIOSH)
- Closed shoes with socks, not sandals
- Gloves with cuffs tucked under sleeves
- Eye protection—goggles or a face shield; sunglasses alone leave gaps
- Optional but smart: a beekeeper veil or hat with netting if you own one
Skip perfume, scented lotion, and open sugary drinks near the work zone. If you are venom-allergic, do not treat the nest—roughly one in a hundred people have systemic reactions, and stings can be fatal without epinephrine (Illinois DPH).
If a wasp approaches before you spray, stay calm. Swatting increases sting risk; back away slowly toward your door (CDC NIOSH).
Protect Nearby Plants and Pollinators
Insecticides do not stop at wasps. Drift and runoff can injure garden plants—leaf speckling, curling, or browning from phytotoxicity (Iowa State Extension). Read your can for plant sensitivity warnings. Shield small pots with a bucket, hose down foliage after treatment if the label allows, and avoid spraying over vegetable beds, butterfly host plants, and blooming pollinator gardens.
Broad-spectrum sprays also kill beneficial insects—native bees, butterflies, and predators—that contact wet residue (Xerces Society). Treat only the nest surface, not the whole yard. Late-evening application reduces daytime pollinator exposure, but it does not eliminate risk on open flowers beneath the eave.
Never spray blooming plants to “get the wasps visiting them.” Relocate dining areas instead, or use traps at the property edge as described in wasp repellents.
After the Spray: Wait, Verify, Then Remove the Nest
Patience separates a finished job from a repeat sting. Wait at least 24 hours—48 is safer on large nests—before knocking down comb. Foragers out during your spray may return; you want them to contact treated surfaces.
The next evening, watch the nest with a flashlight from a safe distance. No movement for a full observation period means you can remove the structure. Wear gloves; even dead wasps can sting reflexively. Paper wasps and hornets do not reuse old nests next season, but removal keeps the area tidy and makes new spring nests easier to spot (UC IPM Pest Notes).
If you still see steady traffic in and out, retreat at the next dusk with a fresh can before you touch the nest. One incomplete pass trains defenders.
Sting first aid if things go wrong: wash with soap and water, ice swelling, and watch for trouble breathing, widespread hives, or dizziness—those need emergency care immediately (CDC NIOSH).
When to Put the Can Down and Call a Professional
Licensed pest control is the lower-risk choice when:
- The nest is inside a wall, attic, or crawlspace and you cannot see the full comb.
- You need a ladder or overhead reach you are not trained to use safely.
- Anyone nearby is allergic or has been stung multiple times this season.
- The colony is large, over a busy doorway, or above a play area.
- Two thorough dusk treatments failed to stop traffic.
- You suspect honey bees, not wasps—pros can arrange relocation instead of poison.
Pros bring dust applicators, extension poles, and void tools homeowners should not guess at. One visit usually costs less than an ER copay.
For next season, combine successful knockdown with prevention: seal trash, patch soffit gaps in late winter, hang decoy nests before queens scout in spring, and keep repellent barriers on old nest sites—details in wasp repellents.
Conclusion
Wasp spray works on the first try when you confirm the nest type, treat only what you can fully see from safe ground, stand downwind inside label range with an escape route, saturate the entrance then the whole nest at dusk in full PPE, and wait a day before removal. Skip any step and you risk stings, wasted cans, damaged plants, or a wall colony that gets angrier.
Run the five-thing checklist before every treatment. Match heavy colonies to professional help. Pair this safety sequence with instant kill methods when soap or smaller tools fit better, and with natural repellents so the same eave does not host a new queen next May. Your first spray should be your only spray—not the opening move in a week-long war.