Do Seeds Need Light to Germinate? The Simple Rule
Do seeds need light to germinate? Learn which seeds need surface sowing, when darkness helps, how to keep seed trays moist, and what to do after sprouting.
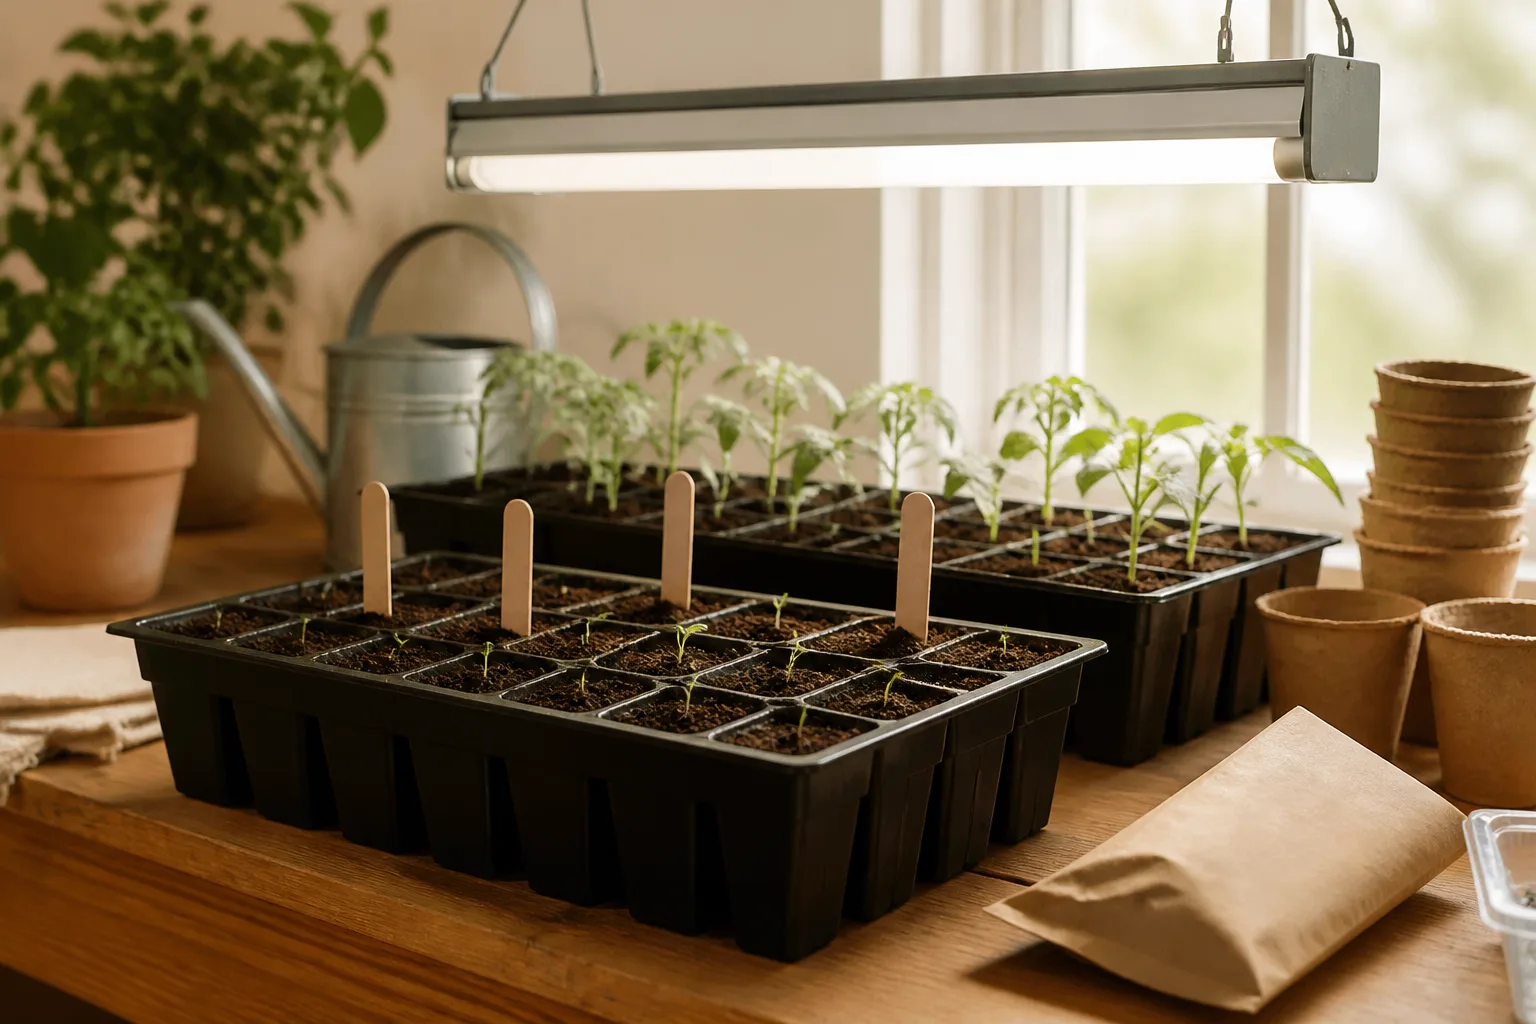
No. Some seeds germinate best after they receive light, some germinate better in darkness, and many can sprout either way. A seed’s response depends on the plant and its immediate conditions, so a general list can help you know what to check but cannot replace the directions for the packet you are sowing.
The most useful distinction is between germination and seedling growth. A seed may use light as a signal that it is near the soil surface, but it does not need to photosynthesize before it sprouts; its embryo initially uses stored reserves. Once the shoot emerges, however, the young plant needs light to grow sturdy leaves and stems. That is why leaving an entire tray in darkness after the first seedlings appear can undo an otherwise successful sowing.
The short answer: it depends on the seed
Think of seeds in three practical groups: those that need or strongly benefit from light while germinating, those whose germination can be inhibited by light, and those that tolerate either condition. The groups are useful for deciding whether to cover a seed, but they are not a universal planting chart. Closely related species, cultivars, seed treatments, temperature, and the seed’s age can all affect results.
For most garden sowings, you do not need to shine a grow light on every seed before it sprouts. You do need to give each kind of seed the right combination of moisture, oxygen, temperature, and depth. If a packet says “surface sow,” press seeds against the mix and leave them visible; if it says “cover,” follow its stated depth even if an online list says that species can germinate uncovered.
The packet is the best starting point because it is written for that particular seed lot or variety. If its instructions are missing or vague, use the guidance below as a cautious starting point, sow a small test batch, and change one condition at a time rather than treating light as the only possible cause of failure.
How light changes a seed’s chance of germinating
Light is not simply plant food that a seed needs before it can sprout. In many species, light-sensitive pigments act as environmental sensors: they help a seed respond to whether it is exposed at the surface, shaded by other plants, or buried. The response can encourage germination, suppress it, or make little difference, depending on the species and the conditions.
That response can be more flexible than a list suggests. A research summary from Botany One describes tests of 131 Campanulaceae taxa in which germination was higher in light than in darkness, while the strength of the light response varied with seed mass and temperature conditions. This does not mean every tiny seed needs light; it shows why the rule “small seeds need light” is only a clue, not a substitute for species-level instructions. Botany One summarizes the study and its findings.
Temperature can also change how a seed responds. Some seeds germinate more readily when conditions fluctuate, as they do near an exposed soil surface; for others, the same light exposure has a different effect at a different temperature. A light-sensitive seed therefore needs the right kind of exposure, not necessarily hot, direct midday sun. A sunny, uncovered tray can dry out or overheat well before it gives a seed a better chance of sprouting.
University guidance makes the same practical point: light and temperature requirements vary among annuals and vegetables, while moisture and air around the seed remain essential. Iowa State University Extension and Outreach’s germination chart is useful when you are comparing crops; Penn State Extension’s seed and seedling biology guide explains why the light requirement belongs alongside moisture, temperature, and oxygen rather than standing alone.
Seeds that often need light or very shallow sowing
Many small flower seeds and some vegetable seeds are commonly surface-sown or covered only with a very fine dusting. University extension examples include begonia, primula, and coleus. Gardeners also commonly encounter surface-sowing instructions for lettuce, petunia, lobelia, snapdragon, poppy, and some other tiny ornamental seeds. The important word is commonly: a list can tell you to pause before burying a seed, but a specific packet’s depth instructions still take priority.
These seeds often have little stored energy to push through a thick layer of mix, and exposure to light can serve as a cue that they are shallow enough to emerge. That is one reason a tiny seed can disappear from view if you water too forcefully, settle a heavy layer of soil over it, or cover it to the same depth as a bean. Penn State Extension identifies begonia, primula, and coleus as species that need light for germination, while its discussion of seed size and sowing depth supports treating surface sowing as a species-specific instruction rather than a universal technique.
Examples gardeners commonly surface-sow
Use the following as a prompt to read the seed packet carefully, not as a guarantee that every variety must remain uncovered:
| Seed examples | Practical starting point |
|---|---|
| Begonia, primula, and coleus | Often require light; press onto the surface unless the packet specifies a very light cover. |
| Lettuce and lobelia | Tiny seed is easy to bury or wash away; use a surface sowing or only the packet’s thinnest cover. |
| Petunia and snapdragon | Check the variety’s packet; many instructions call for surface sowing or minimal covering. |
| Poppy and other tiny ornamentals | Press into firm, moist soil so seed makes contact without being hidden under a thick layer. |
The examples are not a substitute for the package label. A seed company may give a variety-specific method, and a coated or pelleted seed may be easier to handle but still needs the right conditions and moisture to soften the coating. If you have only a handwritten envelope or a mixed packet, start with a small surface-sown test and a second test with the lightest possible cover.
What “surface-sow” actually means
Surface-sowing does not mean scattering dry seeds onto loose dust and leaving them to fend for themselves. Fill a clean tray with pre-moistened seed-starting mix, smooth the surface, place the seeds on top, and press them gently so they touch the mix. Good contact lets the seed take up water without burying it under a barrier that blocks the light cue or makes emergence harder.
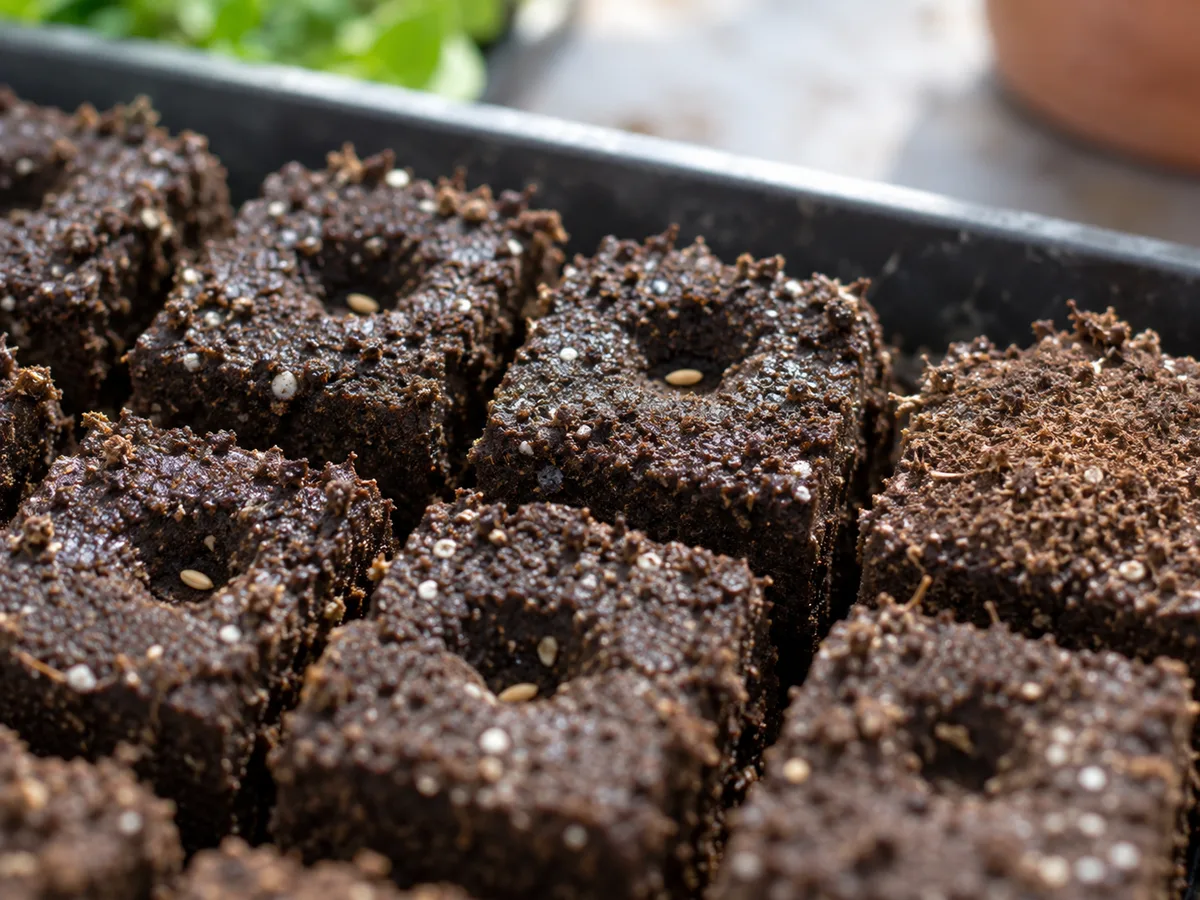
A cover can still be useful if it is transparent or very light. A clear humidity dome, clear lid, or loosely fitted clear bag can slow evaporation while allowing light through; remove or vent it as soon as seedlings emerge, because trapped moisture and stagnant air can encourage disease. If the packet specifically allows a thin dusting, use only a fine, loose layer and do not tamp it down. A thick cover is not a moisture strategy; it changes the sowing depth.
Seeds that often germinate in darkness
Many seeds germinate in dark conditions, and some are inhibited by light. Penn State Extension gives Phacelia and Allium species as examples of seeds that may germinate best in darkness or be suppressed by light. For these plants, sowing at the recommended depth helps block light and gives the emerging shoot enough soil contact and support.
“Dark germination” does not mean planting every seed deeply. Seeds still need oxygen and enough stored energy to reach the surface, and a thin, small seed can fail if it is buried too far. Use the packet’s specified depth; if it gives no depth, follow a reputable guide for that exact species rather than assuming that darkness means a thick layer of soil.
The opposite mistake is to assume a seed that can germinate without light must be buried. Many seeds tolerate both light and dark, so a sensible shallow cover can keep them moist and protect them without needing total darkness. Treat a darkness preference as a biological response, not an instruction to bury seed beyond its normal sowing depth.
Seeds that can germinate with or without light
Many common garden seeds are not strongly dependent on light during germination. Tomatoes, cucumbers, squash, melons, and several other vegetables can usually be sown at the depth on their packet rather than left exposed just because a general list calls them “light indifferent.” An uncovered seed may still sprout, but an appropriate cover can improve contact with moist mix and reduce drying or disturbance.
This middle group is why the question is not simply “light or no light?” The useful decision is whether light exposure is necessary, whether it is harmful, or whether you can choose a depth that best balances moisture, oxygen, and easy emergence. The named-author GardenGuides overview also describes seeds as varying across light, dark, and indifferent responses, and notes that natural growing conditions help explain why some seeds germinate at the soil surface while others do not. GardenGuides discusses those different responses.
When the packet is silent, a shallow cover is often a safer default for a seed large enough to handle than leaving it exposed in bright, dry air. For a seed so small that a cover would hide it completely, press it onto the surface, protect it with a transparent cover, and monitor moisture. If you are unsure, sow a few seeds both ways in separate, labeled cells; a small comparison is more informative than changing the entire tray at once.
When the seed packet should overrule a general list
Seed lists often compress several different ideas into one label. “Needs light” may mean that the seed germinates more reliably with light, that a packet recommends surface sowing because the seed is tiny, or simply that the grower should not bury it deeply. “Can germinate in light” is not the same claim as “requires light,” and a seed that germinates in darkness may still be best planted shallowly for other reasons.
The packet is a better guide than a general list because it names the crop and variety, and may account for its seed size or preparation. Follow its recommended depth first, then use the light advice as a check: if it says to surface-sow, do not add a routine layer of soil; if it says to cover, use the stated depth instead of leaving it uncovered based on an informal list. If directions conflict with a source that is specific to the seed variety, prioritize the packet or contact the supplier.
Seed size is a useful clue, but it is not a diagnosis. Tiny seeds often have limited reserves and are more vulnerable to being buried too deeply; however, not all small seeds have the same light response, and a few larger seeds can have their own unusual requirements. A Botany One summary of the Campanulaceae study describes light responses that differed by seed mass and temperature, while Penn State’s examples show that a seed’s actual species requirement matters. Do not apply a one-size depth rule to every crop.
How to sow light-sensitive seeds without letting them dry out
The challenge with a surface sowing is not only giving seeds access to light; it is keeping their shallow root zone evenly moist. The top of a tray loses moisture faster than the deeper mix, and an outdoor seed can also be moved by rain, wind, birds, or a careless watering can. Plan the moisture protection before you scatter the seed, then keep the cover transparent or thin enough to match the packet’s light instructions.
Start with moist, not saturated, mix. If the mix is dry, water it before sowing and let the excess drain; if you water after sowing, use a gentle mist or water from below so the seeds stay where you placed them. A transparent lid or humidity dome can slow evaporation indoors. Check beneath it at least once a day: persistent condensation, a sour smell, or a green film means conditions are staying too wet or still for too long, so vent the cover and improve airflow.
Do not leave a closed dome on emerging seedlings as a permanent greenhouse. Once the first sprouts appear, open or remove it gradually and keep the mix damp but not waterlogged. The young roots need both moisture and air; waterlogged or compacted mix restricts gas exchange, which can slow germination or suffocate a seed.
Indoors: prepare a tray and protect the surface
Pre-moisten a fresh, fine-textured seed-starting mix and fill shallow cells or a clean tray without packing the mix hard. Smooth the top, sow the seeds at the packet’s spacing, and press lightly with a clean fingertip or flat tool. Label the tray with the variety and sowing date so you can compare it with the packet’s expected germination window.
If the packet says “do not cover,” leave the seed visible and fit a clear dome loosely over the tray. Put it in a bright place that remains within the packet’s temperature range, but avoid a hot sunny windowsill where a covered tray can heat up and dry out. If the packet says “barely cover,” use a very thin, loose layer rather than burying the seed. Inspect daily and add water gently before the surface dries to a crust.
For trays with different seed types, use separate cells or label each row. It is hard to manage one moisture or temperature regime for seeds with different requirements, and repeated misting to help one surface sowing can keep the deeper-sown seeds too wet. The more the tray is mixed, the more useful careful labels and a small watering can with a fine rose become.
Outdoors: protect the seed without burying it
Choose a level, weed-free bed and break large clods so tiny seeds make contact with a fine, even surface. Moisten the bed before sowing if it is dry, scatter or place seed according to the packet, and press it lightly into the soil. Use a very fine layer of horticultural vermiculite only when the packet permits a thin cover; do not use a heavy mulch or compost layer over seeds that need light.
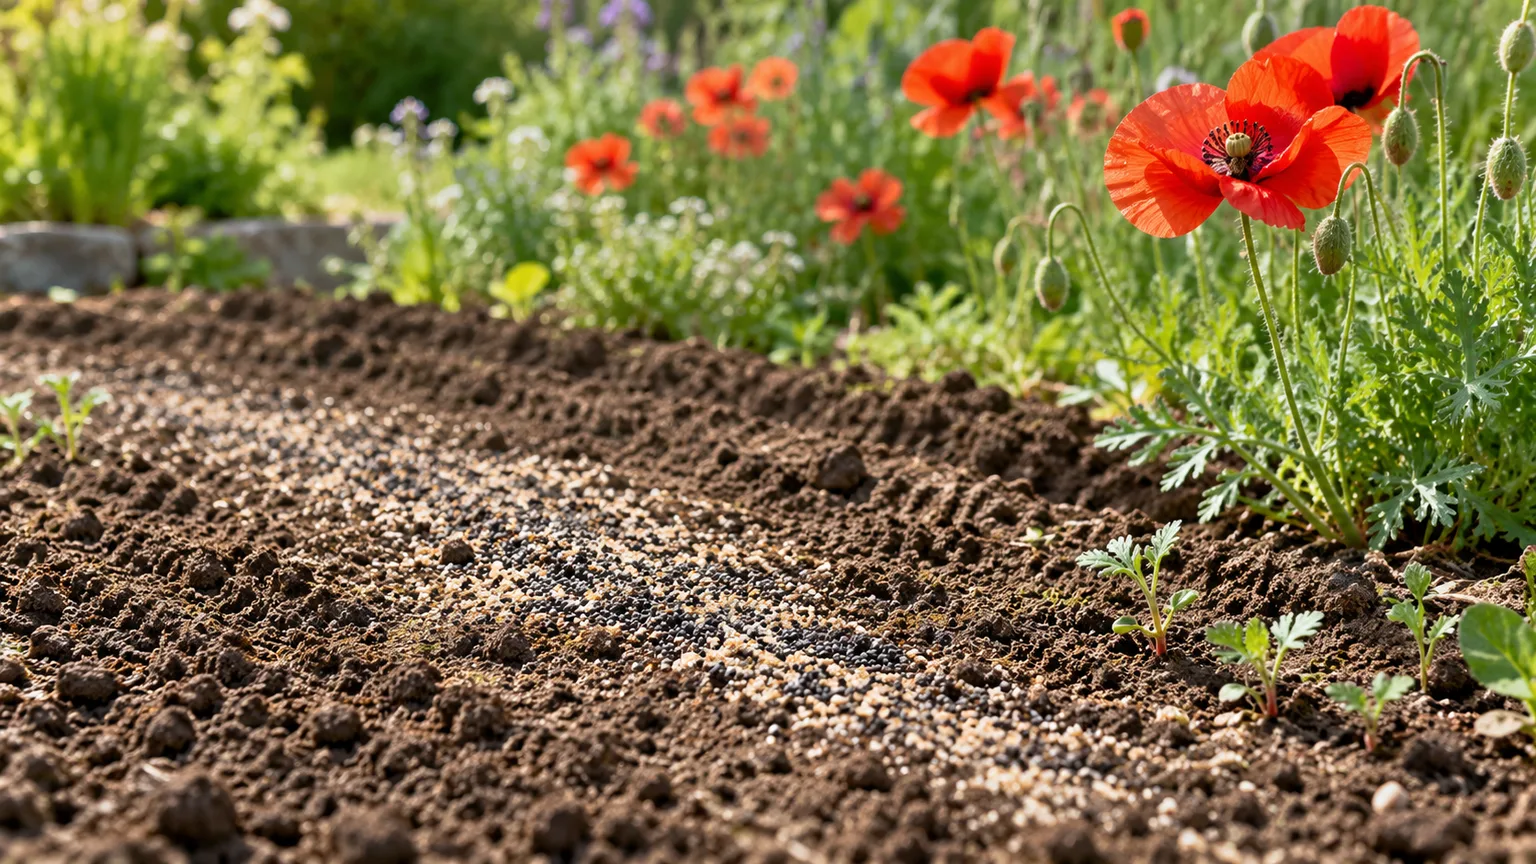
Water with a gentle spray or rose attachment, then keep the surface from drying while the seed germinates. A breathable row cover or fine mesh can reduce disturbance from birds and heavy rain, but it does not replace checking moisture. If you use a cloche or plastic sheet, watch sunny-day temperatures and remove or vent it before the bed becomes hot; a surface-sown seed is especially exposed to rapid drying and heat swings.
In hot, windy, or very dry weather, consider sowing the crop in a protected tray instead of trying to keep a tiny outdoor seed moist every few hours. Direct sowing can be convenient, but the best method is the one that reliably keeps the seed at the correct depth, temperature, and moisture level for the full germination period.
How much light seedlings need after emergence
Once a seedling is above the mix, its job changes. The seedling begins relying on its green leaves to make energy, so it needs bright light soon after emergence even if its seed germinated in darkness. Penn State Extension notes that seedlings without enough light become leggy and fragile; that is a post-germination problem, not evidence that the seed needed light to sprout.
For indoor starts, move emerged seedlings from a germination mat or covered tray into bright light. A sunny window may work for a few plants, but window light can be weak or one-sided, especially during short winter days. If stems stretch toward the glass, leaves are pale, or seedlings lean sharply, increase the available light and rotate the tray as needed. With a grow light, follow its distance and timing guidance and keep it close enough for seedlings to receive useful light without overheating or scorching them.
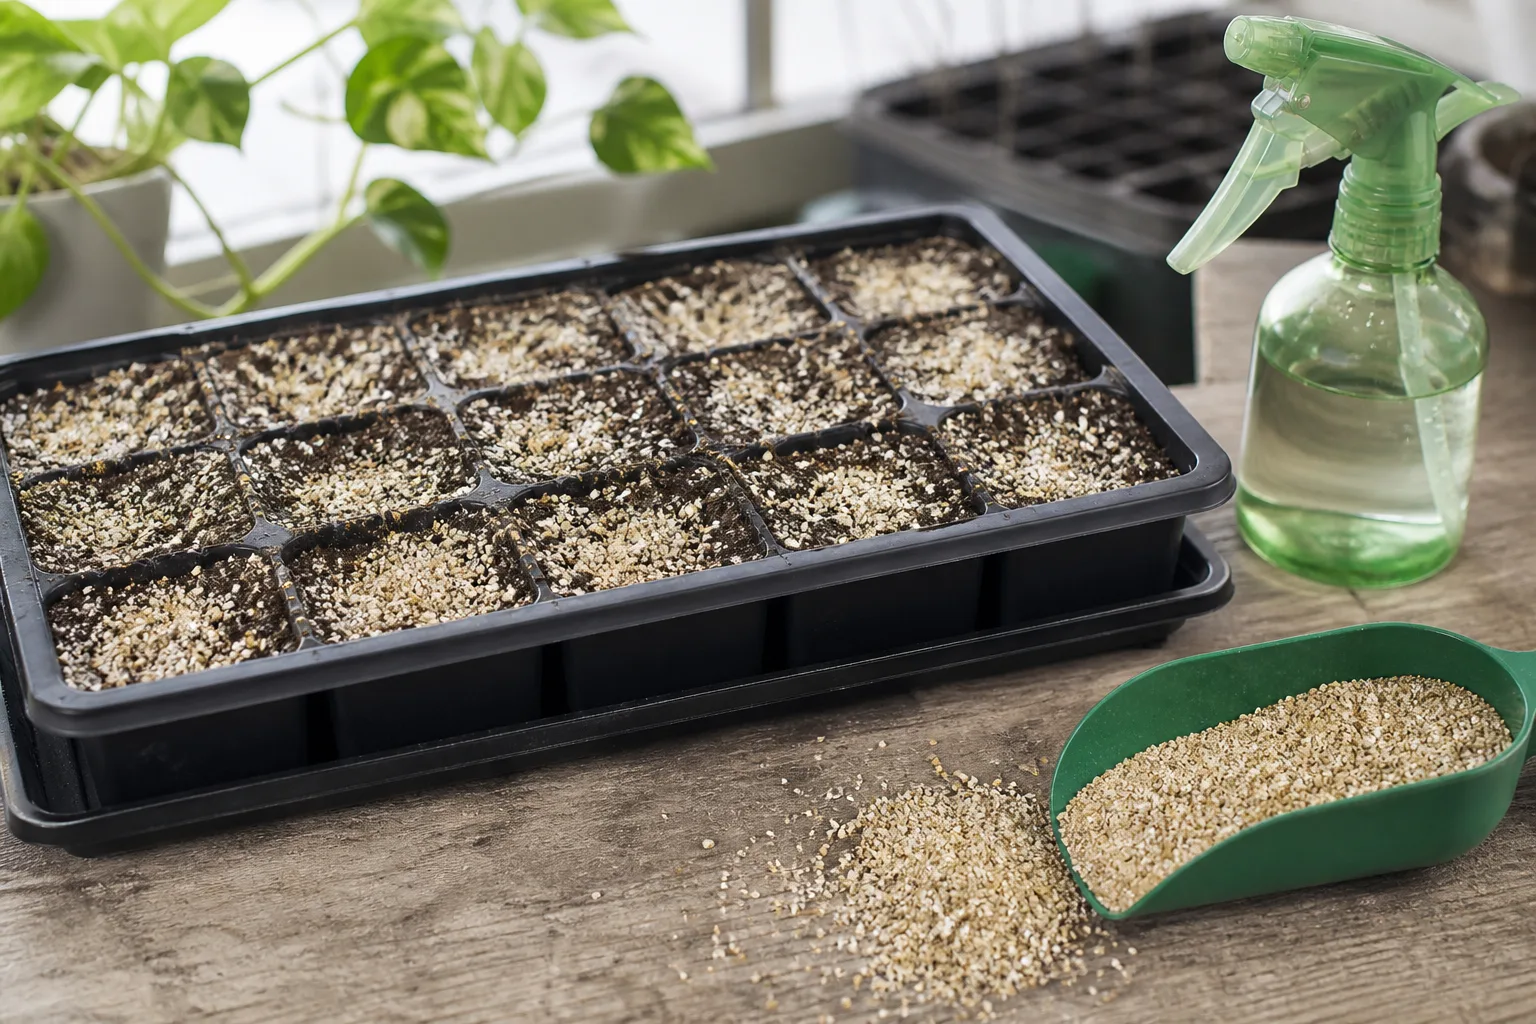
Remove the humidity cover as seedlings emerge so foliage is not trapped in stagnant air. Avoid moving a tray directly from a warm, sheltered indoor spot into harsh midday outdoor sun; acclimate seedlings gradually before transplanting. The seed stage, first-leaf stage, and hardened-off transplant stage have different needs, so adjust light and airflow as the plants develop rather than leaving one setup unchanged.
Moisture, oxygen, and temperature still matter
Light gets the most attention in this question, but a seed usually fails because several requirements did not line up. Germination starts when a viable embryo takes up water; the seed also respires, which means it needs oxygen. If the mix stays saturated, is compacted, or has poor drainage, oxygen cannot move freely around the seed. Penn State Extension explains that excess water and poor aeration can keep carbon dioxide from dissipating, while appropriate moisture and temperature support faster, more even germination.
Temperature is crop-specific. A cool-season lettuce seed and a warm-season pepper seed do not share one ideal temperature, and a tray that looks damp may still be too cold or hot for the seed to start. Use the range on the packet or a crop-specific extension chart, and check the actual mix temperature when the room is much warmer or cooler than the tray. A heat mat can help only when temperature is the limiting factor; it cannot correct an overwatered tray or excessive sowing depth.
The goal is evenly moist mix with air spaces, not standing water. Water from below when cells drain well, then empty any tray that holds excess water. If the top is drying much faster than the rest, a clear cover may help; if the mix stays wet for days, increase ventilation and reduce watering. A seed needs enough moisture to start imbibition, but a swampy mix can deprive it of the oxygen required for the next steps.
Why surface-sown seeds fail
A surface sowing is not automatically the easiest sowing. The seed is closer to light, but it is also more exposed to evaporation, temperature swings, and movement. Tiny seeds may stick to a fingertip, float into a corner during watering, or end up in a clump that is too crowded for healthy seedlings. These problems are often mistaken for a light problem because the seed was left uncovered.
The most common failure is letting the surface dry between waterings. Once a seed has absorbed water, it can stall or die if the shallow mix dries before the root establishes. A transparent cover reduces that risk indoors, but it can create excess heat in direct sun or excessive humidity if left sealed after emergence. Use the cover as a moisture buffer, not as a set-and-forget greenhouse.
The second common failure is covering the seed too heavily. A tiny seed may have too little stored energy to push through a thick layer, and the layer may also block the light cue. Conversely, seed that can germinate in darkness may fail because it was left on a surface that dried out or was washed away. The correct depth is a compromise between the seed’s light response, its size and reserves, and the conditions where it is growing.
Finally, slow or uneven germination is not always a sign that the seed is bad. Uneven mix temperature, old seed, dormancy, poor seed-to-soil contact, or overwatering can all delay emergence. Check the packet’s germination range before disturbing the tray; digging around to look for a root can damage a seed that is still developing.
Troubleshooting a sowing that has not sprouted
Before changing anything, record when you sowed, what the packet says about germination time, and where the tray has been kept. Wait through the full expected window for that seed at the temperature you are providing. If some seedlings are already emerging, leave those cells alone and make a small adjustment only where the mix is clearly too wet, dry, hot, or cold.
| What you see | Likely issue to check | Next step |
|---|---|---|
| Surface is pale and dry; seed coat is hard | The shallow layer dried before the seed could stay hydrated. | Re-moisten gently, use a transparent cover indoors, and check the surface daily. |
| Mix is shiny, soggy, or smells sour | Too much water or poor drainage may have limited oxygen. | Vent the cover, drain standing water, and let the mix return to evenly damp. |
| Seeds swell but no root appears | Temperature, oxygen, dormancy, or seed viability may be limiting. | Compare mix temperature with the packet, then wait the stated window before testing a few seeds. |
| A few seeds sprout while most stay dormant | Moisture or temperature may be uneven; seed age may also vary. | Check tray edges, watering patterns, and the expected germination rate before resowing. |
| Seedlings appear, then collapse or stay thin | The issue may be after emergence rather than germination. | Improve light and airflow, remove the dome, and avoid keeping the mix saturated. |
Treat the table as a diagnostic sequence, not a list of guaranteed fixes. If you discover the tray is too cold, move it to a stable location that matches the packet; if it is too warm, remove it from a sunny window or heat source. If the surface is dry, rehydrate gently rather than drenching the whole container. If it is waterlogged, improve drainage and airflow before adding more water.
Do not assume that light is the cause simply because the seed was meant to be surface-sown. A light-sensitive seed still cannot sprout without water and a suitable temperature, and a light-indifferent seed can fail if it is buried too deeply or has poor oxygen. The simplest way to diagnose the next sowing is to make one controlled change at a time and label the cells so the result teaches you something.
Check seed viability with a small test
If the packet is old or storage conditions are uncertain, test a small sample before sowing a full tray. Penn State Extension describes a germination check using seeds wrapped in a moist paper towel and assessed after several days; its guide gives five to ten days as a useful test window. For a home check, use a clean towel that is damp but not dripping, place the sample in a loosely closed bag or container, and keep it near the temperature recommended for that seed.
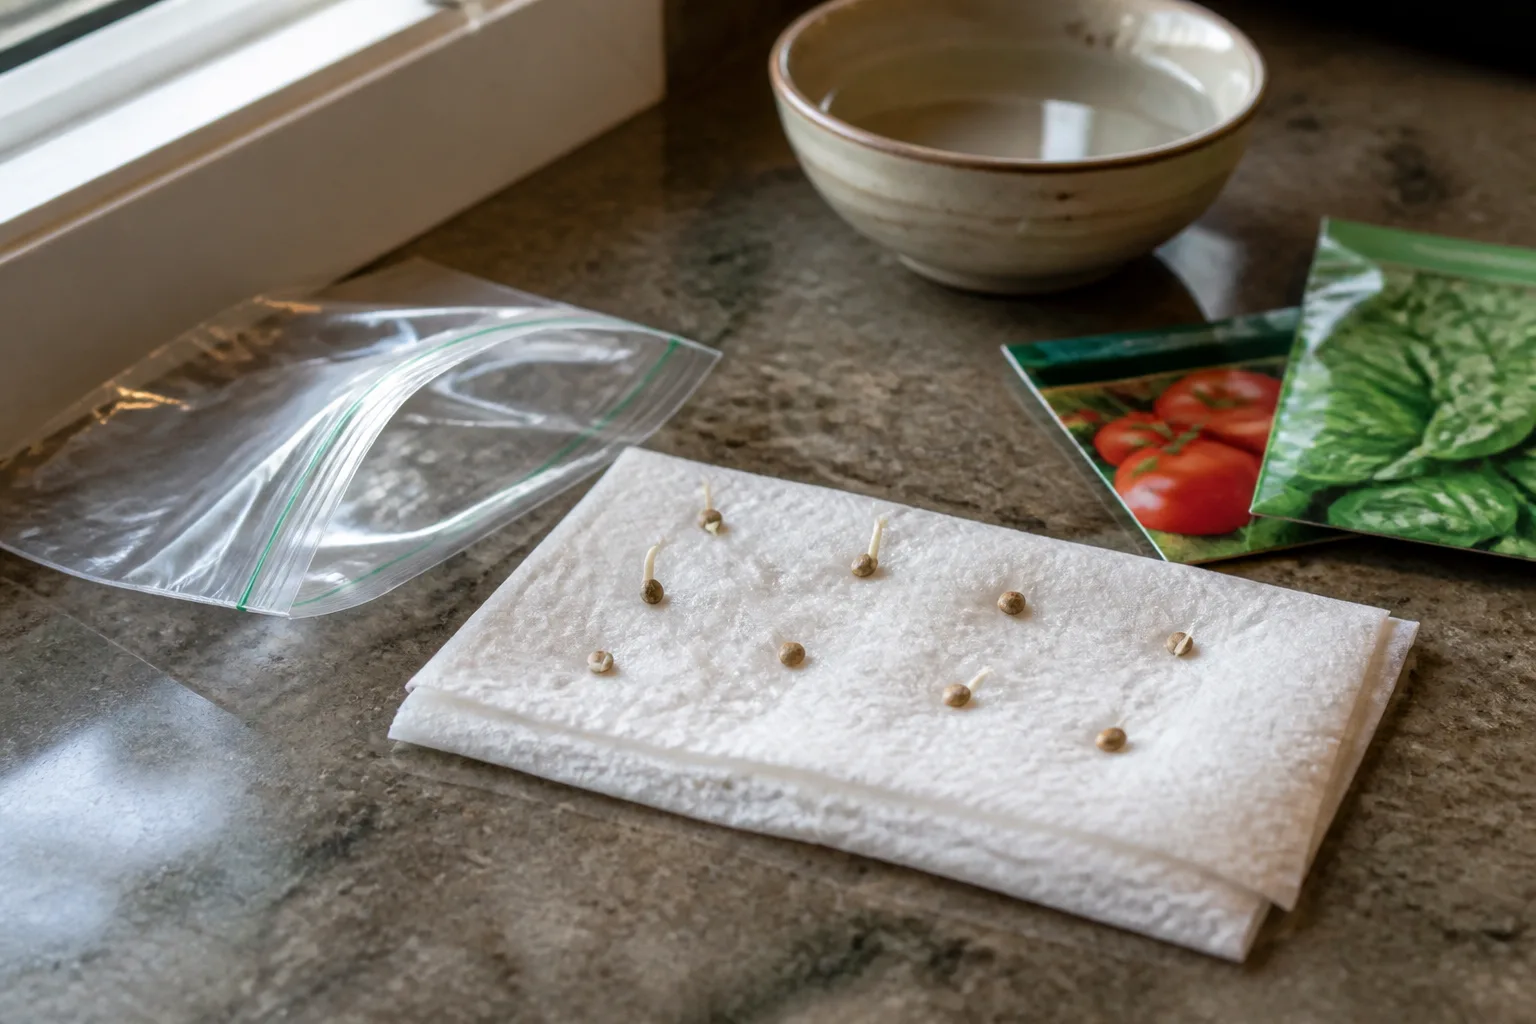
Count how many seeds sprout, not just whether one does. If most fail, the problem may be seed viability or dormancy rather than light. If they sprout in the towel but fail in the tray, revisit sowing depth, mix moisture, drainage, and temperature. Paper-towel testing is a rough check, not a perfect prediction of garden performance: a seed that can sprout in a protected towel may still struggle in cold, crusted, or drying soil.
Conclusion
Seeds do not all need light to germinate. Some, including examples such as begonia, primula, and coleus, need or strongly benefit from light exposure; other seeds germinate in darkness, and many tolerate either condition. Seed size can suggest that a seed should be sown shallowly, but it cannot tell you the complete light requirement.
Use the packet’s depth and germination instructions first. If it calls for surface sowing, press the seed onto moist mix, protect it with a transparent cover or careful watering, and avoid a thick layer of soil. Once sprouts emerge, remove the cover and give the seedlings bright, appropriate light. If nothing appears, check temperature, moisture, oxygen, dormancy, and viability before blaming light alone.



