Starfish Cactus Care: Light, Water, Soil and Flowers
Grow Stapelia hirsuta in a draining pot with bright light and careful winter water; learn how to root a cutting and plan for its carrion-scented flowers.
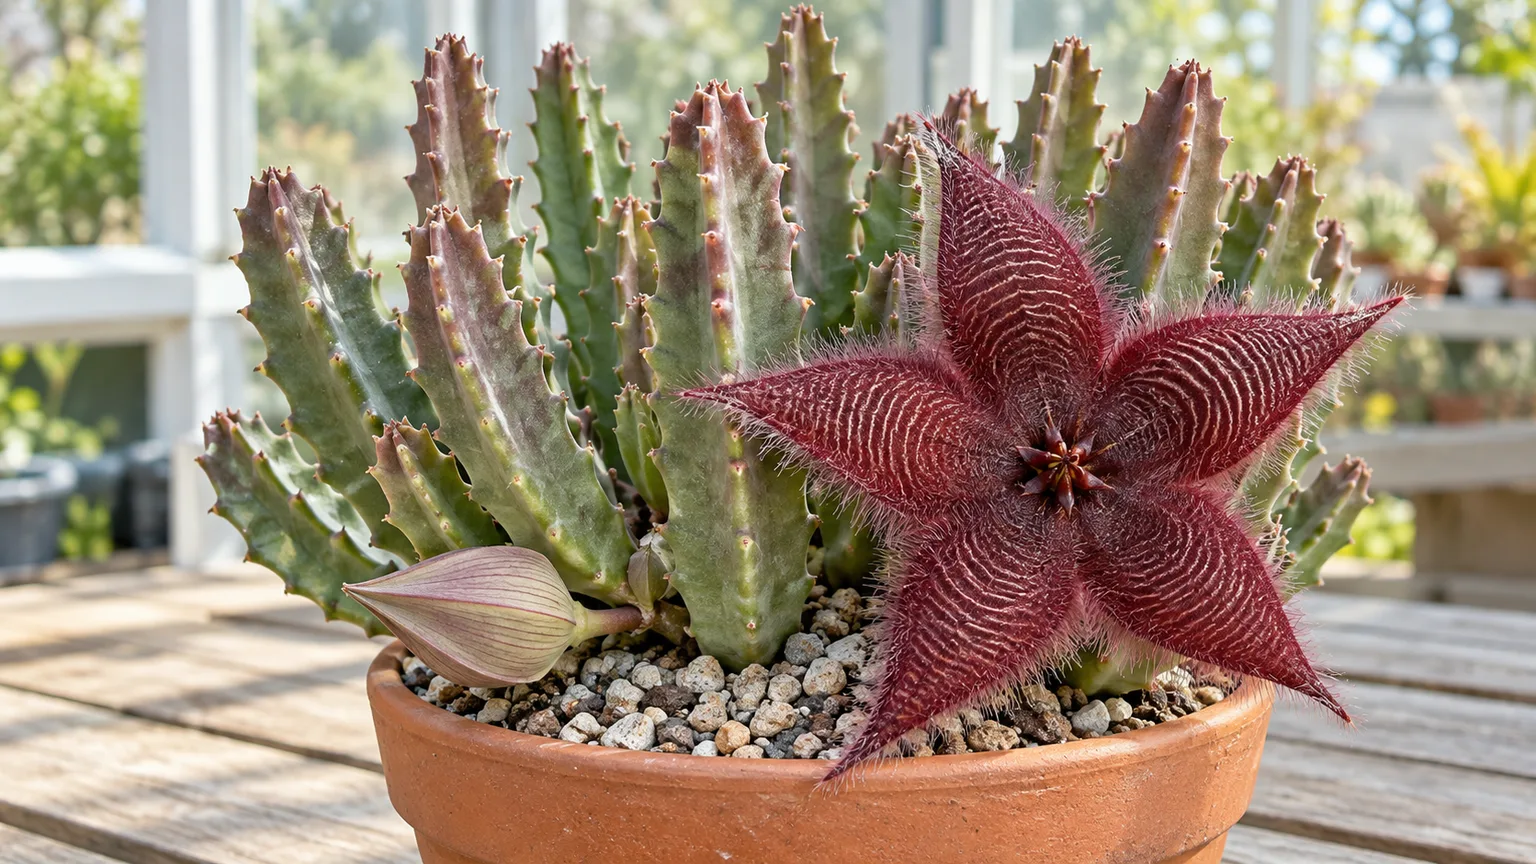
Starfish cactus is a succulent with angular, fleshy stems and unusual star-shaped flowers, not a true cactus. Its accepted botanical name is Stapelia hirsuta, a member of the Apocynaceae family native from southwestern Namibia to South Africa’s Cape provinces. Give it bright light, a gritty root zone, and water that follows its growth and temperature; a soggy winter pot is a more serious risk than a missed watering.
The plant is also called starfish flower, hairy stapelia, or carrion flower. Those names point to its two most memorable traits: flower lobes that can be hairy, and blooms whose odor attracts flies. The following routine is built around what you can observe—how quickly the mix dries, whether stems stay firm, and whether the plant is actively growing—rather than a calendar that ignores your room and climate.
Starfish cactus care at a glance
| Care factor | Practical starting point |
|---|---|
| Light | Bright exposure; full sun or partial shade once acclimated |
| Water | Water during active growth after the mix dries; keep much drier in winter |
| Soil | Gritty, sandy succulent mix that drains freely |
| Pot | Container with an open drainage hole; unglazed clay can help the mix dry |
| Temperature | Warm growing conditions; protect from frost and keep winter plants above about 50°F (10°C) |
| Feeding | Optional, light feeding during active growth only |
| Flowers | Often late summer into autumn; timing varies with maturity and growing conditions |
| Main watch-outs | Soft stems in wet mix, mealybugs, woolly aphids, and abrupt light changes |
The quick version is to make drainage and seasonal judgment do most of the work. Water should reach the root zone and drain out, but the plant should not sit in runoff or remain damp for long periods, especially when it is cool or growth has slowed. NC State Extension notes that forms with more delicate stems or flowers need careful summer watering and no winter water, so lean conservative if you are unsure which form you have.
How to recognize Stapelia hirsuta
Stapelia hirsuta forms low clumps of upright or spreading, four-sided stems. The stems are fleshy and toothed along their angles, usually green to gray-green; strong exposure may bring out red or purple tones. Kew’s Plants of the World Online accepts S. hirsuta as a species and describes its range as southwestern Namibia to the Cape provinces, where it grows in dry shrubland and desert biomes.
The large, five-pointed flowers are the feature that earns the plant its common names. The Ruth Bancroft Garden describes flowers roughly 2 to 5½ inches across, usually purple-red to dark maroon, with variable hairs and markings; individual plants can look quite different. The Royal Horticultural Society places it in Apocynaceae and notes the genus’s angled succulent stems and usually unpleasantly scented summer flowers.
A nursery label that says “starfish cactus” may refer to more than one stapeliad, so use the botanical name when comparing care advice. The species is a succulent perennial rather than a desert cactus with spines, and its unusual flower is not a sign of disease. That distinction matters because advice for a columnar cactus or a leafy houseplant may not fit its low, clumping stems and winter-dry needs.
Give it bright light without sun shock
Set the plant where it receives strong natural light for much of the day. NC State Extension lists full sun and partial shade for S. hirsuta; indoors, a bright south- or west-facing window can work if the stems do not overheat against the glass. If the only available window is less bright, use the brightest spot and watch the shape of new growth instead of compensating with extra water or fertilizer.
Acclimate it before moving it from a greenhouse, shelf, or shaded porch into direct outdoor sun. Start with bright shade, then increase direct exposure over several days while checking the exposed stem surfaces. A sudden jump from filtered light to hot afternoon sun can scorch the stems even though an established plant can tolerate substantial sun.
Light changes also affect the plant’s appearance. The Ruth Bancroft Garden notes that plants in shadier positions may grow longer stems, while plenty of sun helps keep growth compact and can strengthen red or purple coloration. A firm stem that turns evenly reddish is different from a soft, dark, collapsing stem; use texture and growing history alongside color.
Water for active growth, then respect winter rest
During warm, active growth, water thoroughly enough to wet the root zone, then let excess drain from the pot. Wait until the mix is dry through most of the container before watering again; the surface can look dry while the lower portion remains damp. A wooden skewer inserted near the pot’s edge, the pot’s weight, and a finger check below the surface give better information than a weekly reminder.
The interval changes with light, temperature, pot size, and mix. A plant in a small clay pot near a warm, bright window may dry much faster than one in a large plastic pot during a cloudy spell. Avoid tiny repeated sips that keep only the top damp, and empty the saucer or decorative cachepot after watering so roots do not sit in runoff.
Reduce watering as days shorten and growth slows. NC State Extension advises keeping delicate forms dry through winter, with winter temperatures above 50°F; that is a sensible conservative approach for a cool room or a plant that has stopped growing. If yours remains warm and visibly active indoors, do not keep it bone-dry by rote, but still let the mix dry completely and never apply summer-level water to a cold, dim plant.
Wrinkling is not an automatic request for water. First check whether the root zone is actually dry and whether the stem base remains firm; a plant with damaged roots can look thirsty while sitting in wet soil. If the mix is dry, the plant is warm, and the stems are only mildly puckered, one thorough watering followed by a full drain is more useful than misting the stems.
Use a gritty mix and a pot that drains
Choose a commercial cactus or succulent mix only if it drains and dries quickly in your conditions. If it stays damp for days, loosen it with pumice, perlite, or coarse horticultural grit; avoid fine sand that packs tightly and regular potting compost used on its own. There is no single recipe for every room, so judge the mix by how it behaves after a thorough watering.
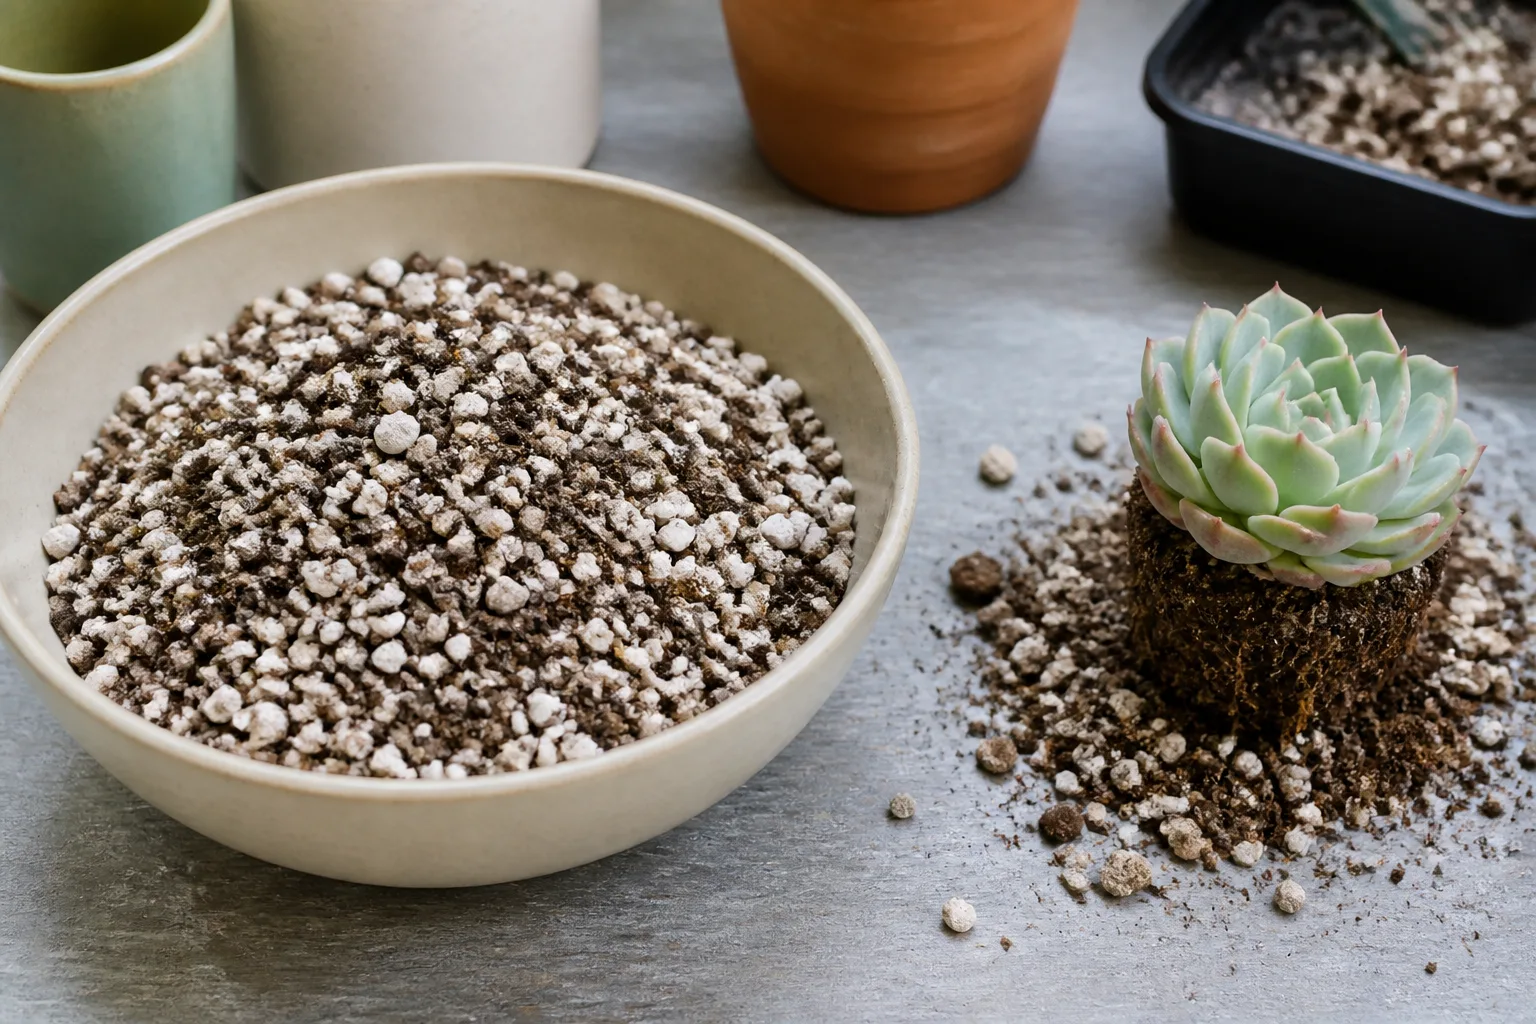
The container needs at least one clear drainage hole. An unglazed clay pot can help moisture escape through its sides, as NC State Extension recommends, but it does not rescue a dense mix or a blocked hole. Pick a pot only modestly wider than the root mass so excess soil does not hold water around a small plant for too long.
A thin surface dressing of coarse grit can help keep damp mix from collecting directly around the stem bases. Keep the layer light and loose rather than building a deep cap that hides the soil line. You should still be able to inspect the crown and see whether stems are sitting against wet material.
Keep temperatures warm and frost-free
Treat starfish cactus as frost-tender. NC State Extension advises winter temperatures above 50°F (10°C) for delicate forms and a dry winter root zone; do not use a generic “succulent” label as evidence that this species can take a cold snap. If you cannot provide warmth and bright light, keep the plant dry and protected rather than trying to maintain summer growth in a cold window.
Warm days support active growth, but heat alone does not justify more frequent watering. A hot, airless corner with a wet pot can still be a poor setup, while a plant in a warm bright room may use water more quickly. Check the mix and stem firmness each time conditions change, including when heating comes on or a cold spell reduces daylight.
Move plants outdoors in stages
A summer position outdoors can give the plant stronger light and airflow, but move it only after nights are consistently warm and frost risk has passed. Begin in bright shade or filtered morning sun, then lengthen its direct-sun exposure gradually over about a week or two. Keep it sheltered from prolonged cold rain, which can leave the root zone wet even when the plant itself is not being watered.
Before bringing it back indoors, inspect the stem angles, crown, and pot surface for insects or debris. Rinse or brush off dirt only if needed, then return it to a bright indoor location before nights approach the plant’s winter threshold. Moving it back and forth between very different light levels can stress stems, so choose a stable transition rather than reacting to each warm afternoon.
Feed lightly and remove only what is spent
Fertilizer is optional if the plant is growing well in fresh succulent mix. If you choose to feed a potted plant, do it only during active growth and use a diluted product labeled for cacti or succulents; follow the label rather than applying a strong dose to dry roots. Stop feeding as growth slows in autumn, and do not use fertilizer to try to force a plant that is resting, poorly lit, or showing root damage.
Routine pruning is not necessary. Remove a dead or rotting stem with a clean blade, cutting back to firm healthy tissue and letting the wound dry before returning the plant to a dry mix. After flowering, snip away a faded bloom only when it is fully spent or messy; avoid cutting into nearby developing stems or flower stalks.
Repot when the root zone needs it
Repot when the mix has broken down, drainage has become unreliable, roots fill the container, or the clump is unstable—not simply because a year has passed. Spring or early summer is usually easiest because the plant can recover while growth is active. Choose a container with a drainage hole that is only slightly larger than the root mass, and replace dense or sour-smelling mix rather than carrying it into the new pot.
Handle the fleshy stems gently and check the roots as you work. Trim only roots that are clearly dead or mushy with a clean tool, then let any fresh cuts dry before placing the plant in new gritty mix. Give it a few days to settle before resuming cautious watering, especially if roots were damaged; combining a repot, heavy watering, fertilizer, and a sudden move into full sun creates several avoidable stresses at once.
What helps starfish cactus flower
A mature, healthy plant is more likely to bloom when it receives bright light, a freely draining mix, and a seasonal rhythm rather than constant indoor conditions. The Ruth Bancroft Garden reports flowering in late summer and autumn for this species, while exact timing in cultivation varies with light, warmth, and the plant’s maturity. A recently rooted cutting may need time to build a substantial clump before it can flower.
Flowers develop close to the base of the stems, so inspect the lower edges of the clump rather than looking only at stem tips. Keep care stable when buds appear: do not suddenly relocate the pot, soak it repeatedly, or feed heavily. A dry rest may support flowering, but deliberate severe drought or cold stress can damage the plant and is not a reliable way to make it bloom.
If it grows but never flowers, look first at light and maturity, then review whether the pot stays wet through winter. Repotting less often may avoid unnecessary root disturbance, but keeping a plant severely pot-bound is not a dependable bloom trick. The goal is a settled root system with enough light and a dry, warm winter—not deprivation.
Plan for the flower’s odor and pollinators
The flower’s carrion-like smell is part of its pollination strategy, not a sign that the plant is rotting. NC State Extension explains that flies are attracted to the odor; the Ruth Bancroft Garden describes the large, hairy, star-shaped blooms and their foul scent. Color, hair length, and flower size vary, so not every bloom will look exactly like a photograph or nursery description.
Place a budding plant where a short-lived strong smell and visiting flies will not bother people. If you move it outdoors while flowering, make the change gradually so the plant is not taken from dim indoor light straight into hot sun. Once a bloom fades, remove it cleanly if needed and check the stems themselves before diagnosing any lingering odor as decay.
Propagate Stapelia from a stem cutting
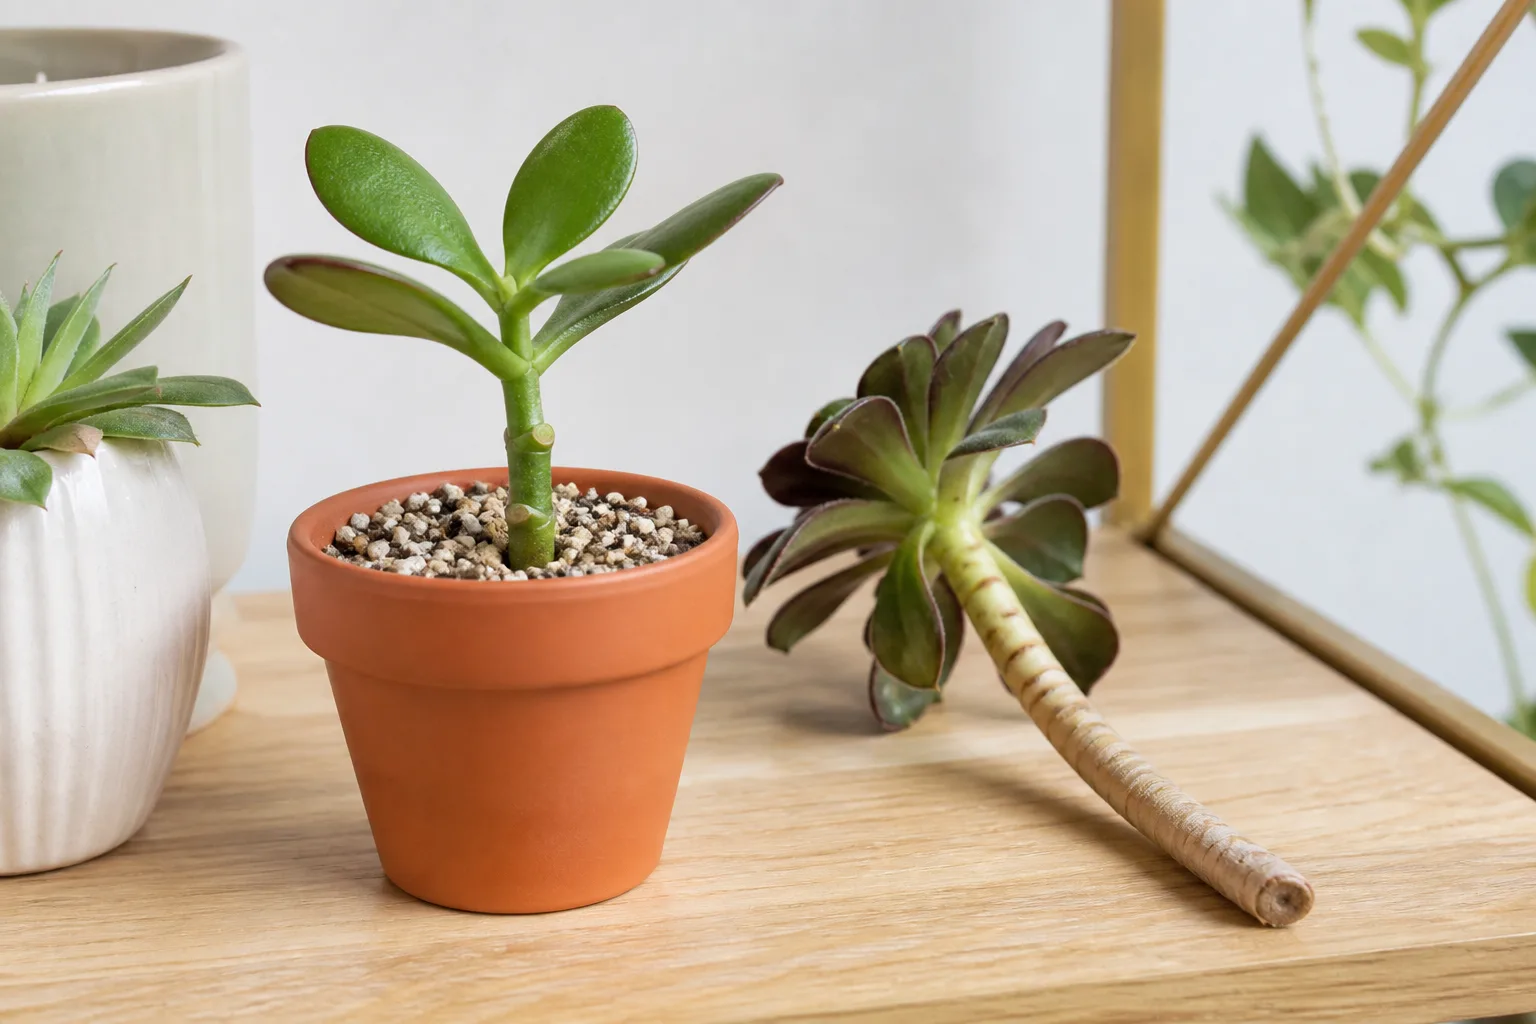
Stem cuttings are the simplest way to make another plant that resembles the parent. The NC State Extension Plant Toolbox lists both seed and stem cutting propagation and specifically advises laying seed or cut material on the surface rather than covering it, because buried succulent tissue may rot. Fine Gardening and Epic Gardening also recommend letting succulent cut ends dry and callus before planting; adapt that general method to this species’ fleshy, moisture-sensitive stems.
- Choose firm material. Select a healthy stem from an established clump, not one that is soft, discolored, or infested. Take a cutting during warm active growth if possible, and avoid removing so much that the parent loses most of its green stems.
- Make a clean cut. Use a sharp, clean knife or pruner to sever the stem near its base. Handle the cut surface carefully and set the cutting on a dry, clean surface out of direct sun.
- Let the wound seal. Leave it in warm, airy shade for a day or several days, depending on stem thickness and room humidity. The cut end should look dry and sealed rather than glossy or wet before it touches potting mix.
- Set it on gritty mix. Fill a small pot with dry, free-draining succulent mix and lay the cutting on the surface, or lightly support it so the cut end rests against the mix. Do not bury the stem or pack wet compost around it.
- Wait for roots before increasing water. Keep the pot warm in bright, indirect light and avoid repeated misting. Once the cutting resists a very gentle nudge or shows roots, begin cautious watering around the mix, allowing it to dry between applications.
Rooting time depends on warmth, light, stem condition, and season; a fixed number of weeks is not a guarantee. If the cutting turns soft or translucent before it roots, remove it from the pot, cut back to sound tissue if any remains, and let the new cut dry longer. Starting with a clean, firm cutting and a dry surface is more useful than trying to speed the process with constant moisture.
Start from seed when you want more variation
Seed propagation is possible, though it takes longer and may not produce a plant identical to the parent. The Ruth Bancroft Garden notes that pollinated flowers form paired, tapered seed follicles; when mature, they split and release flattened seeds with fine hairs that help them travel on the wind. Indoor flowers may not be pollinated, so seed pods should not be expected from every bloom.
If you have viable seed, use a clean, airy seed-starting mix and set the seed on the surface instead of burying it. Keep the medium lightly and evenly moist while seedlings establish, but never saturated; once seedlings are large enough to handle, reduce moisture and pot them into a grittier mix. Seedlings can vary in flower traits, so cuttings are the better choice when you want a close copy of a named form.
Rescue a soft, dark stem before rot spreads
Soft, dark, or collapsing tissue at the stem base is more concerning than an evenly red but firm stem. If you see it, stop watering and inspect the root zone; a persistently wet mix, blocked drainage hole, or cool pot can keep the roots from recovering. Remove the plant from its pot if the mix is wet or the stem base is deteriorating, and check whether roots are firm or mushy.
With a clean blade, remove clearly rotted roots and stems until the remaining tissue is firm. Discard the old wet mix, clean the container, and let sound cut surfaces dry before replanting in fresh gritty medium. Keep the plant in warm, bright shade while it recovers, and do not water just because it has been repotted; wait until the wounds have dried and the plant is stable.
A plant whose entire crown or all stems have turned soft may not be salvageable. If only one stem is affected, remove it promptly and keep the remaining clump in drier conditions while you check drainage. Fungicide cannot fix a pot that stays waterlogged, so correct the moisture and airflow problem before considering any product.
Diagnose wrinkling, redness, and stretched growth
Wrinkled stems can mean the plant has used its stored water, but they can also point to roots damaged by excess moisture. Lift the pot and check below the surface: a very light pot with dry mix and firm stems usually calls for one thorough drink during the growing season, while a heavy pot with damp mix calls for patience and root inspection. Do not respond to every wrinkle with a spray bottle.
Red or purple coloring can be a normal response to strong sun or seasonal conditions. The Ruth Bancroft Garden notes that exposed plants may develop red or purple tinges, and NC State includes both full sun and partial shade as suitable exposures. If redness arrives alongside bleached patches, softness, or rapid collapse after a move outdoors, treat it as possible sun damage or stress and return to gentler light.
Long, weak stems usually mean the plant is reaching for more light, especially when a formerly compact clump sits far from a window. Move it closer to a brighter location gradually and rotate the pot occasionally so growth is more even. If the stems are both stretched and soft, correct light and wet soil together rather than assuming either symptom has only one cause.
Find and manage mealybugs and woolly aphids
Inspect the stem angles, crowded center of the clump, and soil line for small cottony deposits, waxy insects, or sticky residue. NC State Extension identifies mealybugs as the major insect problem for S. hirsuta and also notes woolly aphids; infestations can damage stems and create openings for further decline. A quick look at the top of the plant is not enough because pests can hide between stems.
Isolate an affected plant while you confirm the pest and inspect nearby succulents. For a small infestation, NC State Extension mealybug guidance describes using an alcohol-dipped cotton swab on cherished houseplants; test it on a small area first, since plant surfaces can react differently, and avoid soaking the whole clump. If you use a pesticide or insecticidal soap, choose a product labeled for the pest and ornamental plant, follow all label directions, and repeat inspection because waxy egg masses and hidden insects can survive a single pass.
Keep checking the plant for several weeks after treatment, including the stem bases and new growth. Do not treat every white fleck as a pest without looking closely, and do not use a strong spray on a hot, sunlit plant. Correcting poor airflow and keeping the root zone from staying wet will not eliminate insects by itself, but it helps the plant recover from stress.
Conclusion
Starfish cactus does best when its setup makes excess moisture easy to avoid: bright light, a gritty mix, a drainage hole, and water that follows active growth rather than the calendar. Keep it warm and much drier through winter, then change light gradually when moving it outdoors or back inside. Those few decisions prevent many of the problems that make this unusual succulent seem difficult.
Use stem firmness and soil moisture to diagnose trouble, and expect a flower whose appearance and smell are part of the plant’s biology. If you propagate, let the cut surface dry and place the cutting on the mix instead of burying it. A settled, well-lit plant may take time to bloom, but patient seasonal care is more reliable than forcing it with extra water, fertilizer, or stress.



