How to Divide and Transplant Daylilies
Divide daylilies in spring or after flowering. Follow clear steps for lifting, choosing healthy fans, replanting at the right depth, and watering new divisions.
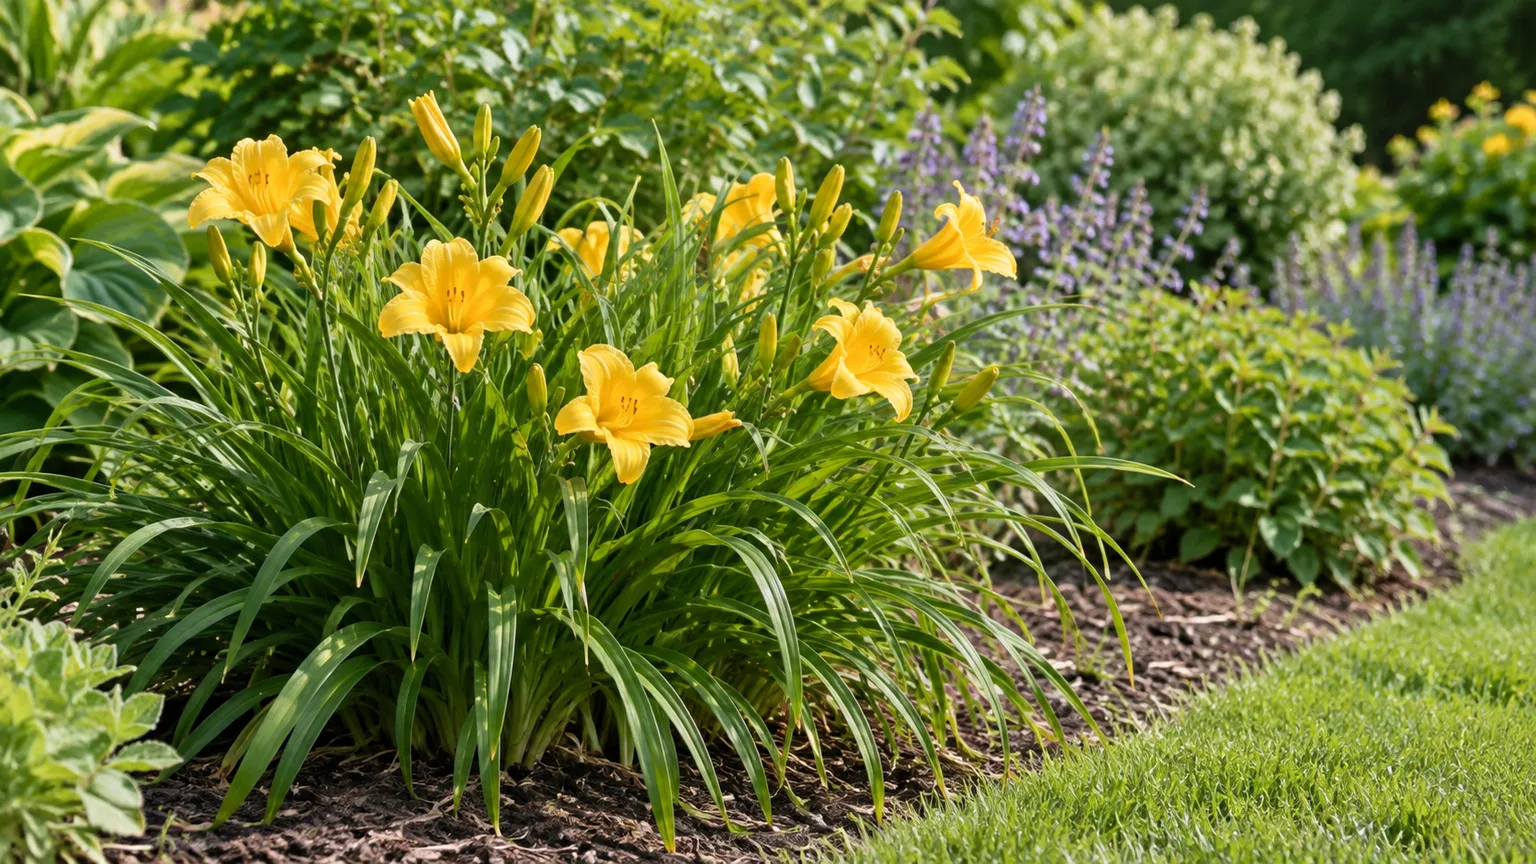
An established daylily can become a dense ring of leaf fans, with a dead or weak center and fewer flowers than it once produced. Division gives the remaining vigorous crowns room to grow and lets you relocate or share extra plants. It is not a mandatory chore on a fixed schedule, though: if a clump is healthy, flowering well, and staying within its space, leave it alone.
The job is straightforward when you choose a cool window, prepare the new bed first, and keep a useful amount of crown and roots attached to each piece. The main tradeoff is timing. Early spring gives divisions a long season to establish but can reduce that summer’s flowering; dividing after bloom preserves the display, provided roots have time to settle before the ground freezes.
When a daylily clump actually needs division
Look for a planting that has become visibly crowded, with fans packed together and little open soil between the outside leaves. A mature clump may also produce fewer or smaller flowers, develop a weak center, or expand beyond the border you planned for it. Those signs can make division useful, but reduced bloom alone is not proof that crowding is the cause.
Before lifting a plant just to “refresh” it, check whether it has enough sun, drains well, and is planted at a reasonable depth. Shade, drought during bud development, waterlogged soil, or a crown buried by years of added mulch can all limit flowering. Fixing one of those conditions may be easier on the plant than dividing it. Kansas State University Extension notes that clumps are commonly divided every few years for better bloom, while Gardener’s Path describes a similar three-to-five-year interval; treat those ranges as a reminder to inspect, not a deadline.
Choose timing by your climate and bloom goals
Daylilies can be divided in early spring as growth begins or in the cooler period after flowering. Both windows work; the best choice depends on your winter, the plant’s bloom cycle, and what matters more to you this year. Avoid lifting during a heat wave or while the soil is frozen, saturated, or so dry that the clump is difficult to excavate.
A practical fall rule is to count backward from the expected first hard freeze. Give divisions several weeks of workable, nonfrozen soil to make new roots; a longer buffer is safer in colder regions or exposed sites. In mild climates the fall window may be generous. Where winter arrives early, choose spring instead of gambling on late establishment. Virginia Cooperative Extension supports early-spring or fall division for perennials, while local weather determines how much time the new roots actually get. For daylilies specifically, Gardener’s Path recommends waiting for early spring growth or allowing several weeks of establishment before freezing weather.
Spring division: more recovery time, possible bloom loss
Lift a clump after the soil is workable and new shoots have begun to appear, but before the plant is carrying a full canopy of foliage and flower scapes. The new divisions then have most of the growing season to rebuild roots and leaves. If the plant is already in bud or flowering, postpone if you can; moving it at that point is more disruptive and usually costs some of the current display.
Spring is especially practical where autumn turns cold quickly, or when a gardener needs to correct a crowded bed before summer. Plan for fewer blooms that year, and judge success by firm crowns and new leaf growth rather than flowers. That temporary reduction is a normal consequence of moving a plant whose energy is going into re-establishment; it does not mean the division is weak or doomed.
Post-bloom division: keep the display, watch the calendar
If you want to enjoy the flowers first, wait until the main flush has finished and the weather has cooled. Late summer to early fall often offers a useful balance: the plant is past its peak display, heat stress is easing, and the soil may still be warm enough for roots to grow. In regions with long, mild autumns, this can be an easy time to divide and move a bed.
Do not use the calendar alone. If an early freeze is close, the soil is drying quickly, or the site is exposed to severe winter winds, leave the clump in place and work in spring. When moving a plant after bloom, shorten long foliage enough to handle the clump without tearing it; there is no need to shear every healthy daylily in the bed. K-State horticulture guidance describes cutting foliage back during division as a practical handling step, not a routine substitute for normal seasonal care.
Prepare the new site before digging
Choose the final location first so the roots do not sit out while you make design decisions. Daylilies bloom best with plenty of sun, though some cultivars and hot gardens benefit from light afternoon shade. Select a site with dependable drainage. They tolerate a range of garden soils, but a low spot that stays waterlogged is a poor place for a freshly cut division, whose damaged roots need oxygen as well as moisture.
Loosen the bed broadly rather than making a narrow, hard-sided hole. Blend modest amounts of finished compost into poor or compacted soil if needed; do not fill the planting hole with a rich, sharply different mix that behaves like a pot inside the surrounding ground. If you are unsure about drainage, water the prepared area and see whether it drains instead of remaining soupy. Correcting a drainage problem before planting is more reliable than trying to solve it with extra fertilizer afterward.
Space divisions according to the cultivar’s mature width and the effect you want. A compact daylily can be planted closer than a large, arching variety. Close spacing gives quicker coverage but means the plants will meet and need dividing sooner; wider spacing leaves gaps initially but reduces future crowding. A useful starting point is to leave roughly the mature spread between individual clumps, then tighten that spacing when you deliberately want a faster, fuller drift. Extension and horticulture references give different ranges because cultivars and design goals differ; use the plant’s mature width as the deciding measure.
Set up tools and a simple work area
Have a sharp spade or digging fork, a clean knife, gloves, a tarp or shaded work surface, and a watering can or hose ready before you start. A spade is efficient for lifting a large clump; a fork can help loosen the soil around the perimeter with less slicing. Use a clean, sharp blade only when natural separations do not release the fans. Clean tools between plants if you see suspicious rot or disease so you do not carry contaminated soil or plant tissue through the bed.
Water the clump the day before if the ground is very dry, but do not try to dig in saturated clay. Moist, crumbly soil is easier to lift and less likely to crumble into a hard, dry root mass. Mark the plants if you have several named cultivars: once they are out of the ground, flowers may no longer be available to identify them. If you need to divide more than one variety, keep each group separate and label it before moving to the next.
Lift the clump without cutting through the crown
Cut away spent flower stalks and remove dead leaves so you can see the base of the fans. If the foliage is long and gets in the way, trim it back enough to work comfortably; keep some green leaves when possible, especially for spring divisions that are still actively growing. A manageable clump is easier to position and water than a huge mass, so there is no advantage to keeping every leaf at full length.
Start digging several inches outside the visible foliage, angling the spade under the root mass as you work around the plant. Daylilies have dense, fleshy roots that can extend beyond the crown. Trying to pry up a mature clump from one side can tear away most of the roots or split through the center unpredictably. Make a circle of cuts, loosen the soil from several directions, then lever the clump upward while supporting it from below. For a very large planting, lift a manageable section rather than forcing one oversized root ball from the ground.
Shake loose soil from the roots or rinse it gently if the crowns are so packed together that you cannot see where one fan group ends and another begins. Washing is optional; the goal is visibility, not bare, scrubbed roots. Work in shade and keep the root mass from drying out. If planting must be delayed, cover the roots with a damp cloth and keep them cool rather than leaving them exposed to sun or wind.
Separate fans into useful divisions
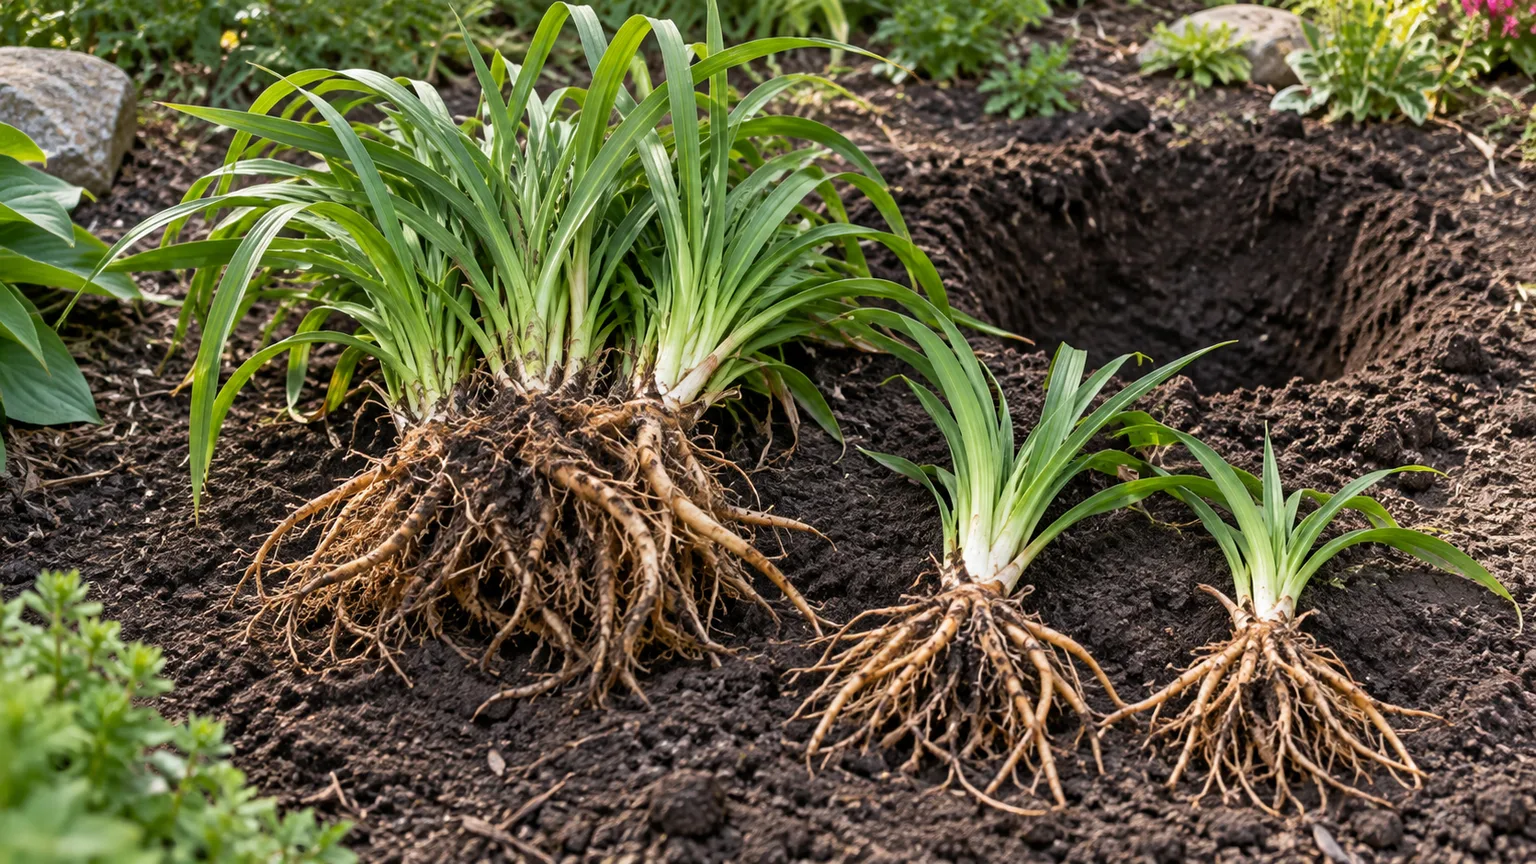
A daylily fan is a cluster of leaves growing from a crown. Once the plant is lifted, look for natural seams between fan groups. Smaller clumps often separate by hand with a gentle rocking motion. Avoid pulling hard on the leaves; hold low near the crown so your force goes through the plant base, not through the foliage.
For older, tightly knit clumps, cut between groups with a sharp knife or spade. A clean cut is better than repeated hacking or twisting that crushes the crown. You may lose some outer roots when splitting a mature plant; preserve a substantial set of healthy roots with each crown rather than trying to keep every fine root intact. Brush off mud and remove roots that are obviously soft, black, hollow, or badly damaged. Do not trim away healthy fleshy roots simply to make every division look tidy.
What a viable division needs
For a dependable garden transplant, keep two or three fans together when the clump allows it, along with a strong crown and a good root bundle. A single fan can grow if it has a sound crown and roots, but it usually takes longer to fill out and may not flower as quickly as a larger section. Kansas State University Extension recommends a larger group of about five fans for a robust replanting clump, while its horticulture blog describes smaller groups for moving and filling a garden. These are not contradictory rules: bigger divisions make an instant fuller display; smaller divisions produce more plants but need more time to bulk up. Gardener’s Path likewise advises keeping a fan with a healthy portion of roots and replanting promptly.
Discard pieces that have no firm crown, no viable buds, or roots that are largely rotten. If the center of a very old clump is dead or weak while its outer fans are vigorous, prioritize the healthy outside sections rather than propagating the declining center. This is a judgment call, not a reason to discard every imperfect root. Keep sound plants, remove clearly dead tissue, and avoid carrying obvious disease into a new bed.
Replant at the correct crown depth
Replant divisions as soon as practical. Dig a hole broad enough to spread the roots without bending or bunching them beneath the crown. Shape a small mound of soil in the middle, set the crown on it, and drape the roots outward and downward. Backfill in stages so soil reaches around the root mass, then firm gently with your hands. Hard tamping compresses the soil and can leave too little air around the roots.
The crown is the junction where the leaves meet the roots; it is not the flower stalk or the top of the longest leaf. Set it near the finished soil surface—commonly about an inch below it—and avoid burying it several inches deep. Gardener’s Path gives about an inch below the soil surface as a practical target. The exact guidance varies by local source and soil, so preserve the original planting depth when moving an intact clump and favor shallow placement in heavy or poorly draining ground. A crown perched well above dry soil can also struggle, so do not leave the roots exposed. After settling the soil with water, check that the crown has not sunk into a depression.
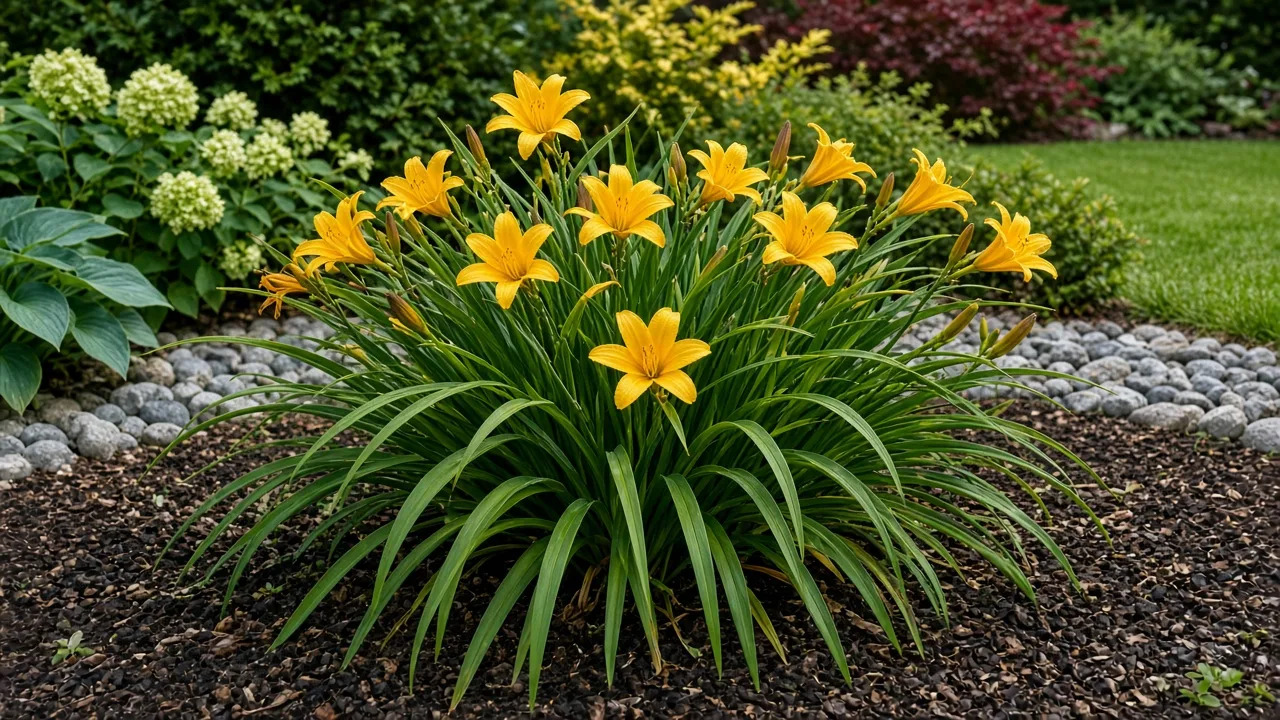
If you are replanting into the same bed, do not put every division back into the exact space the original clump occupied. That simply recreates the crowding you set out to fix. Spread the planting area, improve the soil only where needed, and space pieces so mature foliage can expand. If you are sharing divisions, plant them promptly or temporarily heel them into moist soil in a shaded spot; do not store bare-root pieces in a warm shed or leave them in a bucket of water.
Water, mulch, and care for new divisions
Water thoroughly after planting so soil settles around the roots. Then monitor the soil near the root zone and water when it begins to dry; do not follow a rigid daily schedule. Wind, sun, soil texture, rainfall, and season all affect how quickly a transplant dries. A newly divided plant has lost some absorbing roots, so it needs closer attention than a mature, established clump, but permanently wet soil can suffocate roots and encourage rot.
A light layer of organic mulch can slow evaporation and suppress weeds. Keep it from piling over the crown, where retained moisture and extra depth can cause trouble. Pull weeds by hand while the new divisions are small, but work carefully around their roots. You generally do not need to give a newly divided daylily a strong fertilizer dose; focus first on proper planting, moisture, and drainage. If soil fertility is poor, use a modest soil amendment or a fertilizer according to a soil test and product directions rather than guessing with a high-nitrogen feed.
During the first several weeks, look for firm crowns and leaves that remain reasonably upright. Some foliage may yellow or dry after the move, especially if you divided in warm weather. Remove dead material once it is clearly spent, but do not repeatedly pull at leaves that are still green. In a dry spell, check the soil with a finger below the mulch instead of judging from the surface alone. As the weather cools and growth slows, reduce watering to match actual soil moisture, while preventing the root area from drying completely before it is established.
What to expect from flowering after division
A spring division may flower lightly or skip flowering for the rest of that season. A late-summer move after bloom avoids sacrificing flowers that have already opened, but the plant may still spend energy on roots and produce a smaller display the following year. The size of the division, cultivar, timing, weather, and growing conditions all affect the result. A mature clump divided into a few substantial pieces generally recovers differently from one cut into many single fans.
Do not evaluate the transplant only by flower count. Healthy new leaves and a firm base are better early signs of establishment. Give a small division time to build size before expecting the same abundance as the parent clump. With good placement and care, flowering typically strengthens as the plant re-establishes; if it remains weak after a full growing season, check depth, light, drainage, and moisture before dividing it again.
Troubleshoot transplant setbacks
A little leaf dieback after division is not automatically a disease or a sign that the plant has failed. The key is whether symptoms are limited to the foliage or whether the crown and roots are deteriorating. A transplant that stays firm and begins producing fresh leaves is usually recovering, even if older leaves look rough for a while.
Leaves yellow, wilt, or flop
Check soil moisture first. If the root area is dry several inches down, water slowly and deeply; if the soil is wet and sticky, pause irrigation and improve drainage rather than adding more water. Yellowing of outer leaves can follow root disturbance, but a soft, foul-smelling crown or widespread collapse points to a more serious problem. Remove rotten sections with a clean tool and replant any sound divisions in well-drained soil.
Leaves may also flop because they are long and were not shortened before planting, or because a small root system is supporting too much foliage. Trim damaged or badly wilted foliage back modestly, leaving enough green leaf to support recovery. If the plant was moved during hot weather, provide temporary afternoon shade and check moisture more often until conditions cool. Do not compensate for stress with fertilizer; salts in a concentrated feed can add another burden to injured roots.
The division survives but does not flower
Start with the basics rather than splitting it again. Confirm that the site gets enough sun, the crown is not buried under soil or mulch, and the plant has had time to establish. A small one-fan piece may need an additional season to build into a blooming clump. Flowering can also vary with cultivar and weather, so a single quiet year is not enough evidence that the division is failing.
If the plant produces healthy foliage but still has no flowers after establishment, move it to a sunnier location during a suitable division window or correct the crown depth. Avoid moving it repeatedly in one season. A well-rooted plant can tolerate occasional division, but each lift temporarily interrupts growth; repeated disturbance is unlikely to solve shade or planting-depth problems.
When it is better to wait
Leave the daylily in place if it flowers well, has space, and is not interfering with nearby plants. A calendar interval is not a reason by itself to disturb a healthy clump. Wait for cooler weather if the soil is very hot and dry, and wait for workable soil if it is frozen or saturated. Postpone fall division if there is too little time before hard freezes for roots to settle in.
There are also times to move the plant without dividing it. If you only need to correct its position, lifting a smaller intact root mass can reduce the number of wounds and preserve the display better than splitting every fan apart. Conversely, a mature, crowded clump that needs rejuvenation is easier to divide once it is out of the ground. Choose the least disruptive option that solves the actual problem.
Conclusion
Divide daylilies when crowding, declining performance, space, or a planned move gives you a clear reason—not simply because a set number of years has passed. Choose early spring for a long recovery season or divide after flowering when cooler weather leaves enough time before winter. Lift the whole clump carefully, keep strong crowns and healthy roots together, and replant each division near its original depth in a well-drained site.
Water the new plants thoroughly, then adjust care to soil moisture and weather. Expect some reduction in flowering while divisions establish, particularly after spring work or when pieces are small. Patience, sensible spacing, and a well-prepared site will do more for their return than extra fertilizer or repeated lifting.



