What Is Pruning? Benefits, Types, and Required Tools
Learn what pruning does, when to choose cleaning, thinning, raising, or reduction, how to make a sound cut, and which tools are safe for each branch at home.
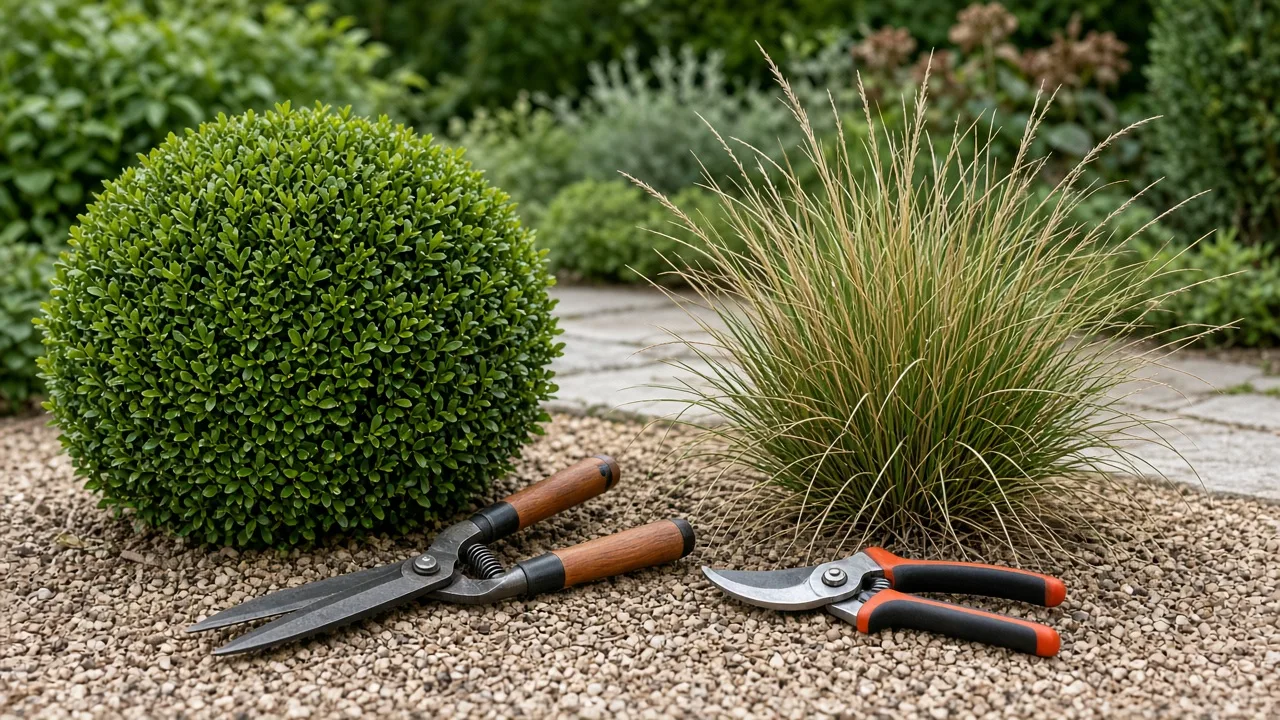
Pruning is the selective removal of plant parts—usually branches, shoots, buds, or stems—to meet a clear goal. A gardener may remove dead wood, correct a young tree’s structure, keep a shrub from blocking a path, encourage flowers or fruit, or reduce a specific safety concern. A good cut has a reason and a planned destination. Cutting simply because a plant looks untidy can remove healthy growth without solving a problem.
The word covers several different jobs, from pinching a soft herb to removing a heavy tree limb. Those jobs do not use the same technique, tool, timing, or safety precautions. Start by identifying the plant and deciding what you want the cut to accomplish. Then make the least severe cut that meets that goal. For a mature tree, a large branch, or any work that cannot be done from stable ground, bring in a qualified arborist.
Why Prune—and When You Can Skip It
Pruning can improve a plant’s structure, remove dead or diseased tissue, maintain useful clearance, direct young growth, and help some flowering or fruiting plants perform well. In a young tree, small corrective cuts can prevent weak branch arrangements from becoming large, difficult problems. On an established tree, selective removal can address a crossing limb or a branch that interferes with a building. On a shrub, a few well-placed cuts can restore a natural shape or remove old stems that no longer flower well. The Washington State University Extension guide to home pruning describes pruning as a deliberate intervention: choose the objective, then make cuts that minimize injury while achieving it.
Pruning does not automatically make a plant healthier, smaller, safer, or more productive. Every live branch carries leaves, buds, or stored resources. Remove too much and the plant loses photosynthetic area; make heading cuts across many branch tips and it may respond with dense, vigorous shoots that need more maintenance. A large cut can also be slow to close over and may leave vulnerable wood. The Penn State guide to mature landscape trees emphasizes that established trees often need only goal-specific pruning and can be harmed by excessive or incorrect work.
Some plants need little or no routine pruning when they are in the right place and allowed to grow in their natural form. Before reaching for a tool, ask: Is there dead, damaged, diseased, crossing, or hazardous growth? Is a branch causing a defined clearance or structural issue? Does this species need pruning for flowers, fruit, or training? If the answer is no, observe the plant rather than cutting it. If the real issue is that a mature plant has outgrown its site, repeated hard cutting may not be a lasting fix; relocation or a better-sized replacement may be kinder and safer.
Four Pruning Objectives
For ornamental trees, arborists often describe the goal as cleaning, thinning, raising, or reduction. These are objectives, not four separate tools. A single tree may need one objective or several, but each removed branch should still serve the plan. University of Minnesota Extension uses these categories to describe common landscape-tree pruning goals; shrub, fruit-tree, and formal hedge work may use additional species-specific methods.
Cleaning: Remove Dead or Damaged Wood
Cleaning removes dead, broken, dying, or confirmed diseased branches. It can also include removing rubbing branches or shoots that are poorly attached, depending on the plant and the problem. Dead wood has no useful foliage to preserve, but a dead branch is not automatically an emergency: size, height, target below it, and the likelihood of failure determine the risk. A small dead twig within reach is different from a heavy limb over a roof.
For suspected disease, first identify what is affecting the plant. Cutting out the wrong tissue, pruning at the wrong time, or carrying contaminated tools from plant to plant can make the situation worse. Some diseases require cuts well below visible symptoms, a particular season, or tool disinfection between cuts; others do not. Follow current local Cooperative Extension or plant-disease guidance for the diagnosis. For a dead or damaged branch attached to a large tree, especially above a structure or walkway, leave the removal to an arborist.
Thinning: Select Branches, Keep the Crown
Thinning removes selected branches back to their point of origin or to a suitable lateral. It can improve spacing, reduce rubbing, and let light and air move more evenly through a dense canopy. The goal is not to hollow out the center or make every branch equally spaced. Preserve the tree’s characteristic outline and keep enough live foliage to sustain it.
Choose branches that conflict with the structure or the stated objective, then look at their attachment before cutting. Removing a whole branch is often better than shortening every branch end, because repeated heading cuts can create clusters of weak shoots. On mature trees, be conservative: thinning should not strip the crown or expose previously shaded limbs and trunk to abrupt conditions. If the tree’s interior is dense but you cannot identify which branches should remain, get professional advice before taking out live wood.
Raising: Create Clearance Gradually
Raising removes or shortens lower branches to create clearance over a path, driveway, garden bed, or road. Clearance should be increased gradually. Lower limbs on a young tree help build trunk taper and strength, so removing them all at once can leave a weak, top-heavy structure. For a young tree, a sound plan may retain temporary lower branches while shortening or removing only the ones that conflict with the eventual trunk and use of the space.
Never raise a tree by removing so many lower limbs that the remaining crown becomes a small tuft at the top. Preserve a balanced live crown and check local rules before pruning branches that extend over public space or a neighbor’s property. If a large limb crosses a street, roof, or utility line, treat it as a professional job rather than a clearance project for a homeowner.
Reduction: Shorten to a Viable Lateral
Reduction lowers height or spread by cutting a branch back to a healthy lateral branch that can continue the growth line. The retained lateral should be substantial enough to assume that role; the Penn State pruning guidance describes selecting a lateral at least about one-third the diameter of the portion being removed. A suitable lateral keeps a more natural outline and reduces the blunt, forked regrowth that follows indiscriminate shortening.
Reduction is often the least desirable way to manage a tree’s size because it removes more live tissue and can leave large wounds. Use it only where a defined conflict or structure goal calls for it, and spread the work over time when the plant’s condition allows. If the only way to make a tree fit is to repeatedly cut off its top or sides, the tree may be the wrong size for the site. Replacement with a species suited to the available space may be a better long-term answer.
Pruning vs. Trimming, Shearing, and Topping
People use “pruning” and “trimming” loosely, but purpose helps distinguish the work. Pruning usually means making selective cuts to influence health, structure, flowering, fruiting, clearance, or risk. Trimming may mean removing a small amount of new growth to maintain a neat outline. Shearing uses many shallow, often heading cuts to create a formal hedge or topiary. A hedge plant that tolerates shearing can be maintained that way, but frequent shearing is not the right method for every shrub, and it can leave a dense outer shell with poor light inside.
Heading cuts shorten a shoot somewhere along its length, often just above a bud. They can be useful for encouraging branching in the right plant and context, including formal hedges. They are different from a reduction cut back to a lateral and a removal cut at the branch collar. On tree branches, cutting across the top without a suitable lateral is not a responsible way to reduce height. “Topping” is the severe version: large upper branches are cut back to stubs or indiscriminately shortened. It damages the tree’s natural structure, can stimulate weak regrowth, and creates future maintenance and failure concerns. The University of New Hampshire pruning fact sheet explains that heavy heading cuts can produce vigorous shoots and may permanently harm the structure of trees and shrubs.
Special forms such as espalier and pollarding are deliberate training systems, not labels for any tree that has been cut back hard. Espalier guides suitable plants along a support with repeated planned cuts. Pollarding begins when a tree is young and maintains a framework through regular, consistent regrowth cuts. Do not start either system by cutting an established tree into an improvised shape; check that the species and site suit the method and learn the technique first.
Choose Tools by Branch Size and Cut
The right pruning tool makes a clean cut with a comfortable grip while keeping your body in a stable position. Branch diameter is only one consideration: wood hardness, whether it is alive or dead, branch angle, reach, tool condition, and the manufacturer’s capacity all matter. Do not force a tool through wood it is not rated to cut. A crushed or torn cut is a sign to stop and choose a better tool—or stop the job.
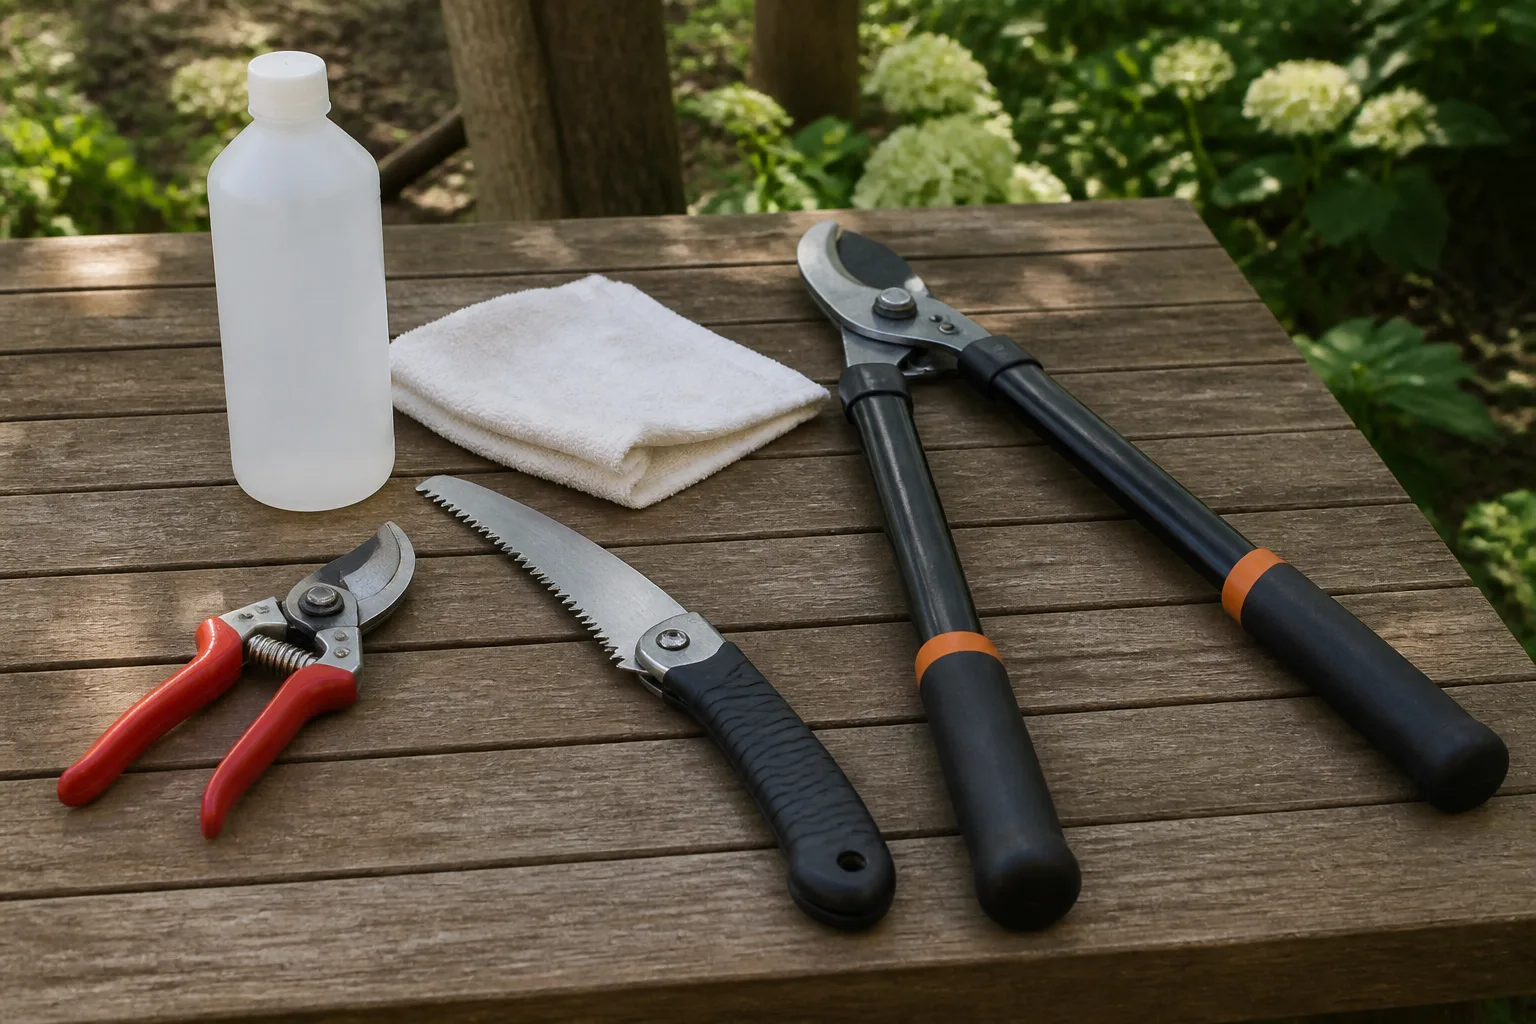
| Tool | Best use | Practical limit | | Bypass hand pruners | Small live stems and precise cuts | Use within the model’s rated diameter; replace or sharpen a dull blade | | Anvil pruners | Some dry or dead twigs | Avoid crushing live stems when a clean bypass cut is needed | | Loppers | Larger reachable branches that fit between the blades | More leverage does not make an oversized cut safe; follow the tool rating | | Folding or fixed pruning saw | Branches too large for pruners or loppers | Use only from stable ground and keep the saw path clear | | Hedge shears | Repeated light cuts on suitable formal hedges | Not for large woody branches or selective tree pruning | | Pole pruner or saw | Limited high work within the tool’s safe operating range | Do not use near power lines, unstable footing, or heavy overhead limbs |
Hand Pruners and Loppers for Small Branches
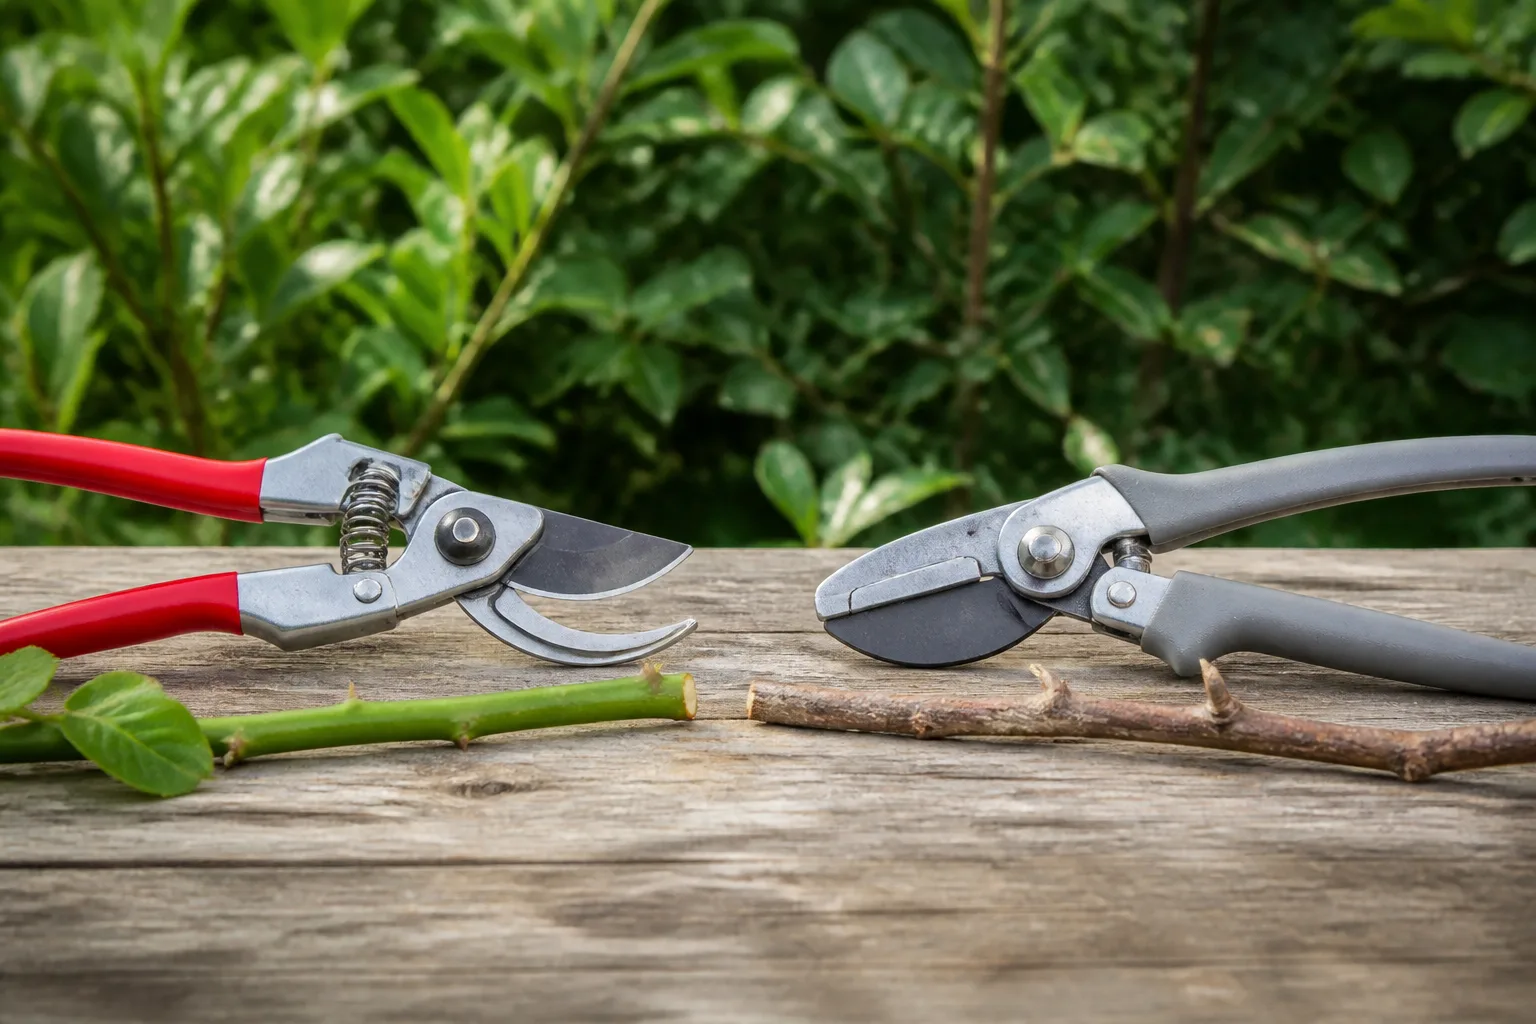
Bypass pruners have blades that pass each other like scissors, so they are usually the better choice for live stems where a clean cut matters. Anvil pruners press one blade against a flat surface and can crush tissue; they are more useful for some dry material. Loppers use longer handles for extra leverage and reach, but they should still cut without twisting or wrenching the branch. If a branch bends sharply, traps the blade, or needs repeated force, stop. A pruning saw is more appropriate than struggling with a pair of loppers.
Capacity varies by model, so the label or manufacturer’s manual should control. A common hand pruner may be designed for stems around three-quarters of an inch, while lopper capacities differ widely; these are examples, not universal ratings. The Penn State Extension tool guide explains the difference between bypass and anvil designs and why choosing the correct tool protects both the plant and the gardener.
Pruning Saws, Pole Tools, and Protective Gear
A pruning saw is designed to cut a branch that is too large for pruners or loppers. Many saws cut on the pull stroke; follow the tool’s instructions and support the branch so it does not split or tear as the cut finishes. Pole pruners and pole saws can extend reach from the ground, but they do not remove the risks of falling wood, poor balance, or branches near electrical conductors. Never prune a tree in contact with or close to a power line yourself; contact the utility or a line-clearance professional.
Wear eye protection, sturdy footwear, and gloves suited to the tool and plant. Check that the handles, blade, locking mechanism, and saw teeth are in good condition. Before cutting, identify where the branch can fall and keep other people and pets out of that area. Avoid standing directly beneath the limb or pulling it toward your face. If a limb is under tension, large enough to swing, or beyond comfortable ground reach, leave it for a qualified arborist with the right rigging and protective equipment.
Make Cuts That Preserve the Plant
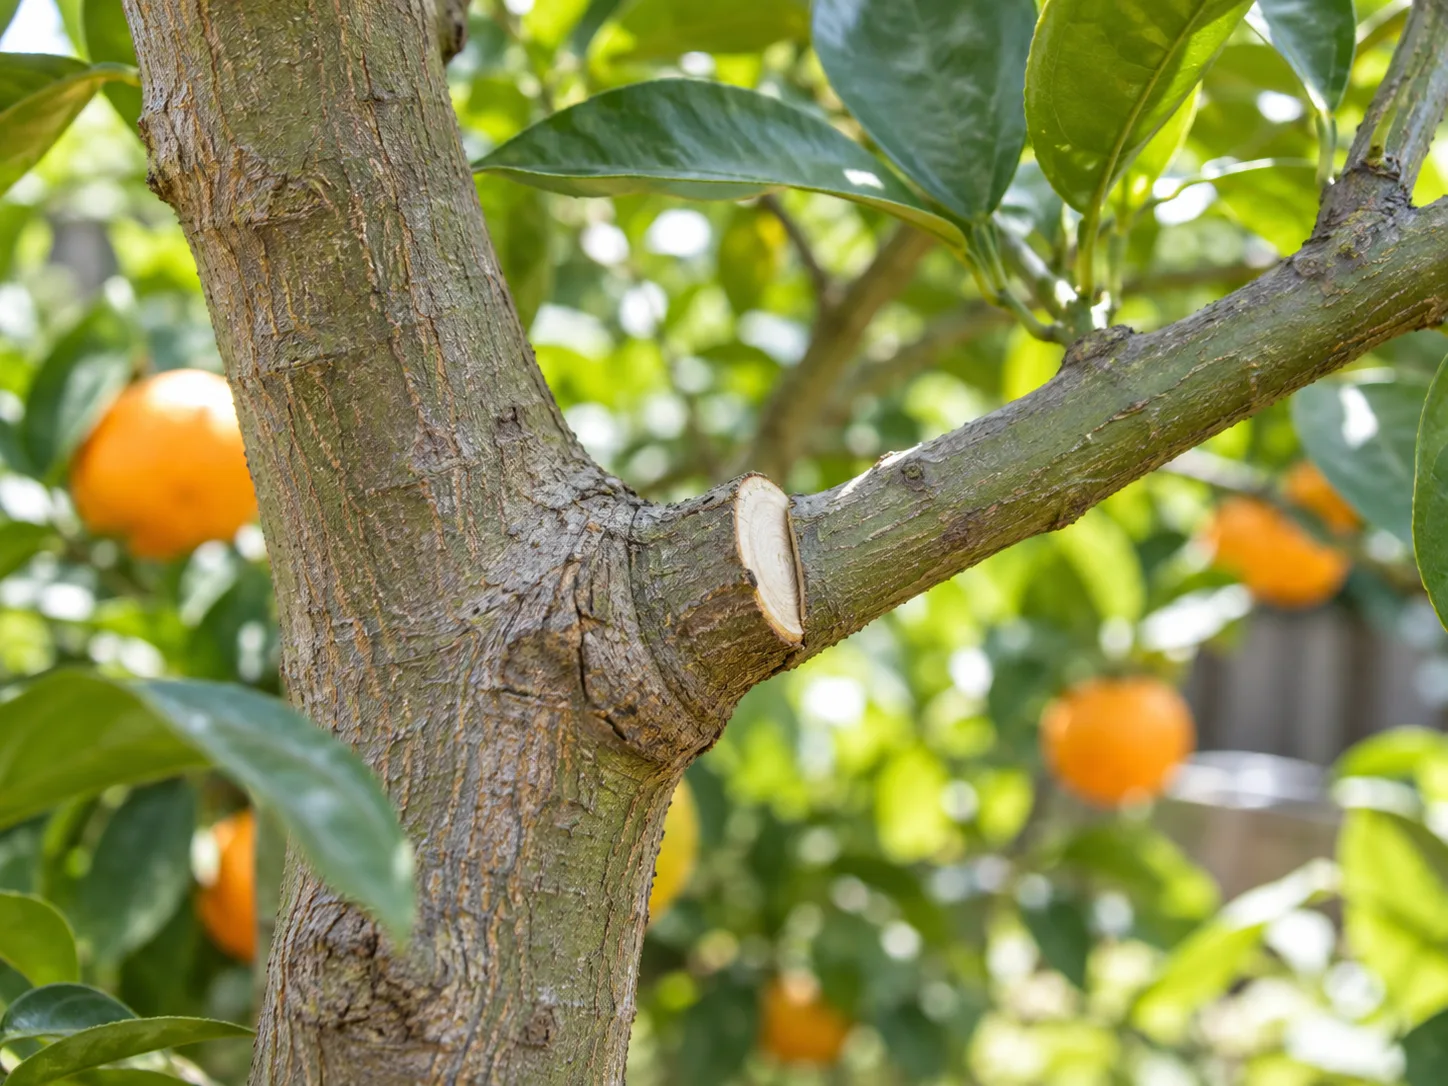
On a branch attached to a larger limb or trunk, look for two landmarks: the branch bark ridge, a raised line of bark at the upper junction, and the branch collar, the slightly swollen area around the base of the branch. Make a removal cut just outside the collar, following its natural angle. Do not cut flush against the trunk: a flush cut removes protective tissue. Do not leave a long stub either; it can die back and obstruct closure. Woody plants do not heal a wound as skin does; they compartmentalize damaged tissue and gradually grow woundwood around the cut.
For a small shoot cut back to a bud, position the cut just above a healthy bud that faces in the direction you want growth to continue. Use a slight angle away from the bud so water does not sit over it, but avoid leaving a long stem above it. For a reduction cut, return to a suitable live lateral. For a removal cut, return to the branch collar. These cut choices are not interchangeable, and a neat surface does not compensate for the wrong destination.
Use a Three-Cut Sequence for Heavy Limbs
When a branch is too heavy to remove in one pass without tearing bark, a three-cut sequence lets you remove its weight before making the final cut. This method is for a manageable branch that can be safely handled from the ground; very large or overhead limbs belong to a professional.
- Make a shallow undercut on the underside of the branch, several inches out from the branch collar.
- Make a second cut from the top, farther out from the first cut. The branch’s weight will break away at this outer cut rather than tearing down the trunk.
- Support the remaining stub if needed and make the final cut just outside the branch collar.
The distance between cuts depends on branch size and the room available, so prioritize control rather than a fixed measurement. The ISA TreesAreGood mature-tree pruning guide and Penn State Extension’s landscape-tree guide describe this weight-removal sequence. If the branch can swing, roll, bind the saw, or fall onto something valuable, stop and hire an arborist.
Choose Timing by Plant, Bloom, and Local Risk
Late winter or the dormant season is a useful window for many deciduous trees because the branch structure is visible and the plant is not carrying leaves. It is not a universal best time. The right window depends on species, bloom timing, the reason for cutting, climate, and diseases that spread during particular seasons. A calendar month that is appropriate in one region may be unsafe in another.
For spring-flowering shrubs that set buds on old wood, pruning before bloom can remove that season’s flowers. In many cases, prune after flowering instead. Shrubs that flower on new growth may be pruned before their active growth begins, though species guidance still matters. The Royal Horticultural Society’s shrub-pruning guidance explains the practical distinction between plants that flower on previous-season wood and those that flower on new growth. Check a reliable species-specific guide before doing major pruning on lilac, hydrangea, spring-flowering shrubs, fruit trees, or evergreens.
Local disease cycles can override a general seasonal rule. Oak wilt, for example, changes pruning recommendations in regions where the disease and its insect vectors are present. University of Minnesota Extension advises Minnesota residents to avoid pruning oaks from April through October; those dates are regional guidance, not a nationwide schedule. The same source gives different windows for other locally important diseases and for sap-bleeding species. Check your state or regional Extension service for current timing advice, and disinfect tools when a diagnosed disease calls for it.
Remove an immediate hazard based on safety, not the ornamental calendar. However, if a branch is large, cracked, suspended, storm-damaged, or near a structure or wire, avoid cutting it yourself. Storm tension can make wood move unpredictably. If a branch is diseased, also avoid assuming that pruning during dry weather solves the problem; confirm the diagnosis and recommended treatment first.
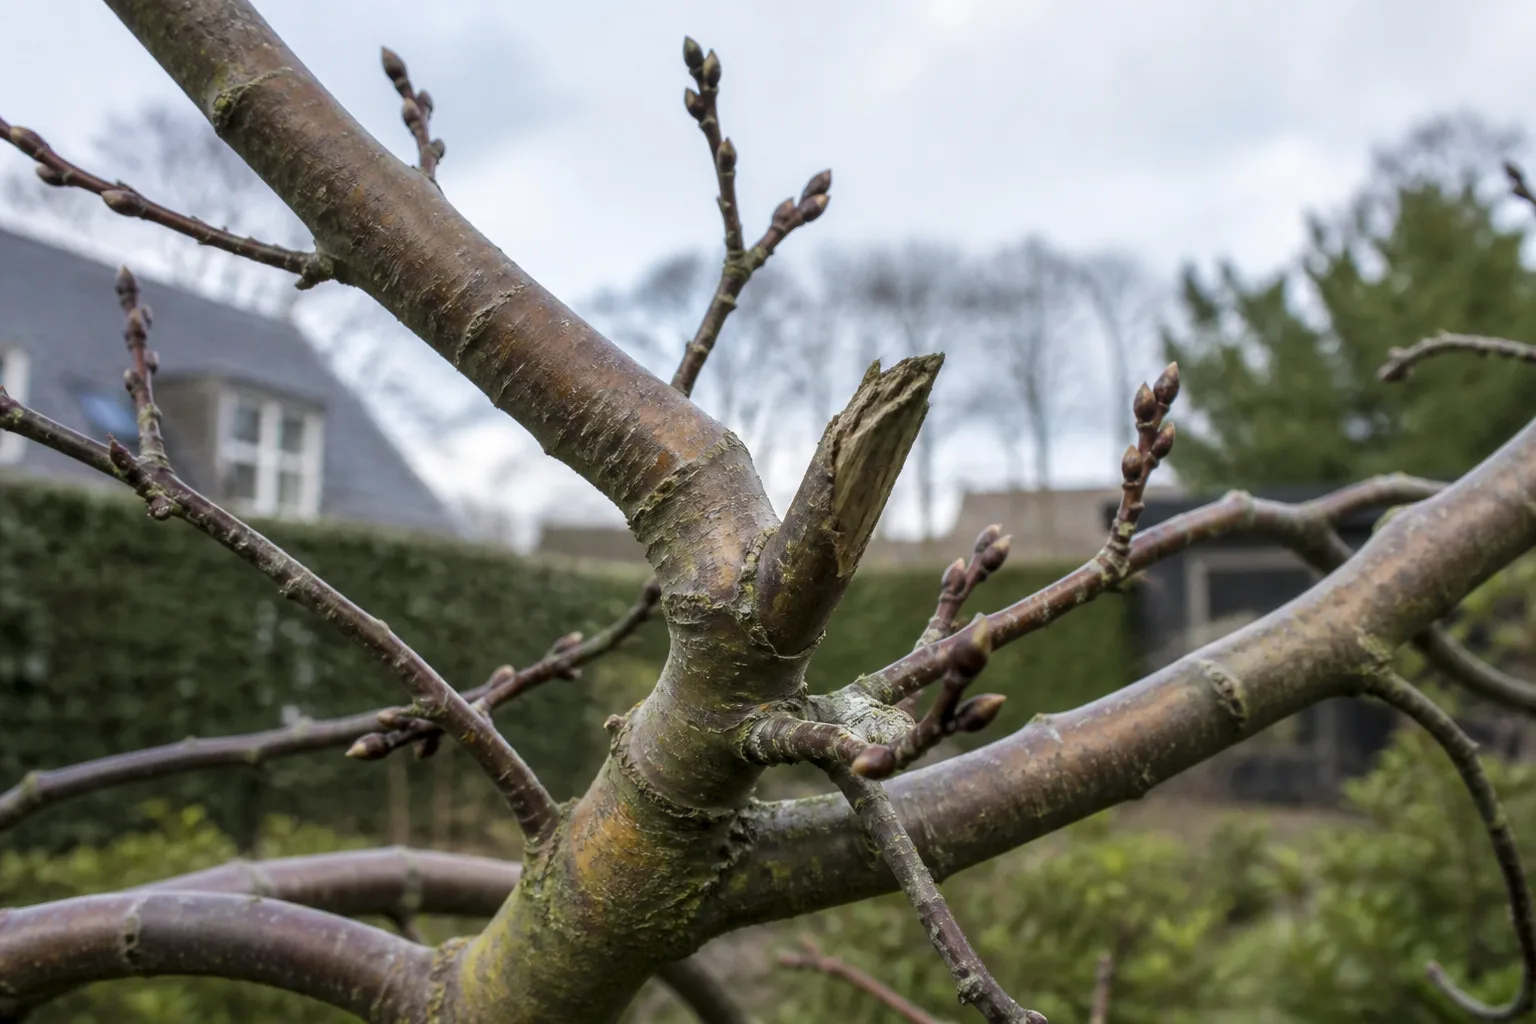
How Much Can You Prune at Once?
There is no single fraction that is safe for every plant, age, species, or condition. A familiar “one-third rule” is a rough ceiling used in some pruning advice, not a target and not permission to remove a third of every tree’s live crown. A young, vigorous shrub that tolerates renewal pruning differs from a stressed mature tree, a newly planted specimen, or a conifer that does not readily replace old growth. Some species are damaged by even modest cuts in the wrong place or season.
For a mature tree, start with only the branches needed to meet the stated goal. Retain the natural crown and avoid removing large amounts of live foliage, especially in a drought-stressed, recently transplanted, declining, or pest-affected tree. Utah State University Extension gives 20 to 25 percent of leaf area as a broad maximum for some landscape-tree pruning guidance, but even that is not a prescription for every tree or a reason to cut that much. The safe amount may be far lower, and a professional should evaluate large or compromised trees.
For an overgrown multistem shrub, gradual renewal may mean removing a portion of the oldest stems at the base over several seasons, but only when that species responds well to renewal. Severe renovation is not a cure for every sparse or diseased shrub. Fine Gardening’s guide to renewal pruning stresses that the technique suits established shrubs capable of regrowing from dormant buds; identify the species and the reason for decline before cutting hard.
If your planned cuts would remove much of a mature tree’s live crown, shorten large structural branches, or leave a plant with only a few stems, pause. Ask an ISA Certified Arborist or your local Extension office to assess whether staged pruning, a different objective, or replacement is the better plan.
Clean and Maintain Tools After Cutting
Remove sap and plant debris after a pruning session, dry the tools, and follow the manufacturer’s instructions for sharpening, lubrication, and storage. A sharp blade makes cleaner cuts and needs less force. Wear gloves when handling blades and keep tools closed or sheathed when they are not in use. Replace damaged handles, loose fasteners, or blades that cannot be sharpened to a clean edge.
Disinfection is most important when there is a known or suspected pathogen that can move on tools. Clean visible soil and plant residue off first; disinfectants work poorly through debris. Then follow the product label for concentration, contact time, and protective equipment, and consider whether the disease guidance calls for treatment between every cut or between plants. Do not assume that wiping a dirty blade once is enough. Bleach can corrode metal, so use it only when a disease recommendation and label support the method, and rinse and dry tools as directed. University of Minnesota Extension’s tool-cleaning guide explains the distinction between cleaning and disinfecting and the trade-offs of common products.
When disease is not involved, a full disinfection ritual after every healthy cut is usually unnecessary. Clean tools before moving between plants if they are muddy or contaminated, and do not use a disinfectant in a way that could injure foliage or expose you to fumes. Tool care should reduce risk, not introduce a new one.
When to Hire an Arborist
Hire a qualified arborist when a pruning job requires climbing, a ladder, chainsaw use above ground, rigging, or removal of a large limb. Also call when branches are over a roof or walkway, the tree has cracks or cavities, storm damage has left wood suspended, or you cannot tell whether a branch is hazardous. Never prune near electrical wires. Tree work combines sharp equipment, unstable wood, and height; buying a longer pole tool does not make an unsafe cut safe.
For a large tree, seek an ISA Certified Arborist or another credentialed professional with relevant tree-care experience. Ask for proof of liability insurance and workers’ compensation, references, and a written estimate describing the objectives and cuts. A responsible proposal should explain what will be removed and why, preserve the tree’s natural structure where possible, and avoid topping. The TreesAreGood consumer guidance provides a way to locate ISA credentialed arborists, while the Tree Care Industry Association’s ANSI A300 overview explains the professional standard framework used for tree-care specifications and work practices.
If the concern is a tree’s health rather than a clear branch conflict, get an assessment before authorizing broad canopy removal. Ask the arborist to distinguish dead, diseased, and structurally weak branches from healthy limbs, explain the pruning objective, and describe how much live crown will be affected. A good plan should make the work legible to you: what is cut, where the cut ends, and how the result supports the tree or the site.
Conclusion
Pruning is a deliberate choice to remove a plant part for a defined reason. Start by identifying the plant and the outcome you need, then choose among cleaning, thinning, raising, or reduction. Use the smallest suitable tool within its rated capacity, make cuts that respect the branch collar, and time the work around the species and local disease risks. Leave heavy, high, unstable, or utility-adjacent branches to a qualified arborist. If there is no clear benefit to cutting, letting the plant grow naturally is often the best pruning decision.



