When and How to Aerate Your Lawn: A Complete Guide
Learn when to aerate your lawn by grass type, test for compaction, choose a core aerator, and follow practical steps for preparation and aftercare.
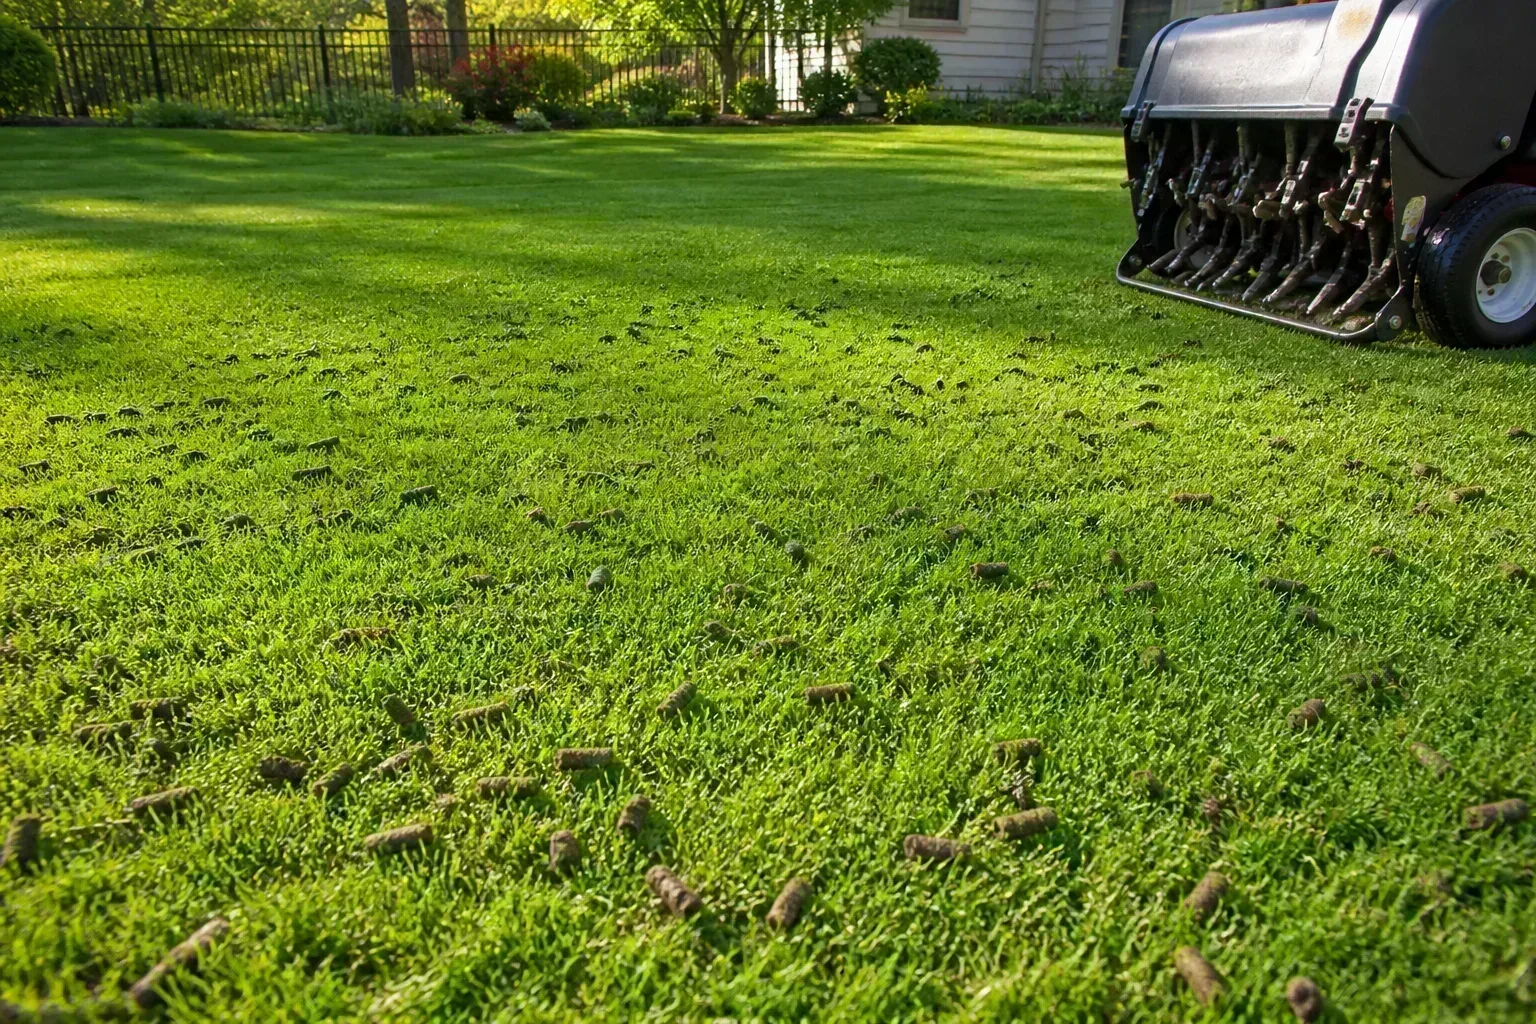
Aerate when the grass is actively growing, the soil is moist enough to take a clean core, and you have evidence of compaction—not simply because a lawn-care calendar says it is time. For most cool-season lawns, that means early fall or, when necessary, spring; for warm-season lawns, aim for late spring through early summer while the turf is growing strongly.
The method matters as much as the date. A hollow-tine core aerator removes small cylinders of soil and opens temporary channels into the root zone. A solid spike only pushes soil aside, which can make compaction worse in dense clay. The practical sequence is simple: confirm the problem, choose a good recovery window, prepare the lawn, make even core-aeration passes, and then decide whether overseeding or another treatment is actually needed.
What Lawn Aeration Actually Fixes
Lawn aeration is a mechanical way to relieve soil compaction. When people, pets, mowers, or construction equipment repeatedly press on soil—especially when it is wet—the pore spaces between soil particles shrink. Roots then have less room to grow, and water and air move more slowly through the root zone. The surface may puddle, shed rain, or stay hard even after it has been watered.
Core aeration removes plugs from the turf, creating temporary openings through the compacted surface layer. These openings can improve the movement of air and water and give roots more usable space; they also provide small pockets where fertilizer or new seed can reach the soil. Penn State Extension describes aeration as a way to relieve compaction and reduce thatch, while WVU Extension highlights heavy traffic and construction disturbance as common reasons to consider it. (Penn State Extension; WVU Extension)
Aeration is not a cure-all for a weak lawn. It will not correct a low spot that collects water, repair a broken sprinkler, replace missing topsoil, diagnose a disease, or remove a thick layer of thatch by itself. If the underlying issue is poor grading or a perched water table, opening holes in the surface may provide only temporary relief. Think of aeration as one tool for a compacted root zone, not a general lawn-revival button.
Signs Your Lawn May Need Aeration
Look for a pattern rather than a single symptom. Compaction is more likely when the grass is thin along a well-used path, around a play area, near a gate, or where vehicles have crossed the lawn, while nearby low-traffic turf grows normally. Water that ponds briefly after rain, runs off a slope before soaking in, or struggles to penetrate a hard patch is another clue. A lawn that feels firm underfoot may also be compacted, but dry soil can feel hard too, so check it when the ground has been watered or has recently had moderate rain.
Thatch deserves a separate look. A thin layer of partly decomposed stems and roots is normal; a thick, spongy mat can interfere with water movement and seed-to-soil contact. Aeration can support decomposition, but a severe thatch layer may need a dedicated dethatching or renovation plan. Penn State’s turf guidance recommends mechanical dethatching when thatch reaches about an inch, during cool weather and adequate moisture—not as an automatic annual task. (Penn State Extension)
Check Soil Compaction Before You Rent a Machine
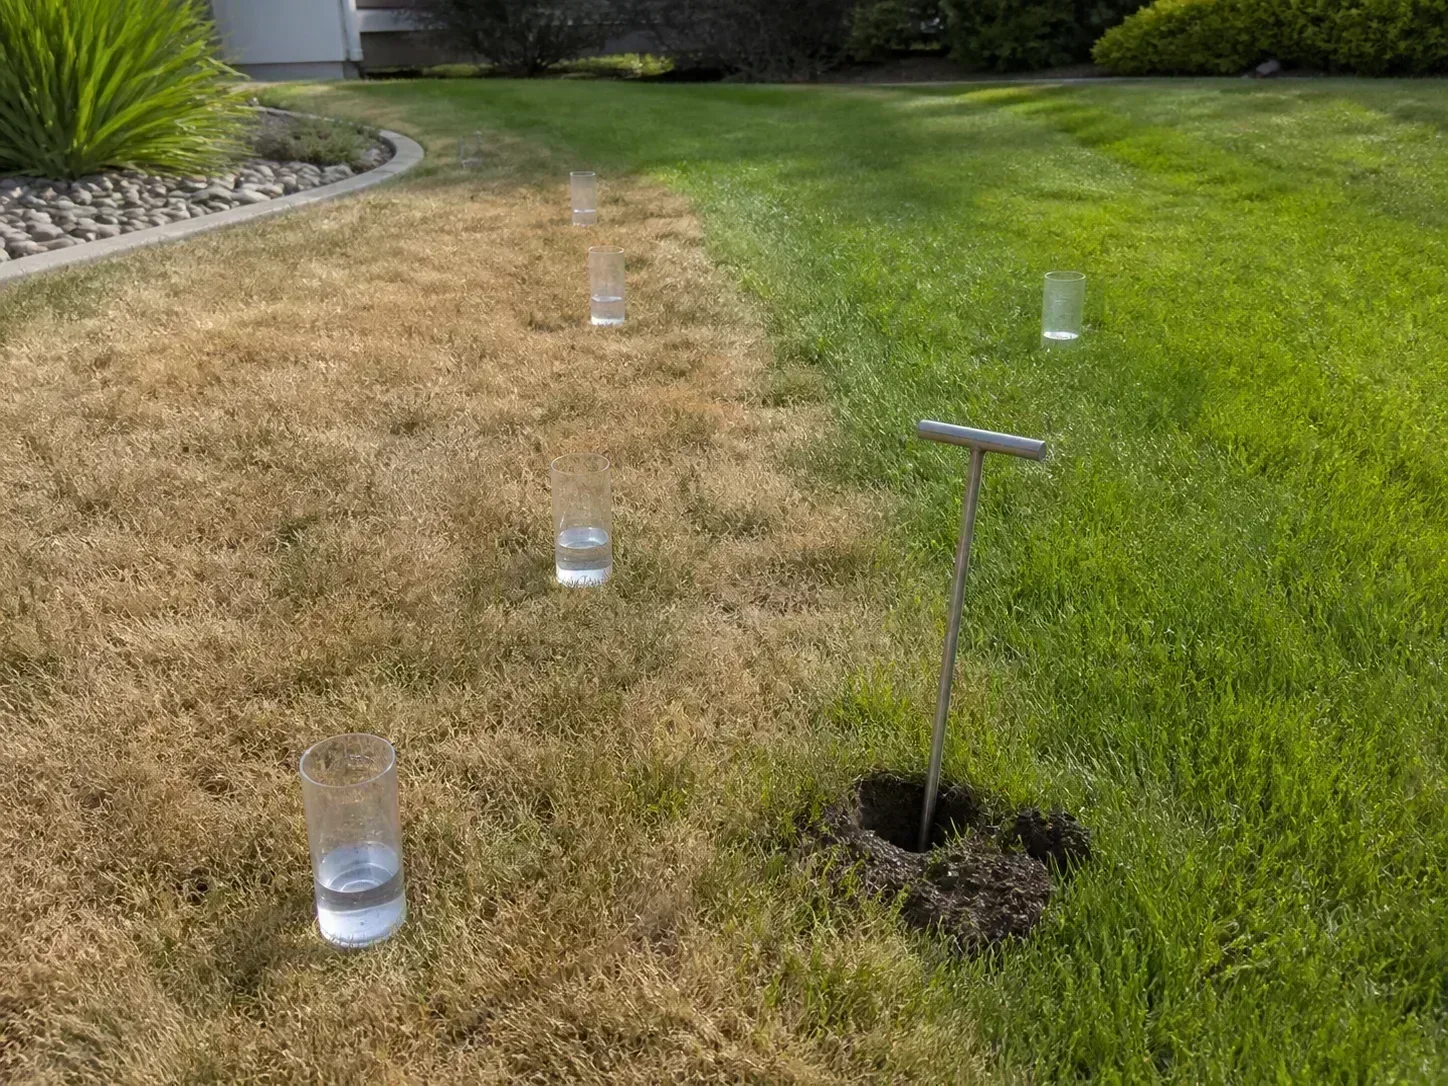
Choose a suspect area and a healthier comparison area. After watering lightly or waiting until the soil is naturally moist, press a long screwdriver into the ground with steady hand pressure. If it enters the healthy patch but repeatedly stops near the surface in the worn area, compaction is plausible. The test is not a laboratory diagnosis—roots, stones, and dry pockets can affect the result—but comparing similar spots gives you better information than testing one place once.
For a closer look, cut a narrow wedge of turf with a spade. Inspect how deep the roots extend, whether they turn sideways at a dense layer, and how the soil breaks apart. A compacted layer often feels dense and blocky; a healthy lawn soil profile is more open and crumbly. If the soil is dry, water and repeat later before concluding that compaction is severe. If a wet area remains saturated for a long time, investigate drainage as well; aeration alone may not solve it.
Map the affected zones before deciding how much to treat. A few compressed paths do not necessarily justify aerating the whole property. On a mixed lawn, mark the high-traffic sections and any broad areas with poor infiltration, then match the equipment and effort to those zones.
When to Aerate by Grass Type
The best time is when the turf can recover quickly: soil is workable, temperatures are moderate, and the grass is actively growing. The calendar month depends on grass species and local weather, not just whether you live in the North or South. If you do not know the grass type, identify it or ask a local extension office before choosing a season; a warm-season lawn aerated as it enters dormancy may recover poorly.
Cool-Season Grasses
Kentucky bluegrass, perennial ryegrass, and most fescues grow most strongly in the cooler parts of the year. Early fall is often the easiest window because the grass is regaining vigor after summer heat and still has time to recover before winter. Early to mid-spring can also work when compaction is limiting growth and the lawn is not waterlogged, but spring aeration can bring buried weed seeds nearer the surface and create open patches where weeds may establish.
Penn State Extension recommends cool-weather windows—early to mid-spring or late summer to early fall—for recovery. It also emphasizes adequate soil moisture so hollow tines penetrate and remove plugs. Those are regional recommendations, so use your local extension calendar for a more precise date, especially at high elevations or in areas with a short growing season. (Penn State Extension)
If you plan to overseed a cool-season lawn, aerate during the locally recommended seeding window rather than choosing aeration timing in isolation. That lets seed fall into the holes and nearby loosened soil while the grass has a favorable period to germinate. The best window differs across regions; do not copy a Pennsylvania or Wisconsin date without adjusting for your own climate.
Warm-Season Grasses
Bermudagrass, zoysiagrass, St. Augustinegrass, and centipedegrass grow most actively in warm weather. Aerate after green-up, once the lawn is growing consistently, and before late-season cooling slows recovery. NC State Extension’s homeowner guidance places warm-season core aeration in late spring or early summer, while the cool-season window is fall. Elevation, drought, irrigation, and local heat can still shift the practical window. (NC State Extension)
Avoid running a heavy aerator over dormant warm-season turf in early spring just because the soil is no longer frozen. Dormant grass cannot quickly cover the holes, and exposed soil may invite weeds. If the turf has not greened up and begun growing, wait. Extension recommendations are not perfectly uniform: a WVU Extension page lists fall for warm-season grasses, while NC State recommends late spring or early summer. Treat that difference as a signal to follow your local turf program and the grass’s active growth rather than transplanting a calendar from another region. (WVU Extension; NC State Extension)
Let Local Weather Refine the Calendar
Even a good seasonal window is not a good day if the lawn is waterlogged, frozen, drought-stressed, or under severe heat. Let the grass’s growth and the soil’s condition overrule a date on a checklist. A recent soaking rain followed by a day or two of drainage may leave soil workable; heavy rain that leaves footprints full of water does not.
Regional advice sometimes differs because the grasses and weather differ. Wisconsin Extension, for example, describes October as suitable for core aeration in its local fall guidance when soil moisture is adequate. Colorado State University’s PlantTalk guidance says spring and fall are generally favorable in Colorado but cautions against extreme heat and dryness. Treat those calendars as climate-specific examples, then follow the cooperative extension service nearest your home. (Wisconsin Extension; PlantTalk Colorado)
When to Wait or Choose Another Fix
Wait if the soil is bone dry and hard enough that the tines bounce, or so wet that the machine sinks and leaves ruts. Dry soil makes core removal difficult and can tear turf; saturated soil smears and compacts under wheel and foot traffic. If you cannot get a test plug with a spade without fighting the ground, conditions are probably not ready.
Do not aerate frozen soil, dormant turf that cannot recover, or grass in a heat or drought crisis unless a local turf professional gives a specific reason. Avoid using a heavy machine on a steep, slippery slope or on a newly seeded lawn with fragile seedlings. Mark sprinkler heads, shallow irrigation lines, invisible dog fences, and any known shallow cables before the first pass; a tine that catches buried equipment can cause costly damage.
Consider a different fix when the symptoms point elsewhere. A low spot with standing water may need regrading or drainage work. A thick thatch layer may need dethatching during a safe growth window. Brown patches may be disease, drought, insects, or poor irrigation rather than compaction. Check the soil and roots before treating the lawn based on appearance alone.
Choose the Right Aerator for Your Lawn
Match the tool to the actual problem and the area. For a small, localized patch, a manual hollow-tine tool can be precise and inexpensive. For a large lawn or widespread compaction, a powered core aerator saves time and produces more consistent coverage, though it is heavy and takes practice to control. If you only need to loosen a small border or garden bed, a digging fork can open soil, but it is not an efficient substitute for a core aerator across a full lawn.
Why Core Aeration Is the Best Default
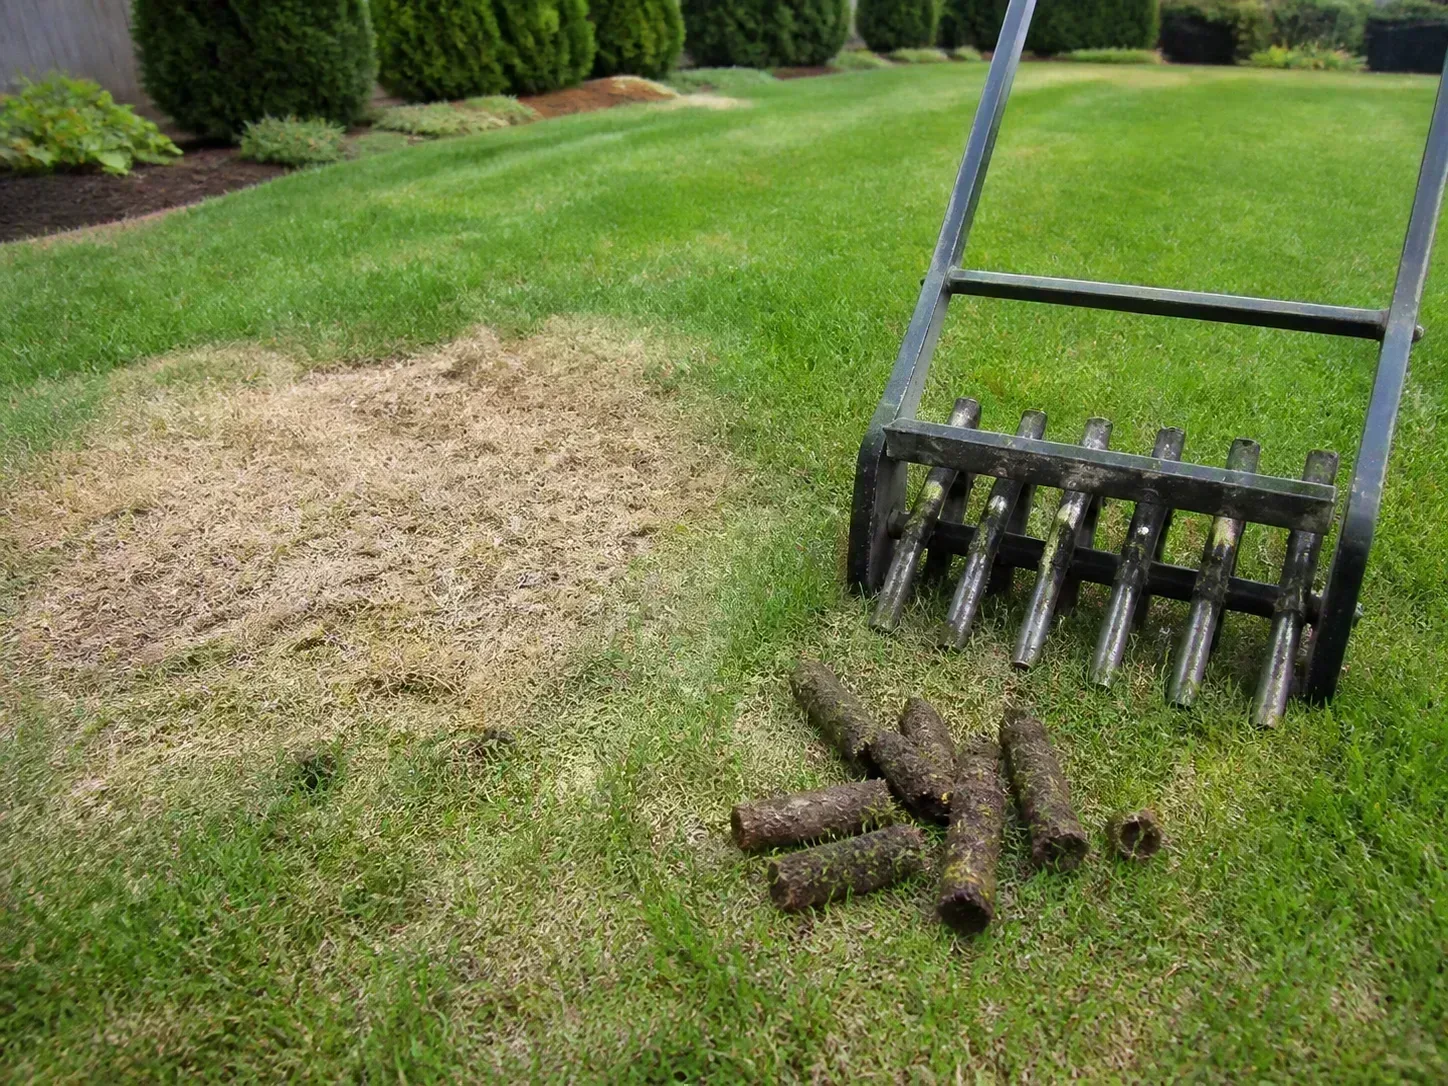
A core aerator has hollow tines that pull out short cylinders of soil. Removing soil creates actual voids rather than forcing surrounding particles sideways, which is why extension sources generally favor core aeration for compacted lawns. Colorado State University guidance describes cores roughly 2 to 3 inches deep and spaced about 2 to 4 inches apart as effective technique; a home machine’s actual result depends on its tine size, weight, soil, and speed. Do not force a particular pattern if the equipment manual specifies a different pass rate. (PlantTalk Colorado; WVU Extension)
For a heavily compacted clay lawn, a second pass at a different angle may improve coverage if the machine is extracting clean plugs and the turf is holding up. Do not make repeated passes simply to create a dramatic field of holes. The goal is to relieve a restricting layer without shredding the surface or rutting the lawn. A good core is a soil cylinder, not a shallow dent with a smear of mud.
Where Spikes, Shoes, and Liquid Products Fit
Solid-tine spike aerators punch or wedge into the soil but leave the displaced soil in place. They may be adequate for light surface loosening in some sandy or already loose soils, but they are not the first choice for dense clay or clear compaction. A spike can press soil sideways around the hole; repeatedly rolling over a compacted clay lawn is not equivalent to pulling cores. Aerator shoes have the same limitation and often penetrate unevenly because a person’s weight and stride vary.
“Liquid aeration” is a label used for different soil conditioners, surfactants, or biological products. These products may help with particular water-repellency or soil-conditioning goals when used as directed, but they do not physically remove compacted soil cores. Do not treat a spray as a mechanical replacement when a screwdriver test shows a dense layer or the soil plugs are tightly packed. Read the label, identify what the product is designed to do, and avoid spending on vague promises to “open” a lawn without evidence.
Prepare the Lawn and Equipment
First, confirm that the machine is a core aerator if removing plugs is your objective. Read its instructions before renting or operating it; powered models can be heavy, may lurch when the tines engage, and can be difficult to steer at boundaries. If the rental counter cannot show you how to disengage the tines and turn safely, ask for a demonstration before taking it home.
Mark irrigation heads, shallow lines, lighting wires, invisible fences, and any other buried system. Clear sticks, toys, stones, hoses, and furniture from the lawn. Mow a little shorter than usual if long blades will tangle in the equipment, but do not scalp the turf; leave enough leaf area for recovery. A clean, even surface also makes missed strips easier to see.
LawnStarter’s practical prep guide likewise recommends marking irrigation hazards, clearing debris, and moistening dry soil before operating an aerator. Treat that as a preparation checklist, not a substitute for the rental machine’s own operating and safety instructions. (LawnStarter)
Check soil moisture a day ahead. If rain has not softened the soil, water enough to moisten the root zone, then allow excess water to drain. The aim is damp, crumbly soil that releases plugs—not mud that sticks to tines or dry ground that resists them. Colorado State University and WVU Extension both stress adequate moisture for effective core removal. (PlantTalk Colorado; WVU Extension)
If you are overseeding, have the right grass seed ready and confirm the local seeding window before starting. If you are applying fertilizer or a weed-control product, check its label and local guidance first; aeration can alter where materials move in soil, and some pre-emergent weed barriers may be disrupted by cultivation. Do not combine treatments automatically just because the equipment is already on site.
How to Aerate a Lawn Step by Step
- Test a small area. Start in an inconspicuous section. Confirm that the tines enter the ground and extract cores without tearing the sod or sinking the machine.
- Work in straight lanes. Begin at an edge and move at the slow, even pace recommended by the manufacturer. Let the tines penetrate fully; rushing can leave shallow marks instead of useful channels.
- Overlap slightly. Keep each pass close enough to avoid wide untreated strips. Use the spacing guidance for your machine and the level of compaction rather than improvising a tight grid that overworks the lawn.
- Cover the target area consistently. Make one full pass over the compacted zone. For stubborn areas, inspect the cores and surface before deciding whether a second, crosswise pass is appropriate.
- Ease off around obstacles. Lift or disengage tines before turning, crossing pavement, or approaching sprinkler heads. Do not operate across a buried line you cannot identify or on a slope where you cannot control the machine.
Make Consistent Passes Without Scalping the Turf
Keep the aerator moving at a steady pace and avoid turning sharply while tines are engaged. If it leaves torn strips, shallow holes, or ruts, stop and reassess moisture, machine settings, and direction. A second pass should improve coverage, not grind the lawn into loose soil.
For a small lawn, work a manual hollow-tine aerator in a grid, focusing first on compressed paths and play areas. Press the tool straight down, remove the core, and repeat at even intervals. This takes patience; if the tool only makes narrow punctures without extracting soil, it is functioning like a spike, not a core aerator. For a large property, uneven terrain, or heavily compacted soil, renting a powered unit or hiring a trained operator may be safer and more effective.
What to Do With the Soil Plugs
In most cases, leave the cores on the lawn. Let them dry for a few days, then allow rain, mowing, and ordinary activity to break them apart and return fine soil and organic matter to the turf surface. Colorado State University advises leaving cores when thatch is more than about half an inch so they can work back into the lawn; other lawns may have the plugs removed or left depending on the result and local advice. (PlantTalk Colorado)
If plugs are large, wet, and clumped, avoid dragging them across the lawn while they are sticky. Once dry and crumbly, a light rake or mower pass can disperse them. Remove only material that forms thick piles or creates a problem, and do not assume that every plug must be bagged. The holes are temporary: soil around them settles, grass grows, and normal maintenance restores the surface.
Expect the lawn to look rough at first. Visible cores and small openings are normal, not proof that the job failed. A healthy, actively growing lawn should gradually knit over the marks; improvement in density or water infiltration is measured over weeks and subsequent growth, not the same afternoon.
Overseeding, Fertilizer, and Aftercare
If the lawn is thin and the grass type needs renewal, overseed during the correct local planting window. Core aeration makes small pockets where seed can contact soil, but it does not replace seedbed preparation or careful watering. Spread an appropriate seed blend at its label rate, keep the surface evenly moist during germination, and avoid heavy foot traffic until seedlings are established. Penn State Extension notes that overseeding can follow aeration and recommends multiple core-aerator passes when overseeding into thin turf; follow your regional extension guidance for the right rate and timing. (Penn State Extension)
Epic Gardening’s fall-renovation walkthrough also places core aeration within a larger repair sequence for thin or bare lawns, followed by seed and, when useful, light topdressing. That is a renovation option, not a required add-on for every aerated lawn; topdress only when the lawn’s condition and soil plan call for it. (Epic Gardening)
Do not fertilize by reflex. A soil test can tell you whether phosphorus, potassium, or pH correction is warranted; aeration does not mean the lawn needs a nutrient dose. If a fertilizer is appropriate, use the label rate and the season suited to your grass. Avoid applying any product to wet foliage or before heavy rain when the label warns against it, and keep granules out of storm drains and waterways.
Water after the work if the surface is dry, but do not flood the lawn. If you have seeded, follow the seed’s moisture needs, which are more frequent and lighter than established-turf watering. If you have not seeded, return to a normal deep-watering pattern based on rainfall and soil conditions. Keep heavy equipment and concentrated traffic off the lawn while it settles; ordinary light use is not usually a reason to cordon off the yard for weeks.
Common Aeration Mistakes to Avoid
Aerating every year without checking the lawn. Some lawns compact quickly; others do not. Repeated aeration without a need can waste money and disturb turf, especially if the timing is poor. Base frequency on soil texture, traffic, and observable compaction.
Working soil that is too wet or too dry. Wet soil smears and ruts; dry soil resists the tines and may tear grass. Test moisture first and wait for workable conditions.
Using spike shoes as if they were core aeration. Punctures do not remove soil. In compacted clay, choose hollow tines or address the underlying soil issue instead of repeatedly pressing it sideways.
Choosing timing by month alone. The same date can be right for one grass type and wrong for another. Aerate during active growth and use a local extension calendar to refine the season.
Expecting aeration to fix drainage, weeds, or severe thatch on its own. Diagnose the actual cause. Aeration may be part of a repair plan, but it is not a substitute for grading, drainage work, targeted weed management, or appropriate dethatching.
Skipping the hazard check. A single hit to an irrigation head or buried wire can turn routine lawn care into a repair job. Mark hazards and clear the surface before powering up.
DIY or Hire a Lawn-Care Professional?
For a compacted patch or a small, mostly level lawn, a manual hollow-tine tool can be practical if you have the time and the soil is moist. A powered rental makes more sense for a larger area, but it requires transport, safe handling, and enough control to avoid rutting. Compare the full rental cost—including delivery or vehicle capacity, fuel, and the time required—with a professional quote.
Consider hiring a turf professional for a very large lawn, steep ground, heavy clay that defeats a small machine, extensive irrigation, or uncertainty about whether compaction is the real problem. Ask what tool they plan to use, how they will protect buried systems, whether the quote includes one or more passes, and whether overseeding is included or separate. A useful contractor should explain the grass-specific timing and the reason the lawn needs aeration, not promise a fixed improvement regardless of site conditions.
Professional service is not automatically better for every lawn, and DIY is not automatically cheaper once time and equipment are counted. The best choice is the one that gets the right type of core aeration across the affected area without damaging turf or infrastructure.
Conclusion
Aerate when a simple check points to compacted soil, your grass is actively growing, and the ground is moist but not muddy. Use a hollow-tine core aerator for meaningful compaction, apply the timing for your cool- or warm-season grass, and postpone the job during drought, heat stress, dormancy, or saturated conditions.
Then let the plugs dry and crumble, overseed only if the lawn needs it and the season is right, and avoid adding fertilizer without a reason. If the problem is poor drainage, severe thatch, or something other than compaction, correct that cause instead. This diagnosis-first approach makes aeration a useful repair—not another lawn chore done by habit.



