Why Is My Orchid Dying? 12 Signs You Need to Change Its Care
Why is my orchid dying? Learn to tell normal leaf aging and post-bloom rest from root damage, pests, or disease, then choose the right first check now.
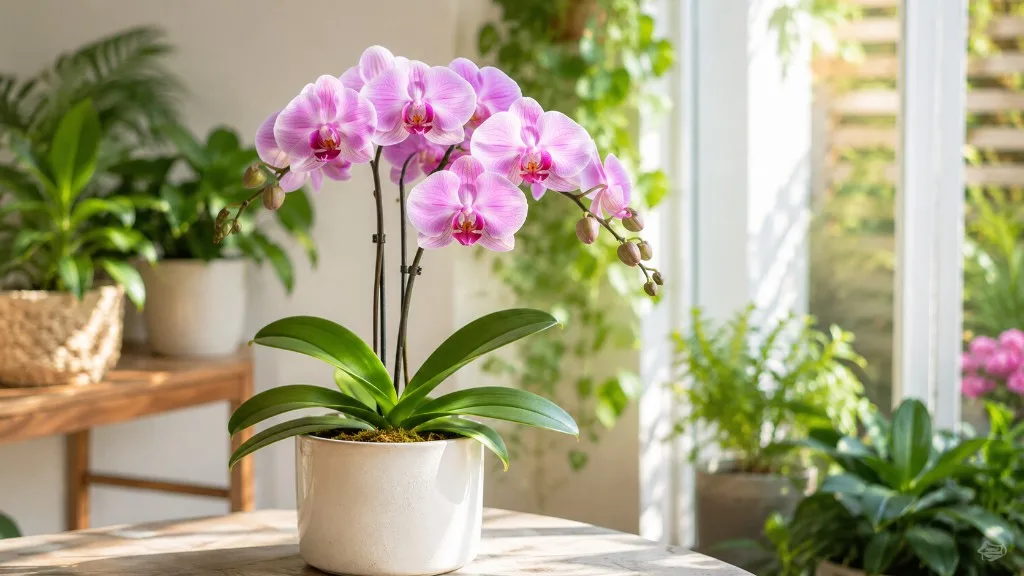
An orchid can look alarming after its flowers fall, an old leaf yellows, or its roots turn silver. Those changes do not all mean the plant is dying. An orchid is in serious decline when important tissues keep collapsing, healthy roots are disappearing, or damage is spreading faster than the plant can replace it.
Start with the pattern, not a single symptom. Check whether the affected tissue is old or new, whether the pot is wet or dry, and whether roots and the crown are firm. The same wrinkled leaf can point to a dry pot or to roots damaged by staying wet, so an extra drink is not always the kindest first response.
First, judge the whole plant—not one flower
An orchid that has finished blooming may rest for weeks or months before it produces another leaf, root, or flower spike. Flower spikes can also brown after the blooms fade. That is a normal end to flowering; it is not evidence that the whole plant is dying. Some orchids have a noticeable rest period, while others keep growing slowly, so the plant’s identity and its previous cycle matter more than a fixed calendar.
Look for living growth points and firm structures. A Phalaenopsis should have a firm central crown and leaves that remain attached; a Cattleya or Dendrobium may have older pseudobulbs or canes that look less attractive but still store water and support new growth. A lower leaf that yellows gradually while the rest of the plant stays firm is very different from several new leaves collapsing in a few days.
One yellow leaf, a bare flower spike, or a month without visible growth is not enough to declare an orchid dead. A soft, blackening crown, a base that is turning to mush, or a root system with widespread collapse is more serious. If there is still firm green tissue or a healthy pseudobulb, recovery may be possible, but the plant may take months to replace roots and leaves.
Check the roots and medium before changing care
Roots help distinguish a plant that lacks water from one that cannot take up water. If the orchid is in a clear nursery pot, look through its sides and drainage holes before removing it. Healthy Phalaenopsis roots are usually firm and plump; they may look green when wet and silvery or gray when dry. Color can be misleading: bark stains roots, roots in the center of a pot may be pale, and some other orchid genera naturally have different root colors. Texture and whether a root is intact tell you more than color alone.
Feel the medium through the pot or lift the inner pot. A pot that stays heavy and damp for many days, old compacted bark, standing water in a decorative cover, or a sour smell raises concern about poor aeration. A dry pot with firm roots and wrinkled leaves points in a different direction. If the visible roots are mostly healthy and the medium drains well, do not unpot the plant just to satisfy curiosity; unnecessary handling can break active root tips.
Royal Botanic Gardens, Kew recommends using both the pot’s weight and whether the growing medium has dried as cues for watering windowsill orchids. That is more useful than a fixed weekday because bark, moss, pot size, room temperature, and airflow change how quickly a pot dries. Kew’s orchid care guidance also distinguishes watering from leaving a plant standing in water.
Unpotting is justified when leaves are declining while the medium remains wet, roots are disappearing, or the mix has broken down and no longer drains. Slide the plant out gently, remove loose old mix, and inspect the full root system. If you need to cut clearly dead tissue, use a clean tool and disinfect it before moving to another cut or plant. Do not cut a firm root because it looks brown, and do not assume a shriveled aerial root is dead without checking its texture.
12 signs your orchid needs a care change
Use each sign as a reason to make a targeted check, not as a standalone diagnosis. If several signs appear together—especially new leaves going limp while roots are soft—look for a shared cause before trying separate treatments.
1. One lower leaf turns yellow slowly
The oldest bottom leaf may yellow and eventually fall as the orchid replaces it. This is more likely normal aging when just one lower leaf changes slowly, the crown remains firm, roots are intact, and the newest leaf looks normal. Let the leaf finish yellowing; it can still supply energy while part of it remains green. Remove it only when it is mostly dry or comes away easily, rather than pulling or cutting into healthy tissue.
If several leaves yellow at once, the yellowing moves upward, or the leaf is accompanied by soft roots, pests, or a weakening crown, do not write it off as age. The New York Botanical Garden and Smithsonian Gardens’ orchid horticulturist both describe natural lower-leaf loss as something to separate from broader decline. Better Homes & Gardens’ orchid troubleshooting guide gives similar context for moth orchids.
2. Several leaves yellow or new growth pales
Multiple yellowing leaves deserve a closer look, but yellow alone does not identify the cause. Check the root system, then review recent changes: a longer stretch of direct sun, a colder window, a warm heater vent, a move to a dim room, a pot left standing in water, or a new fertilizer routine. A broad change in light or root function can affect more than one leaf, while an isolated lower leaf often does not.
Do not respond by simultaneously moving the plant, watering more, adding fertilizer, and cutting leaves. That makes it hard to tell what helped and can compound root stress. Correct the condition you can verify, then judge progress by the next leaf or root tip; already yellow tissue will not turn green again. If the pattern is irregular streaks, rings, or pitting, isolate the plant while you seek a diagnosis instead of assuming it is a nutrient problem.
3. Leaf tips turn brown or crunchy
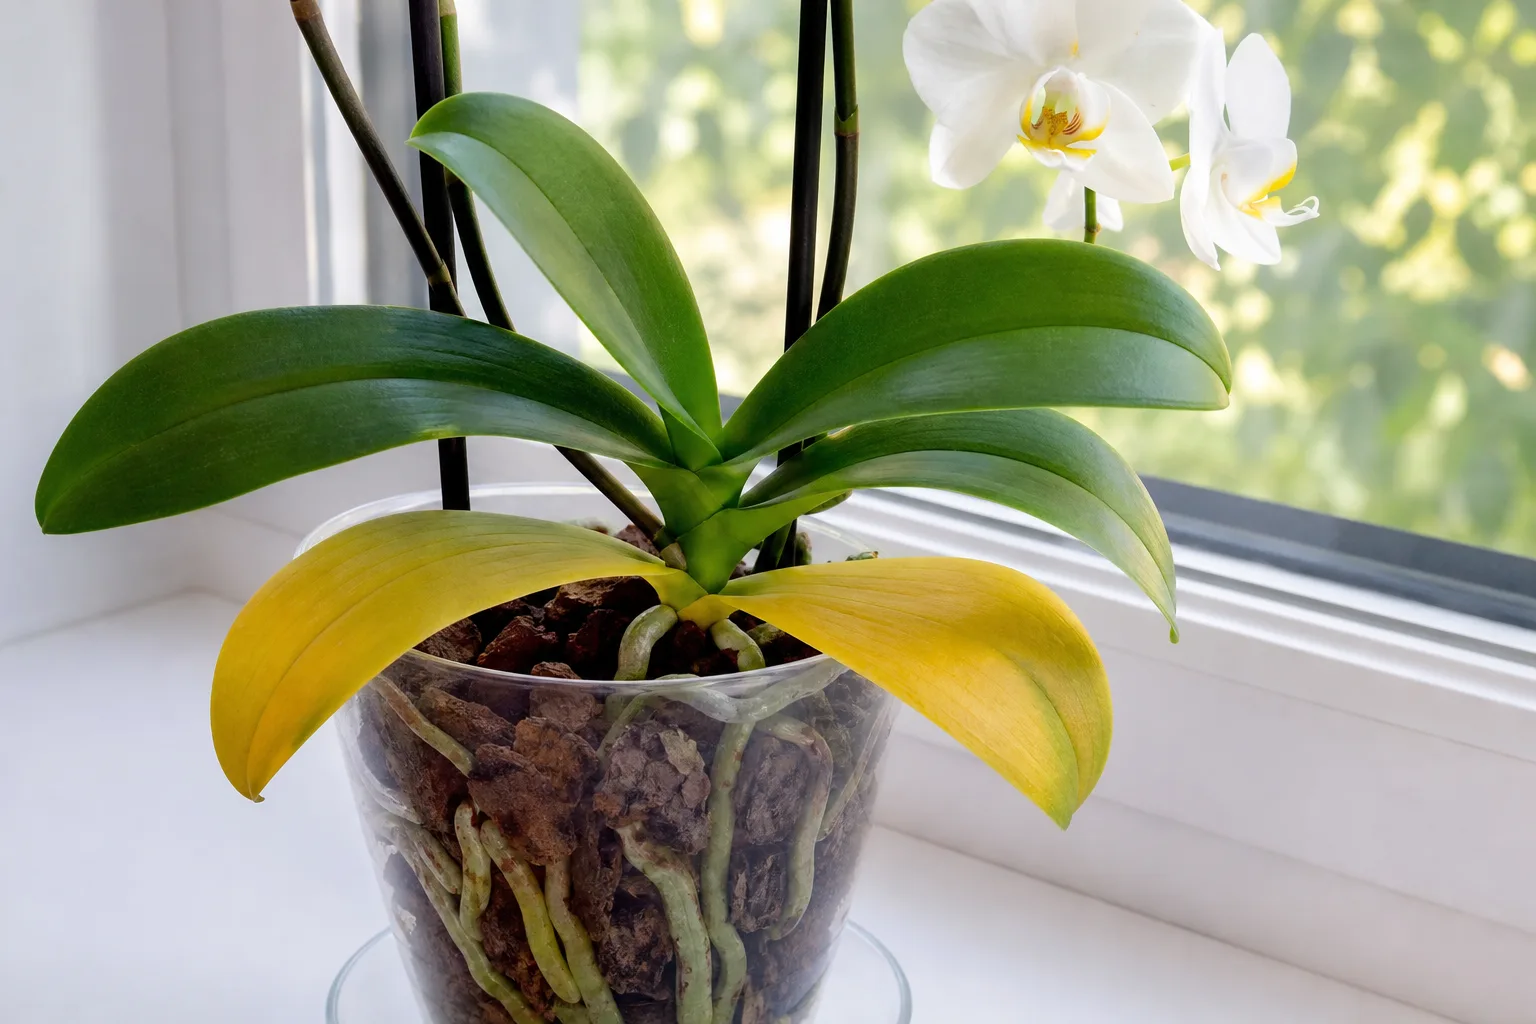
Brown tips can follow dry air or a long gap between waterings, but they can also result from roots that are failing to move water, fertilizer salts, or mineral buildup. A small, stable brown tip is usually less urgent than a leaf that is turning yellow or soft from the base. Check whether the damage is limited to older leaves, whether the medium dries unusually fast, and whether white crust has collected around the pot or mix.
Correct the condition you can verify. If the mix is dry and roots are firm, water thoroughly and drain; if the pot stays wet or roots are soft, investigate the root zone instead of increasing water. Do not mist leaves as the default fix, since droplets that sit in the crown or on damaged tissue can create more trouble. Trim only fully dead, dry tissue if you need to, using clean scissors, and leave a margin so the cut does not enter healthy green leaf. Iowa State University Extension notes that excess fertilizer can also burn root and leaf tips and leave salts on the pot, so look for buildup before adding more feed. Iowa State University Extension’s orchid diagnosis guide recommends wetting the medium before fertilizing and flushing it regularly to limit salt accumulation.
4. Leaves wrinkle or stay limp
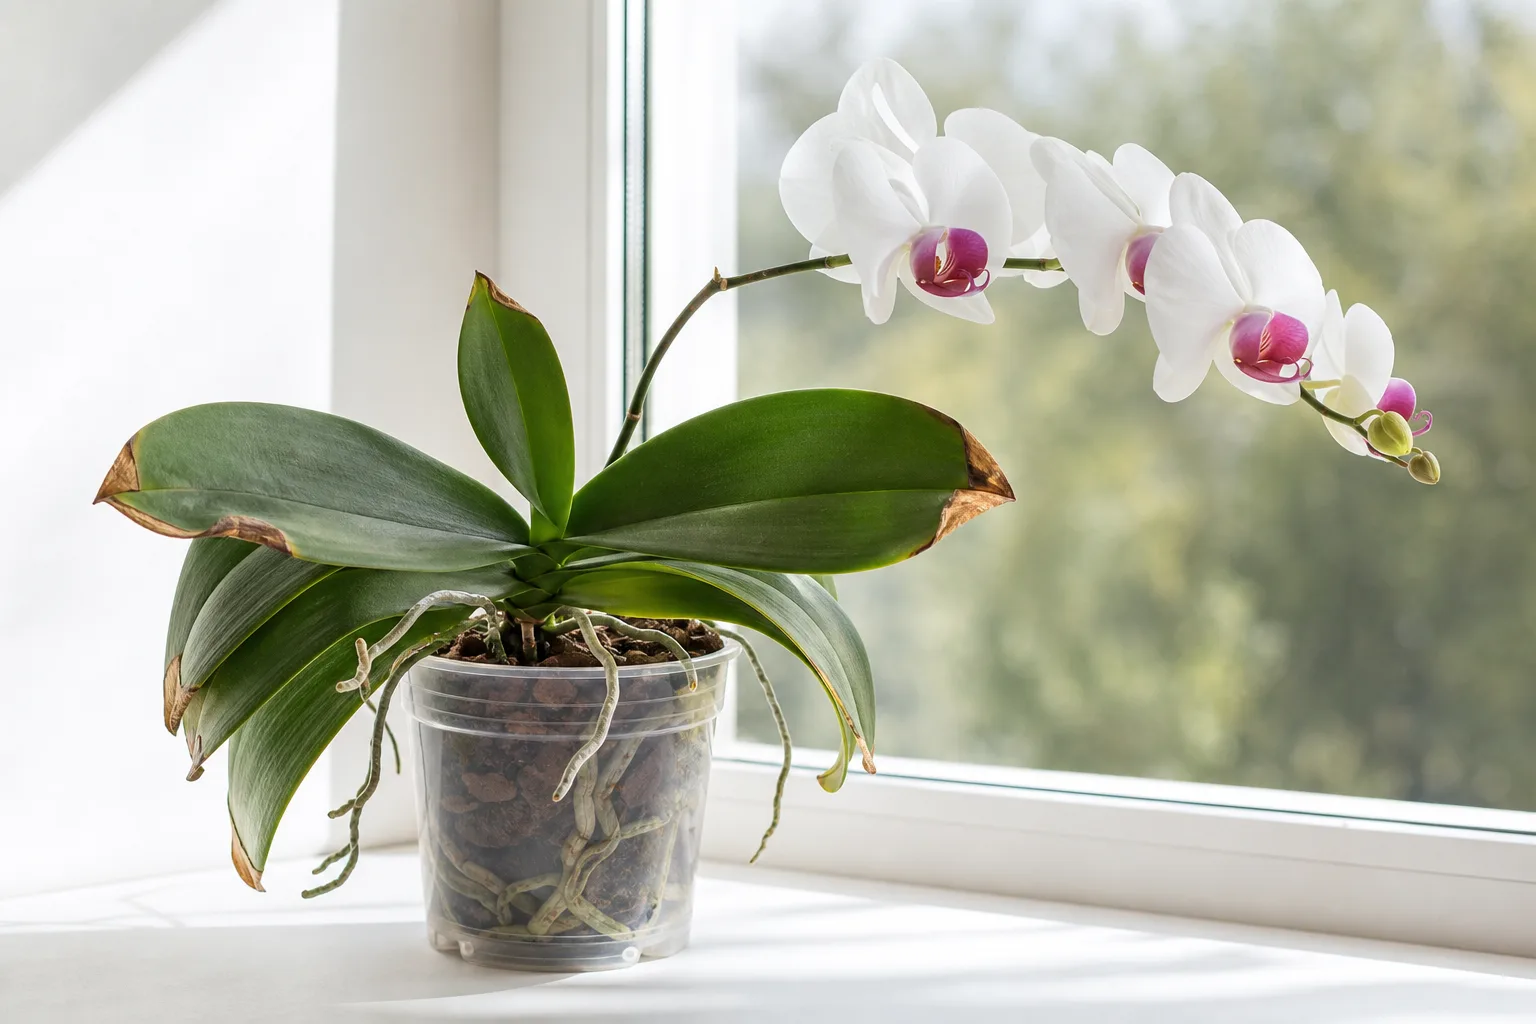
Accordion-like folds and leaves that remain limp show that the plant is not keeping enough water in its tissues, but the pot may not be dry. Roots damaged by rot, cold, or a depleted medium cannot move water effectively, even when surrounded by it. If the bark is damp and the roots are soft, watering again can worsen the conditions that caused the leaves to wrinkle.
Check the medium and the roots before you change frequency. If the pot is wet, inspect for soft or hollow roots and stale mix. If the pot is genuinely dry and the roots are firm, water thoroughly and let all excess drain. Existing folds usually do not smooth out; watch the next leaf for healthier growth. The New York Botanical Garden’s troubleshooting guide also advises tying watering decisions to the plant’s home conditions rather than using one schedule for every orchid.
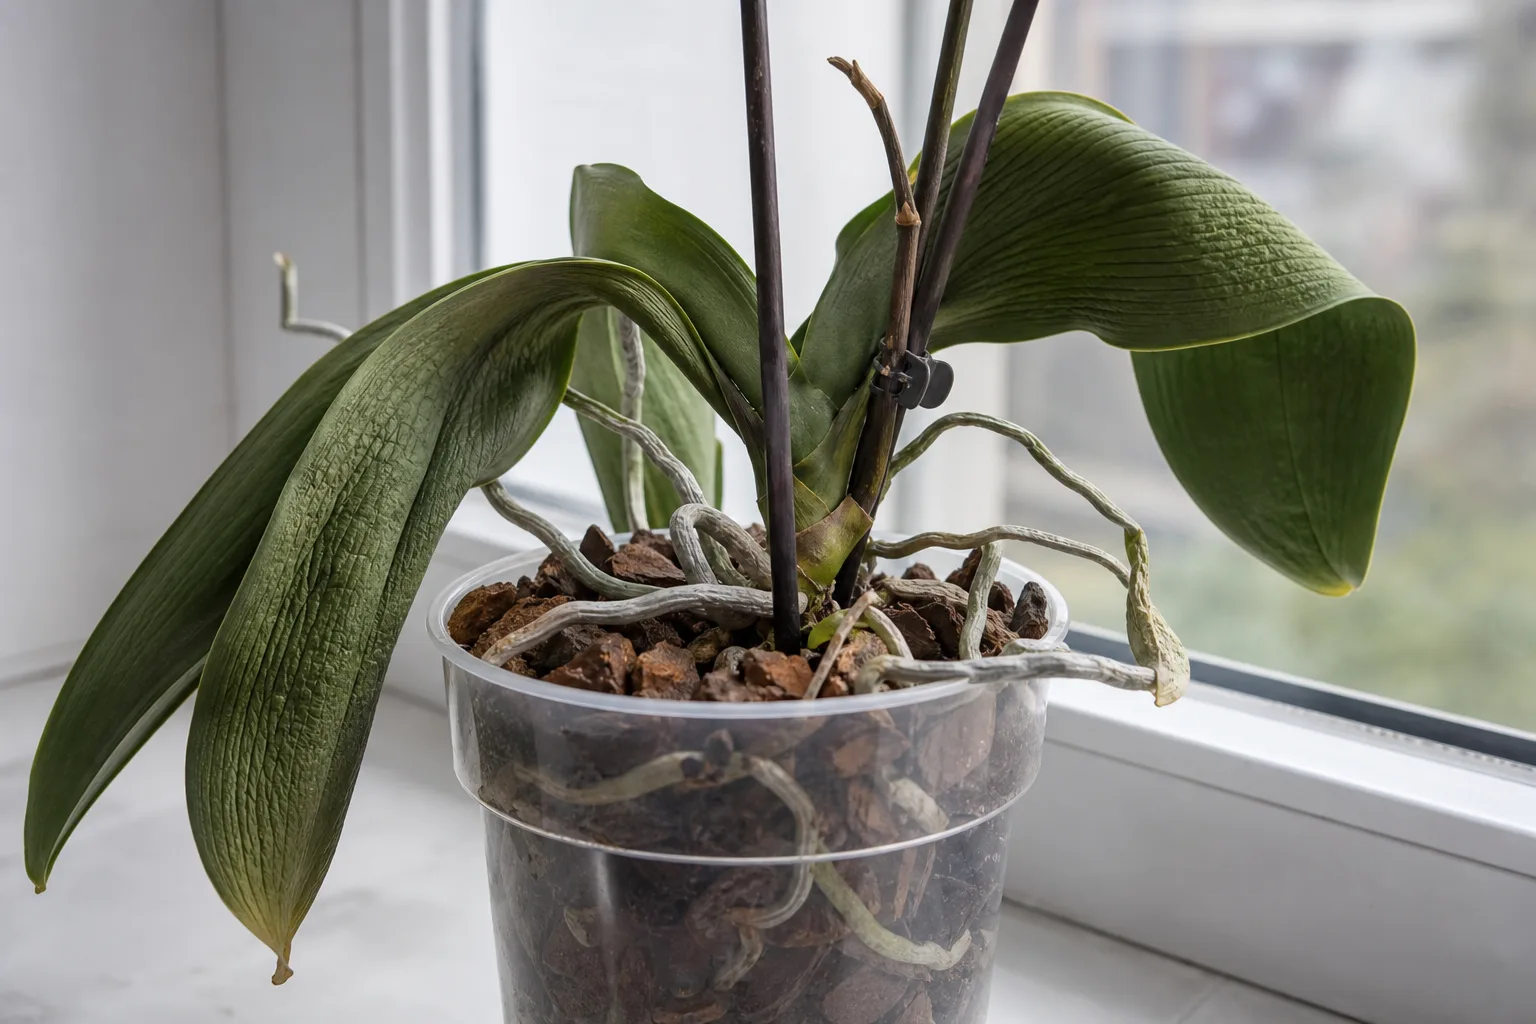
If leaves remain limp after the medium has been watered, stop repeating the drink and look for a root problem. A healthy root system should firm new growth over time, but roots that have rotted or dried completely cannot immediately restore a leaf’s shape. Smithsonian Gardens orchid horticulturist Justin Kondrat describes wilted leaves as a reason to check roots, because damaged roots may no longer supply water to the foliage. Better Homes & Gardens’ report on wilting orchids explains this root-first check.
Compare both the pot and the leaves. A dry, lightweight pot with firm roots suggests the plant may need a more consistent watering pattern for its medium and room. A wet, heavy pot with limp leaves points toward poor drainage or root loss. If the plant is outside its pot, check for a firm crown and living root tips. A soft crown or a smell from the pot raises urgency; a single limp older leaf on an otherwise firm plant does not.
5. Roots are mushy, hollow, or collapsing
Roots that feel squishy, shed their outer covering, or collapse when touched are not functioning normally. Root rot is more likely when many roots are damaged and the medium stays wet or has broken down. A brown color by itself is weaker evidence: a firm root stained by bark or fertilizer residue may still be alive. The American Orchid Society describes fungal rots as capable of killing roots and gradually weakening the plant, while the cause often involves a combination of poor drainage, old medium, excess moisture, or injured roots.
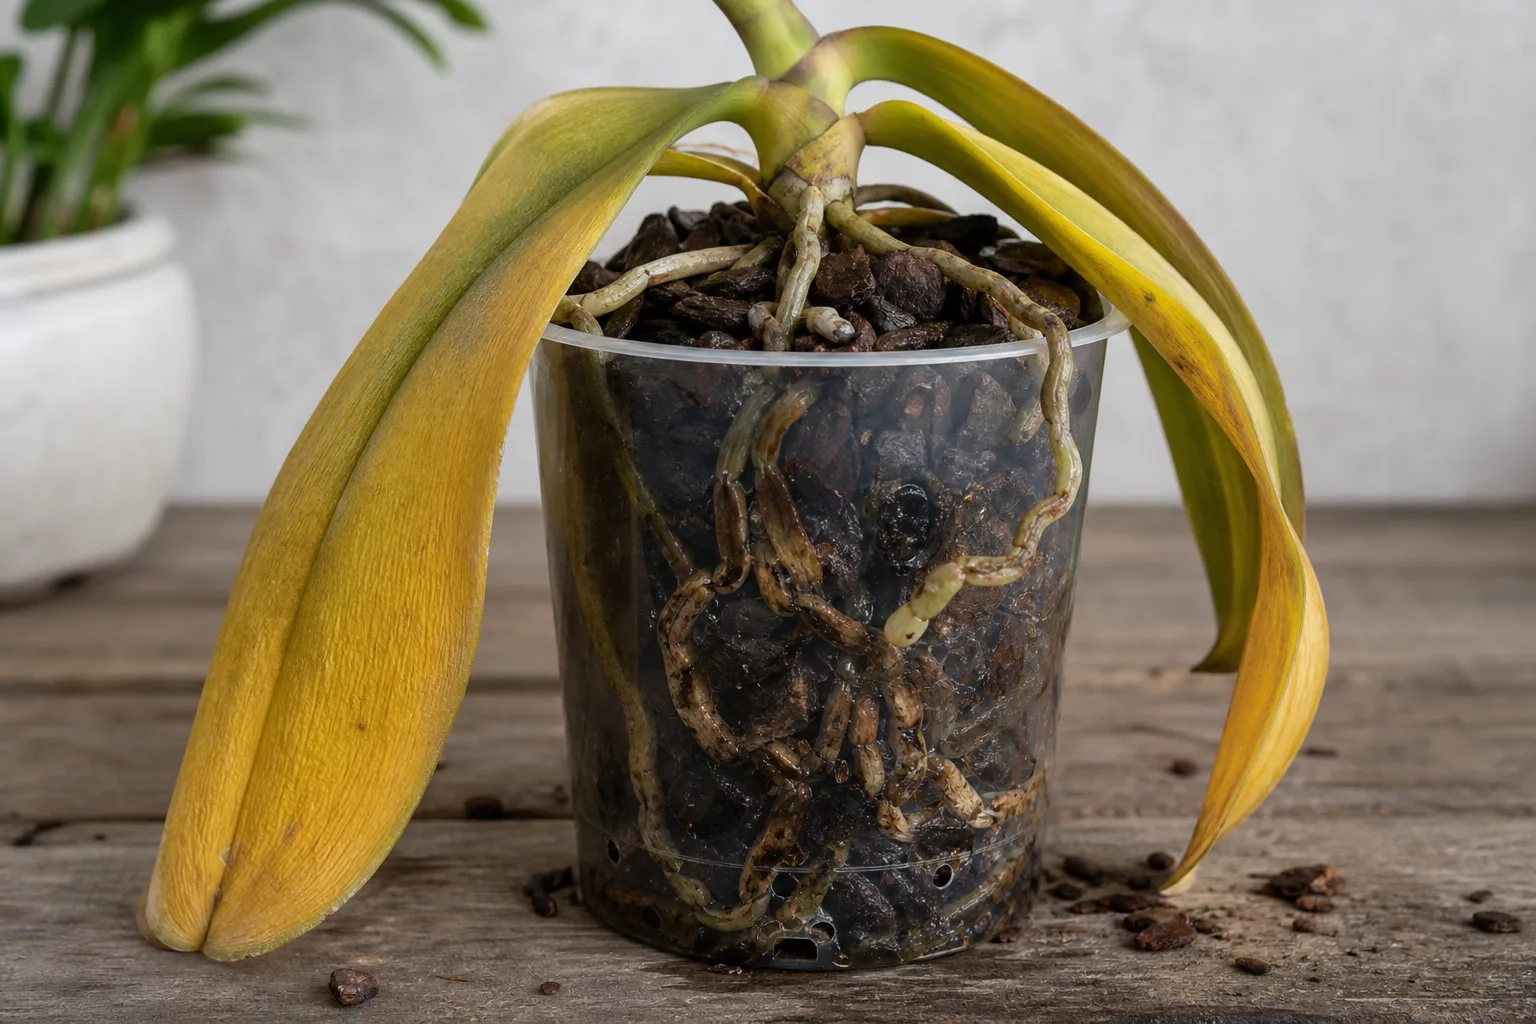
If several roots are truly soft or hollow, isolate the orchid from other plants, remove the failed medium, and repot into fresh orchid mix in a pot with drainage after trimming only dead tissue with a clean tool. Do not reuse the decomposed medium. Keep water out of the crown, empty the cover pot, and pause fertilizer until you see active recovery. The American Orchid Society’s guidance on orchid rots describes root and basal rots as distinct diseases, so avoid automatic fungicide or peroxide treatments when the cause is uncertain. For a confirmed root problem, follow the steps in our orchid root rot guide.
6. Roots are dry, flat, or papery
Dry roots can signal chronic underwatering, a medium that no longer re-wets evenly, or a root that has naturally died. Check whether the whole pot is dry and whether the remaining roots are still firm. If an aerial root is only silver-gray but remains plump, it may simply be dry and ready for water. If a root is flat, brittle, and hollow, it is unlikely to recover. Do not soak the entire plant for hours or strip every dry-looking root from the pot.
When the roots are firm but the mix has become bone dry, water slowly until the medium is evenly moistened and let the pot drain completely. If water runs down the sides without wetting compacted moss, re-wet the mix gradually or plan a repot when the plant can tolerate it. In bark, moss, a basket, and a mounted orchid, the interval between waterings will differ. Set the next watering by how quickly that setup dries, not by copying a weekly rule from another home.
7. The crown or stem base turns soft
A Phalaenopsis crown is the center where the leaves emerge. If it feels soft, dark, or wet rather than firm, water may have collected there or rot may be affecting the growing point. A new leaf that pulls out easily is a warning of active crown damage. Keep the plant away from other orchids, empty water from the crown with absorbent tissue, and improve gentle air movement. Do not pour a household chemical into the crown.
The word “crown” does not describe every orchid’s growth point. Sympodial orchids such as Cattleyas grow along a rhizome and produce pseudobulbs; inspect their base and newest growth instead. A softening base or rhizome is more concerning than an old dry leaf or a spent flower spike. If the main growing point is fully rotted, a Phalaenopsis may not recover, though some orchids can continue from a viable side growth. Avoid promising recovery until you can see firm tissue.
8. A dry pale patch appears on the sunny side
A dry tan, cream, or bleached patch on the side facing a bright window may be sunburn, particularly after a sudden move from shade into direct afternoon light. Burned tissue does not heal, but the plant may remain healthy if the damage is localized and the crown and roots are sound. Move it into bright indirect light or filter the window, then acclimate it gradually if you increase light again.
Do not cut out a small, dry patch from an otherwise firm leaf. That creates a wound without restoring the damaged part. Instead, photograph the mark and see whether it stays dry and stable. If a spot becomes wet, soft, or spreads beyond its original edge, treat it as a different warning and isolate the plant while checking for infection. Light changes should be gradual, especially for orchids moved outdoors for summer.
9. Dark wet spots spread across a leaf
Dark spots that are wet, sunken, expanding, or surrounded by yellow tissue are more urgent than dry sunburn. Some bacterial rots spread rapidly in warm, damp conditions; fungal spotting and cold injury can also produce marks that resemble infection. A photograph cannot reliably distinguish every cause. Keep the plant separate, avoid splashing water onto leaves, and do not handle it over other plants.
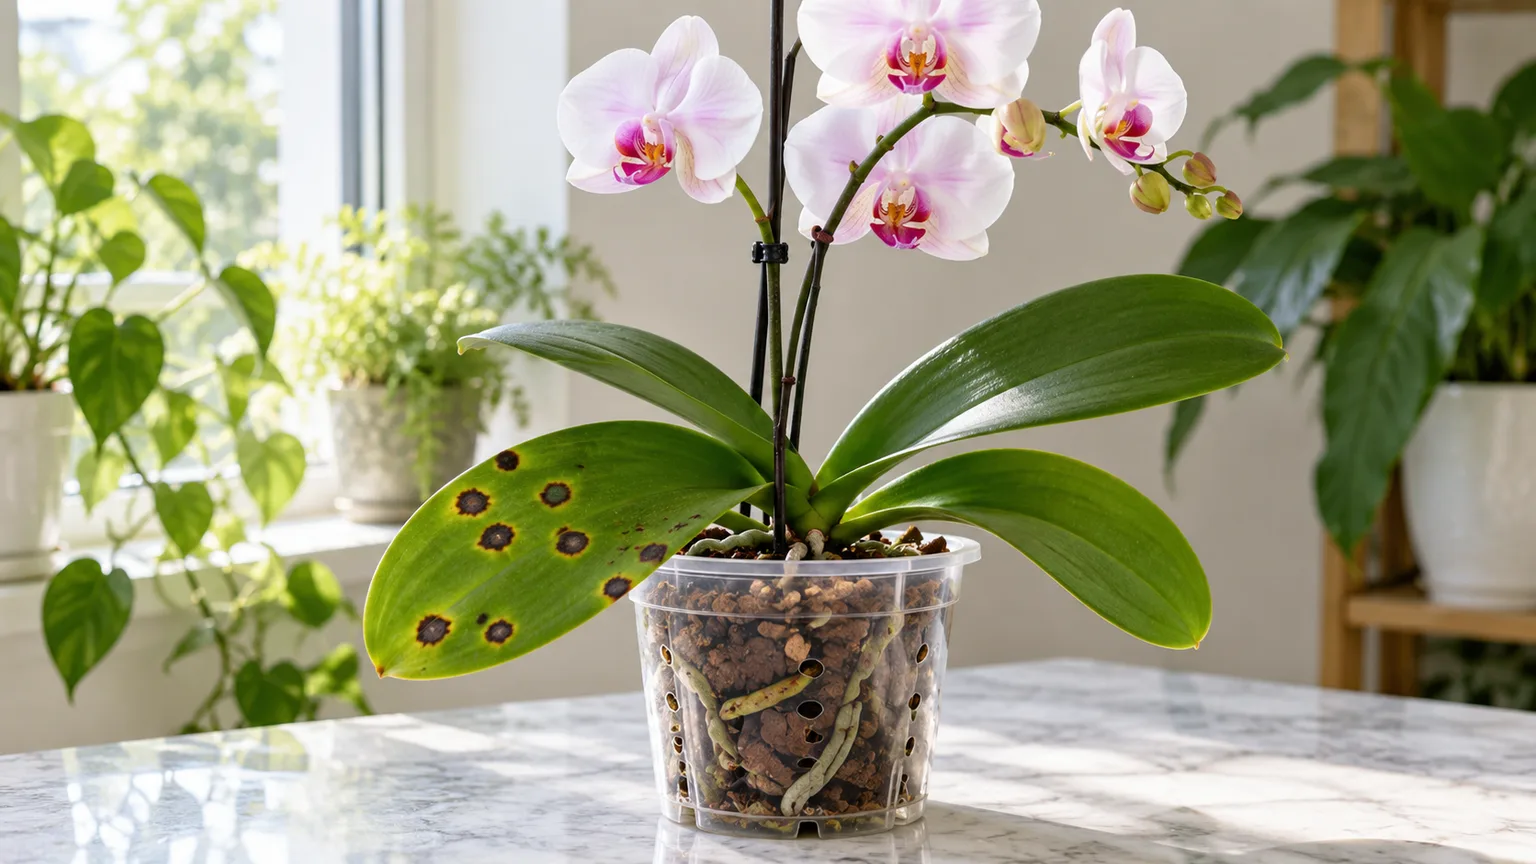
Mark the edge of the spot or take a dated photo so you can tell whether it is expanding. If tissue is collapsing, smells bad, or new spots appear, contact a local orchid society, botanical garden, or extension service for help identifying the problem. The American Orchid Society notes that viral symptoms overlap with other disorders and vary by orchid type; testing, not appearance alone, is needed to confirm a virus. Iowa State Extension likewise cautions that visual symptoms cannot reliably identify an orchid virus. The American Orchid Society’s virus guidance and Iowa State University Extension’s orchid diagnosis guide emphasize isolation and clean tools because viruses can spread during handling.
10. Cottony residue, stippling, or webbing appears
Look closely under leaves, along the leaf bases, and on new growth. White cottony clusters can indicate mealybugs; small fixed brown bumps may be scale; pale stippling, fine webbing, or mottled yellow patches can point to spider mites or other sap-feeding pests. Sticky residue may come from insects feeding above the spot where it appears. A quick glance at the top of a leaf can miss the colony, so inspect the plant in bright light and check neighboring plants as well.
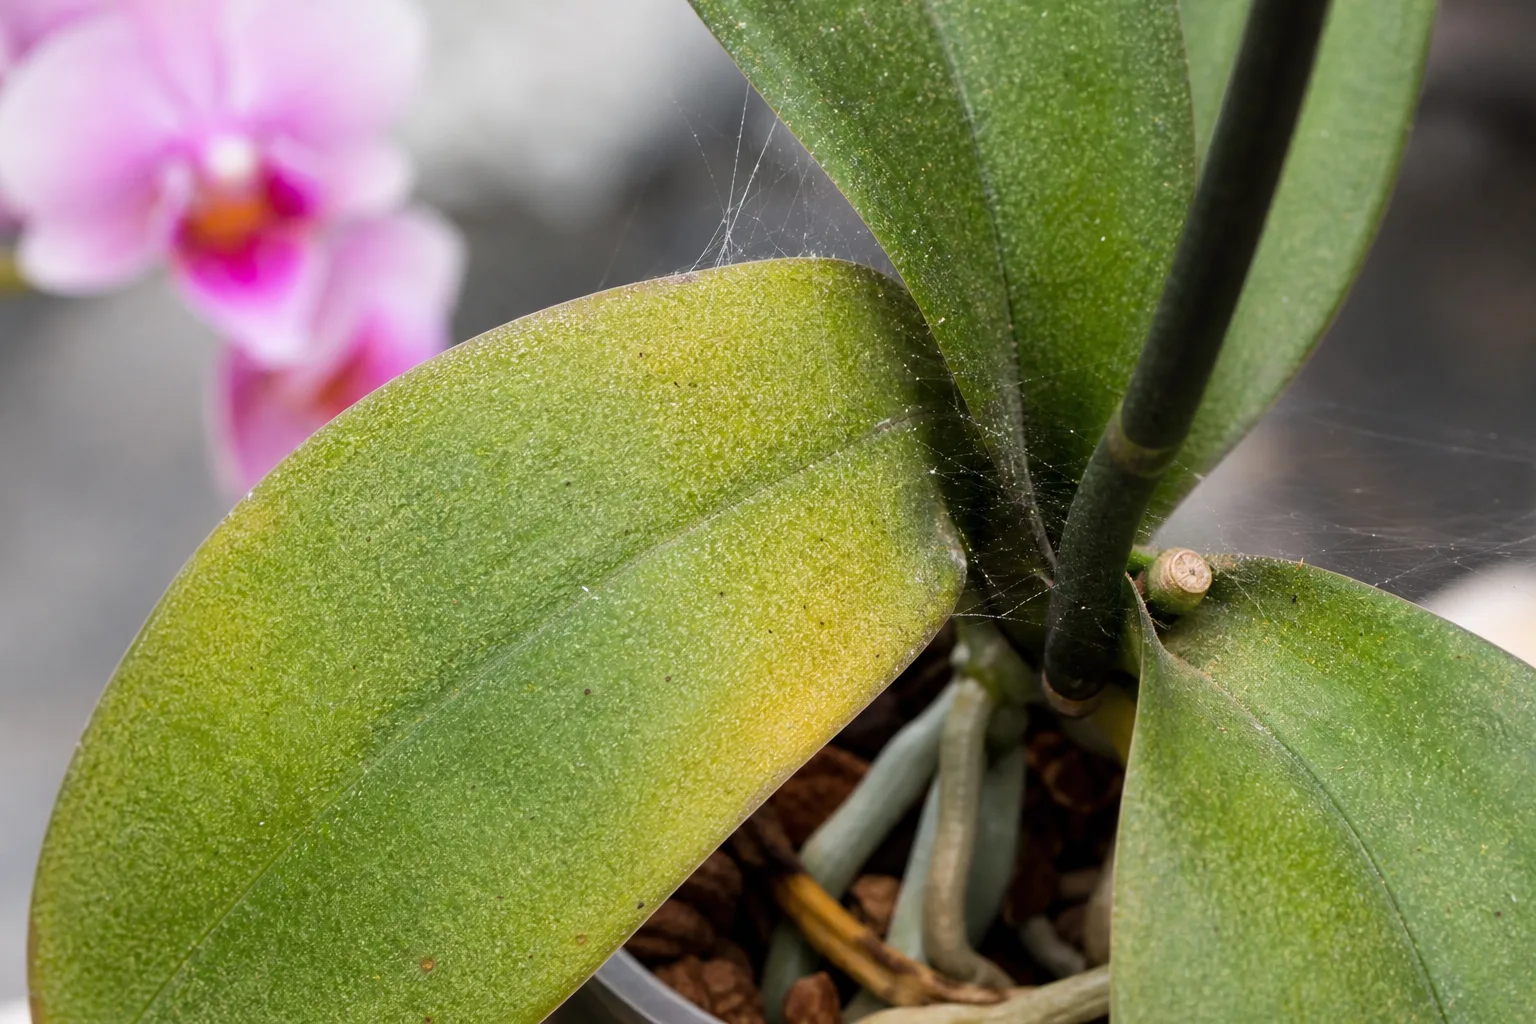
Isolate the orchid before treatment. Wipe or rinse off what you can see, then use a treatment labeled for the pest and suitable for orchids, following its directions and testing it on a small area first. Repeat inspection because eggs or hidden insects may survive a single cleanup. Avoid spraying an unidentified problem with several products at once; if the plant is blooming or the leaves are sensitive, ask an orchid grower or extension service to help identify the pest first.
11. No new roots, leaves, or flowers appear through a full cycle
Orchids do not all follow the same calendar. Some pause after flowering; some make roots or leaves in a particular season; others grow so slowly that a small change is easy to miss. A plant that has not bloomed is not necessarily failing if its leaves and roots remain firm. For orchids that grow pseudobulbs, an older cane can stop growing while a new growth emerges elsewhere, and some healthy plants flower only in a particular season.
Concern rises when a full normal growth cycle passes with no new root or leaf activity and the plant is also shrinking, losing roots, or developing progressively smaller growth. Check light, drainage, root condition, and whether the plant has been kept too wet or too dry through its own rest period. Do not try to force a flower spike with extra fertilizer or water. Record when growth stops and resumes; that history can help an orchid grower or extension adviser tell a normal pause from chronic stress.
12. Buds yellow and drop before opening
Unopened buds that yellow, shrivel, and fall are showing bud blast. It can happen on an otherwise healthy orchid and does not mean the whole plant is dying. The American Orchid Society lists water stress or damaged roots, sudden temperature changes, drafts, inadequate or harsh light, pests, chemical exposure, and fluctuating humidity among possible triggers. Fruit and fumes can also expose sensitive buds to ethylene or other gases.
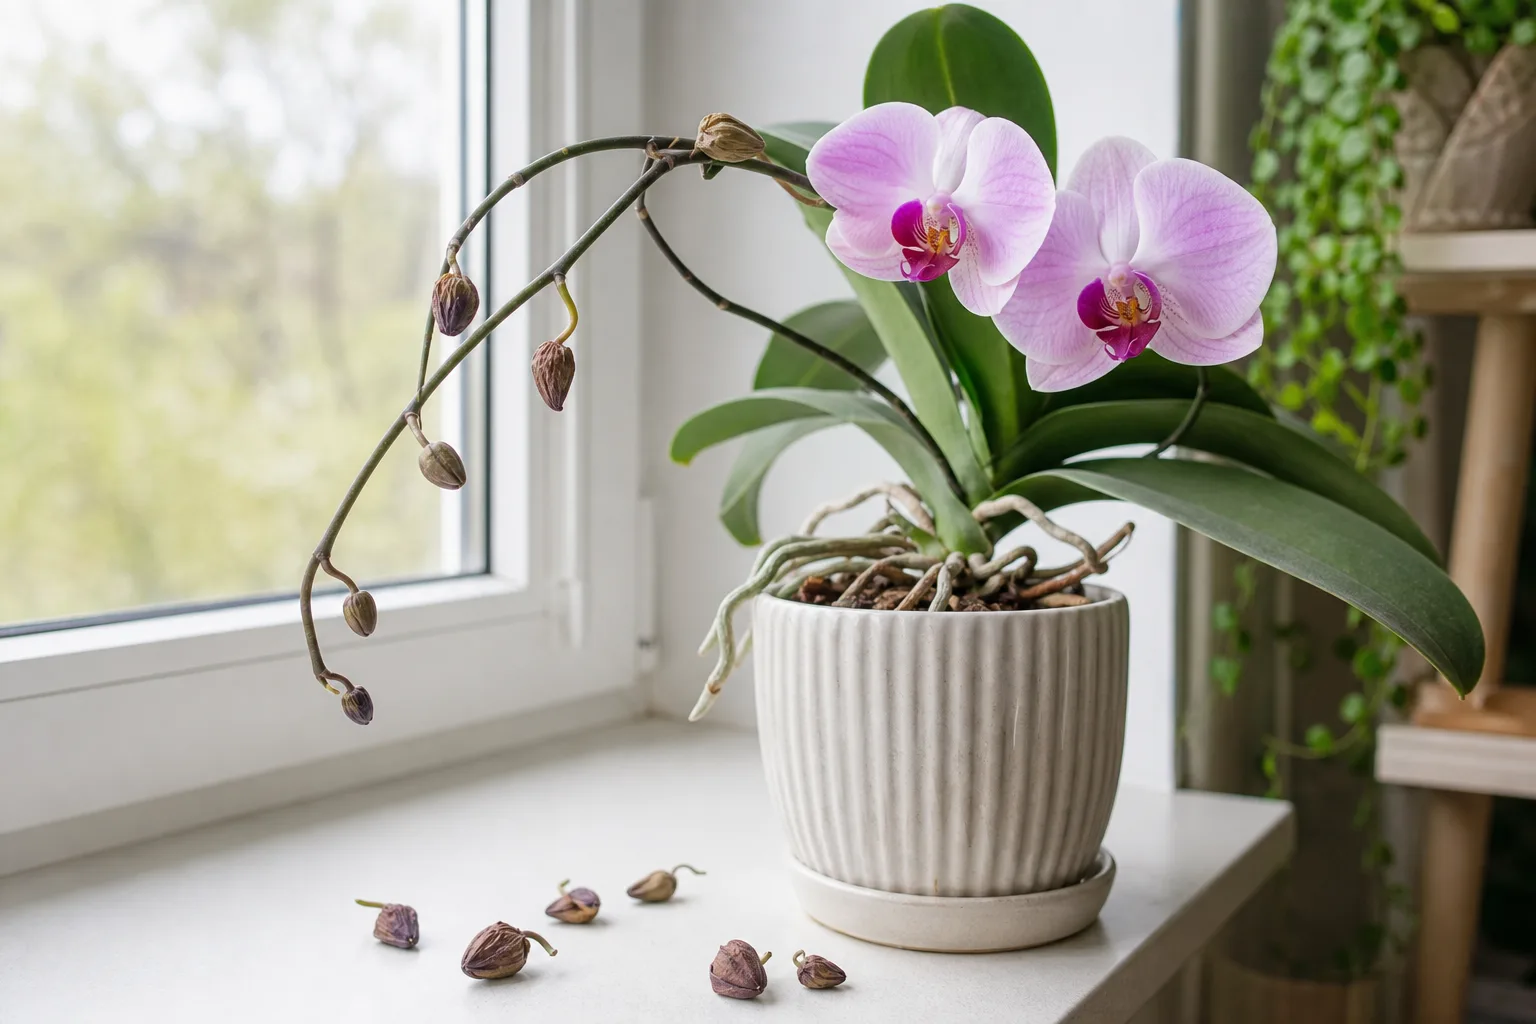
Review what changed while the buds were developing: a move, a heater or air-conditioning vent, a colder window, a dry spell, or an insect on the spike. Stabilize the plant in a suitable spot and avoid moving it repeatedly while buds are forming. The American Orchid Society’s bud-blast guidance notes that several conditions can produce the same result, so fix the recent stress you can verify rather than treating bud drop as a diagnosis by itself.
A 48-hour triage plan for a declining orchid
You do not need to fix every condition at once. Start with steps that prevent spread and tell you which part of the plant is actually failing:
- Separate it if disease or pests are plausible. Move the pot away from other plants, keep water from splashing between them, and use clean hands or gloves when you handle it.
- Record the pattern. Photograph the whole plant and close-ups of the newest leaves, affected leaves, crown, and visible roots. Note when the symptoms began and any recent move, watering change, temperature swing, or repot.
- Check the pot before adding water. Lift the inner pot, feel the medium, look through clear walls or drainage holes, and empty trapped water. Decide whether the medium is dry, damp, or persistently wet.
- Inspect roots and the growing point only when the signs justify it. A declining plant in wet or degraded mix merits an inspection. If the visible roots are firm and the decline is limited to a single old leaf, leave the roots undisturbed.
- Make one correction and watch new growth. Fix blocked drainage, remove a cold or hot draft, restore appropriate light, or repot only when the medium or roots show a problem. Mark a spreading spot and seek help if it continues.
The first sign of recovery is often a new root tip or a firm new leaf, not an old leaf becoming attractive again. A severely stressed orchid may need a growing season to rebuild. The orchid recovery walkthrough can help if your inspection confirms major root loss; keep the diagnosis and first checks above in mind before following any rescue method.
What not to do while an orchid is stressed
Do not water by weekday alone, especially when the orchid is in slow-drying moss, a decorative pot without drainage, or a cool room. Do not water again just because the leaves are wrinkled; test whether the medium is dry and whether the roots still work. Overwatering and underwatering can create a similar leaf appearance for opposite reasons.
Do not cut every root that looks brown, remove a leaf that still has green tissue, or trim aerial roots for neatness. Do not fertilize a plant with damaged roots as a quick fix; salts can add stress, and fertilizer cannot replace root function. Avoid moving it between several light levels in a short time or changing the medium, pot, water, and temperature all at once.
Finally, do not diagnose a virus from one mark or apply a fungicide, pesticide, peroxide, alcohol, or home mixture without confirming it is appropriate for the plant and following the product label. Orchid diseases can resemble sunburn, cold injury, pests, or cultural stress. Isolate a suspicious plant, use clean tools, and ask an orchid society or plant-health professional for a second look when spots spread or the crown is collapsing.
Conclusion
An orchid is more likely to recover when you match the care change to the evidence. A slow yellowing lower leaf or a bare spike can be normal; soft roots, a collapsing crown, spreading wet lesions, or several declining new leaves deserve faster attention. Check moisture, root texture, and the plant’s growing point before you reach for more water or a pair of scissors.
Make one measured correction, keep notes, and judge the plant by fresh growth. Orchids can replace damaged roots and leaves slowly, so recovery is a process rather than a quick visual reset. If the damage is spreading or you cannot separate disease from environmental stress, isolate the plant and ask an orchid specialist or extension service to help identify the cause.



