How to Propagate Herbs in Winter: 8 Practical Tips
Learn how to propagate herbs in winter with eight practical tips: choose cuttings, balance warmth and light, root in water or mix, and know when to pot up.
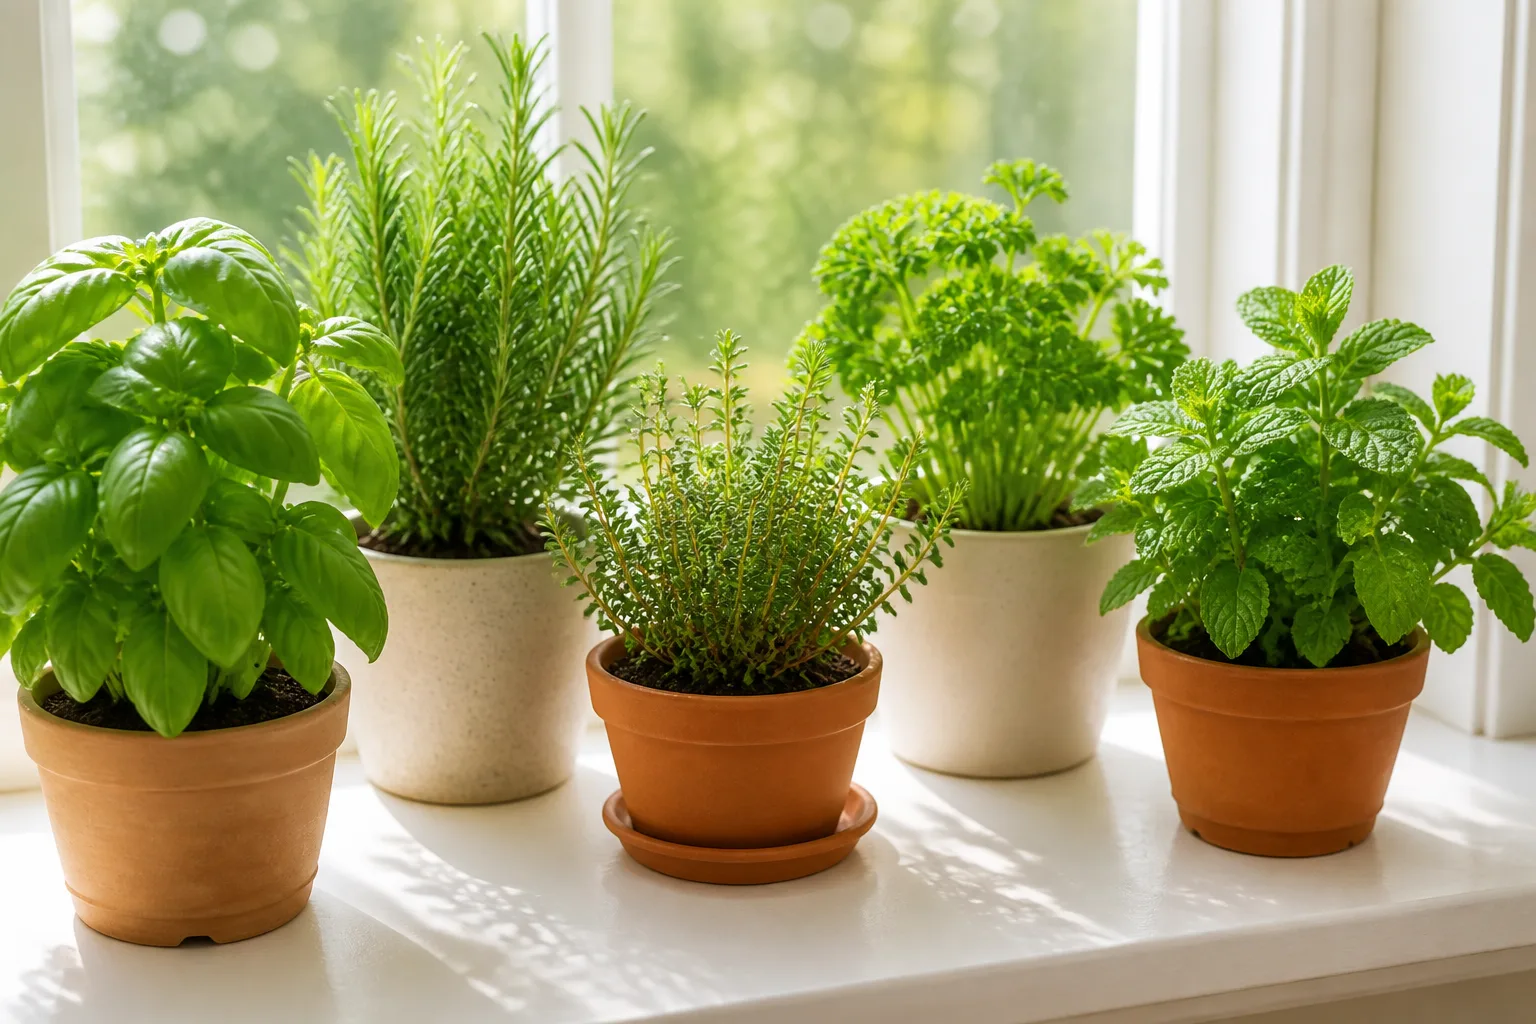
Winter propagation works best when you treat it as an indoor growing project, not as a way to force dormant garden stems into making roots. A basil plant still producing new shoots on a bright windowsill can supply useful cuttings; a woody thyme or rosemary plant sitting outside in cold, low-light conditions may be better left alone until it resumes growth.
The reliable formula is simple: choose a healthy stem that is still growing, reduce the leaves that would lose water, and give the cutting steady warmth, bright light, and a rooting environment that stays moist without becoming soggy. These eight tips help you build those conditions and decide when the sensible move is to wait for spring.
Is winter a good time to propagate herbs?
Yes, if you can provide spring-like conditions indoors and take material from a plant that is actively growing. Tender herbs such as basil and mint can keep making soft stems in a warm, well-lit room. A cutting taken from that new growth is fundamentally different from a bare, dormant twig cut from an outdoor shrub in January.
The season still matters. The Royal Horticultural Society (RHS) recommends softwood cuttings of oregano in summer, division of oregano and mint in spring, and softwood cuttings of thyme in late spring or summer. For rosemary, the RHS points to semi-ripe cuttings in late summer or heel cuttings in spring. Those windows describe reliable outdoor timing; indoors, you can try a cutting outside those seasons only when the plant itself is actively growing and you can replace the warmth and light it would normally receive. The RHS herb-propagation guide is useful for deciding which species to try now and which to save for a brighter season.
Think of winter as a narrower opportunity, not a universal propagation season. You may get fewer viable cuttings, and rooting may take longer if the room is cool or light is weak. If your parent plant is dormant, stressed, or barely holding leaves, protect it and wait; removing stems will not make it wake up sooner.
Set up a small, stable rooting station
Choose a place where temperatures stay fairly even from day to night: a bright shelf, an interior windowsill, or a plant stand under an LED light. Keep cuttings away from cold window glass, drafty doors, heating vents, and radiators. A radiator may warm the air briefly but can also dry foliage and swing the temperature; a thermostatically controlled propagation mat is more predictable when the rooting medium itself is too cool.
Before you cut, gather clean snips, a clear jar or small pot, fresh water, and a light, clean rooting mix if you plan to use one. Label each cutting with its herb and start date. A simple thermometer near the containers helps distinguish “the room feels warm” from “the root zone is warm,” and a timer makes the daily light period consistent.
Keep the setup modest. A crowded tray is harder to ventilate and inspect, while a few cuttings in separate jars or cells let you see which method and plant are working. Start with more than one cutting when the parent plant can spare them, but do not strip a small herb bare just to hedge your bets.
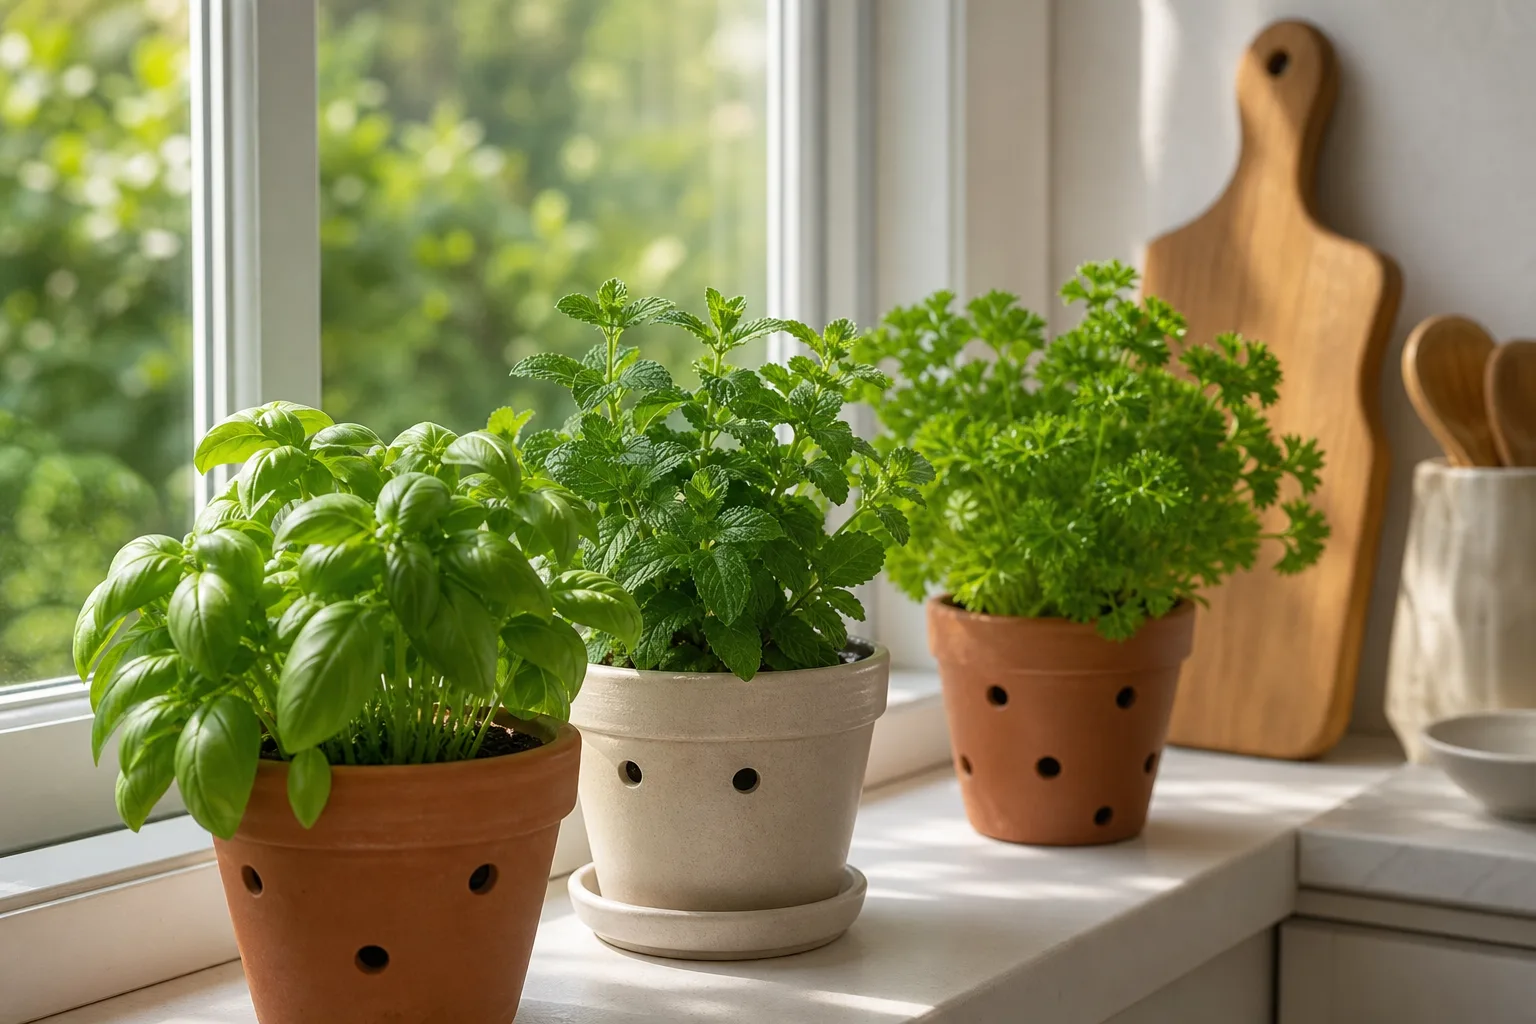
Eight tips for better winter herb propagation
1. Start with an actively growing, healthy plant
Look for firm stems with fresh leaves and visible new growth. Avoid plants with widespread yellowing, pests, soft or blackened stems, or a root ball that is already waterlogged. A cutting has no roots to replace the water it loses, so starting with a hydrated, vigorous parent gives it a better chance to stay firm while it begins forming new roots.
Water the parent plant when it needs water, ideally the day before you plan to take cuttings, rather than soaking it immediately before cutting. Take the stems when they are hydrated and cool, and process them promptly. Purdue Extension recommends healthy starting plants and quick preparation because a severed stem loses water and its cut surface can be exposed to disease.
Do not take every usable tip. Leave enough foliage and growing points on the donor plant for it to keep photosynthesizing and recover. For a small kitchen herb, a few well-chosen cuttings are more useful than a dramatic pruning that weakens the plant you wanted to multiply.
2. Choose a pliable stem, not old hardwood
The best stem depends on the herb. A soft, green, flexible tip on actively growing basil or mint is an herbaceous cutting. A flexible new shoot on a woody herb is softwood; a firmer current-season stem is semi-ripe. Old, rigid stems from earlier seasons are hardwood, and they are not interchangeable with tender shoots just because both can be cut to the same length.
For winter indoor attempts, favor the youngest healthy growth the plant is making now. Do not scrape leaves off a dormant outdoor rosemary or thyme plant and assume the bare woody section will root like basil. Purdue Extension notes that herbaceous and softwood cuttings generally root more readily than hardwood cuttings, while the RHS gives most culinary woody herbs their best softwood or semi-ripe windows in warmer months.
If the stem bends easily and snaps cleanly rather than folding like wet string or resisting like a dry twig, it is a more promising candidate. This is a practical sign, not a guarantee: species and cultivar matter, and the stem still needs a node and the right conditions.
3. Take a cutting with useful nodes and fewer leaves
A node is the point where a leaf or side shoot joins the main stem. Roots and new shoots often form around nodes, so include at least two or three on a short cutting when the plant’s structure allows it. Montana State University Extension recommends selecting a healthy shoot with several nodes and cutting just below the lowest one.
Use clean, sharp snips and make a fresh cut just below a node. Remove leaves from the lower part of the stem so they will not sit underwater or touch the rooting mix; leave a small amount of healthy foliage near the tip to keep the cutting photosynthesizing. Remove flowers or buds, which compete with root formation, and avoid handling or crushing the bare stem. This node-first preparation is also shown in Epic Gardening’s guide to stem cuttings.
Set prepared cuttings into water or rooting medium right away. If you need to prepare several, stand them in a little clean water or wrap them loosely in a damp paper towel while you work. A cutting left on the counter under dry indoor air can wilt before it ever reaches its rooting station.
4. Pick water or a damp, airy rooting mix
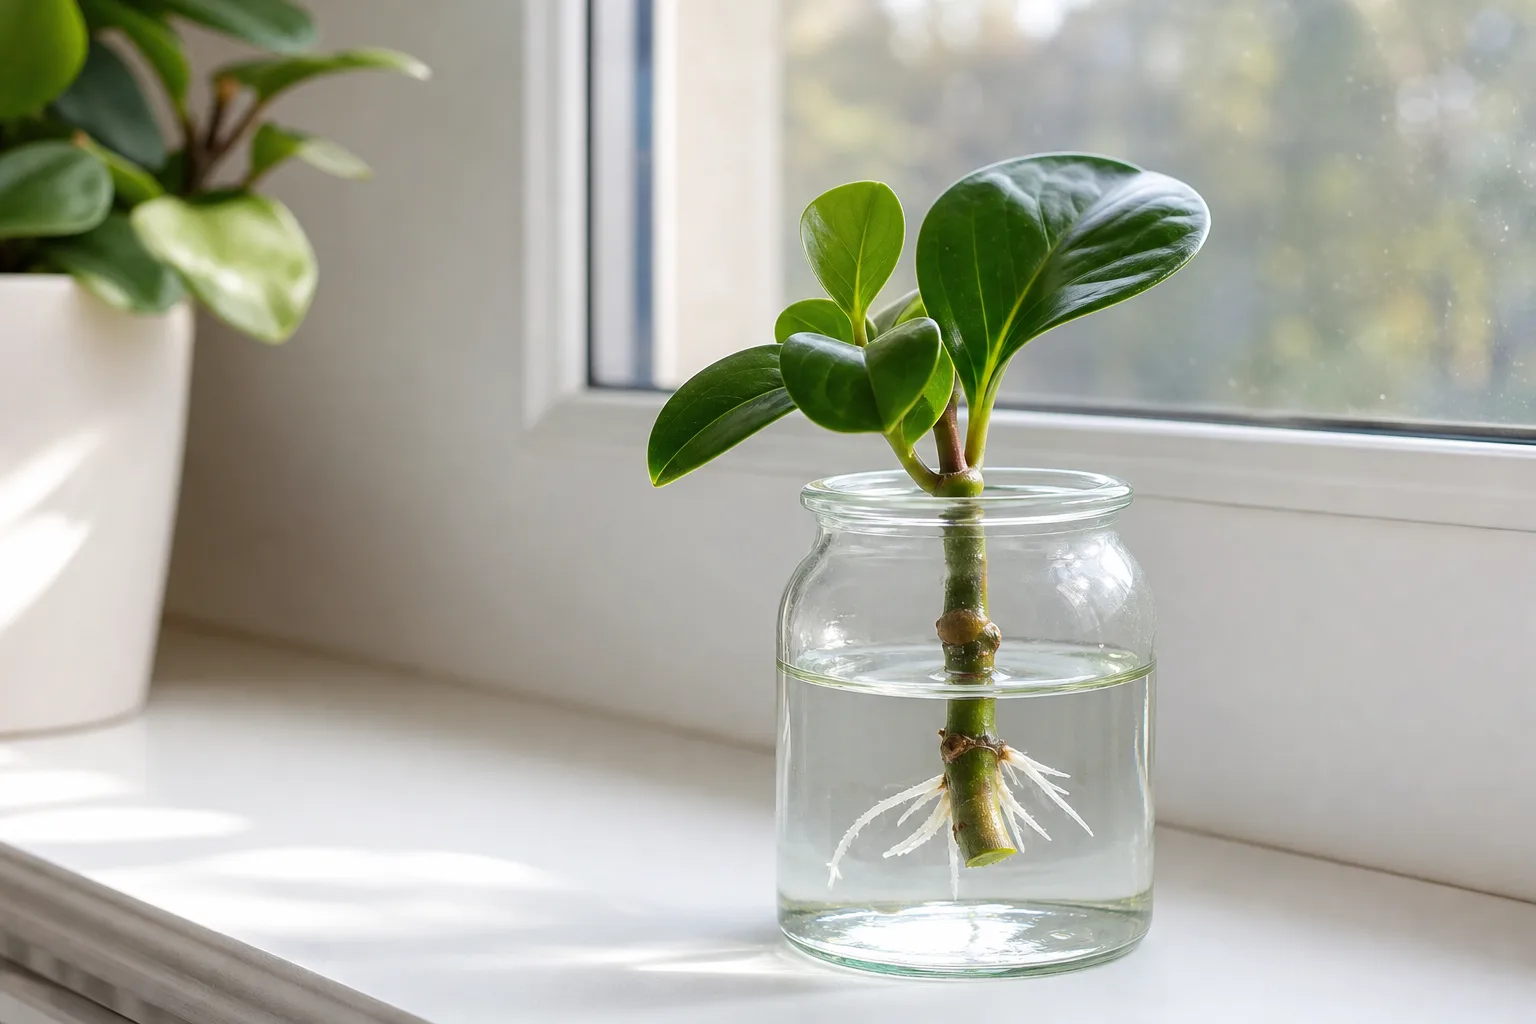
Water is the easiest method to monitor. Place the bare lower node or nodes in a clean jar of room-temperature water, with every leaf above the waterline. You can watch for roots and notice quickly if the stem turns cloudy or slimy. Montana State University Extension recommends changing the water weekly and says not to add fertilizer during water rooting; Savvy Gardening’s indoor mint guide similarly advises refreshing the water and washing the glass every five to seven days.
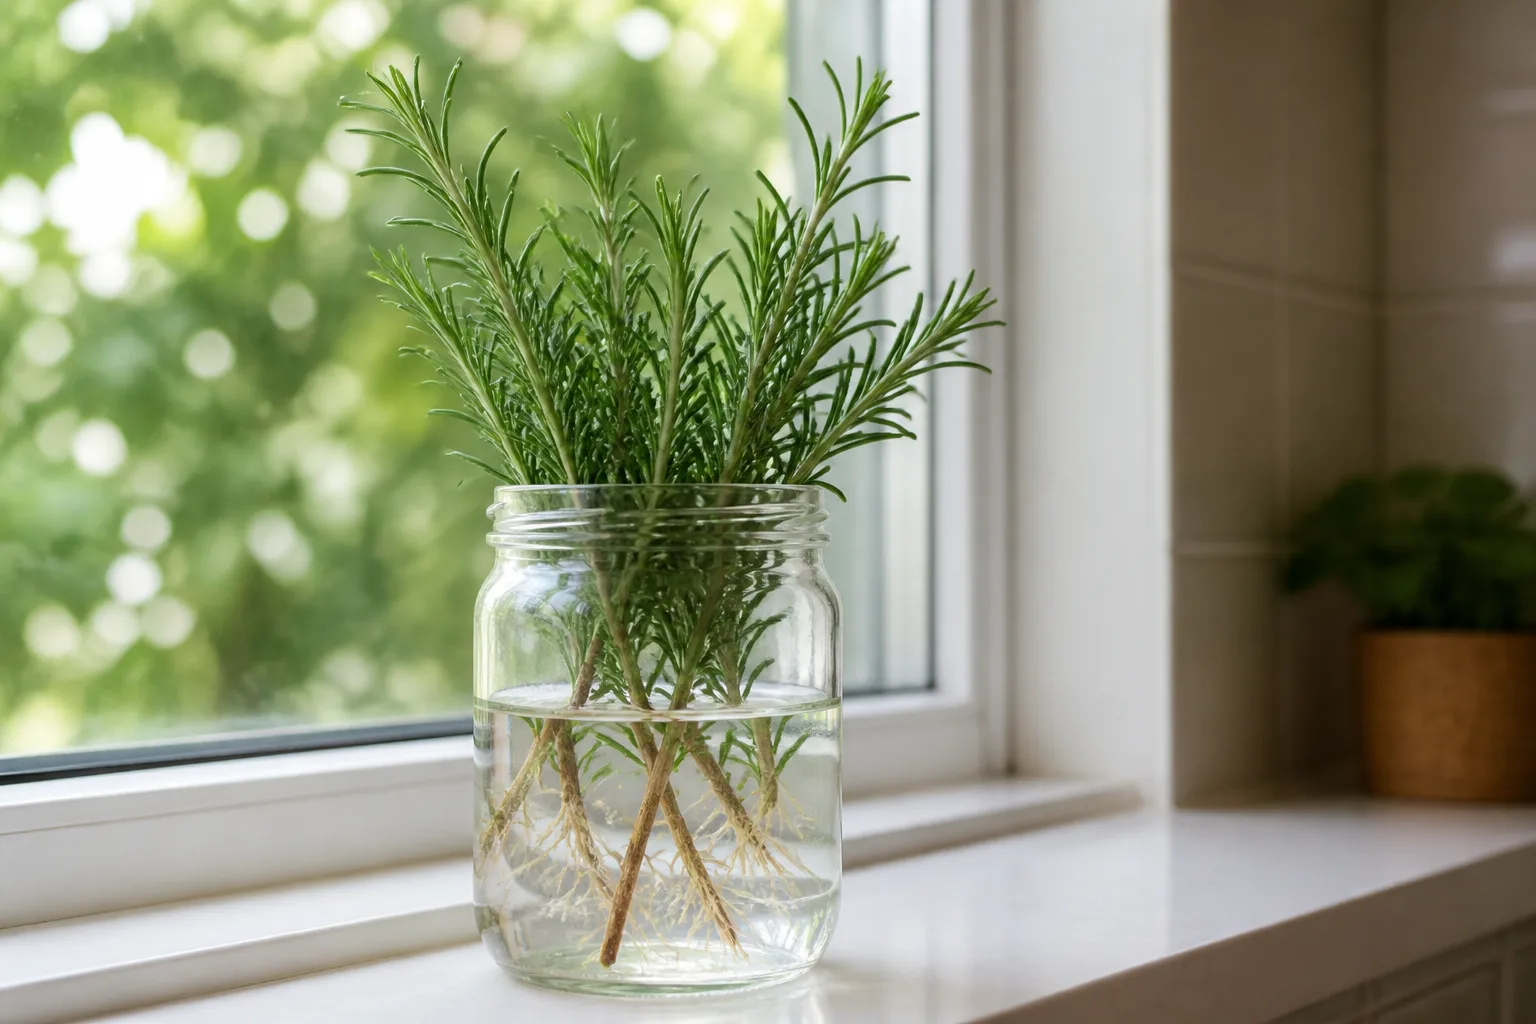
A small pot of clean, damp, well-drained rooting mix is often a better choice when you want to avoid moving delicate water roots later. Use a seed-starting or soilless mix that holds moisture but still contains air; ordinary garden soil can stay heavy in a small indoor pot. Moisten the mix before planting, make a hole for the stem rather than forcing it through, and firm it gently around the cutting.
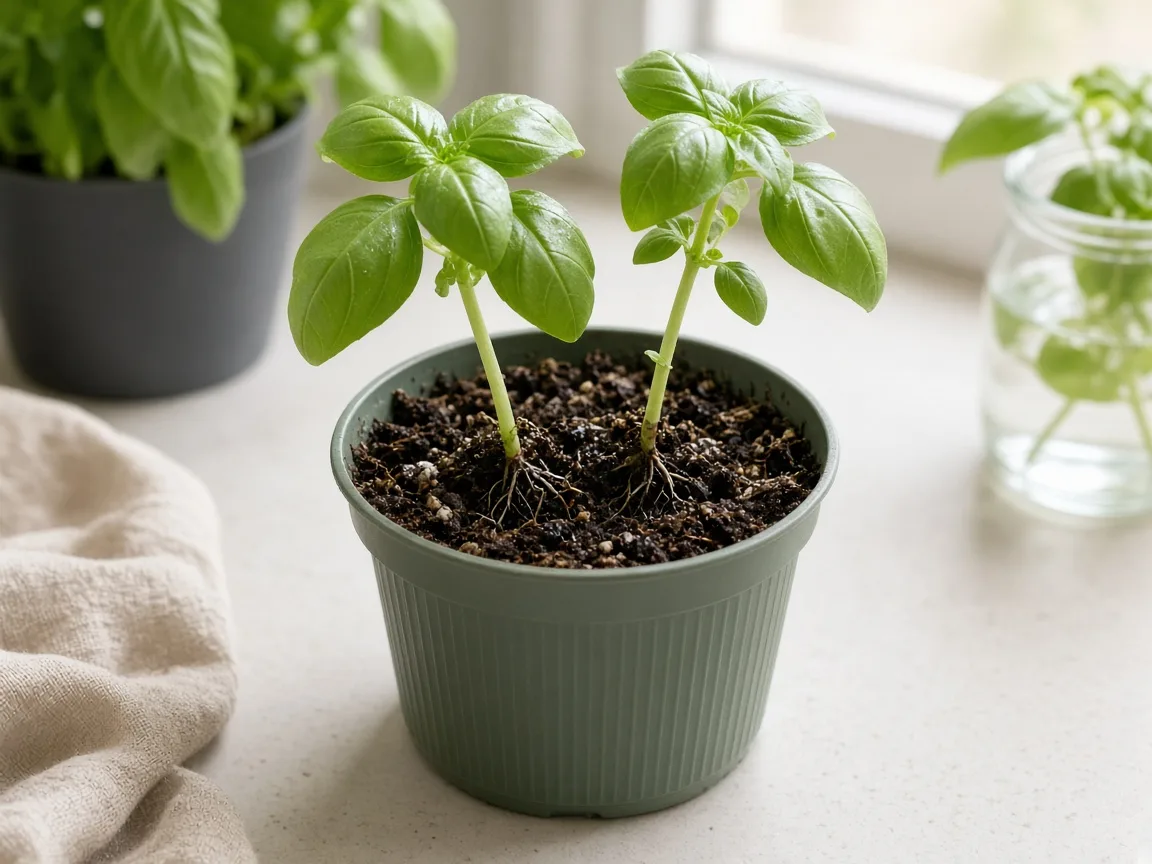
Neither method wins for every herb. Water makes root development visible but the cutting eventually has to adjust to potting mix. A rooting medium hides the roots but lets the new plant form in the environment where it will continue growing. Choose the method you can keep clean and evenly moist, not the one that looks like the least work on day one.
5. Keep the root zone comfortably warm
Warmth speeds root formation, but “warm” does not mean hot. Purdue Extension’s cutting guide recommends keeping cuttings’ rooting mix around 65–75°F (18–24°C), and notes that a propagation heat mat or cable can help when the growing area is too cool. Treat that range as a useful starting point for many cuttings, not a promise that every herb will root at the same speed.
Measure near the base of the pot or jar, especially if it sits on a cold stone sill. A heat mat with a thermostat is safer and steadier than putting jars directly over a radiator, stove, or heating vent. Excess heat can stress the leaves and dry the medium faster than the cutting can replace moisture.
Keep the room comfortable for the foliage as well. If the leaves feel hot, wilt despite damp mix, or dry quickly under a cover, move the container farther from the heat source and recheck the rooting medium. The goal is a gently warm root zone, not a greenhouse temperature spike.
6. Add strong light without scorching the leaves
Roots are only part of the job: a cutting with leaves also needs light to make energy while it roots. Put the jar or pot in bright indirect light, or place an LED grow light above it if winter daylight is weak. Purdue Extension advises a bright location out of direct sun so the cutting gets light without overheating inside a small pot or plastic cover.
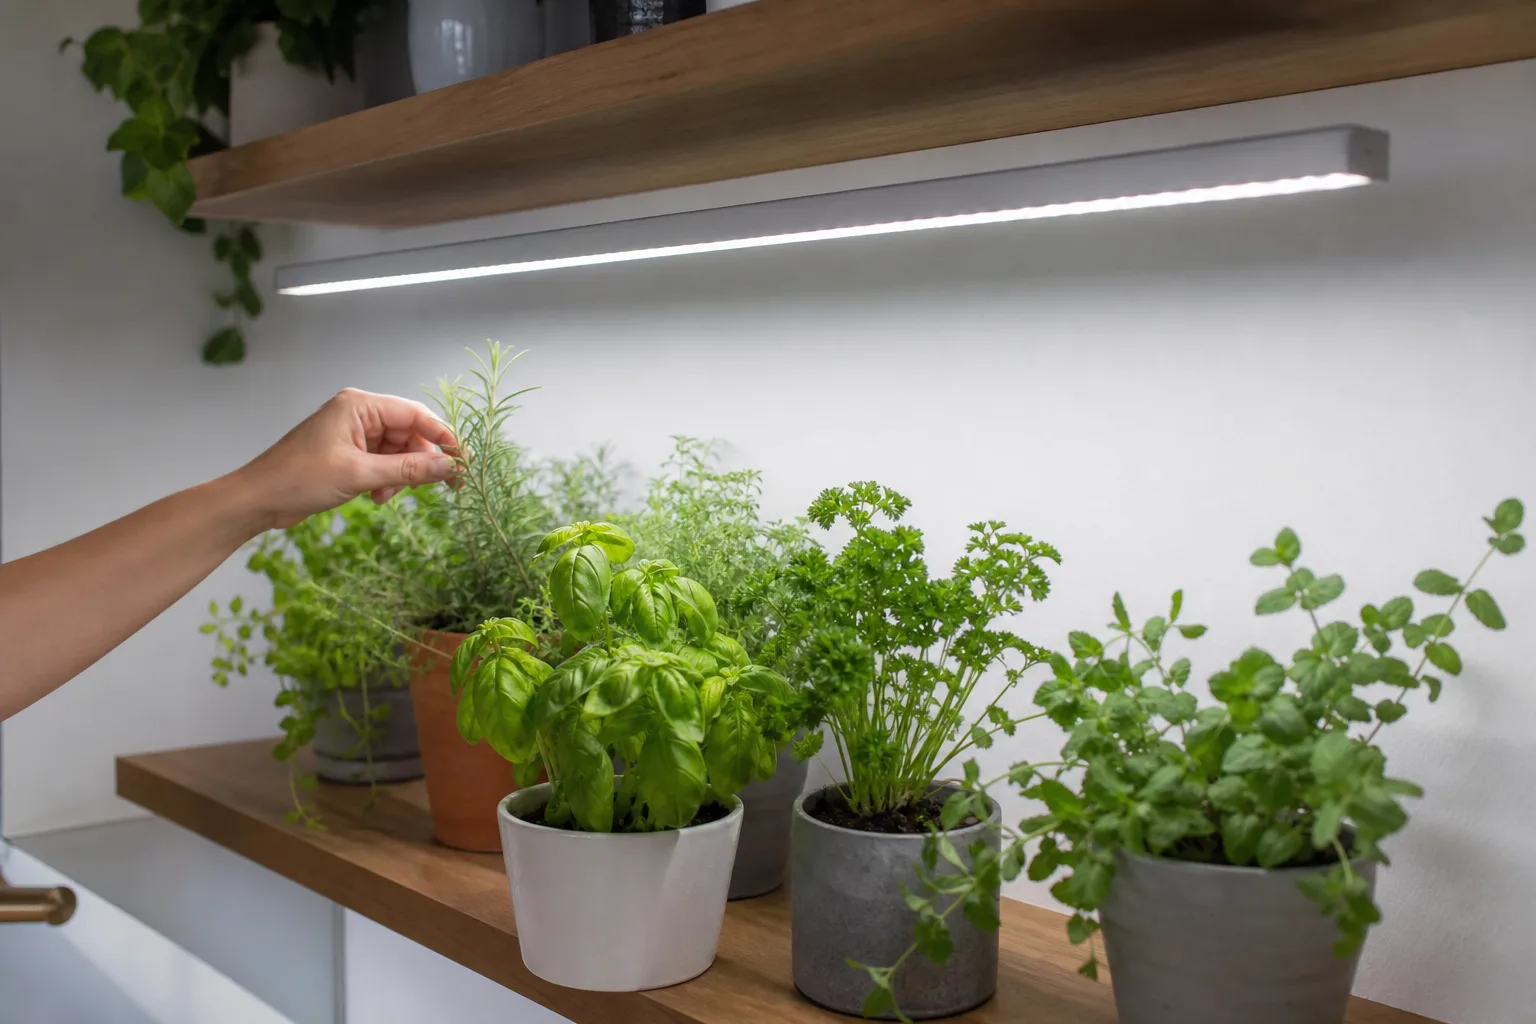
A grow light does not need to be an expensive, specialized fixture to help culinary herbs, but it does need to illuminate the leaves consistently. Follow the fixture’s guidance for distance and timing; a timer helps provide a repeatable daytime period without leaving the light on around the clock. Adjust placement if stems stretch or leaves become pale, and keep the leaves cool to the touch. Savvy Gardening’s indoor mint guide also emphasizes the strong light mint needs indoors.
A sunny window can work if it stays bright without chilling the jar overnight or baking it at midday. If the cuttings lean toward the glass, rotate the containers every few days. If they stretch into long, weak stems, improve light before adding more fertilizer or heat.
7. Balance humidity with fresh air and clean water
Winter rooms can be warm and dry, which encourages leaves to lose water before roots form. For cuttings in mix, a loose clear cover or a small humidity dome can slow that loss. Keep the plastic from touching the leaves, and open or vent the cover regularly so trapped moisture does not become stagnant.
Purdue Extension describes a plastic bag supported above the cutting as a way to hold humidity, while also stressing that the mix must stay moist rather than waterlogged. If the cover collects heavy condensation all day, vent it; if water pools in the tray or bag, pour it away. A cutting needs moisture around its leaves and air around its future roots, not a sealed swamp.
For jars, keep only the bare stem under water. Refresh the water at least weekly, sooner if it becomes cloudy or develops an odor, and rinse the container before refilling. Skip plant food in the jar: the cutting has stored energy, and fertilizer cannot compensate for a missing root system. If you want to use a rooting product, use a commercial product labeled for cuttings and follow its directions. Honey is unnecessary and should not be treated as a proven substitute for an auxin-based rooting product; many easy herbs root without added hormone.
8. Wait for roots, then acclimate in stages
Do not pot up a cutting just because a calendar says three weeks have passed. Some soft-stemmed herbs root in a few weeks under good conditions; woody species or a dim, cool setup can take longer. Montana State University Extension gives a general two-to-four-week window for herbaceous cuttings, but UF/IFAS Extension emphasizes that rooting time varies from a few weeks to several months depending on the species and cutting type.
In water, wait until the roots are visible and long enough to handle gently; Montana State suggests transplanting when roots reach about 1–2 inches. In mix, look for fresh growth and gently check the edge of the root ball only when the cutting has had time to establish. A new leaf by itself is not proof of a useful root system: stored energy can push a leaf before the cutting can support itself.
After roots form, remove a humidity cover gradually over several days instead of taking it off permanently in one step. This lets the foliage adjust to drier room air. If the cutting wilts, replace the cover loosely and slow the transition; if it stays upright, continue opening it until the plant tolerates normal room conditions.
Choose an herb that can actually grow indoors
Herb propagation is species-specific. Some herbs make new soft shoots readily in a warm room, while others are woody perennials whose most reliable cutting windows fall in spring, summer, or early autumn. The table is a starting point; the growth on your actual plant matters more than the month on the calendar.
| Herb | Winter approach | When to wait |
|---|---|---|
| Basil | Try a short, leafy cutting from an actively growing indoor plant; root it in water or a light mix. | Wait if the parent is cold-damaged, flowering heavily, or no longer making healthy tips. |
| Mint | A stem cutting is a simple indoor project; a small root division can also work if you can pot it and give it light. | Keep it in a container. Mint spreads aggressively when planted in open ground. |
| Oregano | Use flexible new growth from a potted plant that is still growing. | RHS recommends softwood cuttings in summer and division in spring, so defer outdoor dormant material. |
| Rosemary | Try fresh, active tips from a healthy protected plant; a well-drained mix is a practical option. | Avoid relying on old, leafless twigs. The RHS favors semi-ripe cuttings in late summer or heel cuttings in spring. |
| Thyme | Use an actively growing indoor tip only if the plant is vigorous. | RHS timing is softwood cuttings in late spring or summer, with layering in early autumn or spring. |
| Lavender | Treat winter as an experiment only when the parent is protected and making fresh growth. | For the best odds, wait for the plant’s spring or summer growth rather than using dormant woody stems. |
Better winter candidates when growth is active
Basil and mint are usually the easiest first trials because a healthy indoor plant can supply flexible stems. Mint is particularly adaptable to containers and can root from cuttings, but its fast, spreading growth is a reason to keep it potted rather than moving it into a garden bed. Savvy Gardening’s practical guide to growing mint indoors describes both stem cuttings and root divisions as ways to establish an indoor plant.
Oregano can also be worth trying if the parent plant is producing new, flexible growth under lights. The key distinction is that winter indoors may support an active cutting while an outdoor plant is dormant; the latter does not suddenly become a good cutting source because a warm room is available.
When spring is the better choice
Wait if you have only hard, old wood, if the mother plant is dormant outdoors, or if you cannot provide a bright and warm place for the cutting. Rosemary, thyme, and lavender are perennial woody herbs, and their recommended cutting stages are tied to the maturity of their new growth. The RHS’s timing guidance and Empress of Dirt’s rosemary-cutting tutorial both distinguish fresh, flexible shoots from fully woody stems; Empress of Dirt also notes that the best stage varies over the growing season.
If waiting feels unproductive, use winter to keep the mother plant healthy, set up a light shelf, and label the pot so you can take cuttings when new growth appears. That small delay often saves more time than repeatedly testing brittle stems that have little chance of rooting.
Troubleshoot stalled, wilted, or blackening cuttings
Start by reading the symptom rather than adding another product. A wilted cutting with a firm stem may be losing water faster than it can replace it: move it out of direct sun, check whether the medium is damp, and add a loose humidity cover if it is rooting in mix. If the stem is shriveled or limp all the way down, it may have dried before roots formed; take a fresh cutting from the parent when it is hydrated.
A black, soft, or foul-smelling base points to decay, often worsened by stagnant water, a waterlogged mix, or dirty tools and containers. Discard a rotting cutting rather than trimming one small section and putting the same contaminated piece back into the jar. Wash the jar or pot, use fresh water or mix, and make sure leaves stay above the waterline or medium surface.
If nothing happens, check the conditions in this order: Is the cutting from active growth? Is at least one node at or below the rooting surface? Is the root zone warm enough? Is there useful light without hot direct sun? Does the mix feel moist but airy? Change one condition at a time and give the cutting time to respond. UF/IFAS Extension notes that the correct cutting type differs by plant and that rooting periods vary widely; a woody species may need more patience than basil or mint.
Cloudy jar water is a reason to rinse and refill, not to add fertilizer or honey. Long, pale stems usually point to insufficient light, while leaves that crisp at the edges may be too close to a heater or light fixture. When several cuttings from the same batch fail, take a fresh set from a healthier parent or switch the method rather than repeating the same setup unchanged.
Pot up rooted cuttings and keep them growing
Move a rooted cutting into a small pot with drainage and fresh, well-drained potting mix. Water it in so the mix settles around the roots, then let excess water drain away. Keep the new plant in bright light while it adjusts, and avoid both deep shade and a sudden move into strong direct sun.
Water-rooted cuttings need a little extra attention because roots formed in water are not yet used to the air spaces and changing moisture of potting mix. Use a small pot rather than a large one that stays wet for days, and keep the mix lightly moist while the plant settles. Do not feed a newly potted cutting heavily; wait until it is growing steadily, then use a suitable fertilizer at the label rate if the herb needs it.
If you plan to move the plant outdoors when spring arrives, harden it off over about a week by gradually increasing its exposure to outdoor light and changing temperatures. Montana State University Extension recommends a 7–10-day transition before transplanting outside. Protect the new plant from frost and bring tender herbs back under cover if cold weather returns.
Fresh leaves are the reward, but avoid harvesting heavily from a small new plant right away. Let it produce enough growth to support itself, then pinch or snip modestly above a leaf pair so it can branch. That turns a successful cutting into a compact herb plant rather than a fragile stem with no reserves.
Conclusion
The best winter herb cutting starts with fresh growth, not an old dormant stem. Choose a healthy basil, mint, or actively growing perennial herb; cut just below a node; keep leaves out of the rooting medium; and provide steady warmth, bright light, and moisture with air around the roots.
If your indoor conditions are too dim or the only available stems are woody and dormant, wait for spring. A few well-timed cuttings from a strong parent plant are more dependable than trying to make every herb root in the coldest, darkest part of the year.