How to Prune Carrots: Thinning, Foliage Cleanup, and Safe
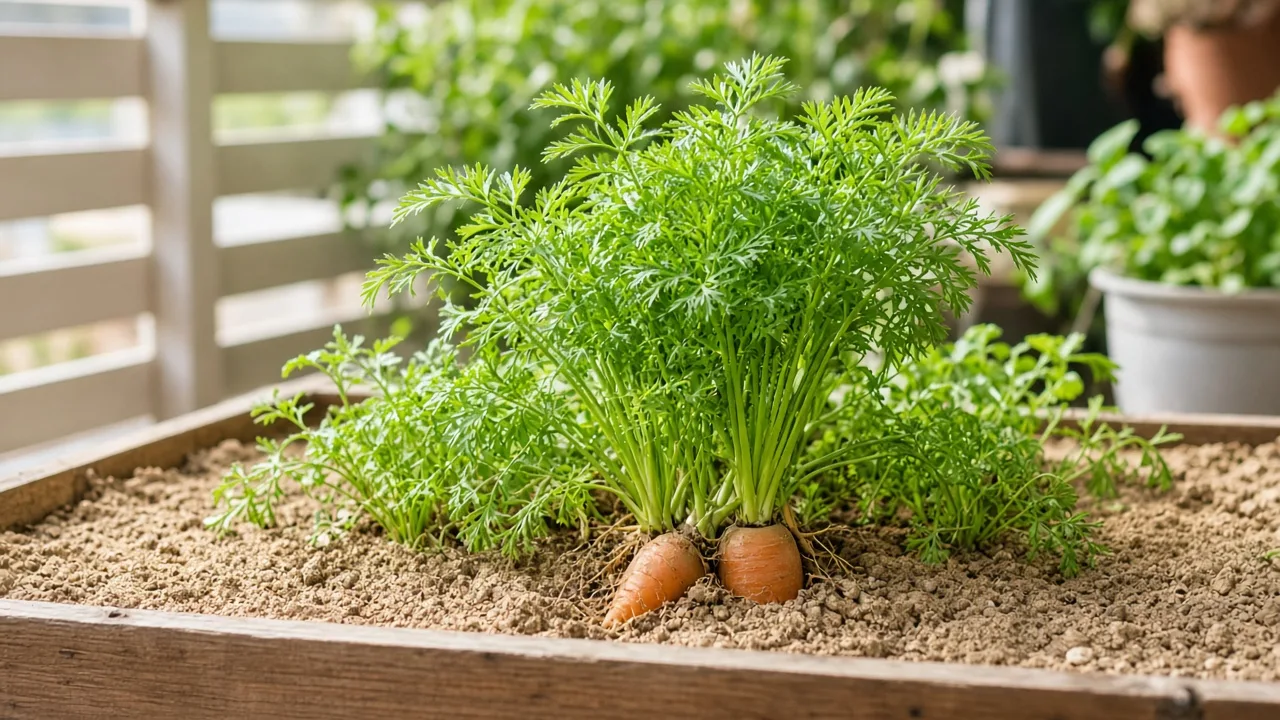
How to Prune Carrots: Thinning, Foliage Cleanup, and Safe Harvest Cuts
How to Prune Carrots: Thinning, Foliage Cleanup, and Safe Harvest Cuts
First, inspect the row and remove only seedlings that are clearly dead, mushy, or diseased—snip them at soil level with clean scissors. Do not start wide spacing cuts until surviving seedlings are about 8 cm tall and can handle thinning. For bed prep, sowing depth, and why carrots hate root disturbance, start on the Carrot overview.
Quick answer
Carrot (Daucus carota) is a cool-season biennial grown as an annual for its taproot, so “pruning” means thinning, foliage cleanup, and careful harvest handling—not shaping a woody canopy. Gardening Know How notes that carrot plants do not need traditional pruning but must be thinned so underground roots can expand without crowding. When seedlings reach roughly 8 cm, cut extras at the soil line so plants stand about 5 cm apart; RHS recommends thinning to at least 5–7.5 cm to prevent distorted roots. Keep soil loose and stone-free, water steadily after thinning, and give full sun so tops can feed root growth. Pruning cannot fix rocky soil, drought stress, or heat that stalls filling—fix those before expecting straight roots.
What pruning does for carrots
The feathery foliage looks delicate, but each leaf feeds the taproot below. Home growers “prune” carrots for four overlapping reasons:
Thinning opens space so each root can thicken without forking against neighbors. Cleanup removes yellow, pest-heavy, or diseased leaves so problems do not spread in a dense row. Bolting control means cutting or harvesting before a flower stalk steals energy from the root—unless you are deliberately saving seed. Harvest technique protects the crown so you lift intact roots instead of breaking tops in the soil.
Unlike shrubs, carrots do not branch from pruning cuts on the crown. University of Minnesota Extension emphasizes direct seeding because the long taproot makes transplanting unreliable—any cut or pull that disturbs nearby roots shows up later as stunted or twisted carrots. Your scissors mainly manage competition and hygiene, not architecture.
Thinning vs foliage trim vs harvest
| Task | When | Tool | What you gain |
|---|---|---|---|
| Thinning | Seedlings ~8 cm tall | Scissors at soil line | Room for straight roots |
| Disease cleanup | Whenever spotted | Snip affected leaves | Slower spread of leaf spots or mildew |
| Bolting cut | Flower stalk forming (leaf crop) | Snip stalk at base | Energy stays in root a little longer |
| Harvest | Root at packet size | Fork + hand lift | Intact carrot without broken top |
Crowding is one of the most common reasons for small or forked roots (Gardening Know How). If rows were broadcast thickly at sowing, thinning is not optional—it is the pruning step that defines harvest quality.
When to prune or thin carrots
Best window for thinning
Germination often takes 2–3 weeks, and seedlings stay small for a while. Plan the first real thinning once plants are about 8 cm tall with true leaves, not just threadlike cotyledons. At that stage neighbors are large enough to see which are weakest, but roots have not yet locked together in the row.
A second light pass can help if you sowed very thickly or rain caused uneven germination. Space final survivors roughly 5 cm apart in the row (about 2 inches), aligning with common home-garden guidance (Gardening Know How; RHS). Wider spacing suits large winter cultivars; tighter spacing works for baby carrots harvested young.
What you can remove anytime
Fully dead seedlings, slime-coated stems, and leaves with obvious blight or mildew can be snipped whenever you see them. That is sanitation, not a harvest. Avoid wholesale top trimming during active root swell unless you are clearing diseased tissue—healthy leaves drive sugar storage in the root.
When to delay cuts
Hold off on thinning if seedlings are still emerging or soil is baked dry. Water lightly, wait for uniform height, then thin. Delay heavy cleanup during heat waves when plants are already stressed; fix watering rhythm first. If you are within a week of planned harvest, skip cosmetic leaf trims and pull on schedule instead.
What to check before cutting
Walk the row and confirm four things:
- Seedling size: Cotyledons only means wait; 8 cm with feathery true leaves means thin.
- Soil moisture: Dry soil makes roots brittle when disturbed—even snipping can jostle neighbors in crusted beds.
- Spacing goal: Baby cultivars in shallow pots can finish at closer spacing; long Nantes types need the full 5 cm or more.
- Disease pattern: Spotting on lower leaves only may warrant cleanup; widespread yellowing may be overwatering or heat, not a pruning problem.
Also note whether any plant is sending up a thick flower stalk. That is bolting. For kitchen roots, harvest or remove the stalk promptly unless you are saving seed per your propagation plan.
Tools and handling
Use small, sharp scissors or snips for thinning at soil level. Bypass pruners work for tough bolted stalks. Rinse soil off blades between rows if you cut diseased tissue.
Garden carrot foliage may contain psoralens that irritate skin on contact (ASPCA). Wear gloves if you are clearing a large batch of tops, and keep pets from digging thinned seedlings. ASPCA lists garden carrot as non-toxic to cats and dogs, but foliage is not pet food—bag trimmings instead of leaving piles in beds.
The first cut to make
After the dead-seedling pass, thin by snipping the weakest seedlings at ground level, keeping the sturdiest plant in each 5 cm zone. Cut straight across the stem where it meets soil—do not tug. Gardening Know How warns that pulling one seedling can disturb the taproot of the one you meant to keep.
Work in small sections so you can step back and check spacing. In containers, thin around the rim first where competition is fiercest.
How to thin carrots step by step
- Water lightly the day before if soil is powder dry—easier cuts, less root jostle.
- Mark a 5 cm spacing mentally along the row or use a ruler for your first bed.
- Choose the keeper in each zone—the tallest, unbranched seedling with dark green leaves.
- Snip losers at soil level; leave roots in place to decay rather than pulling.
- Collect snipped tops if pests or disease were present; compost only healthy trimmings.
- Water gently afterward and keep the top 2–3 cm evenly moist for a few days while survivors settle.
If you used seed tape or pelleted seed, you may need only one pass. Broadcast sowings often need two light thinnings two weeks apart.
How much you can safely remove
For thinning, removing half to two-thirds of seedlings in a thick row is normal—you are selecting survivors, not defoliating them. Never strip more than one-third of healthy leaf area from a single plant during root fill; there is no benefit and it slows bulking.
When cleaning diseased foliage, take only leaves that are clearly affected plus one healthy leaf below the damage as a buffer. If more than a third of the plant looks sick, harvest young or remove the whole plant to protect the row.
What not to cut
- Neighbor taproots—no pulling during thinning.
- The central growing point on purpose—carrots do not bush out like herbs.
- Healthy tops en masse while roots are still sizing.
- Flower stalks you need for seed if you are running a seed crop—label those plants and stop thinning around them.
Do not attempt to “prune” forked roots straight—they are a soil prep issue, not a foliage issue.
Foliage cleanup and airflow
Dense, wet foliage can hold leaf spot and mildew. Remove the lowest yellow leaves that touch soil or mulch. In humid monsoon beds, a little airflow helps, but carrots are not tomatoes—you are not defoliating the whole crown.
If insect damage is localized (for example caterpillars on a few umbels), snip those stems and bag them. Rotate future sowings and avoid composting infested tops near clean beds.
Bolting and flower stalks
Carrots are biennials (NC State Extension). Heat, long days, or stress can push a flower stalk in the first year. Once bolting advances, roots turn woody and bitter.
For eating roots, harvest immediately or snip the stalk at its base and use roots soon. For seed saving, allow selected plants to flower, isolate from wild carrot and other Apiaceae that could cross-pollinate, and follow your propagation guide for dry seed collection.
Aftercare after thinning or cleanup
Water gently so the bed stays evenly moist but not soggy—freshly thinned rows dry quickly in sun. A light mulch after plants are a few centimeters tall can reduce crusting; keep mulch off the crown.
Avoid high-nitrogen feeds right after thinning; they push leafy tops more than roots. If you fertilize, use the mild approach in the Carrot fertilizer guide once survivors are established.
Recovery and what success looks like
Within 3–7 days, keepers should stand upright with no wilting at the snip sites—there should be no sites on keepers if you cut only removed plants. Over the next few weeks, shoulders of roots may orange at the soil line and tops should stay deep green in cool weather.
Signs thinning worked:
- Visible space between crowns at soil level
- Roots thicken without obvious forking at the sides
- Fewer threadlike “baby” roots at harvest
Signs you waited too long or pulled seedlings:
- Forked or intertwined roots at harvest
- Stunted keepers beside empty holes where neighbors were yanked
Mistakes to avoid
- Pulling instead of snipping during thinning.
- Transplanting thinned “extras”—they rarely recover (University of Minnesota Extension).
- Shearing all tops to reduce height in containers—roots stall instead.
- Thinning into dry, hard soil and breaking keeper roots.
- Composting diseased tops next to the next carrot sowing.
- Harvesting by foliage yank—breaks tops and leaves root fragments.
When not to prune
Skip aggressive thinning if seedlings are still germinating unevenly—give the row another week. Avoid foliage cleanup during extreme heat when plants are wilting despite moist soil. Do not thin immediately after a heavy nitrogen application; let growth stabilize. If roots are within days of harvest size, harvest rather than tidying leaves.
Harvest cuts and crown care
Harvest is the last “cut” interaction. Loosen soil with a fork, grip the root shoulder, and lift. If tops are needed for kitchen greens, slice them off after lifting, leaving 1–2 cm of crown on the root for storage if you are not using them immediately.
Regrowing a full carrot from a kitchen top is a fun experiment but does not replace direct sowing for edible roots.
Conclusion
Carrot pruning is really crowd control and hygiene for a taproot crop. Your first move is removing only dead or diseased seedlings at soil level; your main structural task is thinning to ~5 cm once plants are ~8 cm tall, always snipping—not pulling. Protect healthy foliage while roots fill, act fast on bolting, and lift harvests from below. When survivors thicken without forking and tops stay green through cool weather, you thinned at the right time.
When to use this page vs other Carrot guides
- Carrot overview — Crop planning, cultivar depth, and sowing basics before you thin.
- Carrot soil — Escalate here when pruning cannot fix forked or stunted roots.
- Carrot watering — Escalate here when wilting or cracking follows thinning stress.
- Carrot light — Escalate here when pale, weak tops suggest stretch rather than crowding.
- Carrot repotting — Clarifies why carrots are direct-sown, not repotted.