Mold on Soil on Peace Lily: Causes, Checks & Fixes
Quick answer
Mold on Peace Lily soil usually means the potting mix surface stays wet from overwatering or poor dry-down-not a leaf disease on the glossy spathes above. First step: scrape the top layer, improve airflow around dense foliage, and let the top 3–5 cm (~1–2 inches) dry completely before the next drink.
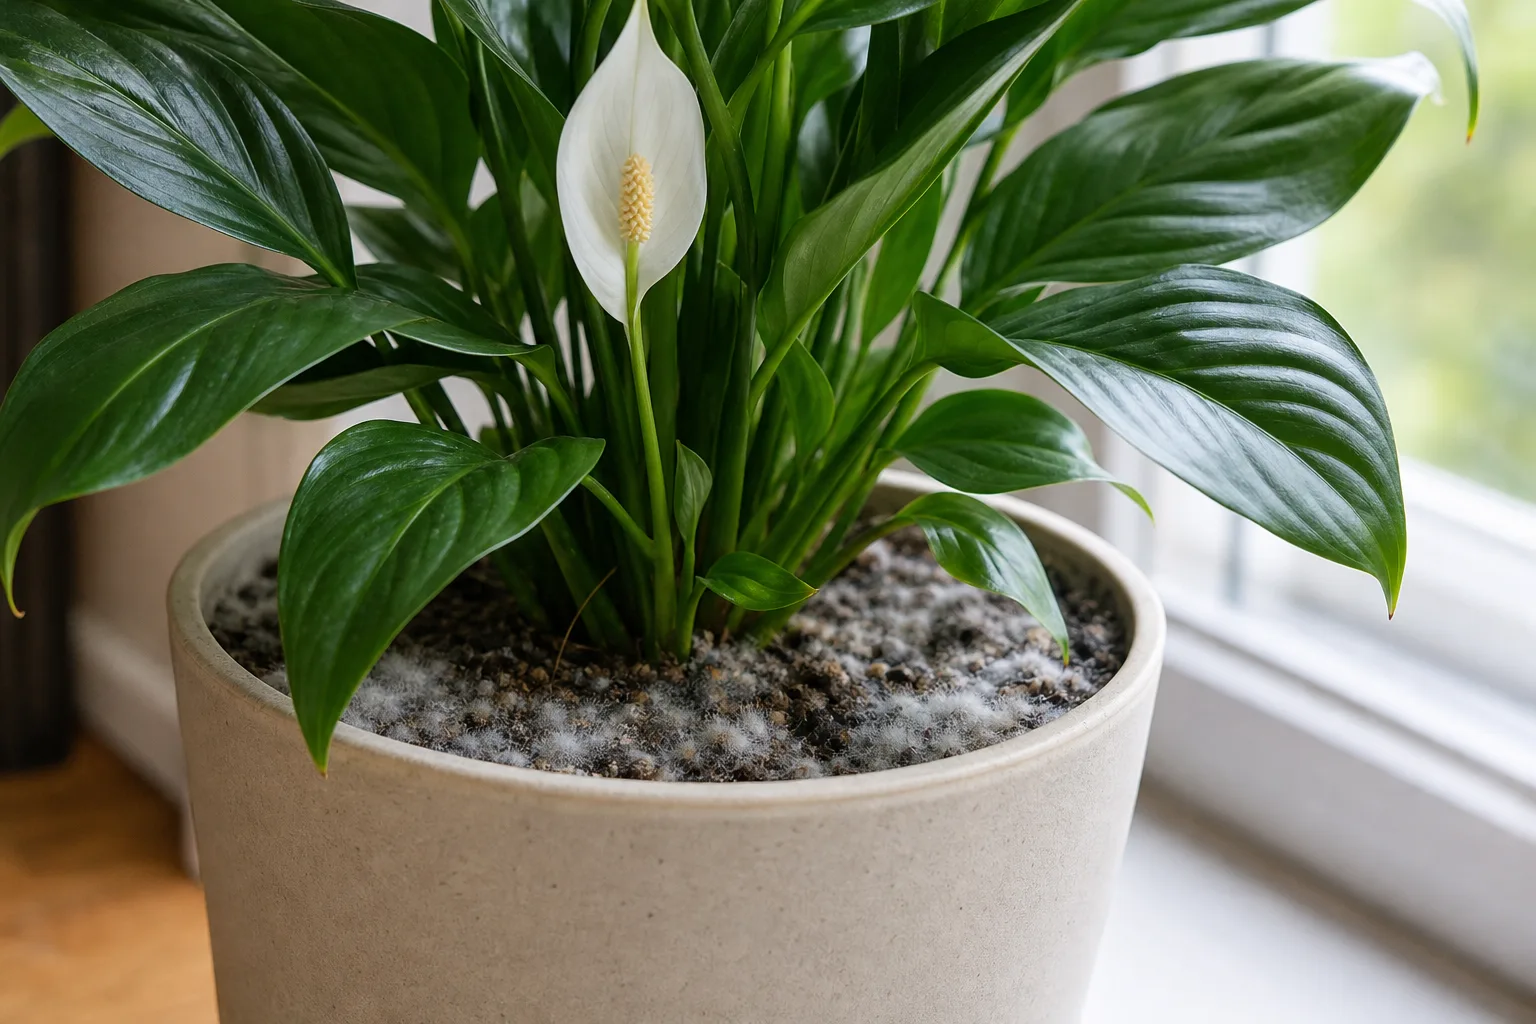
Mold on Soil on Peace Lily: Causes, Checks & Fixes
This guide covers mold on soil on Peace Lily. See also the general Mold on Soil guide, watering, and light pages for this plant.
Mold on Soil on Peace Lily: Causes, Checks & Fixes
Quick answer
White or green fuzz on the soil surface of your Peace Lily (Spathiphyllum wallisii and hybrids) almost always means the top layer of potting mix has stayed damp too long. The mold is usually harmless saprophytic fungus feeding on peat, bark fines, and old root debris-not a disease attacking the glossy leaves or white spathes above.
First fix: scrape off the top centimeter of moldy mix, improve airflow around the dense foliage crown, and pause watering until the top 3–5 cm (~1–2 inches) dries completely. Do not spray fungicide or add water because leaves look limp on already-wet soil.
Peace lilies are famous for dramatic wilt-and-recovery, which trains many owners to water on droop alone. That habit keeps the root zone soggy while mold colonizes the always-wet surface-the same setup that leads to root rot and fungus gnats on this clumping tropical aroid. For the full dry-check workflow, see our Peace Lily watering guide.
What mold on soil looks like on Peace Lily
On Peace Lily pots, surface mold most often appears as a thin white, gray, or occasionally greenish fuzzy film across the potting mix. It may show up in patches between arching leaf bases or cover the entire soil surface. You might notice it after a heavy winter watering, when an office plant has not dried for ten days, or alongside small flies that rise when you disturb the pot.
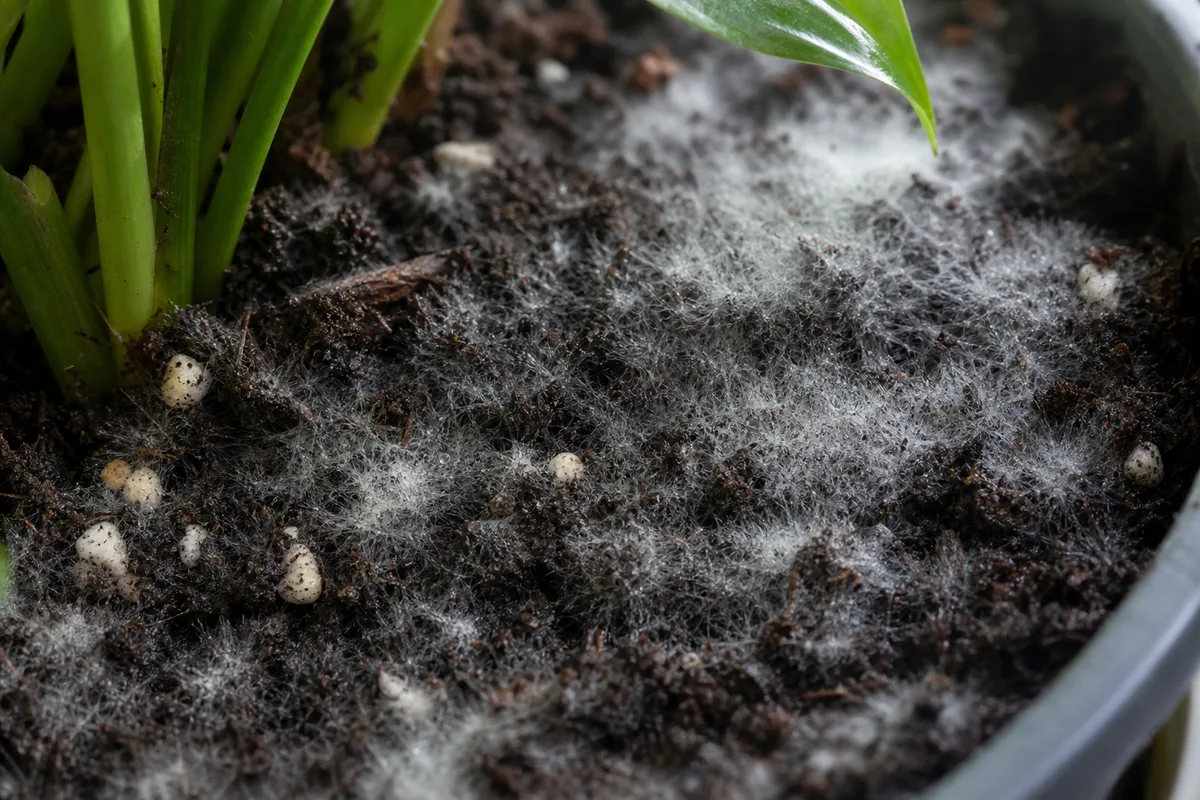
Mold on Soil symptoms on Peace Lily - compare with healthy tissue on the same plant.
White, gray, and green surface fuzz
- White or gray fluff - Flat or slightly raised patches on damp topsoil; scrapes off easily with a spoon
- Green tint - Often algae sharing the same constantly wet surface, especially in low light
- Re-growth pattern - Returns within days of scraping if the surface never dries
- Healthy leaves above - Glossy lance-shaped foliage and spathes can look fine while the soil surface is wrong
Peace Lily leaves should sit above a mix surface that dries within several days of a thorough drink. Dense clumping foliage can mask soil problems because the plant still looks green even when the rim stays wet.
Musty vs. sour smell
A musty or earthy smell when you scrape surface mold usually matches saprophytic fungus on organic mix-annoying but manageable with dry-down correction.
A sour, swampy, or rotten odor from drainage holes suggests anaerobic soil and possible root decline-not a scrape-only situation. That smell plus soft stem bases means escalate to our root rot protocol before assuming cosmetic mold.
Mold vs. mealybugs on stems
Soil mold stays on the mix surface as a uniform fuzzy film following wet conditions.
Mealybugs leave structured white cottony clusters tucked in leaf axils, spathe bases, and along petioles-not a flat layer across soil. If you see white fuzz on the plant body, inspect stems with a hand lens; soil mold alone does not form cotton patches on glossy Peace Lily leaves.
Why Peace Lily soil gets moldy
Peace lilies evolved as tropical forest-floor plants that want moist roots with a briefly dry surface between drinks. Clemson HGIC describes the ideal as soil kept moist but not soggy, allowed to dry out slightly between waterings. Mold appears when you interpret “moist” as “never let the top dry.”
Dense foliage trapping airflow at the soil line
Spathiphyllum grows as a clumping rosette of arching leaves that hang close to the pot rim. That dense crown traps humid still air at the soil surface-exactly where evaporation should happen. Crowded shelf placement and decorative grouping make the problem worse. Generic houseplant mold pages rarely mention this Peace Lily morphology, but it is a common reason the top inch stays fungus-friendly even when you water correctly by volume.
Shallow watering and the wet top inch
Many owners water lightly and often-especially when leaves droop-without checking depth. Frequent shallow drinks wet the surface repeatedly while the lower root ball may still hold moisture. That leaves the top centimeter chronically damp, which is where saprophytic fungi and gnat larvae concentrate.
The wilt paradox makes this worse: Peace Lily collapses dramatically when thirsty, so limp leaves on already-wet soil get another drink instead of a dry-down pause. Wet-soil wilt means damaged roots, not thirst-adding water grows more mold. Our overwatering guide walks through that check.
Peat-heavy mix, saucers, and oversized pots
Standard bagged mixes high in peat hold surface moisture long after a drink. Peace lilies are often slightly pot-bound, which helps dry-down-but an oversized decorative pot with excess unused mix stays wet for weeks. Clemson HGIC warns that too large a container keeps potting mix too wet and leads to root rot.
Saucers, foil wraps, and cachepots without drainage re-wet the mix from below. Standing water is one of the fastest routes to sour soil and recurring surface mold on desk plants.
Low light slowing surface dry-down
Peace lilies tolerate dim offices, but NC State Extension notes they grow best in bright filtered light. A pot that dries in five days near an east window may stay wet two weeks in a fluorescent-lit corner-long enough for mold to return after every scrape. Winter slows growth further while many owners keep the same watering calendar from summer.
How to confirm the cause
Work through this checklist before repotting or spraying fungicide:
- Visual ID - White, gray, or green fuzzy patches on soil only; scrapes off with a spoon; no cotton clusters on leaf axils.
- Surface moisture - Press a finger to the second knuckle. Does the top 3–5 cm stay wet for days without drying?
- Pot weight - Lift the pot. Heavy days after you thought you watered lightly means water is not exiting properly.
- Drainage and saucers - Confirm holes are open, cachepots are empty, and no standing water sits beneath the pot.
- Companion signs - Fungus gnats rising when you water, green algae on the rim, or musty smell when scraping surface mix.
- Stem and leaf health - Firm green stems and normal new center growth suggest nuisance mold. Yellow lower leaves, soft bases, or sour smell suggest root rot overlap.
- Smell test - Musty when scraping fuzz is mold culture; sour from drainage holes is rot urgency.
Lookalike comparison
| Sign | Surface mold | Fungus gnats | Root rot | Mealybugs |
|---|---|---|---|---|
| Where you see it | Fuzzy film on soil top | Tiny flies rise from soil when disturbed | Soft stems, yellow leaves on wet mix | White cotton on stems and axils |
| Smell | Musty/earthy when scraped | Often musty wet soil | Sour, rotten | None from soil |
| Peace Lily leaves | Usually firm and green | May wilt slightly on wet soil | Widespread yellow, limp on heavy soil | Localized wax near clusters |
| First fix | Scrape + dry surface | Dry surface + sticky traps | Unpot, trim, repot dry | Isolate + treat pests on plant |
If only the top centimeter is fuzzy after one overwatering episode and stems are firm, you likely caught it early. Soft stems plus wet deep soil means escalate beyond scraping.
First fix for Peace Lily
Scrape the moldy surface layer, improve airflow, and pause watering until the top 3–5 cm (~1–2 inches) dries completely.
That single correction resolves most first-time mold cases on Peace Lily. Follow this order:
- Scrape the top 1–2 cm of fuzzy mix with a spoon and discard it in the trash-not an indoor compost pile. Peace Lily contains insoluble calcium oxalates toxic to cats and dogs; wash hands after handling scraped mix and keep pets away from discarded soil.
- Improve airflow - Space the pot away from crowded plants, pull arching leaves slightly away from the rim if safe, or run a fan on low nearby (not directly on foliage).
- Pause top watering until the dry-depth test passes. Lift the pot: light weight plus dry top 3–5 cm means the next thorough drink; heavy plus wet depth means keep drying even if leaves look slightly limp.
- Move to brighter indirect light so the surface cycles moisture faster-see our light guide for placement that avoids scorching thin leaves.
- Optional perlite topping - Replace scraped surface with a thin layer of dry perlite or coarse mix to break the moisture cap if mold returns quickly.
Bottom-watering option
If top watering always re-wets the fuzz zone, bottom-water once after the surface has dried: set the pot in a saucer of water until the mix wicks moisture from below, then remove and empty all standing water. Roots hydrate while the top layer can stay drier-but only if you still allow a full dry surface interval between sessions. Bottom watering without dry-down just moves mold to a different week.
When to escalate to root-rot protocol
Scrape-and-dry is enough when stems are firm, smell stays musty-not-sour, and mold does not return within a week after corrected watering.
Unpot and inspect roots when:
- Soil smells rotten and stems soften at the base
- Lower leaves yellow widely while mix stays wet
- Mold returns within days despite dry surface and brighter light
- Limp foliage on heavy soil does not improve after the top dries
Follow our root rot rescue steps-trim mushy tissue, repot in fresh airy mix, and water sparingly until new center growth appears.
Recovery timeline
Surface mold should not return within a week once the top 1–2 inches dry between waterings and saucers stay empty. You should see stable firm leaves and normal new growth from the center crown if roots remained healthy throughout.
Improvement usually shows within one dry-down cycle-roughly five to fourteen days depending on pot size, season, and light. Watch for:
- Good: Dry soil surface before each watering, no new fuzz, firm stems, clean new leaf tips emerging
- Bad: Mold reappearing within days of scraping, sour smell intensifying, yellow lower leaves spreading on wet mix, stems softening at soil line
Brown or yellow leaf tissue from earlier stress does not re-green. Recovery means the problem stops spreading and new leaves emerge clean.
What not to do
Do not water because leaves droop when the top 3–5 cm is still wet-that deepens mold and rot risk on Peace Lily.
Do not drench with fungicide, cinnamon, or hydrogen peroxide as a substitute for drying the soil. Roots need oxygen, not another wet treatment.
Do not leave cachepots or saucers full after watering. Clemson HGIC is explicit: never let the plant sit in a saucer of excess water.
Do not upsize the pot to “fix” mold. Excess mix volume stays wet longer on this slightly pot-bound species.
Do not assume white fuzz is harmless and ignore softening stems. Saprophytic mold and root and stem diseases share the same overwatering cause on Peace Lily.
Do not repot on day one for a single mold patch on an otherwise firm plant-scrape and dry first.
How to prevent mold on soil on Peace Lily
Water when the top 3–5 cm (~1–2 inches) dries per our watering guide-not on droop alone when soil is already wet.
Empty saucers and cachepots within thirty minutes of every drink. Remove fallen leaf debris from the soil surface during weekly checks.
Use airy, well-drained potting mix with perlite or bark; repot when old peat never dries in your light level.
Place the plant in bright indirect light so the surface cycles predictably. Cut back watering frequency in winter when growth slows.
Treat the first patch of white fuzz as a moisture alarm-not a cosmetic annoyance. The same dry-surface rhythm that prevents mold also keeps fungus gnats and root rot off this dramatic wilting plant long term.
When to worry
Surface mold alone on firm stems and green leaves is a culture fix, not a crisis.
Treat as urgent when:
- Soil smells rotten and roots feel mushy on inspection
- More than a third of leaves yellow or wilt while mix stays wet
- Mold returns within days of scraping despite dry surface and corrected saucer discipline
- Stems soften at the base while the surface stays constantly wet
Contact your local extension office or a master gardener helpline if the plant keeps declining three weeks after corrected watering and root trim-advanced rot may need professional diagnosis.
Related Peace Lily guides
- Peace lily overview - species basics and care hub
- Watering - depth probe, droop-vs-rot checks, seasonal schedule
- Overwatering - wet-soil failure before rot advances
- Root rot - trim, repot, and salvage protocol
- Fungus gnats - flies sharing the same wet-surface cause
- Drooping leaves - thirst-focused droop when wet soil is ruled out
- Light - placement that speeds or slows dry-down
- Soil - mix that dries without starving roots
- Repotting - timing when degraded peat never dries
Conclusion
Mold on Peace Lily soil tells you the potting mix surface has stayed wet too long-not that your clumping aroid is doomed. Confirm white or green fuzz on damp topsoil, scrape it, dry the top 3–5 cm (~1–2 inches), and fix the droop-on-wet-soil watering habit before adding another drink. Most Peace Lilies recover without heroic measures when stems stay firm. The same surface dry-down that clears mold also keeps fungus gnats and root rot off this moisture-loving tropical plant long term.