Philodendron Moonlight Repotting: When, How & Pot Size
Philodendron Moonlight Repotting: When, How & Pot Size
Philodendron Moonlight Repotting: When, How & Pot Size
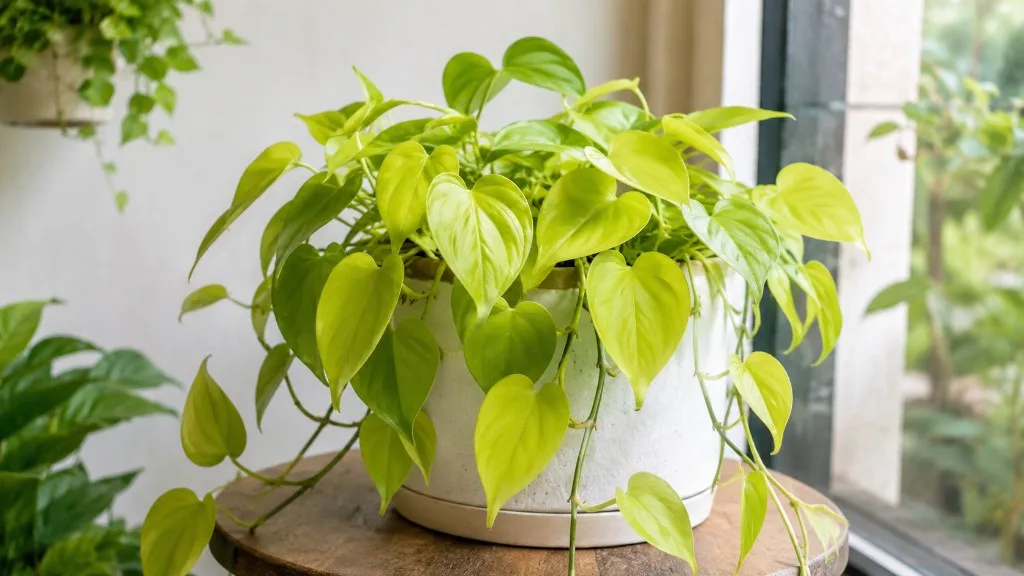
Philodendron Moonlight (Philodendron ‘Moonlight’) is a compact, self-heading Florida hybrid prized for its glowing chartreuse crown — not a vining climber that needs a moss pole reset every time the pot fills. That growth habit changes how repotting feels in your hands and what success looks like afterward. Done well, a spring repot refreshes depleted peat, restores drainage, and gives you a clean moment to divide offsets into new plants. Done poorly — oversized pot, bare-root shock, or repotting a plant that only needed brighter light — you get weeks of dull new leaves, soft drooping foliage, and a compact rosette that looks fine in photos but stalls below the soil line.
This guide covers when Moonlight actually needs a new container, how to execute a routine or rescue repot without stripping fine root hairs, and how to read the next chartreuse leaf at the crown as your clearest recovery signal.
Quick Answer – When to Repot Moonlight
Repot Philodendron Moonlight every one to two years, or sooner when roots circle drainage holes, water runs through without soaking the center, or growth stalls despite good light and balanced feeding. Spring is the best time for repotting houseplants so actively growing roots colonize fresh mix before winter slowdown. Choose a pot only 2–5 cm (1–2 inches) wider than the current one — oversized containers keep compost wet too long and invite root rot. Refresh with the airy potting blend from our soil guide, skip fertilizer for four to six weeks, and expect mild wilting for a few days. A firm new leaf opening bright chartreuse-yellow at the crown tells you roots have reconnected.
No moss pole is required. Moonlight is a self-heading cultivar with short stems and leaves held in a tight rosette — not a climber that needs trellis support at repot time.
Why Moonlight Repotting Differs From Climbing Philodendrons
Philodendron is not one growth form. NC State Extension divides the genus into climbing types with aerial roots along vining stems and non-climbing self-heading types that grow upright from a central crown. Philodendron ‘Moonlight’ sits firmly in the second group alongside ‘Birkin’ — short stems, large leaves in a rosette, and a symmetric root mass that fills pots more evenly than a trailing heartleaf or variegated climber.
Self-heading rosette vs vining root architecture
On a vining philodendron like P. erubescens ‘Pink Princess’, repotting often means managing two zones: the fibrous pot mass and aerial roots wrapped around a moss pole. Moonlight has neither. Its roots spread from a compact crown, which means the plant can look modest above soil while the bottom third of a nursery pot is already a dense mat. Clemson HGIC notes that self-heading philodendrons send leaves from a heavy base clump and that some produce offsets — natural division candidates when you unpot.
That symmetry is an advantage at repot time. You are not resetting pole ties, burying nodes deeper, or worrying about adventitious roots drying mid-session. You are refreshing mix around a single crown and optionally separating offsets with their own root sections. If stems look leggy with small pale leaves, that is almost always insufficient light — repotting will not fix it. Address light placement first.
Chartreuse crown as your recovery benchmark
On a solid green philodendron, any new leaf signals recovery. On Moonlight, you need to look at the crown. Healthy Moonlight pushes new foliage that opens bright chartreuse-yellow and matures to light green. After repot stress, watch whether the first new leaf at the center opens at normal size with vivid colour — not paper-thin, not dull olive, and not stunted.
Colour at the crown is your best early indicator because Moonlight’s self-heading habit concentrates new growth in one place. Damaged roots from soggy old mix or an oversized new pot remove the buffer that keeps chartreuse stable through ordinary watering misses. Treat a firm chartreuse new leaf as confirmation the root zone is working again.
Routine Repot vs Rescue Repot
Not every unpotting is the same job. Matching your session type prevents treating a rotting plant like a simple size upgrade — or delaying a rescue because the calendar says wait until April.
| Signal | Routine upgrade repot | Rescue repot |
|---|---|---|
| Root colour | Mostly white or tan, firm | Brown, mushy, or foul-smelling |
| Growth | Stalled but leaves still firm | Widespread wilt or spreading yellow |
| Timing | Spring–early summer preferred | Any season if rot is active |
| Pot direction | One size up (2–5 cm) | Often same size or smaller after trimming |
| Root handling | Tease circling tips; keep ball intact | Trim rot; may divide healthy offsets |
| Fertilizer | Wait 4–6 weeks | Wait until firm new crown growth |
Penn State Extension recommends spring for routine houseplant repotting because roots grow into fresh mix as seasonal growth resumes. When mushy roots or sour-smelling mix are present, treat it as rescue work even in winter — modest pot, temperatures above 18°C (65°F), and cautious watering until spring.
When to Repot Philodendron Moonlight
Calendar reminders help, but root condition should drive the decision. NC State advises repotting philodendrons when they become root-bound or pot-bound, with spring as the best time. RHS guidance on philodendrons adds that plants can stay in their original container for a couple of years until roots become densely packed — then repot into a pot only a few centimetres larger than the rootball.
Plan a full repot every one to two years for an actively growing indoor Moonlight in a 12–18 cm grow pot. Fast growers in bright east rooms may hit the one-year mark; slower specimens in cooler winter homes may sit comfortably for two.
Root-bound signs on compact crowns
Moonlight’s dense foliage can hide a tight root mass. Check for these signals together rather than in isolation:
- Fast dry-down: Mix dries within a day or two after thorough watering, even in moderate temperatures — a classic pot-bound sign.
- Roots at drainage holes or surfacing above the mix line.
- Water channels through the center without wetting the rootball — hydrophobic, depleted peat.
- Stalled new leaves at the crown despite good light and regular feeding during spring and summer.
- Sour or musty smell from the mix when you lift the pot — often paired with chronic overwatering in low light.
Slide the plant out and examine the bottom third. If roots circle densely with little visible mix, it is time.
When not to repot
Do not repot because one lower leaf yellowed. Yellowing often traces to overwatering, cold wet roots, or natural aging on older foliage. Repotting an already stressed plant stacks variables and makes diagnosis harder.
Do not repot a brand-new nursery plant on day one unless the mix is clearly failing or pests are obvious. Quarantine, learn the pot’s dry-down rhythm for two to three weeks, then repot in the next active growth window if roots are already tight. The overview guide covers first-month stability in more detail.
Do not repot to fix leggy stretching. Long naked stems with small leaves mean insufficient light — increase filtered brightness before changing pot size.
Best Season and Indoor Timing
Why spring wins
Spring repotting gives houseplants the full growing season to establish in fresh containers. For Moonlight, that matters because chartreuse crown colour and leaf size depend on active root uptake paired with bright indirect light. Repotting in March through June aligns root recovery with the period when the plant naturally pushes the most new foliage.
Water the plant lightly the day before repotting to soften the rootball, then proceed on a mild day when your room stays above 18°C (65°F).
Winter repot exceptions
Avoid winter repotting if the plant is only slightly tight and still manageable — slow growth and wet cold mix increase rot risk. Repot in winter only when necessary: active root rot, a broken pot, or a plant that cannot be watered safely in its current container. Use a modest size increase, bright indirect light, and reduced watering frequency until spring growth returns.
Choosing the Right Pot Size and Material
One-size-up rule
The most common repot mistake on Moonlight is generosity. RHS overpotting guidance recommends moving into a pot only 2.5–5 cm (1–2 inches) wider in diameter than the previous container — not jumping to a decorative cachepot that holds triple the root volume. Excess fresh compost stays wet around a small rootball, reducing aeration and causing roots to rot instead of expanding.
Penn State Extension echoes the same principle: the new container should be slightly larger than the current one. For a Moonlight in a 14 cm nursery pot, a 16–17 cm pot with drainage holes is the right target — not a 20 cm statement planter “for future growth.”
Terracotta vs plastic for Moonlight
Plastic nursery pots retain moisture longer — fine if you tend to underwater or run a humid room. Terracotta breathes and dries faster, which suits heavy-handed waterers and warm bright windows. Match material to your watering habits, not aesthetics alone. Every pot needs drainage holes; if you use a decorative cover pot, lift the inner pot to empty saucers after every soak.
Soil Mix for the Repot Session
Replace compacted or sour mix entirely — do not top-dress a root-bound Moonlight and call it done. Use standard potting mix with 20–25% perlite for drainage, matching the recipe in our soil guide. Penn State warns against garden soil in indoor containers because it introduces pests and poor drainage.
Moisten the new mix before backfilling so it absorbs water evenly on the first soak. Moonlight prefers slightly acidic, well-drained organic mix — the same conditions NC State lists for philodendrons generally: bright indirect light, moist but well-drained soil high in organic matter.
Step-by-Step Repotting Procedure
Pre-repot preparation
Gather a clean pot one size up, fresh mix, gloves (philodendrons contain irritant calcium oxalate crystals), and a tarp or newspaper for mess. Water the plant lightly 12–24 hours ahead so the rootball slides out without shattering. If reusing a pot, wash and sanitize it. Soak new terracotta overnight so it does not wick moisture from fresh mix on first watering.
Unpotting and root inspection
Turn the pot on its side and slide Moonlight out by the base — avoid yanking brittle self-heading petioles. Tease circling outer roots gently with your fingers so they point outward into new mix. Trim only soft brown or black mushy roots with clean shears; leave firm white and tan roots intact.
If the rootball smells sour or more than a third of roots are mushy, shift to rescue mode: trim rot, optionally downsize the pot, and water once lightly rather than soaking.
Division at repot time
If you see separate crowns or offsets with their own root sections, this is the reliable home propagation window for this patent cultivar. Gently tease clusters apart so each division has roots and at least two to three leaves. Pot divisions immediately in small containers with the same mix. Full division technique and aftercare sit in our propagation guide — the repot session is the practical time to do it.
Skip division if the plant is recovering from rot or severe stress. One stable plant in fresh mix beats two weak divisions.
Backfill and first water
Place a screen or coffee filter over the drainage hole if mix escapes easily. Add moist mix to the pot bottom so the crown sits at the same depth as before — do not bury the stem deeper to stabilize a self-heading plant. Fill around the sides, firm lightly without compacting, and leave 2–3 cm headspace below the rim for watering.
Water once until excess drains freely, empty the saucer, and place Moonlight back in bright indirect light — the same exposure it had pre-repot if possible. Avoid direct sun on wilted leaves for the first week.
Post-Repot Care for the First Month
Expect mild drooping for three to seven days — normal transplant adjustment on aroids. Hold fertilizer for four to six weeks so tender new roots are not burned by salts. Let the top 3–5 cm of mix dry before the next soak; the temptation after repot is to overwater a wilted plant, which keeps soggy mix around damaged roots.
Watch the crown, not old leaves. A firm new chartreuse leaf within three to five weeks means success. Persistent wilt with sour mix smell means investigate roots again — you may need a second rescue trim.
Keep humidity moderate (50–60%) and airflow steady. Moonlight does not need a humidity tent; stagnant wet air around stressed foliage invites fungal issues.
When to use this page vs other Philodendron Moonlight guides
Use this repotting guide when the root zone or container is the bottleneck — circling roots, fast dry-down, depleted mix, or a planned division session. For day-to-day moisture checks, read the watering guide. For mix ratios and pH before you buy bags of perlite, see soil. For crown colour and window placement, see light. For offset division aftercare beyond the repot hour, see propagation. For feeding schedules after the post-repot pause, see fertilizer.
Related Philodendron Moonlight guides
- Overview — identity, growth habit, and first-month stability after purchase
- Watering — check-first dry-down that determines post-repot soak timing
- Soil — perlite ratios and container choice for the mix you backfill at repot
- Light — keeping chartreuse crown colour vivid through recovery
- Propagation — division steps and weeks 1–8 aftercare when you split at repot
Conclusion
Philodendron Moonlight repotting is straightforward when you respect its self-heading biology: one size up, fresh airy mix, spring timing, no moss pole, and division only when offsets are healthy. Root-bound signals — fast dry-down, circling roots, stalled crown growth — matter more than a calendar. Judge success by the next bright chartreuse leaf at the center, not by whether yesterday’s lower foliage still looks tired. When roots are firm and the crown pushes vivid new colour within a month, the repot did its job.