Alocasia ‘Regal Shield’ Care Guide
Learn Alocasia ‘Regal Shield’ care with practical light, soil, and watering checks, plus propagation, winter protection, and fixes for yellow or drooping leaves.
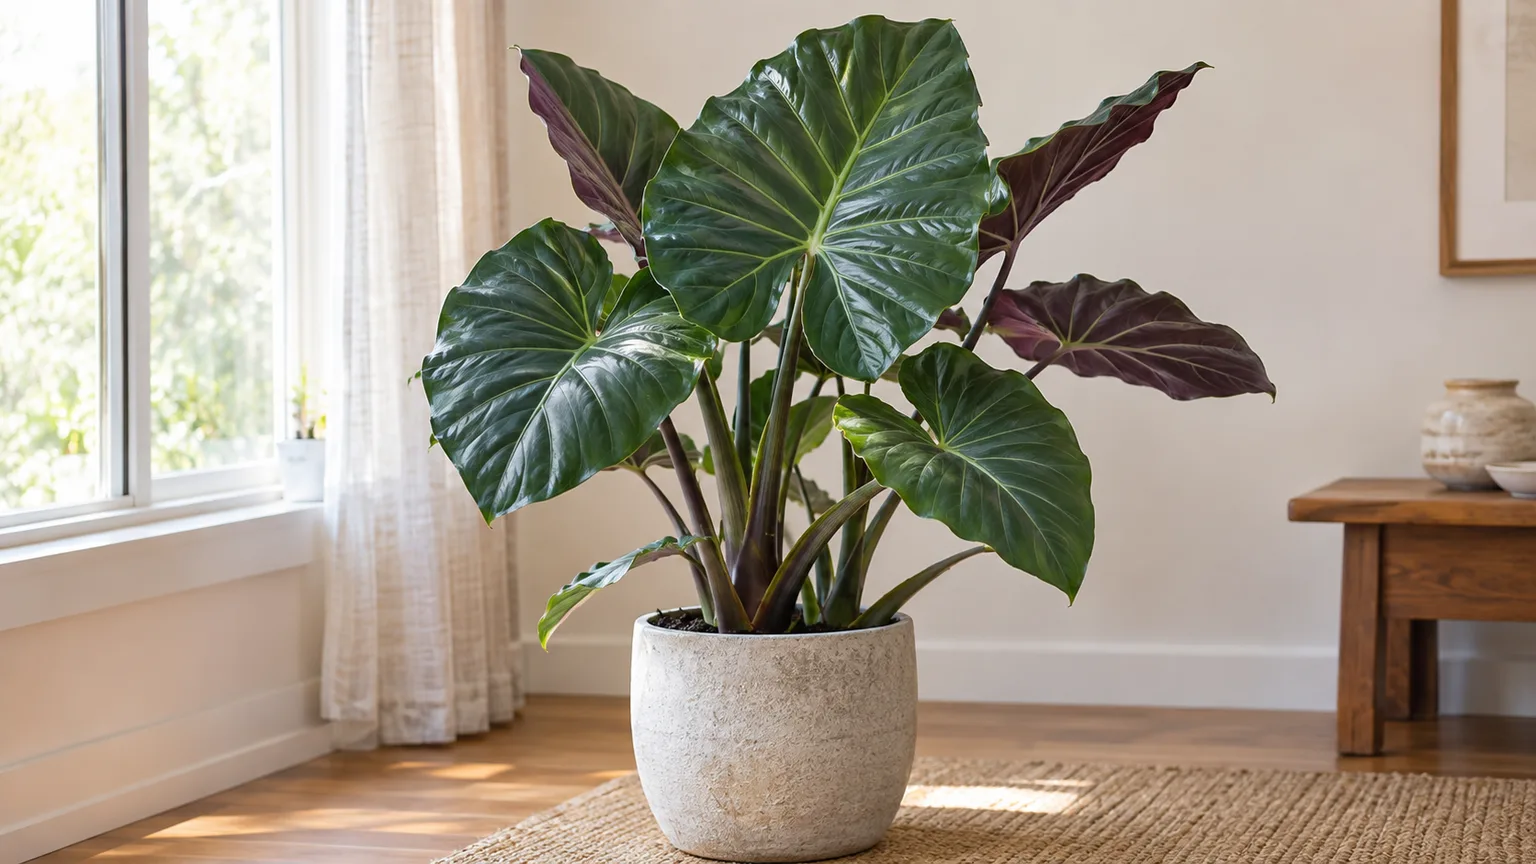
Alocasia ‘Regal Shield’ earns its elephant-ear look from broad, upright leaves with deep green tops, pale veins, and purple undersides. It can grow indoors or in a warm outdoor garden, but it is not frost-tolerant and its thick roots dislike staying waterlogged. The reliable approach is to give it bright filtered light, warmth, an airy mix, and moisture checks that change with the season.
Treat the routine as a balance: keep the root zone lightly and evenly moist during active growth, then water less as growth slows. If the plant droops or yellows, check the soil and roots before changing fertilizer, humidity, and light all at once.
Quick care profile
| Care factor | Practical starting point | What to observe |
|---|---|---|
| Light | Bright, filtered or indirect light | New leaves should hold their size and stems should not stretch toward a window |
| Water | Water thoroughly when the top 1–2 inches of mix begin to dry | A pot that stays wet for many days needs a drainage or light check |
| Soil | Airy, moisture-retentive aroid mix | Water should pass through without leaving the pot heavy and swampy |
| Temperature | About 65–80°F (18–27°C) during growth | Protect from cold drafts and sudden drops |
| Humidity | Moderate to high; around 50% or more is a useful indoor aim | Watch leaf edges, while also checking water and light |
| Feeding | Balanced liquid fertilizer during active growth | Pause when the plant stops producing leaves |
| Outdoor use | Warm, frost-free conditions or a movable container | Bring container plants in before chilly nights |
These are starting points rather than pass-or-fail thresholds. Pot size, mix, window exposure, room temperature, and season all change how quickly the soil dries. The genus-level care profile from NC State Extension describes Alocasia as a warm-growing plant that prefers moisture with good drainage and humus-rich soil; that combination is the key to making the numbers work in a real home.
Regal Shield is grown for foliage, so judge success by steady, sturdy leaves rather than flowers or rapid height. An older leaf can yellow as a plant grows, but several leaves declining together deserve a closer look at the roots, temperature, and pests.
Choose light by how the leaves respond
Set the plant near a bright window where the light is softened by a sheer curtain, filtered through foliage, or reflected into the room. An east-facing window is often an easy starting location. A south- or west-facing window can work if the plant sits back from harsh afternoon sun; a dim corner usually produces smaller leaves and longer, weaker stems.
Direct sun is not automatically harmful in every setting, but intense midday rays through glass can bleach or scorch the leaf surface. Outdoors, start in bright shade or dappled light rather than placing a nursery-grown plant in an exposed, hot bed. If you move it into stronger light, acclimate it over several days and inspect the newest leaves for pale patches.
Let new growth guide small adjustments. If the plant leans toward the window, rotate the pot a little every week or two. If successive leaves are smaller while the plant is otherwise healthy, increase the amount of bright filtered light before reaching for extra fertilizer. If new leaves emerge pale or develop dry sun-facing patches, soften the exposure instead of moving the plant into deep shade.
Move outdoors only when nights stay warm
Regal Shield can make a striking container or sheltered-bed plant in a tropical or frost-free climate. In a region with cold winters, a pot gives you control: keep it outside through warm weather, then move it indoors before nights become chilly. The UF/IFAS elephant-ear guidance provides useful context for growing elephant ears outdoors, but local winter temperatures and the specific cultivar still determine whether a site is suitable.
Choose a position with morning light or bright shade, protection from strong wind, and soil that drains freely. Leaves can be damaged by hot afternoon sun, gusts, or a sudden transition from a protected room to a bright patio. Before bringing a plant indoors, inspect leaf undersides and stems for hitchhiking pests, rinse the foliage, and keep it apart from other houseplants for a short observation period.
Use an airy aroid mix and right-sized pot
The potting medium needs to hold some water while leaving air around the roots. A useful starting blend is two parts indoor potting mix or coco coir, one part orchid bark, and one part perlite or pumice. If your base mix is already loose and chunky, use less bark; if it remains dense and wet, increase the coarse, porous ingredients rather than trying to fix the problem by watering less often forever.
Use a container with open drainage holes. After watering, let the pot drain completely and empty any decorative cachepot or saucer. A layer of gravel at the bottom does not replace a drainage hole and can leave a perched wet zone near the roots. Avoid heavy garden soil in a houseplant pot because it compacts easily and may stay saturated in a low-light room.
The best mix is the one that wets evenly, drains freely, and then gradually becomes lighter as it dries. A loose surface over a dense, sour-smelling root ball is not enough; if the plant repeatedly wilts while its pot remains wet, inspect the mix and roots. The Fine Gardening Alocasia profile also emphasizes moist but well-drained growing conditions, a useful principle whether you buy a ready-made aroid mix or blend your own.
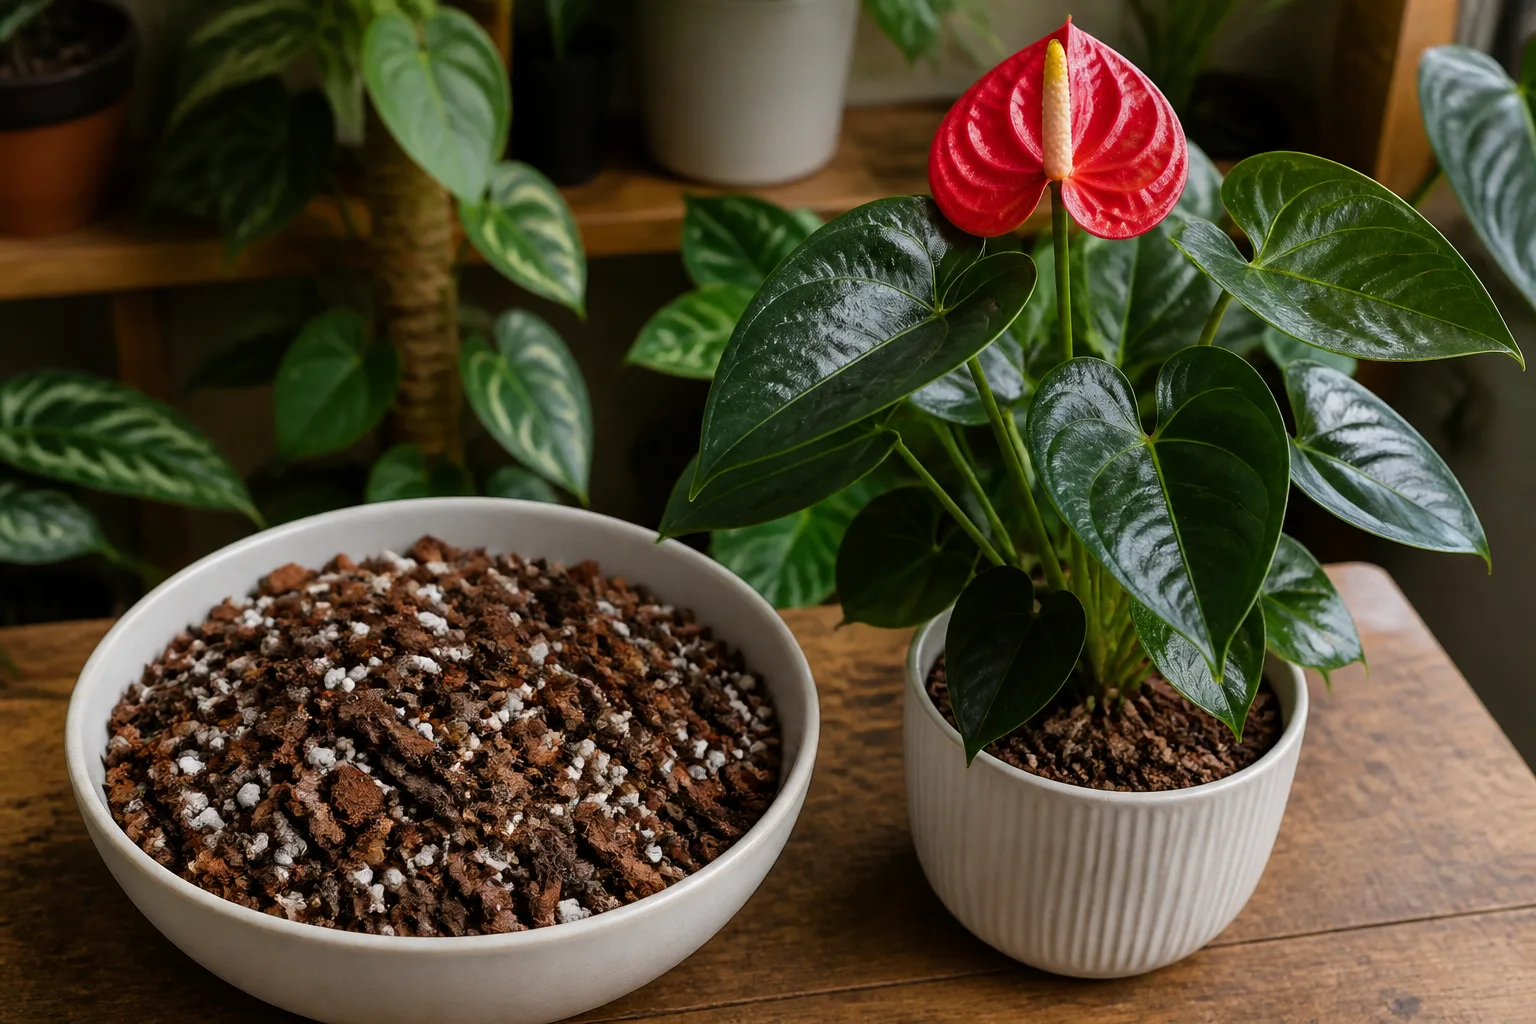
An airy aroid mix combines moisture-holding organic material with larger pieces that leave space around the roots.
Water to keep the root zone moist, not saturated
During active growth, water when the upper 1–2 inches of mix have started to dry. Check near the edge of the pot with a finger or wooden skewer; the surface alone can look dry while the lower root zone is still wet. When the check says it is time, water slowly over the whole surface until excess runs through the drainage holes, then let the pot drain before returning it to its saucer.
Do not water by weekday. A small plant in a warm bright room may dry much sooner than a large plant in a cool, dim room, even if both sit in the same mix. Pot weight is a helpful second cue: lift it just after watering and again as the mix dries so you learn how a ready-to-water pot feels.
Constantly wet soil can deprive roots of oxygen and lead to rot, while a bone-dry root ball can cause drooping and crisp edges. If water runs straight down the sides because the mix has shrunk from the pot, apply it in two slow passes a few minutes apart. If the pot remains heavy for a long time, improve light and airflow, confirm that holes are open, and reassess the mix before adding more water.
Slow watering when growth pauses
The plant uses less water when days shorten, temperatures fall, or new growth stops. Continue checking the soil, but allow more of the upper layer to dry before watering again. Do not try to keep winter soil as wet as summer soil simply because the plant has large leaves.
If the leaves yellow and the soil stays damp, treat that as a warning to inspect conditions rather than as proof that the plant is thirsty. Cool roots in saturated mix are especially vulnerable. If the plant is resting with a firm base and the pot dries slowly, reduce watering and wait for signs of renewed growth before increasing it.
Maintain warmth and useful humidity
Keep the plant in a warm room, away from exterior-door drafts, cold window glass, air-conditioning blasts, and heating vents. A range around 65–80°F (18–27°C) is a practical growing target drawn from the supplied care profile; consistent conditions matter more than chasing an exact thermostat number. Move the plant indoors before cold nights arrive if it has spent the summer outside.
Humidity helps large leaves hold their edges, but a humid room cannot compensate for soggy soil or insufficient light. If the air is dry and new leaves repeatedly emerge with crispy margins, measure room humidity with a small hygrometer before changing the watering routine. Grouping plants or running a humidifier can raise humidity more consistently than occasional misting.
Keep airflow around the foliage so moisture does not linger on crowded leaves. A closed glass cabinet may hold humidity, but it can also trap heat and reduce airflow; monitor it rather than assuming a sealed display is safer. If the room’s humidity is moderate and leaves look healthy, there is no need to buy a humidifier just to hit an arbitrary target.
Feed during active growth only
Use a balanced liquid houseplant fertilizer at the diluted rate on its label while the plant is producing leaves in spring and summer. The supplied care profile calls for regular feeding during the growing season, while the local Alocasia reference set recommends reducing strength for sensitive indoor aroids. Start conservatively and watch the plant instead of stacking multiple products.
Pause feeding when growth slows in fall or winter. Fertilizer does not make a dormant or light-starved plant grow faster, and unused salts can build up in a pot that dries slowly. If leaf margins turn brown after feeding, stop fertilizer temporarily and consider whether the mix has accumulated salts; do not increase the dose to fix a symptom without checking roots, light, and moisture first.
Prune and handle the plant safely
Pruning is mostly cleanup. When a leaf is fully yellow, limp, or badly damaged, use clean, sharp snips to cut its stalk near the base without cutting into the crown or nearby emerging growth. Removing one declining leaf is sensible; removing several partly green leaves at once reduces the plant’s ability to photosynthesize.
Wipe dust from broad leaves with a damp soft cloth so light reaches the surface and pests are easier to spot. Avoid leaf-shine products and rough scrubbing, which can damage the surface. Wear gloves if plant sap irritates your skin, and clean tools after trimming a rotted or pest-damaged part.
Protect pets and children from leaves and sap
Alocasia tissue contains insoluble calcium oxalate crystals. If chewed, it can irritate the mouth and throat and cause pain, drooling, swelling, or vomiting; the National Capital Poison Center’s Alocasia guidance explains the ingestion risk, and the ASPCA Alocasia listing identifies the plant as toxic to pets.
Place the pot where children and animals cannot reach or knock it over, especially if you grow it at floor level. Wear gloves when dividing or repotting if you are sensitive to plant sap, and wash hands and tools afterward. If a person or pet chews the plant, contact Poison Control or a veterinarian for case-specific advice rather than trying a home remedy.
Repot when roots or mix show a reason
Repot in spring or early summer when roots fill the container, emerge from drainage holes, or the mix has broken down and no longer drains predictably. A plant that dries unusually fast may be rootbound; one that stays wet may have compacted mix, poor light, or damaged roots instead. Check which problem you have before automatically choosing a larger pot.
Move up only one pot size, generally about 1–2 inches wider than the current root ball. Too much extra soil stays wet after the roots have used their share, increasing the chance of rot. Loosen the outside of the root mass gently, remove loose degraded mix, and keep the crown at about its previous soil level.
Water once after repotting to settle the mix, let it drain, then return to moisture checks rather than repeating a heavy soak on a schedule. If roots are healthy and the pot is still an appropriate size, refreshing some mix without upsizing may be enough. Avoid dividing, repotting, and changing the plant’s location all at once unless there is an urgent rot problem.
Propagate from offsets or corms
Established Alocasias can produce offsets around the main plant and small corms among their roots. Division is the faster route when an offset already has its own roots or a clear growth point. A leaf or petiole by itself does not contain the structures needed to reliably make a new plant.
Work during active growth, ideally in spring, and water the parent lightly the day before if the mix is very dry. Slide the plant from its pot, brush away enough soil to see where the offset joins the main rhizome, then separate it gently. Keep a growing point and some roots with each division; if the connection resists, use a clean knife rather than tearing through the crown.
Pot each division in a small container with drainage and fresh airy mix. Keep it warm in bright indirect light and evenly, lightly moist while it re-establishes. A divided plant may pause or lose an older leaf while it redirects energy to roots, so judge recovery by a firm base and eventual new growth rather than expecting an immediate leaf.
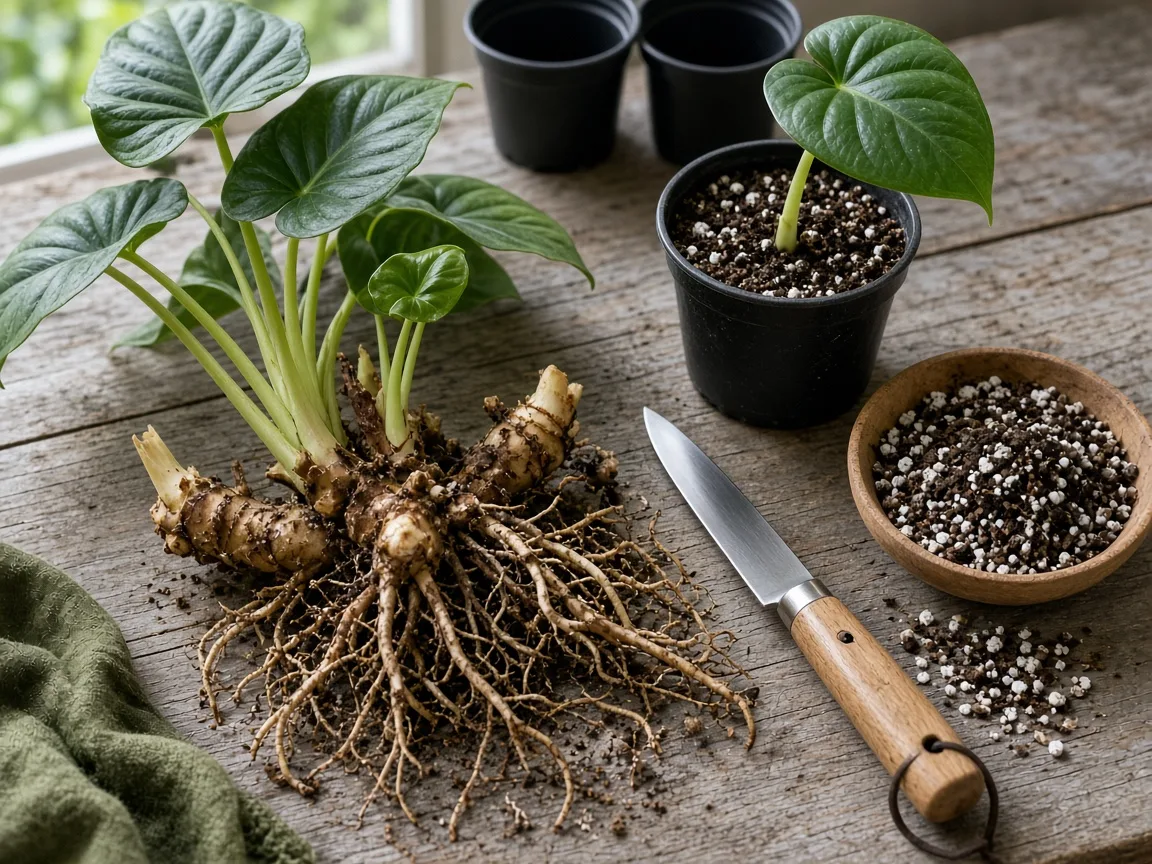
This related Alocasia shows the kind of rooted offset to look for; each division needs a viable growth point.
Start corms warm with measured moisture
Corms take longer than rooted offsets and need warmth, patience, and steady but not waterlogged moisture. After removing the plant from its pot, feel through the root mass for firm, small corms and separate them without damaging the main rhizome. Discard soft or foul-smelling pieces rather than trying to grow them.
Set viable corms in barely moist sphagnum moss or a loose propagation medium in a small covered container. Keep the container warm in bright indirect light, check it regularly for mold or drying, and vent it if condensation stays heavy. Once a corm has roots and a small leaf, move it carefully into a small pot of airy mix and keep it warm while it adjusts. The stepwise method is consistent with the Epic Gardening guide to propagating Alocasia, but exact timing varies with corm maturity and warmth.
Overwinter the rhizome without keeping it wet
In frost-prone areas, grow Regal Shield in a container and bring it inside before cold nights. Check for pests first, then place it in the brightest warm indoor spot available. A sudden move from sun to a dim room can cause leaf loss, so reduce exposure gradually when practical and keep the plant away from cold glass.
Growth may slow substantially and some plants may lose leaves. If the base and rhizome remain firm and the pot dries more slowly, cut back watering and stop fertilizer until new growth resumes. Do not keep watering as if the plant were still growing outdoors in summer.
If you leave a plant in a warm home with good light and it continues making leaves, keep its normal moisture checks; not every indoor Regal Shield enters full dormancy. If foliage dies back, avoid pulling or cutting into the crown. Maintain modest moisture so the rhizome does not shrivel, then watch for growth as warmth and daylight return.
Troubleshoot leaf changes before adjusting care
Read a symptom together with the pot and the plant’s recent conditions. One older leaf yellowing while a new leaf opens can be normal turnover; several leaves yellowing at once, a soft base, or a plant collapsing while the soil is wet is more concerning. Note whether the problem began after a move, a cold night, a repot, or a change in watering.
Dry brown edges can follow low humidity, inconsistent watering, direct sun, or fertilizer salts. Pale patches on the side facing the window point more toward light scorch, while fine stippling and webbing suggest spider mites. Check both sides of several leaves and the soil before settling on a cause; one isolated clue rarely identifies the entire problem.
If a single older leaf is declining and the rest of the plant looks firm, remove that leaf when it is mostly spent and keep the routine steady. If symptoms spread, isolate the plant from nearby houseplants while you inspect it. Make one corrective change at a time unless root rot or an active pest infestation requires immediate action.
Separate thirst from root damage
An underwatered plant often has a light pot and dry mix; leaves droop or curl, and the plant may perk up after a thorough watering and full drainage. If the mix has become hydrophobic, water in two slow passes so the root ball can absorb it. Do not leave the pot standing in water afterward.
Root rot is more likely when the mix stays wet, lower leaves yellow, the plant wilts despite damp soil, or the base feels soft. Unpot it if those clues appear together. Healthy roots are firm; damaged roots are often brown or black, soft, and unpleasant-smelling. Trim only clearly rotten tissue with clean snips, keep any firm rhizome, and repot into fresh airy mix in a container that is no larger than the remaining root mass needs.

Yellowing and collapse can accompany root damage, especially when the pot remains wet; inspect the roots before watering again.
If the crown or rhizome is entirely soft, recovery is uncertain. Remove rotted material, keep any firm corm or rhizome section separate, and avoid reusing contaminated soggy mix. After repotting, give the plant warmth and bright indirect light, then water according to drying rather than applying a strong fertilizer to a weakened root system.
Check leaf undersides for mites and scale
Spider mites are tiny and often show up first as fine pale stippling, dull leaves, or delicate webbing around veins and petioles. Scale insects look like small fixed bumps on stems or leaf veins; whiteflies and aphids may be visible when foliage is disturbed. Isolate the plant, inspect nearby plants, and rinse or wipe accessible pests away before choosing a treatment.

Look along the leaf veins and petioles for fixed scale bumps, and inspect leaf undersides for other pests.
Repeat inspections over the next few weeks because eggs or hidden pests may survive the first cleanup. If you use a pesticide or insecticidal soap, choose a product labeled for the plant and pest, follow its directions exactly, and test a small area first. Do not mix treatments or increase a concentration beyond the label.
What to expect from flowers and older leaves
Mature Alocasias can produce a small arum-family flower structure, but Regal Shield is usually grown for its foliage. A flower is not a reliable scorecard for overall health: stable, firm foliage and roots matter more. If a bloom appears, let it develop or remove it with clean snips if it is spent or unwanted; there is no need to cut it simply to force more leaves.
An occasional older leaf fading as a new one develops is different from a plant losing most of its canopy. Track the pattern: one old leaf over time can be ordinary, while rapid loss alongside cold, wet soil, webbing, or a soft crown signals a problem to investigate. Correct the cause and give the plant time; Alocasias may take a while to replace a leaf after stress.
Conclusion: keep conditions steady
Give Alocasia ‘Regal Shield’ bright filtered light, an airy pot with drainage, warm conditions, and a thorough watering only after the upper mix begins to dry. As days shorten or growth pauses, water and feed less; if leaves change, inspect the soil, roots, and leaf undersides before making several adjustments.
Keep it away from frost and from pets or children who might chew its leaves. With those basics in place, the dramatic foliage is easier to maintain—and the next step becomes clearer when the plant does show stress.



