8 Best Greenhouses for Backyards and Balconies
Compare 8 best greenhouses by size, panels, ventilation, weather protection, assembly, and small-space fit for backyards, patios, and balconies.
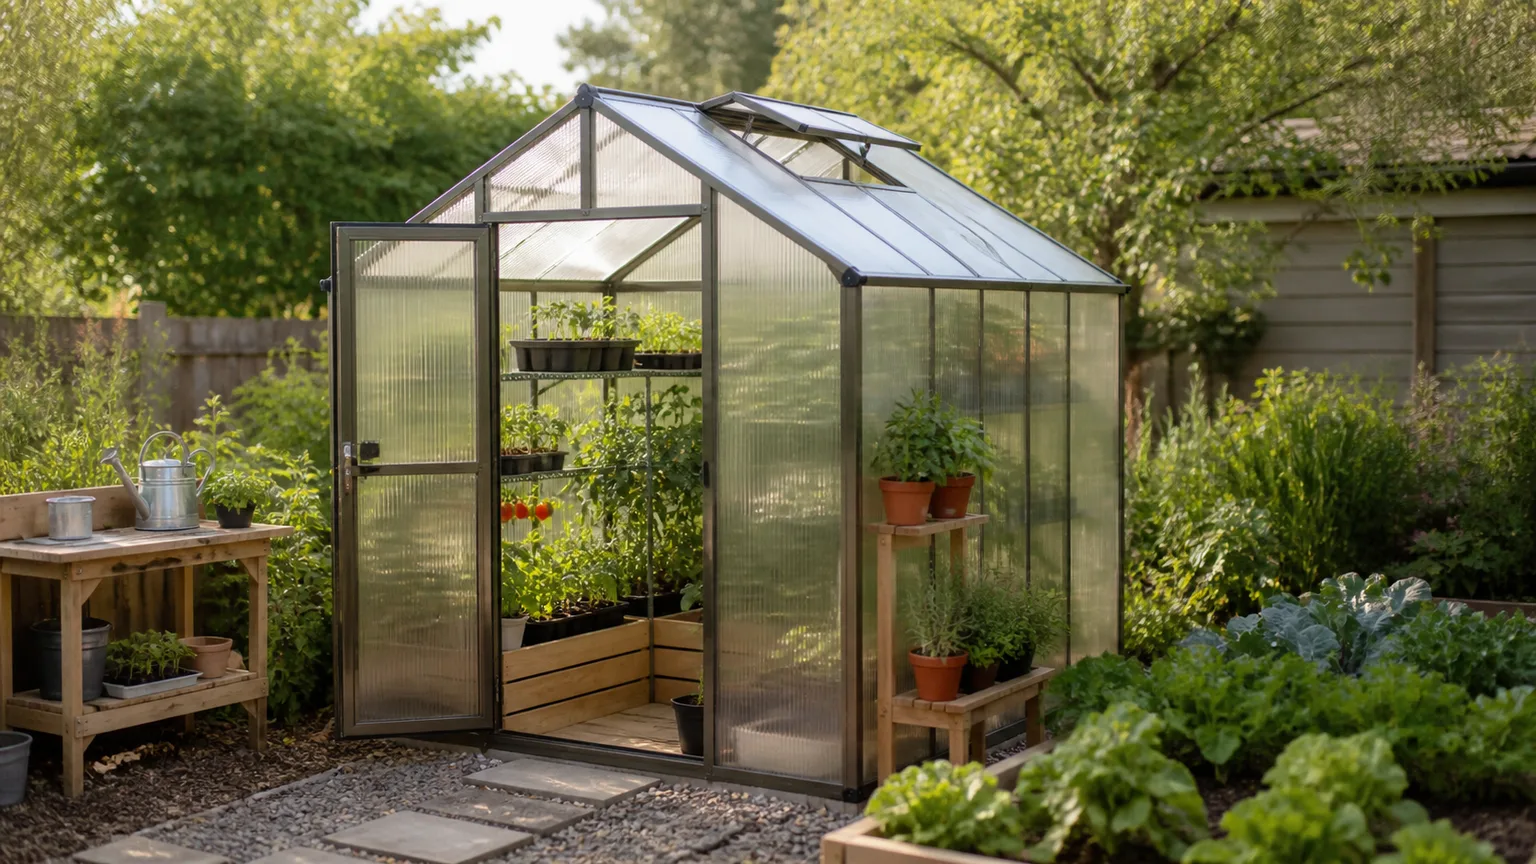
The best greenhouse is the one that fits the way you will actually grow. A compact covered shelf can be perfect for seedlings on a balcony, while an anchored polycarbonate walk-in structure is a better match for overwintering tender plants or growing tall tomatoes. A large greenhouse is not automatically the best choice if it will not fit through the gate, survive your wind, or stay cool when you are away.
This guide compares eight greenhouse models from the supplied review material, then adds the practical decisions that usually determine whether a greenhouse earns its floor space. The product features and reported specifications are not fresh hands-on test results from LeafyPixels, so confirm the current listing, dimensions, warranty, load ratings, and included hardware before buying.
Quick Picks: Match the Greenhouse to the Job
Use this table to narrow the list before you compare details. “Best for” means the model’s feature mix suits that situation; it is not a promise that the structure is safe without a level base, anchoring, and climate-appropriate management.
| Growing job | Best fit | Notable features | Main compromise |
|---|---|---|---|
| Feature-rich backyard setup | Backyard Discovery Willow | Cedar frame, polycarbonate walls, exhaust fan, shelving, outlets, hose hookups | Long, involved assembly |
| Snow and cold exposure | Palram Canopia Harmony 6x10 | Twin-wall roof panels, rain gutters, adjustable vent, lockable doors | Separate anchoring kit may be needed |
| First greenhouse | Eagle Peak Portable Walk-In | Pre-assembled frame, PE cover, windows, stakes and ropes | Flexible cover will not last like rigid panels |
| Maximum workspace | Backyard Discovery Bellerose XL | Large interior, workstation, shelves, four windows, exhaust fan | High space, cost, and foundation demands |
| Tight patio or small yard | Miracle-Gro Mini Walk-In | Narrow footprint, removable wire shelves, quick assembly | Cover is not listed as UV-resistant |
| Hot summer climate | Yardistry Meridian | Automatic roof vent, louvered base vent, double-wall panels | No exhaust fan included |
| Wall-adjacent space | Palram Canopia Lean-To | Aluminum frame, galvanized base, rain gutters, roof vent | Panels are less robust than heavier options |
| Lowest-cost entry | SPECILITE Walk-in | Steel frame, shelves, roll-up windows and door | Passive ventilation is a weak fit for hot climates |
The safest shortcut is to choose the smallest structure that gives your plants enough headroom and gives you enough room to reach them. Then spend the saved attention on anchoring, ventilation, and a route for watering and emptying the greenhouse rather than filling every shelf on day one.
Start With What You Want to Grow
Seed trays, leafy greens, herbs, tall fruiting crops, and tender ornamentals make very different demands. Seedlings need light, stable moisture, and enough shelf height; tomatoes and cucumbers need vertical support and air movement; tender perennials may need winter insulation but not a greenhouse that bakes at midday. Write down the crop that matters most before you shop, because that crop should determine height, door width, shelving, and ventilation.
Greenhouses extend a season by buffering wind, rain, and temperature swings. They do not turn an unheated structure into a frost-free room. Even a well-insulated greenhouse can lose heat overnight, and plants inside can still be damaged by freezing temperatures, prolonged heat, or a missed watering. The right expectation is more control and more growing time, not automatic year-round conditions.
The RHS guidance on greenhouse growing and planting out tender crops makes a useful distinction between protected growing and the move outdoors: tender crops can be scorched when moved suddenly from shelter into strong sun. If your goal is early seedlings, include a hardening-off plan so the greenhouse helps the transition instead of creating a second shock.
Measure the Site and Plan the Interior
Measure the narrowest gate, stair, path, balcony door, storage doorway, and turning point—not just the patch of ground where the greenhouse will sit. Add the opened-door swing and a walkway inside. Shelves reduce floor area, but they also create a reach problem if every pot is packed against the wall or placed above shoulder height.
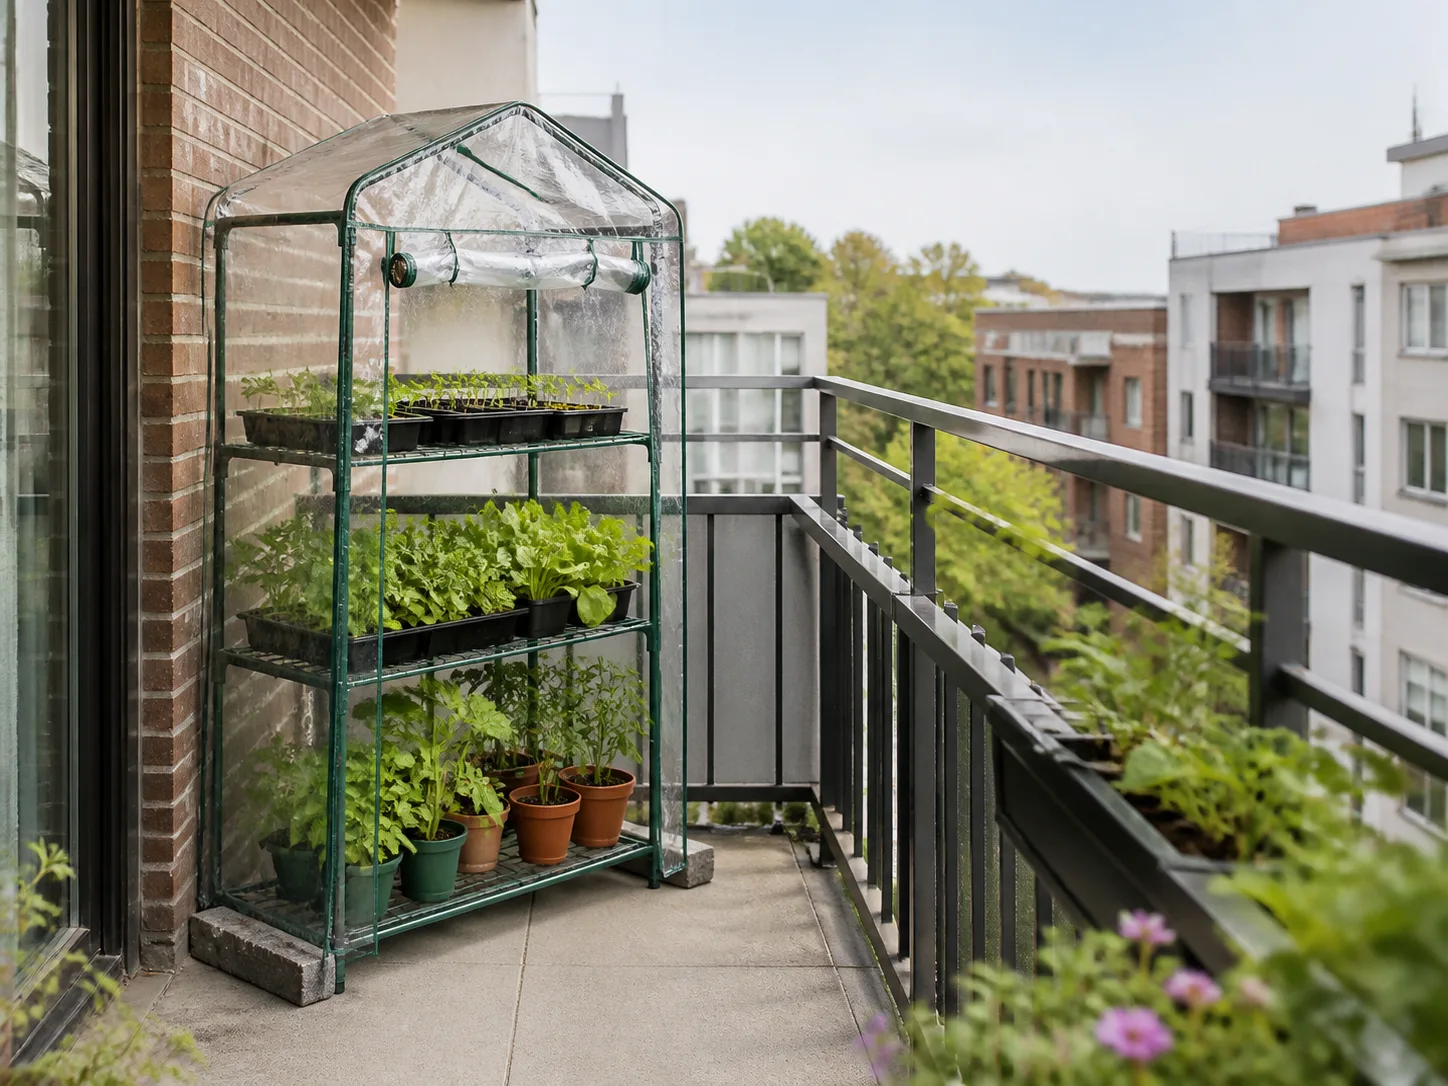
For a balcony, confirm the building’s rules, structural limits, drainage arrangements, and wind exposure before ordering. A lightweight portable greenhouse can act like a sail when a cover is closed and the wind rises; a few decorative weights are not a substitute for an anchoring method approved for the space. Never block an emergency route or create a trip hazard around the door.
For a yard, leave working room around the structure for cleaning panels, opening vents, repairing a cover, and carrying a full watering can. A greenhouse placed in a cramped corner may fit on paper but be frustrating to use. The best position is level, accessible, and sunny enough for the crops, with enough clearance that air can move around the structure.
Compare Frames, Covers, and Panels
Rigid polycarbonate panels are the most convincing choice in this list when you need a more permanent structure and want a balance of light transmission, impact resistance, and insulation. Twin-wall panels add an insulating air layer, but they still need correct framing and anchoring. “Polycarbonate” alone does not tell you the panel thickness, warranty, or how the roof handles your local snow and wind.
PE or PVC covers make portable greenhouses affordable and quick to assemble. Their advantages are low weight, easy replacement, and simple seasonal storage. Their compromises are shorter cover life, more movement in wind, less insulation than a rigid wall, and a greater need to check for tears, loose fasteners, and heat buildup. A cover that is water-resistant is not automatically UV-stable or suitable for a hot exposed balcony.
Frame material changes the ownership job. Aluminum resists rust and keeps weight down, steel can offer a sturdy skeleton but needs protection at vulnerable finishes, and cedar brings a warm look with useful outdoor durability but adds weight and assembly work. Whichever material you choose, the foundation and connections matter as much as the marketing description.
Treat Ventilation as a Requirement, Not an Extra
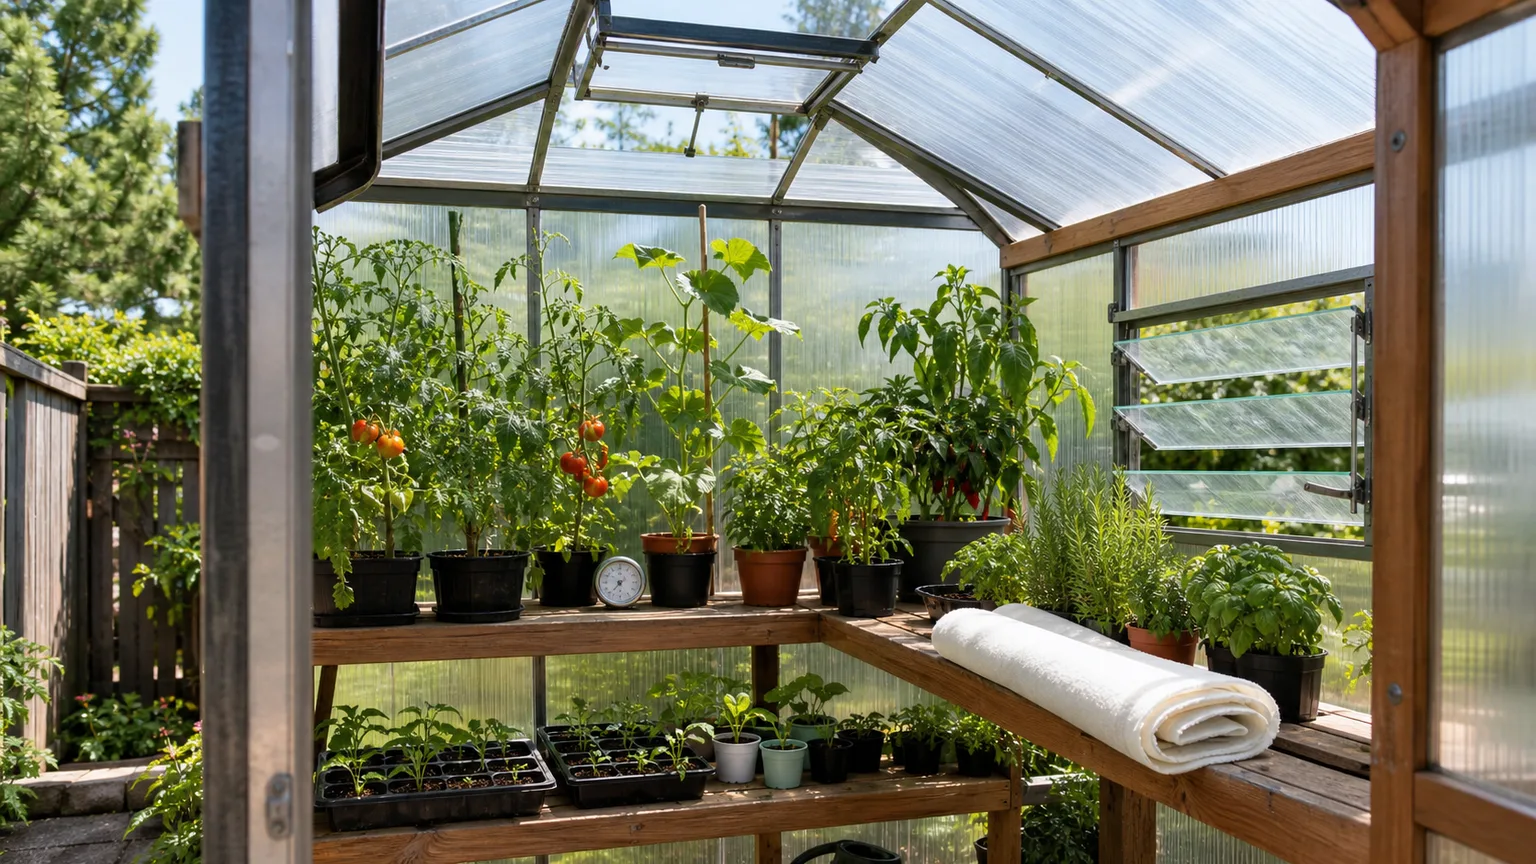
Sunlight warms a greenhouse quickly, including in spring. The RHS guidance on greenhouse ventilation and shading advises monitoring temperature because sustained heat can damage plants, and identifies the door, roof vents, and side vents as the main routes for air exchange. Roof vents are especially valuable because hot air rises, while a side opening or door supplies replacement air lower down.
Open the door and vents on warm sunny days, watch a maximum-minimum thermometer, and use only as much shade as needed. The RHS guidance warns that too much shade reduces the light available for growth, so shade cloth should solve a heat problem rather than become permanent decoration. An automatic roof opener is useful when you are not home, but it responds gradually; it does not replace an open door, extra vent, or manual check during a heat wave.
Airflow matters for more than comfort. Crowded, damp foliage dries slowly and creates a better environment for fungal problems. Give plants space, water the growing medium rather than keeping leaves wet, and avoid treating a closed greenhouse as a humidity box. A fan can improve circulation, but it cannot compensate for a structure with no route for hot air to leave.
Plan for Wind, Rain, Snow, and Anchoring
A greenhouse has to resist the weather where it is installed, not the average weather in a product photograph. Level the base, follow the manufacturer’s anchoring instructions, and treat every claimed wind or snow rating as a specification to verify against the exact model, configuration, foundation, and local conditions. A roof load number is not a license to let snow accumulate; brush off snow only as the manual and safe access allow, and never climb on a small greenhouse.
Rain gutters are useful when you want to direct water into a barrel or away from a walkway, but they do not solve standing water under the greenhouse. Keep the floor well drained and avoid placing a covered structure where runoff from a roof or slope will collect. On a balcony, manage drainage so it cannot spill onto people, property below, or the building envelope.
Portable structures need a special dose of skepticism. Stakes, ropes, and a steel frame help, but exposed sites may need a more secure base or a seasonal decision to take the cover down. If a storm is forecast and the greenhouse cannot be safely secured, protecting the plants elsewhere is better than hoping a light structure remains stable.
Best Overall: Backyard Discovery Willow All Cedar Modern Greenhouse
The Backyard Discovery Willow All Cedar Modern Greenhouse is the strongest all-around choice in this group for a gardener who wants a feature-rich, midsize backyard structure. The supplied review describes a cedar frame, strong polycarbonate walls, built-in shelving, a temperature-activated exhaust fan, an easy-open window, electrical and USB outlets, and interior and exterior hose hookups.
That feature mix is useful because it connects plant care to daily work: shelving uses vertical space, a fan can remove heat, and a hose connection reduces carrying. The trade-off is assembly time; this is not the model to choose if you need a greenhouse assembled in an afternoon or cannot prepare a level, anchored base. The review also reports a substantial snow-capacity claim, but verify the current manual and local loading conditions rather than treating the number as a guarantee.
Choose it if: you want one permanent-looking backyard greenhouse for seedlings, herbs, ornamentals, and vegetables, and you have time for careful assembly.
Skip it if: your main constraint is a balcony, a narrow gate, a temporary growing season, or minimal setup.
Best for Cold Climates: Palram Canopia Harmony 6x10
The Palram Canopia Harmony 6x10 Greenhouse Kit is the best fit here for a gardener prioritizing rigid shelter and winter-weather features. The supplied review highlights twin-wall roof panels, integrated rain gutters and a downspout, an adjustable roof vent, lockable double doors, and a reported 15-pound roof snow-load capacity.
It is a practical cold-climate pick only when the installation is done properly. The review notes that a separate anchoring kit may be needed for wind, and the large footprint requires more foundation planning than a pop-up cover. Polycarbonate panels can retain more heat than a thin cover, but the greenhouse will still track outdoor temperatures after sunset; add insulation or safe supplemental heat only after checking the structure, electrical requirements, and plant needs.
Choose it if: you need a rigid walk-in enclosure with gutters and winter-oriented panel construction.
Skip it if: your site cannot be anchored securely or you mainly need a low-cost seedling shelf for a few weeks.
Best for Beginners: Eagle Peak Portable Walk-In Greenhouse
The Eagle Peak Portable Walk-In Greenhouse is the approachable entry point for a gardener who wants a walk-in structure without a multi-day frame build. The supplied review describes a pre-assembled push-and-lock frame, a water- and UV-resistant PE cover, two ventilation windows, stakes and ropes, a roll-up zippered door, and three adjustable height settings.
Its simplicity is the reason to buy it, and its flexible cover is the reason to keep expectations modest. It can shelter seedlings, herbs, and potted plants, but it will not have the same rigidity, insulation, or long-term cover life as a polycarbonate greenhouse. Anchor it before loading the shelves, inspect the cover after bad weather, and open the windows or door whenever the interior gets hot.
Choose it if: you are testing whether a greenhouse fits your routine and want fast setup.
Skip it if: you face frequent strong winds, heavy snow, or want a structure to leave unattended for long periods.
Best Large Greenhouse: Backyard Discovery Bellerose XL
The Backyard Discovery Bellerose XL Greenhouse is the workspace choice for an experienced gardener with room for a permanent structure. The supplied review describes up to 143 square feet of interior space, a cedar frame, a built-in workstation, five shelves, plant hooks, four windows, a temperature-activated exhaust fan, hose hookups, and outlets.
The large design can make potting, staging, and crop rotation easier, but it also multiplies every site requirement. You need room to deliver and assemble it, a foundation that remains level, a realistic route for water and electricity, and a plan for cleaning and ventilating a large volume of air. The review reports unusually high wind and roof-load figures when anchored; those are model-specific claims to confirm in the current documentation, not a reason to skip local weather planning.
Choose it if: you want a dedicated growing room and potting workspace rather than a few extra shelves.
Skip it if: you are still learning what you grow, have a small yard, or cannot commit to daily ventilation checks.
Best Small Greenhouse: Miracle-Gro Mini Walk-In Greenhouse
The Miracle-Gro Mini Walk-In Greenhouse is designed around a narrow footprint and vertical storage. The supplied review lists a powder-coated steel frame, four removable wire shelves, quick-snap assembly, a zippered door, and dimensions of roughly 4.8 by 2.4 by 6.3 feet.
The compact layout suits a patio, small yard, or sheltered side path where width is more important than floor area. The key caution is the PVC cover: the supplied material says it is not listed by the manufacturer as UV-resistant, so this is a weaker choice for a hot, unshaded site. Place it where you can open the door, monitor heat, and secure the frame instead of assuming the small volume will stay mild.
Choose it if: you need shelves and walk-in access in a very small outdoor footprint.
Skip it if: your location gets intense sun, frequent wind, or you need long-term rigid walls.
Best for Warm Climates: Yardistry Meridian Double-Wall Greenhouse
The Yardistry Meridian Double-Wall Greenhouse is the most climate-aware option here for hot summers because its design emphasizes passive heat release. The supplied review describes an automatic roof vent, a louvered base wall vent, double-wall polycarbonate panels, a cedar frame, and built-in upper and lower shelves.
The automatic vent is useful, but it should be treated as one layer in a ventilation plan. There is no exhaust fan included, so a very exposed, intensely sunny site may still need open doors, additional shade, or a separate circulation strategy. Double-wall panels can help in cooler weather while the vents reduce heat buildup, but they do not remove the need for a thermometer and daily checks.
Choose it if: passive roof-and-base ventilation is more valuable to you than outlets or a powered fan.
Skip it if: you need powered air movement, a very large workspace, or a no-monitoring setup.
Best Lean-To: Palram Canopia Lean-To Greenhouse
The Palram Canopia Lean-To Greenhouse is the space-saving choice for a small yard, patio edge, or wall-adjacent location. The supplied review lists a rust-resistant aluminum frame, galvanized steel base, hinged lockable door, adjustable roof vent, rain gutters, and dimensions of about 96 by 49 by 88.6 inches.
A lean-to can save floor space, but its wall position also shapes the light, heat, and access pattern. Check that the wall is suitable for the installation, that the roof does not dump water into the entrance, and that the structure can still vent on the hottest side of the day. The review describes the polycarbonate panels as flimsier than heavier options and recommends treating this as a milder-climate fit rather than a storm-exposed default.
Choose it if: you have a sunny wall-adjacent spot and want to preserve the rest of the yard or patio.
Skip it if: the wall is shaded, the site has severe wind exposure, or you cannot maintain a stable base.
Best Budget: SPECILITE Walk-in Greenhouse
The SPECILITE Walk-in Greenhouse covers the basic brief at the lowest apparent commitment in the supplied comparison. It uses a steel frame, a polyethylene cover, built-in shelves, a zippered roll-up door, and side screen windows; the review says the shelves can hold up to 24 plants and that assembly is quick.
The budget is paid for in climate control and durability. Passive screen windows can release some heat, but there is no included fan or outlet, so this is not the best fit for a hot climate or an unattended sunny spot. Use it for a sheltered seasonal setup, anchor it carefully, keep plants from touching the cover, and be ready to replace or remove the cover as weather changes.
Choose it if: you want a low-cost way to shelter a useful number of small potted plants.
Skip it if: you need dependable winter insulation, automated cooling, or a permanent structure.
Set Up the Greenhouse Before You Fill It
The first week should be about stability and control, not maximum occupancy. Assemble it on the level base, confirm that the door and vents move freely, install every anchor, and check that rainwater drains away. Then place shelving so you can reach the back without knocking over the front row.
Before moving plants in, run the greenhouse empty through one sunny day if possible. Note how quickly the temperature climbs with the door closed, how much the cover moves in wind, and whether water reaches the corners. Add a thermometer, a watering route, and a simple shade or frost-cover plan before you depend on the structure for tender plants.
When you do fill it, leave air gaps between plants and keep tall crops away from vents and door hardware. Put the plants with the narrowest climate tolerance in the easiest-to-monitor positions. If a plant needs a different temperature or watering schedule, it may be better outside the greenhouse than crowded into a mixed collection.
Use the Greenhouse Through the Seasons
In late winter and spring, use the structure for seed starting and for gradually acclimating young plants. Open it on warm days, close it before cold nights when appropriate, and move plants outdoors gradually rather than directly from shelter into bright sun. The RHS guidance on tender crops specifically warns that sudden exposure to strong sunshine can scorch leaves.
In summer, the job changes from trapping warmth to releasing it. Open the door and roof or side vents early, use only the minimum shade that keeps leaf temperatures safe, water consistently, and avoid filling every shelf. The RHS ventilation guidance notes that small greenhouses are particularly vulnerable to overheating because they have a high glass or panel area relative to their floor space.
In autumn and winter, clean the panels, remove diseased plant debris, inspect the frame, and decide which plants truly need protection. A greenhouse may extend the season, but winter crops still need adequate light and temperatures suitable for their species. If you add heat, use equipment rated for the environment, keep water away from electrical connections, and never rely on an unmonitored heater in a combustible or poorly ventilated structure.
Avoid These Common Greenhouse Mistakes
The most expensive mistakes usually happen before or just after assembly. A few are easy to prevent:
- Buying for plant count instead of plant size: A shelf may hold many small pots today, but tomatoes, cucumbers, and tender shrubs need headroom and access later.
- Skipping the site measurement: A structure that fits the yard may not fit through the gate or leave room to open the door.
- Treating a greenhouse as self-regulating: Sunlight can overheat a small greenhouse in a short time, even when outdoor air feels comfortable.
- Using the wrong cover for the climate: A thin PE or PVC cover can be sensible for a sheltered seasonal setup but a poor permanent choice in harsh weather.
- Ignoring anchoring: Stakes and ropes are part of the system, not optional accessories to install after the first storm.
- Crowding plants: Dense foliage blocks airflow, makes watering uneven, and turns every pest or disease problem into a harder cleanup.
- Believing “year-round” means “frost-proof”: Without suitable insulation, crop selection, and possibly safe supplemental heat, a greenhouse still experiences winter cold.
Greenhouse Alternatives Worth Considering
You may not need a full walk-in greenhouse. A cold frame can be a better match for a few trays of seedlings or low-growing greens, especially when you want a low structure that is easy to open and close. A hoop tunnel can cover a bed with interchangeable frost cloth, plastic, shade cloth, or insect netting; Harvest to Table’s hoop-tunnel buyer guide emphasizes matching frame strength, cover, height, anchoring, and ventilation to the job.
For a balcony, a compact covered shelf may be enough, but first check wind and building restrictions. If you only need to protect a few pots from a cold night, frost cloth or a temporary cover can be more sensible than buying a structure that needs permanent anchoring. Grow Organic’s season-extension guidance also describes greenhouses, cold frames, and row covers as different tools for different levels of protection and commitment.
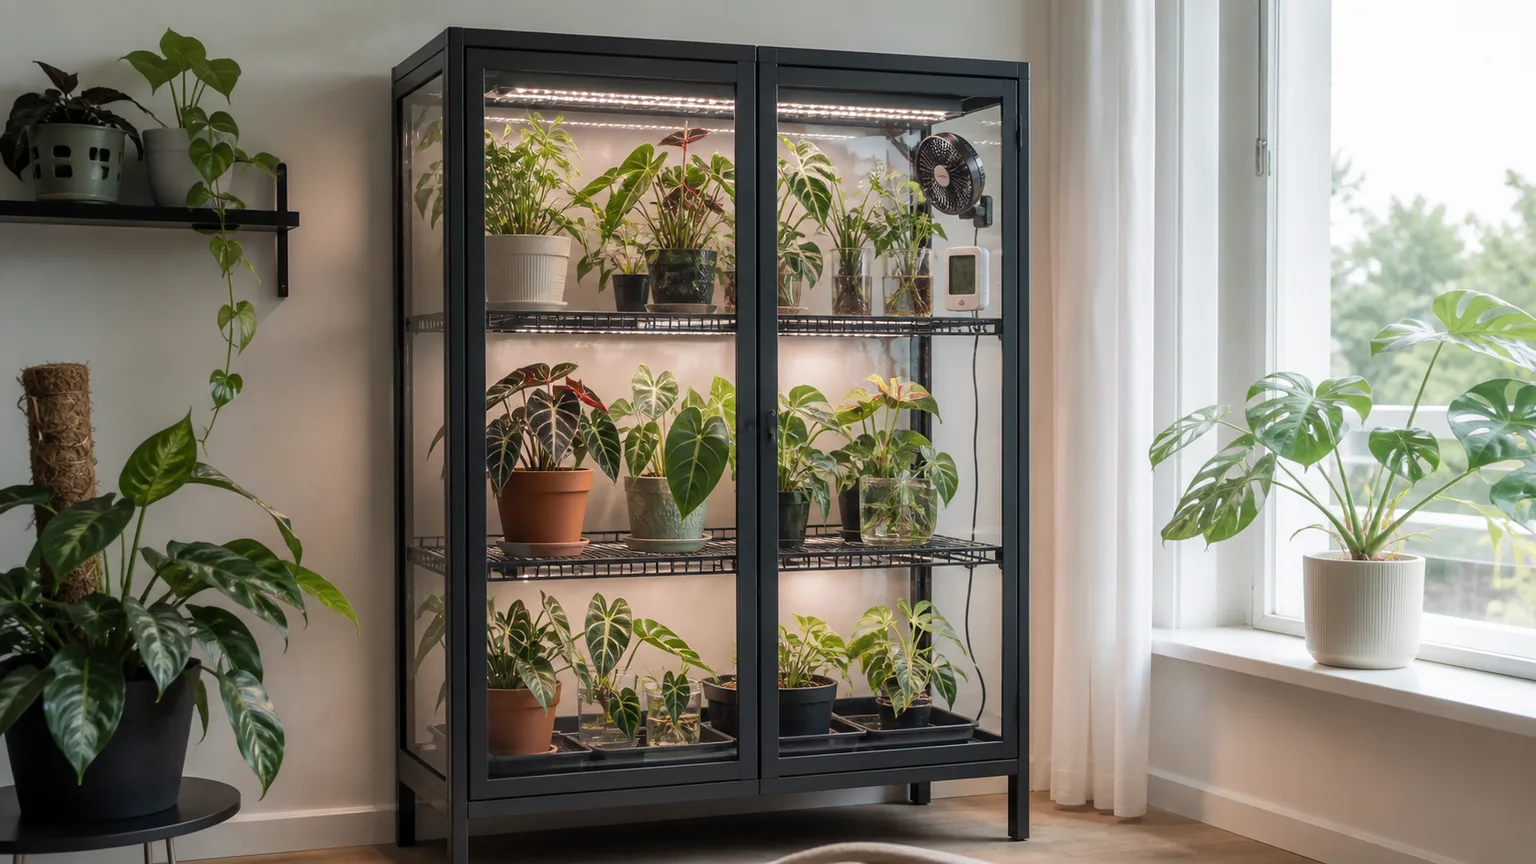
An indoor cabinet greenhouse is another category entirely. It can provide lights, shelves, and controlled air for houseplants or seedlings, but it does not give you an outdoor walk-in growing area, natural rain, or the same wind and weather questions. The existing library image below shows that distinction clearly: it is useful context for indoor growing, not a substitute for an anchored backyard structure.
Conclusion
Choose the Backyard Discovery Willow when you want a feature-rich, midsize backyard greenhouse and can handle careful assembly. Choose the Palram Canopia Harmony when rigid panels, gutters, and a cold-weather-oriented setup matter most; the Eagle Peak when you want a lower-commitment first step; and the Miracle-Gro Mini when a narrow footprint is the real constraint.
The Yardistry Meridian is the better warm-climate direction because its roof and base vents address heat release, while the Palram Lean-To makes sense beside a suitable sunny wall. The Bellerose XL is for gardeners ready to manage a true workspace, and the SPECILITE is for sheltered seasonal use on a limited budget. Whichever model you choose, measure the route, confirm the foundation, anchor it for the site, and plan how you will ventilate it when the sun comes out.



