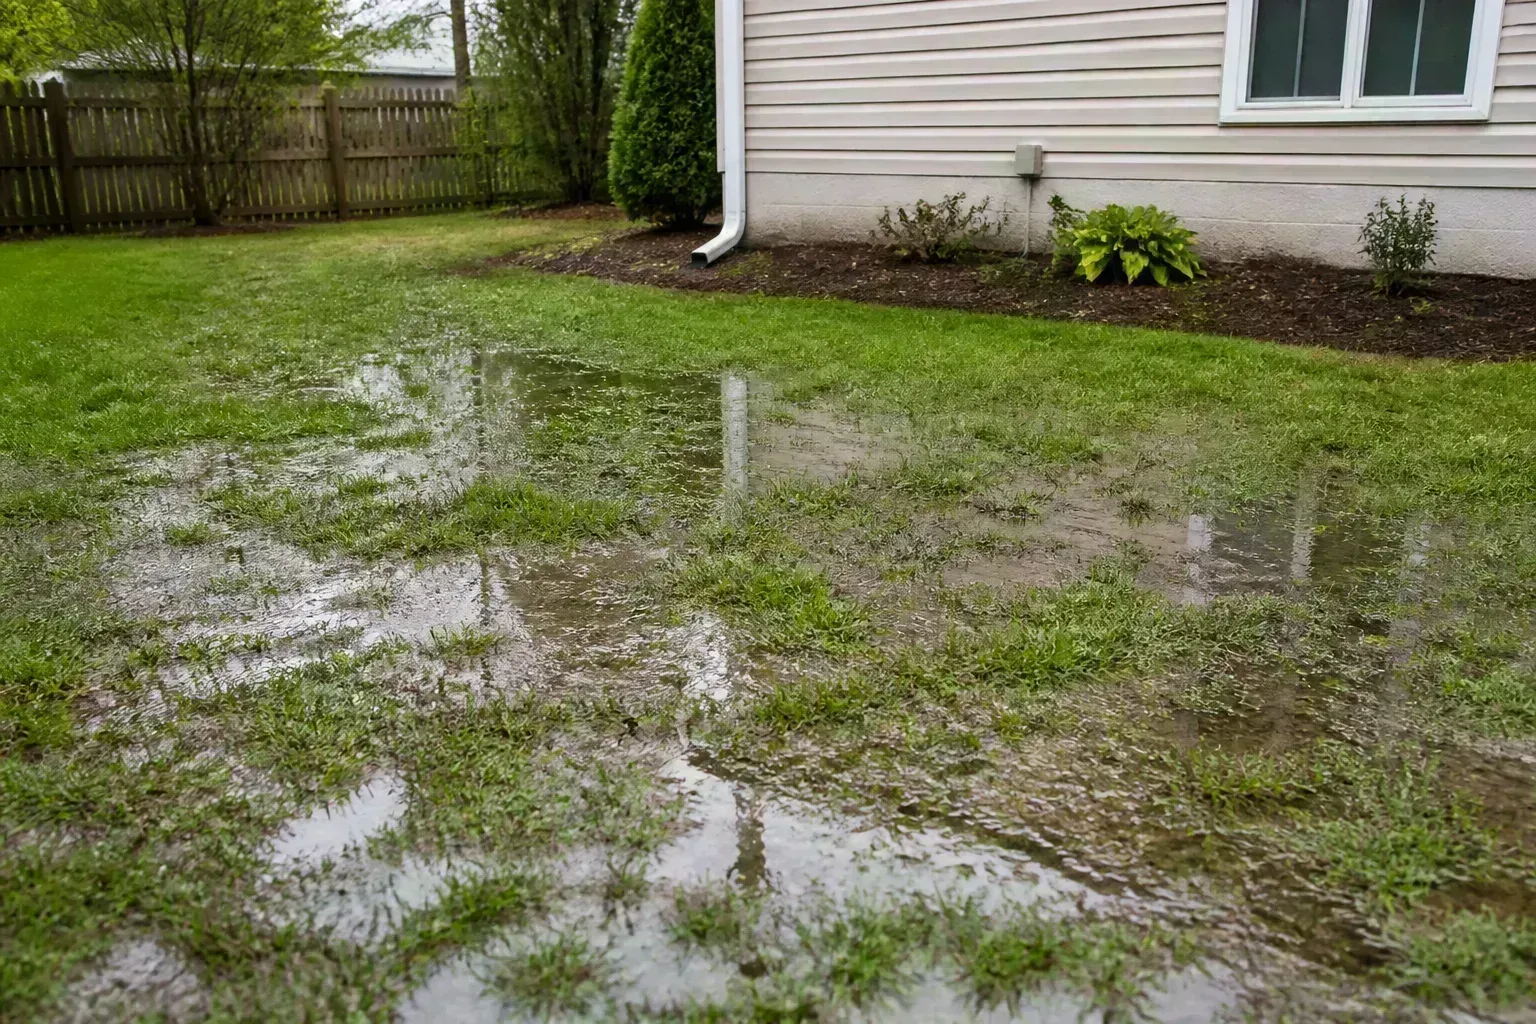
How to Build a Dry Creek Bed for Yard Drainage
Build a dry creek bed with a plan for runoff, slope, rock layers, and a safe outlet. Learn when a French drain or rain garden is the better fix.
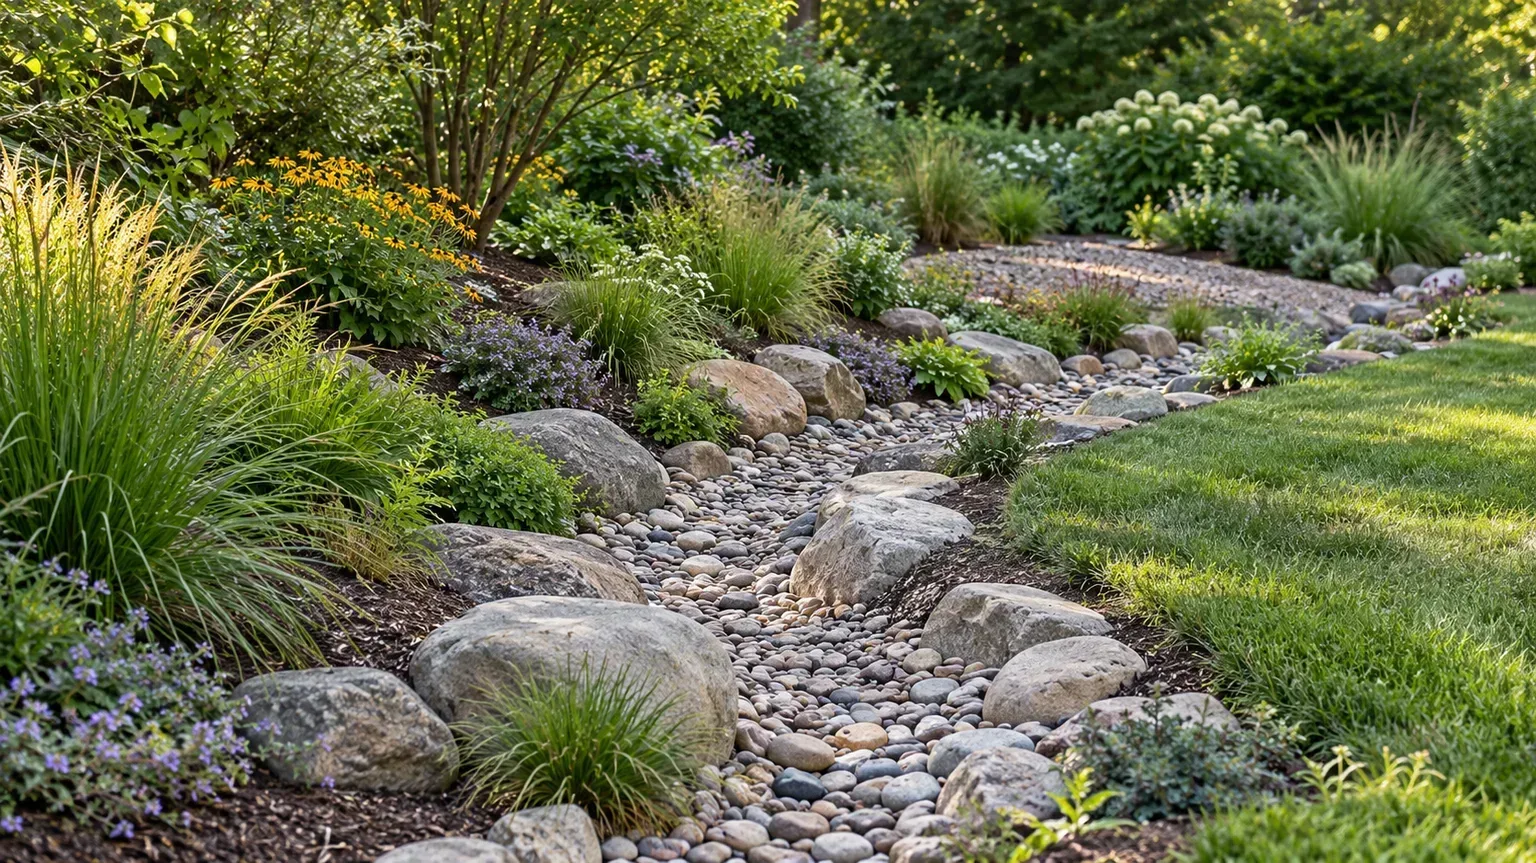
A dry creek bed is a shallow, stone-lined surface channel that gives rainwater a more controlled route through a yard. It can slow and spread runoff, protect a small eroding area, or carry water toward a suitable on-site outlet. The rocks do not make water vanish: if the channel has no safe endpoint, inadequate grade, or too much water for its size, it can simply move the problem downhill.
That distinction decides how to build it. First determine whether you need to convey surface water, infiltrate a modest amount of runoff, or solve a groundwater or foundation-drainage problem. A dry creek bed is most useful when you can trace a manageable flow path from its source to an allowed destination and keep an overflow route on your property.
Start with the job: channel or infiltration feature?
A decorative dry creek can be a shallow planting or rock feature with no drainage job. A functional one is part of a drainage system: water enters at a defined point, moves through a shaped channel, and exits or spreads where it will not damage a structure, neighbor’s land, public right-of-way, or watercourse. Treating both designs as interchangeable leads to common failures, especially a pretty rock bed that ponds because it has no outlet.
A stone channel mainly conveys surface runoff. It may temporarily hold water among the stones and soil, but the empty space in the rock is limited, and the surrounding soil controls how quickly water can soak away. If you need reliable infiltration, design a basin or rain garden based on the area feeding it and the soil’s drainage; if you need to move water below the surface, consider a French drain or another engineered system instead.
Trace runoff before drawing a line
Do not choose a route from a sunny-day view of the yard. Walk the site during a steady rain if it is safe, then revisit it after the rain; note where water first appears, where it speeds up, where it leaves sediment, and where it already collects. Take photographs from the same spots, and use small flags or washable markers to record the edges of the flow.
Pay attention to the contributing area, not only the wet patch. A downspout receiving water from a large roof, a long driveway, or a slope above the yard can deliver far more runoff than a small channel can manage. Mark each source and ask whether you can reduce or spread the water at its source—for example, by correcting a disconnected downspout or directing it to a suitable rain garden—before routing it across the lawn.
Observe the yard during and after rain
Check whether the problem is actually surface runoff. Water that sheets over the ground after storms is different from water that rises from a high water table, seeps through a basement wall, or emerges from a broken irrigation line. A dry creek bed may guide surface water, but it is not a repair for a leaking pipe, a sump discharge problem, or persistent groundwater seepage.
Look for evidence of how fast water moves. A small deposit of silt, flattened grass, exposed roots, or a narrow rill tells you that flow is concentrating and may erode soil; leaves or mulch caught against a fence can show where water backs up. If the route changes between ordinary showers and severe storms, plan for a normal-flow channel and a separate safe overflow path rather than assuming stones can contain every event.
Check permits, easements, and buried utilities
Before changing grade, confirm what your city or county allows. Ask the local stormwater, public works, building, or planning office whether a shallow drainage channel needs review, whether it may discharge toward a curb or storm drain, and whether the property has a drainage easement, floodplain restriction, stream buffer, or homeowners-association rule. Rules differ by jurisdiction and by the amount of soil moved. For example, Permit Sonoma describes grading permits and local cut-and-fill thresholds; those numbers apply to its jurisdiction, not as a nationwide rule. Permit Sonoma’s grading and stormwater FAQs show why checking locally matters.
In the United States, contact 811 or your state’s one-call center several business days before digging, and wait until all participating utilities have responded and marked their lines. A shallow trench can still hit electric, gas, communications, or water services. The national 811 service specifically includes homeowner landscaping and planting projects among the reasons to request utility marks. Call811
Choose a safe endpoint and overflow route
A dry creek bed needs a destination before it needs decorative stone. A suitable endpoint might be a broad, stable, on-site area where water can spread and infiltrate, a properly sized rain garden, or a drainage feature designed and permitted for the property. The channel should not simply stop at a fence, a flat depression that already stays wet, or the edge of a slope where water can accelerate and cut a new gully.
Trace the outlet during a heavy rain in your mind: where will water go after the rock bed fills? Keep it away from foundations and neighboring properties, and do not assume the street, sidewalk, storm drain, wetland, or natural stream is an acceptable discharge point. Ask the local authority before connecting to public infrastructure or directing concentrated flow toward a watercourse. Stormwater flowing over lawns and pavement can carry soil, fertilizer, pesticides, pet waste, and other pollutants; capturing and filtering some runoff on-site can reduce that load, but only if the receiving area drains properly. Penn State Extension explains stormwater runoff and rain gardens.
If the channel will end in a planted basin, plan that basin as a separate feature. Penn State Extension advises siting a rain garden at least 10 feet from a house, avoiding consistently wet locations, and designing it to drain within 24 hours; local soils, groundwater, septic systems, slopes, and rules can require different or additional criteria. The extension also recommends considering an overflow route for unusually heavy rain. Those are useful checks for a rain-garden endpoint, not a universal specification for every dry creek. Penn State Extension’s rain-garden guide.
Decide whether a dry creek is the right tool
Choose the drainage method by the location and behavior of the water, not by the appearance you want. A dry creek is usually an open, visible channel for surface flow; a French drain is a buried perforated pipe and gravel trench for collecting or redirecting subsurface water; a swale is a broad, often vegetated depression; and a rain garden is a planted basin designed to hold runoff briefly while it infiltrates.
| Yard condition | Likely starting point | Why a dry creek may not be enough |
|---|---|---|
| A shallow sheet of stormwater crosses the yard toward a safe on-site outlet | Dry creek or vegetated swale | Check capacity, grade, erosion and overflow first |
| Water seeps through a basement wall or stays high below the surface | Drainage professional; possibly a French drain or foundation repair | A surface rock channel does not intercept groundwater at depth |
| A low area ponds for days after rain | Soil and grade diagnosis; perhaps a rain garden if drainage is adequate | Stones do not fix compacted clay, a high water table or a blocked outlet |
| A small roof downspout overwhelms one spot | Correct the downspout route; a rain garden or short rock channel may help | A large roof can deliver more flow than a small decorative bed can handle |
| A steep slope has active erosion or a large storm flow | Landscape or civil drainage professional | Unchecked concentrated flow can dislodge rock and deepen the channel |
Garden Therapy’s landscape designer Jan Johnsen describes dry streams as shallow depressions that slow and capture runoff, with coarse gravel and filter fabric in her example. BHG’s how-to likewise stresses observing natural flow, checking elevations, and providing an acceptable destination. These are practical design references, but neither generic dimensions nor a single rock recipe should replace local site assessment. Garden Therapy’s dry-stream guide and BHG’s dry-creek instructions offer useful construction perspectives.
Plan the channel around grade, width, and stone quantity
Follow a route that gives water a continuous path without aiming it at a problem area. A gentle curve often looks more natural than a ruler-straight trench, but bends must be broad enough that fast-moving water will not cut the outside bank. Wider pockets can add visual rhythm or momentary spreading, but they are not storage basins unless the soil and outlet have been designed for that purpose.
There is no one correct width, depth, or slope for every yard. A short, low-flow feature may be modest; a route carrying runoff from a roof or hillside may need a wider, more robust section or a designed inlet. Many DIY guides use a channel roughly 2 to 3 feet wide and excavate around a foot deep, but treat that only as a visual reference, not a hydraulic standard. The necessary size depends on the area draining to it, soil, slope, rainfall pattern, rock profile, and outlet capacity. Get professional help when a failure could send water into a building, onto another lot, or into a public drainage system.
Check the route’s grade with stakes and a string line, line level, or laser level. The bed should fall consistently toward its outlet; a low pocket can trap water, while a steep drop can turn the channel into a chute. You do not need to force a uniform grade onto a naturally varied yard, but any change in elevation should be stabilized with broad transitions and securely set stones rather than a sudden lip.
Calculate stone before ordering
Measure the channel length and average width, then calculate each aggregate layer separately: length × width × layer thickness = cubic feet. Divide cubic feet by 27 to convert to cubic yards, then add a modest allowance for irregular edges, compaction, and settlement; ask the stone supplier for coverage by product and size because a ton of one rock does not cover the same area as a ton of another.
For example, a 20-foot run averaging 2.5 feet wide with a 3-inch (0.25-foot) gravel layer takes about 12.5 cubic feet, or 0.46 cubic yard, before extra material. If you also plan a deeper base layer, calculate that layer separately and add the amounts; do not estimate the entire trench as if every inch will be filled with decorative river rock. Boulders, edging stones, and small top-dressing are separate quantities.
Choose rock, separation fabric, and bank plants
Use a mix of sizes for a natural appearance and stability. Larger stones belong mainly along the banks and at places where flow needs to slow; a continuous layer of smaller, washed aggregate fills the center. Rounded river rock makes a smooth, stream-like surface but can roll when water moves quickly. Angular crushed stone tends to interlock more firmly and can form a useful base, though it has a harsher look. Choose material based on the flow and appearance rather than assuming polished pebbles will stay put in a fast channel.
Avoid lightweight decorative gravel and loose bark in the active flow path. They can wash out, collect at an outlet, or travel into a storm drain. Keep topsoil and mulch above the bank line, and use locally sourced stone where feasible so the color and scale fit the landscape. If the bed will be crossed by people or equipment, use a stable stepping-stone or bridge design with a secure foundation; flat stones balanced on rounded rock can tilt underfoot.
Think twice about landscape fabric
Never line a drainage bed with plastic sheeting. It blocks infiltration and can turn the channel into a trough that holds water or sends it toward the next weak spot. Permeable geotextile can separate soil from aggregate and slow sediment migration, but the correct fabric depends on whether the goal is surface conveyance, infiltration, or a buried drainage system.
For a small decorative or low-flow bed, a permeable landscape fabric may reduce weeds and keep soil from mixing into the rock. Under heavy sediment or fine clay, however, fabric can clog and make maintenance harder; it also does not remove the need for a stable outlet. If infiltration is central to the design, avoid compacting the bottom and ask a local extension office or drainage professional whether fabric is suitable for your soil and intended flow. Do not substitute thin plastic, non-draining weed barrier, or a layer of fabric that spans an intended planted basin.
Choose plants for the bank’s actual wet-and-dry pattern, not just for the idea of a stream. Native sedges, rushes, grasses, low shrubs, and perennials can soften the stone and hold soil, but they must suit local sun, winter conditions, and occasional inundation. Penn State Extension notes that rain-garden zones can range from wet to dry and that plants with semi-evergreen foliage can help control winter erosion; use your local extension’s plant lists for regional species. Keep woody roots clear of utilities and the channel’s narrowest flow section.
Build in a safe, practical sequence
Once the route, outlet, permits, utility marks, and material quantities are settled, gather a shovel, rake, wheelbarrow, stakes, level, marking paint or hose, hand tamper, utility knife, and gloves. Materials may include washed crushed gravel, larger bank stones, river rock, a suitable permeable geotextile, and plants for the edges. Heavy boulders and large excavations may require machinery and a professional; do not try to muscle stones that are too heavy to place safely.
Mark and test the route
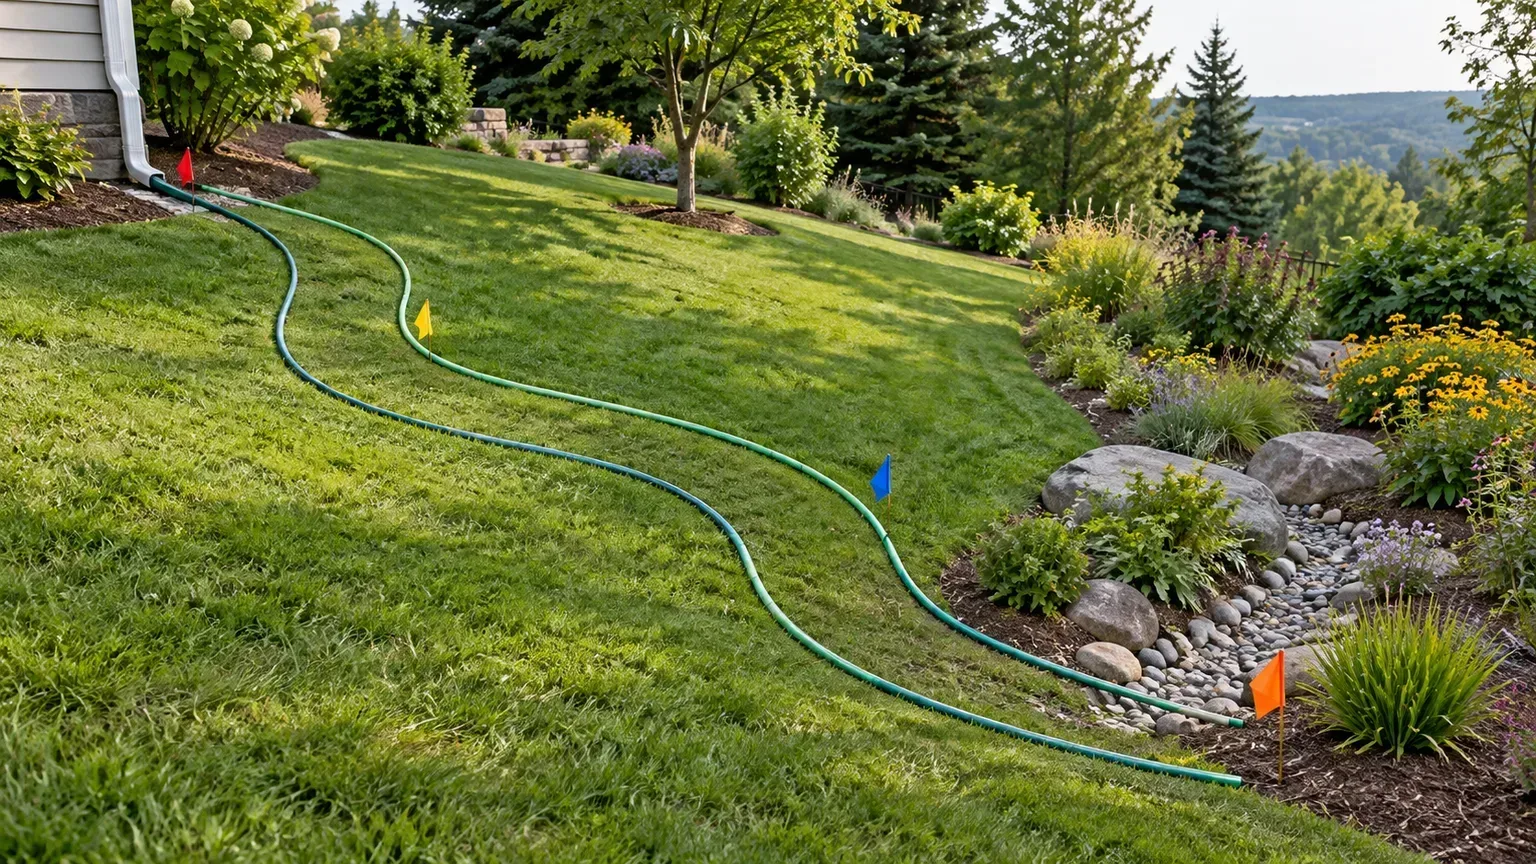
Lay two garden hoses or flexible ropes along the channel edges, then look at the path from the house and from the main outdoor sitting area. Widen and narrow the lines gradually; abrupt pinches look artificial and create bottlenecks. Place flags at the inlet, each bend, the low point, any crossing, the outlet, and the overflow location.
Before digging, run a modest amount of water from a hose at the inlet to check for obvious dead ends or uphill sections. This is not a substitute for a storm-flow calculation, and it cannot mimic a cloudburst, but it can reveal a route that dips the wrong way. If the proposed path requires water to climb a hill or leave your property to work, redesign it before excavation.
Excavate a stable channel
Remove turf and excavate only to the depth required for the planned stone layers and water path. Shape the bottom as a shallow trough, generally lower through the center with stable, gently sloped banks; near-vertical sides can collapse and are harder to disguise. Keep the transitions at the inlet and outlet broad and stable so water does not undercut the first or last stones.
Use the excavated soil to shape planting banks only if you can keep it out of the channel and away from foundations. Compacting the entire bottom can reduce its ability to absorb water, so do not tamp it hard when infiltration is part of the design; where the channel is meant to convey water, follow the planned section and avoid leaving loose, easily scoured soil. A steep cut, deep trench, large cut-and-fill volume, floodplain, or active stream bank is a reason to stop and consult local officials or a qualified professional.
Add the separation layer and stone base
If your design calls for geotextile, line the channel smoothly and extend it beneath the bank stones without leaving exposed edges. Overlap seams generously and arrange them so moving water cannot catch an upstream-facing flap. Do not stretch the fabric across the planned outlet or a planted infiltration area; keep the material and edges in the configuration specified for your application.
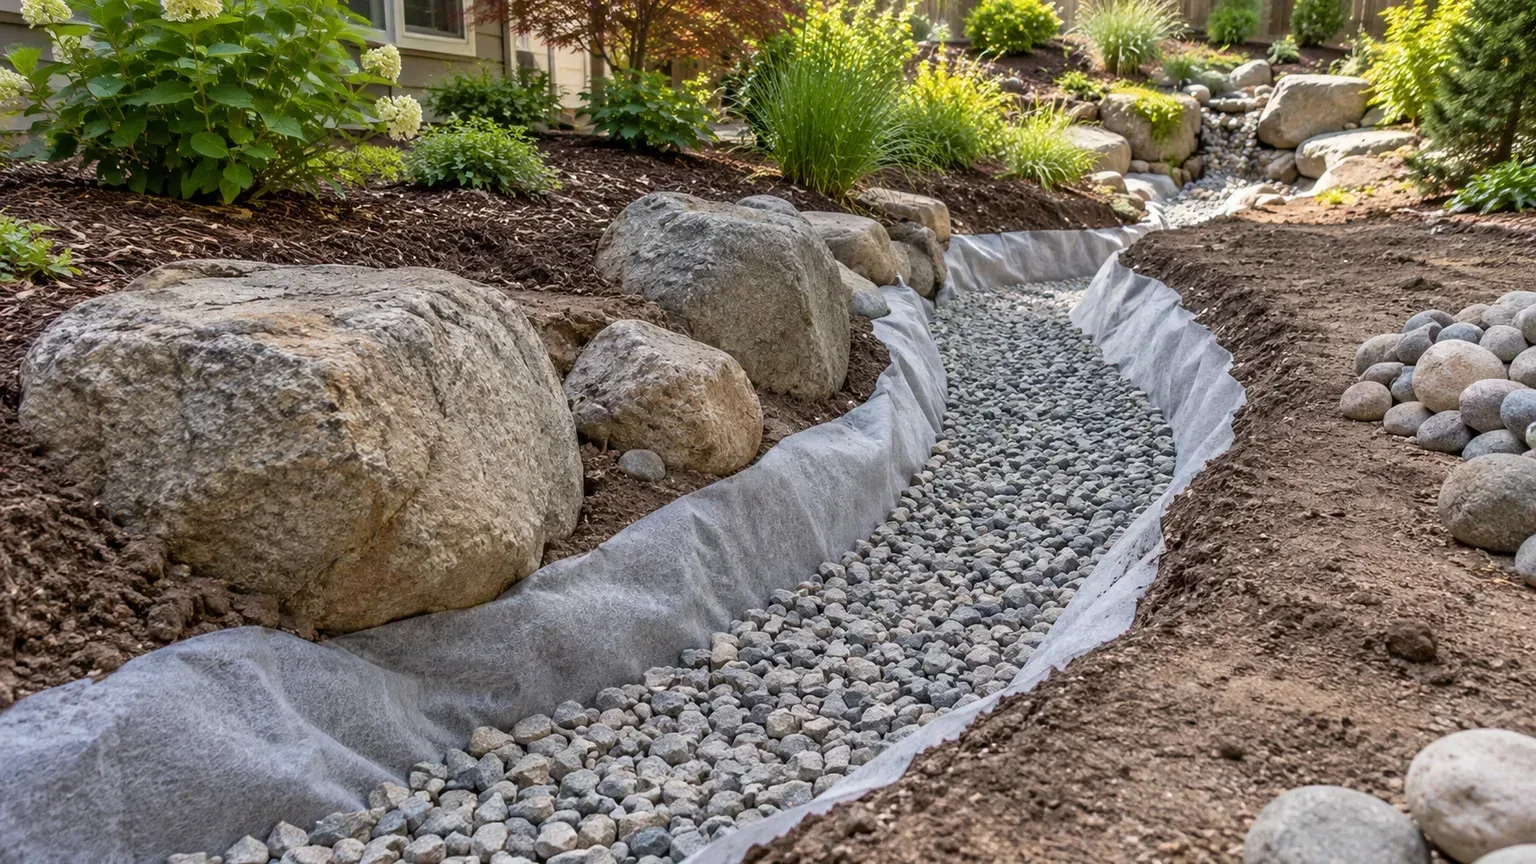
Spread the base aggregate evenly, with the thickness selected for the channel and stone sizes rather than copied from a generic recipe. Coarse angular gravel can create a stable bed under rounded surface stones; a simple decorative channel may need less structure. Keep enough depth for the finish rock to cover the base and fabric completely, but do not fill so high that the channel loses its shallow depression or blocks its overflow route.
Anchor edge rocks and finish the bed
Set the largest stones first, partially nesting them into the banks so they do not sit precariously on loose gravel. Place clusters asymmetrically, with larger stones generally on the outside of bends and smaller stones between them. A few exposed stones across the center can make the bed look less like a uniform trench, but leave ample open area for water to pass and sediment to be removed.
Finish the center with washed gravel or river rock sized to stay in place under the expected flow. Rake the surface so the channel remains lower than the surrounding lawn and has a continuous grade; check it from both ends before trimming any visible fabric. Do not use cement to glue the bed together as a default. Mortar can trap debris, create hard edges, and complicate repairs; reserve masonry or a designed bridge foundation for features that actually need it.
Plant the banks and make crossings safe
Plant outside the channel’s main flow line, placing moisture-tolerant species where water lingers and more drought-tolerant plants on the upper bank. Keep root balls and mulch from narrowing the channel, and water new plants until established even if the feature catches rain. A thick mulch layer in the flow path is likely to migrate; use stone or a stable, low-growing groundcover in that section instead.
If you add a path across the bed, build a stable crossing rather than laying loose flagstones on top of rounded rock. A properly supported flat stone or small bridge should not shift when wet, freeze-thawed, or stepped on, and it should not dam the channel. Consider access for wheelbarrows and maintenance before fixing the crossing in place.
Test the bed in rain and maintain it
After construction, inspect the bed during the first few meaningful storms from a safe location. Confirm that water enters where intended, follows the channel without jumping a bank, reaches the outlet, and leaves the outlet without cutting a new groove. Check again after the storm for sediment lines, displaced stones, pooling, or water near the house; a small correction now is easier than rebuilding the entire route.
A functioning dry creek still needs occasional maintenance. Remove leaves and branches before they form a dam, clear sediment from the inlet and outlet, pull seedlings before roots bind into the fabric, and replace stones that have shifted. If water repeatedly remains for more than a day, distinguish a blocked outlet or compacted basin from soil that simply drains slowly; do not keep adding gravel without finding the cause. Penn State Extension’s 24-hour drainage guidance applies to rain gardens, but persistent standing water in a dry creek is still a useful signal to recheck its outlet and site conditions.
Keep nearby gutters and downspouts clear, because roof debris and shingle grit can clog a small inlet. After winter, inspect for frost movement and heaving, and reset loose crossing stones before anyone walks over them. If the bed carries water toward public infrastructure, keep any required sediment or pollutant-control measures in place and follow local maintenance rules.
Troubleshoot overflow, sediment, and displaced rock
If water spills over the bank, first locate the bottleneck. Leaves, a narrow curve, an inlet that dumps water in one spot, a raised crossing stone, or a shallow outlet can all cause backup. Remove debris and observe another storm; if the channel is routinely overtopped, do not just raise the banks, because that may make the overflow more forceful and send it toward a building or neighbor. Reassess contributing area and get help sizing a larger system.
If stones wash downstream, the flow is too fast for the stone arrangement, the bottom grade is too steep, or the rock is too small or rounded. Stabilize the inlet and bends with properly sized, partly embedded stone, broaden abrupt drops, and create a safe energy-dissipating outlet. If soil is washing into the bed, protect the bare banks with suitable plants or erosion-control materials and keep sediment from reaching a storm drain.
If water sits in the channel, check the outlet elevation and look for a low spot, compacted base, clogged fabric, or soil that cannot infiltrate the volume entering the bed. Adding a deeper gravel layer is not an automatic fix; a gravel trench without an outlet still has finite storage. If the problem is water around a foundation or persistent seepage, stop treating it as a landscaping project and consult a drainage contractor or qualified engineer.
Conclusion
A dry creek bed works when it has a clear job, a safe route, and a dependable endpoint. Trace the water before you dig, check local drainage and grading rules, call 811, and choose a channel sized for the runoff it will actually receive. Then use stable stone, suitable permeable separation material, and plants that fit the banks’ wet-and-dry pattern.
The most important decision is whether the water belongs in a surface channel at all. If your yard needs subsurface drainage, a properly designed infiltration basin, or protection from major storm flows, choose that system instead of asking a decorative trench to do work it was never built to do.