How to Grow and Care for Button Fern (Pellaea rotundifolia)
Button fern care starts with filtered light and a mix that stays lightly moist. Learn how to water, repot, divide, and diagnose brown or yellow fronds.
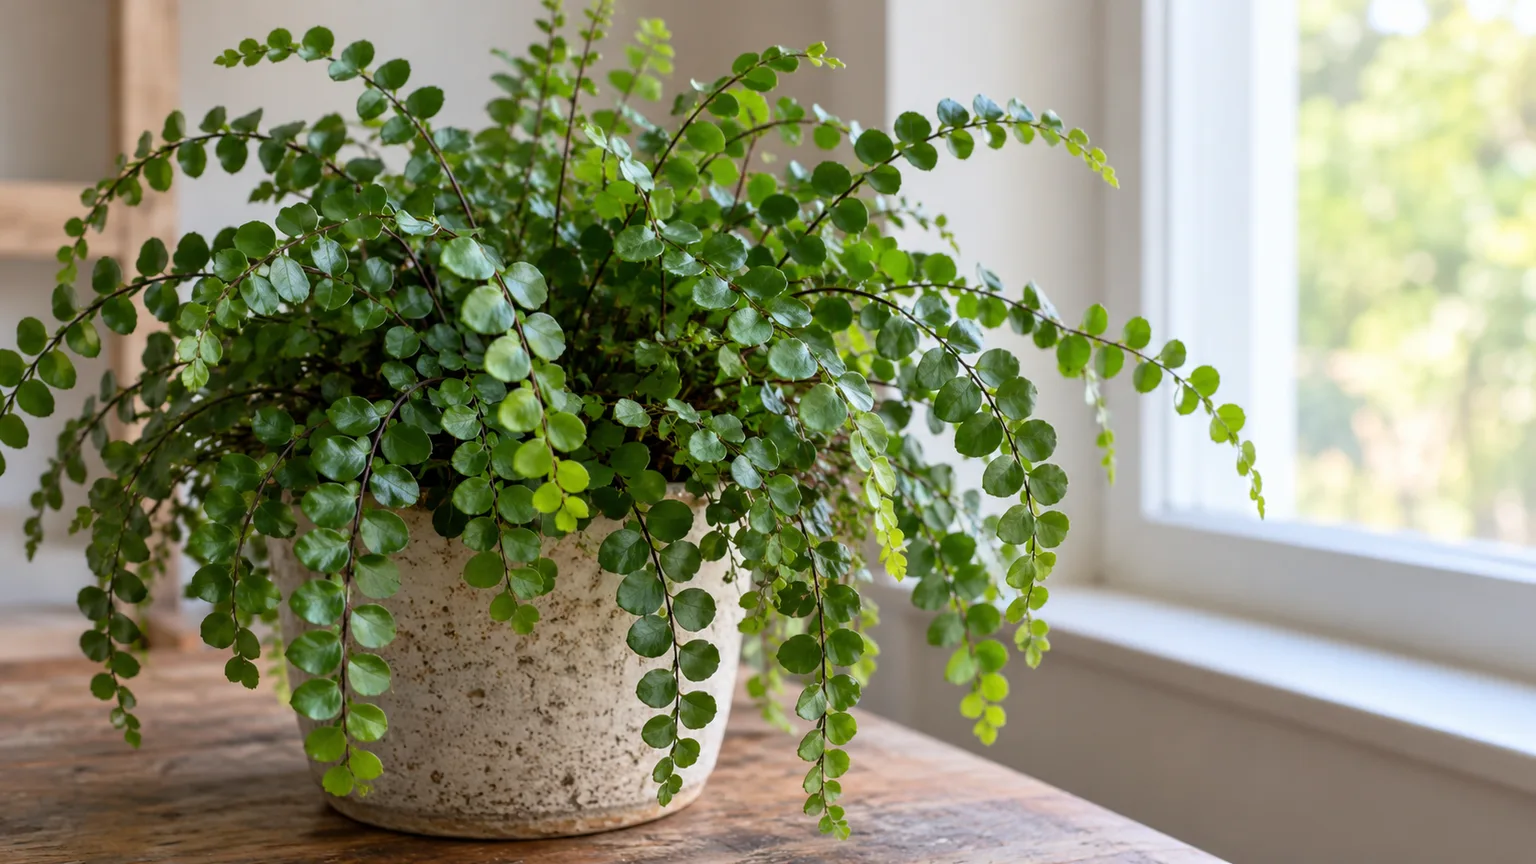
Button fern is a compact fern with arching fronds lined by small, rounded leaflets. It is less demanding about room humidity than many indoor ferns, but it still needs a root zone that stays lightly moist and drains freely. The simplest routine is to give it filtered light, check the mix before watering, and avoid letting the entire root ball swing from soggy to bone-dry.
The plant is commonly sold as Pellaea rotundifolia. NC State Extension now lists it as Hemionitis rotundifolia and records Pellaea rotundifolia as its former name; the Royal Horticultural Society still lists Pellaea rotundifolia in its tender-fern houseplant guide. Both names can appear on nursery labels, so the mismatch does not necessarily mean you have a different plant. (NC State Extension’s button fern profile; RHS tender-fern guide)
Button Fern Identity and Growth Habit
A button fern is a small, evergreen fern in the Pteridaceae family. Its round, glossy leaflets sit along slender arching fronds, and older stalks can deepen to a reddish color.
NC State lists a mature size of roughly 6 to 12 inches tall and wide and notes that the species is native to New Zealand, where it grows in places that include rocky crevices and moist forests. This mix of a compact habit and wiry stems makes it easy to display on a shelf or plant stand.
Do not confuse it with a lemon button fern. Lemon button fern is Nephrolepis cordifolia ‘Duffii’, a different fern with a different growth form; the shared word “button” describes the small leaflets, not a close botanical relationship. A quick label check for Pellaea rotundifolia or Hemionitis rotundifolia helps you avoid applying care rules meant for another plant. (NC State Extension; Gardening Know How’s button fern overview)
| Care factor | Starting point |
|---|---|
| Light | Bright, filtered or indirect light; protect from strong midday sun |
| Water | Keep the root ball lightly and evenly moist; let only the surface begin to lose moisture |
| Potting mix | Moisture-retentive but airy, with a drainage hole below the pot |
| Humidity | Ordinary room air may work; raise it only if the plant shows persistent stress |
| Feeding | Dilute houseplant fertilizer during active spring and summer growth |
| Outdoors | Warm, sheltered shade; overwinter outdoors only in mild climates |
These are starting conditions, not a weekly calendar. A small pot in a warm, bright room will dry faster than the same fern in a cool room with softer light, so let the plant and its mix set the pace.
Start With the Right Light
Button fern grows best in filtered shade outdoors and indirect or subdued light indoors. Bright indirect light helps it produce sturdy, well-spaced fronds, while prolonged direct sun through glass can bleach or scorch the leaflets. A north- or east-facing window is often an easy place to start; near a stronger south- or west-facing window, set it back from the glass or soften the sun with a sheer curtain.
NC State and RHS both emphasize filtered or indirect exposure for ferns, with the RHS specifically warning against bright direct sunlight. (NC State Extension; RHS)
Read the Light at Your Window
“Indirect light” is not the same as a dark corner. At midday, hold your hand above the fronds: a sharp, dark-edged shadow means direct sun is reaching the spot; a softer shadow suggests filtered light.
If the fern is several feet from a bright window, watch how quickly it puts out growth. Long, sparse fronds that lean toward the glass usually signal that the spot is too dim, while a pale patch on the window-facing side can point to sun scorch.
A button fern can adapt to lower indoor light than many flowering houseplants, but “tolerates shade” does not mean “thrives without daylight.” If a room is dim all day, move the pot closer to its brightest window without placing it in hot midday rays. Rotate it a quarter-turn every few weeks if growth leans strongly toward one side.
Water Before the Root Ball Dries
Button fern needs regular water, but “moist” does not mean leaving the pot in a saucer of water. Water thoroughly so the root zone is wetted, let excess drain, and empty the saucer or cachepot. The useful target is a root ball that remains slightly moist between waterings, with enough air in the mix for roots to function.
Care references do not agree on how dry the surface should become. Purdue Extension places button fern among ferns that need continuously moist soil, while Gardening Know How advises allowing the top layer to dry a little; NC State calls for regular water and good drainage. The practical middle ground is to check the mix and water before it dries through, then drain the pot completely rather than keeping it saturated. (Purdue Extension’s indoor fern guidance; Gardening Know How; NC State Extension)
Use a Repeatable Watering Check
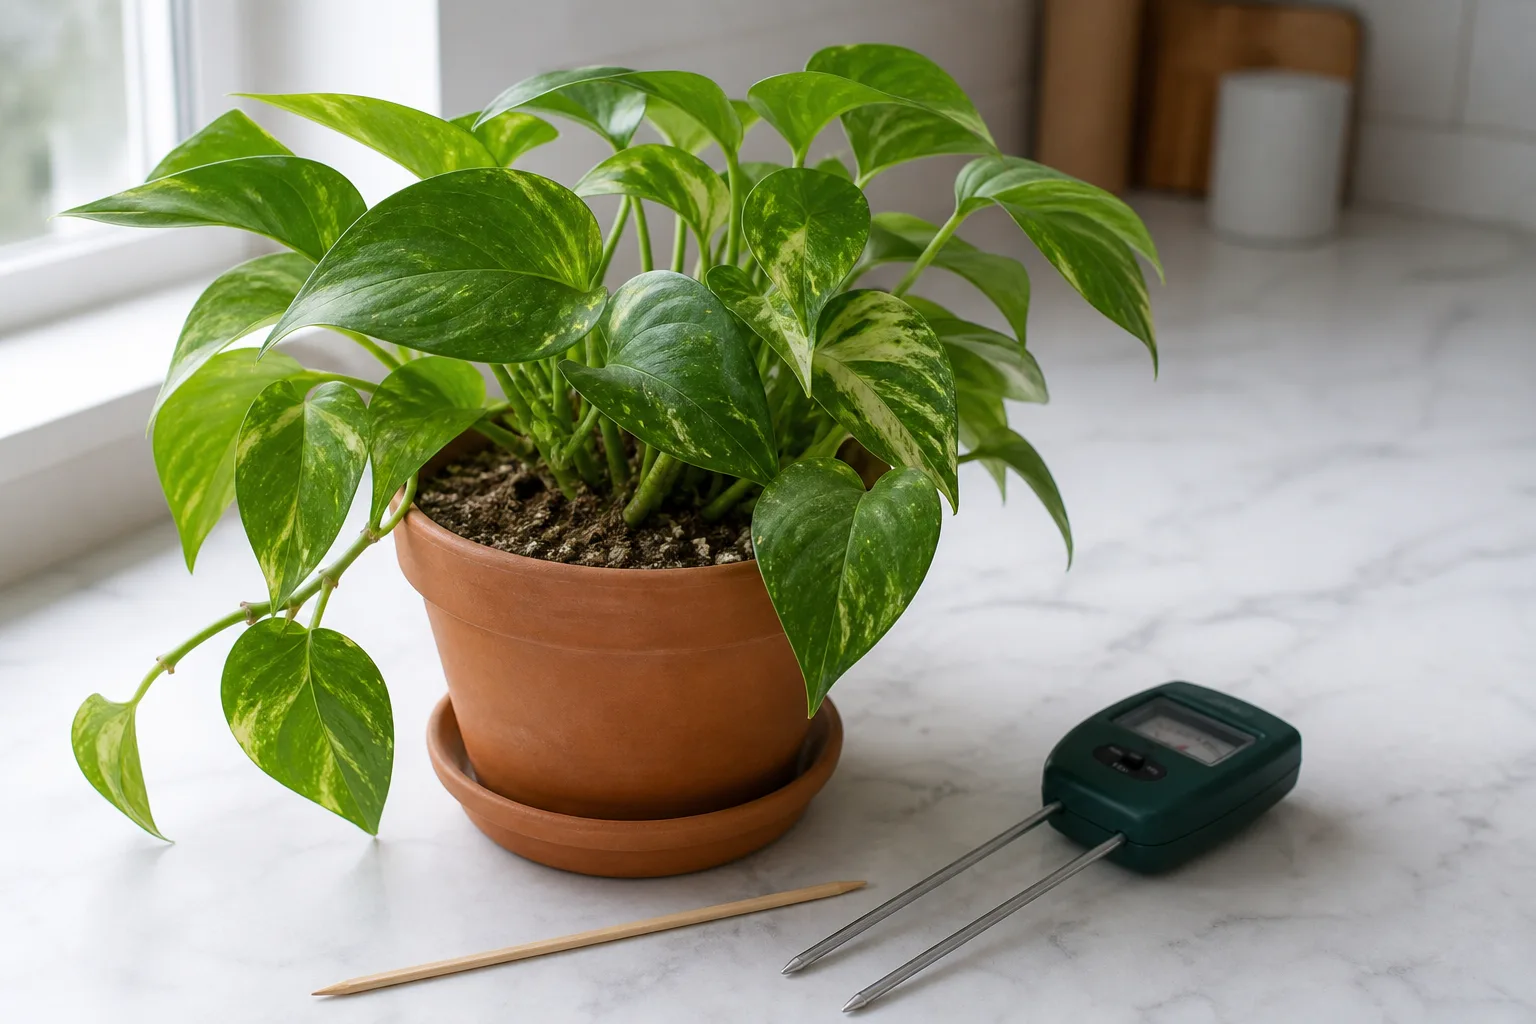
Press a fingertip about half an inch into the mix near the edge of the pot, then lift the container to learn its “just watered” weight. If the surface feels dry but the mix below is cool and faintly moist, wait and check again soon; if the top layer is dry and the pot feels lighter, water. In a small container, this can mean checking every few days in a warm bright room and less often in winter, but the interval changes with the plant’s conditions.
When watering, pour slowly over the mix until water flows from the drainage holes. If the mix has pulled away from the pot or water runs straight through while the center stays dry, set the nursery pot in shallow water for 10 to 15 minutes, then let it drain fully. Do not leave it soaking for hours or let a decorative outer pot hold standing water; a fern can wilt from damaged roots even while its pot looks wet.
Choose a Mix That Holds Moisture and Drains
Button fern needs a mix that holds a little water without collapsing into a dense, airless mass. NC State describes an acidic, humus-rich, peaty potting mix with good drainage, and Gardening Know How also recommends peat-based media amended with perlite. A ready-made houseplant mix can work if it does not stay wet for days; blend it with perlite or pumice to open the texture, or add a small amount of fine bark if the mix feels compact. (NC State Extension; Gardening Know How)
A practical starting blend is two parts quality houseplant mix to one part perlite or pumice. Peat-free mixes based on coir can also work; judge them by how quickly they drain and whether the root ball stays evenly moist, not by the ingredient label alone. Avoid pure garden soil in a pot, which can compact, and avoid a coarse, bark-heavy orchid mix that may dry too quickly for a small fern.
Use a container with at least one clear drainage hole and only a little room around the root ball. An oversized pot holds more wet mix than the roots can use, so it can stay damp long after the surface looks dry. The RHS guidance for tender ferns similarly favors moist but not waterlogged compost, a useful distinction when choosing both mix and pot. (RHS tender-fern guide)
Keep Temperature Steady and Treat Humidity as a Variable
A button fern usually grows well in ordinary warm indoor conditions. Gardening Know How gives 60–75°F as a useful range and warns against drafts; keep the pot away from cold window glass in winter, air-conditioning blasts, and hot furnace vents.
Outdoors, NC State places the plant in USDA Zones 9–11, but notes that extended below-freezing conditions are a problem even though a brief cold spell may be survived. A potted plant is more exposed to temperature swings than one rooted in the ground, so bring it inside before frost threatens. (Gardening Know How; NC State Extension)
Humidity advice varies more than the basic light and drainage advice. NC State says this species does not need the humid conditions preferred by many other ferns, while Gardening Know How and Gardenia recommend a more humid room. That difference is best read as relative tolerance: a button fern may handle ordinary indoor air better than a maidenhair fern, but hot, dry air can still make it lose moisture faster than its roots can replace it. (NC State Extension; Gardening Know How; Gardenia’s button fern profile)
Do not add a pebble tray or mist on a schedule just because the plant is a fern. If tips keep crisping after you have ruled out a dry root ball, direct sun, and a nearby heat vent, check room humidity with a small hygrometer. A humidifier near the plant can help in a very dry home; a pebble tray may make a small local difference but cannot rescue a plant with damaged roots or poor watering.
Feed Only During Active Growth
Button fern is compact and not a heavy feeder. When new fronds are emerging in spring or summer, apply a balanced liquid houseplant fertilizer at about one-quarter strength every four to six weeks, or follow a more conservative label rate if your product is concentrated. Gardening Know How recommends quarter-strength feeding during the growing season; if the potting mix already contains slow-release fertilizer, wait before adding more. (Gardening Know How)
Do not feed a stressed plant to “fix” yellow leaves. Fertilizer cannot compensate for rot, drought, cold damage, or insufficient light, and unused salts can build up in a small pot. Pause feeding when growth slows in fall and winter, then resume only after the plant starts growing again.
Trim Old Fronds Without Cutting the Crown
A button fern does not need shaping. Remove fully brown or collapsed fronds at the base with clean scissors, taking care not to cut the central crown or the short rhizome from which new growth emerges. A few aging lower fronds are normal; if a large share of the plant changes color at once, diagnose light, root moisture, and temperature before pruning away the evidence.
Dust can collect on the small leaflets, but a hard shower can bend or tear them. If the foliage is dusty, use a gentle stream of room-temperature water and let the fronds dry in moving air. Avoid polishing products, which can coat the leaf surface and leave residue on the closely spaced pinnae.
Repot When the Root Zone Is Crowded
Button fern grows slowly enough that repotting by calendar is unnecessary. Check the root zone when roots begin circling densely, the rhizome crowds the rim, the pot dries much faster than it used to, or the mix has broken down and stopped draining evenly. One size larger is usually enough; a huge decorative pot can keep excess mix wet around a small root system.
Spring is a low-stress time to repot if the plant is actively growing. Slide the root ball out, loosen only the outermost circling roots, and keep the rhizome at its previous depth rather than burying the crown. Use fresh, airy mix and water once to settle it, then return the plant to the same filtered light while it re-establishes.
If the roots are firm and the mix drains well, leave it alone even if the pot looks full.
Divide the Rhizome to Make New Plants
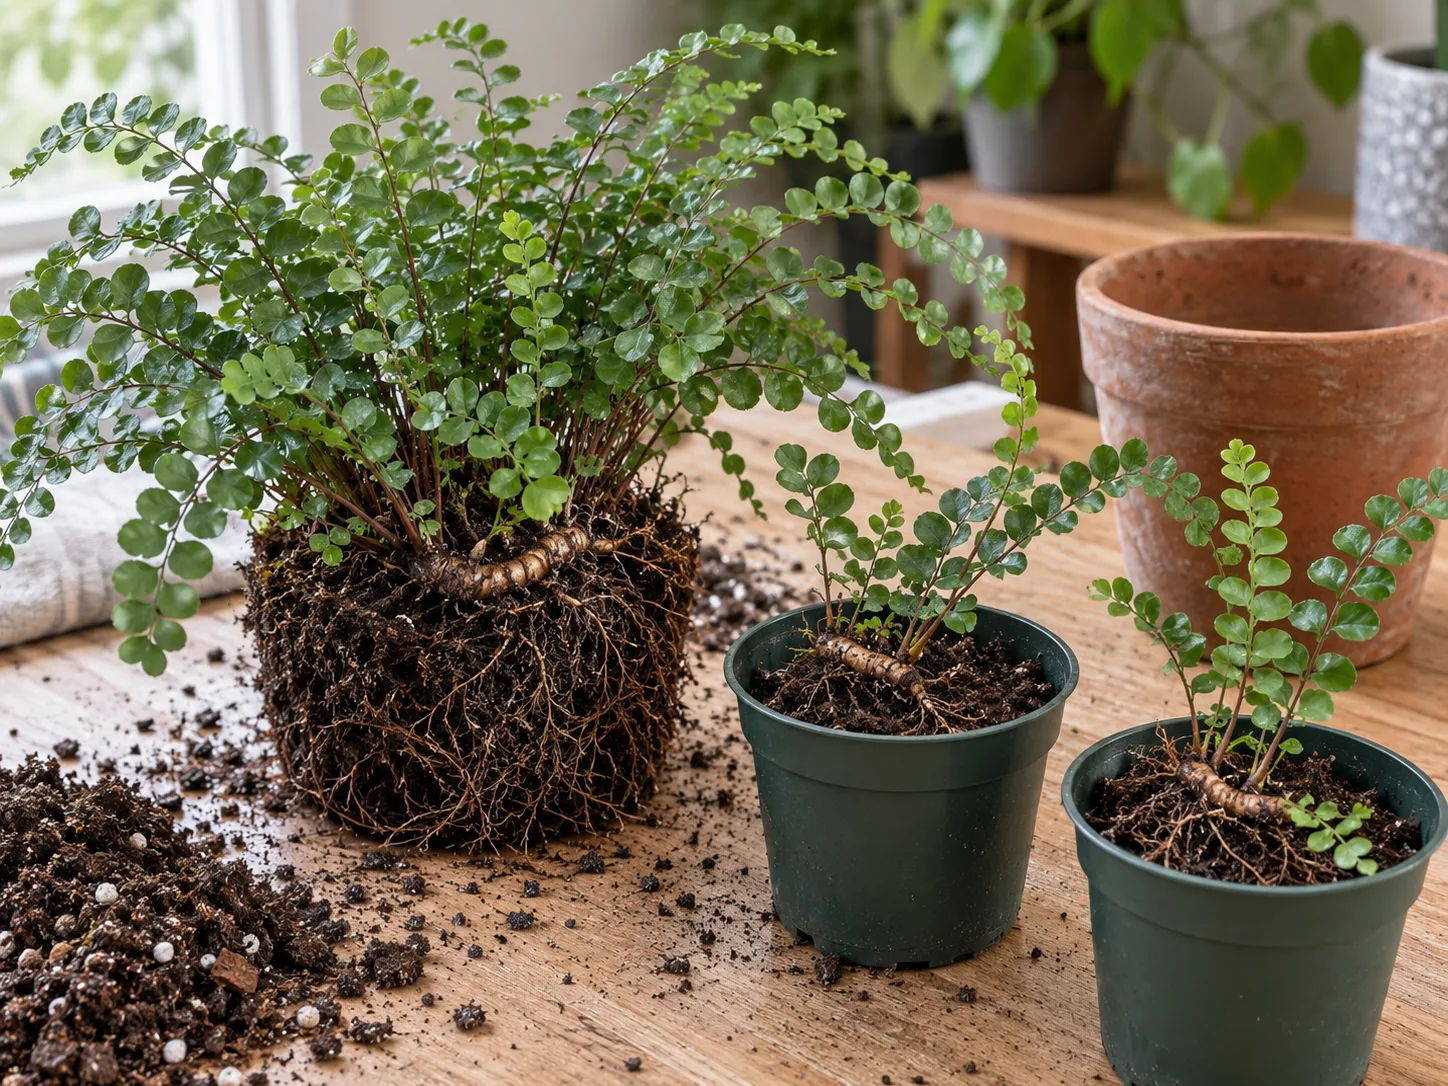
Division is the most practical way to propagate a button fern at home. The plant spreads from a short rhizome, so a viable piece needs a growing point, roots, and at least a few attached fronds; a detached leaflet or stem without rhizome tissue will not make a new plant.
Divide only a healthy, established fern, preferably in spring as new growth begins. NC State identifies rhizome division as a propagation method for this species. (NC State Extension)
Pot Divisions Shallowly and Protect New Roots
Water the plant the day before dividing so the root ball is easier to handle. Ease it from the pot, brush away loose mix until you can see the rhizome, and separate the clump by hand if it divides naturally. If the roots are tightly woven, use a clean, sharp knife to cut through the rhizome; keep each division large enough to carry roots and several healthy fronds rather than making many tiny pieces.
Set each division into a small pot with drainage, at the same depth it was growing before. Fill around the roots with fresh mix, water thoroughly, and drain; do not bury the frond bases under a thick layer of soil.
Keep the new plants in warm, indirect light and check moisture more often while roots re-establish. A division that pauses briefly is not necessarily failing, but a soft, dark rhizome or a completely dry root ball needs attention.
Grow Button Fern Outdoors Only Where Winters Are Mild
In a frost-free or mild-winter garden, button fern can grow in filtered shade, a sheltered rock garden, or a crevice where water drains away instead of pooling. NC State lists it for Zones 9–11 and says strong winds should be avoided; the native plant’s rocky habitat is a reminder that it likes moisture but not stagnant, airless soil. In a cold-winter region, grow it in a pot and treat it as a seasonal patio plant rather than testing its limits outdoors. (NC State Extension)
Move an indoor fern outside gradually in spring. Start in deep shade for a week, then shift it toward brighter filtered light; a plant accustomed to a window can scorch if it goes straight into outdoor sun. Bring it back inside before nights turn cold, and check for hitchhiking insects before placing it near other houseplants.
Troubleshoot Symptoms by Pattern
A single brown or yellow leaflet is not a diagnosis. Look at how much of the plant is affected, where the damage starts, what the mix feels like, and whether the pot has recently moved. The pattern helps distinguish a normal aging frond from a problem that needs a change in care.
Brown Fronds or Crispy Leaflets
Crispy tips and edges usually point to moisture stress, but the source may be the root ball, the air, or the light. If the whole pot feels light and the mix is dry below the surface, water thoroughly and then shorten the gap between checks. If the mix is already wet, do not add more water; look for poor drainage, roots that smell sour, or a pot sitting in runoff.
If browning is strongest on the window-facing side, move the fern farther from direct sun. If it starts after the heat turns on, after a cold draft, or while the soil has stayed evenly moist, move the pot away from that air stream and check humidity before adding a tray or humidifier. Brown tissue will not turn green again, so trim only the dead portion or remove a fully damaged frond; focus on protecting new growth.
Yellow Leaves or a Limp Crown
Widespread yellowing with a limp crown and wet mix raises concern about root stress. Empty standing water, let the mix lose some excess moisture, and check drainage before returning to the usual routine. If the plant continues to decline, inspect the roots: firm roots are a better sign than dark, mushy roots, which suggest rot and may need trimming before repotting into fresh mix.
Yellowing that begins on one or two older fronds while new growth remains firm can be ordinary turnover. If growth is pale and stretched rather than soft, the fern may need a brighter filtered spot. Change one condition at a time so you can see whether the plant responds instead of making several adjustments that hide the original cause.
Leaf Drop or No New Growth
Button fern can shed leaflets after the root ball dries too far, after a move, or when watering swings between very wet and very dry. Stabilize its location, check moisture every few days, and water when the upper layer starts to dry while the lower mix remains faintly moist. Do not bury the crown or fertilize heavily to force quick growth.
Little growth in winter is not automatically a problem. As days brighten, give the fern more usable indirect light and resume light feeding only after you see new fronds. If spring passes with no growth, inspect the rhizome and roots, then check for low light, a pot that stays wet, or an unusually cold position.
Watch for Pests Without Overreacting
NC State lists no known major insect pests or diseases for button fern, but a houseplant can still pick up common indoor pests from nearby plants. Inspect both sides of the fronds and the stems for fine webbing, sticky residue, clusters of soft-bodied insects, or small fixed bumps that do not wipe away. Isolate a suspected infestation before it spreads, and confirm that the marks are pests rather than normal plant structures or dried residue.
For a small infestation, rinse foliage gently and remove visible insects with a damp cloth, then recheck the plant every few days. If the problem continues, use only a treatment labeled for indoor plants and follow that product’s directions; test a small area first because delicate fern leaflets can be sensitive. Avoid treating the plant on a fixed schedule when you have not confirmed a pest.
Conclusion
Button fern care is easier when you treat it as a moisture-sensitive but not humidity-dependent fern. Give it filtered light, a small draining pot, and a mix that stays lightly moist; water by checking the root zone rather than following a weekly timetable. The main failure to avoid is confusing “likes moisture” with “should sit wet.”
If fronds brown, yellow, or drop, read the pattern before changing care: dry mix points toward a shorter watering gap, wet mix points toward drainage and root health, and one-sided scorch points toward direct sun. Repot only when the root zone is crowded, divide only healthy rhizomes, and keep outdoor plants sheltered from frost. With those few checks in place, the fern can stay compact and graceful without a complicated care routine.