35 DIY Garden Ideas for Every Backyard, Big or Small
Explore 35 DIY garden ideas for raised beds, paths, vertical planters, and shade covers, with practical notes on materials, space, upkeep, and project costs.

A useful garden project solves a real problem: it creates growing room, makes a path easier to use, gives climbing plants support, or protects a crop from weather. Start with that job before choosing a paint color or buying lumber. The best backyard upgrades are the ones that fit your sunlight, drainage, available time, and willingness to maintain them.
The 35 ideas below range from a simple sheet-mulched bed to small structures and outdoor work areas. Each can be scaled to a rental patio or a large yard, but check local rules before digging, building near a fence, or collecting roof runoff. Sketching first and building one project at a time usually costs less than trying to redo an entire backyard in a weekend.
Plan your garden project around the site
Map the sun, slope, and route
Spend a few days noting where sun falls in the morning and afternoon, where water pools after rain, and which route you naturally take from the door to the garden. Fruiting vegetables and many flowering plants need a bright site; Utah State University Extension recommends at least six to eight hours of direct sun for maximum fruit and foliage production. A raised bed may warm earlier in spring, but that exposed soil can also lose moisture faster in summer, so plan a reliable watering route before you build.
Sketch the yard with doors, gates, existing trees, downspouts, and the path of a hose or wheelbarrow. Oklahoma State University Extension recommends keeping beds narrow enough to reach without stepping on the growing soil; about four feet is a useful maximum for a bed reached from both sides, while a bed along a wall should be narrower. Walk the proposed paths with a full watering can or wheelbarrow before fixing their position. A path that is attractive but awkward to turn around on will become a shortcut through the plants.
Choose materials for use, not just looks
For a food garden, start with new, untreated, naturally durable lumber or stable masonry when those choices fit your budget. Extension guidance on treated wood differs, and the age and treatment history of salvaged lumber may be unclear. Avoid railroad ties and painted, stained, or chemically contaminated scraps around edible crops; if you choose a treated material, follow current local extension guidance and the product label, and use suitable protection when cutting it. A pallet stamp alone does not tell you whether a load spilled onto the boards.
Think about weight and water, too. A large planter filled with wet soil is heavy; a tall bed needs bracing; a path should drain without directing runoff toward a foundation; and an elevated box needs legs and joints designed for the load. For any project that attaches to a house, fence, or deck, fasten into structural framing rather than thin siding and check whether the structure can bear the extra weight.
Grow more in a small footprint
Raised beds and boundary planters
-
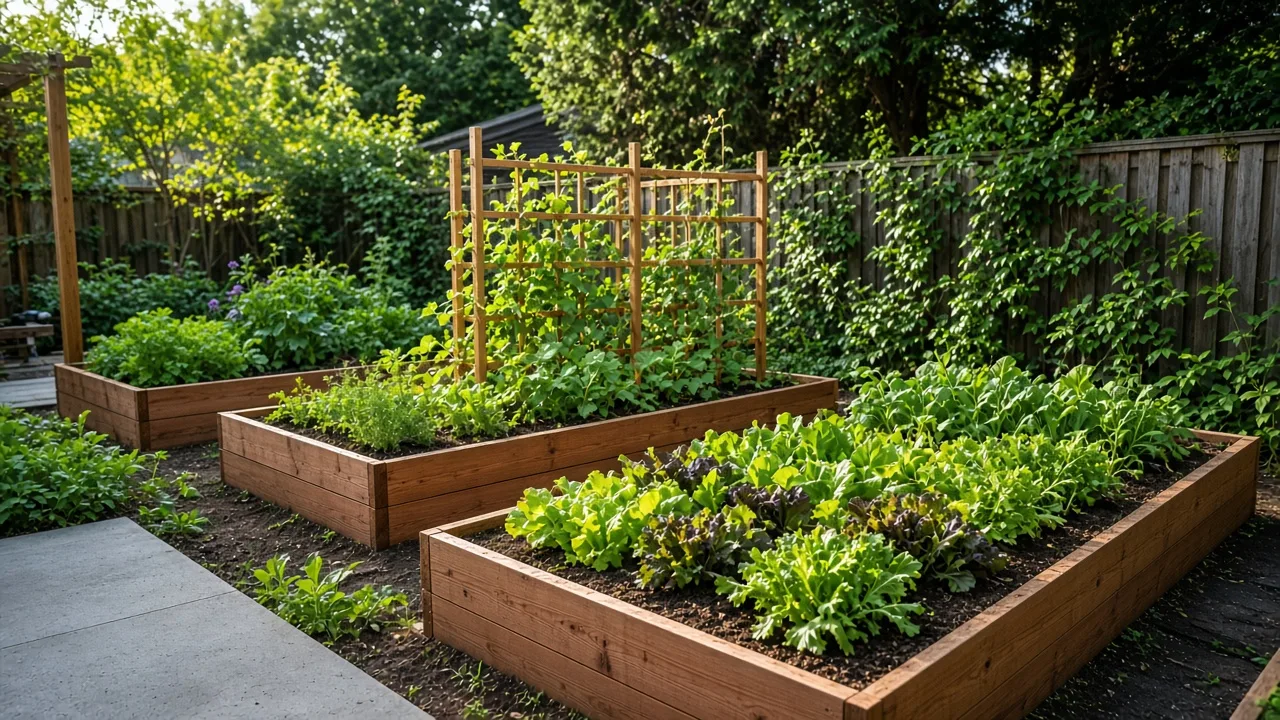
Build a reach-in raised bed. A four-foot-square bed is a straightforward first build because you can reach the center from every side. Use straight boards, exterior-rated fasteners, and reinforced corners; if one side will sit against a wall, reduce the width so you can still tend the back row without climbing into the soil. Oklahoma State and Utah State Extension both discuss the access and soil benefits of this layout, and GrowVeg’s plank-built bed guide shows a simple construction sequence.
-
Make an unframed no-dig bed. Mark a bed with a hose, mow or cut the vegetation low, then cover the footprint and its future paths with plain cardboard with tape and staples removed. Overlap seams so grass cannot push through, wet the cardboard, and top the planting area with finished compost; cover the path with wood chips or another walkable mulch. Garden Betty’s no-dig bed guide describes building layered beds this way, but the method still needs enough finished compost at the surface for seedlings and roots.
-
Create a low block or brick bed. Stack landscape blocks or reclaimed bricks into a low border when you want a durable edge without cutting lumber. Level the base in short sections and keep the walls low unless the blocks are designed for retaining soil; a tall, dry-stacked wall can lean or collapse as wet soil pushes outward. Fill the bed only after checking that the bottom drains and that plants can root into the ground below if the bed is shallow.
-
Build an elevated trough for easier tending. A waist-high planter can reduce bending and bring herbs or salad greens close to a patio door. Add drainage holes, a waterproof liner only if it does not block those holes, and cross-bracing under the box; wet potting mix weighs far more than an empty frame. The soil depth should match what you plan to grow, and a shallow trough will dry quickly in sun or wind.
-
Fit a window box to a shed or fence. A narrow box uses space that would otherwise stay empty and is easy to plant with compact flowers or herbs. Fasten brackets into studs or solid framing, not just thin siding, and leave room for water to drain away from the wall. Since small boxes heat and dry faster than ground beds, choose plants with similar water needs and check them during hot spells.
-
Group containers as a movable garden island. Cluster several pots on a stable, level patio so each plant has the root depth it needs instead of forcing everything into one oversized tub. Put them on locking casters only if the surface is flat and the combined weight is manageable; pots can tip in wind or roll on a slope. Keep a clear watering route and group thirsty plants together so maintenance takes minutes rather than a trip around the yard.
-
Turn a sturdy chair into a planter stand. Remove the seat from a sound, weather-safe chair and fit a plant basket or pot into the opening. The chair is a display frame, not a soil container, so make sure the pot itself drains and cannot slip through the seat. This is a good way to bring a favorite annual or trailing plant up to eye level, but it is less practical for a thirsty crop that needs daily watering.
-
Repurpose a metal trough or old tub. A clean trough can hold a small mix of vegetables, herbs, or flowers and gives a garden a strong focal point. Confirm what the vessel previously stored, create several drainage openings, and set it on stable supports before filling; a deep container can require a surprising amount of soil. If it sits on a deck or balcony, account for the full saturated weight and protect the surface from constant dampness.
Containers and vertical planting
- Hang a fabric pocket planter on a freestanding frame. A vertical pocket system can turn a sunny fence line into a herb or leafy-green garden without using much floor area. Mount it to a freestanding support if the fence is not built for the load, and place the most drought-tolerant plants near the top because upper pockets tend to dry first. Avoid mixing plants with very different water needs in one pocket column.
-
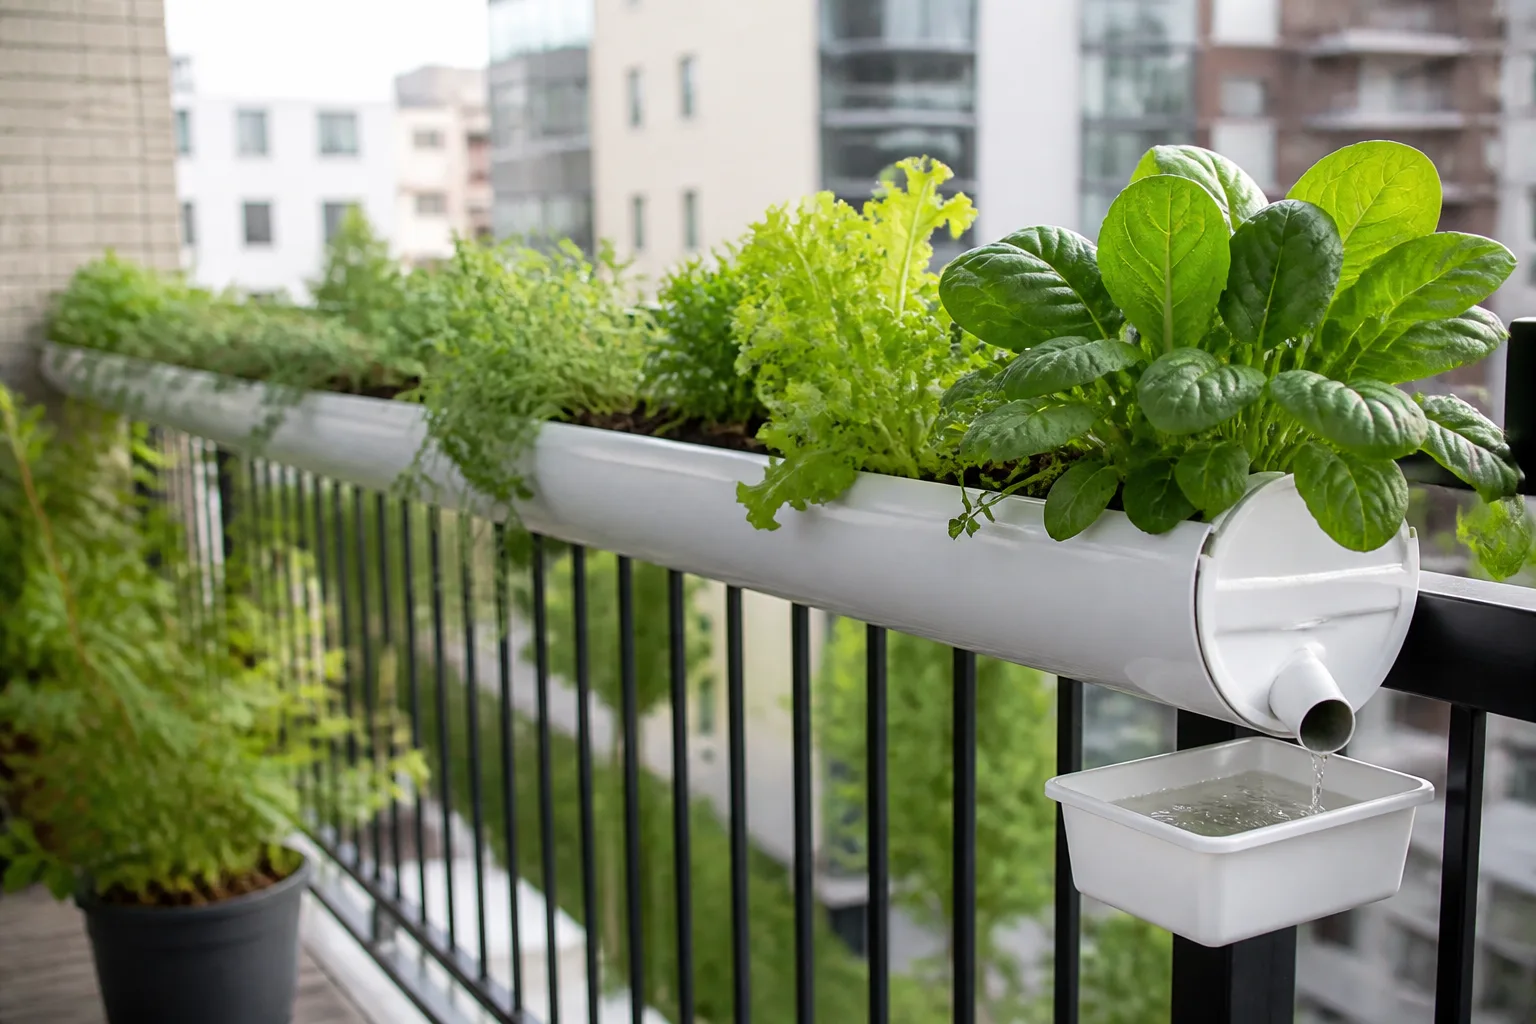
Build a freestanding gutter planter stand. Short sections of new gutter can hold shallow-rooted herbs and greens when mounted on a stable frame with end caps and drainage holes. Keep the rows accessible for harvesting, avoid using old guttering with an unknown coating, and do not expect a shallow channel to support large tomatoes or deep-rooted crops. Water from the top and check the lower troughs so drainage does not leave them waterlogged.
-
Hang a basket garden from a sturdy rail. A series of hanging baskets adds color above a patio edge or along a pergola, leaving floor space open. Use brackets rated for outdoor loads and fasten them to a structural post or beam; saturated baskets swing in wind and can pull loose from light trim. Choose compact plants that tolerate the exposure, and group baskets where you can water them without soaking a walkway.
-
Make a tiered strawberry planter. Stack wide planters or build a stepped frame so berries have room to trail without sprawling across a path. Each tier needs enough depth, drainage, and sun; top tiers usually dry first, so route water where it can reach every level. A tiered design saves ground space, but it also concentrates watering work, so place it near a tap or use a simple drip line.
-
Use a pallet as a backdrop for removable pots. A vertical pallet can support small containers and make a plain fence more useful, but unknown pallets may have chemical spills, splinters, or a history you cannot verify. For edible plants, use a clean, new frame or mount food-safe pots onto a structure instead of planting directly into old pallet boards. Anchor the frame against wind and leave space behind it for air to move.
Give climbing plants a sturdy structure
Supports and privacy screens
-
Build a wooden obelisk for one climbing plant. Four sloping uprights joined by horizontal braces create a freestanding support for beans, peas, or a flowering vine. Set the legs firmly before sowing and leave enough space between the braces to tie stems without crushing them. A tall, narrow obelisk catches wind, so anchor it in the bed or use a wider base rather than relying on its weight alone.
-
Make an A-frame trellis for peas and cucumbers. Two light panels hinged or tied together form a stable tent that can straddle a bed. Stretch netting or wire across the frame, then plant climbers on one or both sides depending on how much sun reaches them. A-frame supports are easy to fold away, but vines need regular training and the structure should be secured before summer storms.
-
Create a conduit tomato trellis. Metal conduit and crossbars can make a reusable frame for tomatoes when posts are placed deeply and joints are tightened. Match the height to the variety and tie plants with soft reusable ties as they grow; a top-heavy frame can buckle under a heavy crop or gusty weather. Keep enough space between plants for airflow and for reaching fruit from both sides.
-
Shape a cattle-panel arch between beds. A bent livestock panel makes a broad tunnel for cucumbers, beans, or small squash and doubles as a garden entrance. Drive the ends into secure posts, keep the walkway wide enough to carry a harvest basket, and choose crops whose mature fruit will not become too heavy for the panel. It is a bigger build than a single trellis, so check panel dimensions and transport before buying.
-
Add removable bucket planters to a trellis. Hooks can hold small pots or buckets on a sturdy lattice, combining vertical flowers with a few herbs. Drill drainage holes and place a saucer only where overflow will not stain or damage the wall below. The pots should be easy to lift off for watering and cleaning; if they are permanently attached high above the ground, ordinary upkeep can become a chore.
-
Make a living privacy screen. Attach a simple grid or wire panel to solid fence posts and let a suitable vine soften the boundary. Pick a plant that behaves well in your climate and does not overwhelm the fence, and leave an inspection gap so you can spot rot or loose fasteners. A living screen takes time to fill in, so use it as a gradual privacy upgrade rather than an immediate substitute for a solid fence.
Make paths and work areas deliberate
Paths, edging, and places to pause
-
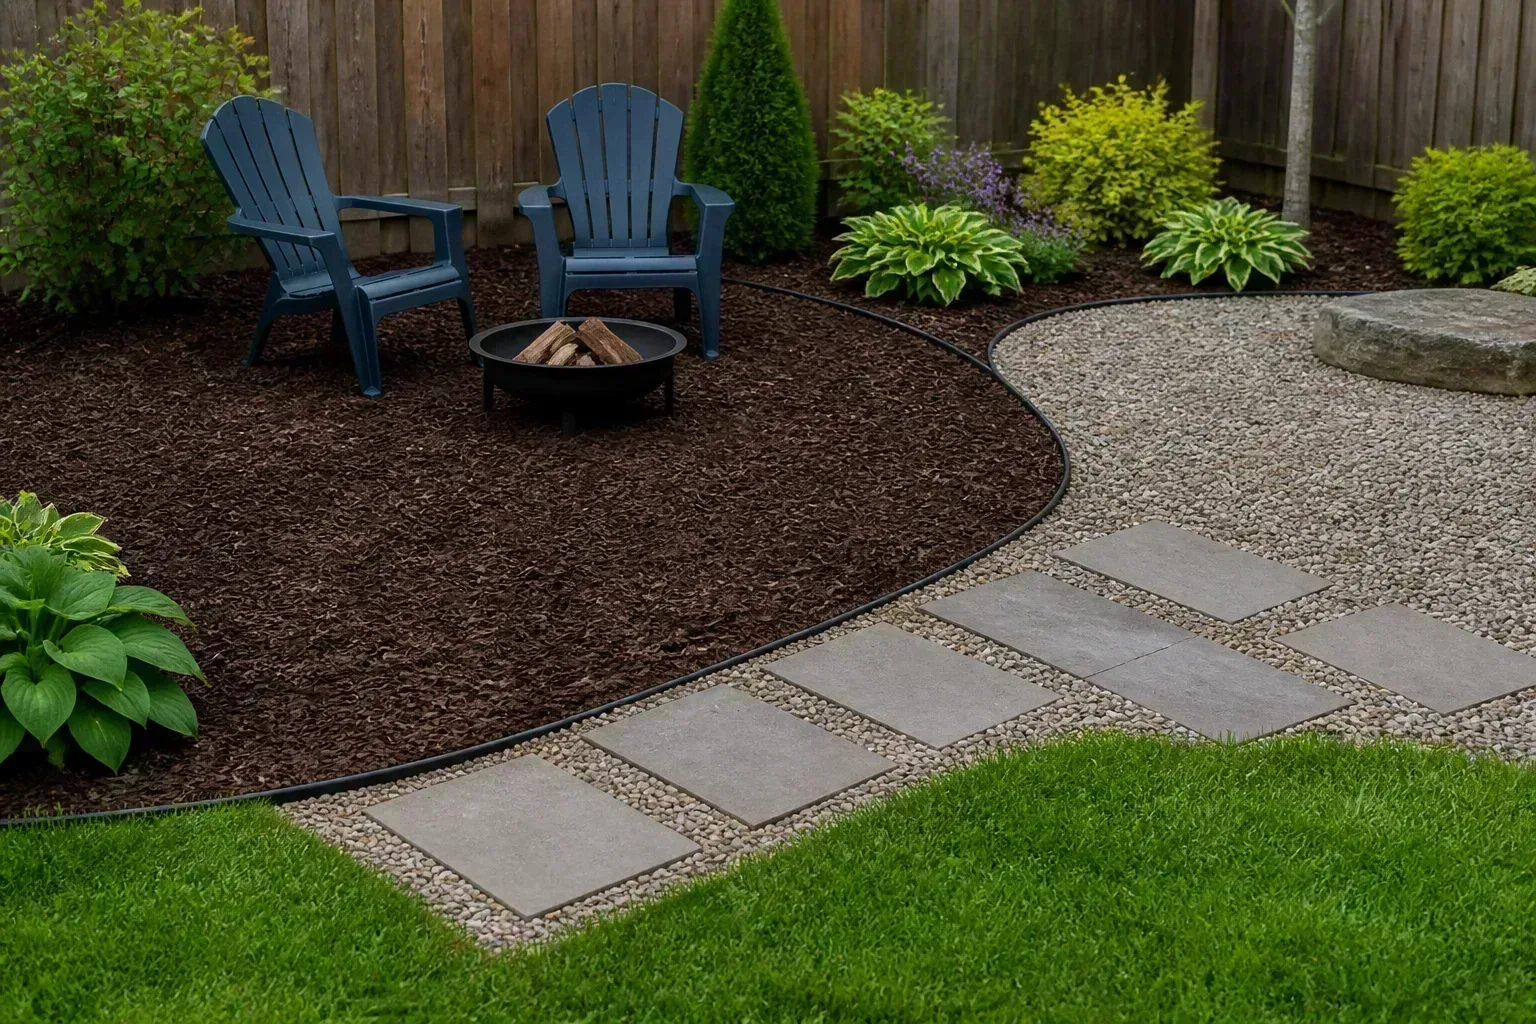
Lay a compacted gravel path. Gravel drains well and is flexible to curve around beds, but it needs a stable base and edging to keep stones from migrating into the lawn. Remove sod, set the path grade so runoff moves away from buildings, and add gravel in compacted layers. Choose a fine, firm aggregate if you need a smoother route for a cart or mobility aid.
-
Set large stepping stones through a planted area. Broad stones create a direct route without covering the whole yard in hardscape. Place them where your feet naturally land, bed each stone on a level base, and keep the surface flush enough to avoid a trip edge. Leave gaps for groundcovers only if you can still cross comfortably when plants are wet or dormant.
-
Use wood chips for a soft garden aisle. A deep layer of arborist chips can make a low-cost path that suppresses weeds and feels comfortable underfoot. Keep chips out of lawn edges and replenish them as they break down; they are not a firm surface for wheelchairs or wheeled carts. If accessibility matters, choose a compacted, stable path material instead.
-
Define beds with brick or stone edging. A clean edge can keep lawn grass from creeping into a flower or vegetable bed and make mowing easier. Set the material low enough that a mower wheel can pass it, and avoid creating a raised lip that catches toes or blocks drainage. Reuse bricks only if they are sound and free of mortar or contamination that could leach into the soil.
-
Build a hose-hiding planter cabinet. A simple ventilated box can conceal a hose reel while giving you a shallow top for pots. Leave a wide opening so the hose can be pulled out without scraping, and do not trap a damp coil in a sealed box where it stays wet. The upper planter needs its own liner and drainage route so runoff does not collect around the reel.
-
Add a small garden bench at a useful stopping point. A bench makes the garden easier to enjoy and gives you somewhere to sort harvests or rest. Set it on a firm, level pad, leave clearance behind it for plants and pruning, and choose outdoor-rated fasteners and finish. A bench tucked beside a path is more likely to be used than one hidden behind overgrown beds.
-
Make a potting bench from a salvaged table. A weatherproof table with a lower shelf can hold pots, hand tools, and a tray of seed-starting supplies. Put it near water and shade, secure it against wind, and use a removable tray to catch loose soil rather than sweeping potting mix into a drain. Keep sharp tools and fertilizers in closed storage if children or pets use the yard.
Protect plants and extend the season
Covers, frames, and shade
-
Build a cold frame with a clear polycarbonate lid. A low box with a sloped, hinged top protects seedlings from wind and cold while letting in light. Use polycarbonate rather than a heavy, fragile pane where possible, prop the lid open on warm days, and close it before evening temperatures fall. A cold frame buffers weather; it does not make frost-sensitive plants safe in every freeze.
-
Bend hoops over a raised bed for row cover. Flexible hoops anchored along a bed can support lightweight fabric or clear cover without touching the crop. Secure the edges against wind and remove or open the cover when temperatures rise so plants do not overheat. Measure the bed first and keep the support high enough for the crop at maturity.
-
Add an insect-netting tunnel. Fine mesh stretched over hoops can keep many chewing insects away while allowing air and rain through. Seal the edges at ground level and check plants before covering, because netting can trap pests already inside. Remove or lift the tunnel when pollinator access is needed for flowering crops that depend on insect pollination.
-
Rig a removable shade-cloth panel. A simple frame can hold shade cloth over young transplants during intense summer sun. Make the panel easy to take down, anchor it for wind, and avoid shading plants that need full sun to flower or fruit. Temporary shade is most useful during establishment or heat waves; it should not become an all-season cover by default.
-
Make ventilated bottle cloches for early seedlings. A clean, clear, food-grade bottle with its bottom removed can shield an individual seedling from wind and a light chill. Leave the cap off or remove the cover during warm daylight so heat can escape, and secure the bottle so it cannot blow onto a plant. Use cloches for short-term protection, not as sealed mini-greenhouses through sunny weather.
Add water, compost, and character
Upcycled details that earn their upkeep
-
Fit a rain barrel to a downspout. A covered barrel with a screened inlet, secure base, overflow hose, and spigot turns roof runoff into water for the garden. Check local rules and keep overflow directed away from the foundation; a full barrel is extremely heavy and must sit on a level support. Drain or winterize it where freezing weather can damage the tank or fittings.
-
Run a simple drip line along the beds. A hose timer and drip tubing can deliver water near roots and make a multi-bed garden easier to manage. Use a filter if the system requires one, test each outlet, and inspect for clogs after installation. Drip irrigation is not maintenance-free: adjust the schedule for rain, plant size, and soil, and avoid watering a path or leaving a leak unnoticed.
-
Build a wire compost corral. A circle of sturdy mesh held by posts gives leaves and garden trimmings a place to break down without taking up much space. Keep the pile away from doors and use a cover or balanced mix of dry and fresh materials to limit mess and odor. Do not add diseased plants, persistent weeds, or materials treated with chemicals unless local compost guidance says they are safe.
-
Create a child-height garden corner. A small bed, a short path, and a few durable labels give children a defined place to sow easy crops and observe insects. Keep it close enough to supervise and use tools sized for small hands, but avoid sharp edges, toxic plants, and heavy structures that can tip. Let the children choose a few plants they will actually harvest or watch grow.
Choose a project that fits your time and budget
If the goal is fresh food, start with a bed, container cluster, or trellis that matches your sun and watering access. If the problem is muddy shoes, repair the route first. If the yard feels exposed, try a screen that can be anchored safely. This order prevents spending on a decorative feature that does not solve the everyday frustration.
Compare the full cost, not just the frame. A raised bed may be inexpensive to build but costly to fill; a vertical planter saves floor space but usually needs more frequent watering; a gravel path costs less than masonry but needs topping up. Write down materials, delivery, fasteners, soil, tools, and annual upkeep before deciding. A low-cost project is one whose maintenance you can sustain.
For most gardens, one well-built project is a better first step than several rushed ones. Mark the footprint, run a hose to it, check drainage after rain, and verify the material source before cutting or digging. Once the first project works through a full season, the next addition can respond to what the garden actually needs.
Conclusion
A backyard upgrade does not have to start with a full redesign. Choose one practical improvement—growing space, a clear path, a stable support, or weather protection—and size it for the people who will use it. When a project handles water, weight, access, and maintenance as well as appearance, it earns its place in the garden year after year.



