15 DIY Yard Drainage Methods for Wet Lawns
Wet yard after every rain? Learn 15 DIY drainage methods—regrading, French drains, rain gardens, dry wells—and a priority order so you fix the cause, not just the puddle.
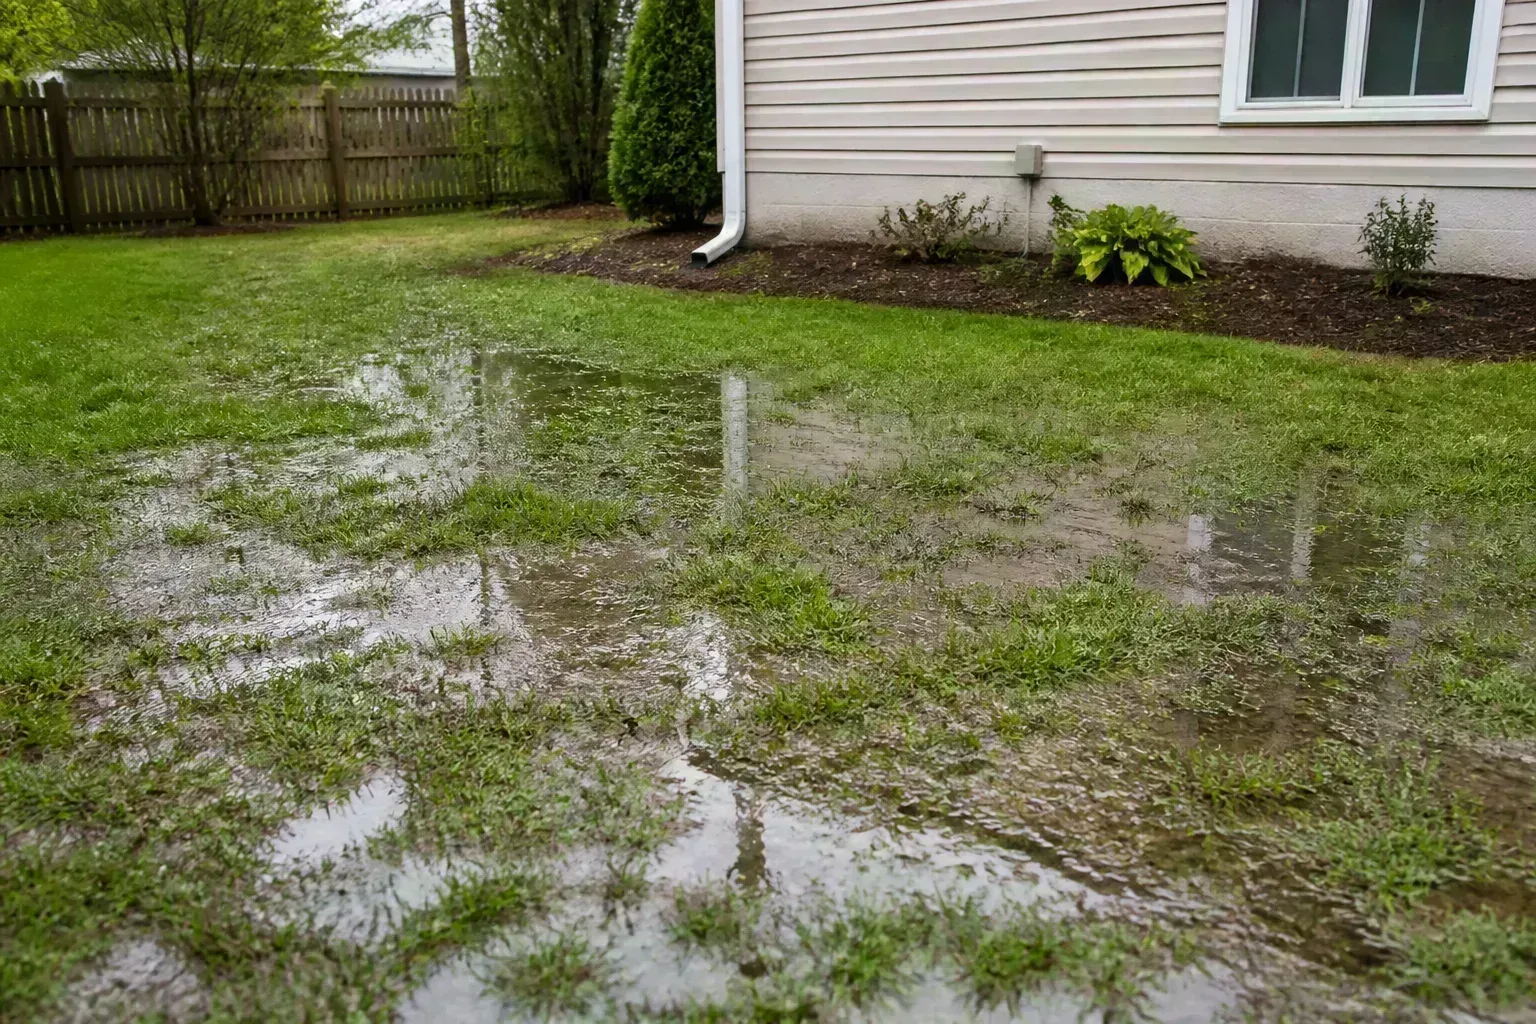
A wet lawn after a normal rain is not just ugly—it is a warning. Water that sits against your foundation raises hydrostatic pressure, seeps into basements and crawl spaces, kills turf roots, and turns low spots into mosquito breeding ground. The good news: most yard drainage problems respond to do-it-yourself fixes if you match the method to the cause instead of digging random trenches.
These 15 DIY yard drainage methods range from a Saturday afternoon with a rake to a full weekend of trenching. None of them work everywhere. Start with diagnosis, try the cheapest surface fixes first, and escalate only when water keeps winning.
Diagnose the Problem Before You Dig
Every drainage fix assumes you know where water enters and where it gets stuck. Walk the property during or right after a rain—or run a hose uphill and watch flow patterns. Mark puddles, downspout splash zones, and any water that appears without obvious rain (a sign of a broken irrigation or sewer line).
Signs and Common Causes of Poor Yard Drainage
Standing water more than 24 hours after a storm usually means slow infiltration, a blocked path, or a low point with no outlet. Soggy soil near the foundation often traces to negative grade (soil sloping toward the house), short downspouts, or clogged gutters dumping roof runoff in one concentrated band. Mud in the lawn center while the perimeter drains fine may mean compacted soil or heavy clay—not a need for a French drain across the entire yard.
Common causes include improper yard slope, compacted or clay-heavy soil, impervious hardscape tilted toward the house, gutter and downspout failures, and runoff from uphill neighbors you cannot control but can intercept. Oregon State Extension notes that poor drainage often worsens after construction projects—pools, patios, and foot traffic pack soil and change natural flow paths (Oregon State Extension).
Priority order that saves money: (1) regrade within 10 feet of the foundation, (2) clean and extend gutters/downspouts, (3) aerate and amend compacted lawn zones, (4) add surface channels or permeable patches where hardscape blocks flow, (5) install subsurface pipe only where surface fixes failed. Skipping straight to a French drain is the most expensive mistake homeowners make.
Regrade Soil Away From Your Foundation (Method 1)
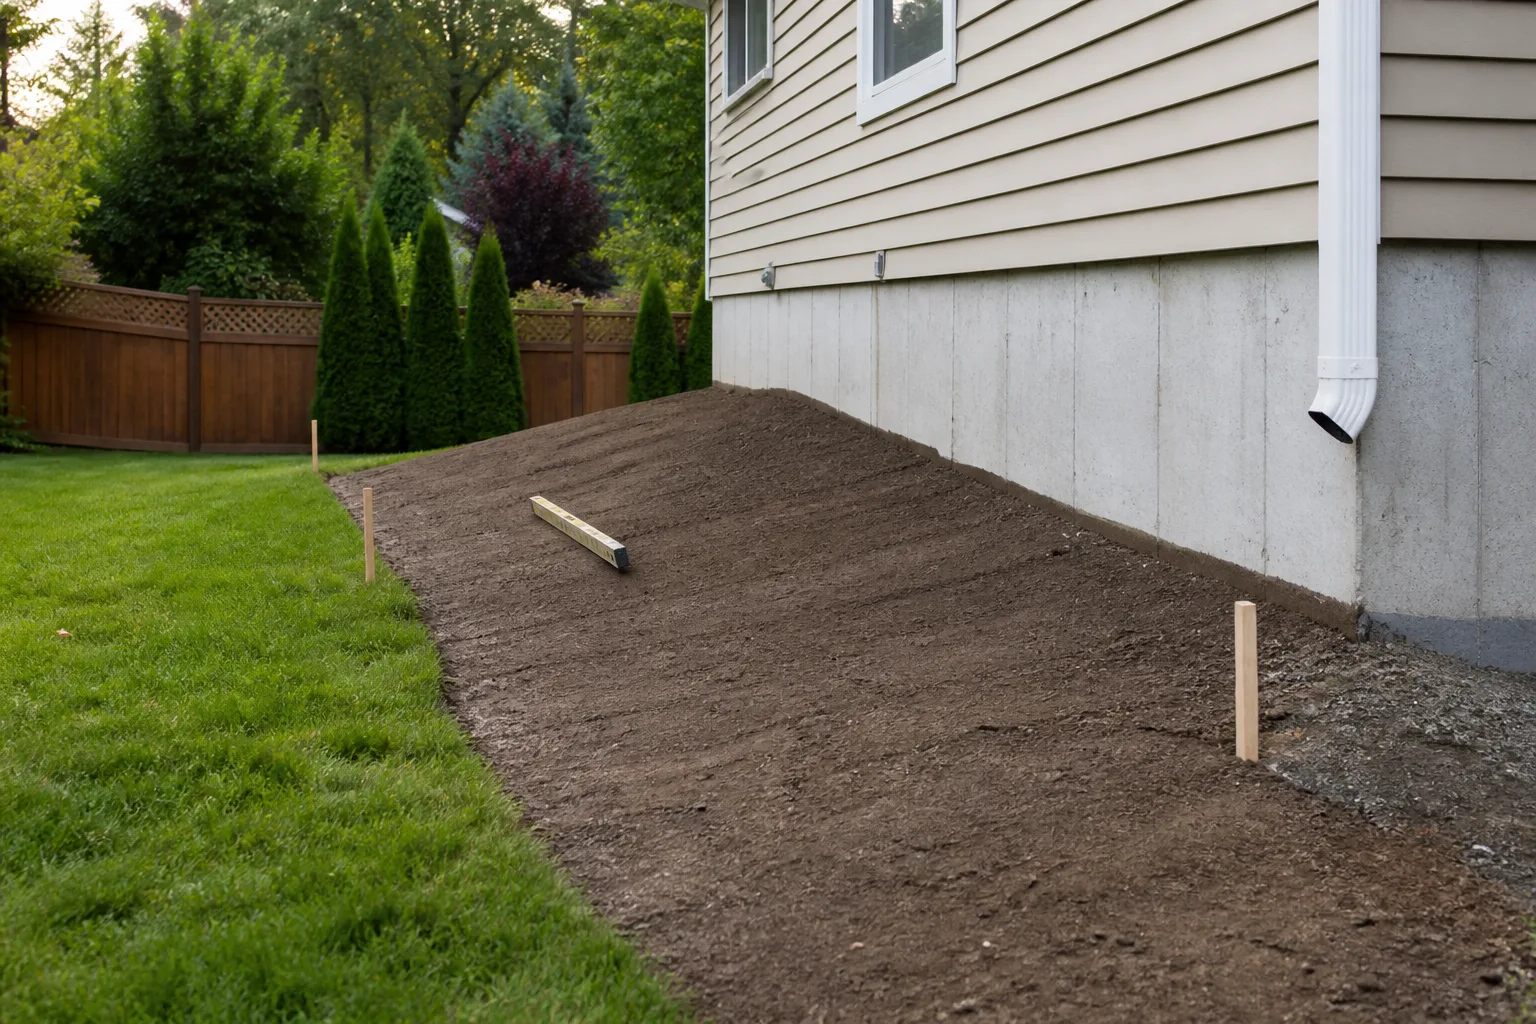
Regrading is the first fix to consider because roof and surface runoff should never linger near siding. The goal is a positive slope away from the house: industry guidance and residential building practice call for roughly 6 inches of drop in the first 10 feet away from the foundation wall. That translates to about 1 inch of fall per foot in the critical zone closest to the house.
Use compactable fill—a clay-loam or screened topsoil blend that packs—not bagged mulch or fluffy potting mix that washes away in the next storm. Keep finished grade at least 4 inches below the bottom of siding so soil and mulch never touch wood or fiber-cement cladding. Siding contact holds moisture and invites rot and pests.
Regrading is labor-intensive but cheap in materials. Rent a wheelbarrow, use a long level or laser level on stakes, and work in lifts you can compact with a hand tamper. If the lot slopes toward the house from a neighbor’s uphill yard, grading alone may not be enough—you will need an intercepting swale or drain upslope. That is where Methods 12–15 enter the picture.
Replace Hardscape With Permeable Materials (Method 2)
Concrete patios, asphalt driveways, and solid walkways are impervious surfaces. When they pitch toward the house or form a dam across natural flow, water sheets off and pools in the lawn or against the foundation. Replacing a section of solid paving with crushed gravel, pea gravel, or permeable pavers lets stormwater infiltrate instead of racing downhill in a sheet.
This is one of the heavier DIY projects because it involves demolition, base preparation, and compaction—but it solves drainage and heat-island issues at once. A gravel path along the side of a house that previously had a tilted concrete pad can redirect hundreds of gallons per storm into the soil rather than the basement window well. Match stone size to use: ¾-inch crushed stone for driveable bases, pea gravel for foot traffic and decorative channels where displacement is acceptable.
Do not swap impervious paving for mulch alone in traffic areas; mulch floats and erodes. For patios you want to keep solid, consider a channel drain at the low edge (Method 8) instead of full removal.
Fix Gutters, Downspouts, and Extensions (Methods 3–4)
Gutters and downspouts are the front line of yard drainage. A roof sheds a surprising volume of water—a 1-inch rain on a 2,000-square-foot roof delivers about 1,250 gallons. If gutters overflow because they are clogged, undersized, or pitched wrong, that load hits the ground in a few spots and overwhelms local grade.
Clean gutters at least twice a year (spring and late fall) and after major storms if you have overhanging trees. Check that downspouts are securely attached and discharge at least 4–6 feet from the foundation—farther in expansive clay soils. Downspout extensions (flexible or rigid) are the fastest, cheapest drainage upgrade: clamp a length onto the elbow and aim discharge toward a storm drain, rain garden, dry well, or swale—never toward a neighbor’s property or a public sidewalk without checking local rules.
For concentrated flow at the base of every downspout, add a splash block or catch basin tied into buried pipe. A catch basin is a grated box that collects surface water and connects to solid PVC leading to a safe outlet. Advanced DIYers can tie multiple downspouts into one lateral line that daylights at a slope or drains to a dry well—but call 811 before any trenching to locate buried utilities (Call 811).
Aerate and Loosen Compacted Soil (Methods 5–6)
When water pools on the lawn but the foundation stays dry, the soil surface may be sealed. Construction equipment, years of foot traffic, and heavy clay create a crust that repels infiltration. Core aeration pulls small plugs from the turf, opening channels for air and water. Aerate during the active growing season for your grass type—cool-season lawns in early fall or spring, warm-season lawns in late spring—so turf recovers quickly.
For garden beds and non-turf areas, use a broadfork, digging fork, or rototiller to break compaction without destroying structure. In heavy clay, add compost worked into the top 6–8 inches to improve aggregation. Some guides suggest pea gravel mixed into clay for drainage; use that sparingly in planting beds—too much stone in root zones can dry plants out. Reserve coarse gravel for trench backfill and hardscape bases, not general bed amendment.
Aeration helps moderate drainage problems; it will not drain a swamp or fix negative grade. Treat it as maintenance after you have corrected slope and downspout discharge.
Install a Rain Barrel (Method 7)
A rain barrel captures roof runoff from a reconfigured downspout, reducing peak flow against the foundation and supplying free irrigation water. Install a diverter or overflow that sends excess water away safely when the barrel fills—an overflowing barrel with no overflow hose is worse than no barrel at all.
Check local law before you install. Some Western states restrict rainwater collection; many Eastern and Midwestern areas encourage it. Use food-grade or purpose-built barrels with tight lids and mosquito screens. Disconnect or drain barrels before hard freezes if you live in a cold climate so ice does not split fittings.
Rain barrels manage volume at one downspout; they do not fix lawn grading or subsurface saturation. Pair them with Methods 3–4 and 14 for a complete roof-to-root strategy.
Channel Drains for Driveways and Patios (Method 8)
Where a driveway or patio cannot be removed, cut a narrow trench across the low point and set a channel drain (trench drain) with a grated top. Water enters the channel, flows through a buried pipe, and exits at daylight or a storm inlet. This is common across garage entrances where pavement slopes toward the door.
DIY installation requires a concrete saw or wet saw, trenching, and careful slope—typically 1/8 to 1/4 inch per foot toward the outlet. Pros charge roughly $30 to $150 per linear foot depending on region and pavement type; DIY saves labor but not precision. Poor slope leaves water sitting in the channel; too steep and you lose capture area. Set the grate flush with the pavement surface so wheels and feet do not trip.
Build a French Drain (Method 9)
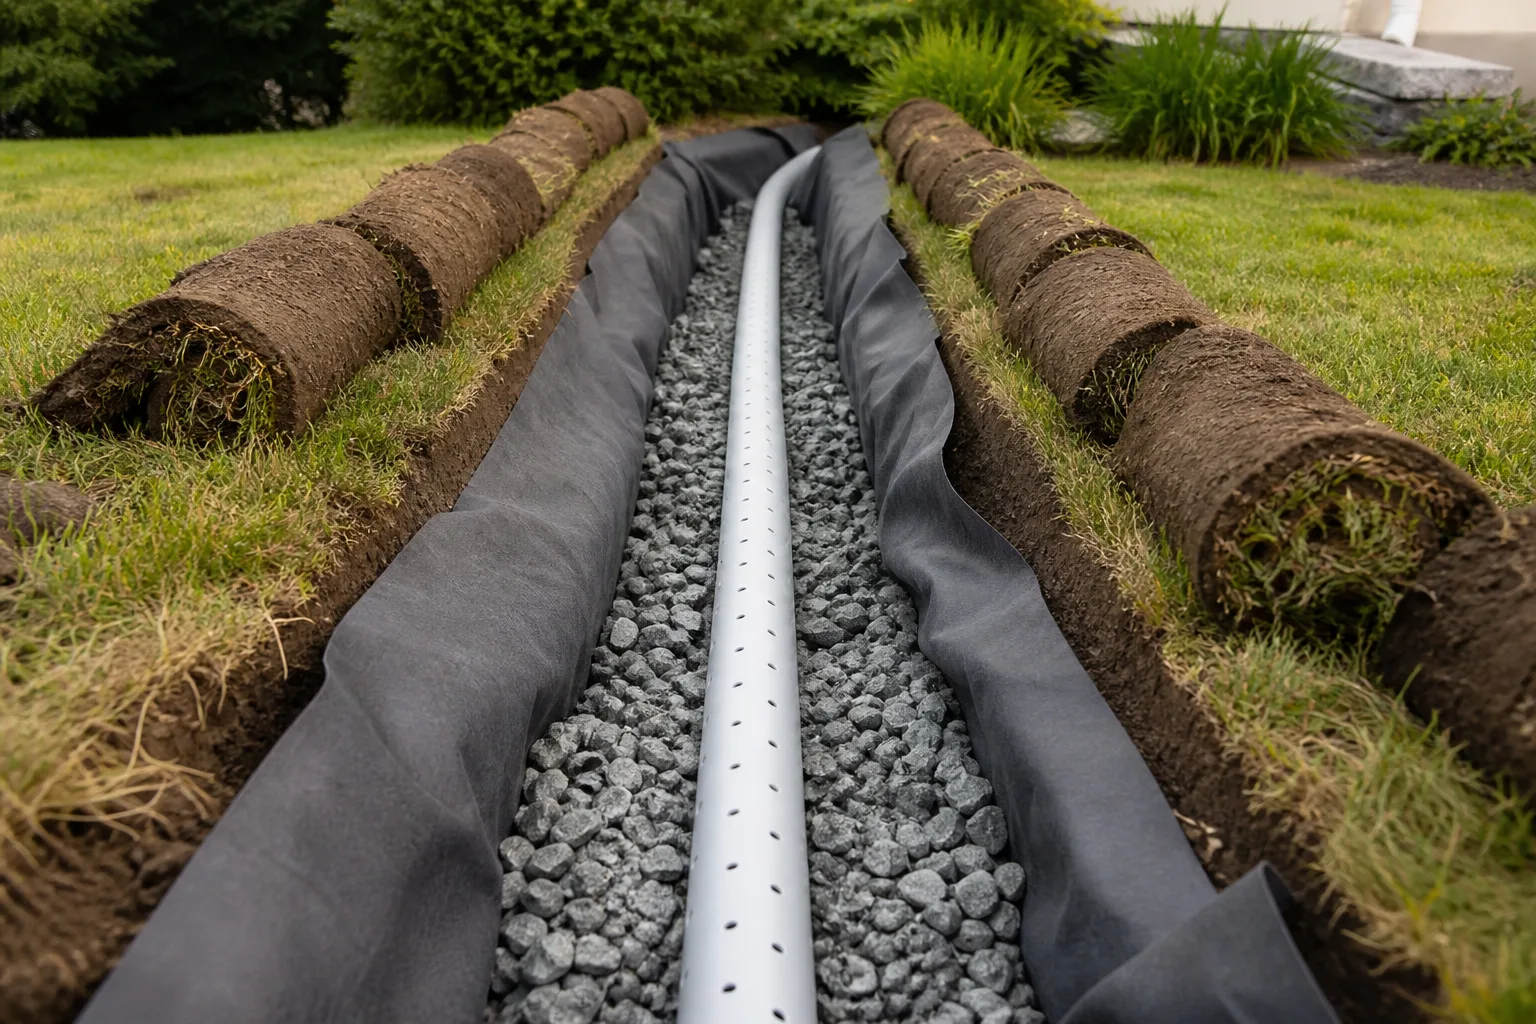
A French drain is a sloped trench lined with filter fabric, filled with coarse aggregate, and often containing a perforated PVC pipe that collects groundwater and surface seepage. Water enters through stone and pipe holes, flows downslope by gravity, and exits at a lower elevation—storm drain, swale, or dry creek—not back toward the house.
Typical DIY specs: 12–18 inches wide, 18–24 inches deep in problem areas, minimum 1 inch of fall per 8–10 feet of run. Place pipe holes downward or to the sides per manufacturer guidance; wrap pipe in fabric to block silt. Do not use mulch or fine soil as trench fill.
French drains excel where lawn water moves horizontally across the yard or where foundation perimeter drainage is needed. They fail when installed on flat ground with no outlet, when the pipe clogs because fabric was skipped, or when discharge is illegal (into a sanitary sewer without permit). Annual inspection of outlets and cleanouts prevents slow failure.
Yard Drains, Catch Basins, and Dry Wells (Methods 10–11)
A yard drain (area drain) is a grated inlet set at the lowest point of a patio or lawn, connected to solid pipe—similar to a shower drain for your yard. Use it where you know water collects repeatedly after other fixes. DIY units can cost under $100 for materials; the work is digging, bedding, and maintaining slope to the outlet.
A dry well is an underground chamber or rock-filled pit that temporarily stores water and lets it infiltrate into surrounding soil. It works when native soil percolates well and the water table is low. In heavy clay or high water tables, dry wells saturate quickly and back up—then a French drain discharging to a storm system or daylight is the better choice.
Size dry wells to your roof or catchment area; connect them to downspouts or yard drains with solid pipe. Prefabricated dry well chambers simplify installation. Keep access for sediment cleanout. Professional dry well jobs can run several thousand dollars on large properties; DIY scales with depth and chamber count.
Dry Creek Beds and Grass Swales (Methods 12–13)
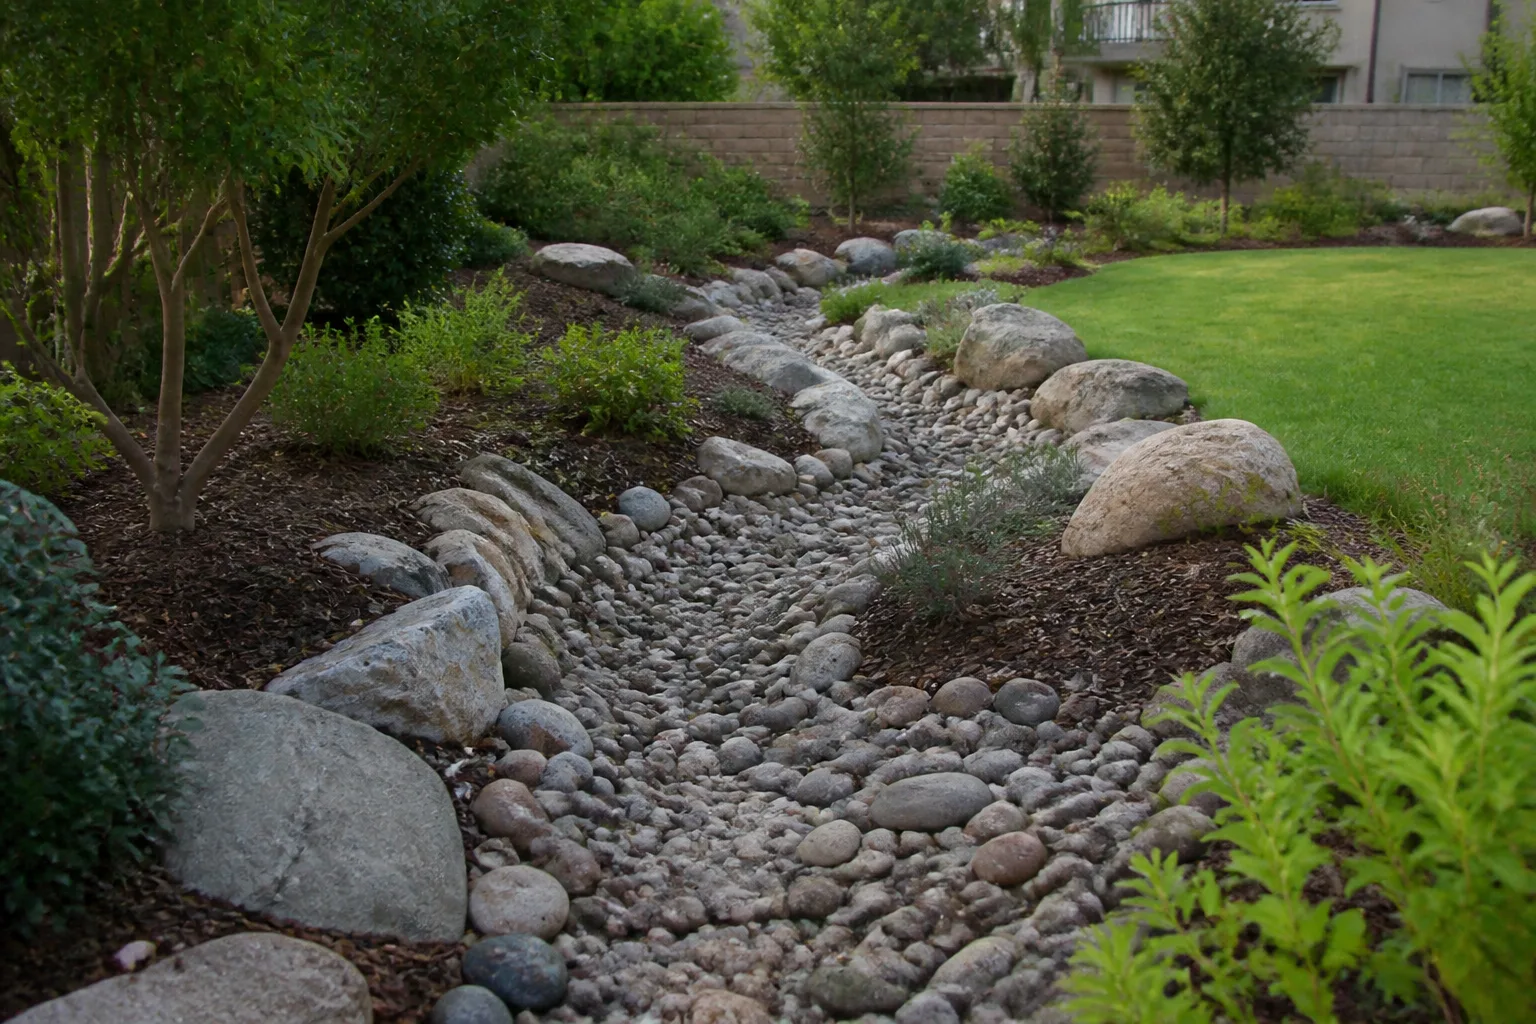
A dry creek bed is a lined or rock-filled channel that only carries water during storms. It turns an erosion gully into a designed path—typically 3–4 dollars per square foot in rock for DIY builds. Use landscape fabric under stone to limit weed growth and define edges with boulders so flow stays centered. Route the bed to a rain garden, storm drain, or property line swale—not a neighbor’s lawn.
A grass swale is a shallow, vegetated ditch along contour or slope—about 1 inch of drop per 10 feet—that slows and spreads runoff. Swales suit larger lots and agricultural-style landscapes where a visible ditch is acceptable. PNNL’s stormwater guidance groups swales with grading as the first line of distributed, low-cost stormwater control (PNNL BASC).
Both features need stable slope and vegetation to prevent erosion. In steep yards, combine a swale upslope with a French drain at the toe of the slope.
Plant a Rain Garden (Method 14)
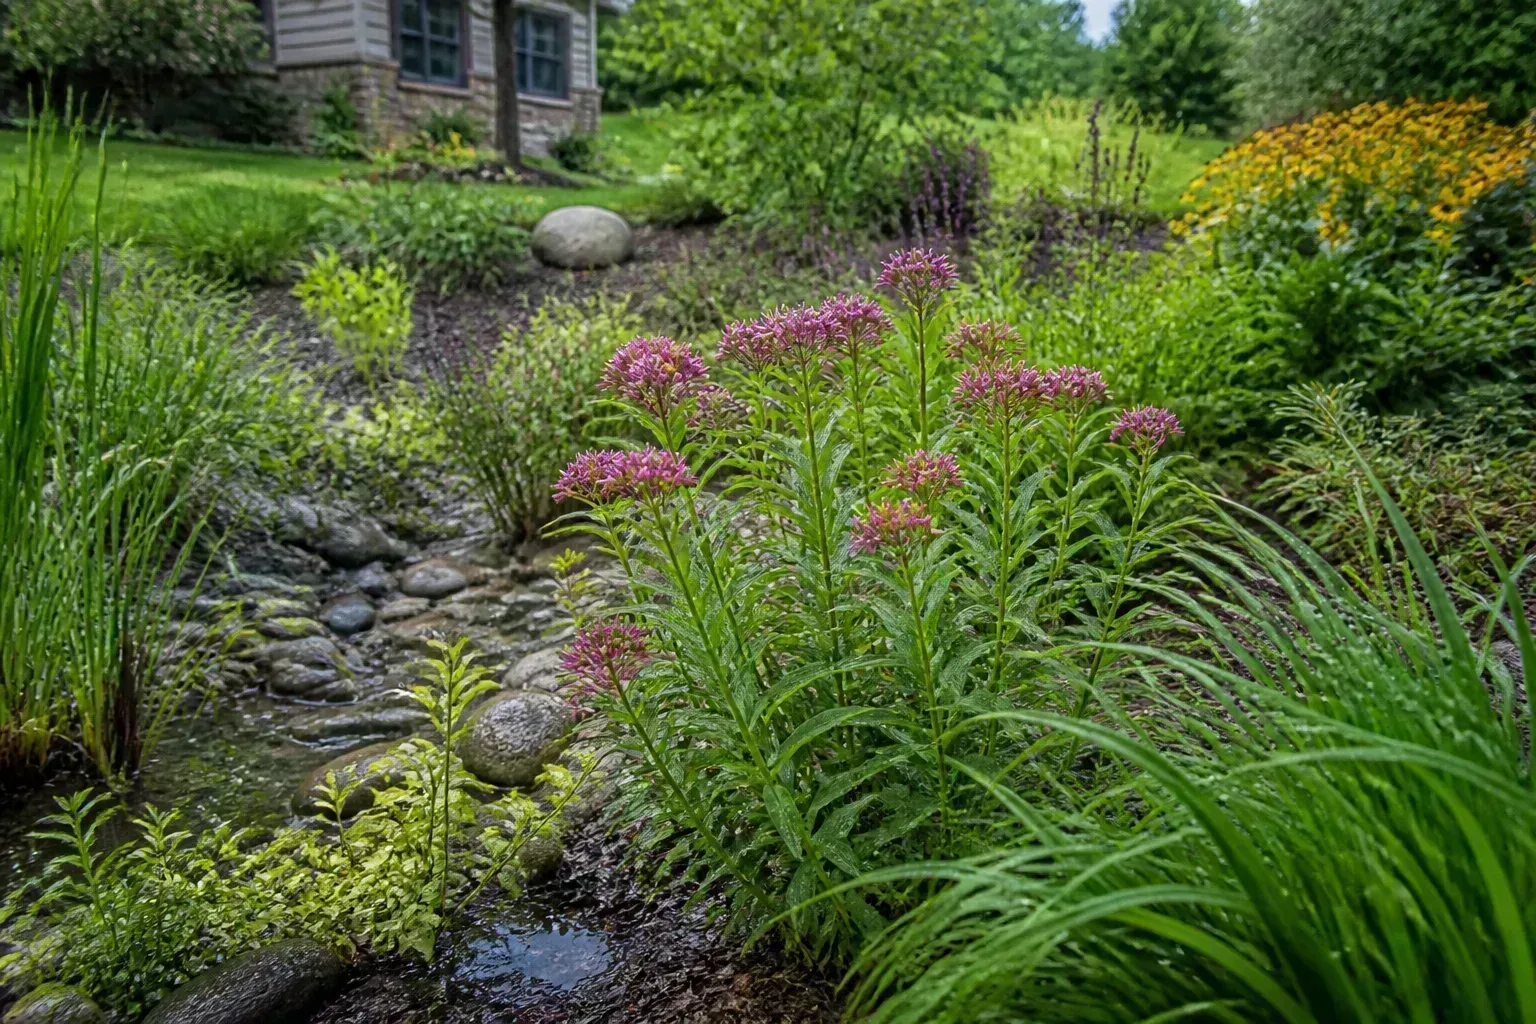
A rain garden is a shallow depression planted with native and moisture-tolerant species that absorb and filter runoff. It is not a pond—it should drain within 24 hours so it does not breed mosquitoes. EPA’s Soak Up the Rain program positions rain gardens as homeowner-scale tools that reduce runoff pollution while beautifying the yard (EPA).
Site it correctly: at least 10 feet from the foundation on the downspout side, not over a septic field, and not where the water table stays high. Perform a percolation test—dig a hole, fill with water, measure drop over 24 hours—to confirm infiltration. Amend soil with compost; plant in zones from wet center to drier edges. Portland’s municipal rain garden guide recommends sizing based on contributing roof area and soil infiltration rate (Portland.gov).
Rain gardens manage runoff; they do not fix a basement leak caused by negative grade. Install them as the terminal feature of a downspout extension or dry creek—not as a substitute for foundation grading.
Layer Methods for Stubborn Wet Spots (Method 15)
The fifteenth method is not a product—it is a strategy. Persistent wet yards need stacked solutions: regrade the first 10 feet, extend every downspout, aerate compacted turf, intercept uphill flow with a swale, collect foundation perimeter seepage in a French drain, and terminate roof runoff in a rain garden or dry well sized for your soil.
Draw a simple site map: arrows for current flow, circles for puddles, lines for proposed pipes. Work from highest elevation to lowest, always maintaining positive slope. One dry well at the bottom of the lot cannot absorb an entire roof if clay surrounds it—pipe that water to an outlet instead.
Document cleanout locations and pipe depths for future owners. Mulch exposed trench lines until grass establishes to prevent erosion.
When to Call a Professional
Call a licensed drainage or landscape contractor when water enters the basement despite surface fixes, when you need interior perimeter drains or sump systems, when slopes require retaining walls with engineered drainage, or when local code mandates permits for storm connections. Also call a plumber if wet spots smell like sewage or coincide with low water pressure—broken water or sewer lines mimic drainage problems.
Before any DIY trench, dial 811 for a free utility locate. Hitting gas or electric lines is not a learning experience. If discharge crosses a property line or enters a municipal storm system, confirm local stormwater ordinances—some jurisdictions restrict where French drains may outlet.
Pros charge roughly $10–$100 per linear foot for French drains and more for interior systems; get multiple quotes and ask what happens if the fix fails.
Conclusion
Yard drainage is a hierarchy: move water away from the house first, improve soil infiltration second, and install pipes and landscape features only where water still has nowhere to go. These 15 DIY yard drainage methods—from regrading and permeable hardscape through French drains, dry wells, swales, and rain gardens—give you a full toolkit. Diagnose the cause, follow the priority order, call 811 before you dig, and escalate to a pro when water threatens the structure. Fix the flow path now and spring storms become background noise instead of a basement emergency.



