How to Grow and Care for Asparagus Fern
Learn how to grow asparagus fern with the right light, moisture, humidity, pruning, repotting, propagation, pet safety, and outdoor cautions.
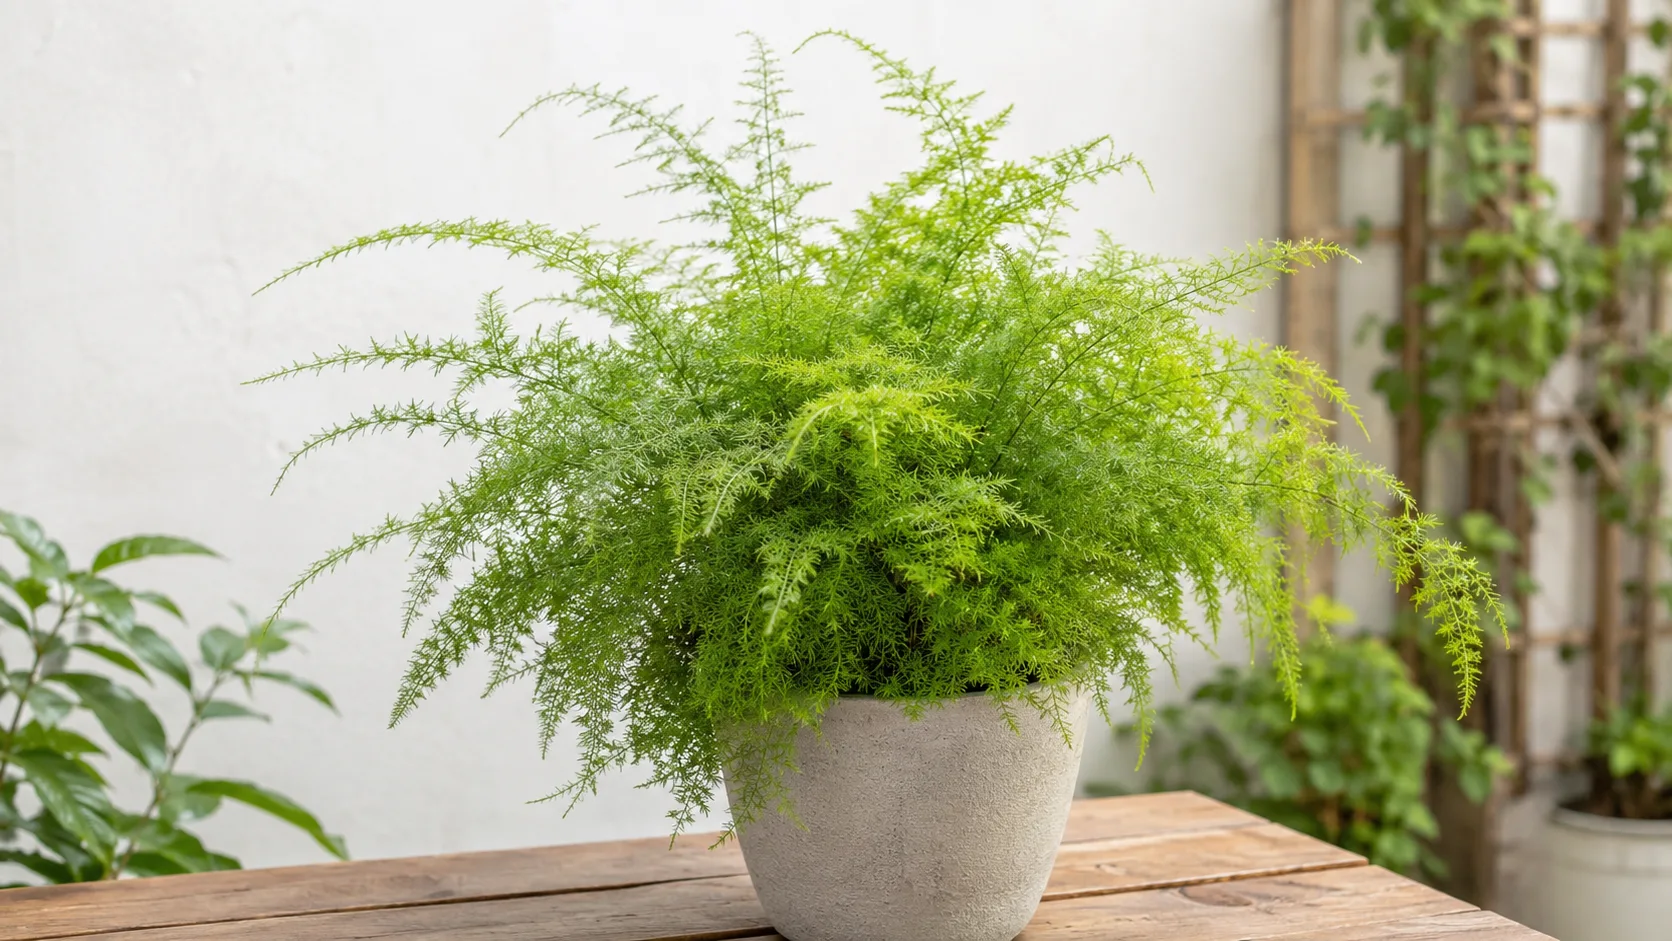
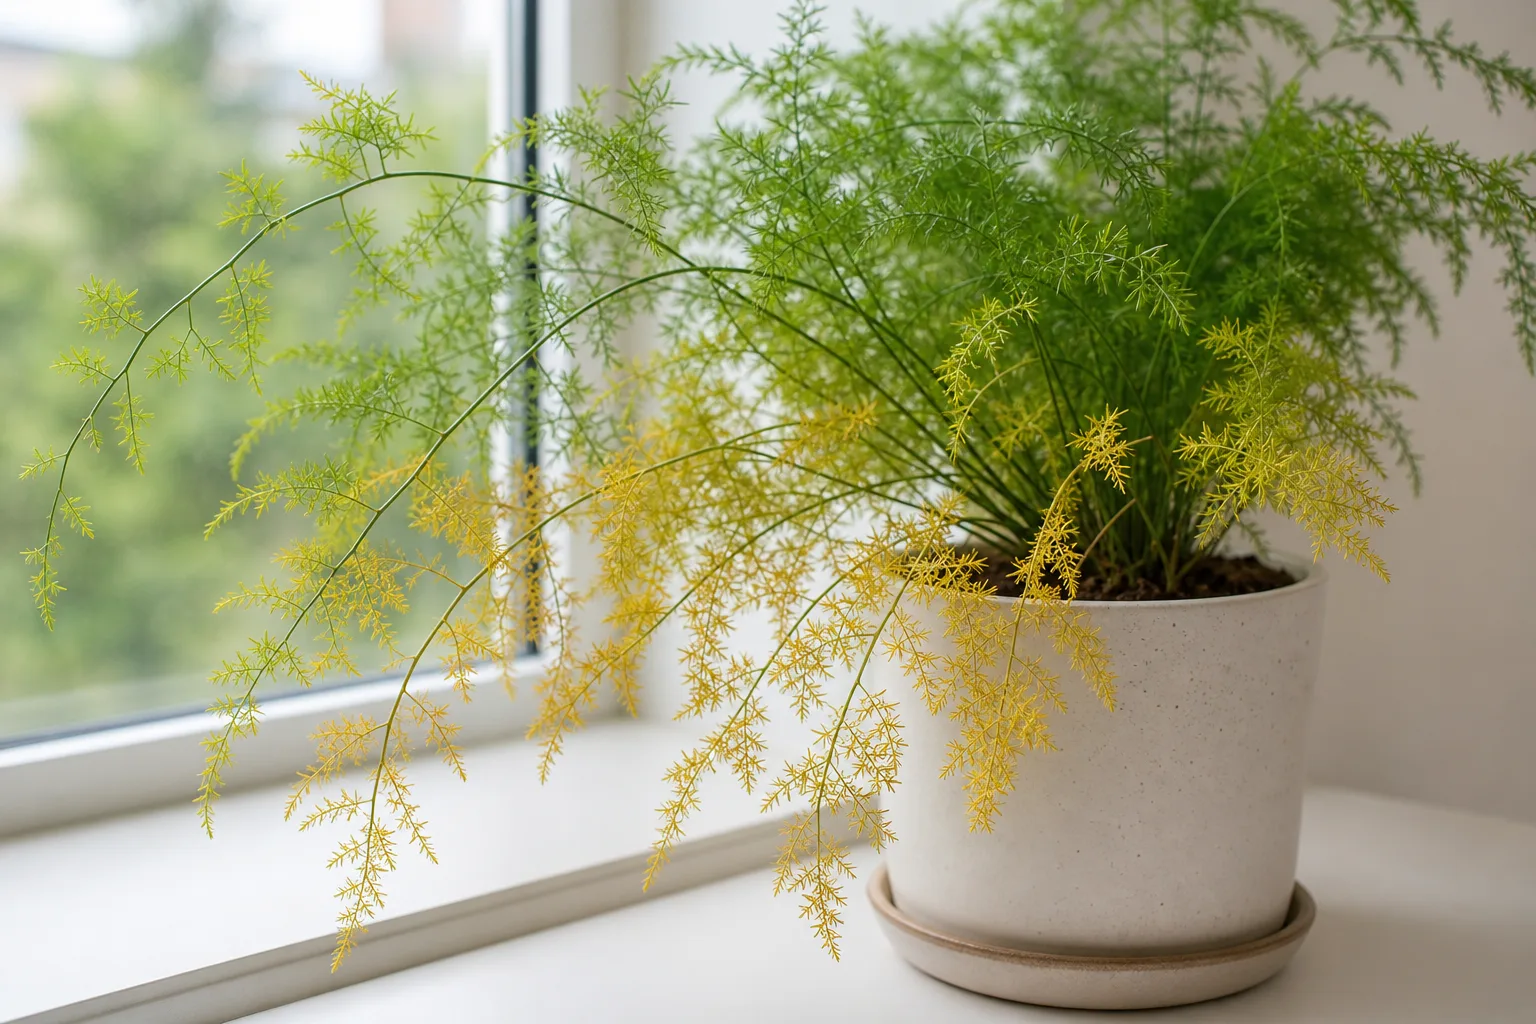
Asparagus fern is forgiving about missed perfection but not about extremes. Give it bright filtered light, soil that stays lightly moist while still admitting air, and a stable warm spot, and its arching stems can become a dense, airy mound. Keep the pot waterlogged, let the root ball dry hard, or place it in hot afternoon sun, and the fine green cladodes may yellow, brown, or fall in a surprisingly short time.
The name is also a useful warning: asparagus fern is not a true fern. Plants sold under this name include Asparagus setaceus and Asparagus densiflorus cultivars such as ‘Sprengeri’. The feathery “leaves” are mostly flattened stem structures called cladodes, while the true leaves are tiny scales. That explains why the plant looks delicate but grows from water-storing tuberous roots, and why it needs a different watering rhythm from a thirsty Boston fern. Epic Gardening’s asparagus fern reference also treats the tubers, rather than the foliage, as the plant’s main drought buffer.
Start with the right asparagus fern
Before changing the care routine, identify which plant you have. The fine, lace-like plumosa type often grows as a graceful climber or trailing plant, while ‘Sprengeri’ and its compact forms make fuller arches and are commonly sold in hanging baskets. ‘Meyersii’ or foxtail forms hold their stems more upright and look like bottle brushes. These differences change the shape you should expect, but not the core rules of filtered light, drainage, and steady moisture.
North Carolina State Extension describes asparagus fern as an arching perennial with needle-like cladodes, small flowers, and red berries. Its plant profile also records the important limits: direct sun can yellow foliage, wet soils are poorly tolerated, and even a light frost can kill the exposed top growth. If you are unsure of the label, use the asparagus fern plant profile as a reference point and judge the plant by its root zone rather than by the common name alone.
Use this quick care routine
For a healthy indoor plant, place asparagus fern in bright indirect light or gentle morning sun, then let the top layer of mix become only slightly dry before watering thoroughly. Use a pot with a drainage hole, empty the saucer, and keep the root ball from swinging between swampy and bone dry. A warm room with moderate-to-high humidity, light feeding during active growth, and occasional base pruning will do more than daily fussing.
| Care factor | Practical starting point | What to watch |
|---|---|---|
| Light | Bright filtered light; gentle morning sun is usually safer than hot afternoon sun | Leggy stems, pale growth, bleaching, or one-sided yellowing |
| Water | Check the upper 2–3 cm of mix and the pot weight before watering | Soggy core, sour smell, dry crumbly root ball, or rapid wilting |
| Soil | Moisture-holding but airy houseplant mix | Water sitting in the pot or running straight through a dry root ball |
| Humidity | Moderate to high humidity with airflow; improve dry rooms if tips crisp | Brown tips, shedding, or a plant beside a heater or air conditioner |
| Feeding | Balanced liquid fertilizer at reduced strength in active growth | Salt crust, sudden tip burn, or soft weak growth after heavy feeding |
| Pruning | Remove dead or bare stems at the base; shape lightly | New shoots at the crown and whether the plant is replacing lost growth |
These are starting points, not a care contract. A small plastic pot in a bright, dry room may need checking several times a week, while a large hanging basket in dim winter light may stay wet much longer. The plant tells you when to intervene: check the soil, pot weight, light pattern, and root firmness together.
Choose light that keeps the fronds full
Asparagus fern performs best in bright indirect light or dappled shade. An east-facing window, a bright room with a sheer curtain, or a position set back from a strong south- or west-facing window usually gives enough energy without the heat load that scorches fine cladodes. Rotate the pot every week or two so new growth does not lean toward one side.
Separate low-light survival from healthy growth
Low light can keep the plant alive, but it often produces long bare stretches, sparse cladodes, pale new growth, and soil that stays wet because the plant is using water slowly. If the plant is stretching, move it closer to a bright window or add a full-spectrum grow light on a timer; do not solve leggy growth by pruning first. Cutting back a hungry plant can make it smaller without correcting the reason it became thin.
Hot direct sun creates a different pattern. Bleaching, crisp patches, or yellowing on the window-facing side after a move usually points to excessive intensity or heat rather than a fertilizer shortage. Acclimate gradually over about a week, use a sheer curtain, and remember that brighter light increases water use—check the mix more often after the move.
Water by the root ball, not the calendar
Water when the upper layer of mix is beginning to dry but the entire root ball is not. Push a finger or wooden skewer a few centimeters into the pot near the edge, lift the pot to feel its weight, and look at the drainage hole if it is visible. If the mix is cool and damp below the surface, wait; if it is dry deeper down and the pot is much lighter, water slowly until excess drains from the bottom.
The plant’s tuberous roots store some water, which gives asparagus fern more drought tolerance than many true ferns. That does not make it a succulent. Repeated hard drying can still cause yellowing, frond drop, and dead-looking stems, while constant saturation removes air from the root zone and encourages root or crown rot. The right target is an evenly moist root ball that has a little air between waterings.
Use a check-based asparagus fern watering routine rather than copying a weekly schedule. Water more often when the plant is actively growing in bright warm conditions; check less often in cool, dim winter conditions. Always discard water collected in a cachepot or saucer. Gravel placed in the bottom of a pot does not create drainage, and a decorative cover pot is safe only when the inner pot has holes and never sits in runoff.
Adjust watering through the seasons
Spring and summer are the seasons of new crown shoots, longer stems, and faster drying. Check the pot as the surface changes, but do not automatically water every day. Heat, bright light, pot material, basket size, and airflow matter more than the name of the season.
In fall and winter, reduce watering only because growth and evaporation usually slow. Do not stop checking or let the root ball become dusty and hard. If the plant is near a heater, the foliage may be dry while the pot remains wet, so increase room humidity and airflow rather than adding water to compensate for brown tips.
Choose soil and a pot that protect the tubers
The best asparagus fern soil holds moisture without collapsing into a dense, airless block. Start with a quality all-purpose houseplant mix and lighten it with coarse perlite; a practical editorial blend is two parts potting mix to one part perlite. The exact ratio can change with your home: use more aeration if the pot stays wet for many days, and more moisture retention if a small basket dries almost immediately.
Use a container only one size larger when roots or tubers crowd the current pot. A pot that is dramatically wider than the root mass holds excess moisture and can create the same yellowing that people mistakenly treat with more fertilizer. The asparagus fern soil and potting guide covers mix adjustments, pH considerations, and why drainage holes matter more than a layer of stones.
Repot if the mix has broken down, smells sour, stays wet far beyond the normal drying pattern, roots are escaping, or the tubers are pressing against the pot. Do not repot a merely healthy plant because the calendar says it is time; every unnecessary root disturbance costs recovery energy. When you do repot, loosen the outer mix gently and keep firm, healthy tubers attached to a crown section with live stems.
Balance temperature and humidity indoors
Aim for stable room temperatures rather than chasing a perfect number. Asparagus fern is happiest in warm indoor conditions, away from cold drafts, hot radiators, forced-air vents, and glass that becomes very cold at night. A sudden move from a humid nursery to dry air can cause shedding even when the roots are fine, so give a new plant a consistent location for a few weeks while you learn its drying rate.
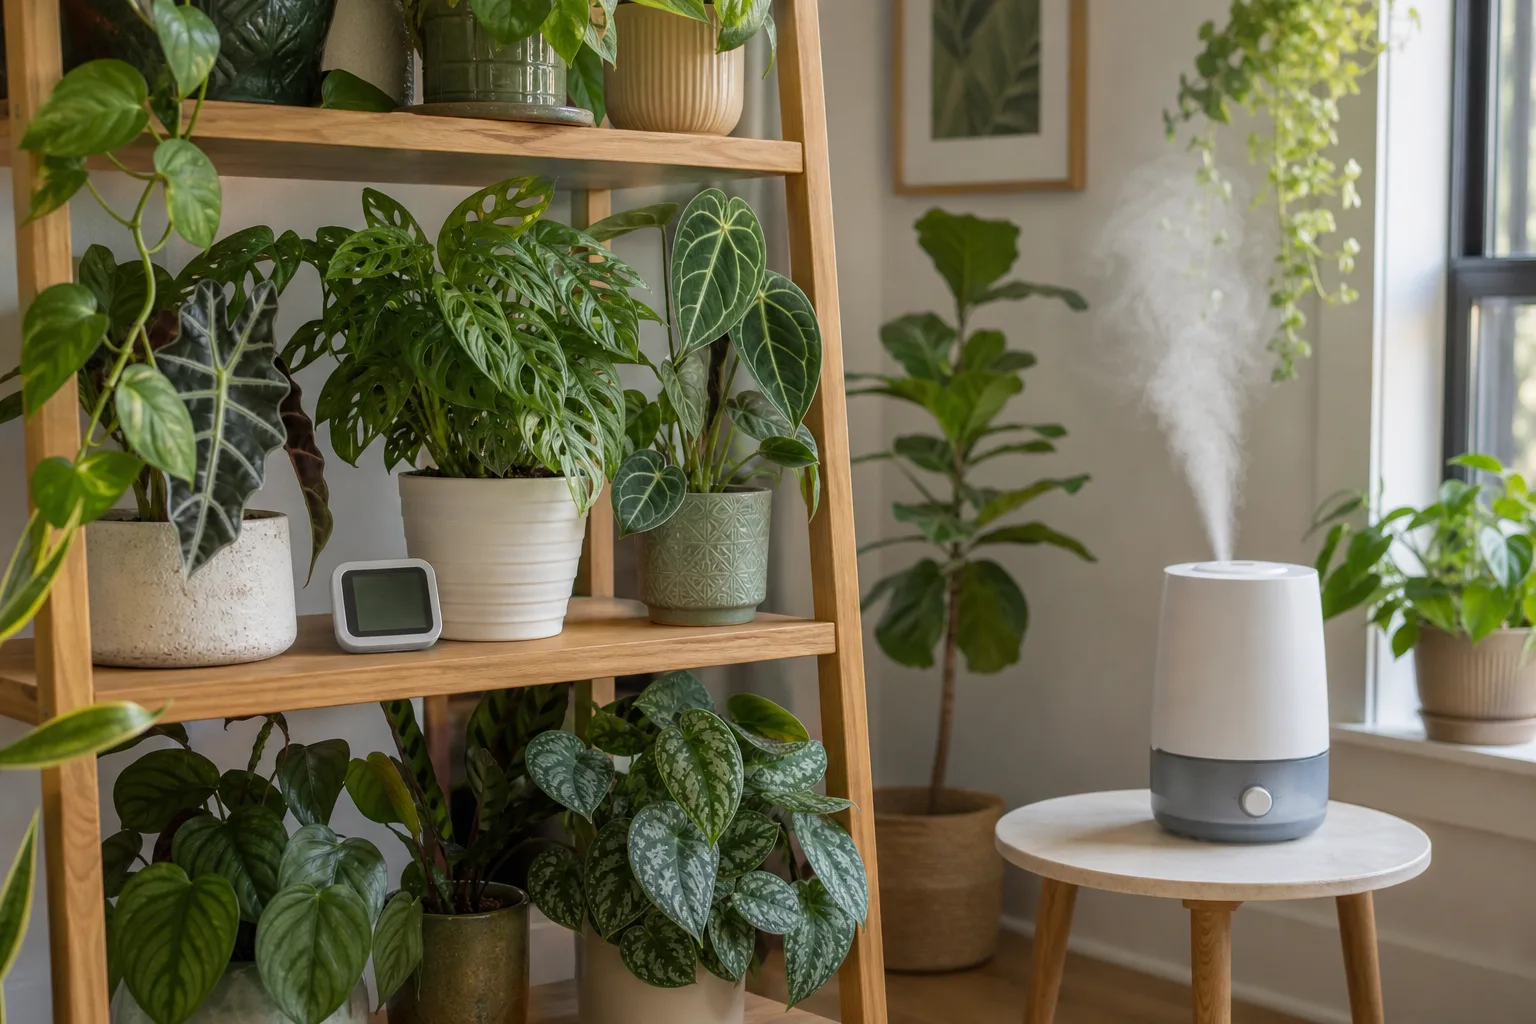
Humidity helps the fine cladodes stay presentable, but humidity cannot replace light or root-zone care. Grouping plants, using a cool-mist humidifier, or choosing a bright bathroom can improve the surrounding air. Keep airflow moving around the foliage so a damp, crowded corner does not become a pest or fungal problem.
Know when misting is not enough
Misting is a short-lived surface treatment, not a substitute for watering and not a reliable way to hold room humidity. It may make the plant look refreshed for a few minutes, but it will not correct a dry root ball or a room that sits at very low humidity all day. If tips continue to brown, measure the room with a hygrometer, inspect the soil, and look for drafts before misting more frequently.
A pebble tray can create a small local buffer when the pot sits above the waterline, but the tray should not turn the container into a standing-water reservoir. The most reliable improvement for a genuinely dry room is a humidifier with sensible cleaning and enough space around the plant. If the air is already comfortable and the soil stays wet, adding humidity alone will not fix the plant; better light and drainage may be the priority.
Feed lightly during active growth
Asparagus fern is not a heavy feeder. During spring and summer, use a balanced liquid houseplant fertilizer diluted according to the product’s conservative indoor-plant directions, or feed at reduced strength when the plant is actively producing new shoots. Apply fertilizer to already moist soil rather than to a bone-dry root ball.
Skip feeding after a major repot, during a collapse, or when the plant is not growing. Brown tips that appear soon after fertilizing, a white crust on the mix, or a sudden decline despite moist soil can indicate salt buildup or fertilizer stress. Flush the pot thoroughly with plain water if the container drains freely, let it drain completely, and hold fertilizer until the plant resumes healthy new growth. More food cannot compensate for weak light, bad drainage, or a damaged root system.
Prune asparagus fern for shape and recovery
Pruning is easiest when you trace each declining stem to the crown. Remove fully brown, yellow, broken, or leafless stems cleanly at the soil line with sanitized, sharp scissors or pruners. Cutting only the middle of a bare stem leaves an awkward stub and does not encourage useful growth from that section.
For a bushier plant, improve light first, then pinch or shorten a few vigorous tips during active growth. Remove no more than about one-third of living growth in one session, especially indoors or in a plant that is already stressed. If the whole plant is old and tangled, rejuvenate it in stages: remove dead material, wait for crown shoots, and then take out the oldest unproductive stems.
The stems can hide small sharp projections, and the plant’s sap or tissue may irritate sensitive skin. Wear gloves, keep cuttings away from pets, and clean the blades between plants. Do not hard-prune immediately after moving a plant from dim light into harsh sun or after a root disturbance; first give it a stable environment in which to replace foliage.
Repot before crowded tubers become a crisis
A root-bound asparagus fern may dry unusually fast, push roots through holes, lift itself in the pot, or crack a thin container as tubers expand. Those signs justify repotting; a healthy plant that is simply large does not necessarily need a bigger pot. Spring or early active growth is the gentlest timing, although root rot or a broken container is an emergency rather than a seasonal question.
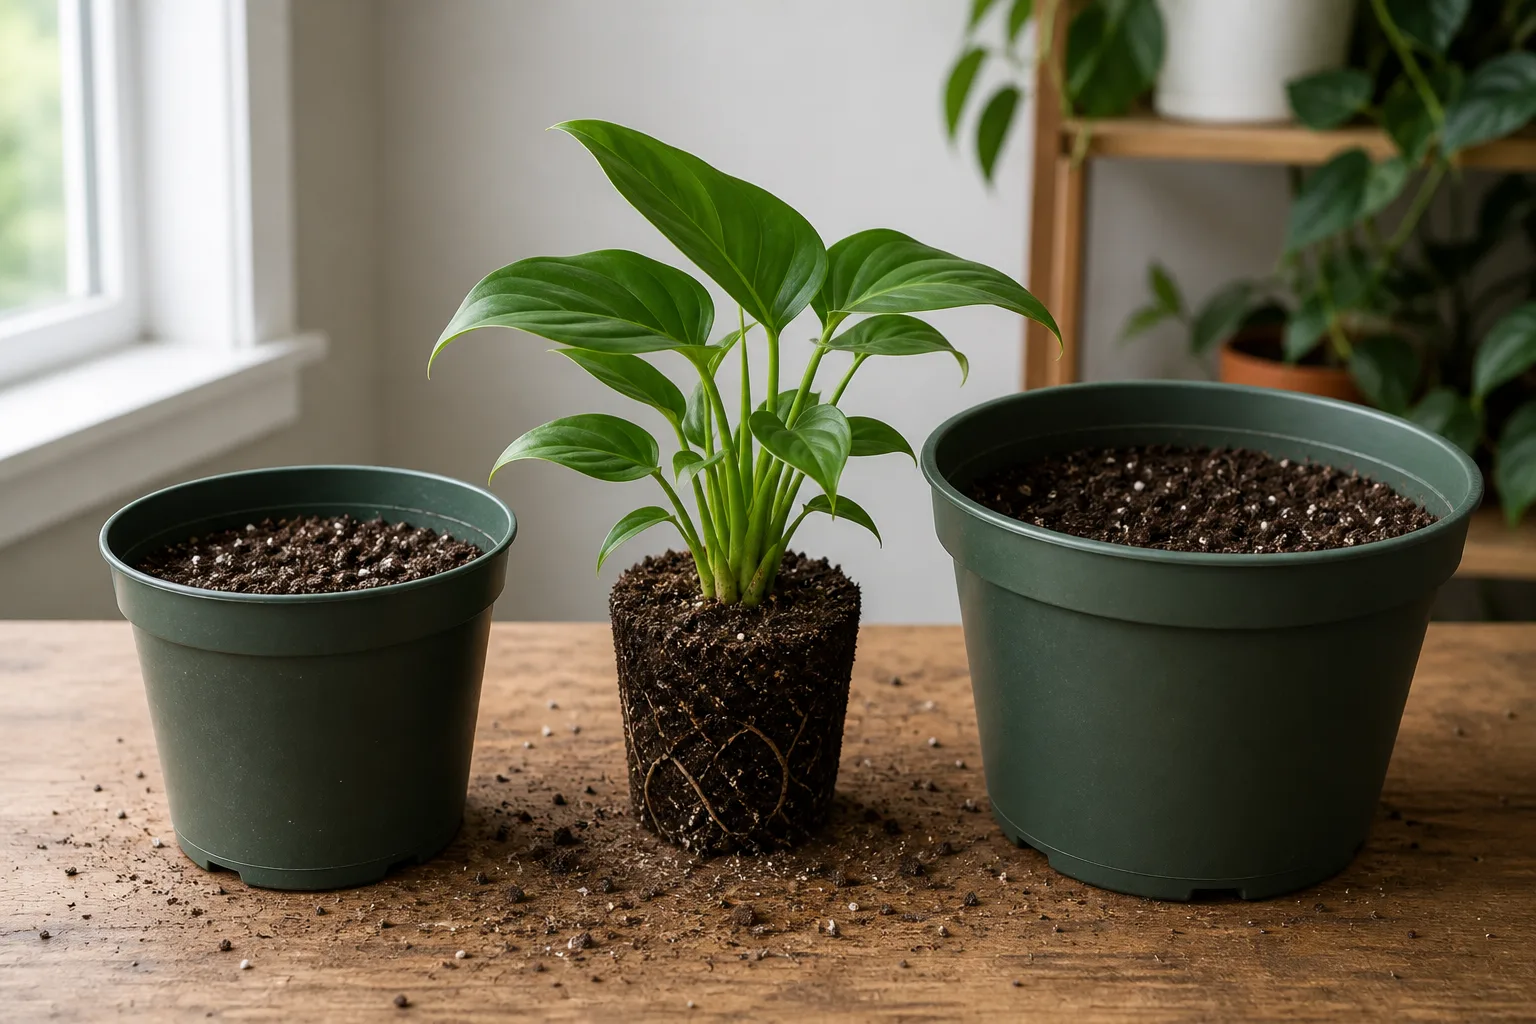
Water the plant lightly a day before repotting so the tubers are hydrated but the mix is not dripping wet. Slide out the root ball, support the crown instead of pulling the stems, and remove only loose exhausted mix. Set the plant at the same depth in a pot one size larger, fill around the root mass with fresh airy mix, and water once to settle it before returning it to bright indirect light.
Avoid stacking every intervention on one day. If the plant is yellow, do not automatically increase the pot, change the soil, move it into full sun, prune it hard, and fertilize it at once. Stabilize the root zone and light first, then make the next change only after you can observe whether the first one helped. Use the repotting guide when you need a slower inspection sequence.
Propagate by division for the fastest results
Division is the dependable way to make new asparagus ferns because it works with the plant’s natural crown-and-tuber structure. Choose a vigorous plant in active growth, prepare pots with drainage holes and fresh mix, and use a clean sharp knife if the clump will not separate by hand. Each division needs a section of crown with live stems and a useful portion of firm tubers and roots; a loose stem without that base is not a viable cutting.
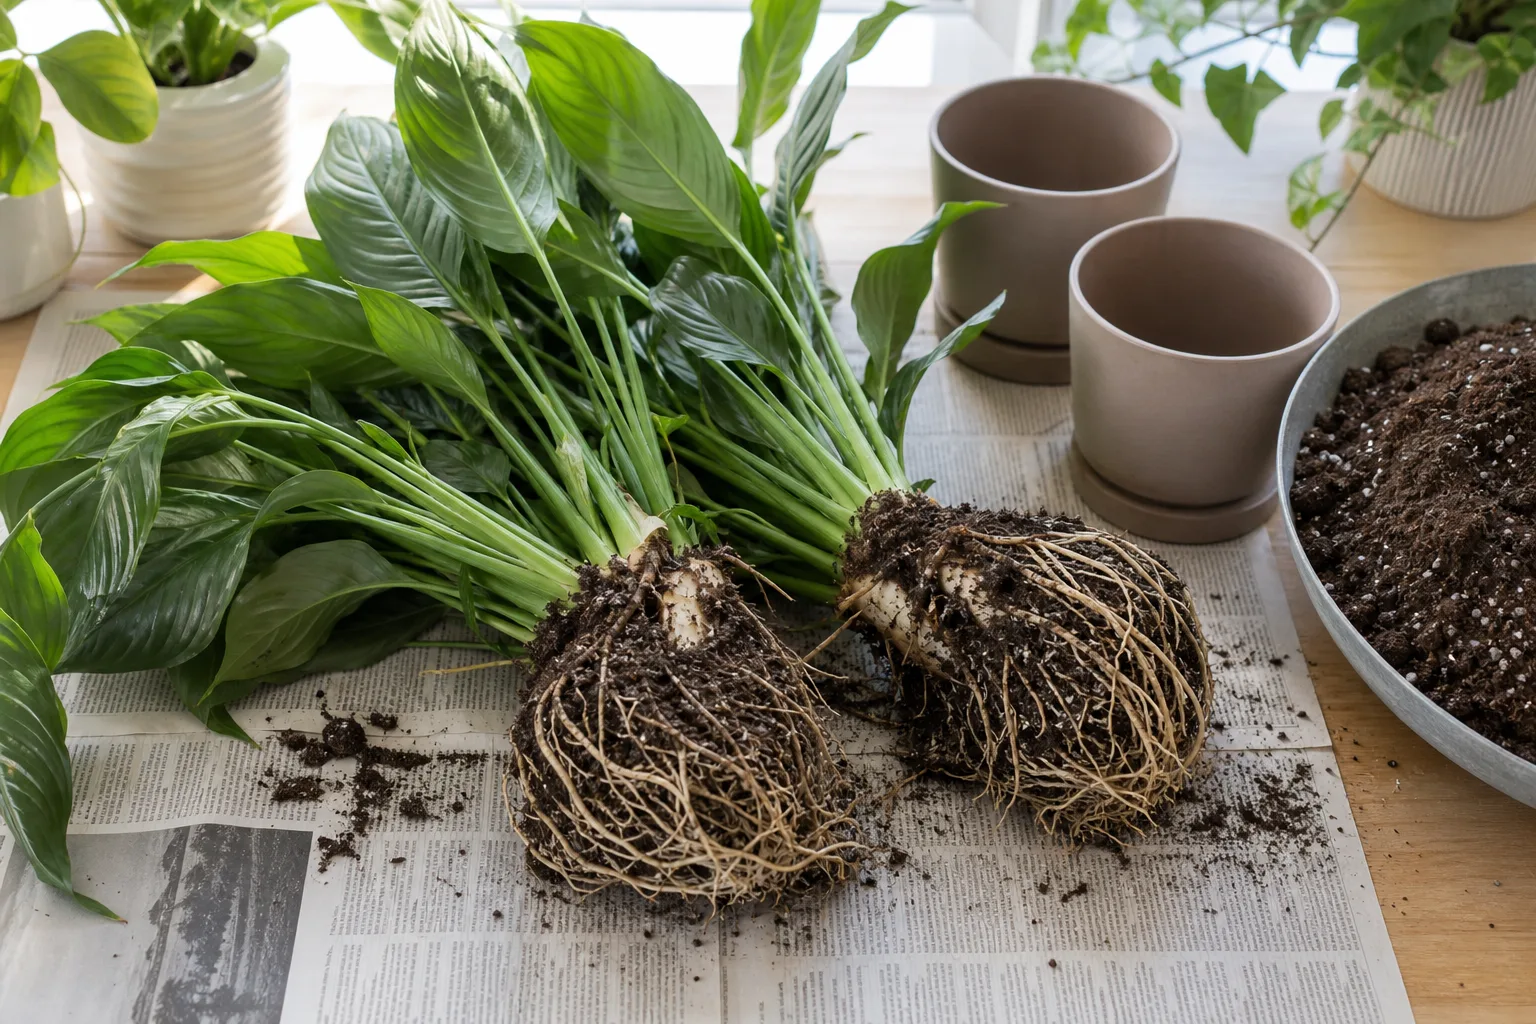
Remove the plant, brush away enough mix to see natural junctions, and separate the clump with as little tearing as possible. Pot each section at its original depth, water thoroughly so the mix settles, and place the new plants in bright indirect light away from harsh sun. Keep the mix lightly moist while they re-establish, but do not keep it saturated in the hope of speeding roots.
Division is also a good answer when the parent plant has become too crowded. Instead of forcing a huge pot to hold every tuber, split the clump into manageable containers and keep the foliage-to-root balance reasonable. Expect a pause while each section rebuilds; new growth from the crown is more meaningful than a quick flush of soft, stressed stems.
Grow asparagus fern from seed when patience is the point
Mature plants may produce small flowers followed by red berries, and the berries contain seeds. Seed propagation is slower and less predictable than division, so use it when you want to experiment with a full life cycle or grow several seedlings, not when you need a quick replacement plant.
Handle berries with gloves, remove the fleshy material, and sow fresh cleaned seed in a light, sterile seed-starting medium. Press the seed into the surface rather than burying it deeply, keep the medium evenly moist, and provide warm bright conditions. Germination can take weeks, and seedlings need time to develop a useful crown before they behave like established plants. Stem cuttings rooted in water are not the shortcut here: the important storage organs are below the soil, so divide the tuberous crown instead.
Grow asparagus fern outdoors responsibly
Use asparagus fern outdoors only after checking your local invasive-plant list and climate guidance. In frost-free or warm regions it can work as a shaded container plant or landscape perennial, but its berries can be eaten and dispersed by birds, and its vigorous root system can make unwanted plants difficult to remove. North Carolina State Extension lists it for outdoor use in warm hardiness zones and also warns that some locations consider it invasive.
For a summer holiday outdoors in a colder climate, move the potted plant outside gradually into bright shade, protect it from harsh afternoon sun, and bring it back in before frost or cold nights. Inspect the pot for hitchhiking insects before it returns to your houseplant collection. Do not dump divisions, berrying stems, or old soil into natural areas, compost piles that spread seed, or a neighbor’s garden.
If you plant in an area where it is permitted, choose a contained site with shade, drainage, and enough space for mature spread. Remove berries before they mature if local guidance recommends containment, and monitor for seedlings beyond the planting area. “It grows well here” is not the same as “it belongs everywhere here,” especially for a plant that can spread by birds and persistent underground structures.
Diagnose yellow, brown, and dropping fronds
The same color change can have several causes, so diagnose the pattern before treating it. Feel the mix and the stems, compare the light on the affected side, inspect the undersides of cladodes, and ask what changed in the last two weeks. A plant that is yellow in wet soil needs a different first action from one that is yellow, dry, and sitting beside hot glass.
| Symptom | First checks | First response |
|---|---|---|
| Yellow fronds in damp mix | Drainage, pot size, soft tubers, sour smell | Stop watering, improve drainage, and inspect roots if the pot stays wet |
| Yellow or bleached side facing a window | Recent move, hot glass, afternoon sun | Move to bright filtered light and acclimate future changes |
| Brown crispy tips | Dry air, missed watering, salt crust, fertilizer timing | Check soil and humidity, flush salts if appropriate, and trim only dead tips |
| Fine foliage dropping | Drought, sudden draft, low humidity, or move shock | Stabilize light and temperature, then resume check-based watering |
| Long bare stems | Low light or old unproductive growth | Improve light and cut selected stems at the crown |
| Wilting while soil is wet | Root damage, cold stress, or compacted mix | Inspect roots rather than watering again |
Old brown cladodes will not turn green again. Correct the cause, remove dead material at the base, and judge recovery by firm new shoots from the crown. If the plant continues to decline after you correct the obvious condition, unpot it and inspect the roots instead of adding more water or fertilizer.
Check pests before you reach for treatment
Spider mites, mealybugs, and aphids can hide in the fine foliage and cause stippling, yellowing, sticky residue, or distorted new growth. Isolate the plant, examine stem joints and undersides with a bright light, and rinse or wipe accessible pests before choosing a treatment. NC State Extension lists mites, aphids, and mealybugs among the problems associated with asparagus fern, along with root and crown rot.
For a small indoor infestation, repeated physical cleaning may be enough. If you use insecticidal soap or another pesticide, follow the product label exactly, test a small area first, and keep the plant out of reach of pets and children. Do not spray a drought-stressed plant in intense sun, and do not call every brown tip a pest; dry air and salt buildup are common lookalikes.
Protect cats, dogs, and children from berries and foliage
Treat asparagus fern as a plant that must be kept away from pets and curious children. The ASPCA asparagus fern listing identifies it as toxic to cats and dogs and describes skin irritation with repeated contact plus gastrointestinal signs after berry ingestion. LSU’s veterinary plant reference reports the same concern, including vomiting, abdominal pain, or diarrhea after berries are eaten.
Place the pot on a high, stable shelf only if the stems and dropped berries truly remain inaccessible. A hanging basket is not automatically safe: a cat can reach trailing growth, and a child can pull a basket down. LSU’s veterinary plant reference reports the same berry-related gastrointestinal concern as the ASPCA listing. Wear gloves for pruning if your skin is sensitive, remove fallen berries promptly, and contact a veterinarian or an animal poison service if a pet may have eaten the plant and develops symptoms. If reachability is impossible in your home, choose a genuinely pet-safer plant instead; a warning label is not a substitute for containment.
Conclusion
Successful asparagus fern care is a balancing act with a clear order: choose bright filtered light, keep the tuberous root ball lightly and evenly moist, use airy soil in a draining pot, and protect the plant from hot sun, cold drafts, and very dry air. Feed modestly during active growth, prune declining stems at the crown, and repot only when the roots or mix give you a reason.
When the plant looks unhappy, read the soil and the pattern before acting. Wet yellow foliage points you toward roots and drainage; crispy tips point you toward dry air, drought, sun, or salts; sparse stems point you toward light. Divide a crowded plant when you want more plants, grow from seed only if you can wait, and treat outdoor planting and pet access as decisions that require local and household safety checks—not afterthoughts.