How to Grow Hydrangeas From Cuttings in Soil
Learn how to grow hydrangeas from stem cuttings in soil, with the right timing, cutting length, rooting mix, humidity, aftercare, and transplant cues.
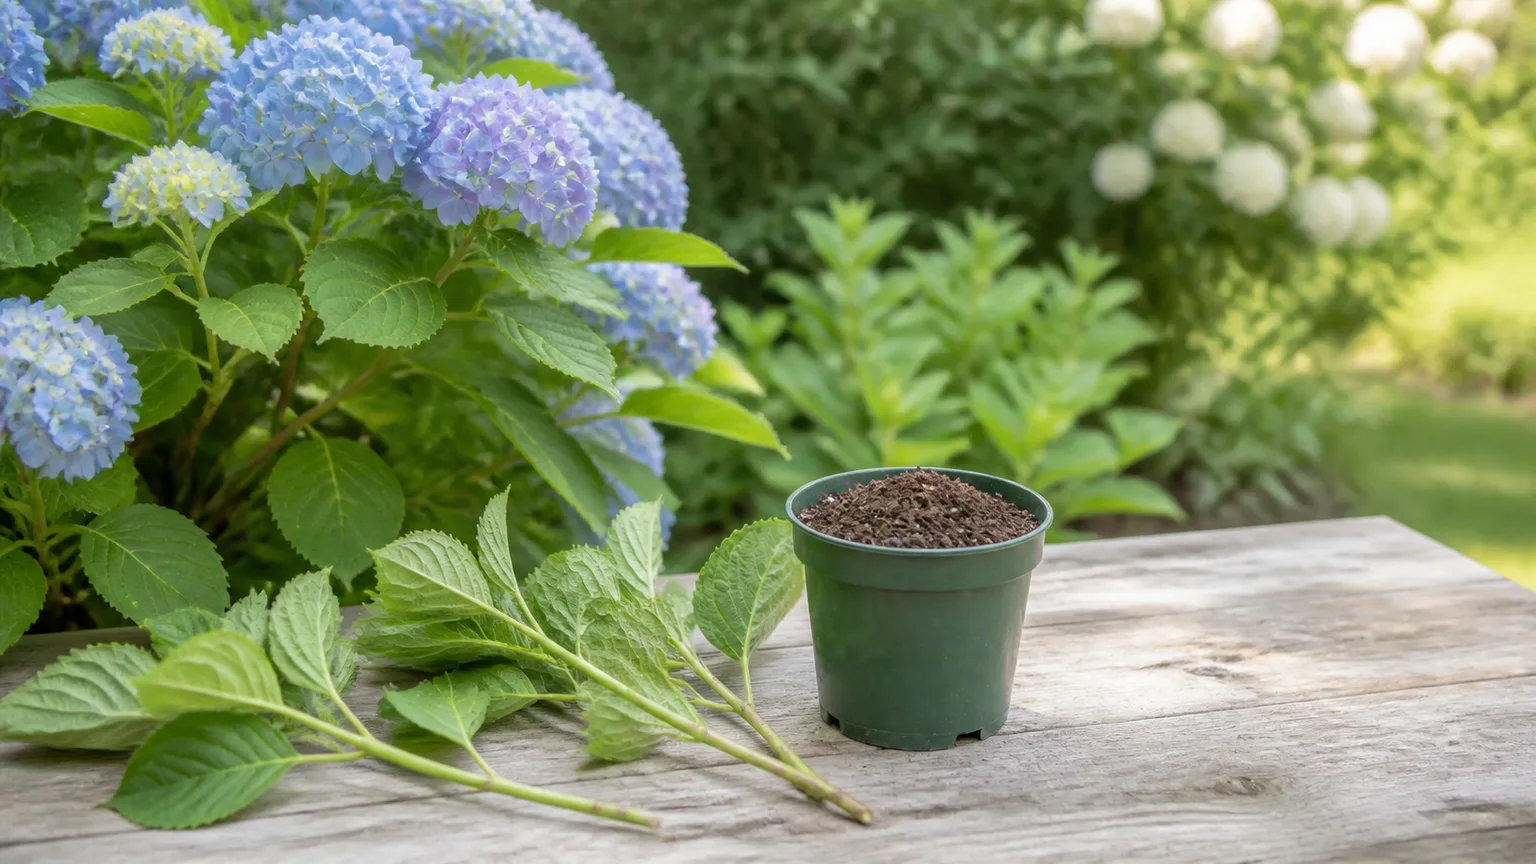
The most dependable soil method starts with one simple rule: take a healthy, nonflowering stem from current-season growth, then place its lower nodes in a light, clean rooting mix. A cutting has no roots to replace the water it loses through its leaves, so success depends on balancing three things from the moment you cut: a viable stem, a moist but airy medium, and humid air around the remaining leaves.
You do not need a greenhouse or a complicated misting bench. A clean pot with drainage, fresh soilless mix, bright indirect light, and a loose clear cover can be enough. Expect roots in a few weeks under good conditions, but use the cutting’s firmness and new growth—not a fixed calendar—as your final test.
Start with the right parent plant
Choose a hydrangea that is actively growing, well hydrated, and free of obvious pests, leaf disease, and stem damage. The new plant will be a clone of the parent, so this is your chance to preserve a shrub with the flower form, size, leaf shape, and color you actually want. A weak parent can sometimes produce a cutting, but it gives you less healthy material and fewer reserves to work with.
Water the parent deeply the day before you plan to cut, especially if the weather has been hot or dry. Purdue Extension’s cutting guidance makes the reason practical: once a cutting is severed, it cannot replace water lost through its leaves, so starting with well-hydrated tissue and processing it promptly reduces stress. Take cuttings in the cool morning or evening, not from a branch that has been baking in afternoon sun.
Avoid taking a stem from the center of a shrub that is already crowded, diseased, or under drought stress. Select a branch with clean, undamaged leaves and several leaf joints. If you want several plants, prepare more cuttings than you need and discard any that show bruising, soft tissue, or a questionable growing point rather than trying to rescue every piece.
Know which hydrangea stems root best
Look for a green, flexible shoot that snaps when bent rather than folding into a limp thread or refusing to bend at all. This is usually softwood: new growth that has begun to firm but is not yet woody. It is the most forgiving material for a beginner because it still has active growth tissue and generally roots faster than older wood.
Your target is a stem tip about 4 to 6 inches long with at least two leaf pairs or nodes. It should not carry a flower head or a developing flower bud. Flowering uses energy that the cutting needs for roots, and a bloom on the tip often signals that the stem is shifting away from the leafy growth you want to root.
Softwood versus semi-hardwood cuttings
Softwood cuttings are typically available in spring and early summer, when hydrangeas are extending fresh shoots. Purdue Extension and NC State Extension’s propagation handbook describe softwood as succulent new growth that snaps easily and still shows a gradation in leaf size: older leaves are fuller, while the newest leaves are smaller. That description is more useful than a universal date because spring arrives at different times in different climates.
Semi-hardwood cuttings come later, after current-season stems have matured and the leaves have reached full size. They can root, but they are often slower and may need closer control of moisture and a little more patience. Hardwood cuttings taken from dormant, firm winter stems are a different project and are not the best starting point for this soil guide.
Choose timing by growth stage and climate
For most home gardeners, mid-spring through early summer is the safest starting window. Days are longer, the parent is pushing growth, and a rooted cutting has time to build a better root system before winter. BHG identifies mid-spring or early summer as a strong general window, while Gardening Know How favors early autumn in some conditions; the useful conclusion is not that one season is always right, but that the stem must be at a rootable stage and the new plant must have enough time to establish.
In a hot climate, take the cutting during a cooler spell and keep it in bright shade or indirect light while it roots. In a short-season or cold climate, favor the earlier part of the growing season so the plant is not rushed outdoors. If you propagate in early fall, keep the plant protected and plan to overwinter it in a bright, cool, frost-free place unless it has developed a substantial root system and your local conditions allow safe planting.
Calendar advice also changes with the hydrangea type. Bigleaf hydrangeas may be growing vigorously when the weather is already warm, while smooth and panicle hydrangeas can have a different rhythm. Use stem texture, leaf maturity, and local weather as your cues, then leave several weeks for rooting and hardening before a permanent move.
Gather clean tools and a rooting setup
Gather sharp bypass pruners or a knife, rubbing alcohol, a clean pot with drainage holes, fresh soilless rooting mix, a pencil or dibber, and a clear plastic bag or simple cloche. A small nursery pot is usually better than a large container because excess mix stays wet around a small, rootless stem. You can root several cuttings together, but their leaves should not touch and each cutting needs room to be checked.
Clean the blade before the first cut and again if you move from a questionable stem to a healthy one. NC State Extension recommends clean containers and a sterile, low-fertility medium for cuttings; garden soil is a poor substitute because it can be heavy, poorly aerated, and a source of disease organisms. If you reuse pots, scrub away old debris, sanitize them, rinse, and let them dry before filling.
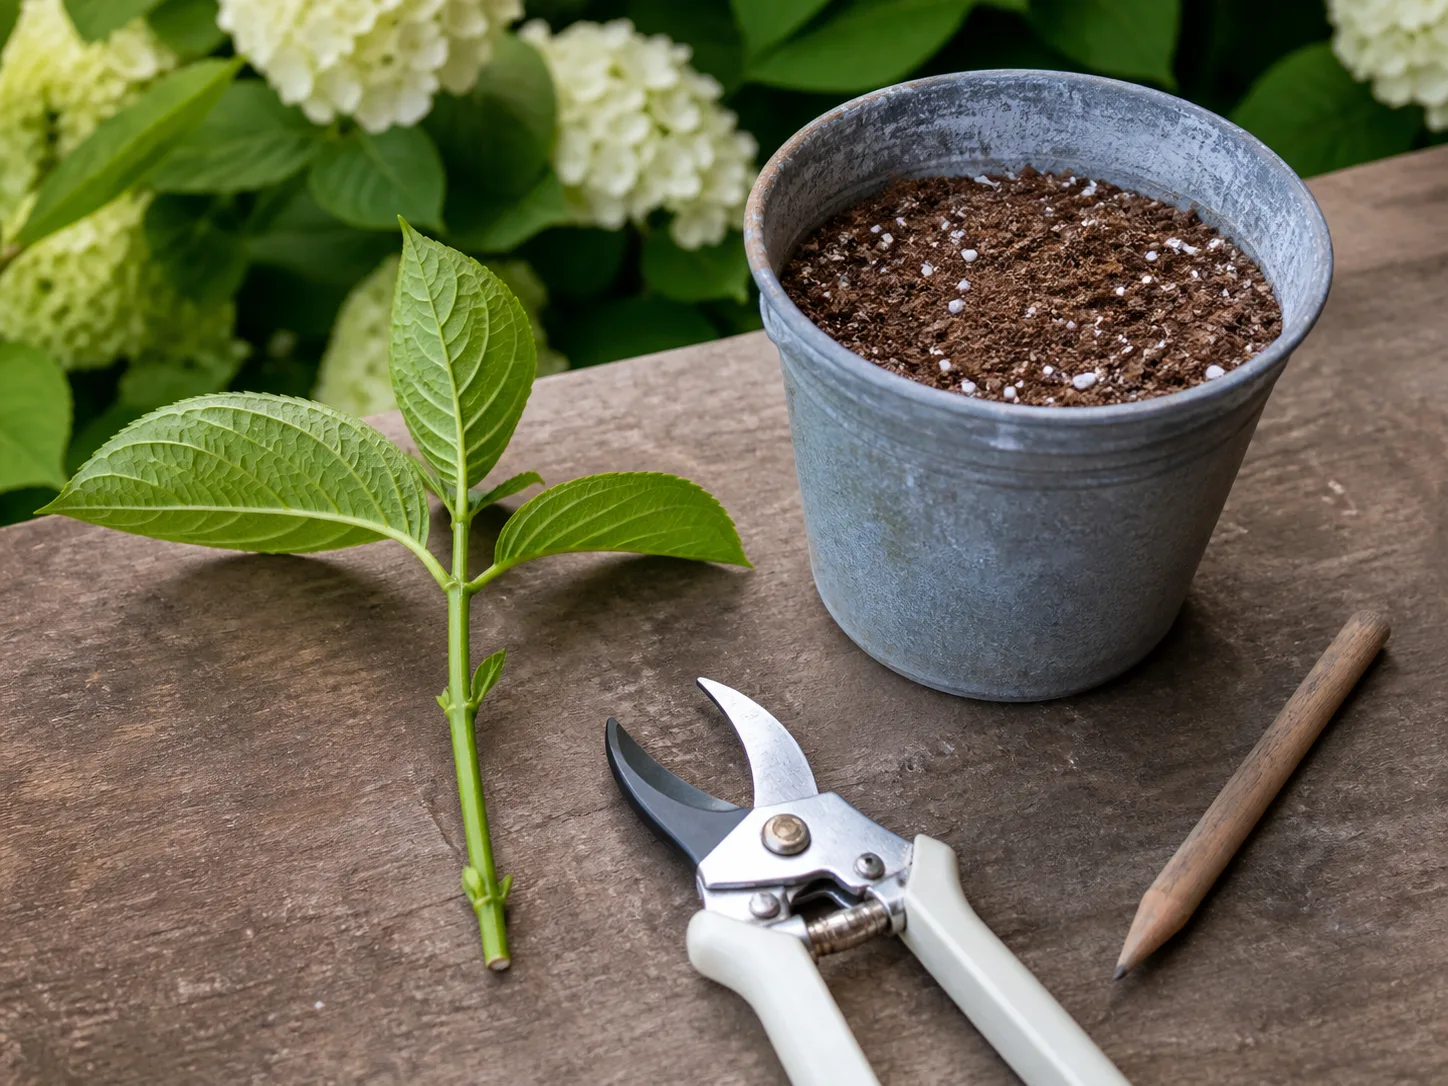
Use a medium that holds moisture while leaving air around the buried stem. A practical home blend is two parts fresh seed-starting or fine potting mix to one part perlite. You can also use a commercial propagation mix or a blend containing coarse sand and peat or coir. Avoid fertilizer-heavy mixes, dense garden loam, and a container with no drainage hole. New roots need oxygen as much as they need water.
Take and prepare the cutting
Find a leaf node—the point where a pair of leaves joins the stem—and make the bottom cut just below it. Keep 4 to 6 inches of stem above that cut, with at least one more node and a healthy leaf pair near the top. The exact length matters less than keeping a viable lower node and a manageable amount of foliage.
Remove the leaves from the lower half of the stem. If the lowest leaf pair is large, cut the remaining upper leaves in half across their width. This is not cosmetic pruning: fewer and smaller leaves lose less water while the stem has no roots. Keep at least one or two leaves so the cutting can photosynthesize, but do not leave a full bouquet attached to a rootless stem.
Strip off any flower, flower bud, or damaged leaf. Make each cut cleanly rather than crushing the stem with blunt shears. If you cannot plant immediately, stand the cut end in clean water or wrap the cutting in a damp paper towel inside a shaded bag for a short time. Do not leave it in a hot car or on a sunny table.
Rooting hormone is optional. A light dip of the lower inch can help some difficult cuttings, but it cannot make an internode root and it cannot correct a waterlogged pot. If you use powdered hormone, place a small amount in a separate dish, dip only the prepared base, and discard the leftover powder rather than returning it to the container. Follow the product label and avoid treating wet, dripping stems.
Prepare the soil mix and pot
Moisten the rooting mix before planting until it is evenly damp, then let excess water drain. The right texture is like a wrung-out sponge: it holds together when squeezed but does not release a stream of water. Pre-moistening prevents the planted stem from being washed out by a heavy first watering and lets you judge the mix before the cutting is in place.
Fill a clean pot and make one hole for each stem with a pencil. The hole should be deep enough to accept the bare lower section without scraping off the rooting hormone or folding the stem. A pot that is 4 to 6 inches wide can hold a small group if the cuttings are spaced so their leaves do not overlap; individual cells make later transplanting gentler.
The goal is not “rich soil.” NC State and Purdue guidance emphasizes a medium that is low in fertility, well drained, moisture retentive, and aerated. Roots that form in continuously saturated mix are vulnerable to decay because water displaces the air spaces they need. If your mix remains glossy and wet for days, add more perlite or coarse material before planting another batch.
Plant the cutting at the right depth
Set the cutting into the hole so the lowest one or two leaf nodes are below the surface and the leaves remain above it. Firm the mix around the stem with your fingers, but do not compress it into a hard plug. Keep all leaves off the mix; buried foliage decays quickly and can spread rot up the stem.
Water gently once after planting so the mix closes around the stem, then let the pot drain fully. Do not leave it standing in a saucer of water. Label the pot with the hydrangea cultivar and date if you know them, especially when you are rooting more than one kind. The label will help you compare timing and prevents a successful cutting from becoming an unidentified shrub later.
Place the pot in bright indirect light. A sheltered outdoor bench, bright porch, or indoor window a short distance from direct afternoon sun can work. A cutting needs enough light to keep its remaining leaves functioning, but direct sun through a clear cover can overheat the foliage and the pot before roots exist to regulate water use.
Create humidity without trapping rot
Cover the pot with a clear plastic bag held above the leaves by sticks, or use a clear cloche with ventilation. The cover slows water loss from the leaves while roots are forming. It should not touch wet foliage, and it should not seal the pot so tightly that condensation runs constantly down the stem.
Check the cutting at least every few days. If the leaves are crisp but the mix is damp, humidity is too low, the air is too hot, or the stem was already dehydrated. If the cover is dripping, the mix smells sour, or gray mold appears, open it for airflow and check drainage. Misting the leaves can provide a brief humidity boost, but it is not a replacement for a breathable cover and correct root-zone moisture.
Remove or loosen the cover as soon as the cutting is clearly rooted and growing. Keeping a rooted plant in an enclosed, stagnant pocket for too long creates a new disease risk and leaves it unprepared for ordinary garden air. Humidity is a bridge to root formation, not the permanent care plan.
Keep the cutting stable while roots form
For the first several weeks, keep the mix consistently damp but never saturated. Touch the surface and lift the pot to judge moisture rather than watering by a rigid schedule. A small pot in warm, bright conditions may need attention often; a covered pot in cool shade may stay damp much longer.
Keep the rooting zone warm and stable, ideally around ordinary warm-room temperatures rather than next to a cold window, draft, radiator, or heat mat set too high. Purdue Extension gives 65–75°F as a useful general rooting range for many cuttings. Warmth can speed the process, but excessive heat increases leaf water loss and can cook a covered cutting.
Do not fertilize while the cutting is unrooted. Fertilizer does not replace roots, and soluble salts in a small volume of mix can stress the cut base. Do not tug on the stem every day, either. Root initials are fragile; repeated checking can tear them before they become a useful network.
Test for roots and pot the new plant
Start checking after about three weeks, but expect the range to stretch longer in cool, dim, or late-season conditions. A gentle resistance test is useful: hold the pot steady and nudge the stem very lightly. Resistance suggests roots are anchoring the cutting, while a stem that slides freely needs more time. New green growth is another encouraging sign, but it can sometimes come from stored energy before the root system is strong.
Once the cutting resists a light nudge and has visible new growth, or once roots show at the drainage edge, move it into its own small pot. Prepare ordinary quality potting mix with good drainage, slide the root ball out with as much surrounding mix as possible, and set it at the same depth. Avoid teasing apart every root or moving it repeatedly just to inspect progress.
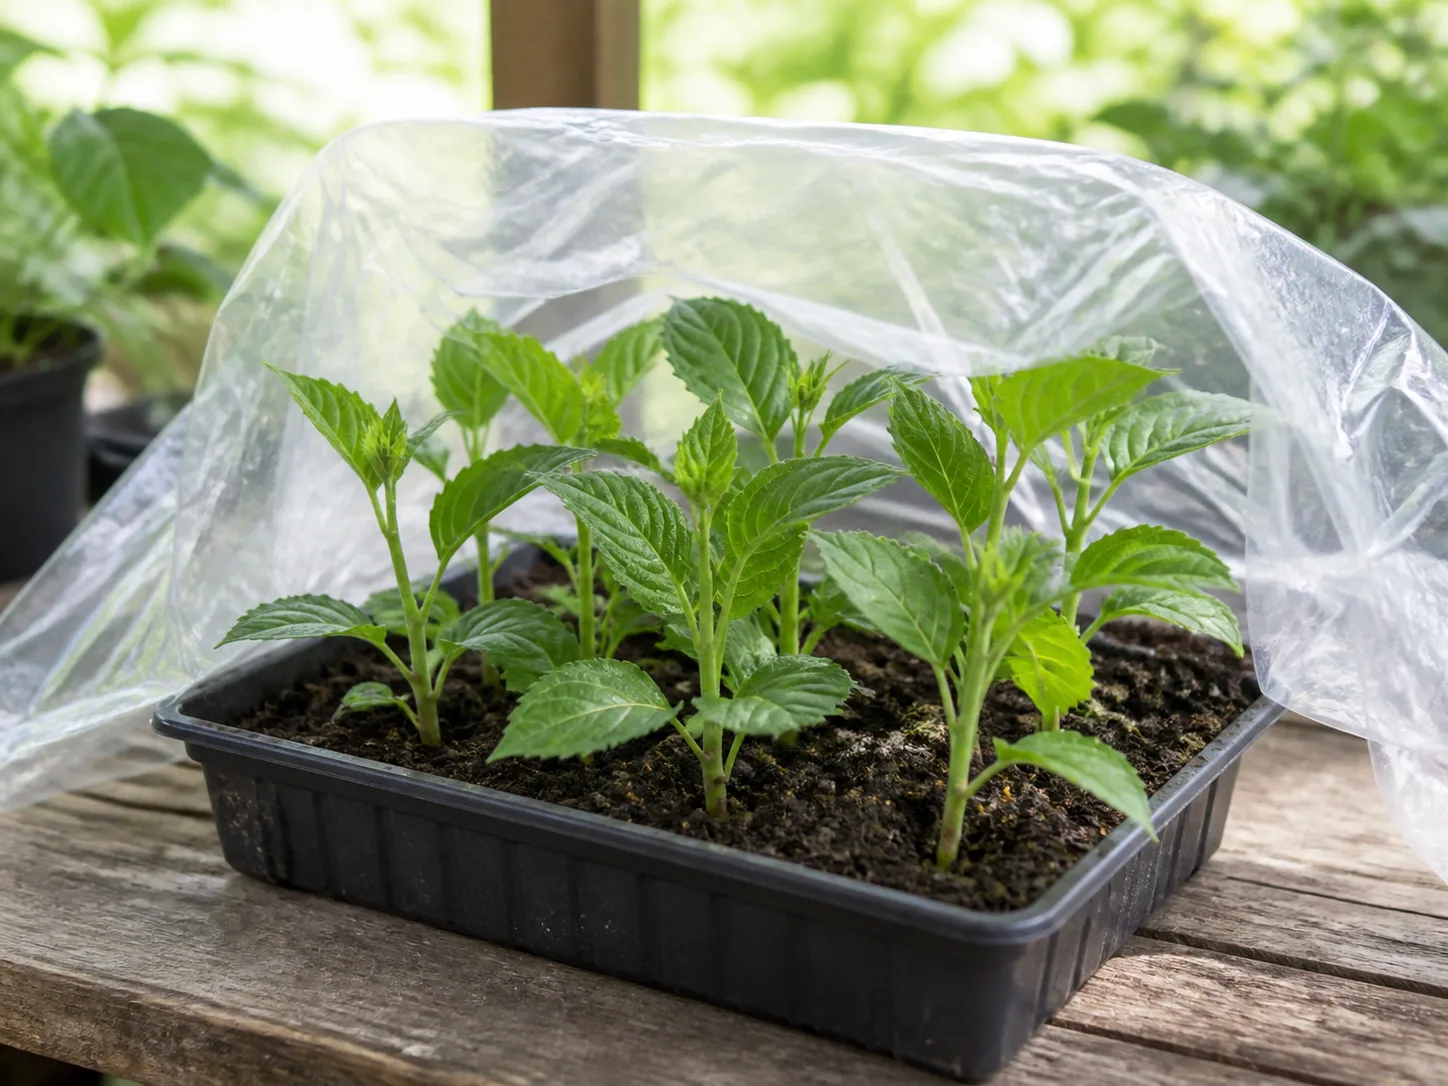
After potting, water thoroughly once and let it drain. Keep the plant in bright indirect light for a week or two, then increase light gradually. The new plant may pause after the move; that is not failure. The priority is a living root system that can resume growth, not a rapid flush of leaves before it has adjusted.
Harden the plant before moving it outdoors
A cutting raised under plastic has been living in still, humid air with reduced water loss. Moving it straight into wind, full sun, or a dry garden bed can cause leaf scorch and wilting even if its roots are healthy. NC State Extension recommends hardening plants by reducing humidity and increasing exposure gradually; begin at least two weeks before outdoor planting when possible.
Start by opening the cover for a few hours on a mild day, then leave it ajar overnight if temperatures are safe. After the plant is growing in open air, place it outdoors in bright shade for an hour or two. Increase the time and light over the next 7 to 14 days, protecting it from strong midday sun, drying wind, and cold nights.
Plant only when the hydrangea has a firm root ball, active growth, and weather appropriate to its type. Choose a site with the light and moisture that the parent cultivar needs, and water the young plant consistently while its roots expand. A rooted cutting is a small shrub, not an instant replacement for a mature hydrangea; give it a full season to establish before expecting a large flowering display.
Adjust expectations by hydrangea type
Most commonly grown hydrangeas can be made from stem cuttings, but their growth habits affect what “success” looks like. Bigleaf hydrangeas, Hydrangea macrophylla, can preserve the parent’s flower color and form through cloning, but the new plant still needs the same winter protection and soil conditions as its parent. A cutting does not become more cold-hardy just because it rooted indoors.
Smooth hydrangea, H. arborescens, often produces multiple stems from the crown and may also be propagated by division when a colony has separate rooted shoots. Oakleaf hydrangea, H. quercifolia, and panicle hydrangea, H. paniculata, can also root from suitable current-season wood, but their final size and bloom timing may make a container-growing period more practical before planting.
Do not use soil pH as a rooting shortcut. The pH conversation matters for the flower color of some bigleaf cultivars after establishment; it does not replace a well-aerated rooting medium or cause a stem to make roots. Wait until the new plant is established before making major soil amendments, and follow a soil test rather than adding products by guesswork.
Choose soil, water, or ground layering
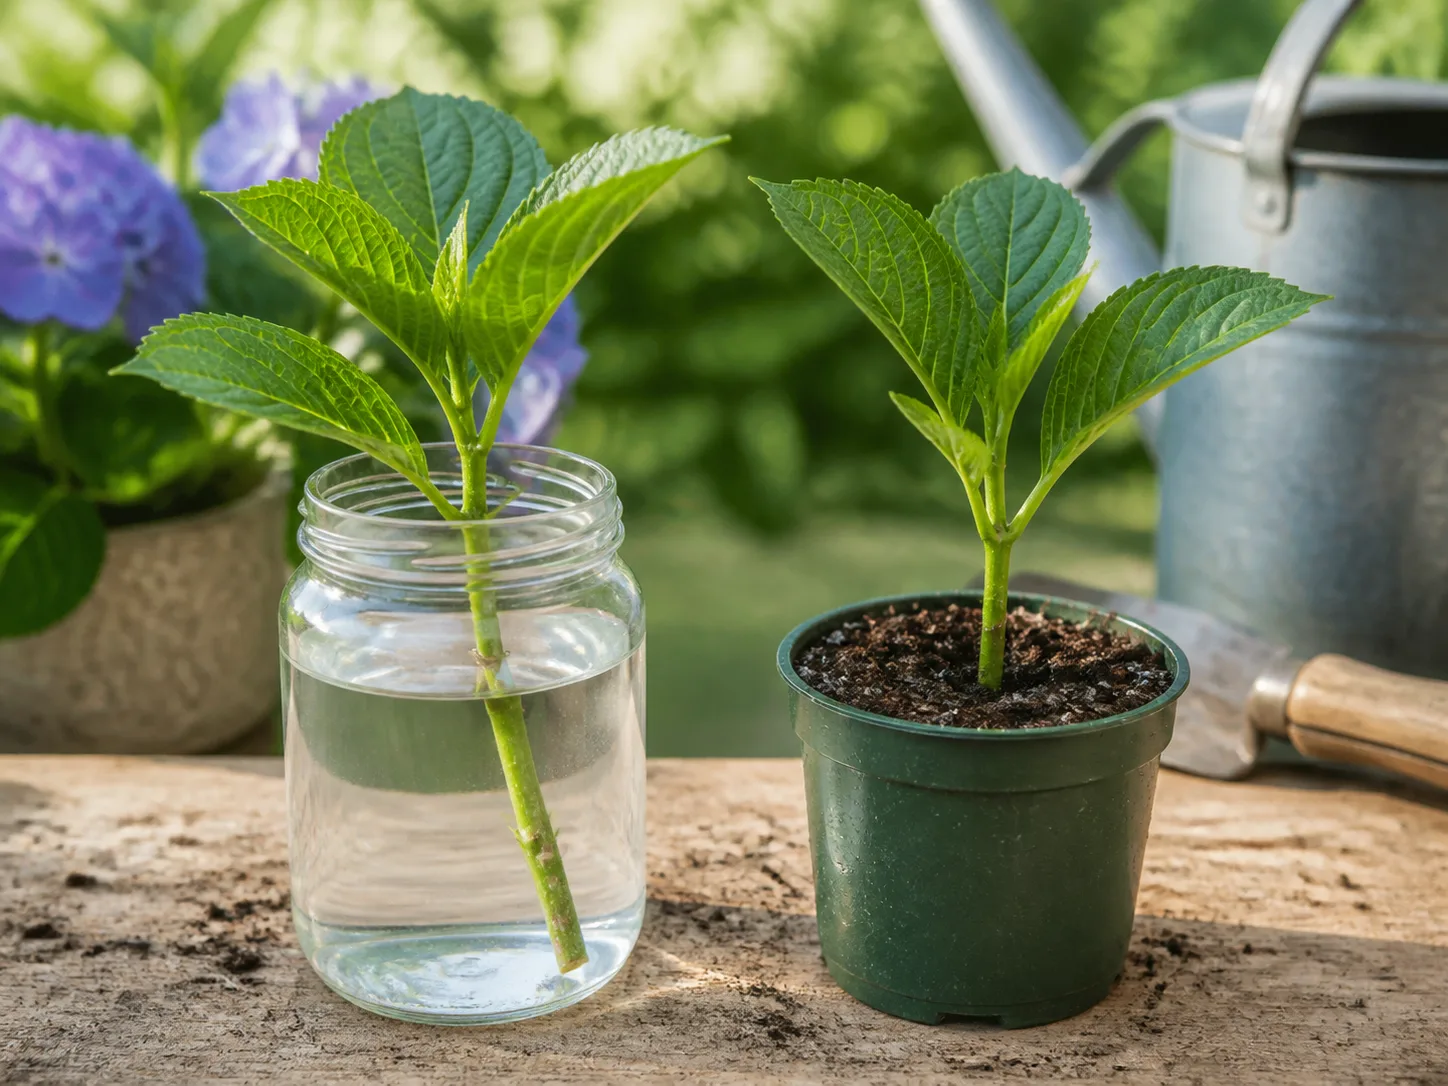
For this goal, direct soil rooting is a strong default because the roots develop in the medium they will continue using. It avoids a water-to-soil transition, but you cannot see the roots and must be disciplined about moisture. Water propagation is easy to observe, yet water-grown roots may be more vulnerable during transplanting and stagnant water can damage the stem.
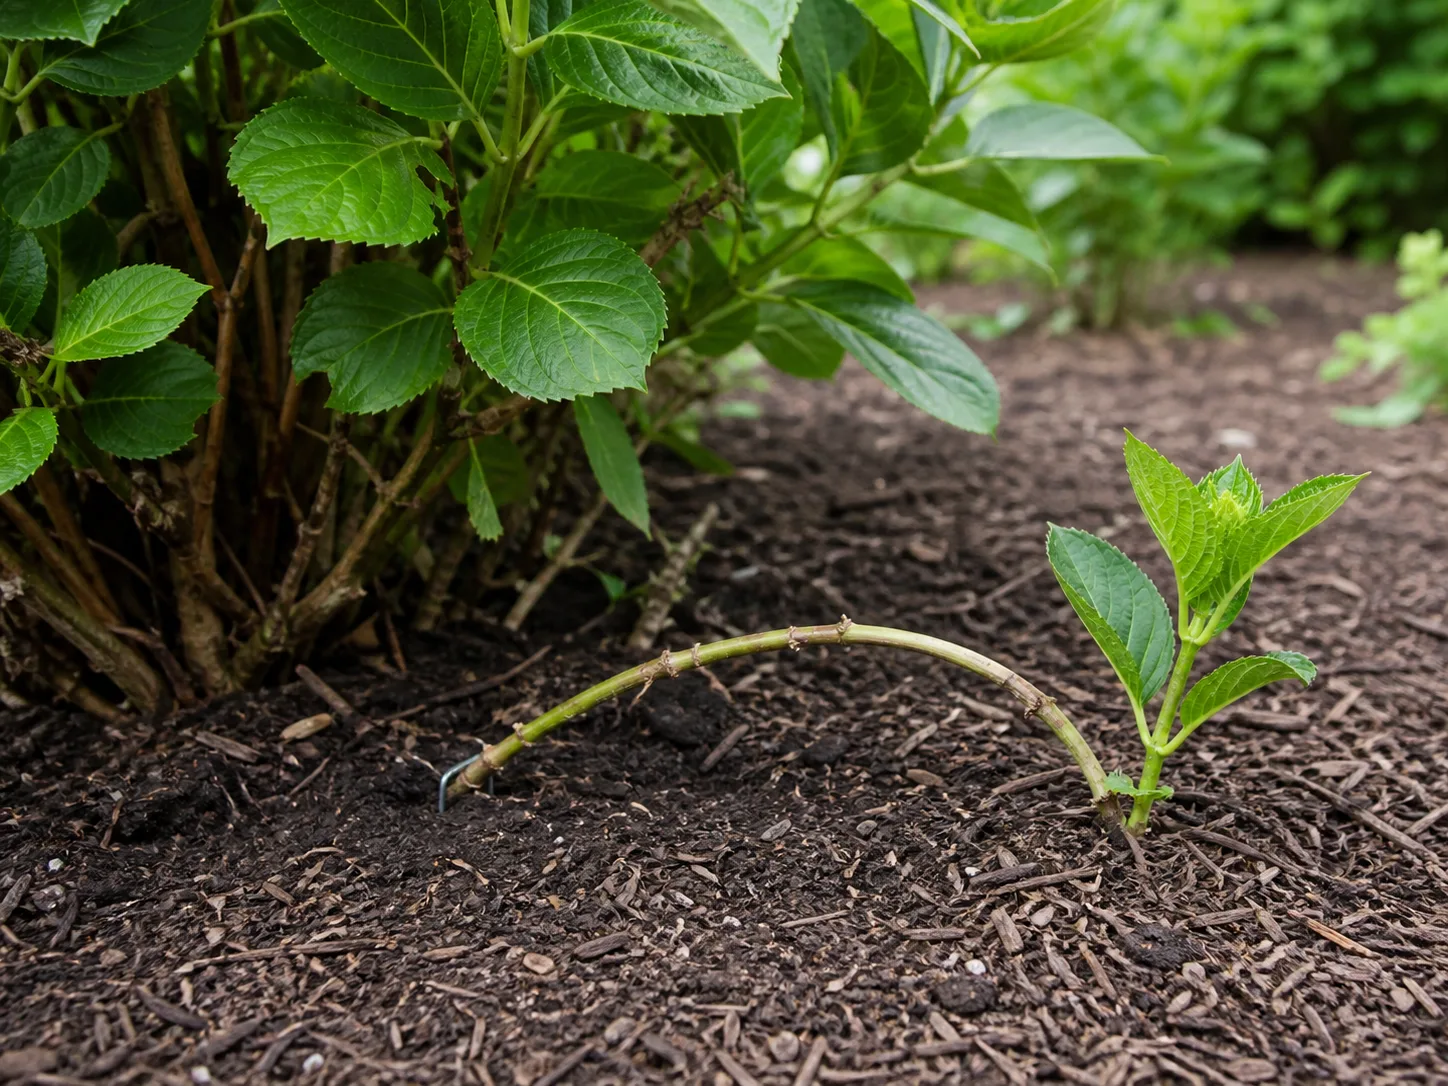
Ground layering is often the lowest-stress choice when a flexible branch reaches the soil. Instead of cutting it away, bend part of the stem into a shallow trench, keep a node under the soil, and leave the tip exposed. The attached branch continues receiving water from the parent while roots form. Once it resists a gentle lift and has a useful root system, sever it from the parent and pot or plant it.
| Method | Best fit | Main advantage | Main trade-off |
|---|---|---|---|
| Direct soil cutting | A modest softwood stem and a gardener who can manage moisture | Roots adapt in their final medium | Progress is hidden |
| Water cutting | A small experiment where visible roots are important | Easy inspection | Water changes and soil transition are required |
| Ground layering | A long, flexible low branch | Parent supports the unrooted section | It makes fewer plants and needs space |
Use layering when the branch is valuable or you are unsure about cutting it. Use direct soil when you have several healthy shoots and want pot-ready plants. Whichever method you choose, do not take a cutting from a patented cultivar for sale or distribution without first checking the label and applicable rules.
Diagnose the common failure modes
Propagation problems usually become easier to solve when you separate water loss above the soil from decay below it. Check the stem, leaves, cover, light, and potting mix in that order. A green, firm cutting can be alive while doing nothing visible; a black, mushy cutting needs action now.
Wilted leaves and a limp stem
If the leaves wilt soon after cutting, reduce leaf area, move the pot out of direct sun, and confirm that the cover is holding humidity. A very large leaf load, a hot windowsill, delayed planting, or a dry root mix can overwhelm the stem. Water the medium if it is genuinely dry, but do not compensate for wilt by keeping the pot permanently flooded.
If the stem remains green and firm, it may recover after conditions stabilize. Remove only collapsed or rotting leaves. If the entire stem is soft rather than simply flexible, treat it as a decay problem instead of increasing humidity.
A black or soft stem
Blackening, a sour smell, or tissue that collapses when pinched usually indicates rot. Remove the cutting from the mix, discard the wet medium, and cut the stem back to firm, healthy tissue with a sanitized blade. If a viable node remains, restart it in a clean pot and fresh airy mix; if every node is soft or the base is gone, discard the cutting and start with new material.
The common causes are dense mix, no drainage, overwatering, buried leaves, contaminated tools, or a cover that stays dripping wet. More hormone or more mist will not fix those conditions. The durable correction is clean material, oxygen around the stem, a smaller pot, and moisture that is checked rather than assumed.
No roots after several weeks
First confirm that the buried portion includes a node and that the stem was not planted upside down or taken from old, hard wood. Then check whether the mix is cold, saturated, bone-dry, or compacted. Improve one variable at a time—usually bright indirect light, stable warmth, or drainage—and stop disturbing the cutting.
Some cuttings simply need longer than the common two-to-four-week estimate, especially when taken late in the season. If the stem is still firm and the leaves are not collapsing, give it more time. If it has lost all leaves but the stem and node are firm, it may still root, but the odds are lower because it has less photosynthetic capacity. A new batch from a healthy parent is often a better use of time than repeatedly repairing one failing stem.
Make the cut with the parent plant’s shape in mind. Leave enough healthy nodes on the remaining branch for new growth, and do not remove so many shoots that the shrub loses its ability to feed itself. A clean cut above a node generally gives the parent a sensible place to branch, but follow the pruning habits of the hydrangea type rather than cutting blindly during its bud-setting season.
The cutting preserves the parent’s genetics, which is useful when you want another plant with the same characteristics. It does not guarantee the same flower color or size if the new site has different light, soil, winter temperatures, or water availability. It also does not give permission to reproduce every named cultivar: check the nursery tag for patent information and local rules before selling, trading, or distributing plants.
Conclusion
To grow hydrangeas from cuttings in soil, start with a hydrated, healthy parent and a green nonflowering shoot that snaps gently when bent. Cut just below a node, remove the lower leaves, reduce the remaining leaf area, and plant the bare nodes in a pre-moistened, airy mix. Cover the pot loosely, keep it warm and brightly lit without direct sun, and maintain moisture without turning the mix into mud.
Give the cutting time to form roots before tugging, repotting, fertilizing, or moving it outdoors. When it resists a gentle nudge and begins growing, pot it up, loosen the humidity gradually, and harden it over at least a week or two. That measured sequence produces a stronger young shrub than chasing a fast result—and it gives you a clear decision at every stage if the first cutting does not take.