How to Build a Rock Garden: A Step-by-Step Guide
Learn how to build a rock garden with stable stones, useful planting pockets, and drainage that suits your site. Includes plant choices and fixes for common failures.
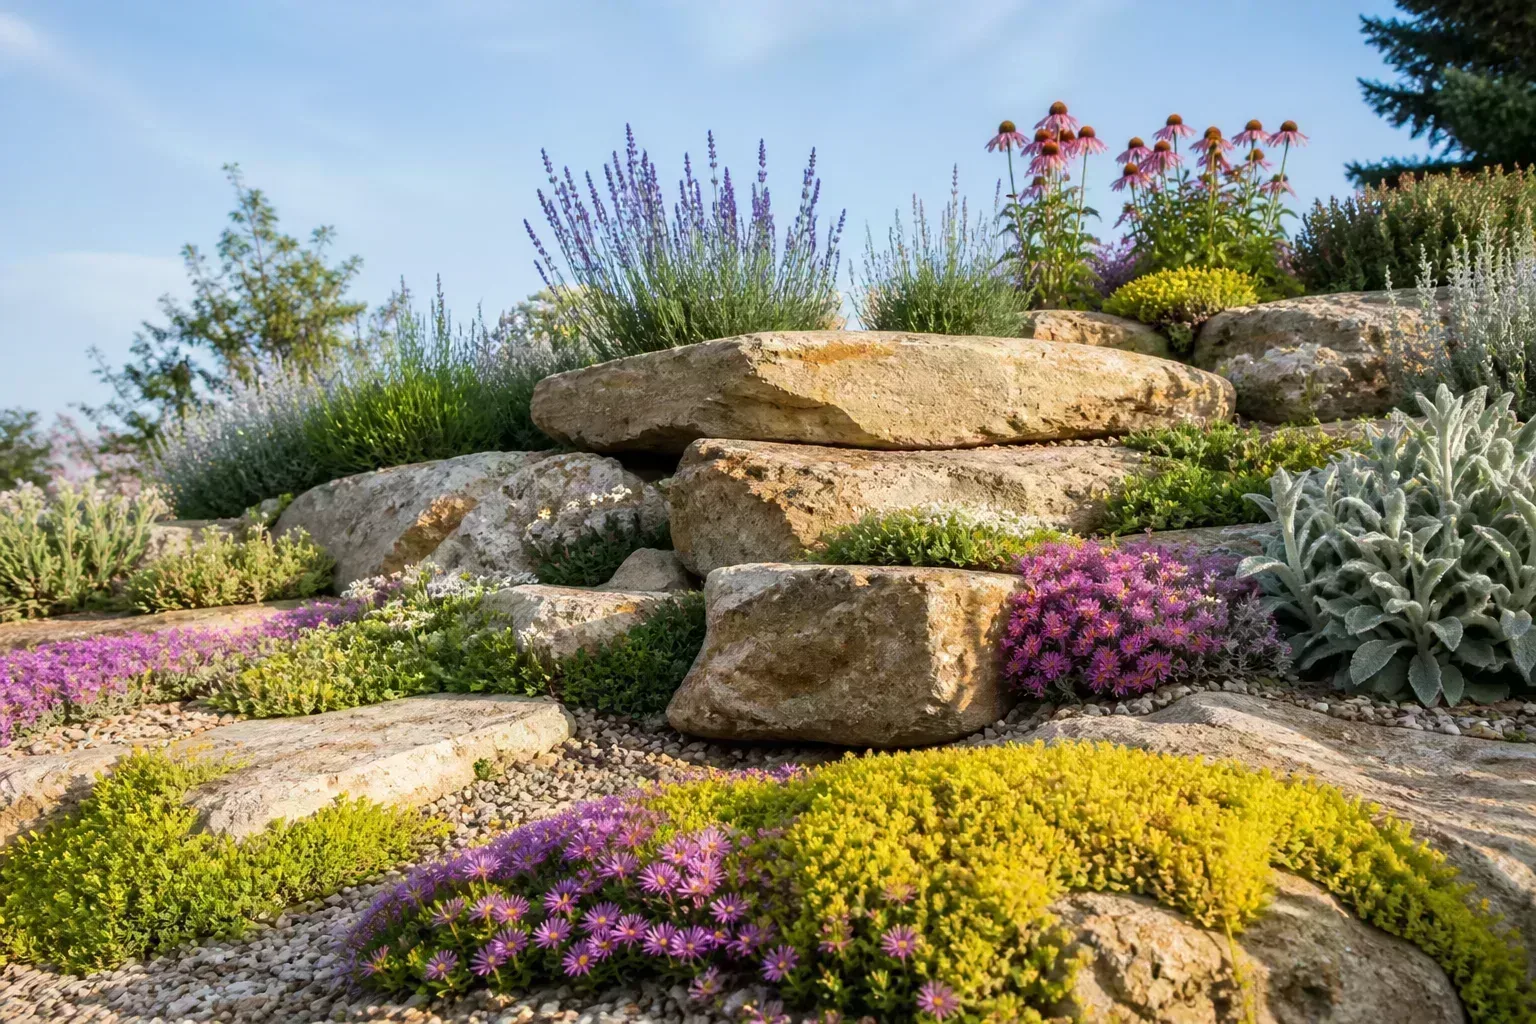
A rock garden works when the stones, soil pockets, water, and plants act as one system. If you start by piling rocks onto a wet or compacted patch, you can end up with unstable stones, plants that rot between them, and soil washing downhill after every hard rain. Start with the site and the job the garden should do; then build the stonework around the conditions you can actually provide.
The guidance below covers a small backyard rockery, a sloped planting, and compact trough-style gardens. The right mix of stone and plants varies by region, but the sequence is consistent: observe water and light, prepare a stable footprint, set the large stones first, make plantable pockets, and choose species that fit each pocket rather than forcing a generic alpine palette.
Decide what kind of rock garden fits the site
“Rock garden” can describe several different projects. A traditional rockery is a mound or slope of stones with small plants rooted in crevices; a scree or gravel garden relies on a deep, sharply drained surface layer; a crevice garden uses closely spaced slabs to create narrow vertical root channels; and a small alpine trough recreates those conditions in a container. A dry, raked gravel courtyard is a different design again: it may use stone as the main feature without being planted as a rockery.
Choose the form by matching it to the land, not by copying a picture. A natural bank or terrace is a good candidate for a planted rockery; a flat, soggy lawn may need a raised bed with a designed outlet; a balcony or tiny patio may be better served by a trough.
Colorado State University Extension recommends natural slopes or terraces as effective rock-garden locations, while the RHS notes that gardens can scale down to walls and containers. Gardening Know How likewise describes rock gardens as an option for rugged slopes and hot, dry sites when the plants suit the local climate. (Colorado State University Extension; RHS; Gardening Know How)
| Site or goal | Useful format | Main constraint |
|---|---|---|
| Sunny bank with fast drainage | Rockery or crevice garden | Control erosion and anchor stones |
| Flat ground with average soil | Low mound or raised rockery | Avoid creating a basin with no outlet |
| Wet or compacted ground | Raised bed with a planned overflow route | Stone at the bottom alone will not fix impermeable subsoil |
| Small patio or balcony | Alpine trough or stone planter | Keep the container stable and use a free-draining mix |
| Dry, low-planting landscape | Gravel garden | Select plants for local heat, cold, and rainfall |
Check light, slope, water, and access before digging
Observe the proposed site through a normal day and after rain. Record where direct sun lands, which areas stay shaded, where water runs or stands, and whether nearby trees cast seasonal shade or compete for moisture. Sun and shade can differ across a few feet: the warm face of a large stone may suit a drought-adapted mat, while its cooler north side can hold a small, moisture-tolerant plant.
Look beyond the footprint. A rock garden should not divert runoff toward a house, retaining wall, path, or neighbor’s property. On a slope, identify where water enters and where it can leave without cutting a channel through the planting pockets. Check for buried utilities before excavation, and do not dig into a slope that supports a structure or has signs of movement without professional advice.
If the area stays wet, do not assume plants will solve the problem. Colorado State University Extension notes that compacted and clay-heavy soils have smaller pores, so water moves slowly and roots can be deprived of oxygen when soil remains saturated. Test the site after a soaking rain and, if needed, dig a small inspection hole to see whether water is draining through the upper soil or stopping at a hard layer below it. (Colorado State University Extension on soil drainage)
Choose stone that belongs in the landscape
Local stone usually looks more natural and can be easier to source than imported decorative rock. Choose one dominant geological type and vary its size, shape, and face texture. A mixture of unrelated boulders, polished river cobbles, and bright gravel can look like separate materials were dumped together; repetition creates coherence even when the stones are irregular.
Think about weight and handling before delivery. Large keystone rocks give a rockery structure, but a boulder that needs machinery or a team should not be moved by improvising with a shovel or by standing below it on a slope. Hire a landscaper or stone contractor for very heavy pieces, steep terrain, retaining functions, or any installation where a shifting stone could injure someone or damage property.
Stone chemistry matters when you grow plants with narrow soil preferences. Limestone and some other calcareous materials can create more alkaline conditions over time, while different plants tolerate different pH ranges. If you have a particular plant palette in mind, check a soil test and plant references before choosing a large load of stone. The RHS recommends selecting suitable, locally available stone and using a consistent range of sizes to create a natural outcrop. (RHS rock-garden advice)
Design for planting pockets, not a pile of stones
Sketch the outline and mark the biggest stones before construction. Use a hose or rope to test the curve from the viewpoints that matter—such as a kitchen window, path, or seating area—and leave room to mow, weed, and reach the back. A compact garden is often easier to keep convincing than a broad bed with scattered stones and no visual anchor.
Plan the “voids” as carefully as the rocks. Plants need pockets with enough depth for their mature roots, not merely a thin film of soil on top of gravel. Vary pocket size: shallow, sharply drained crevices for small alpines; deeper pockets for clumping perennials or dwarf shrubs; and a few open gaps so the stones remain visible.
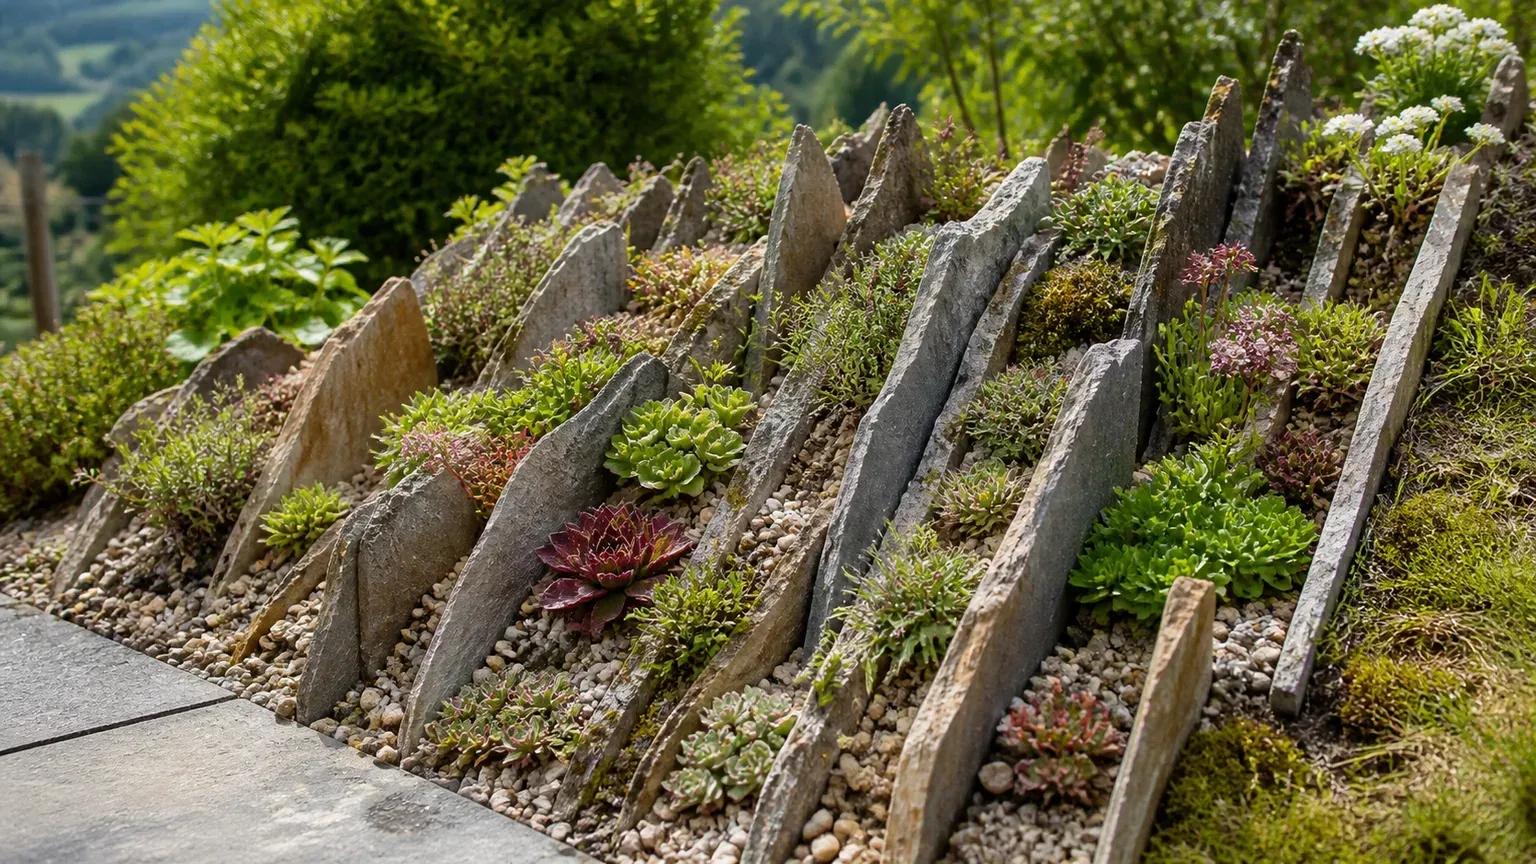
In a naturalistic layout, larger keystones anchor a few small clusters rather than forming a perfect ring. Fine Gardening’s photo essay on Janet’s rock garden shows how plants rooted in the gaps of a stone wall can soften hard edges and make a small space read as a miniature landscape. That is a useful design idea, but it depends on a wall or crevice with genuine planting space—not a decorative face of rocks placed against a thin layer of soil. (Fine Gardening)
Set the footprint and estimate materials
Measure the area, mark it on the ground, and decide how high the finished feature will rise. A single small bed can be built by hand with manageable stones; a long bank, tall mound, or multi-tiered slope needs a more deliberate structural plan. Keep the shape broad enough to support stable rock placement and planting pockets, but small enough that you can reach weeds and trim plants without climbing on the stonework.
Estimate materials after you have a layout. You will need large structural stones, smaller matching stones for chocking and surface detail, planting mix suited to the plants, and clean gravel or grit for top-dressing. For raised gardens, calculate the soil volume and plan where excess excavated soil will go; do not use chunks of construction debris or unknown fill that could contain contaminants.
If you are hauling stone yourself, ask the supplier about load weight, unloading access, and whether the delivery truck can reach the site without crossing a septic field or compacting a garden. Buying all the stone in one local type and then selecting the most useful sizes is more reliable than buying a few attractive pieces and discovering that you cannot complete the structure consistently.
Correct drainage problems before building
Drainage is about where water moves, how quickly it moves, and whether roots get air—not about adding as much gravel as possible. A shallow rock layer under clay can become a sump: water passes through the loose fill, then stalls at the denser soil below. A raised rock garden needs a route for excess water to leave, and an in-ground rockery needs a soil profile that does not stay saturated.
For a compacted patch, wait until the soil is dry enough to work, loosen the compacted layer, and incorporate suitable organic matter into the root zone rather than mixing a small amount of sand into heavy clay. Colorado State University Extension explains that organic matter can improve soil structure by helping clay particles form larger aggregates, while also increasing water-holding capacity in very coarse sandy soils. The goal is a stable, aerated root zone, not a uniformly dry bed. (Colorado State University Extension)
If water collects because the site is low or the subsoil is impermeable, raise the planting area or correct the grade only when you can direct runoff to a safe outlet. A French drain or retaining structure is not a casual rock-garden accessory; it has to be designed for the actual water source and slope. If standing water is persistent or drainage work affects a building, get site-specific help before planting.
Prepare the base and soil mix
Remove sod, roots, and persistent weeds from the entire footprint before placing stones. Pulling perennial weeds after the rocks are set is slow work, and a few buried rhizomes can spread through every soil pocket. If tree roots dominate the area, consider shifting the site or choosing plants that can cope with competition instead of cutting major roots to make room.
There is no universal “rock garden soil.” The RHS gives a useful starting mix for many alpines: one part loam, one part horticultural grit, and one part leaf mold or coir, adjusted for the plant. That is a recipe to adapt, not a mandatory formula for every climate or species. Plants that need a bit more moisture will not thrive in the same pocket as a plant that rots when wet; use a small number of clearly different pockets rather than blending every requirement into one compromise. (RHS)
For a raised structure, a coarse rubble or gravel base can help form a firm foundation and improve drainage when it is designed with the surrounding soil and outlet in mind. The RHS describes a coarse base in its rockery construction guidance, but that does not mean every garden should be lined with plastic or built over a deep rubble trench. Avoid continuous weed fabric under a planted bed: the plants need access to the soil profile, and fabric can complicate future changes. Use a permeable, stable structure and put gravel on the surface where it has a clear role.
Place large stones safely and naturally
Set the largest stones first. Dig a shallow cradle for each one, place its broadest stable face down, and bury a substantial portion—about one-third is a useful starting point for ordinary rockery stones. Turn stones so their natural grain or strata run in a consistent direction, and tilt slabs slightly back into the bed rather than toward the edge. Colorado State University Extension also recommends embedding rocks and using their placement to shape soil pockets and reduce erosion. (Colorado State University Extension)
Test every stone before you move on: push from several directions, check whether it rocks, and add small, stable chocking stones underneath if needed. Do not wedge loose stones where they can roll out onto a path. In a layered slope, stagger joints so the stones interlock, and avoid stacking a vertical wall unless it is engineered as a retaining structure.
Use the largest pieces as visual anchors, then repeat smaller stones near them. Leave gaps irregularly, not in evenly spaced rows, and avoid outlining the entire garden with an identical border that makes the bed look like a ring of rocks. Keep natural lichens and moss facing outward when present; scraping them off removes part of the stone’s existing character.
Create planting pockets and stabilize the stones
After the keystones are stable, add the next stones and work soil into the spaces as you go. This prevents hidden voids from collapsing later and lets you shape pockets that fit the roots of the planned plants. A good pocket is deep enough to hold the root ball and surrounding mix, but open enough that rainwater can drain through rather than collecting behind a slab.
Compact the backfill gently with your fingers or a trowel; do not stomp it into a dense plug. On a slope, turn each planting pocket slightly uphill so it catches some rainfall without becoming a basin. Place a few small stones at the lower edge of a pocket to hold soil in place, but leave a drainage gap so water can escape. If soil is already washing through, reduce the exposed flow path and stabilize the outlet rather than repeatedly adding loose topsoil.
A well-built rockery is more than a wall with plants stuck in front. The spaces between stones should create different depths, exposures, and moisture levels. The RHS describes stone placement and planting crevices as the core of a rock garden, and the practical example from Fine Gardening demonstrates how even a wall can support small plants when it is built with those pockets in mind. (RHS; Fine Gardening)
Choose plants by climate, exposure, and stone chemistry
Begin with the environment each planting pocket offers, then look for plants sold for your region. Many classic rock-garden plants are low-growing, compact perennials that tolerate excellent drainage, but “alpine” does not automatically mean suitable for every yard. A plant adapted to cool mountain conditions may struggle in humid summer heat, while a desert succulent may fail through a wet freeze-thaw winter.
For a sunny, sharply drained bed, consider compact sedums, hens-and-chicks, creeping thyme, sea thrift, rock cress, creeping phlox, and regionally hardy ice plants. For part shade, consider small bellflowers, some heucheras, woodland stonecrop, or miniature ferns where the pocket retains more moisture. These are starting points, not universal prescriptions: check mature size, winter hardiness, soil pH, and whether a species spreads aggressively in your region. Colorado State University Extension’s plant table sorts choices by exposure, soil, bloom, and habit, which is more useful than selecting only by flower color. (Colorado State University Extension)
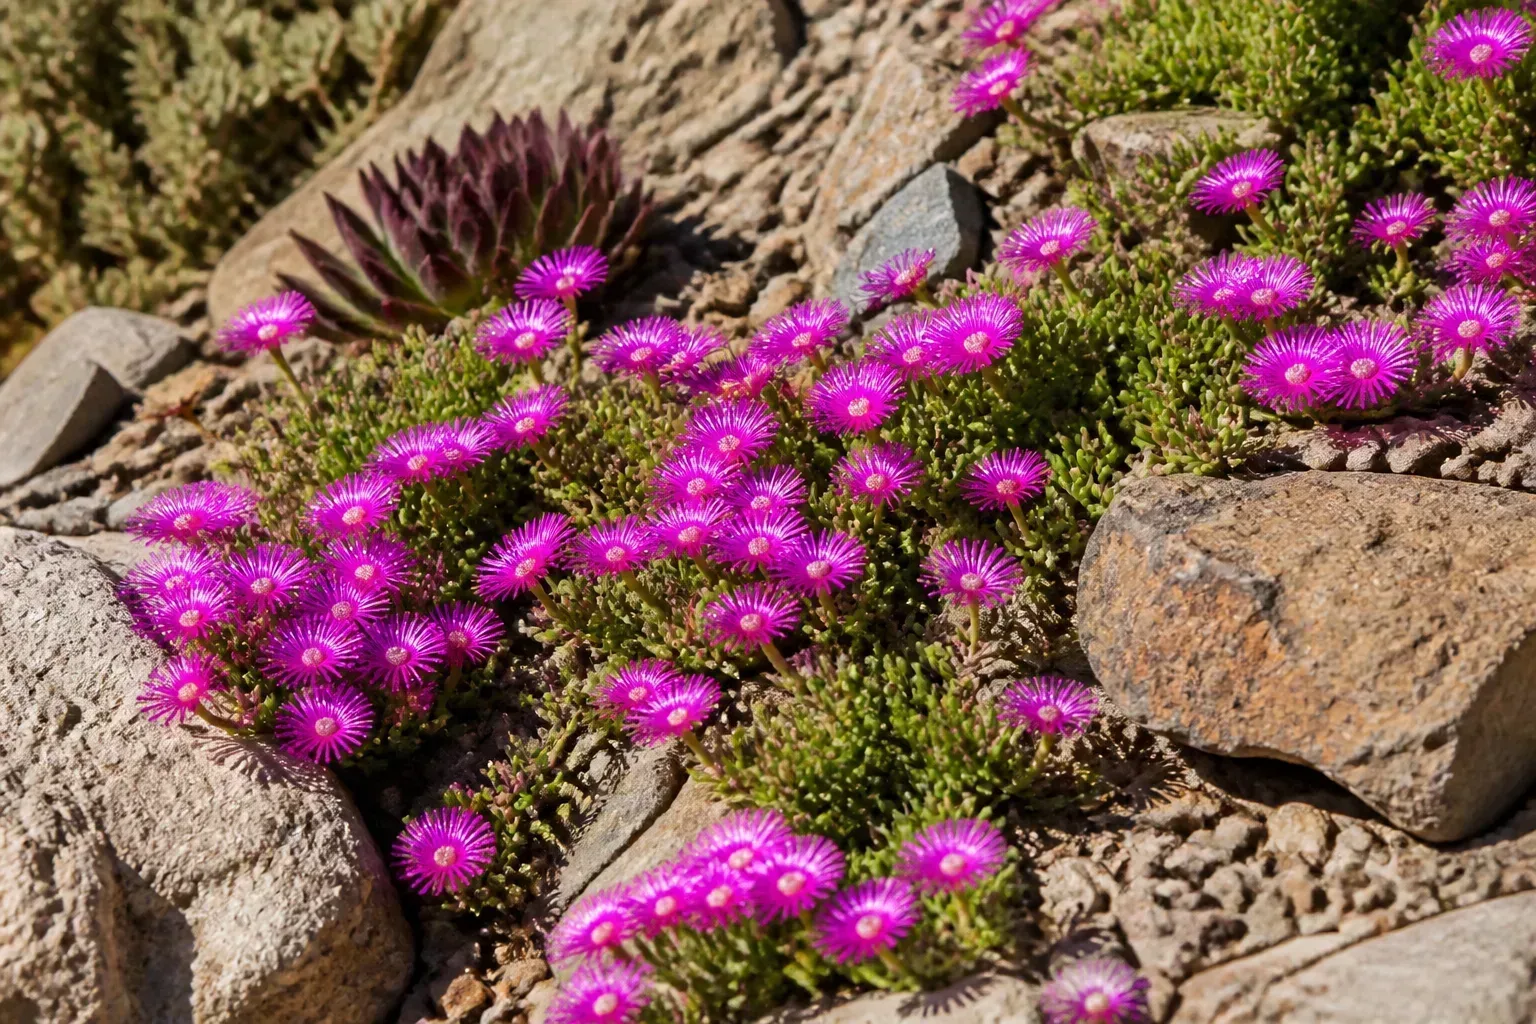
Match neighbors by their water needs. A drought-tolerant mat and a moisture-loving fern may both be described as “rock garden plants,” but they should not share a tiny crevice that receives the same irrigation. Use stone faces and pocket depth to separate them: hot, exposed ledges for dry-site plants; deeper or north-facing pockets for plants that prefer cooler conditions.
Avoid choosing a plant solely because it is small at the nursery. Ask how wide it spreads, whether it self-seeds, and how quickly it can cover neighboring plants. A compact, slow-growing plant helps preserve the visible stonework; a vigorous groundcover can be useful at an edge but may swallow the crevices and become difficult to edit.
Arrange plants for scale and seasonal interest
Arrange every plant in its pot before planting. Set taller clumps toward the back or center of an island bed, low mats along the front, and a few trailing plants where they can soften a stone edge without covering an important path or drain. Repeat a small number of species in more than one pocket; repeating forms usually looks calmer and more natural than using one of everything.
Use a simple height plan: a few structural plants, a middle layer of compact clumps, and low groundcovers that knit selected gaps together. Leave open stone between groups. If every inch is filled on day one, the garden will become crowded as roots spread and will lose the contrast that makes a rockery legible.
Think in bloom sequence as well as height. Small spring bulbs can begin the season, followed by spring flowering mats, summer cushions, and late-season sedums or grasses. Add evergreens or durable foliage for winter structure, but keep leaf-falling shrubs away from tiny crevices if you cannot clear debris easily. A small garden does not need flowers every week; a strong pattern of leaf shape, stone, and a few bloom windows can carry it.
Plant at the right depth
Plant in spring in climates with cold or wet winters so roots have time to settle before the harsh season. In mild regions, fall planting can work if the soil drains freely and the plants have time to establish. Avoid planting during heat waves, drought restrictions, or periods when the bed is being rebuilt and stones may still shift.
Water each nursery pot before planting and place it in its intended pocket while still in the container. Confirm that its crown will sit at the same level as it did in the pot, with the root ball fully covered but the stem base not buried. Tease circling roots gently, set the plant, and backfill with the matching mix. Keep fine grit or gravel away from delicate crowns if it tends to trap moisture against them.
Water the pocket after planting to settle soil around roots, then check whether the water drains out as expected. If it runs straight off, reshape the pocket or water in smaller passes. If it remains pooled, pull the plant temporarily and correct the pocket before roots sit in waterlogged soil. The RHS similarly recommends setting plants in position before planting and firming the roots into a suitable, free-draining mix. (RHS rock-garden guidance)
Add gravel mulch and water carefully
A thin top-dressing of clean gravel or horticultural grit can reduce soil splash, show off the stone, and help keep some crowns from sitting against wet compost. Use a material that matches the bed visually and is small enough not to bury low plants. Gravel mulch is not a substitute for weed removal or drainage, and a thick layer can make it harder to inspect plant crowns and pull seedlings.
Water new plants according to their root-ball size and weather rather than a fixed calendar. During the first growing season, check moisture several inches into each pocket; water deeply when the root zone is dry, then allow it to drain. Shallow daily sprinkling encourages roots to stay near the surface and can keep crowns constantly damp.
Once established, many rock-garden plants need less frequent irrigation than typical bedding plants, but no single schedule fits every climate. A heat wave, shallow pocket, or roof overhang can dry a small root zone rapidly. Conversely, watering on an automatic lawn schedule can rot plants that prefer dry intervals. Group plants with similar needs and use separate irrigation zones if the rest of the yard is watered regularly.
Keep weeds and runoff manageable
Weed while seedlings are small, before their roots weave through mats or stone cracks. Pull after rain when the soil releases roots easily, and use a narrow tool for weeds lodged between stones. Keep a simple record of plants that self-seed or run; remove unwanted seedlings while the parent plants are still small enough to manage.
Inspect the garden after a heavy rain, especially the first few storms. Look for soil deposited below the bed, water cutting a channel through a pocket, stones that have shifted, or a puddle that remains after surrounding ground drains. These are design signals: repair a loose stone, alter the outlet, or rebuild a pocket before roots are damaged.
Keep leaf litter from accumulating around evergreen rosettes and small cushions, where wet debris can smother crowns. Trim flowering mats after bloom only if the species benefits from it, and remove dead growth before it mats over gravel. Avoid heavy feeding; too much rich fertilizer can push soft, oversized growth that quickly hides the structure.
Diagnose common rock garden failures
Plants rot at the crown: Check for a low pocket, fine mulch packed against the base, or a blocked drainage path. Lift the plant, remove saturated mix, and replant higher in a deeper, freer-draining pocket if the species is otherwise suited to the site. Do not simply add more gravel around a plant that is already sitting in a water-filled hole.
Soil washes out after storms: The runoff may be entering from above, flowing too quickly across the surface, or leaving through a wide gap. Slow or redirect the incoming water safely; then add stable small stones to narrow the flow path and refill with a mix that binds without becoming dense. If the slope is steep or eroding beyond the bed, ask a landscape professional about grading and stabilization.
Plants look scorched despite regular watering: Stone can reflect and hold heat, and a shallow root pocket dries faster than nearby soil. Move heat-sensitive plants to an east-facing or partially shaded pocket, enlarge the root zone, or choose a plant adapted to the exposure. Watering more often may temporarily mask the mismatch without fixing it.
The garden looks like a rock pile: Too many small stones can bury the structure, while too few plants leave disconnected bare ground. Re-group stones around a few larger anchors, repeat a handful of plant forms, and leave deliberate open gaps. A few seasons of growth should soften the arrangement, but it cannot correct unstable stonework or a bed with no planting depth.
Build a small rock garden in a trough or raised bed
A trough is a practical choice when the ground is unsuitable or the garden is tiny. Use a stable container with generous drainage holes, cover holes only enough to keep mix from escaping, and fill with a gritty medium suited to the selected plants. Arrange small stones so they create shallow and deep pockets, rather than covering the whole surface with decorative rock.
For a raised bed, use a sturdy frame or natural stone edging that will resist soil pressure and water. Make sure excess water can leave through the base or a planned outlet; do not place an impermeable liner beneath a planted rockery unless the container design includes drainage. A raised bed warms and dries faster than the ground around it, so check moisture during hot weather and choose plants for the container’s exposure.
Keep the plant palette compact. Three to five compatible species repeated in a small trough will usually read more clearly than a miniature version of a large landscape. The RHS notes sinks and troughs as useful settings for small alpine landscapes; container gardening also lets you separate plants with different drainage or soil preferences. (RHS trough gardening)
Know when to hire help and where to save
Save money by using local stone, starting with a modest footprint, and repeating a short plant list. Salvaged stone can be a good option if you know what it is and can transport it safely. Spend more attention on the structure and soil preparation than on a large number of unusual plants; a well-positioned stone and a compatible, locally hardy groundcover will often outperform a crowded collection.
Hire help for heavy boulders, steep slopes, retaining walls, drainage outlets near buildings, or sites where soil movement could affect paths and foundations. A rock garden that changes the direction of water or holds back a bank has structural and drainage implications beyond plant selection. Professionals can also help assess local stone, equipment access, and the load a slope or wall can safely support.
If you build by hand, work in small lifts and test stability after each layer. Keep people out of the fall path of moving stones, use appropriate lifting equipment, and stop if a rock cannot be controlled. A smaller garden built safely will be more successful than a dramatic feature that shifts after its first wet winter.
Conclusion
To build a rock garden that lasts, start by understanding the site: sun, slope, soil texture, runoff, and access. Choose a coherent stone type, establish a stable footprint, solve drainage before planting, and set each large rock so it creates real soil pockets instead of a decorative pile.
Then choose plants for the microclimates you created. Keep their light, moisture, mature spread, and climate tolerance compatible; plant with crowns at the right level; and watch how the garden behaves after rain. The result should look natural, but its success comes from deliberate decisions below the surface—stable stone, aerated roots, and water that has a clear way through and out.



