How to Grow Iceland Poppies: Planting and Care Guide
Learn how to grow Iceland poppies from seed, time sowing for your climate, prevent transplant shock, and extend the cool-season display with care tips.
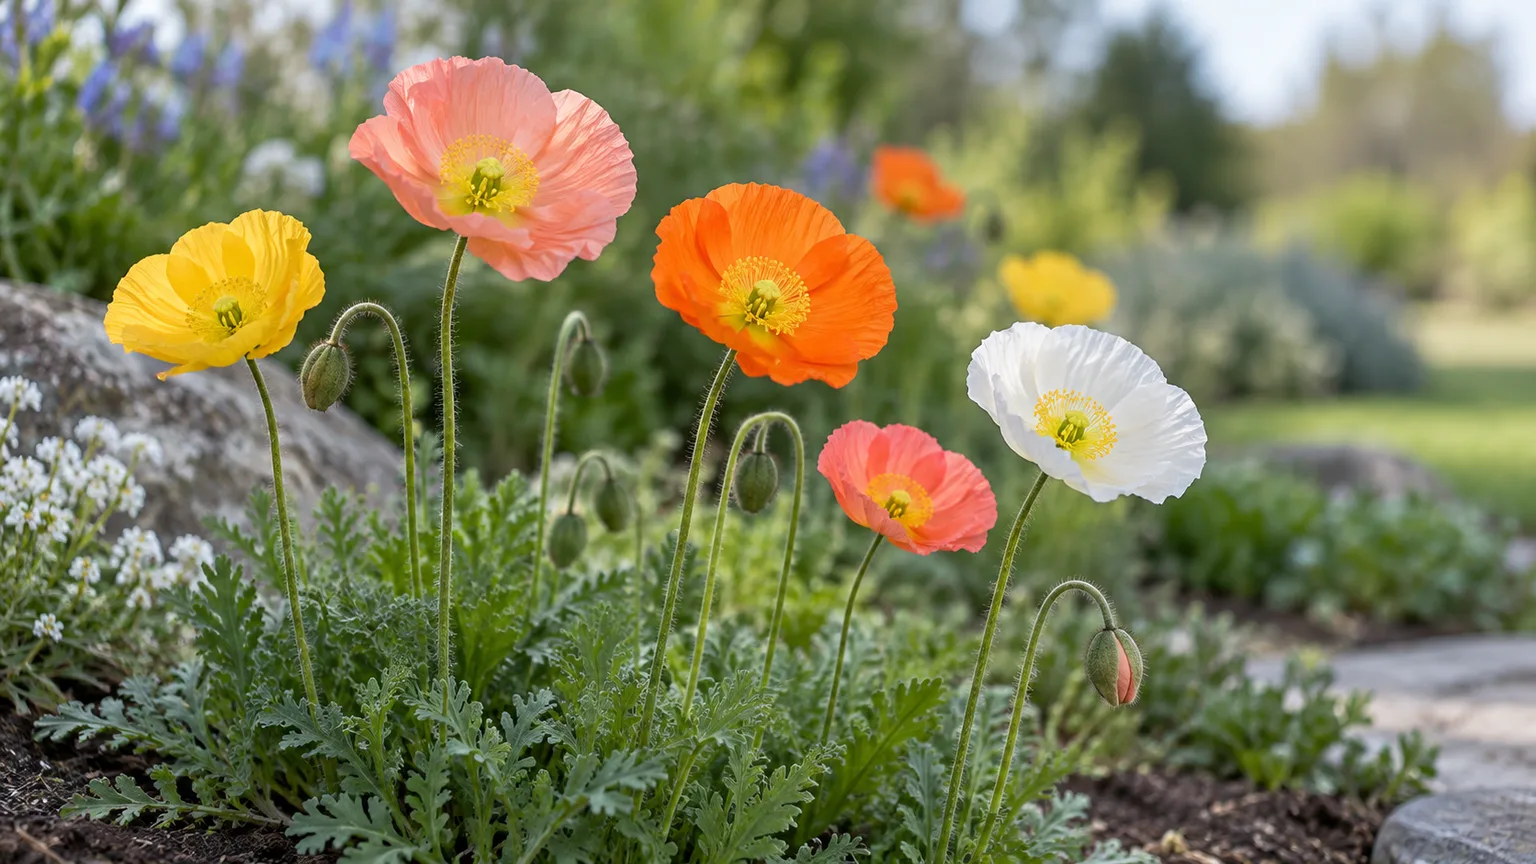
Iceland poppies are at their best when the weather is cool: their silky flowers open above low, gray-green foliage in spring, then fade as heat settles in. The key to growing them well is to plan around that short season and sow them where they can stay, because seedlings dislike having their roots disturbed.
In most gardens, treat them as cool-season flowers that may return for a short time in a favorable climate—not as dependable, long-lived perennials. Sow in spring where winters are severe or wet; sow in fall where winters are mild and spring arrives before summer heat. Give them sun, fertile soil that drains freely, steady moisture while they establish, and room for air to move around the foliage.
Iceland poppy basics: a cool-season, short-lived perennial
The plant most seed packets call Iceland poppy is Papaver nudicaule, also sold as Icelandic or Arctic poppy. Its finely divided leaves form a low basal clump, while individual buds rise on slender, hairy, nearly leafless stems. Flowers are cup-shaped and papery, with colors that can include white, yellow, apricot, orange, pink, and red. Do not confuse it with the larger Oriental poppy or the orange California poppy; those are different species with different growth habits.
You may see a second botanical name. Kew’s Plants of the World Online currently lists Papaver nudicaule as a synonym of Oreomecon nudicaulis, while horticultural references and seed sellers still commonly use Papaver nudicaule. Follow the name on the packet when matching a cultivar, and focus on the species description rather than assuming every poppy care instruction applies to it. (Kew Plants of the World Online, Royal Horticultural Society)
The RHS describes it as a perennial usually grown as an annual, and Johnny’s Selected Seeds likewise notes that its life cycle depends on conditions. In practice, it is most reliable as a cool-season annual or short-lived perennial: it can persist where summers stay cool, but hot or humid weather often ends flowering and may finish the plant. Hardiness-zone ranges differ between references, so use them as a rough winter-survival guide, not a promise of repeat bloom. A poppy that survives winter can still struggle in a hot summer.
Treat ornamental poppies as garden plants, not food. NC State Extension notes that some Papaver species contain alkaloids, but its genus-level page does not establish a species-specific ingestion risk for Iceland poppy. Prevent children and pets from chewing unknown ornamentals, and contact a poison center or veterinarian if ingestion occurs. (NC State Extension)
Choose a sowing window that fits your summer
Temperature matters more than a universal calendar date. Johnny’s grower guidance says Iceland poppies germinate in about seven to twelve days at 65–75°F, while established plants grow best below about 70°F and flower quality drops as temperatures rise. That distinction is useful: seed can start in mild warmth, but seedlings should move promptly into bright, cooler conditions. (Johnny’s Selected Seeds)
Cold-winter climates: sow in early spring
Where winter is long, soil stays wet, or freeze-thaw cycles are harsh, sow outdoors as soon as the bed is workable in early spring. The plants get a cool growing window before summer heat arrives. You can also start a small tray indoors several weeks before planting time, but do it only if you can move seedlings out while they are still compact and their roots have not filled the cells.
Fall sowing can work in colder regions, too, but avoid placing tiny seeds in a spot that remains waterlogged through winter. If the bed is heavy or winter-wet, spring sowing or a raised bed is more dependable than trying to force an autumn schedule.
Mild-winter climates: sow in fall for spring flowers
Where winters are mild and summers heat up early, sow after the hottest weather eases. Seedlings can establish a low rosette through the cool months and flower in spring before heat suppresses new buds. NC State Extension notes that fall plantings of Iceland poppy can flower in spring; Johnny’s also lists fall and winter sowing as options. (NC State Extension, Johnny’s Selected Seeds)
If your climate has both mild winters and a warm, humid spring, sow toward the earlier part of the cool season and expect a concentrated display rather than flowers through summer. This is not a sign that care failed: heat shortens the useful bloom period. The goal is to get roots and foliage established before temperatures climb.
Find a bright site with quick-draining, fertile soil
Choose full sun in a cool-summer garden. In a warmer region, give the plants morning sun and light afternoon shade if that is what keeps the root zone cooler. They tolerate some shade, but too little light can produce fewer flowers and loose stems. The RHS recommends full sun and deep, fertile, well-drained soil; its profile lists chalk, loam, or sand and a broad pH range, so do not adjust soil pH without a test showing a real need. (Royal Horticultural Society)
Drainage is the non-negotiable part. Iceland poppies need moisture during establishment, but roots sitting in saturated soil are vulnerable to decline. If water stands after rain, choose a raised bed or improve drainage across the planting area before sowing. Adding a little compost can improve a poor soil’s structure, but filling a heavy-clay planting hole with rich potting mix can create a water-holding pocket; amend a wider area or plant above grade instead.
Prepare a fine, firm seedbed and remove weeds before sowing. Tiny poppy seedlings are easy to lose among fast-growing weeds, and cultivating close to an established rosette can damage roots. A location that is visible and easy to water gently is more useful than a hidden corner that dries unnoticed.
Grow Iceland poppies from seed
Seeds are very small, so the most common sowing error is burying them too deeply or washing them into a clump. Direct sowing is usually the simplest method because it avoids transplant shock. If you need a head start or want to control spacing, use small cells and move seedlings while they are young rather than keeping them in a tray until they become root-bound.
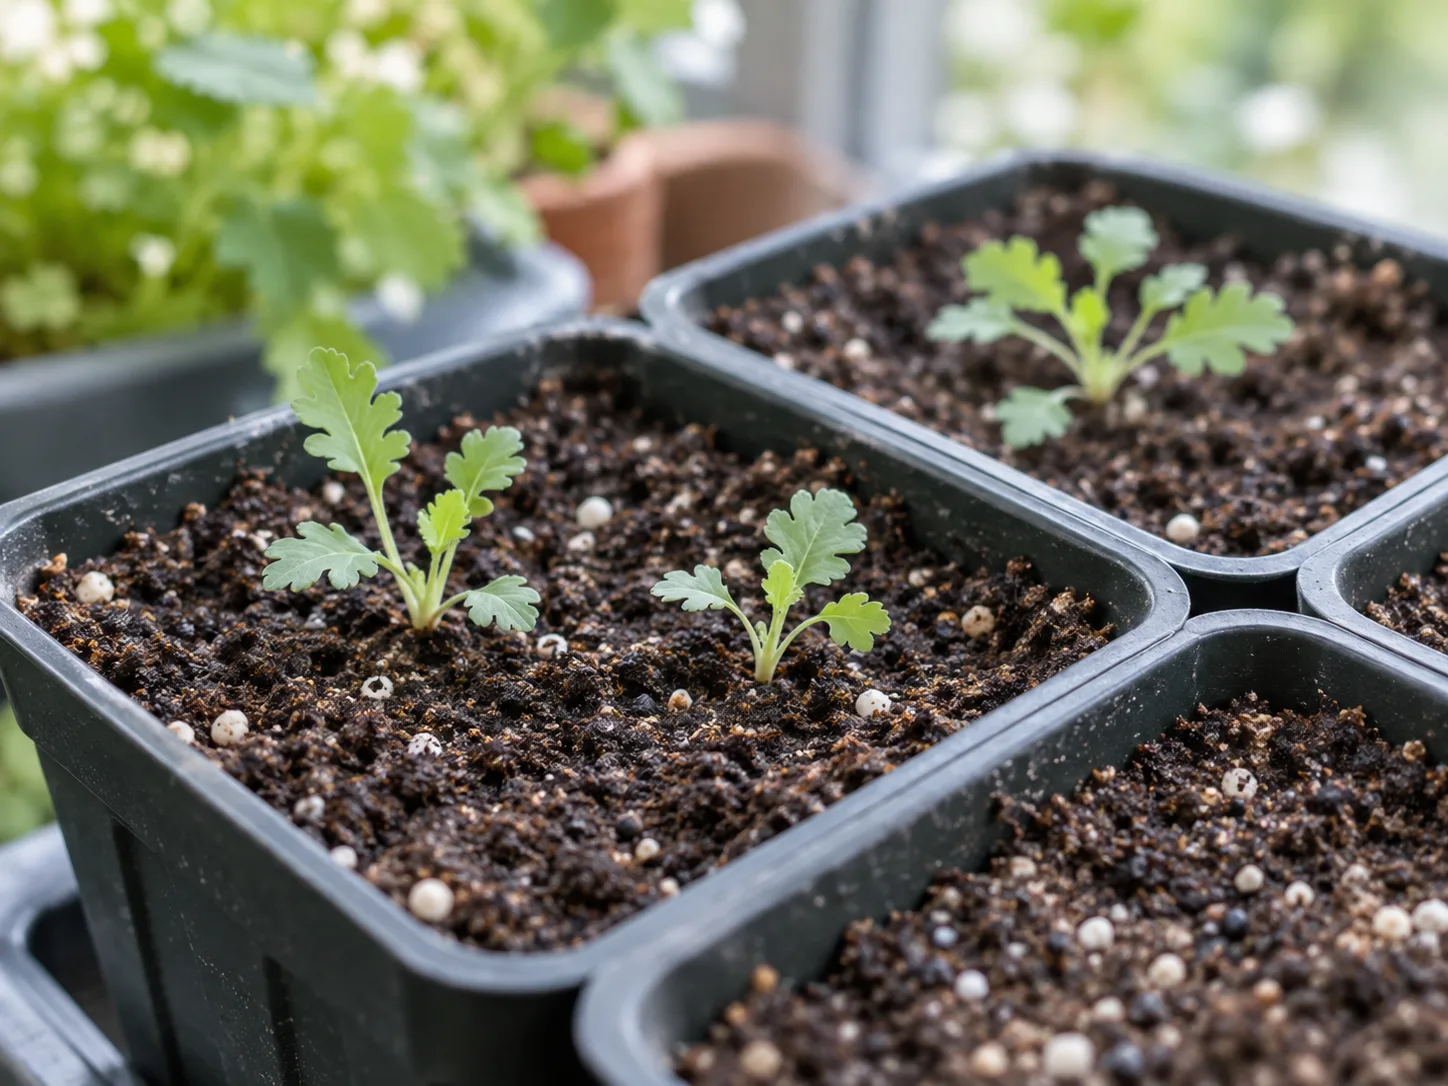
Direct sowing: the simplest route
- Rake the prepared soil until the surface is fine and level, then moisten it before sowing.
- Scatter seeds thinly over the surface. If distributing a pinch is difficult, blend it with a small amount of dry sand so you can see where it lands.
- Press the seed gently onto the soil. Cover it with only a dusting of fine material, if any; a thick layer can prevent emergence.
- Water with a fine rose or mister so the seed stays in place. Keep the surface evenly damp—not sodden—until seedlings appear.
- When seedlings have several leaves, thin crowded patches by snipping extras at soil level, leaving roughly 6–12 inches between plants depending on cultivar and whether you want an airy or fuller display.
The moisture check is simple: the surface should not crust and dry while seed is germinating, but it should not shine with standing water. In a dry spell, use a light, frequent mist rather than one forceful watering that carries seed away. Once plants are established, shift to less frequent, deeper watering.
Starting in trays: use small cells and transplant early
Tray sowing helps when spring is brief, beds are not ready, or slugs and weeds make direct sowing difficult. Johnny’s recommends small-cell trays and very light seed covering; its listed germination range is seven to twelve days at 65–75°F. After germination, give seedlings strong light and cooler air so they do not stretch in a warm room. Bottom-water or mist gently to avoid displacing the seed. (Johnny’s Selected Seeds)
Do not keep seedlings in a warm tray just because they still look small. A flower grower at FluffyFlower emphasizes planting young seedlings directly from their trays and avoiding root damage; that matches the main risk home gardeners face with this crop. Start only as many as you can plant on time, and check cell bottoms often. When roots begin holding the plug together but have not circled densely, harden plants off gradually and set them out. (FluffyFlower)
Transplant without wrecking the root system
Iceland poppies can be transplanted, but they do not reward rough handling. Water the tray beforehand so the plug holds together. Make the planting hole first, then ease out the whole root plug while holding a leaf or the soil—not by pulling the stem. Set it at the same depth, firm the surrounding soil lightly, and water the plug in. Avoid teasing roots apart or shaking soil away.
Plant on a cool, overcast day or in late afternoon, then protect the seedlings from drying wind while they settle. If a plant wilts briefly, keep the root zone evenly moist and shaded during the hottest part of the day rather than flooding it. Persistent wilting in wet soil points to root stress or poor drainage, not a need for more water.
Biodegradable pots can reduce handling, but they are not a guarantee against transplant trouble: roots may still be disturbed at the rim or base. If you use one, set the whole pot into the bed with its rim below the soil surface so it does not wick moisture away from the root ball. Direct sowing remains the lower-risk option when the site is ready.
Space and grow them in beds or containers
The grower spacing range is about 6–12 inches. Use the wider end where spring is damp or plants will be irrigated from above; good air movement helps foliage dry. The closer end can create a fuller patch in a dry, breezy garden, but do not crowd plants until leaves overlap tightly. (Johnny’s Selected Seeds)
Containers work if the pot drains freely and is large enough to hold an even level of moisture without baking quickly. Choose a deep, wide container with open drainage holes, fill it with a quality potting mix, and sow directly into the final pot where possible. In a hot climate, place it where it gets morning sun and afternoon shade; a dark pot on paving can heat faster than a garden bed. Check the mix more often during windy weather, but do not let the pot sit in a full saucer of water.
For a mixed container, combine poppies with plants that also prefer cool weather and moderate moisture. Keep vigorous neighbors from shading the low basal foliage. Once summer heat takes over, remove declining plants and reuse the container for warm-season flowers rather than trying to keep stressed poppies alive with extra fertilizer.
Water evenly and feed lightly
During germination and early growth, prevent the surface from drying out. Once plants have several leaves and roots are established, water when the upper soil begins to dry, then soak the root zone and let excess drain. In-ground plants need less frequent attention after rooting than seedlings; containers dry faster and may need checks every day in wind or sun. The goal is a steady supply of moisture with air still available around roots.
Water at soil level when possible. Wet flowers can be bruised by heavy droplets, and prolonged wet foliage in crowded beds creates conditions that favor fungal problems. A morning watering gives leaves time to dry if they do get wet. If rain has left the bed saturated, skip irrigation and improve drainage rather than following a calendar.
Do not automatically feed every other week. The RHS calls for fertile soil, while Johnny’s recommends moist, well-drained soil; neither requires a universal high-frequency fertilizer schedule. If the bed is already amended and plants have normal gray-green growth, extra feed is unlikely to help. In poor soil, work in mature compost before sowing or use a modest balanced fertilizer according to its label. Avoid high-nitrogen feeding that produces soft foliage at the expense of sturdy flowering stems.
Keep plants cool and air moving
Cool weather is part of the plant’s basic care, not an optional preference. Johnny’s notes that growth and flower quality decline as temperatures rise above the cool range. In a hot-summer garden, sow for a spring finish, protect plants from intense afternoon sun, and do not expect a summer-long display. In a cool coastal or mountain climate, flowering may last longer because nights stay mild. (Johnny’s Selected Seeds)
Humidity is hardest on plants when it comes with warm nights, wet leaves, and stagnant air. Space them so foliage can dry, remove spent or diseased material, and avoid overhead irrigation late in the day. A layer of mulch can conserve soil moisture, but keep it away from the crown and do not use a thick, damp blanket around the rosette.
Deadhead for flowers, or let some set seed
Remove a spent flower stem down near its base if you want the plant to keep producing buds and do not want seedlings scattered around. The RHS recommends cutting plants back after flowering. Deadheading is most useful while the weather is still cool; it cannot force new blooms through sustained heat. Leave a few healthy stems in place if you want to collect seed or see whether plants self-sow. (Royal Horticultural Society)
When seed pods turn dry and brown, collect them before they spill if you want to keep seed in a labeled paper envelope. Seedlings from mixed or named cultivars may not match the parent flower exactly, so save seed for variety rather than a guaranteed color. If you want to prevent volunteers, remove pods while they are still green and firm.
Cut blooms at the right stage
For a vase, cut stems when a bud is just beginning to split and the petals show color, before the flower fully opens. Johnny’s lists a typical vase life of five to seven days and recommends putting stems in water promptly. A flower grower at FluffyFlower reports a longer range when using a particular stem-conditioning method, which illustrates why vase life varies with cultivar, harvest stage, and handling. Treat any number as a guide, not a guarantee. (Johnny’s Selected Seeds, FluffyFlower)
Use clean snips and a clean vase, strip foliage that would sit below the waterline, and place stems in fresh water immediately. If you are growing several plants for cutting, leave enough foliage on each plant for it to continue photosynthesizing. The stems are delicate, so carry them loosely rather than packing them tightly into a bucket.
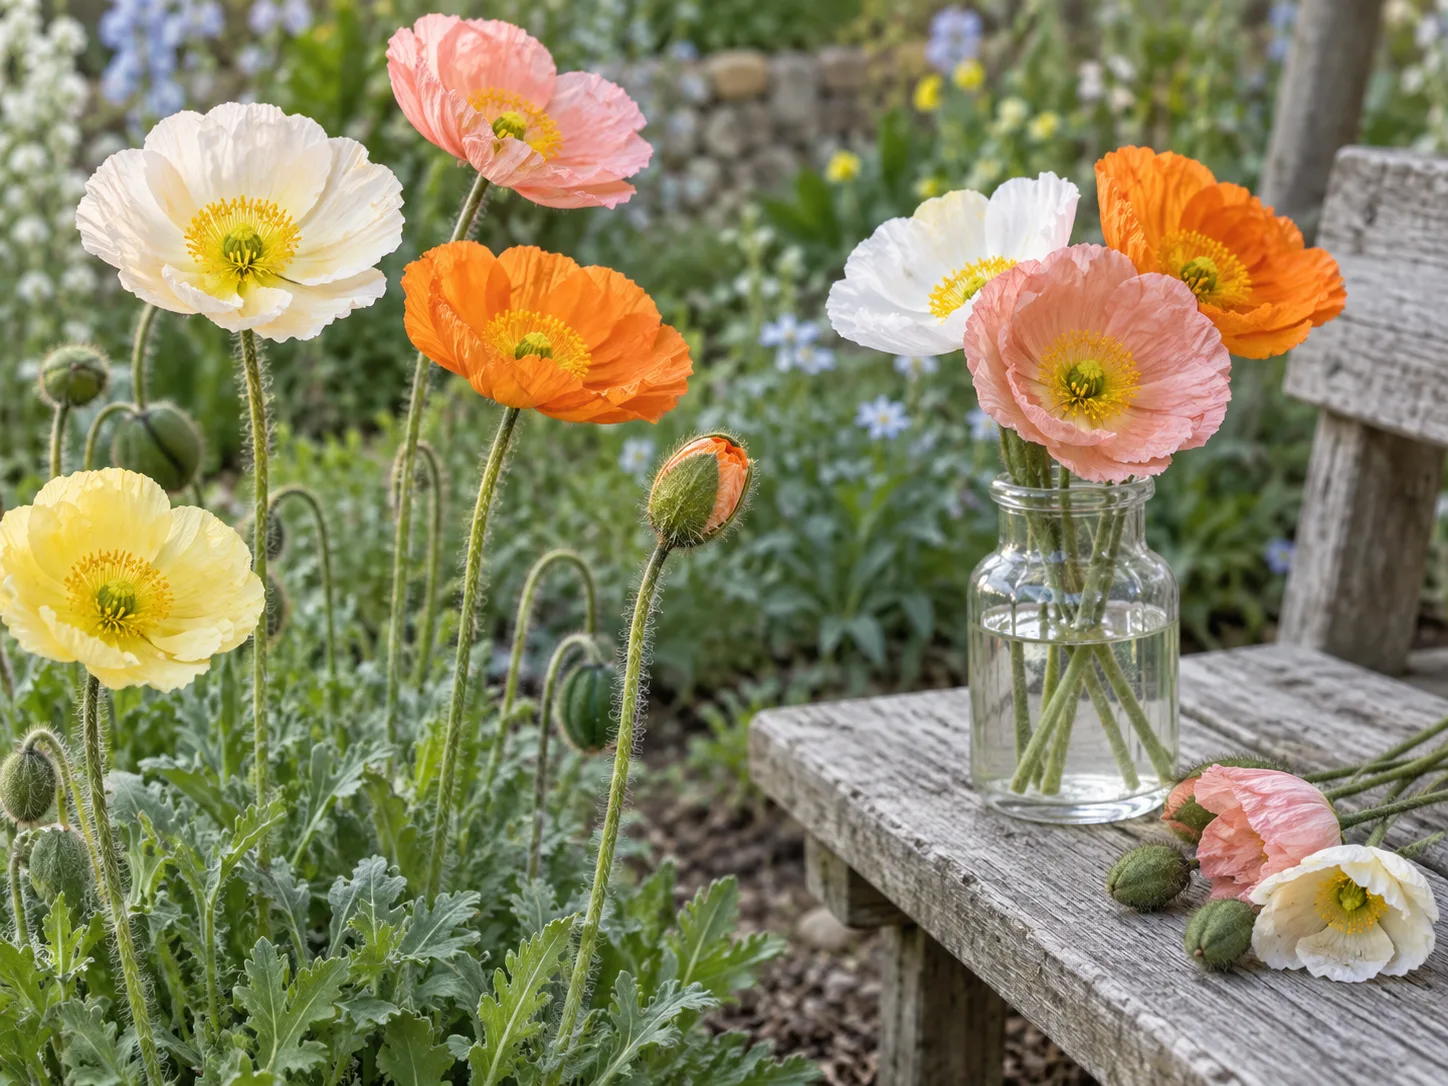
Choose varieties by height, flower color, and use
Seed mixes such as Champagne Bubbles offer a range of colors in one planting, while named series may be sold for a more predictable palette or flower form. The RHS profile describes yellow, orange, reddish, and white flowers; Johnny’s lists plants around 15–20 inches tall and recommends 6–12-inch spacing. Check the current packet for the series’ height and sowing notes because cultivar dimensions and local availability vary. (Royal Horticultural Society, Johnny’s Selected Seeds)
Choose a compact series for a low front border or container, and taller stems if your priority is cutting. Do not buy based on color alone: flowering time still depends on your sowing window and spring temperatures. A mixed packet is useful if you want a naturalized patch and do not mind variable colors; a named cultivar is better when coordinating a particular palette matters.
Troubleshoot poor germination, weak bloom, and disease
Start with the growing conditions you can observe rather than applying fertilizer or fungicide immediately. Check how long the seed has been sown, whether the surface stayed moist, how much light plants receive, whether soil drains after rain, and whether a heat spell coincided with bud drop. Those checks narrow the cause before you disturb the roots or treat the wrong problem.
If seed has not emerged after roughly two weeks under the grower’s recommended temperature range, check that it was not buried deeply, washed to one edge, or allowed to dry. Re-sow a small patch on the surface while conditions are still cool. If seedlings emerge and then collapse, inspect the soil: constantly wet mix, poor airflow, and crowded seedlings can contribute to damping-off. Remove collapsed plants and let the surface breathe between gentle waterings.
Separate heat stress from watering problems
When established plants stop making buds during a warm spell, heat is a likely limit, especially if leaves remain firm and the soil is not bone-dry. Deadheading will not reverse heat stress. Keep the root zone evenly moist, provide temporary afternoon shade if practical, and accept that flowering may be over for the season.
If plants wilt while soil is dry, water deeply and recheck later. If they wilt while soil is wet, do not add more water; inspect drainage and the crown. Yellowing with soft, dark tissue at the base is more concerning for rot than ordinary end-of-season decline. Remove badly affected plants and avoid replanting into the same saturated pocket until drainage improves.
Act early on aphids and mildew
The RHS lists aphids, downy mildews, powdery mildews, fungal wilts, and Verticillium wilt among potential problems. Inspect new growth and leaf undersides for aphids; a small colony can often be knocked off with a gentle stream of water or removed by hand. Avoid crushing delicate buds while treating. (Royal Horticultural Society)
White or gray growth on leaves, distorted foliage, or spreading lesions calls for better spacing, removal of affected material, and drier foliage—not an automatic fungicide application. If the problem continues, identify the disease before choosing a treatment and follow the product label and local rules. A plant with suspected systemic wilt or a rotting crown is usually better removed than repeatedly sprayed. Do not compost diseased material if the pathogen is unknown and your compost pile does not heat reliably.
Conclusion
Grow Iceland poppies as cool-season flowers: sow them in spring where winter is severe or wet, and in fall where mild winters give seedlings time to establish before a hot spring. Surface-sow the tiny seeds, keep them moist until they emerge, give seedlings bright cool conditions, and avoid disturbing roots once they begin to grow.
The rest is a balance: fertile soil that drains quickly, steady but not excessive water, enough space for airflow, and a decision about whether to deadhead or save seed. If heat shortens the display, adjust the next sowing window rather than feeding harder or watering a saturated bed. That climate-first approach gives these delicate poppies their best chance to flower well.