How to Grow and Care for Daylilies
Learn how to grow daylilies with practical advice on light, soil, planting depth, watering, deadheading, division, containers, and common problems.
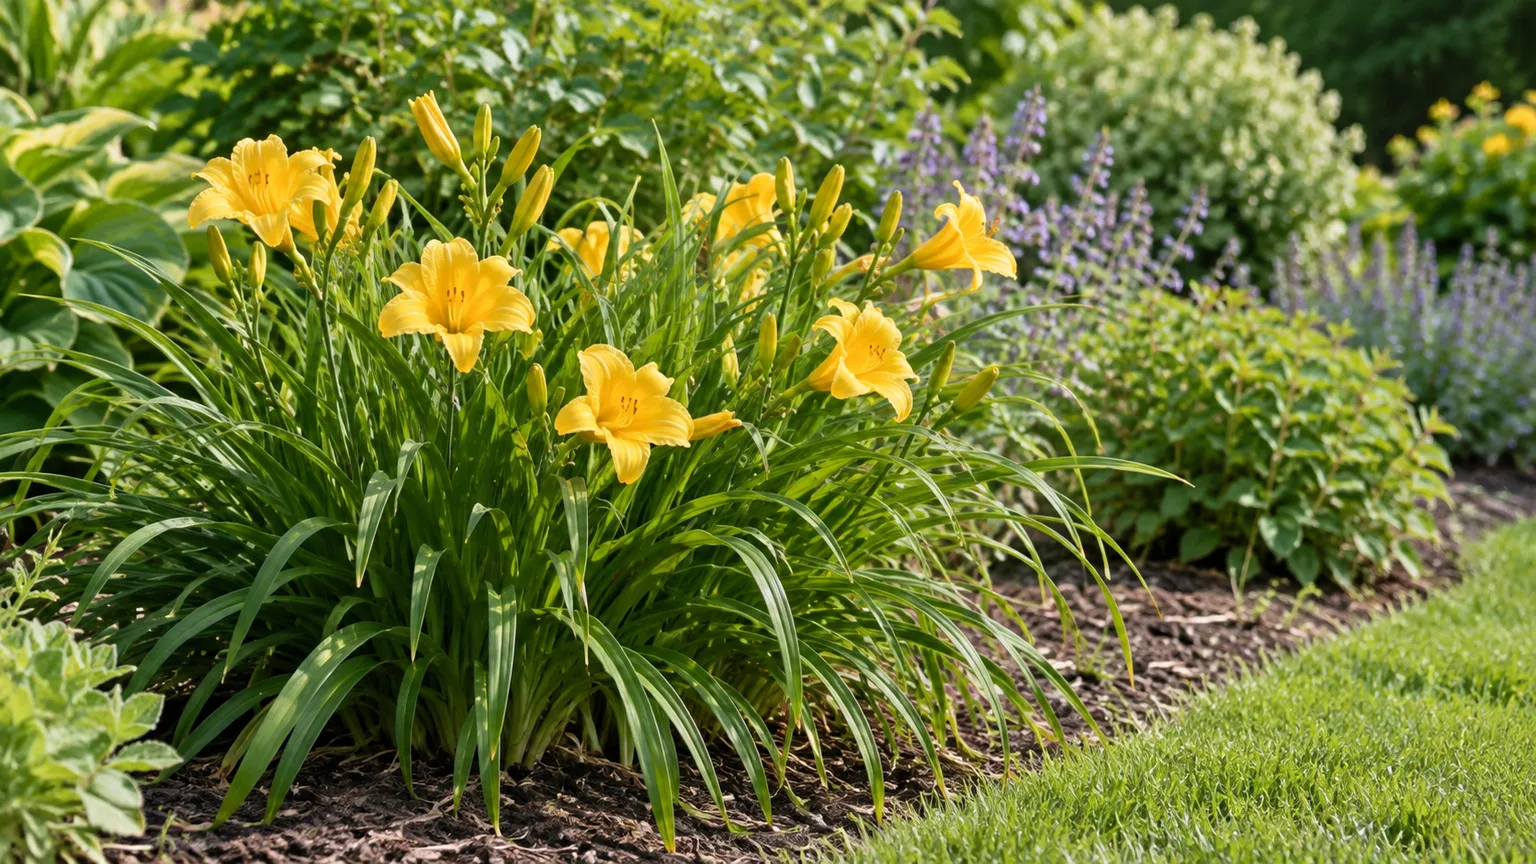
Daylilies are long-lived flowering perennials that reward a good planting site with years of color and relatively little routine work. The key is to give the crown enough light and air, set it at the correct depth, and keep the root zone moist but not waterlogged while the plant establishes and develops flower stalks.
The common name can mislead new gardeners: daylilies are not true lilies, and they do not grow from the scaly bulbs of plants in the genus Lilium. Hemerocallis grows from a crown and fleshy roots, then produces fans of arching leaves and leafless flower stalks called scapes. Each flower lasts about a day, but multiple buds open in sequence, so the whole clump can flower for weeks. NC State Extension’s daylily profile describes its arching, clumping habit and short-lived flowers.
Understand how daylilies grow and flower
The crown is the short, dense junction where leaves meet roots. New fans grow around it over time, gradually enlarging the clump. This is why daylilies should be planted shallowly: burying the crown under several inches of soil can leave a healthy mass of foliage with few or no flowers.
Daylilies are perennials, not bulbs. Their roots store water and help established plants tolerate short dry spells, but drought tolerance is a survival trait rather than a promise of abundant blooms. Plants still need adequate moisture during active growth, especially while scapes lengthen and buds form.
Cultivars vary in height, flower shape, bloom season, fragrance, foliage habit, hardiness, and tendency to rebloom. Some lose their leaves and go dormant in winter; others retain foliage in mild weather. The Royal Horticultural Society’s growing guide notes this range, so check the plant label or supplier profile rather than assuming every daylily behaves alike.
Choose a cultivar that fits your garden
Start with the mature height and spread, then check when the cultivar flowers and whether it is suited to your local winters. A short cultivar such as Stella d’Oro can edge a path or sit at the front of a border; taller varieties work better behind lower plants where their scapes remain visible. Look for a named cultivar if flower color, height, rebloom, or foliage habit matters to your plan.
Bloom season is also a selection decision. Early-, mid-, and late-season cultivars can be combined to extend color more reliably than expecting a single plant to flower without interruption. Reblooming types may produce another flush under favorable conditions, but timing and repeat performance vary with cultivar, climate, water, and plant vigor. “Reblooming” describes potential, not a guarantee of flowers from spring to frost.
Before buying, check whether the cultivar is dormant or evergreen so its winter habit fits your climate. The Royal Horticultural Society’s growing guide notes that most daylilies die back in autumn, while some keep their leaves year-round; follow the cultivar’s own profile rather than assuming one habit fits the whole genus.
Choose a site with useful sun and good drainage
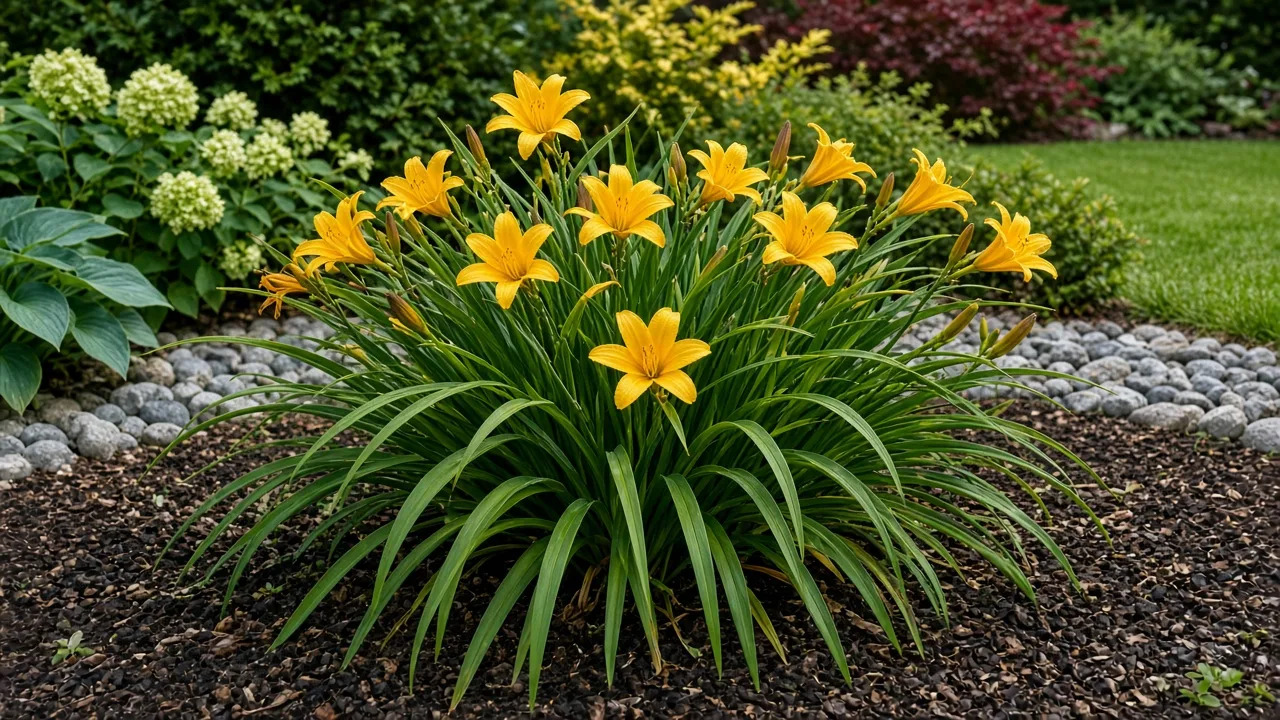
Daylilies flower best in a sunny position with soil that drains after rain. They tolerate a range of soils and some partial shade, but a spot where water sits around the crown for days is a poor trade: roots need oxygen, and persistent saturation raises the risk of rot. Choose a slightly raised bed or improve drainage across the planting area if the site stays wet.
Adjust sunlight for heat and flower color
Aim for about six hours of direct sun a day for dependable flowering. In light shade, plants may remain leafy and alive but set fewer scapes. In very hot regions, afternoon shade can reduce heat stress, especially for dark or richly colored flowers that may fade in intense sun. If your daylily grows well but hardly flowers, observe the site across the day before adding fertilizer; trees and shrubs can cast more shade as they mature.
Airflow matters when foliage stays wet. Avoid wedging clumps tightly between walls or dense plants, particularly in humid climates. A site that gets morning sun and dries after dew or rain is easier to manage than a shaded, stagnant corner.
Improve soil without creating a wet pocket
Daylilies grow in many ordinary garden soils, but fertile loam that holds some moisture and drains freely supports stronger growth. Before planting, loosen compacted soil across the bed and blend in finished compost if the soil is poor or sandy. Avoid filling one small hole with a rich, loose mix surrounded by heavy clay; that can collect water like a basin around the roots.
The RHS growing guide recommends well-drained, fertile soil while noting that daylilies tolerate poorer soil and clay. You do not need a special acidic mix or a pH adjustment unless a soil test or a local growing problem points to one. If water remains on the surface long after rain, solve drainage first rather than trying to compensate with a different fertilizer.
Plant daylilies at the right crown depth
Spring and early fall are practical planting windows in many regions because temperatures are less stressful and roots have time to establish. In colder areas, plant divisions early enough to root before the ground freezes. In hot climates, avoid transplanting during a heat wave if you can wait for cooler weather. Potted plants offer a wider planting window than bare-root divisions, but they still need reliable water during establishment.
Before planting, soak a dry bare-root division briefly and remove any broken or mushy roots. Dig a hole wide enough to spread the roots naturally. Make a low mound in the center, set the crown at or just below the soil surface, and drape the roots down and outward. Backfill, firm gently, and water thoroughly to settle soil around the roots.
For a nursery-grown plant, set the crown at roughly the same depth it was growing in its pot. Do not bury the leaf bases under a thick layer of soil or mulch. A crown planted too deep is easy to miss later because the plant may produce plenty of foliage; if it refuses to flower despite good light, carefully check its depth before assuming that it needs feeding.
Water the new planting slowly so moisture reaches the full root zone. If the soil sinks and exposes roots, add a little more soil without covering the crown. Keep the soil evenly moist while new roots form, but pause irrigation when the bed is already wet.
Space clumps for their mature size
Use the cultivar’s listed mature spread as your guide. Many medium daylilies need roughly 18 to 30 inches between crowns, while compact types can sit closer and large, vigorous clumps need more room. Wider spacing takes longer to fill but improves airflow and delays the point when neighboring crowns compete; closer spacing makes a fuller display sooner but usually means dividing or moving plants earlier.
If you do not know the cultivar, leave enough room to reach between clumps for weeding and deadheading. Do not plant a small division at the same spacing as a permanent mass planting if you want to inspect its growth over the next few seasons. Daylilies expand by adding fans, so the space that looks generous in year one will gradually shrink.
Water for establishment and bud development
Water newly planted daylilies whenever the upper soil begins to dry, adjusting for rain, heat, wind, and soil texture. A deep soak encourages roots to grow outward and downward; frequent splashes that wet only the surface do not. Check the soil a few inches below the mulch rather than watering by calendar alone.
Established clumps can tolerate short dry spells, but flowering is better when they receive steady moisture during active growth. As a starting point, about an inch of combined rain and irrigation per week is useful in warm, dry weather, with more frequent checks for sandy beds and containers. Reduce supplemental water in cool weather or after substantial rain, and never keep the crown sitting in saturated soil. Gardenia’s daylily growing guide also emphasizes moisture while scapes and buds develop rather than a rigid year-round schedule.
Direct water onto the soil when possible, particularly in humid or rainy climates. Wet foliage is not automatically harmful, but repeatedly watering overhead late in the day can leave leaves damp for longer and favor leaf disease. If flower stalks are elongating and buds are swelling during a dry spell, prioritize watering then; established plants need less attention outside active growth.
Feed lightly and mulch without burying the crown
Daylilies are not heavy feeders in reasonably fertile soil. A thin layer of compost in spring may be enough. If you use a balanced garden fertilizer, follow the label and apply modestly; more fertilizer does not correct shade, buried crowns, poor drainage, or overcrowding. Too much nitrogen can push leafy growth while flowering remains weak.
Mulch helps conserve water and suppress weeds. Apply a loose layer of shredded leaves, compost, or bark around the plant, leaving a small clear space around the crown so it does not stay damp or become buried as the mulch settles. Renew mulch when needed rather than piling new material over old layers year after year. The RHS guidance likewise recommends organic mulch while advising gardeners to avoid waterlogged soil.
Make the most of each bloom cycle
An individual daylily flower opens, fades, and closes within about a day. That short life is offset by a succession of buds on each scape and multiple scapes per mature clump. Remove faded flowers if you want a tidier plant or do not want seedpods to develop, but understand what the task can and cannot do: it does not make a non-reblooming cultivar rebloom.
Pinch or snip off each spent flower without removing neighboring unopened buds. Once every bud on a scape has finished, cut the bare stalk near its base. Removing completed scapes improves the plant’s appearance and prevents seed formation when you do not want seedlings. The RHS recommends removing a scape after its flowers have finished; White Flower Farm’s daylily growing advice similarly distinguishes spent blooms from a completed flower stalk.
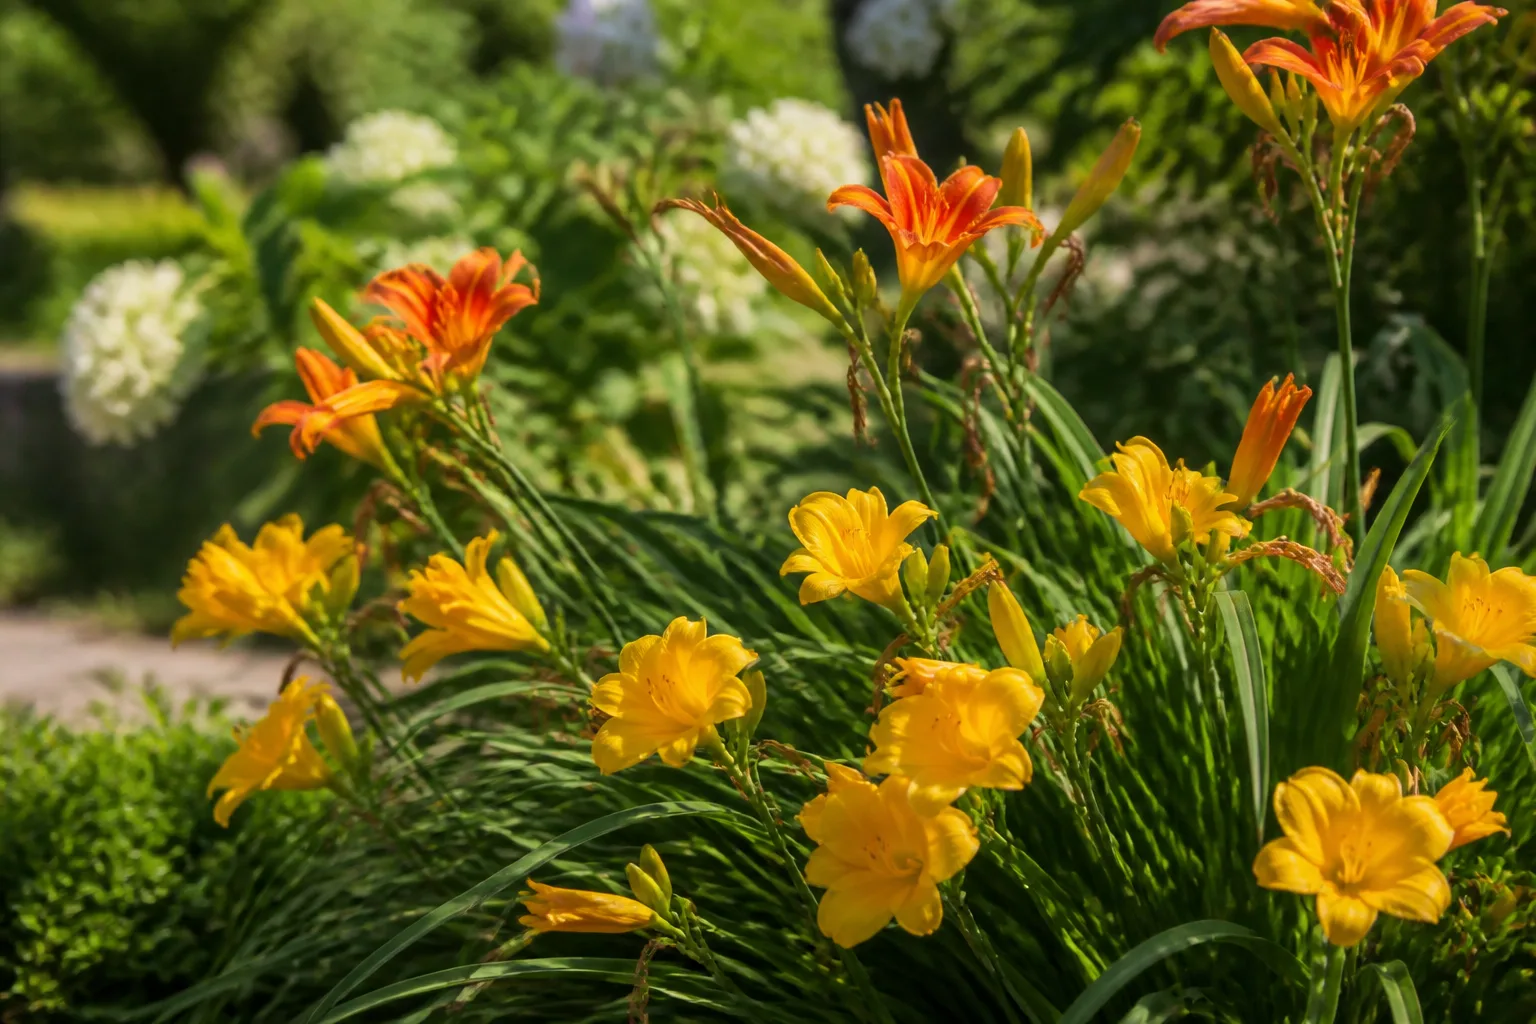
Leave healthy green leaves in place after flowering. They continue to support the crown and roots. Remove individual yellow or damaged leaves for appearance, but do not shear the whole plant simply because its flowers have ended; wait for normal dormancy unless disease requires earlier removal.
Grow daylilies in containers
Choose a compact cultivar and a sturdy pot with several drainage holes. The container should be large and deep enough for the plant’s mature root mass, not just the nursery pot it arrived in. A cramped pot dries quickly, heats up in sun, and leaves little room for the crown to expand; a broad, stable container is usually easier to manage than a shallow bowl.
Use a quality container mix that drains freely, set the crown at the same depth it had in its nursery pot, and water until excess drains from the bottom. During warm weather, check the mix more often than you would in a garden bed because wind and sun dry container roots faster. Empty standing water from a saucer and do not let the pot remain in runoff.
Feed container plants lightly during active growth according to the potting mix and product label. Divide or repot when the clump becomes crowded, water runs straight through a dense root mass, or flowering declines despite suitable light and moisture. In cold climates, protect the pot from repeated deep freezing by moving it to a sheltered unheated location or insulating the container; roots above ground are more exposed than roots in a garden bed. The RHS notes that dwarf cultivars are particularly suitable for containers and need regular watering and feeding during growth.
Divide crowded clumps to restore vigor
Daylilies do not need to be divided on an exact anniversary. Check clumps every few years, then act when the center becomes congested, the plant pushes beyond its allotted space, or flowering weakens despite good sun, moisture, and planting depth. Guidance varies from about three to five years because cultivar vigor and site conditions vary; visible crowding is a more useful cue than a strict calendar. The RHS recommends lifting and dividing established clumps every three or four years.
Divide in early spring as growth begins or in early fall after flowering, when temperatures are moderate and the divisions have time to re-root before severe cold. Avoid splitting during extreme heat or just before the ground freezes. Water the clump the day before if the soil is dry, and choose a cool, cloudy day when possible to reduce stress.
Lift, split, and replant in five steps
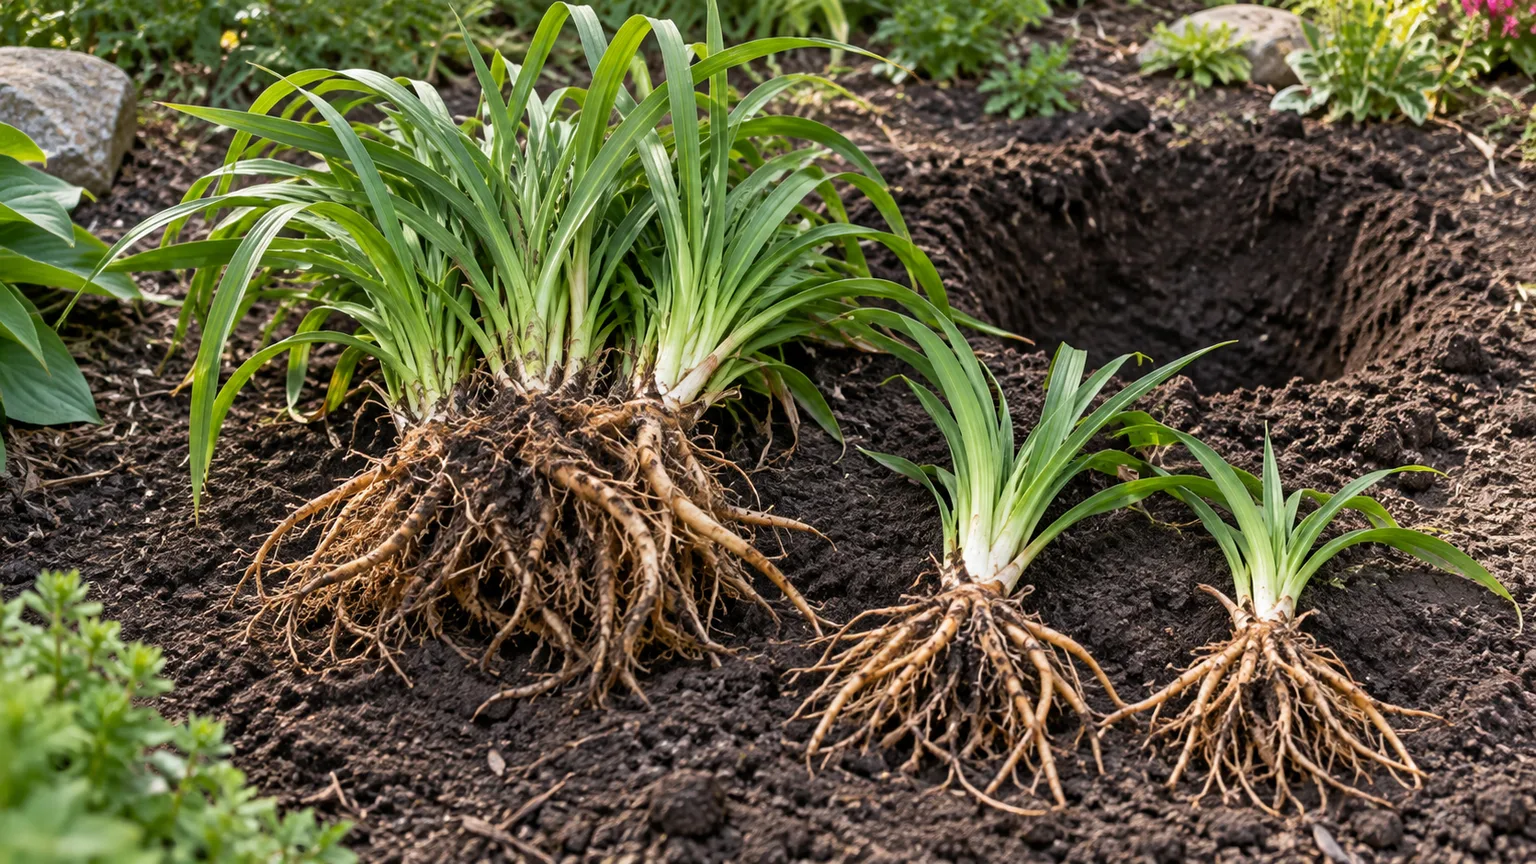
- Prepare the new site first. Loosen the soil and make planting holes before you lift the clump, so roots are not left exposed while you work.
- Lift around the outside. Drive a spade or garden fork around the clump, a few inches beyond the leaves, then lever underneath and raise the plant with as many roots as you can manage.
- Separate healthy fans. Shake off loose soil and tease apart natural groups of leaf fans by hand. Use a clean, sharp knife or spade only where the crown is tightly joined. Keep a healthy crown and roots with each division; discard soft, rotted tissue.
- Replant promptly. Set each division at the original shallow depth, spread its roots, and firm soil around it. Keep the crown visible at the soil line rather than burying it under a deep layer of compost.
- Water and monitor. Soak the soil after planting and keep it evenly moist while the roots re-establish. A division may flower less in its first season as it rebuilds roots, so give it time before judging its long-term performance.
You can divide a small section from the edge of a large clump instead of lifting the whole plant, provided you can remove a sound piece with roots and a growing point. This is useful when you want to contain an otherwise healthy border plant without disturbing the entire bed. Clean soil from tools between plants if you are removing diseased foliage or suspect rot.
Grow daylilies from seed only when variation is acceptable
Division is the reliable way to reproduce a named cultivar. Most garden daylilies are hybrids, and seedlings may differ from the parent in flower color, shape, height, or flowering time. The RHS explains that divisions retain the parent plant’s characteristics, so treat seed-grown plants as an experiment rather than an exact copy of a favorite.
If you want to experiment, let seedpods mature and sow the seeds as a breeding project, understanding that the result is unpredictable and may take more than one season to flower. Remove pods if you would rather keep the plant tidy or direct effort toward the established clump. For a matching replacement or a plant to share, divide the crown instead.
Follow a seasonal daylily care calendar
In spring, remove only dead or damaged foliage, top-dress with compost if the soil needs it, and plant or divide once the ground is workable. Water new plants consistently as they establish. Check that winter mulch has not drifted over the crown, and pull it back if it is smothering emerging fans.
In summer, monitor moisture during scape and bud development, especially in the first year and in containers. Pinch off faded flowers if you want to prevent seedpods, then remove each scape after its buds are finished. Leave healthy leaves alone and watch for distorted buds, streaked foliage, or persistent yellowing rather than treating every blemish as a feeding problem.
In fall, divide crowded clumps early enough to re-root before hard frost. For dormant cultivars, let foliage yellow naturally, then remove dead leaves when they are easy to pull or cut. If you have had leaf streak, clear infected debris and avoid leaving it around the bed; healthy foliage can remain until it dies back.
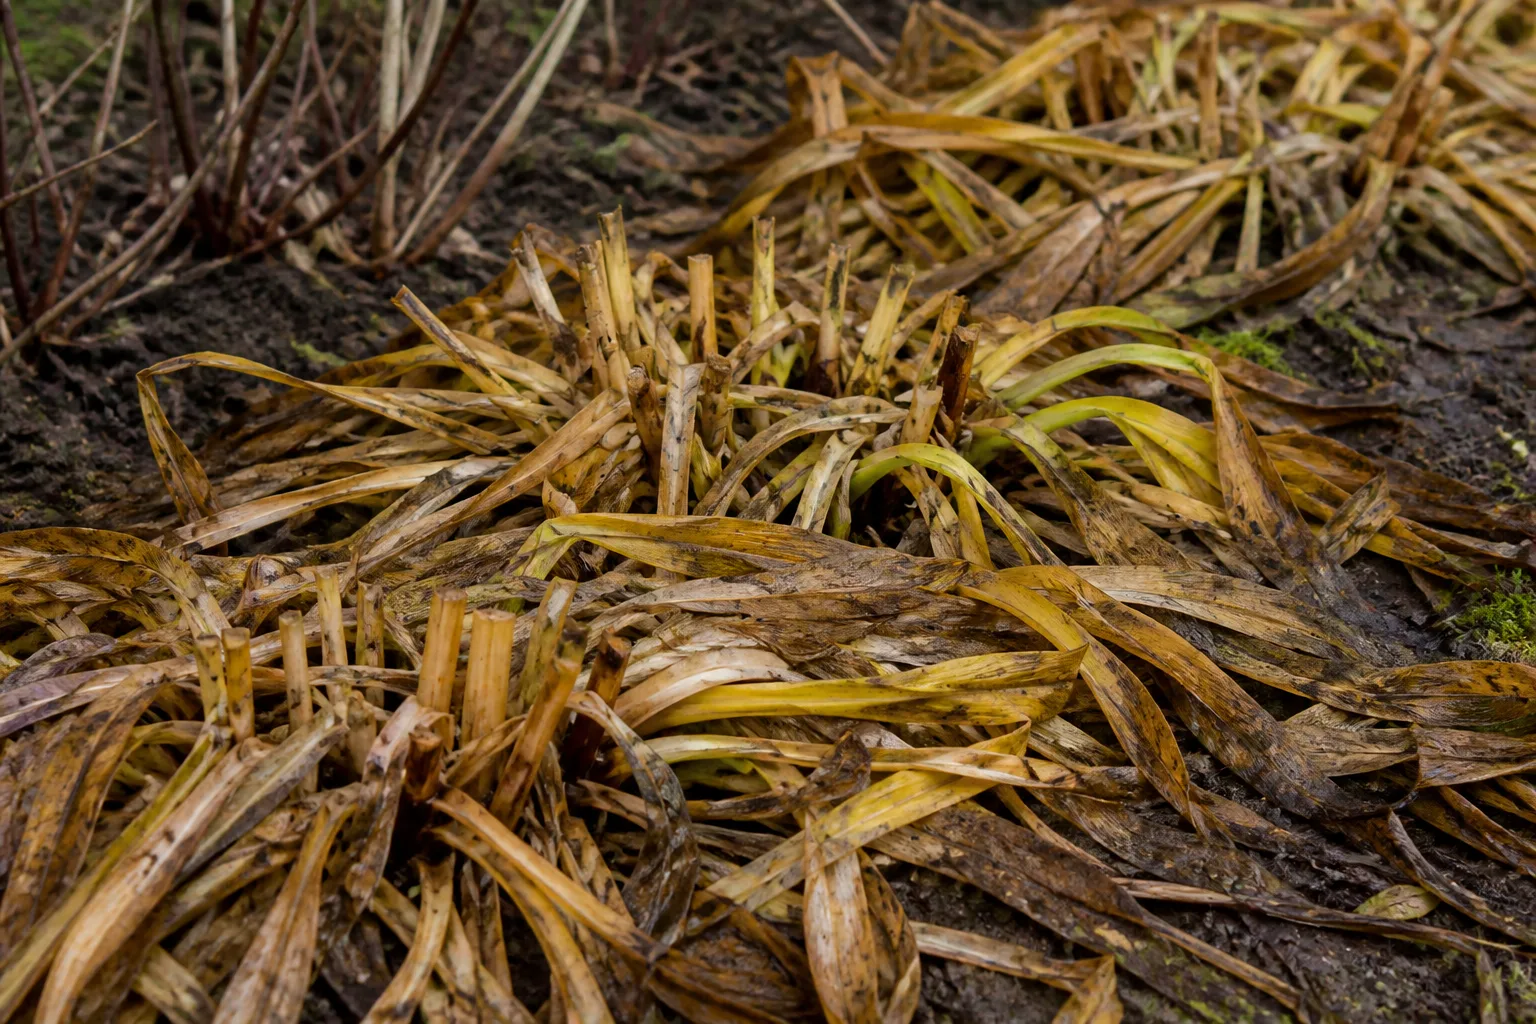
In winter, established daylilies in the ground usually need little attention. A light mulch can help newly divided plants in regions with freeze-thaw heaving, but keep material loose and away from the crown. Evergreen and semi-evergreen cultivars may keep leaves in mild winters, while dormant types die back; follow the cultivar’s habit instead of cutting every plant to the ground on the same date.
Troubleshoot weak flowering and yellow leaves
When a daylily produces leaves but few flowers, check the conditions in this order: direct light, crown depth, clump crowding, moisture during bud formation, and fertilizer history. This sequence starts with the common growing constraints and avoids feeding a plant whose real problem is shade or a buried crown. If a tree has grown over the bed, the light available now may be very different from when you planted the daylily.
| What you see | First check | Practical next step |
|---|---|---|
| Healthy foliage but few scapes | Hours of sun and crown depth | Increase light if practical; expose a buried crown carefully during dormancy |
| Many leaves, little flowering | Nitrogen and crowding | Stop routine high-nitrogen feeding; divide only if the clump is congested |
| Crispy or scorched leaves during heat | Soil moisture and reflected heat | Water deeply when the root zone is dry; consider afternoon shade in extreme heat |
| Broad yellowing after wet weather | Drainage and crown firmness | Pause irrigation, correct standing water, and inspect for soft or damaged tissue |
| A few older leaves yellow late in the season | Normal foliage turnover | Remove only the untidy leaves and let the rest finish naturally |
Recently planted, moved, or divided daylilies may flower less while they re-establish. A plant with a damaged root system can also look thirsty even when soil is wet; adding more water in that situation makes matters worse. Check soil moisture below the surface and inspect whether the crown is firm before changing the watering routine.
Recognize leaf streak and other plant problems
Daylilies are generally robust, but leaf streak is a useful disease to recognize. The University of Wisconsin–Madison Plant Disease Diagnostics Clinic describes symptoms that often start as yellowing at leaf tips and spread along the midvein, followed by brown dead tissue; red-brown flecks with yellow halos can also occur. Warm, wet weather and infected leaf debris help the fungus persist, although not every yellow or brown leaf is leaf streak.
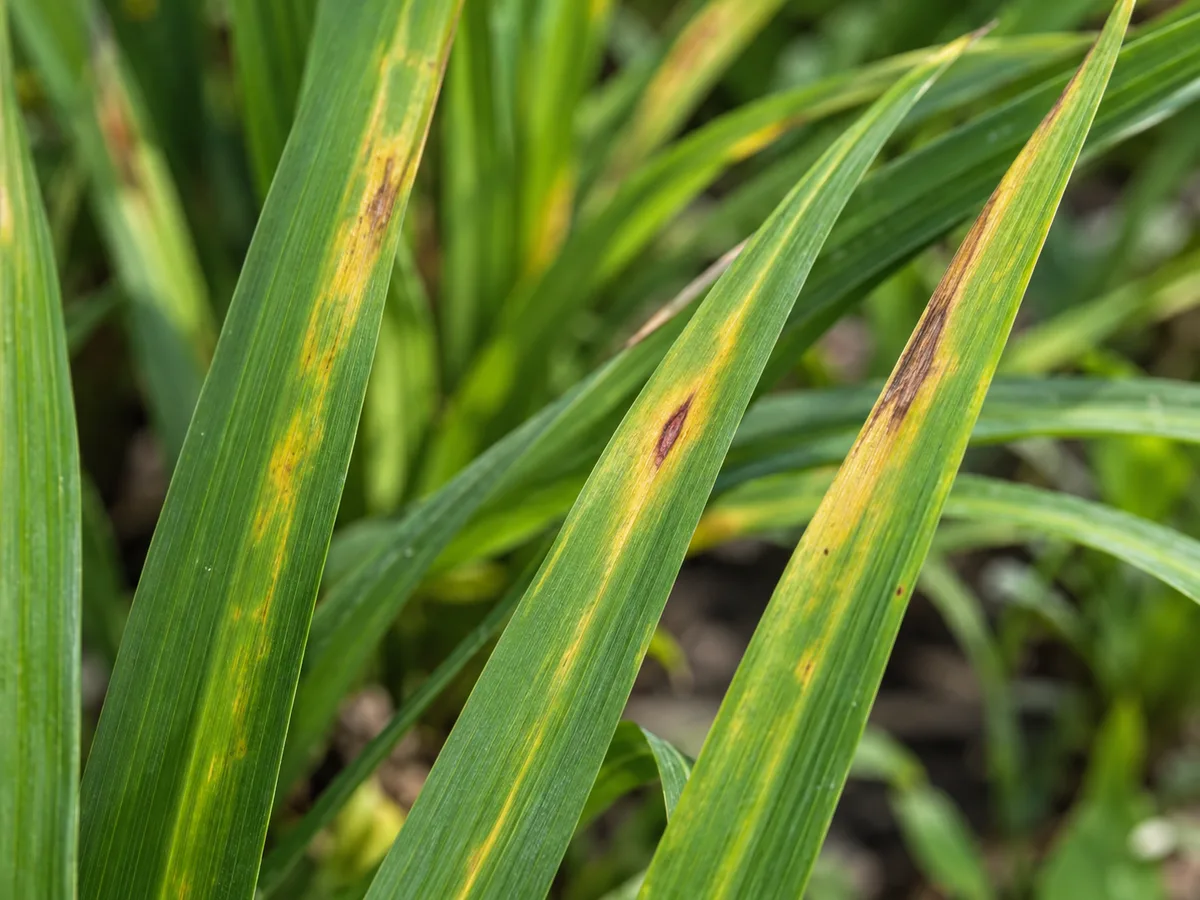
Yellow streaks from leaf tips and small brown lesions can be consistent with daylily leaf streak; other causes can look similar.
If the pattern fits, remove affected leaves as they appear, water at soil level, and avoid handling wet foliage. At the end of the season, clear infected debris from the bed and give crowded clumps more room so leaves dry faster. Wisconsin Extension advises against sprinkler irrigation for affected plants and recommends removing diseased leaves; use its regional plant clinic or a local extension office if symptoms recur or you are unsure of the diagnosis.
Distorted flowers or buds that fail to open can point to a bud-feeding pest such as hemerocallis gall midge in areas where it occurs. Remove affected buds and check nearby scapes, but do not spray merely because a flower looks unusual; cultivar shape, weather damage, and other insects can create similar symptoms. Aphids can often be rinsed off, and slugs or snails can be managed by reducing damp debris around crowns. If a pesticide becomes necessary, identify the pest first and follow the current product label and local rules.
Keep cats away from daylilies
Daylilies are toxic to cats if eaten. The ASPCA lists Hemerocallis as toxic to cats and reports signs that can include vomiting, loss of appetite, lethargy, kidney failure, and death. Keep plants and cut foliage out of reach, and contact a veterinarian or animal poison-control service promptly if a cat chews any part of one; do not wait for symptoms to appear.
This risk is separate from the plant’s name and taxonomy: being different from a true lily does not make a daylily safe for cats. If cats roam through your garden, consider whether you can keep them away from the bed before planting, and dispose of trimmings where pets cannot reach them.
Conclusion
Give daylilies a sunny, well-drained site, set the crown shallowly, and keep new plants evenly moist until roots establish. After that, water during meaningful dry spells and bud development, feed only when soil or growth calls for it, and remove a scape after its final buds finish rather than cutting healthy leaves after bloom.
When flowers decline, check light, planting depth, water, and crowding before reaching for fertilizer. Divide a congested clump in moderate weather, preserve the characteristics of a favorite cultivar by dividing it, and treat patterned leaf damage or cat exposure as a separate issue that needs a specific response. Those small, well-timed decisions are what keep an easy-care daylily productive for years.



