How to Grow and Care for Tradescantia Nanouk Indoors
Learn how to care for Tradescantia Nanouk indoors: find its best light, watering cues, airy soil, pruning rhythm, propagation steps and fixes for fading color.
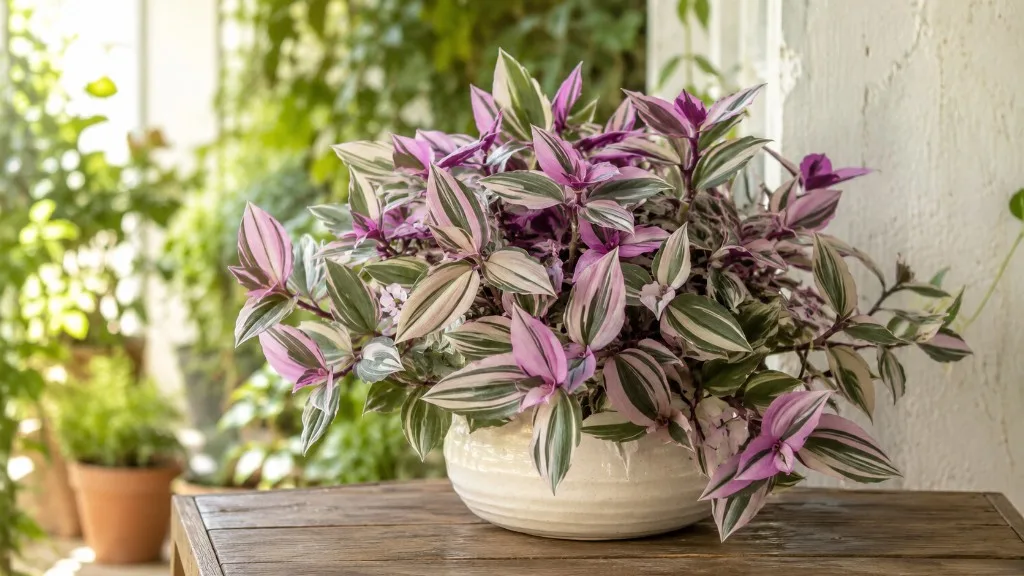
Tradescantia Nanouk is a compact, colorful houseplant with fleshy stems and leaves striped in green, cream, and pink, often with purple undersides. It can stand upright when young, then spread or trail as its stems lengthen. To keep the foliage colorful and the pot full, give it strong indirect light, water when the top layer of mix dries, and pinch the growing tips before bare stems take over.
The useful care rule is to read the plant and the pot together. Pale new leaves and long gaps between leaf pairs suggest a light problem; a limp plant in dry mix needs water, while a limp plant in persistently wet mix may have failing roots. Correct one cause at a time, and judge the result on new growth because old scorch, faded leaves, and stretched stems will not reverse.
Tradescantia Nanouk care at a glance
| Care need | Practical starting point | What to check |
|---|---|---|
| Light | Bright, indirect light near a window; gentle morning sun only after acclimation | New leaves keep pink and cream without bleached patches |
| Water | Water thoroughly when the top inch of mix feels dry; drain runoff | A dry, light pot versus a wet, heavy pot tells you whether wilt is thirst or root trouble |
| Soil | Houseplant mix loosened with perlite or fine bark | Water should pass through, and the center should not stay swampy |
| Temperature | Ordinary warm room conditions; avoid cold drafts and sudden exposure changes | Growth slows in cool, dim months, so the pot dries more slowly |
| Humidity | Average indoor humidity is usually adequate | Move away from hot vents if margins crisp, but check water and light first |
| Feeding | Dilute balanced houseplant fertilizer during active growth | Pause if growth stalls, the plant is stressed, or salts crust the mix |
| Shape | Pinch above a leaf node and root healthy tips | Shorter internodes and fresh side shoots make the pot look fuller |
These are starting points rather than a rigid weekly schedule. A small nursery pot in bright light dries faster than a large cachepot in a cool room, so let the plant’s conditions set the timing.
What Tradescantia Nanouk is—and what makes it different
Nanouk is a named cultivar selected for compact growth and distinctive leaf color, not a wild species with one uniform appearance. The U.S. plant patent PP29,711 identifies it botanically as Tradescantia albiflora ‘Nanouk’ and describes an upright-to-spreading habit, colorful leaves, and successful propagation by terminal cuttings. Shops and older care pages sometimes attach other species labels to the name; the patent is the clearest cultivar-specific identity record, while extension pages for related inch plants are useful context rather than proof that every species behaves identically.
That distinction matters in practice. Nanouk’s showy pink and cream areas make its newest growth a useful light indicator, and its fleshy stems can root at nodes when cuttings touch a moist medium. It is not a cactus: let the surface dry between thorough waterings, but do not leave the whole root ball bone-dry for long periods during warm, active growth. The cultivar can also produce small flowers, but a healthy indoor plant may not bloom; treat it primarily as a foliage plant rather than feeding heavily to force flowers.
Give it bright, filtered light
Place Nanouk where the leaves receive a long stretch of bright ambient daylight without sitting in a hot midday beam. An east-facing window is often an easy starting point. A south- or west-facing window can work if a sheer curtain or a little distance from the glass softens the strongest sun; a dim corner may keep the plant alive but often dulls pink tones and lengthens the stems. The RHS houseplant guidance distinguishes bright, filtered placement from harsh exposure, while NC State Extension’s profile of the related inch plant describes bright indirect light and afternoon protection in full sun.
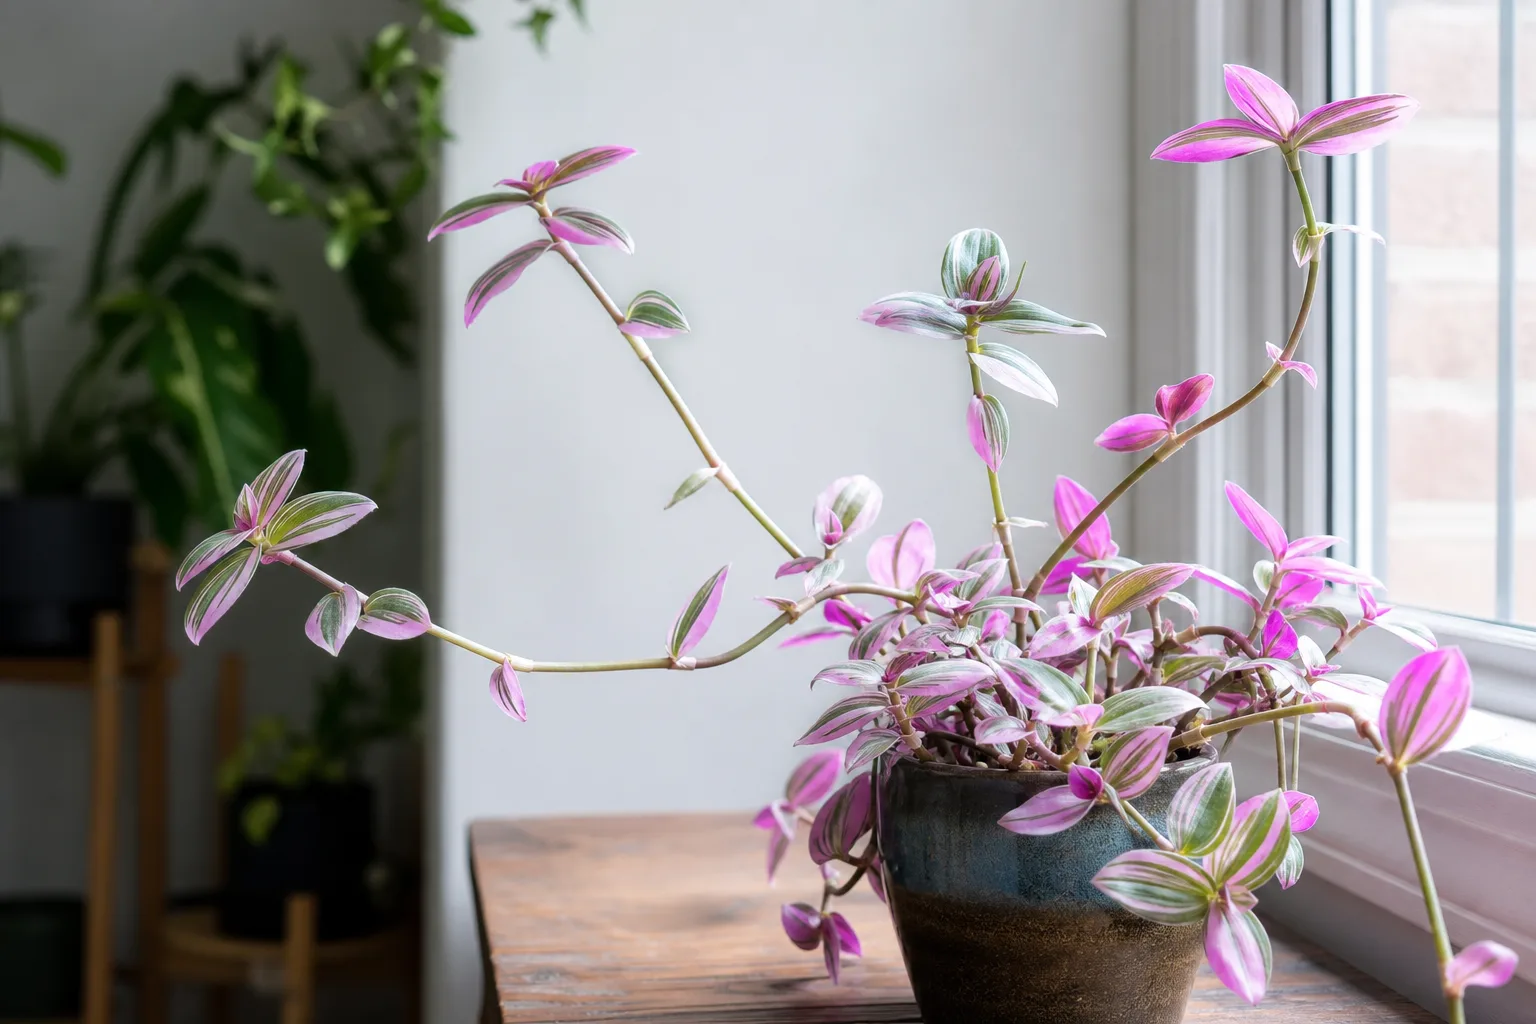
Use new leaves as your test. If they emerge mostly green, smaller than earlier leaves, or separated by long bare sections, move the plant toward a brighter window gradually. If pale pink or cream areas bleach, turn papery, or crisp mainly on the glass-facing side, reduce direct sun or diffuse it. A gradual move over several days is gentler than shifting a plant from a dark shelf straight into afternoon sun. Rotate the pot occasionally so one side does not do all the reaching.
If your brightest room still lacks window light, a full-spectrum grow light can help. Place it above the canopy and begin with a moderate daily run time, then watch new leaves for stretch or bleaching before changing distance or hours. Do not try to repair greened-out foliage by adding fertilizer: the old leaves will not turn pink again, and the new growth needs usable light first.
Water when the top layer dries
Check the mix with a finger or wooden skewer about an inch below the surface. When that layer feels dry, water slowly and thoroughly until excess runs from the drainage holes, then empty the saucer or cachepot. A plant in active growth may reach that point within several days; a cooler, dimmer winter location can take much longer. Petal Republic’s Nanouk care guide and the Missouri Botanical Garden’s indoor watering guidance both favor checking the soil and draining the pot rather than following a fixed calendar.
The top inch is a trigger, not an instruction to dry the whole root ball. Small sips every day can leave the lower mix dry while the surface stays damp, whereas repeated full waterings into a still-heavy pot deprive roots of air. If the surface looks dry but the pot feels heavy, probe a little deeper and wait. If the mix has pulled away from the pot and the container feels very light, give it a complete drink and let it drain.
Nanouk may droop when thirsty, but droop alone does not tell you to water. First feel the soil and lift the pot: dry and light usually points to thirst; wet and heavy with yellowing lower leaves or soft stem bases calls for a pause and root-zone check. Bottom watering can keep water off the foliage, but it is not protection against overwatering—remove the pot once the mix is evenly moist and never leave it standing in runoff.
Choose an airy mix and a pot that drains
Use a clean indoor potting mix that holds some moisture but does not pack into a dense, airless block. A practical starting blend is about three parts general houseplant mix to one part perlite; add a little fine orchid bark if the mix compacts quickly or the container dries unevenly. Happy Houseplants’ Nanouk guide gives a similar airy, well-drained direction, while NC State’s related inch-plant profile also specifies moist but well-drained potting mix. There is no need to chase a narrow pH number if the plant is growing well in a normal commercial mix.
The container needs open drainage holes. Do not add a gravel layer to the bottom as a substitute: Wisconsin Horticulture Extension explains why a gravel layer does not improve drainage, and a decorative cachepot should be emptied after watering. Choose a pot only modestly wider than the root ball when a change is needed. A much larger pot holds unused wet mix around the roots and can make the next watering decision harder, not easier.
If water runs down the sides without wetting the center, the mix may have shrunk or become hydrophobic. Rehydrate it slowly in several passes, then check whether roots have filled the pot or the old mix has broken down. Those clues call for a sensible repot, not extra daily splashes.
Keep temperatures steady; average humidity is enough
Nanouk is happiest in a comfortably warm indoor room. Keep it away from cold window drafts, air-conditioner blasts, and direct heat from radiators or vents; abrupt changes can damage soft leaves even when the thermostat seems acceptable. Happy Houseplants’ cultivar care guide describes a broad indoor comfort range, and the patent’s greenhouse observations show that the plant’s appearance varies with temperature and light intensity. Use that as a reminder that a single temperature figure cannot guarantee the same growth in every home.
Average household humidity is generally adequate. A humidifier may help if indoor air is persistently very dry, but a pebble tray or daily misting is not a substitute for correct watering and can keep the leaf crown unnecessarily wet. If margins brown while stems remain firm and the mix dries normally, check the plant’s distance from heating vents and consider room humidity; if the pot is wet or the new growth is scorched, fix the root-zone or light issue first.
Feed lightly during active growth
During spring and summer, when the plant is making new leaves and stems, use a balanced liquid houseplant fertilizer at half the label strength about once a month. Start with moist soil rather than applying concentrated feed to a dry root ball, and stop or reduce feeding as growth slows in autumn and winter. Petal Republic describes this light monthly growing-season approach for Nanouk; it is a measured routine, not a reason to push the plant into fast, weak growth.
More fertilizer will not restore pink variegation or fix poor light. If leaf tips brown after feeding, pause fertilizer, water the mix thoroughly once to rinse soluble residue, and let all runoff drain away. Resume only when the plant is growing steadily and the pot is drying normally. A fresh, adequately lit Nanouk usually needs less correction than repeated changes to fertilizer strength.
Pinch and prune for a fuller plant
Nanouk can grow upright, spread across the pot, or trail over its rim. If the stems become long and sparse, first improve the light; pruning in a dim spot just produces another thin flush. Once the plant is receiving better light, pinch or snip each healthy growing tip just above a leaf node. The node below a cut can push new side growth, while the removed tip becomes a ready-made cutting. NC State describes pinching related inch plants as a way to make them denser, and Petal Republic’s Nanouk guide also recommends pruning to shape the plant.
Use clean scissors and remove only a portion of the plant at one time, especially if it is already stressed. Take out dead or badly damaged stems at their base, but do not strip every trailing stem to the crown in one session. For a nursery-full look, root several healthy tips and plant them around the edge of the same pot after they establish. This is usually more reliable than expecting a bare old stem to refill evenly along its entire length.
Propagate from healthy stem cuttings
Choose a firm, actively growing stem and cut just below a node with clean scissors. A useful cutting has at least two nodes: remove the leaves from the lower node so it can sit in water or mix, and keep foliage above the medium. Nanouk’s patented description records stable reproduction through terminal cuttings; the patent and Petal Republic’s practical instructions support taking healthy tips rather than trying to propagate from a leaf alone.
For water rooting, place the bare lower node in a small clean glass and keep all leaves above the waterline. Set it in bright indirect light, top up with fresh water as needed, and pot it into airy mix once it has several sturdy roots rather than waiting for a long tangled mass. For direct-to-mix rooting, insert the lower node into lightly moist, well-drained potting mix and keep it evenly—not constantly—damp while roots form. Water rooting makes progress visible; direct rooting avoids a water-to-soil transition. Either can work, but a cold, dark windowsill or waterlogged soil can rot the cutting before it roots.
To thicken an established pot, start several cuttings at once and add them around the rim after they are rooted. Keep the new cuttings in the same bright indirect light as the parent, and do not feed them heavily until they resume growth. If a cutting turns translucent or mushy at its base, discard that piece and start over with a fresh cut above firm tissue.
Repot when the root system gives you a reason
Repot when roots form a tight mass, circle the bottom, emerge repeatedly through the drainage holes, or the mix dries unusually fast despite correct watering. A plant that is simply trailing over the edge is not automatically pot-bound. The RHS repotting guide recommends moving container plants into a modestly larger pot; for Nanouk, choose roughly one pot size up, with drainage holes, rather than surrounding a small root ball with a large volume of wet soil.
Spring or early summer is a convenient time because the plant is entering active growth, but an urgent drainage failure should not wait for a calendar date. Loosen only the outer roots that are circling tightly, remove sour or collapsed old mix, and replant at the same depth in fresh airy mix. Water once to settle it and let the pot drain. Then wait for the top layer to dry before watering again; a brief pause in growth after repotting is less concerning than worsening wilt in wet soil.
Adjust care through the seasons
In spring and summer, stronger daylight and active stem growth usually make the pot dry sooner. Check the soil more often, rotate the plant for even growth, pinch tips when they reach the shape you want, and take cuttings from firm new growth. If you move Nanouk outdoors for a warm spell, acclimate it to brighter conditions gradually, keep it in a container, and bring it back inside before cold nights or a sharp weather change.
In autumn and winter, shorter days slow growth and often lengthen the time between waterings. Do not keep a summer watering rhythm when the pot remains cool and wet; check the mix each time instead. Move the plant closer to a bright window if color fades, while watching for winter sun that now reaches the leaves directly. Related Tradescantia fluminensis can root from nodes and spread aggressively outdoors, according to NC State Extension; since Nanouk’s patent identifies a different botanical designation, avoid treating that invasive-status note as a cultivar-specific verdict, but keep cuttings and trimmings contained and out of natural areas.
Troubleshoot changes in color, leaves, and stems
Look for patterns across several leaves rather than diagnosing from one damaged tip. Note whether the newest leaves are affected, whether the trouble is on the window-facing side, and whether the pot is dry or wet. Wisconsin Horticulture Extension describes wilt despite wet soil, yellowing, and soft brown roots as common root-rot clues; a dry, lightweight pot can cause a similar droop but needs a different first action.
Pink fades and stems stretch. If new leaves are greener and the gaps between them grow longer, give the canopy more bright indirect light. Do not move straight into harsh midday sun. Once the new placement works, pinch back stretched tips and root them to rebuild a compact pot; the old bare sections will not shorten themselves.
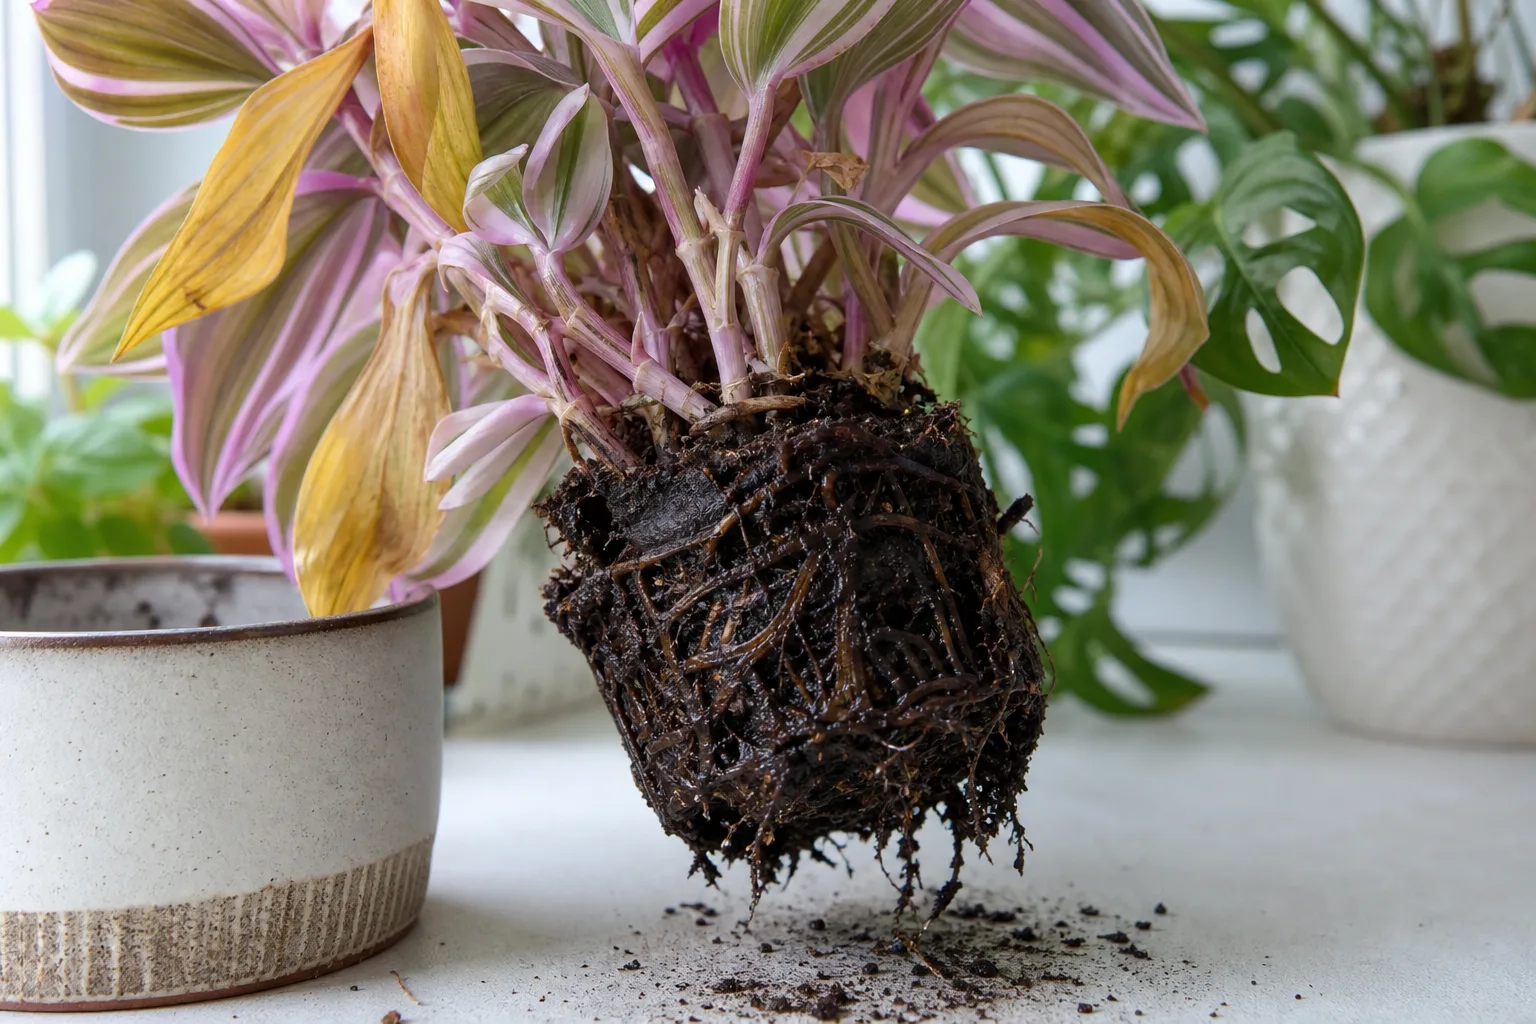
Wilt or yellow leaves with wet soil. Stop watering and check the pot’s weight and drainage before adding more. If it stays heavy and the base softens, slide the plant out and inspect roots: healthy roots are firm, while decayed roots may be brown, soft, or foul-smelling. Trim only clearly mushy tissue with clean tools and replant the surviving roots or healthy tips in fresh, airy mix. Wisconsin Horticulture Extension cautions that root-rot diagnosis can be difficult by appearance alone, so treat the combined wet-soil and root symptoms as stronger evidence than a single yellow leaf.
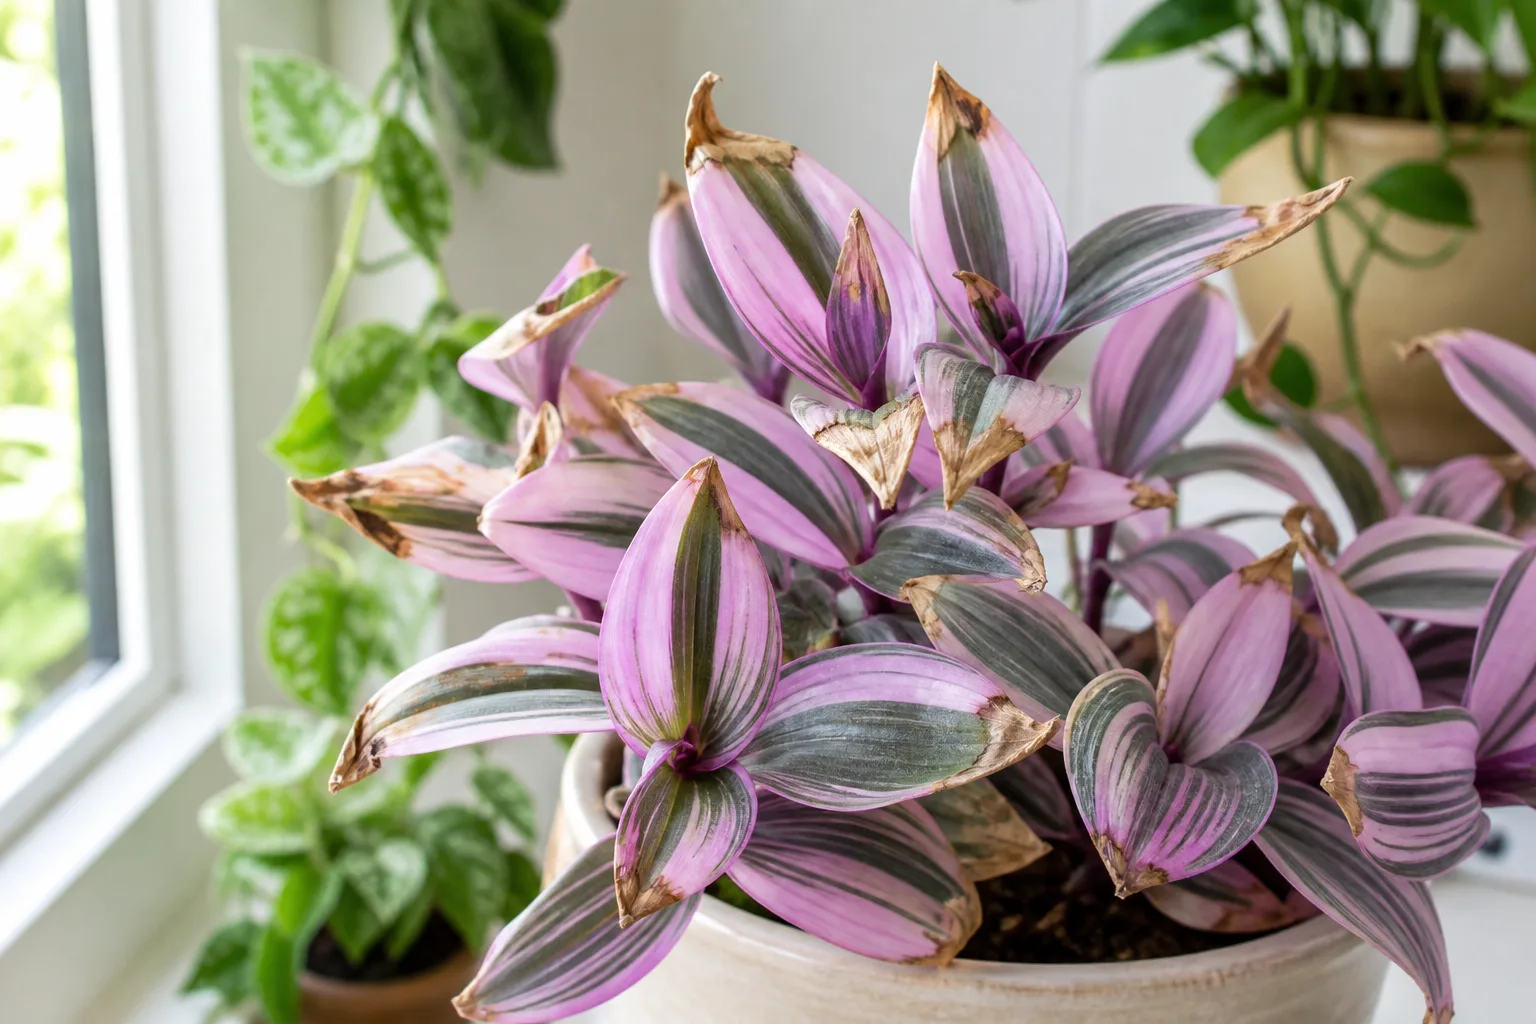
Crispy brown tips or pale patches. Dry air, concentrated fertilizer, a very dry root ball, and harsh sun can all leave brown tissue. Match the pattern to the conditions: sun-facing pale patches point toward scorch; widespread tip burn after feeding suggests salts; firm stems with crisp edges near a heater suggest dry air. Correct one likely cause and inspect the next leaves rather than changing water, light, and fertilizer all at once.
Fine stippling, webbing, or cottony clusters. Inspect leaf undersides, stem joints, and fresh tips for spider mites, aphids, or mealybugs. Isolate the plant, rinse or wipe visible pests away, and repeat inspections over the next week. If you choose a pest-control product, use one labeled for indoor plants and follow its directions; test a small area first because tender variegated foliage can be sensitive. NC State Extension lists common pests including mealybugs and spider mites on related inch plants, but a speckled leaf alone is not enough to identify a pest.
Keep the plant away from pets and protect your skin
Keep Nanouk where pets cannot chew it, and wash sap from skin if handling leaves or taking cuttings causes irritation. The ASPCA’s inch-plant listing identifies the related Tradescantia fluminensis as toxic to cats, dogs, and horses, with dermatitis among its clinical signs; NC State Extension also notes low-severity poison characteristics and skin irritation for that species. Those references do not establish a cultivar-specific reaction for patent-named T. albiflora ‘Nanouk’, so the sensible household choice is to prevent chewing and avoid claiming it is pet-safe. If an animal eats the plant or develops symptoms, contact a veterinarian or animal poison-control service rather than trying a home treatment.
When to use this page vs other Tradescantia Nanouk guides
Use this page for the whole indoor routine and for deciding which condition to check first. For a focused fix, the Tradescantia Nanouk light guide goes deeper on window placement and color fade; the watering guide explains the top-inch test and wet-versus-dry wilt; and the soil guide covers mix and drainage in detail. If the plant is already stretched, use the pruning guide for shaping, or the propagation guide for rooting the tips you remove.
Related Tradescantia Nanouk guides
The Nanouk overview summarizes its identity and baseline needs. Read the fertilizer guide before changing feed strength, and the repotting guide when roots or old mix—not just long stems—show that the pot needs attention.
Conclusion
Tradescantia Nanouk stays colorful and full when you get three things right: give its leaves bright filtered light, water only after the surface layer dries, and keep the roots in an airy mix with free drainage. Use the newest growth to judge light, the pot’s moisture and weight to decide whether to water, and fresh side shoots to judge whether pinching is working. Temperature, humidity, and fertilizer matter, but they rarely compensate for a dim position or a waterlogged root ball.
When a symptom appears, start with the simplest check that separates likely causes: look at the newest leaves, feel the mix, and note whether the damage faces the window. Make one correction, wait for the next growth, and only repot or treat pests when the evidence points there. Healthy tips can become new plants, so even a leggy Nanouk gives you a practical way to rebuild a compact, pink-striped pot.



