How to Grow Morel Mushrooms Outdoors at Home
How to grow morel mushrooms at home: compare outdoor beds with indoor trials, prepare soil and wood matter, time spring fruiting, and avoid false morels.
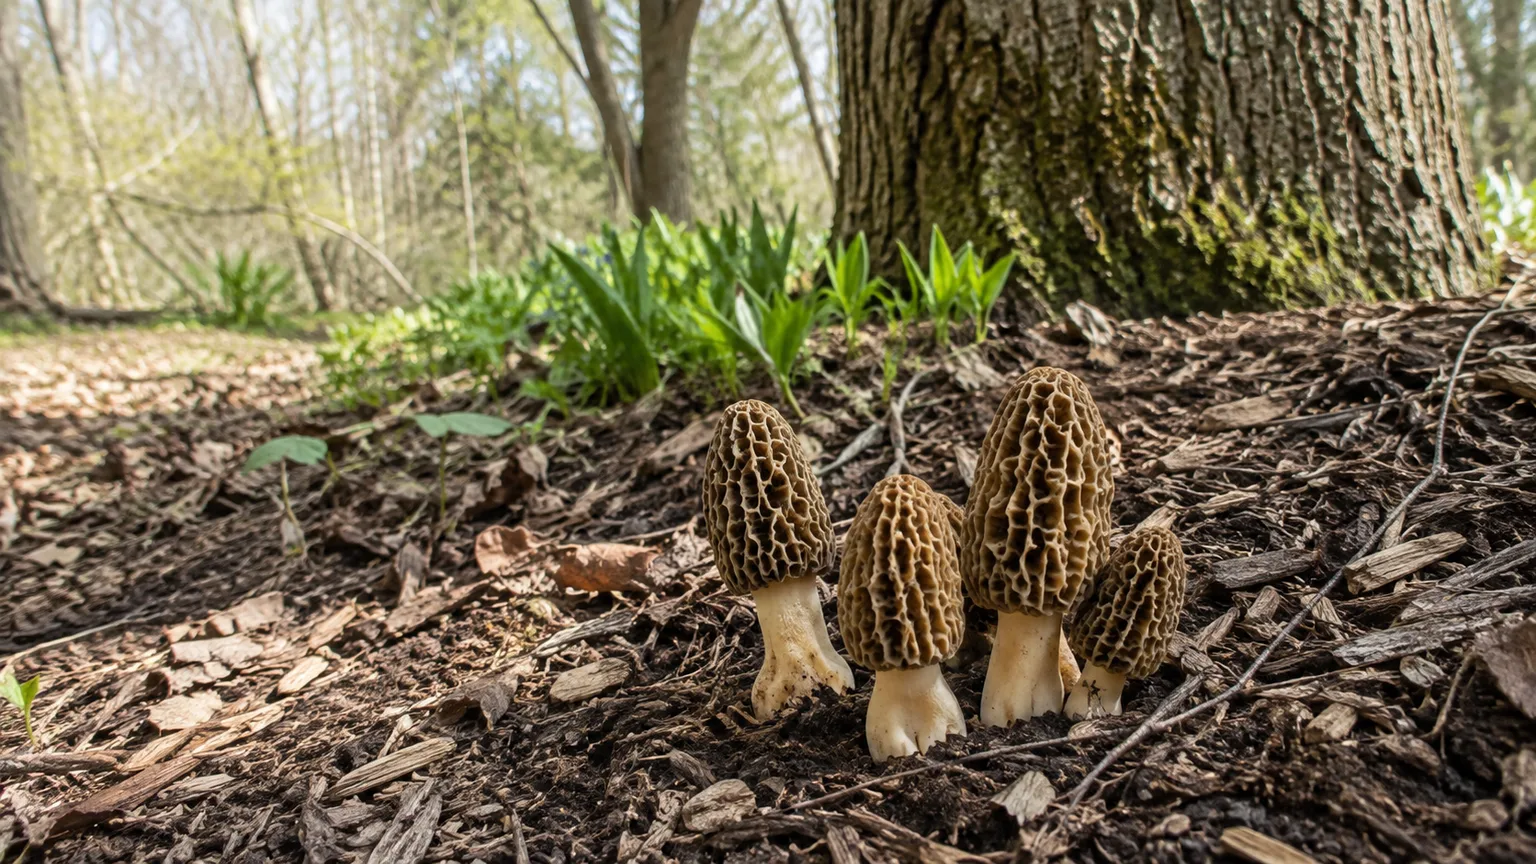
Growing morel mushrooms is possible, but it does not work like planting a vegetable or starting an oyster mushroom block. You are trying to establish a living fungal network, help it form a nutrient-storing structure called a sclerotium, and then catch a narrow window of cool, wet spring weather that tells it to fruit. That is why a well-made bed can remain quiet for years and still not be a failure.
For a home gardener, the most sensible route is an outdoor morel bed made with compatible spawn, loose soil, decaying hardwood, filtered shade, and reliable moisture. Indoor cultivation exists, but it is closer to a controlled research or production project than a casual kitchen experiment. Plan for patience, treat every harvest as a bonus rather than a guarantee, and never eat a mushroom you cannot identify with confidence.
Decide Whether Morel Cultivation Fits Your Garden
Morels belong to the genus Morchella, a group of fungi prized for their pitted, honeycomb-like caps and earthy flavor. The visible mushroom is only the seasonal fruiting body. Most of the organism lives below the surface as mycelium, so “growing morels” really means creating a habitat where that hidden network can survive and eventually fruit.
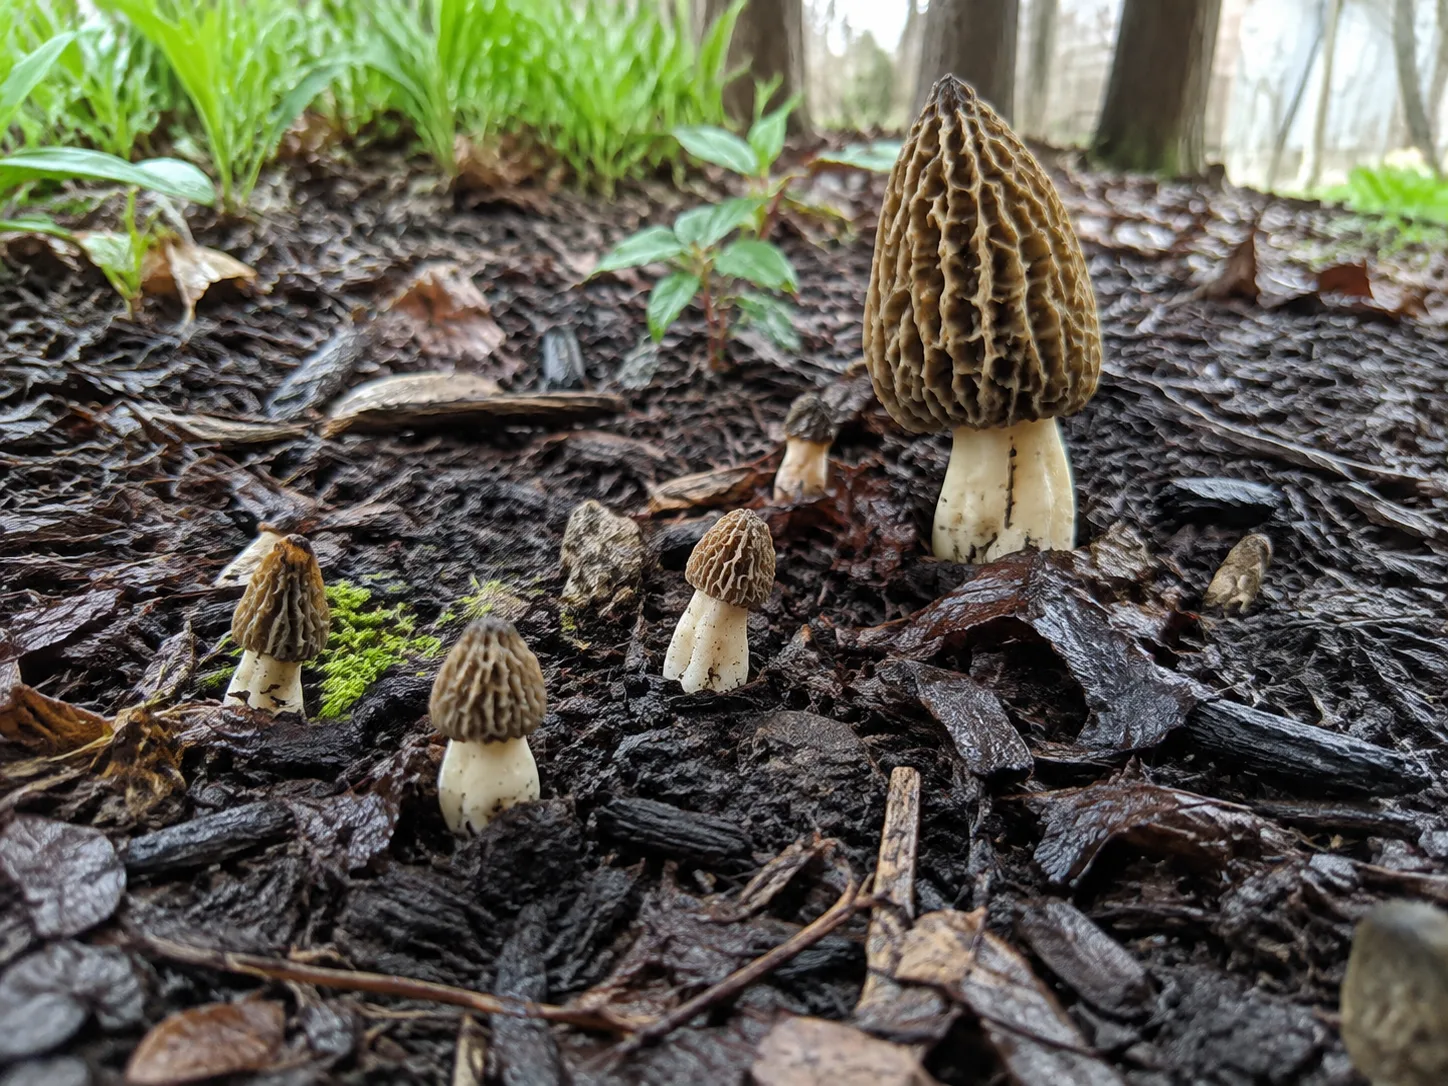
The first harvest from a newly inoculated outdoor bed may take two to five years, depending on species, climate, substrate, and weather. Once pins appear, development is much faster: a morel can move from a small emergence to a harvestable mushroom in roughly one to two weeks. The long establishment period is the part that makes morels unsuitable for anyone who needs a predictable crop this season.
Your garden is a reasonable candidate if it has a cold winter, a recognizable transition into spring, deciduous-tree shade, soil that drains after rain, and a way to water during dry spells. A hot, exposed yard or a permanently saturated corner is a poor match, even if a kit promises easy results. If you want dependable beginner mushrooms, start a simpler species alongside the morel project so this bed can remain a long-term experiment.
Understand the Morel Life Cycle Before You Inoculate
Morel spores germinate into mycelium, which spreads through soil and woody material. Under some conditions, the mycelium consolidates into sclerotia: compact, food-storing masses that help the fungus survive an unfavorable season. Those sclerotia can either resume vegetative growth or switch to fruiting, and the switch is where cultivation becomes difficult.
The University of Wisconsin–La Crosse’s morel life-cycle explanation describes the central problem clearly: forming mycelium and sclerotia is much easier than getting those structures to produce fruiting bodies. The trigger is not one magic ingredient. Nutrition, moisture, temperature, carbon dioxide, and the timing of seasonal change interact, and a condition that supports colonization may not be the condition that supports pinning. (University of Wisconsin–La Crosse’s morel life-cycle reference)
Why the Sclerotium Makes Fruiting Difficult
Think of a sclerotium as a reserve tank, not a mushroom waiting to be watered. It stores resources while the fungus is deciding whether conditions are favorable for reproduction. If the temperature, moisture, or nutrient balance is wrong, the reserve may feed more mycelial expansion instead of a cap and stem.
This explains two common disappointments. First, a white network on the soil surface is evidence that the fungus is active, not proof that a harvest is imminent. Second, adding more food or more water when a bed does not fruit can make the situation worse by favoring competing molds, rotting the substrate, or pushing the fungus back into vegetative growth.
The best practical response is to keep the bed stable and observe it across seasons. Avoid digging to check for underground growth. Your job is to provide the broad habitat conditions and let temperature and rainfall supply much of the fruiting signal.
Choose an Outdoor Bed or an Indoor Experiment
The method you choose determines how much you can control and how much risk you take on. Outdoor beds use the natural winter-to-spring transition and are accessible to a patient gardener. Indoor systems give you tighter control but demand cleaner technique, specialized environmental control, and a better understanding of the particular strain.
Why an Outdoor Bed Is the Practical Starting Point
An outdoor bed can be as simple as a small prepared patch beneath a deciduous tree, around a suitable old stump, or beneath shade cloth where a tree is not available. The weather supplies the cold period and spring fluctuation that indoor growers must recreate artificially. You still may fail, but the setup is less likely to fail because of a single sterile-technique mistake or a poorly controlled humidity chamber.
Purchased sawdust spawn, plug spawn, or a supplier’s outdoor kit is usually the best first attempt. A reputable supplier should identify the species or strain, tell you whether it suits an outdoor bed, and provide inoculation timing and coverage instructions. Do not assume that every product labeled “morel” is interchangeable: morel groups differ in habitat and fruiting behavior, and a strain selected for controlled production may not suit your yard.
Penn State research on morel cultivation documents why strain choice matters. Its work with Morchella rufobrunnea and M. importuna examined outdoor high-tunnel and indoor production, along with differences in mating type and fruiting response. That is useful context for a home grower: commercial progress does not translate into one universal backyard recipe. (Penn State’s morel-cultivation thesis record)
What Indoor Cultivation Actually Requires
Indoor morel cultivation is not simply putting a tray in a dark closet. A typical experimental approach needs a clean, moisture-retentive but aerated substrate, contamination control, controlled incubation, a cold or cool transition, and a fruiting space where humidity and air exchange can be adjusted without saturating the substrate.
Practical cultivation guides describe a staged sequence: colonize a substrate, allow sclerotia to form, provide a cold transition, and then move into fruiting conditions. One cultivation overview also describes nutrient bags as a way to create a changing nutrient environment around the mycelium. These are useful explanations of the logic, but they are not a plug-and-play home protocol; a tray that colonizes successfully can still refuse to fruit. (GroCycle’s outdoor and indoor morel guide; Lykyn’s cultivation overview)
For most readers, the decision is straightforward: use an outdoor bed if you have the right climate and space, and use indoor work only as a learning project when you already understand sterile mushroom cultivation. Do not bring a wild slurry into a warm indoor room. The unknown mixture of bacteria, yeasts, and molds is a contamination problem before it is a growing method.
Choose a Site That Mimics a Cool Woodland Edge
Morels often appear in spring woodland settings, around dying or decaying deciduous trees, in old orchards, or in disturbed areas such as burn sites. That pattern is not a checklist that guarantees fruiting. It is a clue to the combined conditions the fungus encounters: cool soil, filtered light, woody carbon, seasonal moisture, and an environment that changes gradually from winter into spring.
Balance Filtered Light and Spring Warmth
Choose a site with dappled shade, especially during the warmer part of the day. A deciduous tree can provide useful seasonal timing: bare branches let early spring light warm the soil, while emerging leaves reduce the intensity of later sunlight. A bed under dense evergreen shade may stay too cold and wet, while a south-facing patch with no protection can dry and heat too quickly.
If your yard has no suitable tree, use a shade cloth or a simple overhead screen. Keep the bed open enough for rain and air movement. The goal is not darkness; the morel fruiting body is responding to a seasonal outdoor environment, and soil still needs to warm modestly in spring.
Build Moisture Retention Without Waterlogging
Morel soil should feel like a wrung-out sponge: damp below the mulch, never glossy with standing water. Waterlogging removes air from the pores, encourages bacterial and mold problems, and can rot woody substrate. Pure sand may drain too fast; heavy clay may stay wet and compacted.
Before inoculating, dig a small test hole and fill it with water. If the water remains for hours after ordinary drainage, choose a different spot or improve the bed’s structure without creating a raised, exposed mound that dries out. If the soil dries within minutes, add mature organic matter and plan a light mulch layer rather than watering constantly.
During incubation, check beneath the mulch with a finger every week or two when the weather is dry. Water slowly and thoroughly only when the upper layer is losing its springy moisture. Fine rain or a gentle sprinkler is less disruptive than a hard jet aimed at the inoculated surface.
Use Woody Organic Matter and Test the Soil
Use loose, well-drained soil with a moderate amount of mature organic matter and aged, untreated hardwood. Small chips from suitable hardwoods such as ash, elm, apple, oak, or poplar can contribute the woody material found in many morel habitats. Leaf mold or finished compost can improve structure, but a bed should not look like a rich vegetable garden loaded with fresh manure and fertilizer.
Aim for a mildly acidic to near-neutral soil reaction, roughly pH 6.0 to 7.5, unless the spawn supplier gives a narrower range for the strain you bought. Test first. Do not dump lime or wood ash onto a bed because a recipe mentions it: ash can push pH sharply upward and add soluble salts, while a pH number alone cannot correct poor drainage, compacted soil, or the wrong strain.
Never use pressure-treated, painted, stained, or chemically contaminated wood. Avoid fresh manure, heavily fertilized potting mix, and fungicide-treated mulch. The bed’s fertility should come from slowly decomposing, clean woody material, not from forcing a flush with high nitrogen.
Inoculate an Outdoor Morel Bed Step by Step
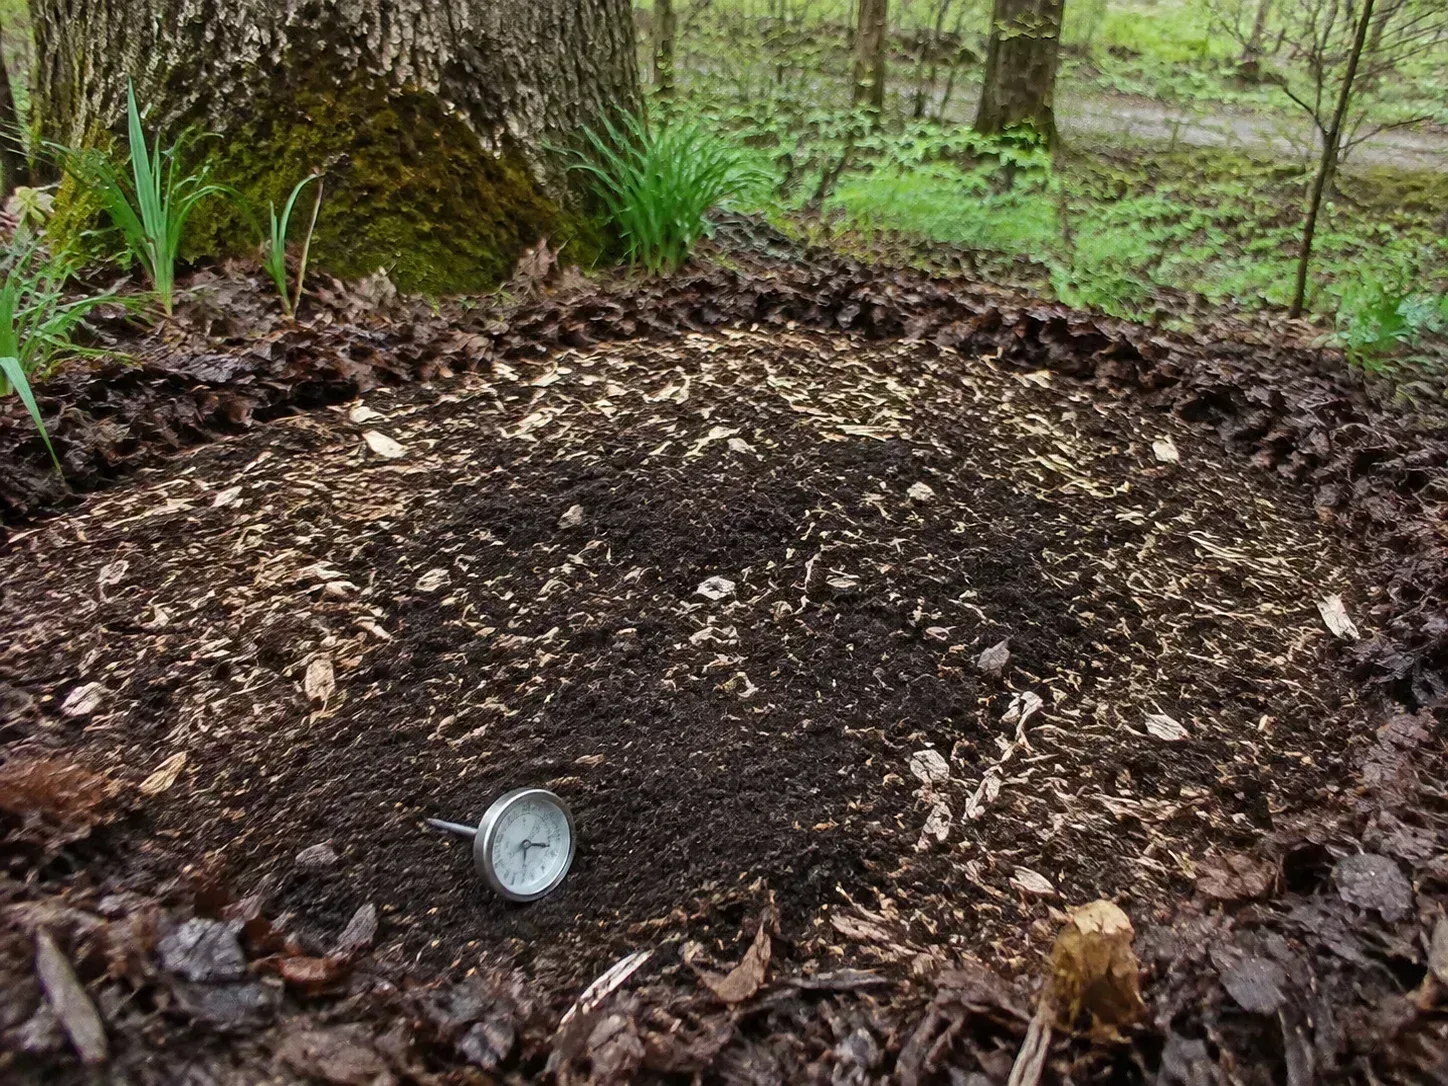
Start with a small, clearly marked bed so you can monitor it without disturbing the rest of the garden. A 4-by-4-foot area is a useful starting size when a kit is portioned for that footprint, but follow the supplier’s coverage rate rather than stretching a small amount of spawn across a larger patch.
Prepare the bed in cool weather when the soil is workable. Loosen only the top few inches, remove aggressive weeds, mix in a modest amount of aged hardwood and leaf mold, and water until the soil is evenly moist. Keep existing tree roots intact where possible; morels do not need a deep planting hole, and major root disturbance can create a dry or unstable site.
Start With Proven Spawn When Possible
Spread or bury spawn exactly as the kit instructions describe. In general, sawdust or plug spawn is mixed into the upper soil layer, while grain spawn may be placed in small pockets or distributed through the prepared surface. Cover the inoculated area with about 1 to 2 inches of clean compost or hardwood-chip mulch, enough to protect the surface without sealing it into a wet cap.
Write down the date, spawn type, supplier’s strain name, bed dimensions, pH, and nearby tree species. That small record turns a vague experiment into something you can improve. If the bed fails, you can change one variable in a second patch rather than forgetting what you did.
The first season is mainly an establishment period. Keep the bed moist during extended dry weather, remove weeds by hand, and avoid walking across it. Do not add lawn fertilizer, routinely apply compost tea, or rake the surface to look for mycelium. Each disturbance can change moisture and temperature exactly where the fungal network is trying to settle.
Use a Spore Slurry as an Experiment, Not a Promise
A spore slurry is inexpensive, but it is less controlled than known spawn. You need a freshly collected, confidently identified true morel, and even then you are dispersing spores into a competitive outdoor community rather than placing an established culture into prepared substrate.
For a cautious trial, tear a fresh morel into clean, non-stagnant water and let the mixture sit overnight in a cool place. Strain out large pieces if desired, then pour the liquid over a prepared, moist bed and cover it with a thin layer of leaf mold or hardwood mulch. Some traditional recipes add molasses or a small amount of salt, but those ingredients are not a guarantee of spore germination or a healthy morel colony; excess salt can harm soil life, and sugary liquid can feed contaminants as readily as it feeds the target fungus.
Treat wash water from a known true-morel harvest the same way: as a low-cost experiment with uncertain odds. Do not use mushrooms collected from an uncertain patch, do not pour a slurry into an indoor tray, and do not promise yourself a harvest because the liquid contained spores. A spore slurry can seed a place; it cannot choose the right strain, remove competitors, create sclerotia, or supply the spring trigger needed for fruiting.
Care for the Bed and Watch for Fruiting Weather
Morel beds need less daily attention than vegetable beds, but they reward careful seasonal observation. Through the first year, keep the mulch light and intact, prevent grass from invading, and water only during genuine dry periods. A loose mesh cover can deter animals that scratch or dig, but it must not trap heat or press wet fabric against the soil.
In spring, use a soil thermometer rather than guessing from the calendar. Morels commonly begin responding as soil moves into roughly the upper 40s to mid-50s Fahrenheit, with daytime temperatures in the 60s and cool nights providing a useful fruiting pattern. Exact thresholds vary with species and site, so use the range as a watch window, not a switch that guarantees mushrooms.
When that window arrives, inspect the bed every day or two. If the surface is dry below the mulch, give it a gentle, even watering; if it is already damp, leave it alone. Stop disturbing the soil once tiny pins appear. Young fruiting bodies are fragile, and a hard spray, heavy footstep, sudden drying, or animal digging can damage a crop that took years to form.
Do not fertilize during the fruiting window. The fungus is not a flowering plant that needs a quick feed to hold blooms. A stable bed, mild temperatures, moisture without saturation, and clean air are more useful than a stronger dose of anything.
Troubleshoot a Morel Bed With Mycelium but No Mushrooms
No mushrooms in the first year: keep the bed in place. Outdoor establishment commonly takes multiple seasons, and silence is not evidence that the project is dead. Check moisture, shade, drainage, and mulch depth, then wait for the next spring rather than rebuilding immediately.
No mushrooms after two or three seasons: review the site before adding more spawn. Was the bed hot and exposed in summer? Did it stay saturated? Did a lawn treatment, fresh manure, treated wood, or thick compacted mulch enter the patch? Was the purchased strain intended for outdoor fruiting in your climate? These questions are more useful than adding random ingredients.
White mycelium but no fruiting: the fungus may be colonizing successfully without receiving the right trigger to convert its sclerotia into fruiting bodies. Morel biology makes this a genuine limitation, not necessarily a care mistake. Keep the environment steady, record spring temperatures and rainfall, and do not assume that forcing a sudden drought or flooding event will reproduce a forest disturbance safely.
The surface dries quickly: deepen the shade, add a thin layer of clean leaf mulch, and water slowly during dry weather. If the soil becomes hydrophobic or crusted, correct the site gently after the season rather than breaking apart active spring growth.
The bed smells sour, turns slimy, or grows aggressive mold: stop adding water and remove the contaminated material from the immediate area. Do not taste-test unknown growth or move contaminated indoor substrate into the garden. If contamination is widespread, discarding the affected material and restarting in a clean, better-drained location is safer than trying to rescue it with household chemicals.
Mushrooms appear but you are unsure what they are: do not harvest for the table. A morel bed can also produce unrelated fungi, and a familiar location does not make every mushroom a true morel.
Identify and Harvest Morels Safely
Before you cook anything, identify the whole mushroom. True morels have a cap covered in inward pits and ridges, a cap that is attached to the stem at the base or in the characteristic half-free form, and a completely hollow interior when sliced lengthwise. Color ranges from pale tan and yellow to gray-brown or nearly black, so color alone is not a reliable test.
False morels include species in the Gyromitra and Verpa groups. They may have brain-like folds instead of a true honeycomb of pits, a cap that hangs like a thimble or attaches irregularly, and cottony, chambered, or solid tissue inside. A medically reviewed safety reference notes that false morels can contain gyromitrin, a toxin associated with serious illness; do not experiment by cooking a questionable mushroom to “make it safe.” (WebMD’s false-morel safety reference)
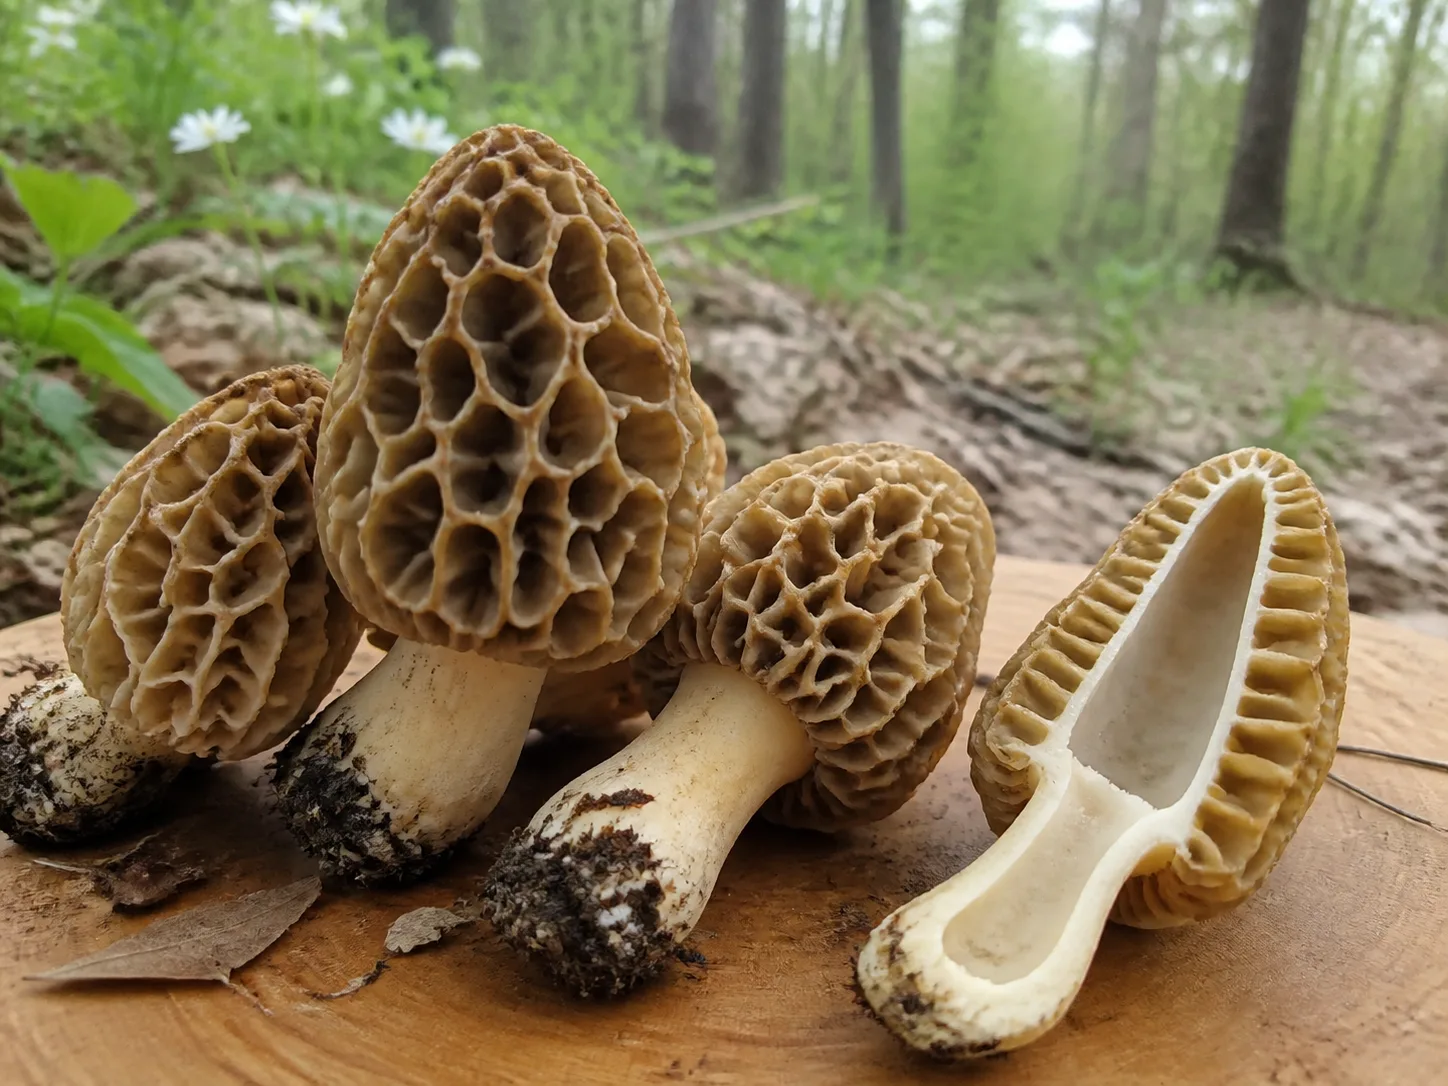
If you cannot identify a specimen with complete confidence, leave it in the bed and ask a local mycological club, extension office, or experienced identifier for help. A photograph can support a conversation, but it should not replace an in-person check when someone plans to eat a wild-type mushroom. The morel identification guide from Lykyn also emphasizes the combination of cap texture, attachment, and hollow structure rather than a single visual clue.
When a true morel is confirmed, cut or pinch it just above the soil surface. The choice between cutting and pinching is less important than keeping dirt out of the pitted cap and avoiding a hard pull that disturbs surrounding pins. Use a small clean knife if the bed is muddy, and handle each mushroom gently.
Slice morels lengthwise at home to check for insects and confirm the hollow structure again. Brush away loose soil, rinse only as needed, and cook them thoroughly; true morels should not be eaten raw. If anyone develops symptoms after eating a wild mushroom, contact local poison control or emergency services promptly and keep a labeled sample or clear photographs for identification.
Maintain the Bed After Harvest
After picking, leave the soil and mycelium undisturbed. Do not till the bed, turn it into a vegetable row, or rake away every piece of leaf litter. A light top-up of clean, aged hardwood mulch can protect the surface after the fruiting season, but avoid burying the patch under a thick, wet blanket.
Record the harvest date, approximate number and size of mushrooms, recent rain, soil temperature, and any unusually hot or cold weather. If the bed fruits again, those notes help you recognize its local pattern. If it does not, they give you evidence about whether moisture, timing, or climate was the limiting factor.
Morels may return to a successful outdoor bed, but a first harvest is not a permanent guarantee. The underground network remains exposed to drought, animals, competing organisms, and future weather. Think of the project as stewardship of a small woodland-style habitat, with an occasional edible harvest when the biology and the season line up.
Conclusion
The most reliable way to try growing morel mushrooms at home is to establish an outdoor bed with compatible spawn, loose well-drained soil, clean decaying hardwood, filtered shade, and steady spring moisture. Expect a two-to-five-year wait, and understand that visible mycelium is progress but not proof of fruiting.
Use a spore slurry only as a clearly labeled experiment, keep indoor cultivation in the advanced-project category, and change one variable at a time when you troubleshoot. When mushrooms finally appear, identify every specimen by its pitted attached cap and hollow interior, cook true morels thoroughly, and leave any uncertain mushroom out of the kitchen.



