How to Grow Collard Greens: Planting to Harvest
Plan a spring or fall crop of collard greens with planting dates, spacing, water, pest checks, container advice, and a harvest method that protects the crown.
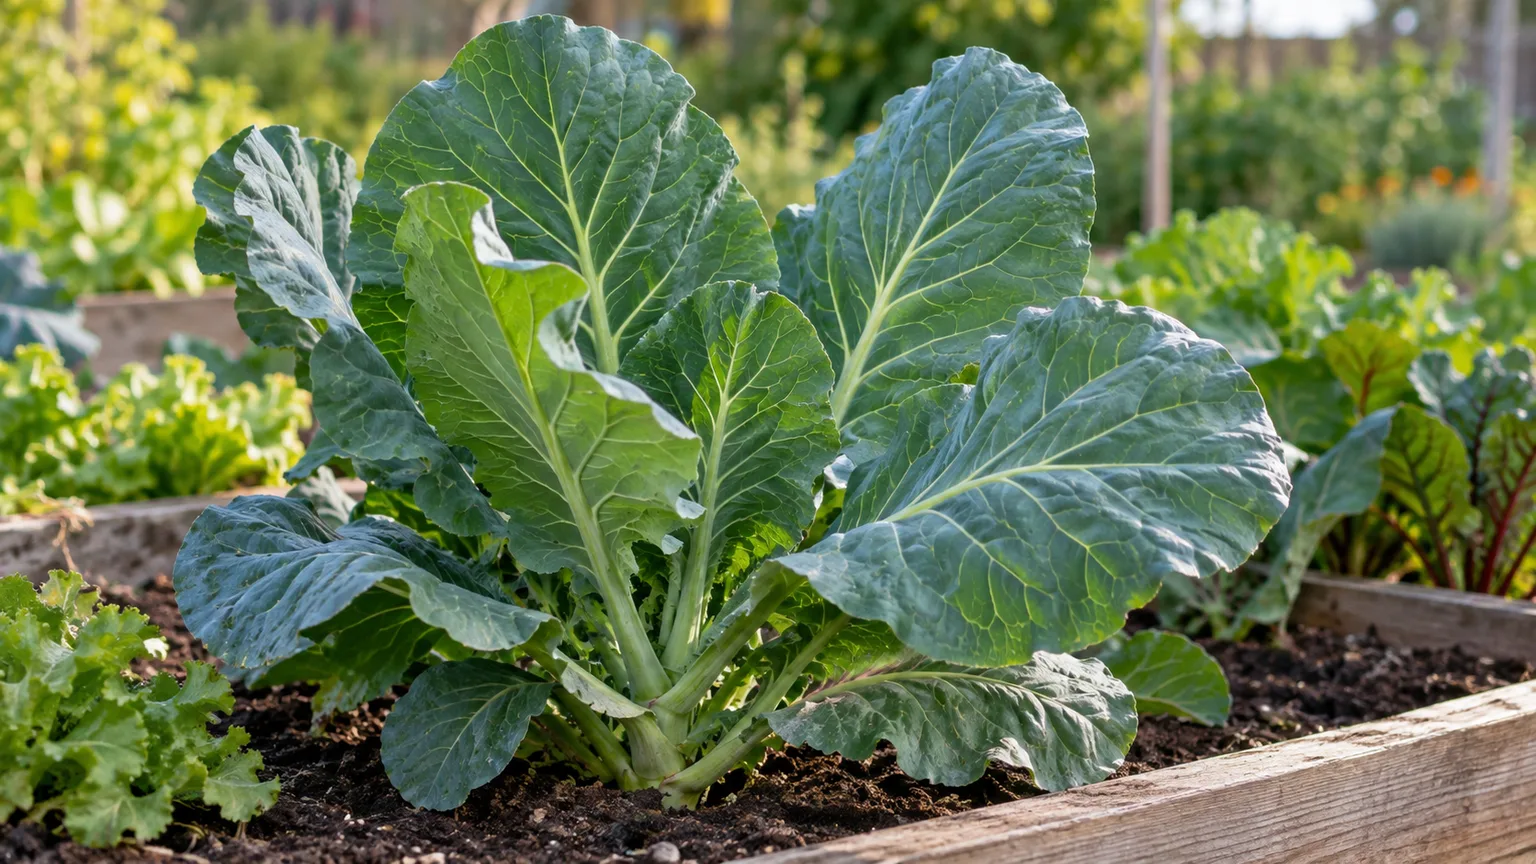
Collard greens grow best when you time them for a cool stretch, give their broad leaves room, and keep the root zone evenly moist. In most gardens, that means sowing in early spring or late summer rather than asking young plants to push through peak summer heat; in mild-winter regions, a fall planting can supply leaves well into winter. Collards are forgiving once established, but a good planting window and early pest protection make a bigger difference than frequent fertilizer or pruning.
Use the seed packet’s maturity range as a planning estimate, then judge the crop by the plant: harvestable outer leaves can be picked before a collard reaches its listed full size. The basic sequence is simple: prepare fertile, draining soil; sow shallowly or transplant sturdy starts; thin plants to match your harvest goal; and keep the center growth point intact as you pick.
Choose a Planting Window Around Frost and Heat
Collards are a cool-season brassica, so plan around the temperature pattern in your garden rather than a single national planting month. For spring, sow outdoors a few weeks before the average last frost if your soil is workable, or start indoors about four to six weeks earlier and transplant while the weather is still cool. For fall, count backward from your area’s first hard freeze and allow enough time for the variety to reach useful leaf size; seed packets often estimate roughly 50 to 80 days, but heat, day length, and transplant age change the calendar. NC State Extension recommends spring or fall growing and notes that established collards tolerate frost and light to medium freezes. (NC State Extension)
In hot-summer areas, fall is often the easier crop because plants can size up as nights cool. Alabama Cooperative Extension’s regional schedule, for example, places planting in late winter to early spring and again from mid-August into mid-September; that is useful for Alabama, not a month-by-month rule for every latitude. In northern gardens, choose a spring window that leaves time to harvest before sustained heat, or sow in midsummer for fall leaves. Gardening Know How similarly emphasizes matching the planting season to local heat and using adequate moisture if a spring crop must grow into summer. (Alabama Cooperative Extension System, Gardening Know How)
For fall sowing, use the variety’s days-to-maturity figure as a minimum planning signal, not a promise. Add a cushion for slow germination, cloudy weather, and the fact that smaller plants need time to become established before cold nights arrive. If you are unsure, sow a small first batch and another a week or two later; this spreads the risk of a heat spell or an early freeze without leaving you with one oversized flush.
Pick a Variety for Your Space and Harvest Style
Collards are grown for their leaves, not for a tight cabbage head. Loose, open varieties suit repeated outer-leaf picking because the plant keeps producing from its center; heading types curl their leaves inward and can be convenient if you plan to cut most of the plant at once. NC State Extension lists Vates, Georgia Southern, Champion, Morris Heading, and other cultivars that have performed well in its region, while the University of Delaware notes cultivar differences in days to maturity and growth habit. (NC State Extension, University of Delaware Cooperative Extension)
Choose a variety for the problem you need it to solve. Georgia Southern is a common choice for heat tolerance and a longer season; Vates is relatively compact; Champion is a Vates-type hybrid often selected for a smaller garden; Flash and Top Bunch are useful when an earlier harvest matters; Morris Heading is the more compact, loose-heading option. These are tendencies, not guarantees: the same variety can mature at a different pace in cool spring soil than in a warm fall bed, so check the seed packet for the expected harvest window in your region.
If this is your first crop, choose one dependable open-leaf variety and one early or compact variety rather than buying several packets based on a single advertised maturity number. A pair of varieties gives you a simple comparison: note which one handles your local heat, pests, and spacing best, then repeat that choice next season. Collards are biennial by nature but are usually grown as annual vegetables; keeping a plant through a second year is a seed-saving choice, not a reliable way to produce tender leaves indefinitely. (NC State Extension Plant Toolbox)
Give Collards Sun, Fertile Soil, and Room to Spread
Choose a site with at least six hours of direct sun, loose soil that drains after rain, and access to water. Collards tolerate some light shade, especially when afternoons are hot, but a deeply shaded bed grows slowly and produces smaller, thinner leaves. If your site stays wet after a storm, fix drainage or use a raised bed; a thirsty crop is easier to recover than roots sitting in saturated soil.
Aim for soil that is rich in organic matter and close to mildly acidic or neutral. Extension recommendations vary slightly: NC State gives a pH range of 6.0 to 6.5, while other regional guides use a somewhat higher target. A soil test is more useful than guessing or repeatedly adding lime; it tells you whether pH or nutrients actually need adjustment. Before planting, work in finished compost and follow the test’s recommendations for fertilizer. Collards need enough nitrogen to keep leaves growing, but more fertilizer is not automatically better and can create soft, unbalanced growth. (NC State Extension, University of Delaware Cooperative Extension)
Set Spacing According to the Size You Want
Spacing advice can look contradictory because gardeners may be growing baby greens, half-size plants, or full rosettes. NC State’s guide places full-size collards about 15 to 18 inches apart, with closer spacing for a young-plant harvest; Alabama Extension uses 12-inch spacing in its regional quick guide. For a home garden where you want large, repeated leaf pickings, start with about 15 to 18 inches between plants and 24 to 36 inches between rows. Use the closer end for compact varieties or a one-time young harvest, and the wider end for large spreading plants and better airflow. (NC State Extension, Alabama Cooperative Extension System)
| Harvest goal | Starting spacing | What to expect |
|---|---|---|
| Baby leaves or young plants | Sow 2 to 4 inches apart, then thin or cut young plants as needed | Faster coverage; less room for mature plants |
| Half-grown plants | About 10 to 15 inches apart | A middle ground between early harvest and full-size growth |
| Full-size plants with repeat leaf harvest | About 15 to 18 inches apart | Larger leaves, easier access, and better air movement |
Rows do not have to be perfectly isolated. In a wide bed, a few staggered rows can use space well, but do not crowd the center so tightly that you cannot reach the undersides of leaves or remove damaged foliage. The spacing you choose should make harvesting and inspection easy, not just maximize the number of seedlings at planting.
Sow Seeds Outdoors or Start Them Indoors
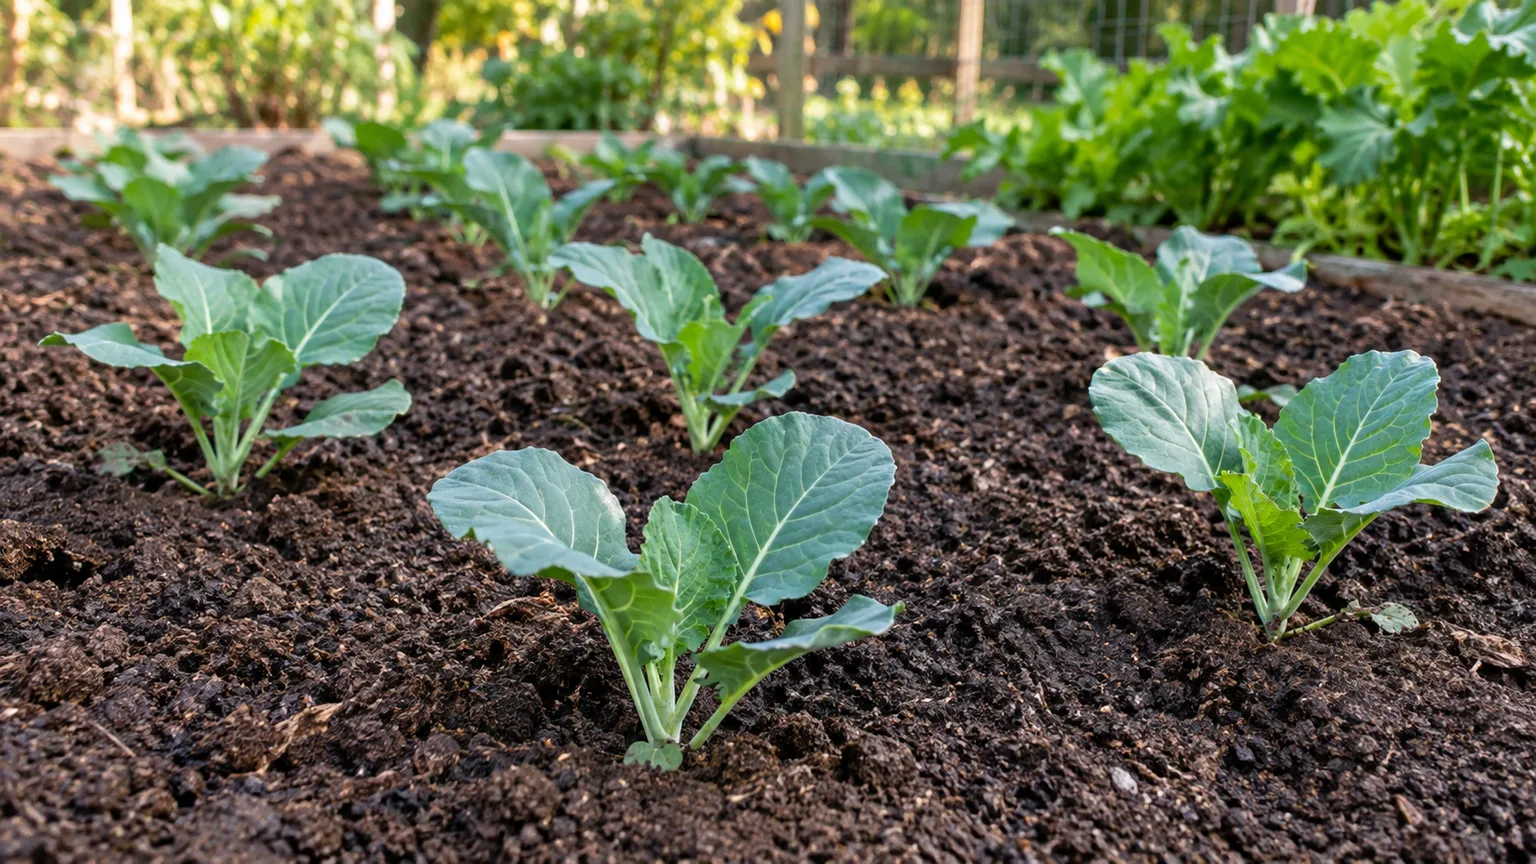
Direct sowing is the simplest method when the garden bed is ready and the weather is within the right seasonal window. Plant seeds about one-quarter to one-half inch deep in moist soil; keep the surface evenly damp until germination, but do not leave seed rows waterlogged or crusted. Sow two or three seeds at each final position, then snip off the weaker seedlings once the strongest has several true leaves. Snipping is gentler than pulling when the roots have begun to tangle.
Indoor starts help you get a spring crop moving before the garden soil is ready or make a fall crop easier to schedule. Sow into a cell tray four to six weeks before transplanting, keep the mix lightly moist, and give seedlings strong light so they grow stocky rather than stretched. Alabama Extension advises starting seedlings six to eight weeks before planting and hardening them off for about a week; follow the pace that produces compact plants with roots holding the plug together, not a root-bound seedling that has stalled in its cell. (Alabama Cooperative Extension System)
Transplant Sturdy Seedlings Without a Stall
Harden off indoor seedlings by placing them outdoors in a sheltered, lightly shaded spot for a few hours, then increasing their exposure over about a week. Bring them inside if a sharp freeze, drying wind, or intense sun is forecast. A sudden move from a protected room to a windy bed can set a seedling back even when the air temperature seems reasonable.
Transplant on a cloudy day or in the late afternoon, water the cell before planting, and set the plug at the same depth it grew in. Firm soil gently around the root ball, water deeply, and check the bed again the next day. If leaves droop briefly but the stem stays firm, keep the soil evenly moist while roots settle; do not compensate by keeping the plant permanently wet. If you buy starts, choose compact green plants without flower stalks, visible insect colonies, or circling roots.
Keep Soil Evenly Moist and Feed From Evidence
Collards make broad leaves quickly when water is steady. A useful starting range is about one to one and a half inches of water a week, including rain, with more frequent checks during hot, dry, or windy weather. Push a finger into the soil near the plant: if the root zone is drying several inches down, water slowly enough to soak the bed; if the soil is already wet and sticky, wait and improve drainage rather than adding more. Alabama Extension gives a broader one-to-two-inch weekly range for its local conditions, which reinforces the need to adjust to soil and weather rather than follow a rigid schedule. (Alabama Cooperative Extension System)
Water at the base when practical and mulch with a thin layer of clean, weed-free organic material once seedlings are established. Mulch slows evaporation, limits soil splash on leaves, and makes it easier to keep moisture consistent. It should not be piled against stems, and a heavy wet layer in a cool, waterlogged bed can hold too much moisture where the plant needs air.
Feed according to a soil test first. If the bed is low in nutrients, use the recommended amount of a balanced fertilizer at planting, then side-dress only if growth slows or the test indicates a need. NC State advises checking soil and applying follow-up fertilizer after seedlings emerge or transplants settle; Alabama Extension gives a similar post-planting follow-up. Keep granular fertilizer several inches away from the stem and water it in. Pale older leaves can be a nitrogen clue, but yellow leaves can also mean waterlogged roots or a disease problem, so do not diagnose every yellow plant as hungry. (NC State Extension, Alabama Cooperative Extension System)
Protect Collards From Heat, Cold, and Bolting
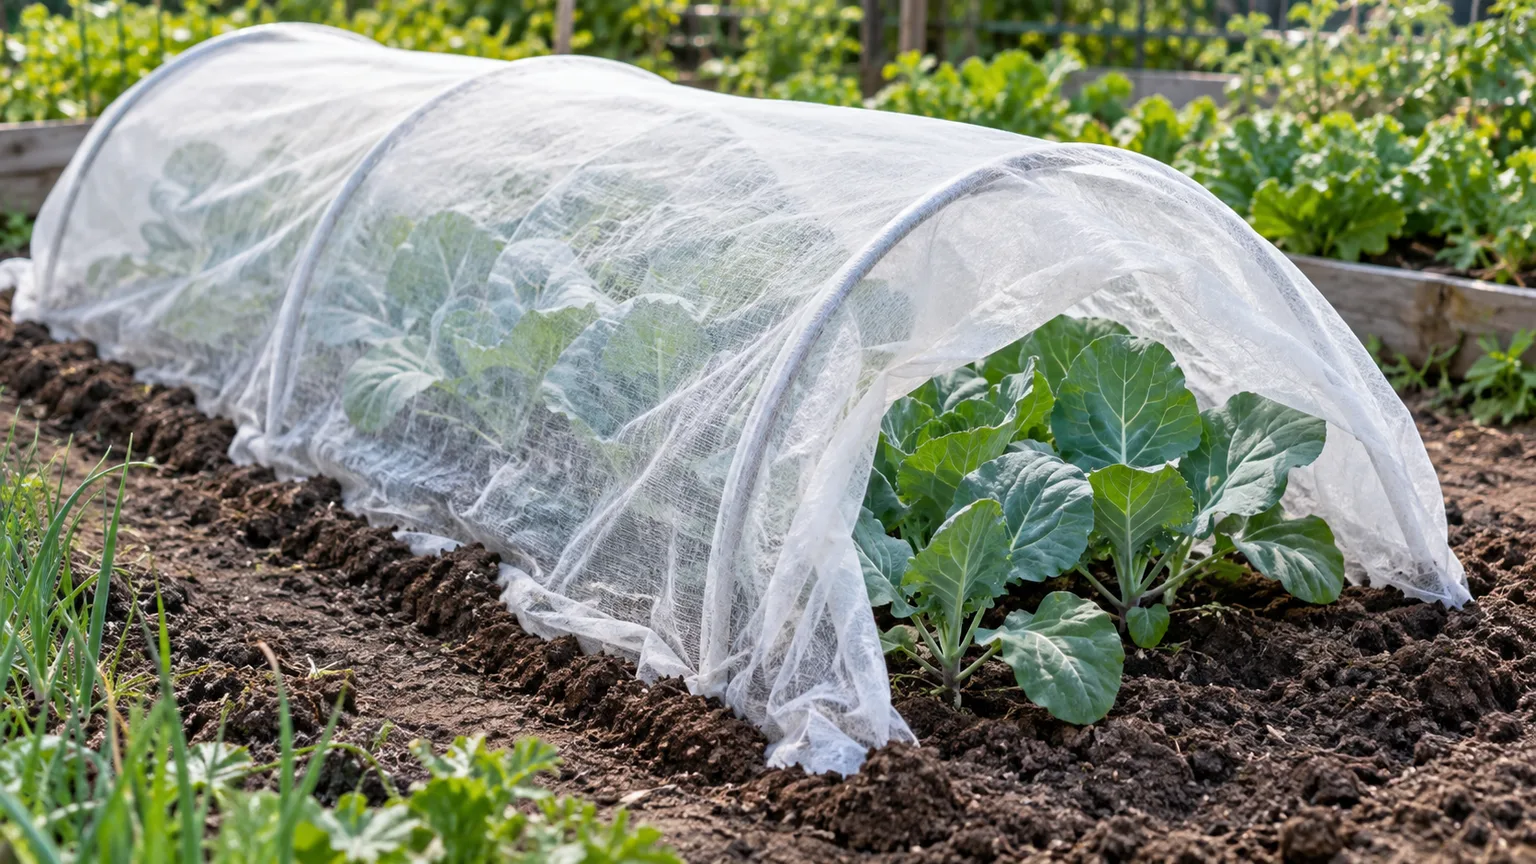
Collards are at their most productive during cool weather, but mature plants usually tolerate light frost better than tender seedlings do. A light frost can make leaves taste milder or sweeter, yet a prolonged hard freeze can damage the canopy; protect plants with a floating row cover or cold frame when severe cold is expected. A row cover also buffers young starts from wind and flying insects, provided its edges are secured and it is removed or vented if temperatures climb.
Heat and lengthening days can push collards toward a flower stalk. When the center starts rising, leaves often become tougher or more bitter, and cutting the stalk off does not reliably return the plant to steady leaf production. Harvest the usable outer leaves promptly, then either remove the plant or let it flower only if you want seed. For a hot region, shift the main crop toward fall; for a short northern summer, start early enough that the leaves are useful before sustained heat arrives.
Harvest Outer Leaves While the Crown Keeps Growing
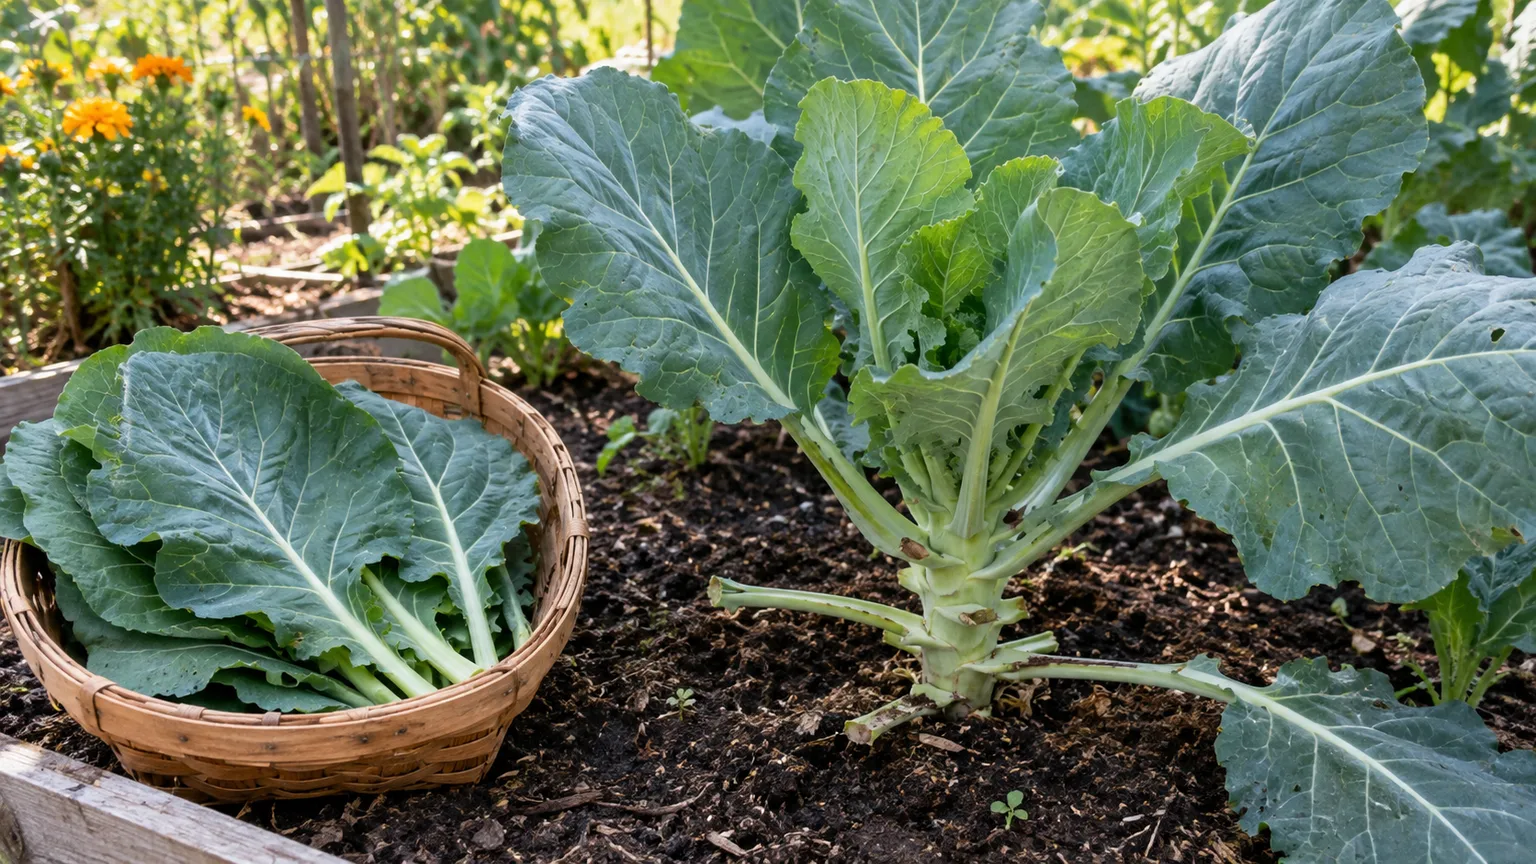
You can begin harvesting when the plant has several healthy leaves large enough to use; many gardeners start with outer leaves about 6 to 10 inches long. Cut or snap the oldest leaves near the main stem, working from the bottom upward, and leave the small central leaves and growing point untouched. This gives you a meal without asking the plant to rebuild its entire canopy after every picking. NC State describes both whole-plant harvests and tender-leaf picking, while Alabama Extension recommends removing only part of the lower foliage at a time. (NC State Extension, Alabama Cooperative Extension System)
When repeat harvest matters, take no more than roughly one-third of the plant’s leaves at a visit and wait for fresh growth before returning for another large picking. If a cold snap or bolting is about to end the season, cut the whole plant above the crown for a larger final harvest. A healthy base may send out new leaves, but regrowth depends on weather, variety, and crown condition, so treat a second flush as a bonus rather than a guarantee.
Pick in the cool part of the day when the leaves are dry, then refrigerate them promptly. NC State Extension recommends refrigerating fresh collards in a plastic bag for up to five days; keep leaves dry and remove damaged ones before storage, then wash just before cooking. For a larger surplus, blanch and freeze the leaves using a trusted food-preservation method instead of storing a wet, compressed harvest in the refrigerator. (NC State Extension)
Grow Collard Greens in a Container
Collards can grow in a container if you choose a stable pot with drainage holes and enough volume for one large plant. Alabama Cooperative Extension suggests one plant per 5- to 7-gallon container; a wider pot can hold more only if each plant still has room to spread. Use fresh potting mix rather than dense garden soil, and place the pot where it gets several hours of direct sun. (Alabama Cooperative Extension System)
Containers dry faster than garden beds, so check moisture daily during warm or windy spells and water until excess drains from the bottom. Do not solve frequent drying by leaving the pot in a saucer of water; collard roots still need air. A compact variety such as Vates or Champion is easier to manage on a patio, while one plant in a roomy pot is usually more productive than several crowded plants fighting over a small container.
Prevent Caterpillar and Aphid Damage Early
The most recognizable collard pests are the caterpillars of cabbage white butterflies and cabbage loopers, along with aphids on tender growth. Caterpillars leave irregular holes and dark frass on leaves; tiny, light-colored eggs may be attached to the undersides. Aphids cluster around leaf folds and the growing tip, where they can curl new leaves. Check the undersides and center of the plant, not just the top surface where damage is easiest to see.
Cover clean seedlings with a floating row cover before butterflies begin laying eggs, and secure the edges so insects cannot crawl underneath. A cover will not help if eggs or larvae are already on the plant, so inspect starts before planting and scout regularly after transplanting. Hand-pick caterpillars and egg clusters when numbers are low; a firm stream of water can knock aphids off sturdy leaves. For persistent damage, identify the pest before choosing a control and use only products labeled for collards or the edible crop and pest in question, following every label direction and harvest interval. Penn State’s PlantVillage collard reference lists cabbage loopers, cabbageworms, flea beetles, and aphids among common problems and recommends matching control to the pest and infestation level. (Penn State PlantVillage)
Follow a Quick Scouting Routine
Walk the bed once or twice a week, and more often during warm weather when insect activity can increase quickly. Look at the newest growth for aphids, flip several older leaves for eggs or caterpillars, and check stems at soil level for cut plants or chewing. Note whether holes are appearing on one plant or across the row; a single cluster of damaged leaves calls for a different response than a whole bed full of feeding larvae.
Remove badly damaged outer leaves only after checking for insects, since those leaves may be sheltering caterpillars that will move to the new growth. Keep a simple record of when damage starts and which protection was in place. That lets you install covers before the next planting and adjust the sowing date if the worst pest pressure arrives during the same warm stretch each year.
Read Yellowing, Wilting, and Leaf Spots Carefully
A collard that wilts midday but perks up by morning may be under heat or water stress; one that remains limp in wet soil needs a root-zone check. Yellowing can point to nitrogen shortage, but it is not a diagnosis by itself. Inspect the whole plant, the soil moisture, the roots if the plant is already failing, and whether other plants in the bed show the same pattern before adding fertilizer or spraying.
Small shot holes suggest flea beetles, while larger ragged holes with frass often point to caterpillars. Leaf spots, yellow V-shaped patches, or plants that wilt despite moist soil can signal disease rather than an insect chewing problem. Black rot and leaf spots affect brassicas, and clubroot can cause stunting, daytime wilting, and swollen, distorted roots. If roots are badly galled, do not assume extra water or fertilizer will cure the plant; remove the affected crop and seek a local Extension diagnosis before reusing that bed. (NC State Extension Plant Toolbox, Penn State PlantVillage)
Rotate Brassicas and Respond to Persistent Disease
Collards share pests and diseases with cabbage, kale, broccoli, and other brassicas, so rotating only from one collard variety to another does not break the cycle. Move the crop to a bed that has not recently grown brassicas, remove plant debris after harvest, and avoid working wet plants when foliage is easily bruised. A two- to three-year break is a useful general rotation goal for common crop problems, but clubroot is a special case: the pathogen can persist in soil for many years, and routine rotation alone may not eliminate it. (Penn State PlantVillage)
If you suspect clubroot, clean soil from tools and footwear before moving to another bed, and do not transplant soil or seedlings from the affected spot. Remove diseased roots rather than composting them in a home pile, then ask your county Extension office about management for your soil and region. Avoid applying lime simply because a plant is sick; changing pH without a soil test can create a new nutrient problem and is not a quick cure for established disease.
Plan Another Sowing or Save Seed for Next Season
In a long cool season, sow another small batch a week or two after the first instead of planting every seedling on the same day. Succession sowing makes harvests less dependent on one planting’s germination, one early heat wave, or a short-lived burst of pest pressure. Stop sowing when the next crop would not have time to establish before your area’s sustained heat or hard freeze.
If you want to save seed, leave a healthy plant through its second year and allow the flower stalk and seed pods to mature. That plant will shift energy away from tender leaf production, so keep it only if seed is the goal and leave space for it away from the harvest row. Collards may reseed in a mild climate, but seedlings that appear later are not a dependable substitute for a planned seasonal planting.
Conclusion
For reliable collards, plant during a cool window, choose spacing for the size of leaf you want, and keep the soil moist without leaving roots waterlogged. A fall crop is often the easiest route in hot-summer climates; a spring crop works well where leaves can mature before sustained heat. Start with a soil test and a local planting calendar, cover clean plants before caterpillars arrive, then harvest the outside leaves while protecting the crown. Those few decisions do more to extend a useful harvest than a strict fertilizer schedule or a single date on the calendar.