How to Install a Catch Basin for Yard Drainage
Install a catch basin with a safe outlet: assess runoff, call before digging, set the grate correctly, slope solid pipe, test, and maintain the system.
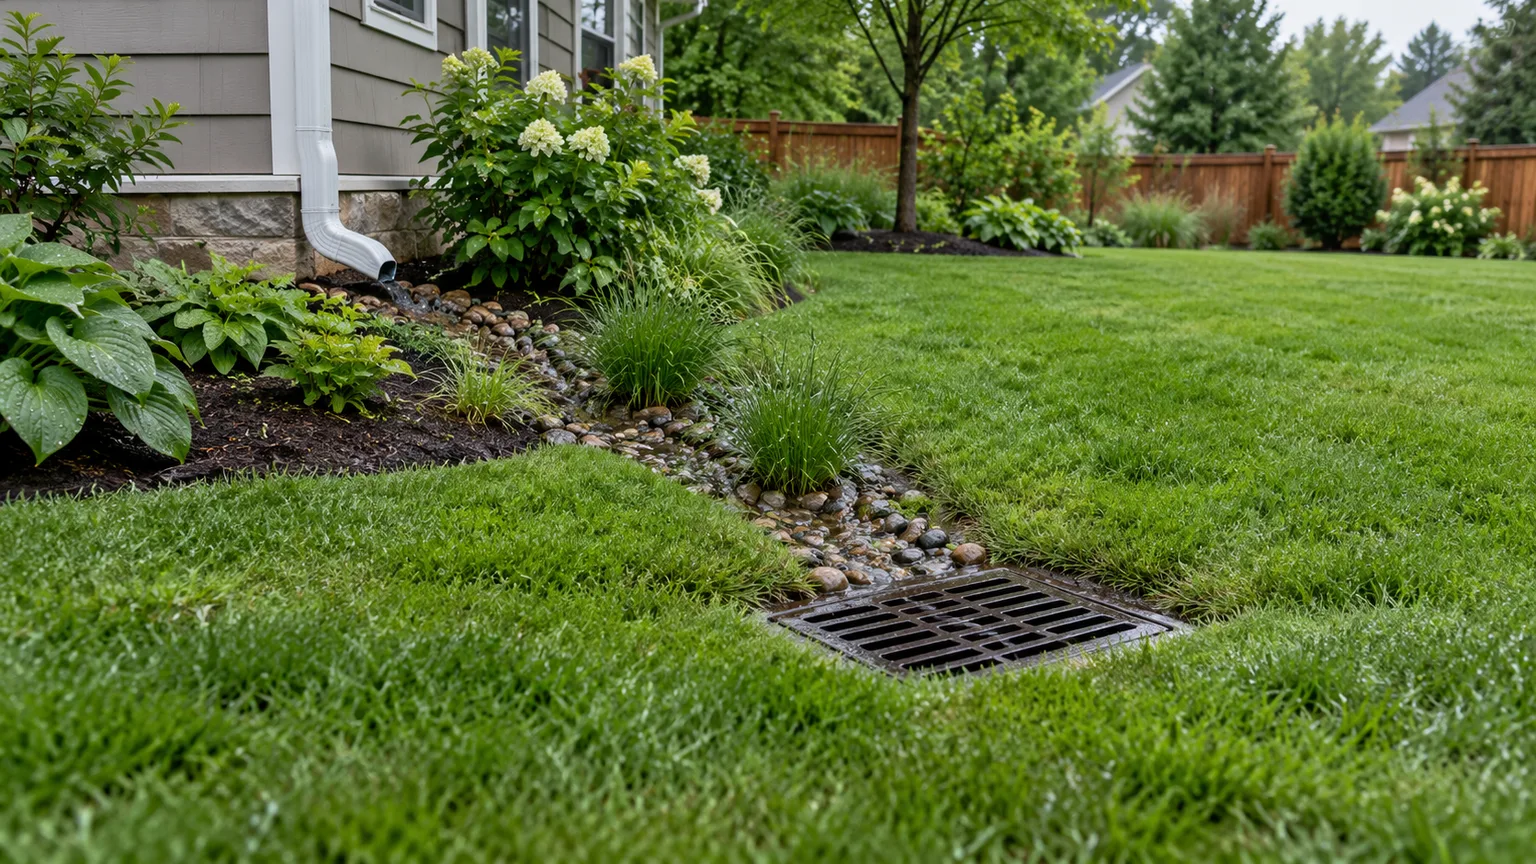
A catch basin is a grated box set at a low point in a yard or paved area. It catches surface water and feeds it into a buried pipe. That sounds simple, but a box in the ground does not make water disappear: a useful system also needs a pipe with continuous fall and an outlet that can legally and safely receive the flow.
That distinction determines whether this is a good do-it-yourself project. A basin can collect water that repeatedly pools at a driveway edge or beneath a downspout, but it will not correct a yard that slopes toward the house, make heavy clay absorb water, or solve groundwater pressure by itself. Before buying a kit, trace where the water comes from and decide where it can go.
What a Catch Basin Is—and What It Is Not
A residential catch basin is a buried chamber with a removable grate at the surface and one or more pipe ports on its side. Many models include a lower sump where sand, leaves, and grit settle instead of traveling immediately into the outlet pipe. That access point makes the box useful both as an inlet and as a place to inspect and clean the system.
A catch basin is not a pump, a dry well, or a sewer connection. Unless it is a product specifically designed and approved for infiltration, the basin does not dispose of water through its bottom; it passes water into the connected drain line. Do not assume that holes, leaks, or a gravel-filled excavation will improve drainage: they can send water into soil beside a foundation or allow sediment to enter the system.
How Water Moves Through the System
Rain falls on a roof, patio, or lawn and runs toward a low point. Water entering the grate drops into the basin; heavier debris may settle in the sump, while water reaches the side outlet and flows through a solid pipe toward a lower discharge point. The system depends on gravity, so the pipe cannot have a belly, rise, or hidden high spot that holds water.
A basin can receive a downspout outlet or collect surface runoff at a soggy low point, but those are different hydraulic jobs. A roof concentrates water at a known pipe, while a yard inlet must capture water spread across an area without becoming overwhelmed by a storm. For a large roof or broad paved area, use the basin manufacturer’s sizing guidance or ask a drainage professional to check the inlet and pipe capacity.
Catch Basin, French Drain, Dry Well, or Rain Garden?
The right system depends on whether water is arriving at one point, moving through a long strip of soil, or meant to soak into the landscape. These features can work together, but they are not interchangeable; Penn State Extension describes several property-scale stormwater choices, including redirecting downspouts and using rain gardens, and recommends expert help for complicated conditions (Penn State Extension: How Can I Control Stormwater on My Property?).
| System | Best fit | What it does | Main limitation |
|---|---|---|---|
| Catch basin / area drain | A repeatable surface low point or inlet location | Collects water through a grate and sends it into a pipe | Needs a maintainable, approved outlet; the inlet can clog |
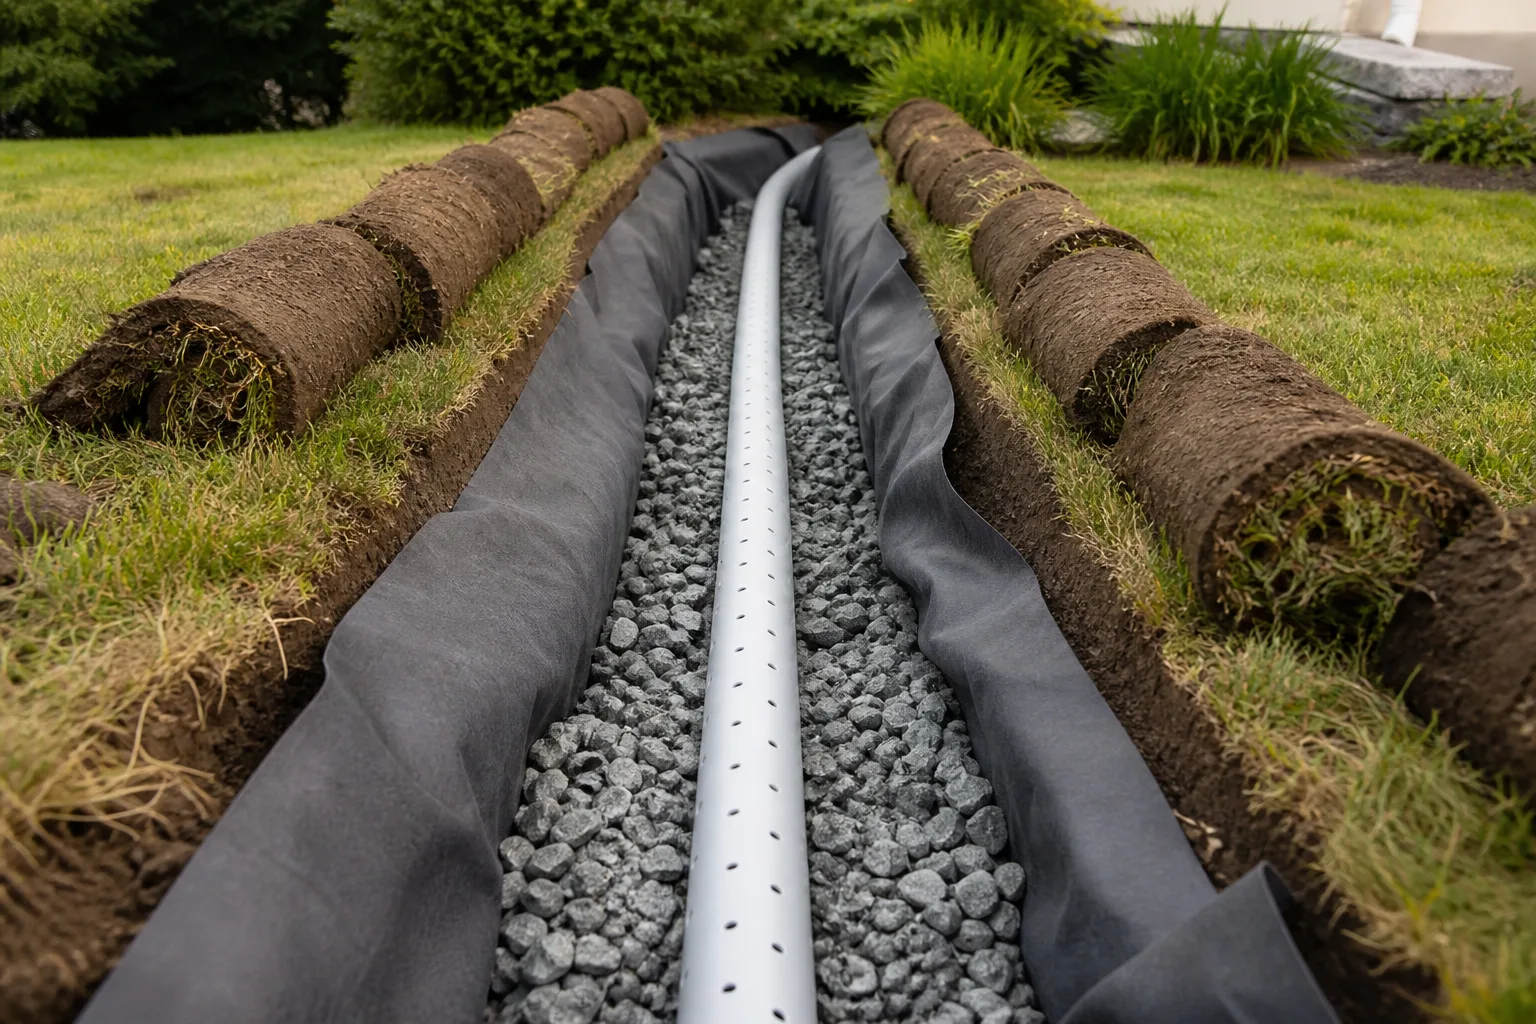
| French drain | Seepage or subsurface water moving along a longer route | Perforated pipe in a stone-filled trench collects water along its length | Needs a workable outlet and filter design; it is not a substitute for roof-leader pipe |
| Dry well | A measured amount of runoff where native soil can infiltrate it | Stores water temporarily while it seeps into surrounding soil | Fails in poorly draining or saturated ground and needs correct sizing and setbacks |
| Rain garden or swale | Surface runoff that can be slowed, spread, and absorbed in a suitable landscape | Uses grading and planting to manage water near the surface | Needs suitable soil, space, overflow planning, and local approval where required |
The solid pipe leaving a catch basin is a conveyance line, not a French drain. Perforations are designed to collect or release water in specific systems; mixing perforated pipe into a line meant to carry a concentrated downspout flow can leak water where you are trying to keep soil dry. For examples of a different trench-based approach, see this guide to building a dry creek bed.
Decide Whether a Catch Basin Fits Your Problem
A basin is worth considering when water repeatedly collects at a defined low point and you can carry it away from there. It can suit a paved patio corner, driveway edge, or a lawn depression that remains wet after you have corrected the roof drainage and checked the surface grade. It is also useful when you want a removable grate and sump that can be cleaned without excavating the pipe.
Start with simpler fixes if they address the cause. Penn State Extension recommends directing downspouts away from foundations and identifies rain gardens, rain barrels, and plantings as options for managing stormwater; a basin is only one tool in that larger system (Penn State Extension: How Can I Control Stormwater on My Property?). If the downspout simply empties beside the house, a correctly routed extension or splash block may be cheaper and easier to maintain than buried pipe.
Do not install a basin just because a spot is wet once. Water can linger after an unusually intense storm, snowmelt, irrigation leak, or temporary construction disturbance. If the puddle appears without rain, or if a foundation wall is damp, look for a broken water line, gutter leak, grading problem, or groundwater issue before assuming a grated drain is the fix.
Trace the Water Before Choosing Parts
Observe the yard during rain and again after it stops. Note where runoff enters, which direction it travels, where it pools, how long the pool persists, and whether it carries mulch or soil; these clues reveal whether you need an inlet, grading, erosion control, or a professional assessment. Photos from the same locations during two storms can show whether the problem is repeatable or tied to a single extreme event.
Sketch the proposed route from source to outlet, including the house, paved areas, trees, property lines, retaining walls, septic components, wells, and any existing drains. Mark the basin where water can actually reach the grate, but keep enough access to lift it for cleaning and enough clearance to avoid foundation footings and buried services. If the site has no safe downhill route, stop planning a gravity drain and compare infiltration options or professional designs instead.
Choose the Outlet Before You Dig
Decide where every gallon will go before you locate the basin. Depending on local rules and site conditions, possible endpoints include a stable daylight outlet on your own property, a designed swale, a properly sized dry well, or an approved municipal stormwater connection. Penn State Extension emphasizes controlling stormwater on the property and seeking landscape or engineering help when the problem is complicated (Penn State Extension: How Can I Control Stormwater on My Property?).
Never treat a neighbor’s lot, a public sidewalk, a sanitary sewer, or an unapproved street connection as a convenient outlet. Concentrated water can erode soil, flood a basement, damage pavement, or create a nuisance downstream; local codes may regulate both where you discharge and how you connect to public infrastructure. Ask your municipal stormwater or building department about permits, easements, and approved connections before the design is fixed.
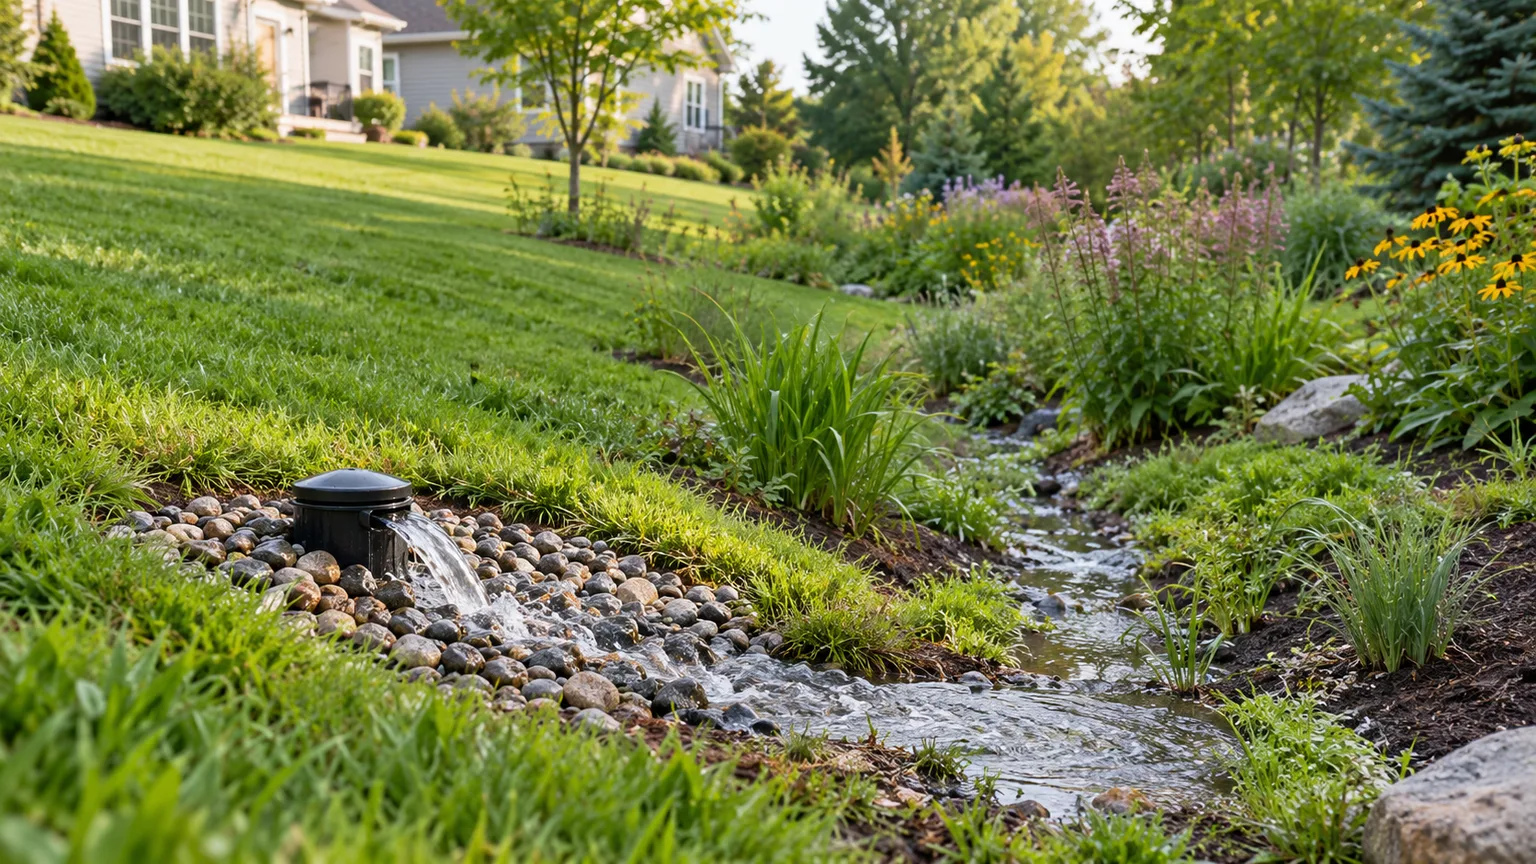
An outlet must remain open when leaves, snow, or landscaping are present. A pop-up emitter can be neat on a lawn, while a stabilized rock apron or swale may be better where water can spread without erosion. Whichever you choose, preserve a visible overflow route so an overwhelmed pipe does not send water back toward the foundation.
Plan the Route and Check Pipe Fall
Measure the pipe route and compare the outlet elevation with the basin outlet elevation. A gravity line needs a continuous downward pitch; the correct minimum depends on pipe diameter, expected flow, fittings, the basin system, and local code. The NDS installation guide gives a 1% slope as a planning example for its system, but product requirements are not universal (NDS: How to Install a Catch Basin).
The arithmetic is straightforward: fall = run × slope. At a 1% example grade, a 30-foot run drops 0.30 feet, or 3.6 inches; that is about 1 inch for every 8 feet 4 inches. Mark the required drop on stakes or calculate the pipe elevations before digging, then recheck with a line level, laser, or suitable builder’s level as the trench progresses.
A trench that looks downhill can still contain a reverse pitch where it passes a root, walkway, or shallow rise. A low pocket holds water and sediment; a pipe pitched too aggressively may also create a fast discharge that erodes the outlet. If the outlet sits higher than the basin outlet or the route requires deep excavation, a gravity basin is not the right design without a revised route or engineered solution.
Check Local Rules and Call Before Digging
Buried service lines can run through lawns and gardens, not only beside driveways. In the United States, contact the local 811 notification service before excavation and wait for required utility responses and markings; the Call 811 portal directs homeowners to their state’s notification center and process (Call 811: 811 in Your State). If you live elsewhere, use the equivalent utility-locate service in your area.
Utility markings do not identify every private line. Irrigation, landscape lighting, a private well line, septic piping, or a homeowner-installed cable may require separate identification, so check your property records and arrange private locating if needed. Respect marked tolerance zones and hand-dig only as local instructions specify; never assume a shallow trench is safe because it is small.
Before ordering parts, confirm setbacks, easements, permit requirements, and rules for storm drains, streets, and shared drainage. Penn State Extension notes that stormwater redirection practices and community requirements can differ, and its guidance is not a substitute for your local code. If the work is near a foundation footing, retaining wall, septic system, well, wetland, or public right-of-way, get the relevant authority or a qualified professional involved before excavation.
Choose Basin, Pipe, Tools, and Materials for the Job
Select a basin whose inlet area and outlet arrangement match the amount and type of water you need to collect. A small grate designed for a patio corner may not be appropriate beneath a downspout serving a large roof, and a basin intended for foot traffic is not necessarily rated for vehicle loads. Check the manufacturer’s flow and load ratings, compatible pipe adapters, sump depth, and whether the grate can be removed without special tools.
For a line that carries water away, use a solid-wall drain pipe with compatible fittings, not perforated French-drain pipe. Four-inch pipe is common in residential products, but it is not a universal prescription; choose diameter and material for the expected flow, burial conditions, basin outlet, and local requirements.
NDS’s product-specific guide explains basin connections and installation sequence (NDS: How to Install a Catch Basin). A general DIY overview from Mr. Rooter notes that installation steps vary by basin type, so use the exact product sheet to settle fitting and sealant choices (Mr. Rooter: How to Build a Drainage Catch Basin).
Choose a basin with enough ports for the planned layout and access for cleaning sediment. Never rely on caulk to compensate for a mismatched fitting or unsupported pipe.
Rest the pipe on its own stable bedding, with the basin level and supported independently. The pipe should not hang from the basin outlet connection.
A basic project may need a catch basin and load-appropriate grate, the correct outlet adapter, solid drain pipe, compatible couplers and elbows, clean bedding aggregate, marking paint, stakes and string, a tape measure, a level, shovel, pipe cutter or saw, and backfill. The amount of stone, pipe, and fill depends on the basin model and route; follow its installation sheet instead of treating a generic shopping list as a design.
Have eye protection, gloves, sturdy footwear, and a tarp ready before you dig. Separate reusable turf and topsoil from subsoil so you can restore the surface neatly, and keep soil away from the trench edge. If the job needs machinery, a deep or long trench, work beside utilities, or entry into an excavation, hire a qualified installer; do not work in an unsupported trench.
Step 1: Mark the Basin and Trench Route
Mark the basin footprint at the actual surface low point, then mark a route to the approved outlet with stakes and string. Confirm that the route avoids utility markings, tree roots, septic components, footings, and hardscape you do not want to cut. Measure the run and calculate the fall again before any soil is removed.
Family Handyman’s yard-grading guidance explains why water near a home should move away from the foundation rather than pool against it (Family Handyman: How to Grade a Yard for Proper Drainage). Apply that same logic to the drain route: the basin should intercept water where it collects, while the pipe carries it away from the home and does not redirect the problem to a neighboring area. Check the proposed layout during a storm if you are unsure where surface flow really travels.
Step 2: Excavate and Prepare a Stable Base
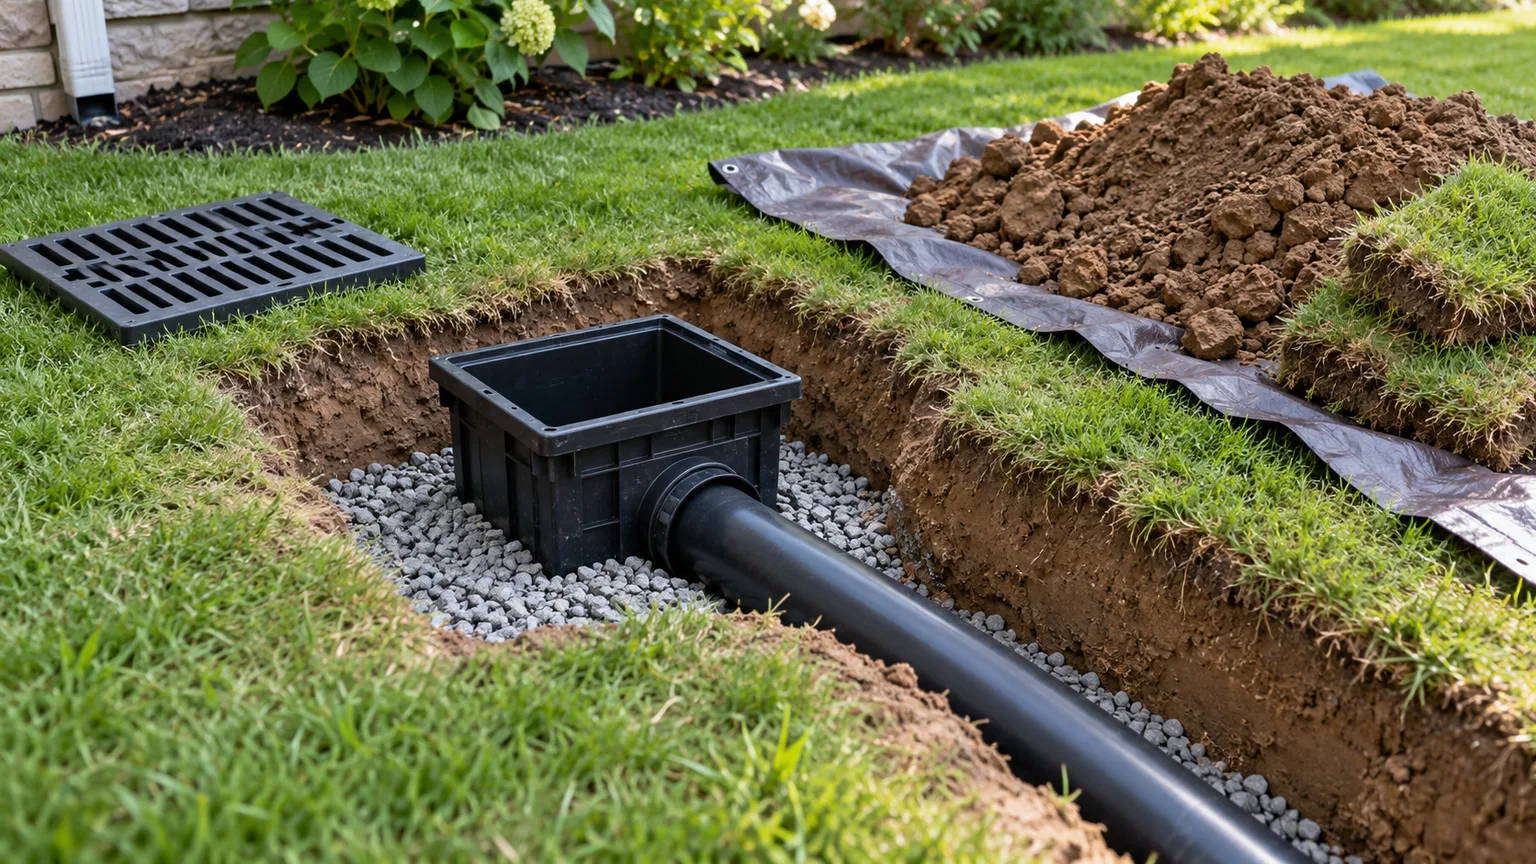
After utility marking and any required approvals, excavate the basin hole and a trench wide enough to place and connect the pipe without forcing it. The basin excavation generally needs working room around the product; the base needs enough depth for the manufacturer-specified bedding while leaving the grate at the intended finished elevation. Keep excavated soil on a tarp, and do not leave an open trench unattended where someone could fall into it.
Remove loose, soft material under the basin and place the specified clean aggregate or bedding. Compact and level it as the product instructions require; an uneven base can settle, tilt the grate, strain the pipe joint, and let surface water bypass the inlet. Avoid digging below a footing or undermining a paved edge, wall, or tree root to meet an arbitrary depth from a generic guide.
Step 3: Set the Basin at the Right Grade
Dry-fit the basin on its prepared base, check that it is level in both directions, and set its top so the grate catches water without becoming a trip hazard. On lawn, the grate usually needs to sit flush with or slightly below the immediate collection surface; on paving, it should align with the finished surface and the product’s load rating. The low point should lead water to the grate rather than let it skim past.
Keep the basin accessible and orient its outlet toward the planned trench. Remove only the manufacturer-designated knockouts and use the model’s specified adapter or gasket; a rough oversized opening can leak soil into the box and weaken support. If the basin includes a sump or drain plug, keep it configured as designed rather than drilling extra holes to make water disappear.
Step 4: Connect and Bed the Solid Pipe
Dry-fit the outlet pipe and fittings from the basin to the discharge point before making permanent joints. Keep the pipe continuously descending, support it on the specified bedding, and avoid tight turns that create snag points or make later cleaning difficult. Use the jointing method approved for that pipe and basin; gasketed, soil-tight, and solvent-welded systems have different instructions.
A pipe joint does not have to be under household water pressure, but it still must stay aligned and resist soil intrusion. Support the pipe independently so its weight and backfill do not pull on the basin wall, and test the assembled route before covering any connection. If connecting a downspout, use the adapter designed for the outlet and include a way to inspect and clean leaves before they reach the underground line.
Step 5: Build a Stable, Visible Outlet
At the lower end, finish the pipe with the approved emitter or outlet detail and protect the receiving ground from erosion. A pop-up fitting should open under flow and sit where its discharge can spread across stable soil; a daylight outlet should be visible, supported, and protected from mowing damage and animals. Do not bury the pipe end under mulch or let the receiving area slope back toward the house.
Check that the outlet is below the basin outlet and clear of standing water, debris, and likely snow or leaf blockage. A dry well or rain garden is only an appropriate endpoint if the soil, groundwater, setback, overflow, and local stormwater requirements support it. Penn State Extension describes a rain garden as a landscape feature that temporarily holds water until it infiltrates and suggests professional advice for complicated stormwater conditions (Penn State Extension: How Can I Control Stormwater on My Property?).
Step 6: Test the System Before Backfilling
Leave joints and the basin visible while you test. Slowly pour water into the basin or run a hose into the inlet, then watch the outlet: water should move through without backing up, leaking soil into the box, or flowing toward the foundation. Repeat with enough water to reveal a sag or poor-fitting joint, but do not create a flood that overwhelms the system and hides the cause.
A successful test checks more than whether water exits once. Confirm that it drains promptly after the flow stops, that no section of the pipe holds a puddle, that the grate remains level, and that the outlet does not scour its receiving area. If the basin fills faster than it empties, clear debris and recheck the grade and pipe route before burying it.
Backfill Carefully and Restore the Surface
Once the test passes, backfill in small lifts around the basin and pipe using the material and compaction approach specified for the system. Do not dump a large mass of heavy soil on one side of a plastic basin; uneven pressure can shift it or distort its wall. Keep the grate and any cleanout accessible, and avoid putting vehicle loads over pipe or a basin not rated for them.
Replace turf or topsoil and shape the surface so runoff still reaches the grate while the surrounding grade moves away from the building. Do not create a raised ring of soil that dams water outside the basin, and do not cover an emitter or inspection point with mulch. Run another controlled hose test after restoration and after the first substantial rain.
Maintain the Basin and Diagnose Slow Drainage
Inspect the grate after leaf fall, storms, and spring cleanup. Lift it safely, remove leaves and sediment from the sump, check that the outlet is clear, and replace the grate securely; a catch basin’s ability to trap debris is useful only if the debris is removed before it blocks flow. Keep grass, mulch, and landscape fabric from covering the opening.
If water remains in the box, first check whether the basin is intentionally designed to retain a sediment sump; a shallow amount may be normal for that model. A full basin that backs up during rain can point to a clogged grate or pipe, insufficient pitch, a frozen or submerged outlet, or a receiving area that is saturated. If the yard stays wet while the basin drains freely, the basin may be collecting one point correctly but failing to address the broader source, such as negative grade, compacted soil, or groundwater.
Watch for settling around the grate, erosion at the outlet, a new wet patch above the pipe, odors, or repeated sediment. Those signs can mean a loose joint, a damaged line, or an undersized system. Do not pour drain chemicals into a yard basin; remove debris mechanically or ask a drainage contractor to inspect the line if the blockage is beyond the sump.
When to Hire a Drainage Professional
A single small basin with a short, shallow route and an approved outlet may be manageable for an experienced homeowner who can verify utility locations, grade, and the product instructions. A drainage contractor or civil/landscape professional is the safer choice when several drains must connect, flow comes from a large roof or steep slope, the lot has a high water table or heavy clay, the pipe needs substantial depth, or runoff is already reaching a basement or retaining wall.
Get professional help if there is no obvious gravity outlet, the project would alter a public drain or curb, the discharge could affect another property, or the system must handle water from multiple sources. Penn State Extension similarly advises considering an engineer or landscape professional for complicated stormwater issues. Before accepting a plan, ask the installer to identify the design flow, pipe fall, receiving point, cleanout access, overflow path, permit responsibility, and who will restore the lawn or paving.
Conclusion
A catch basin is a grated surface inlet, a sediment sump, and a pipe connection—not a complete drainage solution by itself. It works best where water predictably collects and a properly sized, continuously descending line can carry it to a permitted, stable destination.
Observe the yard first, choose the outlet before digging, confirm local rules and underground utilities, and follow the exact basin and pipe instructions. Set the grate to collect rather than bypass water, support and slope the pipe, test everything before backfilling, and keep the sump clean. If the route, capacity, or discharge point is uncertain, solve that design question before starting the excavation.



