How to Kill Weeds With Dish Soap (and Its Limits)
See when dish soap can scorch weed leaves, why it is not a selective herbicide, and which removal method works better in beds, lawns, or pavement cracks.
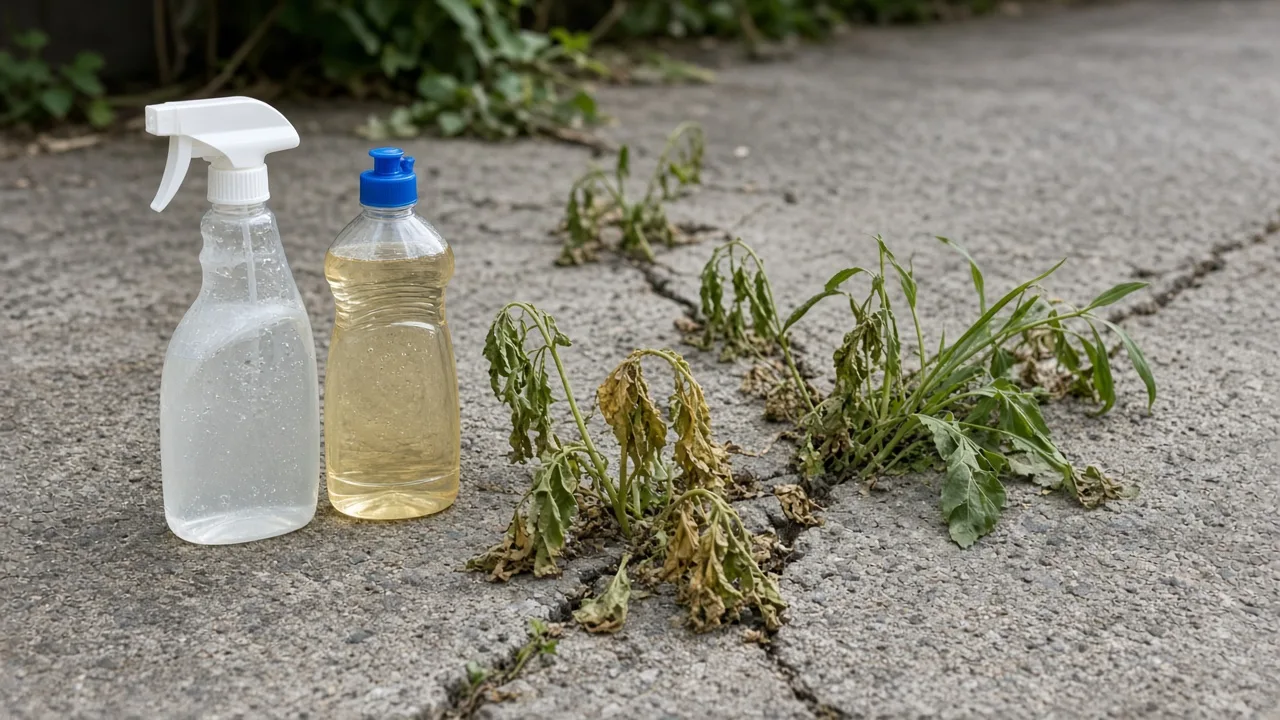
The short answer: dish soap can injure weed leaves, but it is not a dependable, selective weed killer. A spray that makes foliage wilt may leave the roots alive, and the same detergent can scorch nearby flowers, lawn grass, or vegetables if it drifts or runs off.
That distinction matters more than the recipe. A small annual seedling growing alone in a pavement joint is a different problem from a dandelion rooted in a lawn or a perennial weed threading through a flower bed. Before you reach for a spray bottle, identify where the weed is growing and whether you need to damage its leaves, remove its roots, or stop new seedlings from appearing.
The short answer
Dish soap is not a reliable stand-alone herbicide. It may help a homemade spray spread over or cling to foliage, and at some concentrations it can damage leaves. But that surface injury does not reliably reach a weed’s crown, taproot, rhizomes, or other below-ground storage organs. If those structures remain alive, the plant can push up fresh growth after the treated leaves dry or fall away.
There is a real difference in extension advice. Colorado State University Extension’s Pueblo County page includes a soap-and-water recipe for coating weeds, while Montana State University Extension says there is little research on ordinary dish soap as a spray additive and advises caution. That disagreement is a reason to set expectations: a recipe on an extension page does not establish a universally safe concentration or guarantee control across weed species, soil types, or garden settings.
If you want to remove one small weed, a hand tool is usually more predictable. If your goal is to prevent weeds in a bed, a suitable mulch and regular seedling removal do more than a detergent spray. Save any pesticide for a product whose label lists the site and target weed, and follow that label rather than adding kitchen ingredients.
What dish soap is doing in a weed spray
Dishwashing liquid is formulated to clean dishes. Gardeners add it to some homemade sprays because a surfactant changes how liquid behaves on a waxy leaf: it can lower surface tension and help a mixture spread or stay in contact. That does not make the dish soap the active ingredient that selectively kills a weed. In a vinegar mixture, for example, acetic acid is the contact-damaging ingredient; soap is added as a spreading agent.
The problem is that “dish soap” is a category of changing household formulations, not one standardized garden product. Ingredients and concentrations differ, and the bottle does not generally give weed-control directions for a particular garden site. Montana State Extension notes that the effectiveness of common dish soap as a surfactant has little research behind it, and that soap ingredients could react with soil particles or fertilizer. A homemade mix can therefore behave differently from one brand, plant, or application to another.
Soap alone versus a labeled surfactant
Do not confuse dish detergent with insecticidal soap or with an adjuvant recommended on an herbicide label. University of Georgia Extension describes commercial insecticidal soaps as formulated potassium salts of fatty acids; they are made for particular pest-control uses. Household dish soaps are different products and can injure foliage, especially at high concentrations, on stressed plants, or during hot, humid weather.
A labeled spray adjuvant is also not interchangeable with dish liquid. It is selected for compatibility with a particular pesticide and used at its labeled rate. Epic Gardening’s practical discussion of spreader-stickers likewise cautions against using dish or castile soap as a substitute, because ingredients may interact with a garden product or burn plants. If an herbicide label says to add a specific surfactant, use only what the label names or permits. If it does not call for one, do not assume extra soap will improve the result.
Why a weed may brown and then return
Leaves are the visible part of a plant, not the whole plant. A contact treatment can injure tissue it touches without traveling down to the root system. A small, newly emerged annual with little stored energy may be easier to finish off than an established perennial, but results still depend on coverage, weather, the weed’s growth stage, and what the spray actually contains.
Perennial weeds survive through structures below the soil. Dandelions store energy in a taproot; bindweed and some grasses can spread from underground roots or rhizomes. If a spray browns the top growth but misses those reserves, the plant can regrow. A fast change in leaf color is therefore not the same as durable control. Check the crown and site over the next several weeks instead of treating a brown patch as proof that the weed is gone.
This is also why repeating the same weak treatment can waste time. Each round can expose nearby plants and soil without solving the root problem. If fresh shoots appear, switch to a method matched to the weed: remove the root where practical, repeatedly cut back a spreading perennial to weaken it, or use a labeled control appropriate to the site.
Which weeds a surface spray might affect
A leaf-contact spray is most plausible on a tiny, exposed seedling with soft leaves and no established root system. Even then, “might affect” is more accurate than “will kill.” A mature plant, a grass with a dense crown, a creeping weed with runners, or a taprooted perennial is more likely to recover if only its leaves are damaged.
Before treating, look for the plant’s growing point. For a weed in a crack, the crown may sit below the pavement line; for a lawn weed, it may be tucked among grass blades; in a bed, the weed may share soil and foliage with plants you want to keep. If you cannot tell which plant is the weed, do not spray it. Young self-sown flowers and vegetable seedlings can resemble weeds, and a nonselective contact spray will not know the difference.
The practical rule is simple: the harder it would be to replace a nearby plant or repair the treated area, the less sense an improvised broad spray makes. Pulling one weed may take longer than spraying it, but it gives you control over exactly what is removed.
Where dish-soap spray can cause trouble
Household soap does not distinguish a weed from a wanted plant. A droplet that lands on a tomato leaf, lawn blade, flowering perennial, or young tree can damage that foliage too. This risk increases when a sprayer makes a fine mist, when wind carries droplets, or when the target weed grows within a dense planting. Rinsing a plant after exposure may limit residue, but it cannot guarantee that a leaf already injured by a concentrated spray will recover.
University of Georgia Extension warns that high concentrations of dish soap can burn plant foliage, particularly when plants are stressed and conditions are hot and humid. That is an important caveat to advice that homemade sprays work best on a hot day: heat may speed visible drying, but it can also make collateral injury more likely. If you are managing a vegetable bed, pollinator border, newly planted lawn, or stressed plantings, skip the soap experiment and remove the target mechanically.
Lawns, beds, and edible gardens
Do not spray dish soap across a lawn to spot-treat broadleaf weeds. The same contact that browns a weed can burn turf, leaving bare spots where new weeds can establish. In a mixed flower or vegetable bed, overspray can mark foliage and may contact plants you plan to eat. A label for a kitchen detergent is not a crop-use instruction, and washing harvested produce later does not undo plant injury or make an unapproved treatment appropriate.
For an isolated weed among ornamentals, use a narrow weeding tool and shield nearby stems while loosening the root. For a weed in a lawn, choose a hand removal method suited to the root or consult local extension guidance on a lawn product labeled for that weed and grass species. Selective herbicides are not universally safe either; the label determines where and how they can be used.
Soil, drains, and nearby water
Avoid spraying where liquid can flow into a storm drain, pond, stream, or vegetable-bed soil. Household detergent formulations vary, and surfactants can move with water rather than staying neatly on the weed. UConn Extension’s review of homemade pesticide recipes stresses that familiarity does not make a mixture harmless; recipes vary, repeated applications can have collateral impacts, and users may increase a mix because they assume it is safer.
Do not make a large batch to store. If a product label does not authorize the use, there is no label telling you how to store, dispose of, or repeat that homemade mixture. Keep children and pets away from wet sprays, avoid windy conditions, and prevent runoff. The simplest way to eliminate these uncertainties is to use a hand tool in a planted area.
If you still choose to test a soap-only spray
First decide whether the location can tolerate damage. A single weed in an isolated crack is a lower-risk test site than a lawn, edible garden, or border packed with desired plants. Identify the weed, check for roots or runners that will survive leaf injury, and consider whether a weeding knife can remove it more completely. If the weed is close to a valued plant, skip the spray.
Colorado State University Extension’s Pueblo County page lists one recipe—five tablespoons of dish soap mixed with four cups of water—and says to coat weeds. Treat that as a single local extension suggestion, not as a universal dose or a tested guarantee. Montana State Extension reports little research on the effectiveness of ordinary dish soap as a surfactant. Because household products differ and soap can injure foliage, I would not use this recipe across a lawn, bed, or edible crop.
If you choose to experiment, make only enough for one small, isolated weed; apply it directly to that weed’s leaves rather than misting the area; keep the spray off desirable foliage and soil; and do not add vinegar, salt, bleach, or another cleaner. Do not spray in wind, over water, or during conditions that stress neighboring plants. Wear eye protection and gloves to avoid splashes, and discard any leftover mixture safely rather than leaving an unlabeled bottle around. If leaves brown but the crown sends up new growth, stop repeating the mix and remove the plant or change methods.
Does soap make vinegar or salt work better?
Adding dish soap does not turn a homemade mixture into a selective or root-killing treatment. It may change how a liquid spreads across foliage, but the other ingredient still determines most of the plant injury. Combining household products can also make a mixture more difficult to predict. If your reason for adding soap is “it makes the spray stronger,” pause and ask what the stronger spray might damage besides the weed.
Vinegar burns contact tissue but may miss roots
Acetic acid can burn plant tissue it touches. Montana State Extension and UConn Extension explain that contact injury is nonselective, so a spray may damage ornamental plants just as readily as a weed. Household vinegar is relatively dilute and can fail on established weeds; stronger horticultural vinegar can be caustic and requires strict label and protective-equipment precautions. A browned top does not mean a perennial root is dead.
Do not spray vinegar near wanted plants or assume that dish soap makes it safe to use around them. The soap does not create selectivity. If you need a treatment for a specific site, choose a product labeled for that site and target rather than raising household vinegar strength or improvising a blend.
Salt can leave a lasting soil problem
Salt can desiccate plant tissue, but it can also remain in the soil and make conditions worse for future plants. Montana State Extension cautions against adding salt to garden soil, and UConn Extension notes that repeated homemade applications can build salts that harm desired plants. Even if the weed dies, a salty patch can interfere with later planting or move toward roots with water.
That makes salt a poor choice for a flower bed, lawn, or vegetable garden. A crack in a hard surface may look like a place where nothing else grows, but runoff can carry dissolved salt into adjacent soil. Use a scraper, narrow weeding knife, or boiling water with careful targeting in suitable hardscape areas instead of contaminating the surrounding bed.
Better ways to remove weeds
The best alternative depends on the weed’s life cycle and where it is growing. A seedling can often be lifted easily after rain; a mature taproot needs a deeper tool; a broad patch of small annual weeds may respond to shallow hoeing; and an empty bed may benefit from mulch or a light-blocking cover. A method that targets the plant’s structure is usually more repeatable than spraying soap and waiting to see what wilts.
BBC Gardeners’ World’s guide to weeding without chemicals recommends tracing persistent weeds to their roots and repeatedly weakening shoots when a full root removal is not possible. Epic Gardening likewise puts hand removal and mulch among practical approaches for avoiding unnecessary spray. Use the method that removes the plant or prevents new emergence while disturbing the fewest desired plants and the least soil.
Pull or dig when the root matters
For a small weed in a bed, water the soil beforehand or work after rain, when roots release more easily. Grip close to the soil line and pull slowly. For taprooted plants such as dandelions, insert a narrow weeding knife beside the root, loosen the soil deeply, then lift the root rather than snapping the leaves off at ground level. Replace the soil and check the spot for regrowth.
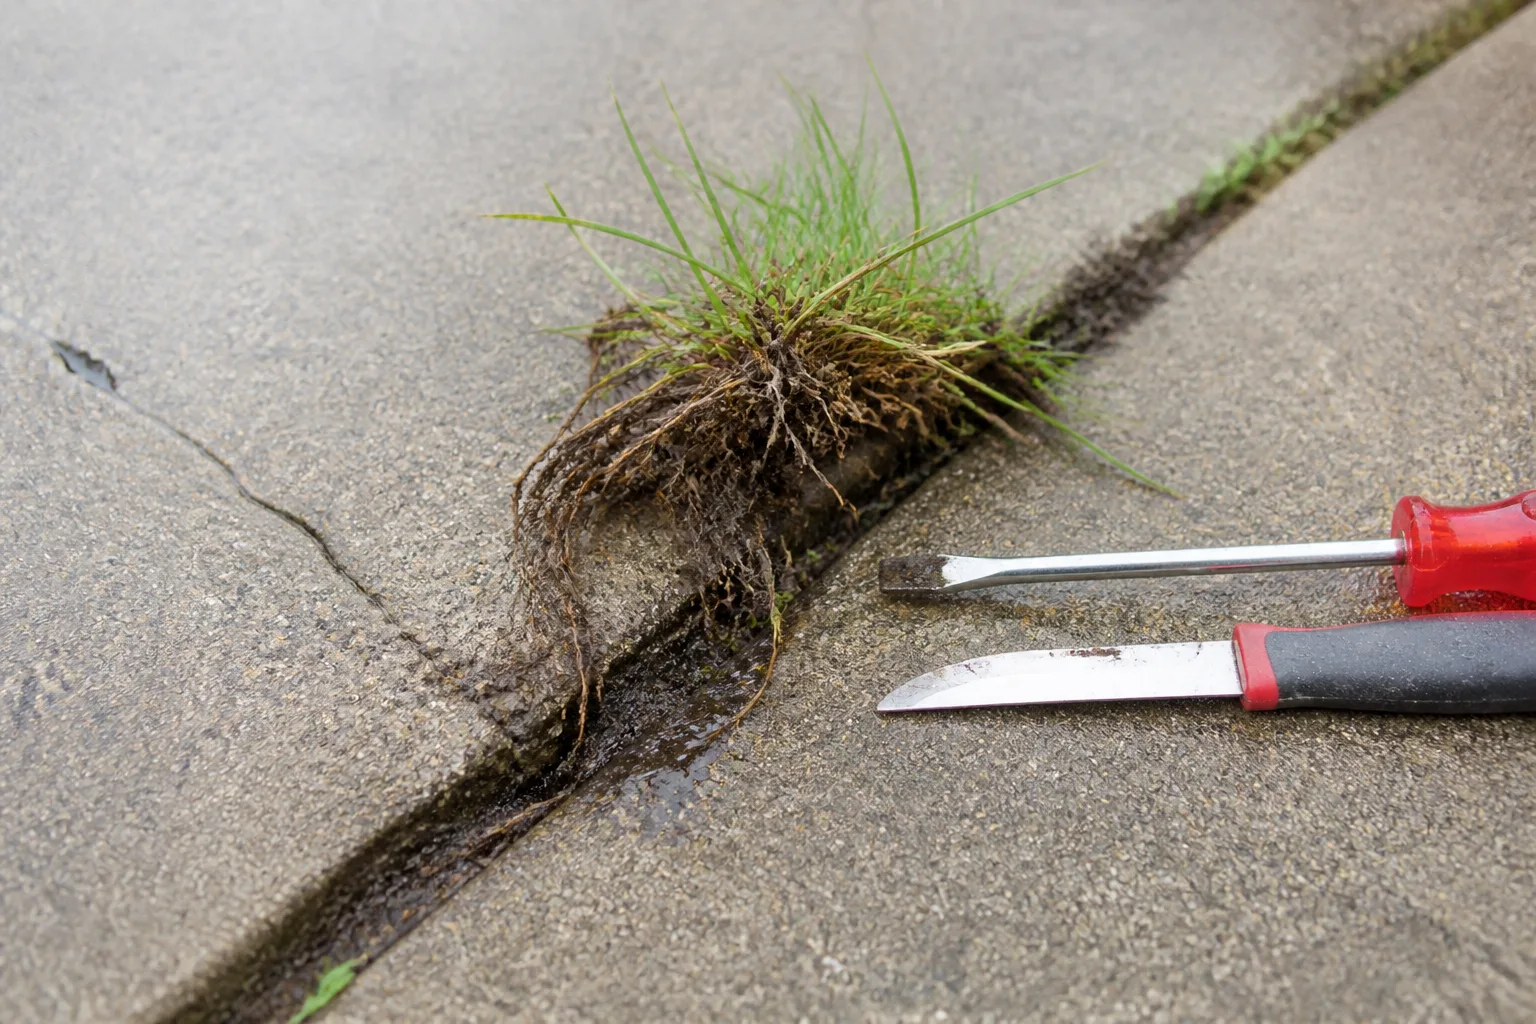
For creeping weeds, do not aggressively chop roots into small pieces; some species can regenerate from fragments. Loosen a wider area, follow runners where possible, and remove seedheads before they mature. If you cannot remove every root, repeat a careful cut or pull whenever fresh shoots appear. Consistency weakens the plant and stops it from replenishing its energy or dropping more seeds.
Remove mature seedheads from the bed rather than leaving them on top of the soil. Composting weeds with ripe seeds or persistent roots can spread them if the pile does not heat sufficiently. If you are unsure whether a plant is invasive, thorny, or irritating, identify it before handling and use gloves and a tool rather than bare hands.
Hoe young annual weeds and stop seed production
A sharp hoe can sever tiny annual weeds just below the soil surface before they build a large root system. Work when the soil is dry enough to crumble, and use a shallow stroke so you do not bring buried seeds to the surface or disturb the roots of nearby plants. On a dry day, exposed seedlings can wither; after rain, fragments may re-root, so gather them if the species is prone to regrowth.
For flowering weeds, remove seedheads promptly even if you cannot pull the whole plant that day. This will not kill the root, but it prevents one plant from adding more seeds to the area. BBC Gardeners’ World notes that regular removal and cutting back can weaken some persistent weeds over time. Think of this as repeated energy depletion, not an instant cure.
In lawns, raising mowing height to suit the grass and keeping turf dense can reduce open space for weed seedlings. If the lawn is thin because of shade, compaction, poor drainage, or drought, fix that underlying condition before expecting a weed spray to solve the problem. A vigorous lawn competes better than bare soil.
Mulch beds and maintain pavement joints
In a garden bed, remove existing weeds first, then cover bare soil with an appropriate organic mulch. A few inches of coarse mulch blocks light from many new seedlings and slows moisture loss; it does not kill every established perennial or stop seeds from landing on top. Pull seedlings that appear above the mulch and replenish the layer as it decomposes. Keep mulch away from plant crowns and woody stems so it does not trap excess moisture against them.
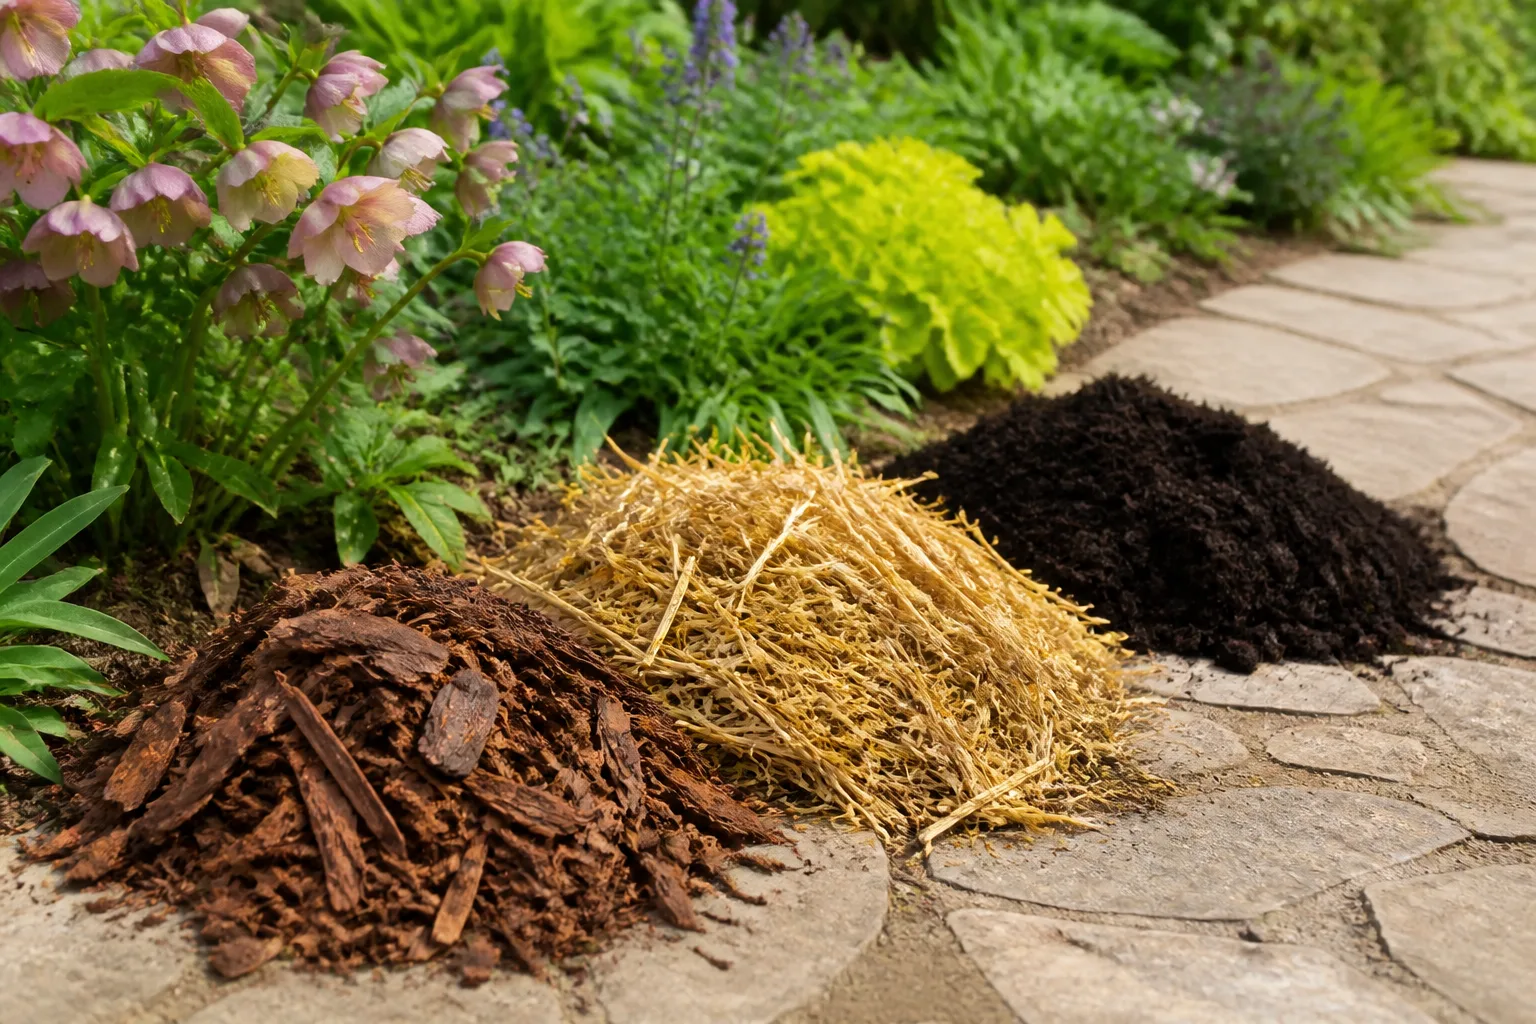
For a larger patch you are not ready to plant, a light-excluding cover such as cardboard beneath mulch can suppress growth while you prepare the site. Check edges and openings, because any gap that admits light can become a route for new shoots. If you use landscape fabric, plan for maintenance: soil and debris collect on top, and weeds can root in that material over time.
Between pavers, scrape out the crown and root with a narrow tool, then sweep joints clear of soil and seed debris. Refill the joint with a suitable material if needed, and inspect it periodically. Dish soap may make a leaf look damaged for a few days, but removing the weed and reducing the bare soil in the crack addresses the actual reason it keeps returning.
Choose the method by location
| Where the weed is growing | Better first choice | Why it is usually a better fit |
|---|---|---|
| Flower or vegetable bed | Hand-pull or dig; mulch afterward | Keeps a nonselective spray off valuable foliage and edible crops |
| Lawn | Remove the whole weed with a suitable tool; improve turf density | Soap can injure grass along with the weed |
| Between pavers | Scrape out the crown and root; maintain the joint | Targets the plant without putting detergent into a bed or lawn |
| Large, empty patch | Cover with cardboard and mulch, or use an appropriate labeled product | Light exclusion or a labeled treatment is more systematic than repeated spot spraying |
| Deep-rooted perennial | Identify it, remove or weaken roots repeatedly, or seek local extension advice | Leaf browning alone often leaves underground growth alive |
These are starting points, not universal prescriptions. A weed’s identity changes the best approach, and soil, climate, nearby plants, pets, water, and local product labels all matter. If a plant is spreading aggressively or you cannot identify it, take a clear photo to your local cooperative extension office before using a chemical treatment. The right identification can prevent you from damaging a desirable plant or spreading an invasive one.
What to do after the first treatment
Whether you pull, hoe, cover, or use a labeled product, look for new growth instead of judging success from the first day. A contact spray can make leaves droop within a short period, while a surviving crown may take longer to send up new shoots. Recheck the area in a week and again over the next few weeks. If the weed returns, identify whether it came from an intact root, a runner, or a new seedling before deciding what to do next.
For hand removal, lift regrowth while it is small and replenish mulch where soil is exposed. For a perennial that keeps resprouting, dig more of the root or repeat a controlled removal schedule. For a lawn, repair bare spots with the right grass seed at a suitable time for your region so the opening does not invite another flush of weeds. Do not keep increasing soap concentration to force a result; a stronger mix can injure wanted plants without improving root control.
If you use a commercial herbicide instead, read the full label before buying or applying it. Confirm that it lists the weed and site—such as lawn, ornamental bed, or pavement edge—and follow the directions for rates, timing, protective equipment, storage, and re-entry. Do not add dish soap unless the label specifically permits the adjuvant and rate. Local extension offices can help identify persistent weeds and explain regional options.
Conclusion
Dish soap may damage exposed weed leaves, but it is an uncertain way to kill a weed permanently. It is not selective, does not reliably reach roots, and can injure grass, flowers, vegetables, or soil-adjacent areas when the spray lands in the wrong place. One extension office lists a soap-water recipe; another says the evidence for ordinary dish soap as a surfactant is limited, so do not treat a recipe as a guarantee.
For a single weed, remove the root with a hand tool. For a bed, pair early seedling removal with mulch. For a crack, scrape out the crown and reduce the soil and debris where seeds settle. If those methods do not fit, use only a labeled control suited to the site. That approach takes the weed’s growth habit seriously and avoids turning an easy kitchen shortcut into a larger garden problem.