How to Build a DIY Obelisk Trellis for Garden Vines
Make a stable DIY obelisk trellis from 2×2 lumber. Get the cut list, assembly order, finish options, and guidance for choosing and training garden vines.
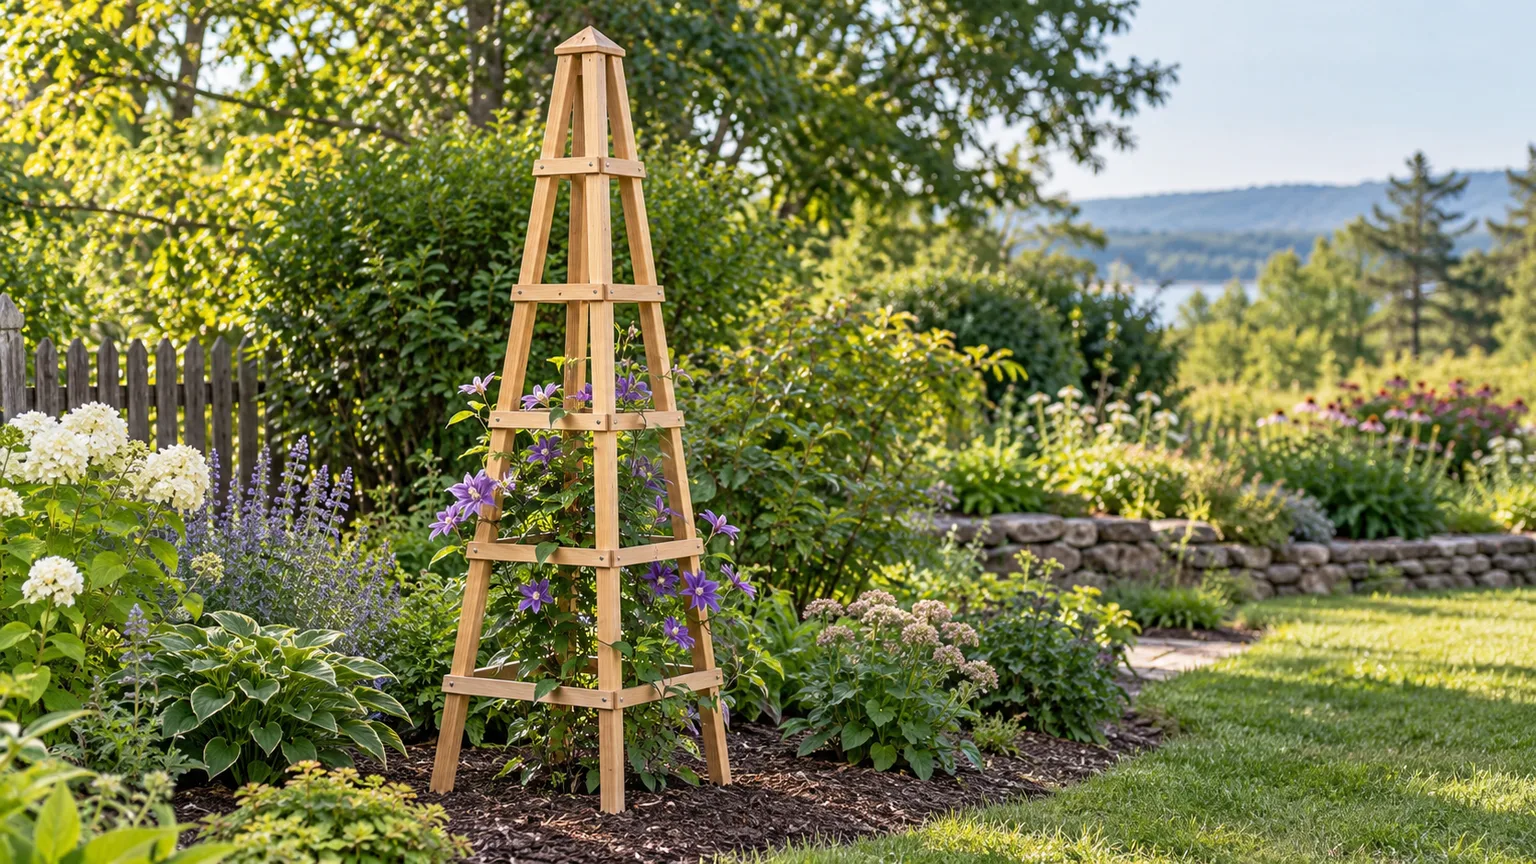
A wooden obelisk trellis is a freestanding, tapered frame with crossbars that give climbing plants places to grip or tie in. This build uses four 2×2 uprights, five tiers of rungs, and a square 24-inch base; the plan makes a six-foot structure for light to moderately vigorous vines. The essential beginner trick is to assemble two matching ladder-shaped sides first, then connect them into a square so the finished frame does not twist.
This design favors a stable footprint and accessible repair over a decorative planter at the top. It is not a load-bearing arbor, a tomato cage for a large indeterminate plant, or a permanent support for a heavy woody vine. Fine Gardening’s guide to choosing a structure for vining plants describes obelisks as useful for adding height with gentler climbers such as clematis; the frame below follows that same scale, while the University of Minnesota Extension’s trellis guide underscores a general rule: the structure has to fit the load and training system.
Is an Obelisk Trellis Right for Your Plant and Space?
An obelisk works when you want a vertical focal point in a border or a compact support for a vine that can be trained around several sides. Its four faces offer more access than a flat trellis, and the freestanding form can be repositioned before a plant fills it. A six-foot frame with a two-foot footprint suits a small bed, but measure the mature plant and clearances before you cut: a dense vine can occupy far more space than its container suggests.
Choose this design for annual climbers and moderate vines that can be guided onto narrow rungs, such as sweet peas, climbing nasturtiums, pole beans, or a compact clematis. It can also support a young, carefully managed rose for a while, but a mature rose’s woody canes and wind load may outgrow a light 2×2 frame. Avoid using this plan for wisteria, climbing hydrangea, or another heavy, vigorous perennial; those plants call for a much stronger structure and deeper, engineered anchoring.
Do not add a heavy pot to the top. A container concentrates weight high above the footprint, and saturated potting mix can weigh substantially more than a dry pot; the plant also catches wind. Set a planter on the ground at the base instead, where it can be watered and checked without turning the trellis into a tall, top-heavy object.
Materials and Tools for This Wooden Obelisk
Use eight straight, exterior-suitable 2×2 boards, each eight feet long. Cedar or another naturally durable outdoor wood is a good choice when the frame will sit above soil; select boards with minimal twist, large knots, checks, or soft spots because a bent upright makes an even taper difficult. The nominal 2×2 size is about 1½ inches square after milling, so keep the actual board dimensions consistent across all four legs.
Gather a tape measure, pencil, framing square, drill, drill bits, countersink bit, clamps, and a miter saw or circular saw with a guide. Use exterior-rated screws that suit the wood, about 2½ inches long, and wear eye and hearing protection while cutting; clamp lumber and follow the saw and drill makers’ instructions. A small level, a long straightedge, and a flat paved or workbench surface make the layout much easier.
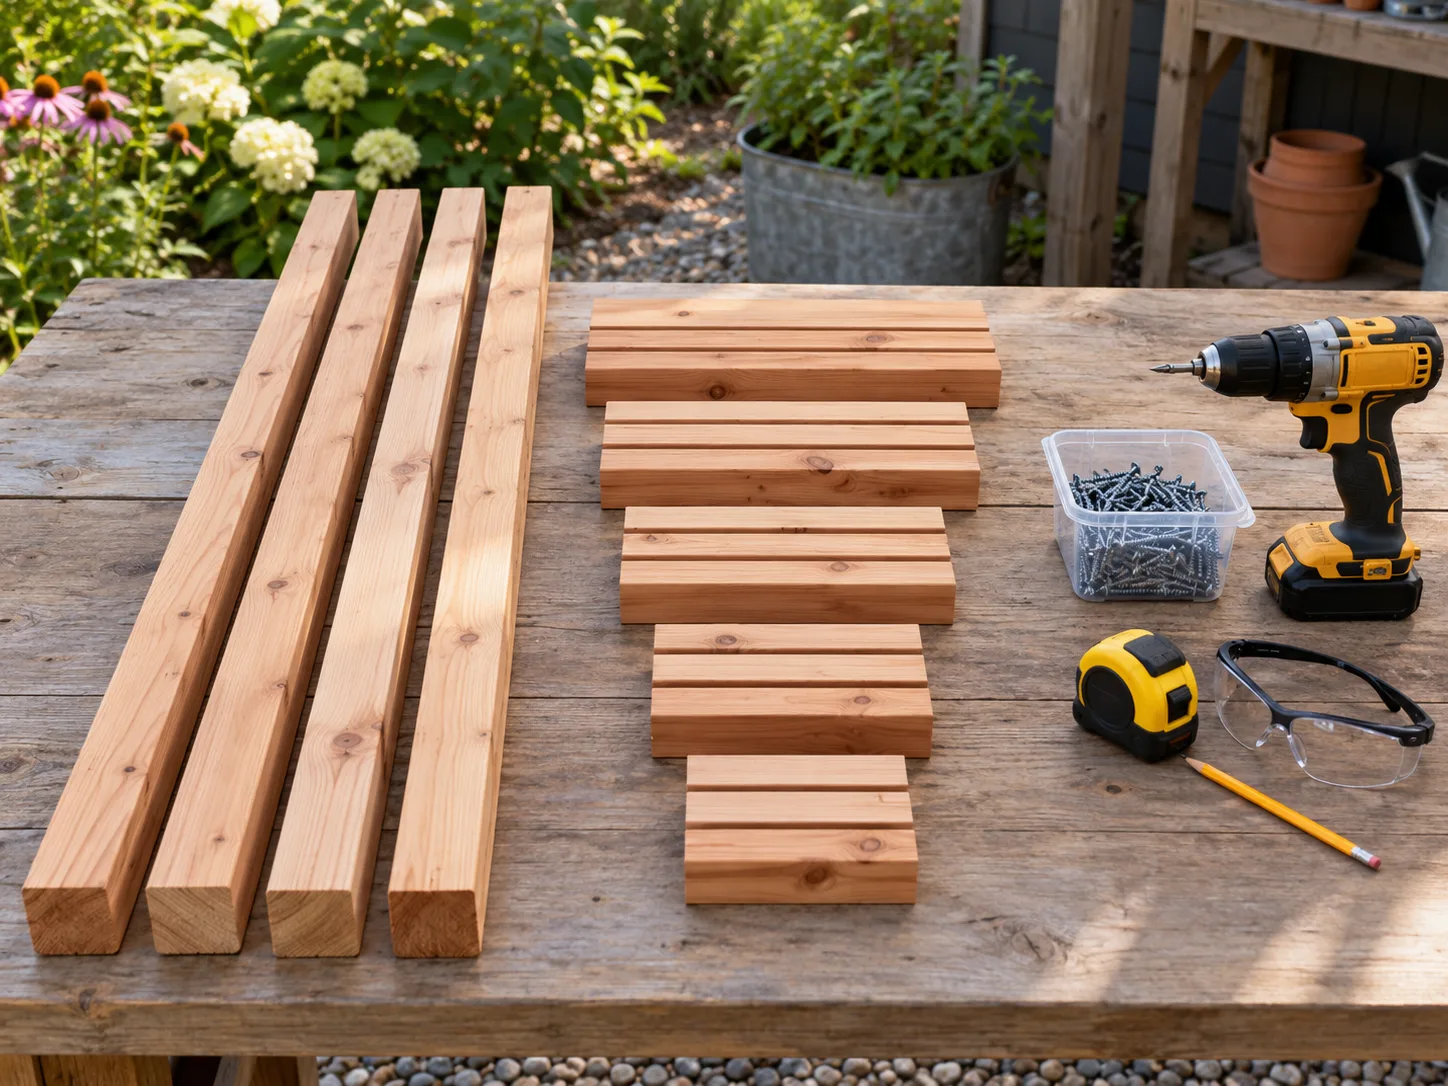
Cut List for a Six-Foot Obelisk
The four legs are 72 inches long. In this plan, their outside edges spread to 24 inches at the base and narrow to 6 inches at the top, so each leg leans inward about 9 inches over its height. Five rung levels sit 6, 18, 30, 42, and 54 inches above the leg bottoms. The rung length is the outside-to-outside span of the legs at that height; the taper is even, so the span narrows by three inches for every 12 inches of height.
| Pieces | Cut length | Tier height above leg bottoms | Use |
|---|---|---|---|
| 4 | 22½ in. | 6 in. | Lowest rung tier |
| 4 | 19½ in. | 18 in. | Second rung tier |
| 4 | 16½ in. | 30 in. | Middle rung tier |
| 4 | 13½ in. | 42 in. | Fourth rung tier |
| 4 | 10½ in. | 54 in. | Upper rung tier |
| 4 | 72 in. | — | Upright legs |
There are 20 rungs total: five on each of the four faces. Buy enough stock for the cuts and kerf; eight eight-foot boards provide a little margin for imperfect cuts and a spare piece. Treat the table as a starting schedule, not a reason to force a rung into a frame that is out of square. If your lumber is not exactly 1½ inches square or your layout differs, dry-fit the piece and trim it to the actual leg span.
How to Build a DIY Obelisk Trellis
Assemble the frame on a level surface, with the same face of each leg oriented outward. Work slowly through a single ladder panel, copy it, and then connect the two panels; this repeats the same measurements instead of asking you to hold four loose legs in the air. Fine Gardening’s bamboo trellis project uses the same useful planning principle for a different material: draw the final shape and mark intersections before fastening pieces together.
Cut and Label the Legs and Rungs
Cut all four legs to 72 inches and label them A through D. Cut four rungs at each length in the table, then bundle each tier and mark its height on a small piece of tape; this prevents the 10½-inch and 22½-inch tiers from being mixed up during assembly. Make a stop block or mark a repeatable cut line so every rung in a set is the same length.
Check each cut with a square and sand any splinters off the ends. If you use a circular saw, support the full board and clamp a guide so it cannot shift; if you use a miter saw, keep the workpiece tight to the fence and wait for the blade to stop before lifting it. Drill pilot holes near each end of the rungs, staying centered and away from the end grain to reduce splitting.
Lay Out the First Ladder Panel
Mark a 24-inch outside-to-outside distance between the lower ends of two legs and a 6-inch outside-to-outside distance between their upper ends. A straightedge or chalk line can help you align the uprights; the inward lean should be the same on both sides. On a 72-inch leg, that change in spacing creates a gentle taper of about seven degrees from vertical.
Measure upward from the bottom edge of each leg and mark the five rung heights at 6, 18, 30, 42, and 54 inches. Set the matching rung across the face of the two legs at each mark, with its ends flush to the outside edges, and clamp it before drilling. The first ladder should lie flat and should not rock when you press opposite corners; use one screw at each end to hold the dry fit, then check the spacing before adding the second fastener at each joint.
Build a Matching Second Panel
Repeat the same layout with the other two legs and the remaining five rungs for the opposite face. The safest way to make it match is to place the second panel directly over the first one, align the four leg ends, and transfer the rung positions from the first panel. This is more reliable than re-measuring each rung independently, especially if the boards vary slightly in width.
Before tightening the screws, compare the two panels from the side and from the top. Their lower spans and top spans should match, and their rung lines should be level with each other when the panels are stood upright. If one panel is visibly wider or more twisted, loosen it and correct the layout now, while the frame is still easy to handle.
Join the Panels With Side Rungs
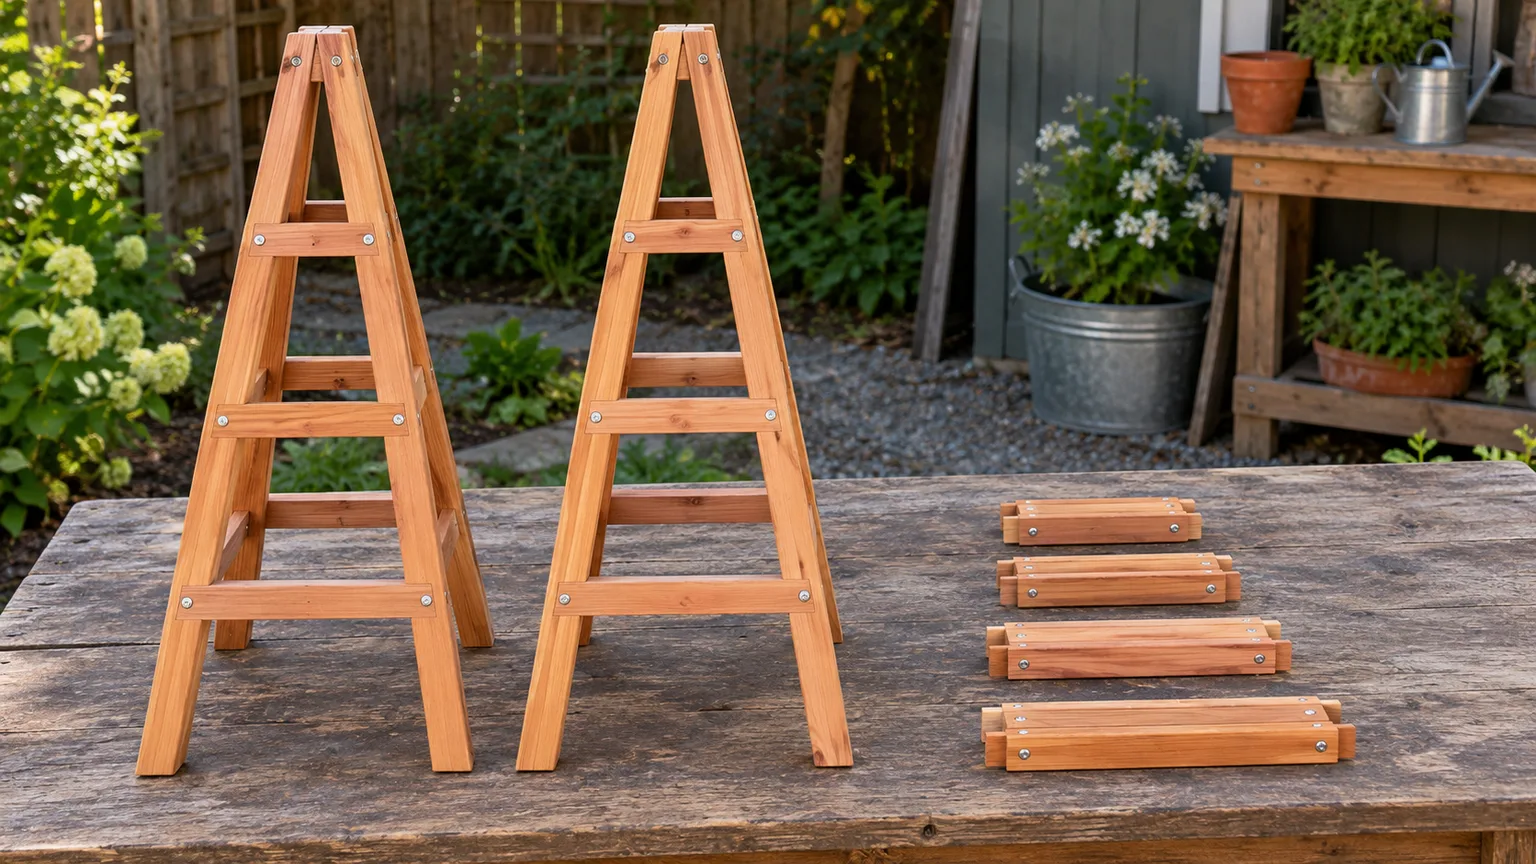
Stand the two ladder panels upright and parallel, with their bases 24 inches apart. At the first tier, fit one 22½-inch rung between the panels on each open side, again aligning the rung ends to the outside edges of the legs. Repeat at the remaining four heights with the corresponding lengths; add temporary clamps or a helper’s support so the panels cannot fall while you work.
Check the footprint from above before fastening each side. The base should be a square, not a diamond, and the upper ends should taper symmetrically toward the six-inch span. Once the fit is right, drill pilots and drive two exterior screws through each rung end into its leg, keeping the pair vertically staggered and centered on the board. If a screw begins to split the wood, stop, back it out, and move the pilot hole slightly inward rather than forcing it.
Check the Frame Before Tightening
Measure both diagonals across the base. If they are equal, the footprint is square; if one is longer, push the longer diagonal’s corners toward each other until both measurements match. Sight up each face to check that the legs remain straight and the rungs sit level, then tighten the screws gradually rather than driving one corner fully home before the others.
Set the trellis on a flat surface and press each side gently. A small amount of movement can come from uneven boards or the flexible joints, but it should not rack into a parallelogram. Add a short exterior-rated angle bracket on the inside of a loose lower corner if needed, or re-seat a rung and re-drill; do not try to hide a badly twisted frame with extra screws.
Anchor the Trellis and Protect the Feet
Set the frame where it will grow before planting, with its feet on firm, level soil and its four sides accessible for tying. The RHS recommends putting plant supports in place before stems need tying in, ideally before planting; that order also gives you room to anchor the structure without crushing roots. Keep the lower rung a few inches above the soil so it does not sit in wet mulch.
A light vine in a sheltered bed may only need four galvanized landscape stakes driven alongside the legs and screwed to the frame. On a breezy site, use longer stakes or rated screw-in earth anchors attached near the base; put anchors on at least two opposing sides, and use all four if the structure catches wind from multiple directions. Better Homes & Gardens’ removable PVC garden support project also places anchoring pieces at the corners before building upward, a useful reminder that stability starts at the base.
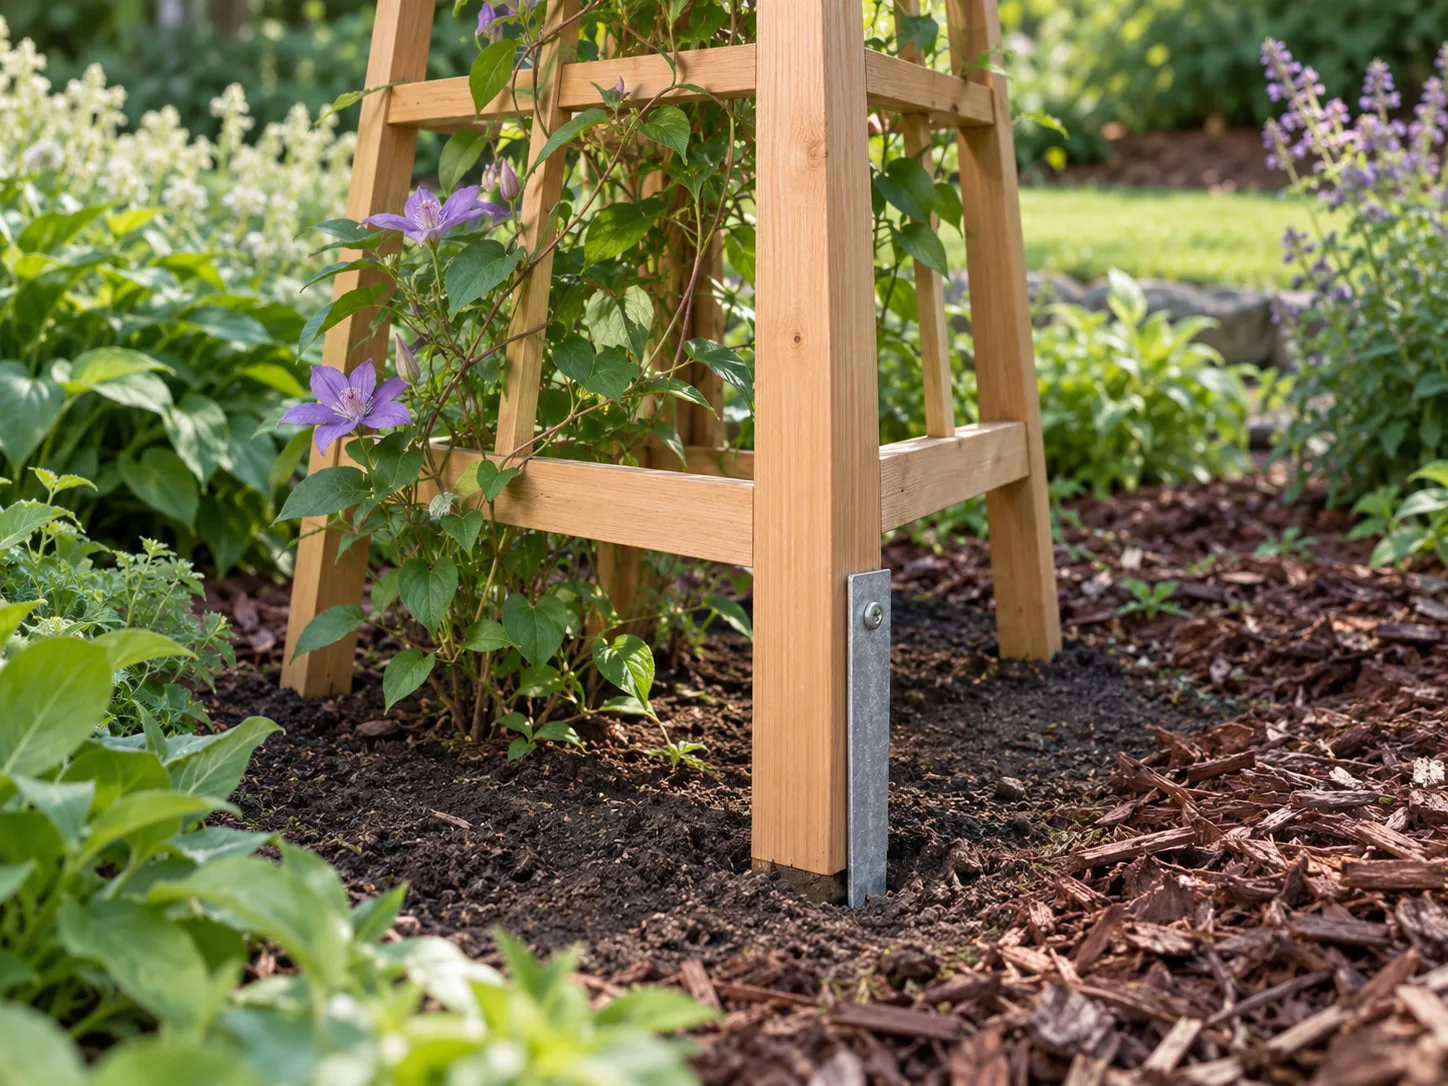
Do not bury untreated wood or encase the legs in concrete as a shortcut. Soil and standing moisture can speed decay, and concrete makes inspection and later repairs harder. If the ground is soft, the bed is raised, or the site is exposed to strong gusts, anchor the frame to a solid bed structure or choose a heavier, professionally designed support; a small obelisk is not made safe by adding more vine.
Choose a Finish and Maintain the Wood
Apply paint, stain, or an exterior water-repellent finish before the vine covers the frame, following the product label for preparation, coats, and cure time. Coat the cut ends and concealed faces as well as the visible sides, because end grain absorbs moisture readily. If you are growing edible crops, select a finish labeled for the intended setting and follow its use directions; a naturally durable wood left unfinished is also a reasonable choice if you accept more frequent inspection and weathering.
Use corrosion-resistant exterior screws, not drywall screws, which are not made for repeated outdoor wetting. At the start of each growing season, inspect the feet, rung joints, and screw heads for soft wood, rust, loose movement, or splits. Touch up the finish before the season is underway and replace a cracked rung while the vine is small enough to lift aside.
Pick Plants That Fit the Frame
Match the plant’s mature weight and climbing method to the support. Twining stems can wrap around each corner, while tendrils often need thinner lines than a 2×2 rung; tie jute or another soft garden twine between levels if the plant cannot grip the lumber. A light annual such as sweet pea or morning glory can cover the structure for a season, while a compact clematis can use the frame if its stems are spaced and tied in as they grow.
A small obelisk also works for a few pole beans or a climbing nasturtium, though you may need to add netting or vertical twine for the tendrils to catch. A climbing cucumber has more fruit weight and often benefits from a broader, more open trellis that leaves room to harvest; for tomatoes, use a cage or a stronger dedicated support, because tomato stems do not climb by twining and need repeated tying. Fine Gardening’s comparison of structures for vining plants similarly distinguishes obelisks for gentler climbers from sturdier structures for hefty vines.
Avoid heavy, mature wisteria or climbing hydrangea on this 2×2 design. Fine Gardening notes that hefty woody vines need large structural supports, while University of Minnesota Extension’s vineyard guidance explains that trellis posts and braces are selected around the tension and weight they must carry. Those are different scales than a decorative garden obelisk, but the lesson transfers: choose a support for a plant’s mature size, not the size of its nursery pot.
Train Vines and Keep the Trellis Healthy
Install the support before planting, then position the vine near one leg rather than directly against the center of the frame. Untangle crowded stems gently and spread them around the nearest faces so new growth finds more than one route upward. A plant that only twines at its tips may need a temporary cane from the pot or soil to the first rung.
Use soft, loose ties that leave room for stem growth. The RHS guide to tying in climbers recommends matching the tie to stem weight, avoiding wire that can cut into thickening stems, and using a figure-eight tie where movement or rubbing is a concern. Check ties regularly, especially after fast growth or windy weather, and move any tie that is pinching or rubbing.
At the end of the season, remove annual vines before dried stems become brittle and difficult to unwind. For a perennial, keep the main stems trained but do not force a thick, rigid cane through a narrow rung; cut a tie and reposition the stem instead. Leave room between foliage and neighboring plants so air can move through the frame and you can inspect the wood.
Troubleshoot a Lean, Loose Joint, or Stalled Vine
If the trellis leans, first check the ground rather than tightening every screw. One foot may have settled into loose soil, or a stake may have pulled free; level the frame, firm the soil around each foot, and reset the anchors before the plant adds more wind resistance. If the frame is upright but twists when pushed, measure the base diagonals and tighten or reinforce the lower rung joints.
If a rung cracks, remove the vine from that level and replace the piece with the same length, pre-drilling new holes that do not overlap the old ones. A damaged upright is more serious: unload the frame and replace the leg, or rebuild the structure rather than trusting a patch hidden under foliage. Rust at a fastener is a sign to use a better exterior-rated screw and check for water sitting in the joint.
A vine that refuses to climb may be a natural sprawler, may need a finer support, or may simply be too far from the first rung. Add vertical twine or a narrow cane and loosely guide the stem; do not cinch it tightly to force a direction. If growth is heavy at the top and sparse below, spread several young stems around the lower tiers while they are still flexible.
Adapt the Build for Containers and Narrow Beds
For a container, reduce the frame to fit the pot, but do not scale down the anchor logic. A six-foot trellis in a small, lightweight pot can tip as the vine catches wind; use a broad, heavy container, secure the legs to a stable planter frame, or choose a shorter obelisk. Keep drainage holes clear and avoid pushing a sharp leg through the pot bottom where it could damage roots or create a leak.
In a narrow bed, turn one face toward the path and leave enough room behind the frame to prune and remove the vine. You can make a narrower obelisk by reducing both base and top spans proportionally while keeping the same taper, but shorten the height too if the base becomes small. As a practical limit, do not retain a six-foot height with a half-size footprint; a tall frame needs enough base and anchoring to resist a vine-loaded gust.
A flat wall trellis may be better when the planting strip is shallow, while an A-frame or broad arch makes more sense for vegetable rows that need two-sided access. The frame’s shape should answer the garden’s actual job: display, easy harvest, a screen, or a support for a particular vine. Choosing that purpose before cutting lumber saves more time than trying to make one design suit every plant.
Conclusion
A basic wooden obelisk is straightforward to build when the taper, rung schedule, and square footprint are set before assembly. Use four straight 2×2 legs, cut matching rung tiers, build two identical ladder panels, and connect them with the same tier lengths; then check the diagonals and anchor the feet for the conditions in your garden.
Keep the frame above wet soil, choose a plant whose mature weight fits a light structure, and inspect the joints and ties each season. That combination gives a climbing plant a useful path upward without asking a small decorative trellis to carry more than it was built for.



