How to Mulch Roses for Winter: Timing and Depth
Protect roses from freeze-thaw damage with the right mulch, timing, depth, cage, and spring-removal plan for shrubs, climbers, and containers.

Winter mulching is not a contest to see who can pile the most material around a rose. The useful question is which part of your rose is vulnerable, and what kind of cold is your garden likely to deliver? A hardy, established shrub rose in the ground may need only a normal layer over its root zone. A grafted hybrid tea in an exposed bed may need a mound over the bud union, while a rose in a pot may need protection around the entire container.
The timing matters as much as the material. Mulch too early and you can hold moisture against a still-growing plant, shelter pests, or delay dormancy. Mulch too late and the graft union or shallow container roots may already have been exposed to damaging cold. This guide helps you match the depth, material, and method to the rose you actually grow.
Start With the Rose, Not the Calendar
Begin by identifying the rose as accurately as you can. Look for the cultivar name, whether it was sold as a grafted or own-root plant, its recommended hardiness range, and whether it is a shrub, hybrid tea, floribunda, grandiflora, climber, tree rose, or miniature. If the label is gone, the rose’s growth habit and the location of its graft union still tell you a great deal.
Then assess the site. A rose planted in heavy, well-drained ground beside a wind-filtering hedge has more thermal protection than the same cultivar in a raised bed on an exposed corner. A rose in a dark container on a patio has a small root volume that can freeze from every side. The American Rose Society’s container guidance makes the same essential distinction: pot-grown roots are exposed to cold and drying wind in a way in-ground roots are not (American Rose Society container-winter guide).
Your winter plan should answer four questions: Is the rose hardy where it is planted? Is the crown or graft union close to the soil surface? Is the site windy, raised, or poorly insulated? Is the rose growing in a container? The more “yes” answers you have, the more useful a deliberate winter-protection system becomes.
That zone-first approach is also the practical starting point in Epic Gardening’s rose winter-care guide, which separates hardy roses that need little intervention from tender modern types and exposed container plants that need more planning.
Why Winter Mulch Protects Roses
Mulch is valuable in winter because it slows temperature change around the root zone. It does not make the rose warm, and it cannot compensate for an unsuitable cultivar or a saturated planting site. Its job is to buffer the soil, reduce rapid thawing and refreezing, and limit the drying effect of wind near the crown.
Mulch also keeps soil from heaving as it freezes and thaws. That matters because repeated movement can loosen shallow roots or disturb a grafted plant at the point where the canes meet the rootstock. A loose, stable layer can also keep rain from splashing disease-carrying debris back onto lower canes, although mulch is not a substitute for removing infected leaves.
Freeze-Thaw and Wind Are the Real Risks
The lowest temperature on the forecast is only one part of the problem. A mild afternoon can thaw the outer soil or warm a covered plant, followed by a sharp freeze that rehardens tissue. The New York Botanical Garden recommends waiting until a rose is going dormant and the ground is cooling, then using a 6- to 8-inch mulch mound as its standard protection for roses in the Peggy Rockefeller Rose Garden (New York Botanical Garden winter rose guide).
Wind adds a different kind of stress. It can rock a rose in frozen soil, break long canes, and pull moisture from exposed stems. A mulch layer protects the base, but it will not stop a tall cane from whipping against a trellis. If wind is your main hazard, tie long canes loosely or add a permeable wind barrier rather than burying the whole plant in wet material.
Decide How Much Protection Your Rose Needs
Think in protection levels rather than a single rule for every rose. Light protection means ordinary mulch over the root zone. Moderate protection means a deeper layer around the crown or graft union. Heavy protection adds a wire cage, dry insulating material, or a special method for a climber, tree rose, or container.
The right level can change with the season. A rose that survived five winters may need extra help after being transplanted, weakened by disease, planted in a raised bed, or exposed to an unusually windy winter. A rose that is reliably hardy in your region may need little more than a clean bed and a modest mulch layer.
Hardy Own-Root and Shrub Roses
Many shrub, species, miniature, and old garden roses are more forgiving than tender modern roses. Own-root roses do not have a graft union that can be killed separately from the roots, although their above-ground canes can still suffer dieback. If the variety is suited to your climate and the site drains well, a 2- to 4-inch maintenance layer in a mild, nonfreezing climate or a 6- to 8-inch layer in a colder climate is a reasonable starting point.
Spread the mulch across the root zone, not just in a narrow ring around the trunk-like center. Keep it loose and slightly pulled back from the canes. For a hardy rose, more is not automatically safer: a dense mound of wet leaves can reduce airflow and create a cold, slow-drying pocket at the base.
Grafted Modern Roses
Hybrid teas, floribundas, and grandifloras are often grafted, and the bud union is the priority. This knobby junction is where the desired flowering rose joins the rootstock. If the canes die back but the union survives, the plant can often recover; if the union is killed, the rootstock may send up growth that is not the rose you intended to grow.
For a tender grafted rose in a cold or exposed site, plan to mound about 10 to 12 inches over the graft union once the rose is dormant and the ground is cold but workable. The N.C. Cooperative Extension describes a smaller 5- to 6-inch cover for graft unions in its zone 7 guidance and a 10- to 12-inch soil mound for tender bushes, which is a useful reminder that depth is climate- and rose-specific rather than universal (N.C. Cooperative Extension winter rose guide).
Do not scrape soil away from the rose’s own root zone to build the mound. That exposes roots and can leave the plant less stable. Bring in clean soil or use a suitable finished compost or mulch, and shape the mound so water does not sit against the canes.
Climbers, Tree Roses, and Containers
Climbers have long canes that can be damaged by wind, but trying to cover every cane with mulch is usually impractical. In a moderate climate, protecting the graft union and tying the canes to a strong support may be enough. In a very cold climate, a flexible climber may be laid into a nearby trench using a Minnesota tip-style method, but never force stiff, old canes to the ground.
Tree roses are harder because they may have a graft high on the stem as well as a vulnerable base. They need a frame, a protective wrap, or a method that shelters the whole stem and crown. A container rose needs the pot and its root ball addressed separately from the canes. The container-focused guidance from the American Rose Society recommends considering in-ground “heeling in,” an unheated sheltered space, or a carefully insulated outdoor setup; it also warns that outdoor container roots are more vulnerable than in-ground roots.
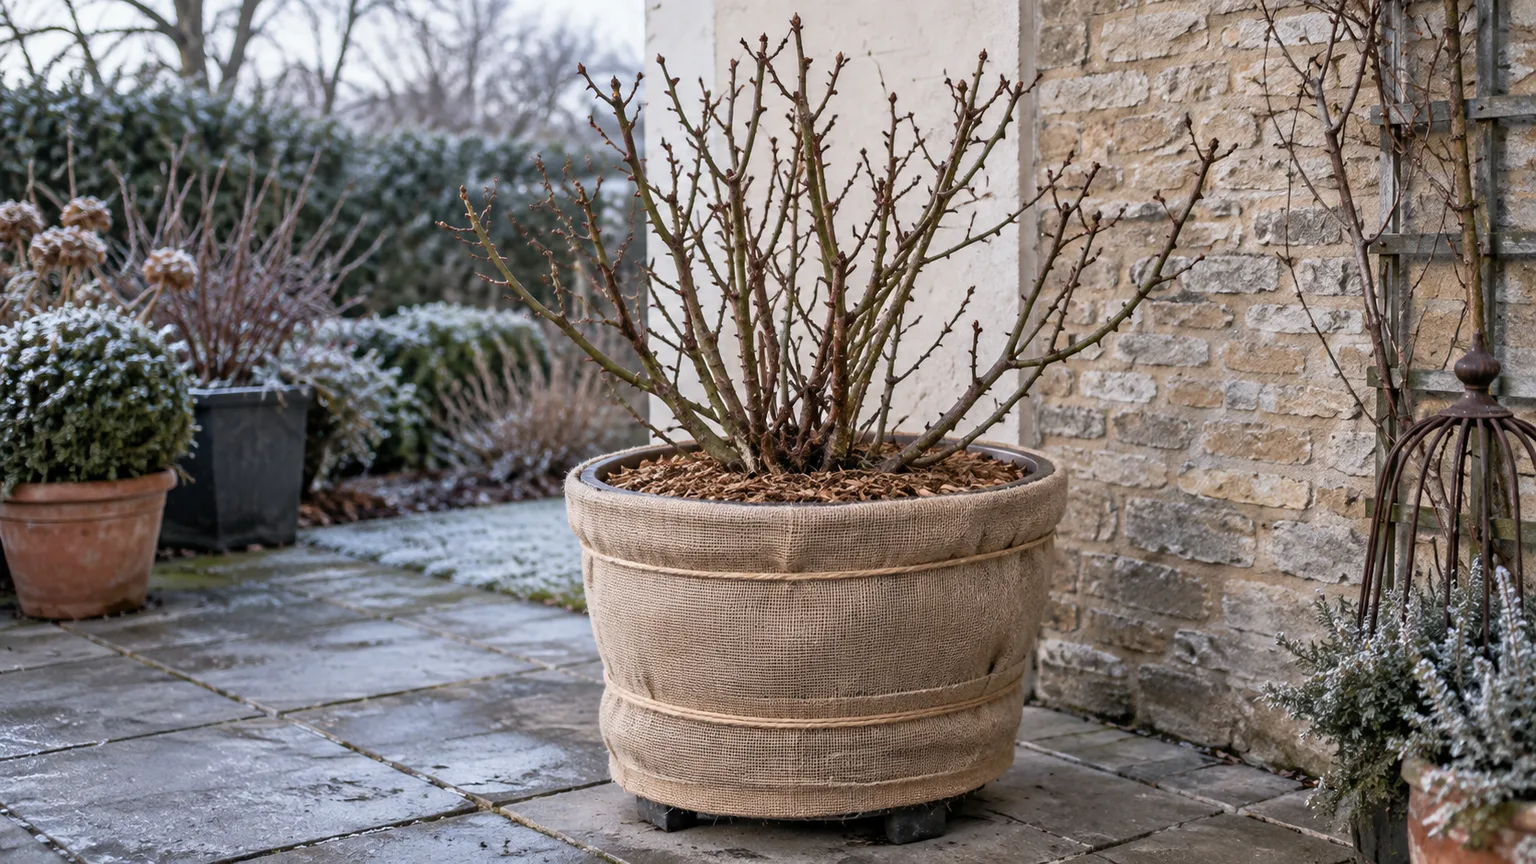
If a potted rose stays outdoors, move it out of prevailing wind, group it with other containers, top-dress the pot with a loose insulating material, and wrap the pot itself with a breathable or weather-resistant insulating layer. Do not leave the container standing in a saucer that can freeze into a block of water. Check during thaws so the root ball does not become completely dry, but do not water on a rigid schedule when the mix is frozen or saturated.
Choose Mulch That Insulates Without Matting
The best winter mulch is not necessarily the one with the most nutrients. For winter protection, physical behavior matters more: the material should be reasonably dry, loose enough to hold air, stable enough not to blow away, and unlikely to form a soggy shell after rain or snow.
Best Materials for a Winter Rose Mound
Finely shredded pine or hardwood bark makes a dependable base mulch because it spreads evenly and is less likely than whole leaves to form large, windblown pockets. Finished compost can help insulate while improving soil structure, but use it as a stable mound or top-dressing rather than packing wet compost tightly against the canes.
Dry shredded leaves are useful when held in place by a wire collar. Whole leaves tend to mat, shed water from the top, and collapse into a dense layer. Shredding them and keeping them dry makes them more useful. Straw or pine needles can provide airy insulation, especially inside a cage, but they need to be anchored in a windy yard.
The Nashville Rose Society describes a practical layered approach: a base of existing pine-needle mulch, material placed over the bud union, and another loose layer above it. Its guidance also notes that raised beds are more exposed to cold than beds connected to the surrounding ground, so the same mulch depth may not give the same result in both places (Nashville Rose Society winterization guidance).
Materials and Setups to Avoid
Avoid building a sealed, wet collar around the rose. Mulch should not be packed tightly against the canes, and it should not create a bowl that holds water at the crown. Keep the plant’s graft union covered when needed, but keep ordinary maintenance mulch a little away from the stems.
Do not use diseased rose leaves as the main insulating layer. If black spot or another foliar disease was present, remove the fallen leaves from the bed and dispose of them according to local guidance. Do not use fresh, unfinished woody material as if it were compost; it can tie up nitrogen as it breaks down and may settle into a dense layer.
Plastic sheeting wrapped directly around canes is another poor shortcut. It can trap condensation, touch cold foliage, and heat the plant during a sunny thaw. If a rigid cover is needed over a cage, keep it above the insulation and leave ventilation at the sides. A breathable fabric or burlap wind screen is usually easier to manage.
Prepare the Bed Before Mulching
Winter protection works best when it begins with a clean, stable planting site. First inspect the rose and the ground around it. Look for a loose crown, standing water, diseased foliage, broken canes, and branches that could whip in the wind. Fix drainage or staking problems before piling anything over the plant.
Clean Up, Water, Feed, and Prune Carefully
Remove fallen leaves and spent foliage that clearly carries black spot or another disease. New York Botanical Garden emphasizes careful fall cleanup because disease spores can remain around an infected rose. Pull weeds from the root zone, but avoid deep cultivation that cuts roots just before winter.
If the soil is dry, water deeply before the ground freezes, allowing the bed to drain. Do not water simply because the calendar says it is time: a rain-soaked or poorly drained bed needs air, not another soaking. Container roses also need a final moisture check, but excess water must drain completely before the pot is sheltered.
Avoid late high-nitrogen feeding. Nitrogen can encourage tender new shoots at the point when the rose should be slowing down. Some regional rose programs use a low-nitrogen late-season feeding, but that is not a universal requirement; for most home gardeners, stopping routine feeding as the growing season ends is the safer default. Homes & Gardens likewise advises keeping fertilizer to the active growing season (Homes & Gardens winter rose guide).
Do not hard-prune every rose in fall just to make the mulch look tidy. Remove dead, broken, or diseased wood, and shorten only canes that are likely to snap, rub, or loosen the plant in winter wind. The Nashville Rose Society cautions against routine fall pruning because it can stimulate growth; major shaping is often better done in late winter or early spring, according to the rose group.
Time the Job for Dormancy and Cold Soil
Wait until the rose has slowed down, lost most of its leaves naturally, and the soil has begun to cool. A brief early frost is not always the signal for a permanent mound; the plant may still be growing, and a warm spell may follow. The Nashville Rose Society uses two real freezes below about 28°F as a regional rule of thumb, while the New York Botanical Garden frames the timing around dormancy and cooling ground. Those are useful cues, not a universal date for every climate.
Use a temporary frost cloth or sheet on a supported frame when a single overnight frost threatens an actively growing rose. That is a different job from winter mulching. Remove a temporary cover after the frost passes and the morning begins to warm. Build a lasting mound only when the plant and weather are ready for prolonged cold.
Mulch an In-Ground Rose Step by Step
- Confirm the rose’s risk. Check its hardiness, graft location, exposure, and whether it is in a raised bed. Choose light mulch, a graft mound, or a cage before you move material.
- Clear the base. Remove diseased leaves, weeds, and old material that has become sour, compacted, or waterlogged. Keep the soil surface intact around the roots.
- Water only if the root zone is dry. Give the soil a deep soaking before freeze-up, then let excess water drain.
- Tie loose canes. Use soft twine to bring wind-whipped canes together without making a tight, wet bundle.
- Build the protection over the right target. Spread a root-zone layer for a hardy rose, or mound clean soil or finished compost over the graft union for a tender grafted rose.
- Add loose insulation if needed. Place dry leaves, straw, bark, or pine needles around and over the mound, preferably inside a cage if wind is strong.
- Inspect after weather changes. Replace material that has blown away, open a rigid cover during a warm spell, and check that the mound is not holding water against the canes.
Light Base Mulch for Hardy Roses
For an established, hardy shrub or own-root rose in ordinary ground, spread 2 to 4 inches of mulch in a mild climate or 6 to 8 inches where the soil freezes more deeply. Cover the root zone broadly, following the spread of the branches rather than making a narrow volcano around the crown.
Leave a small air gap around the main canes. The mulch can still protect the root zone without touching the woody stems. If you use shredded leaves or straw, a low wire collar can prevent wind from carrying the material away. Do not add a new thick layer simply because the first layer settled; check whether the remaining material is still loose and protective.
Mound the Graft Union for Tender Roses
For a tender grafted rose, place about 10 to 12 inches of clean soil, finished compost, or a suitable stable material over the graft union when the plant is dormant. In a milder site or with a moderately hardy rose, a smaller 5- to 8-inch mound may be enough. The goal is to cover the union and nearby lower canes without burying the entire shrub in compacted mulch.
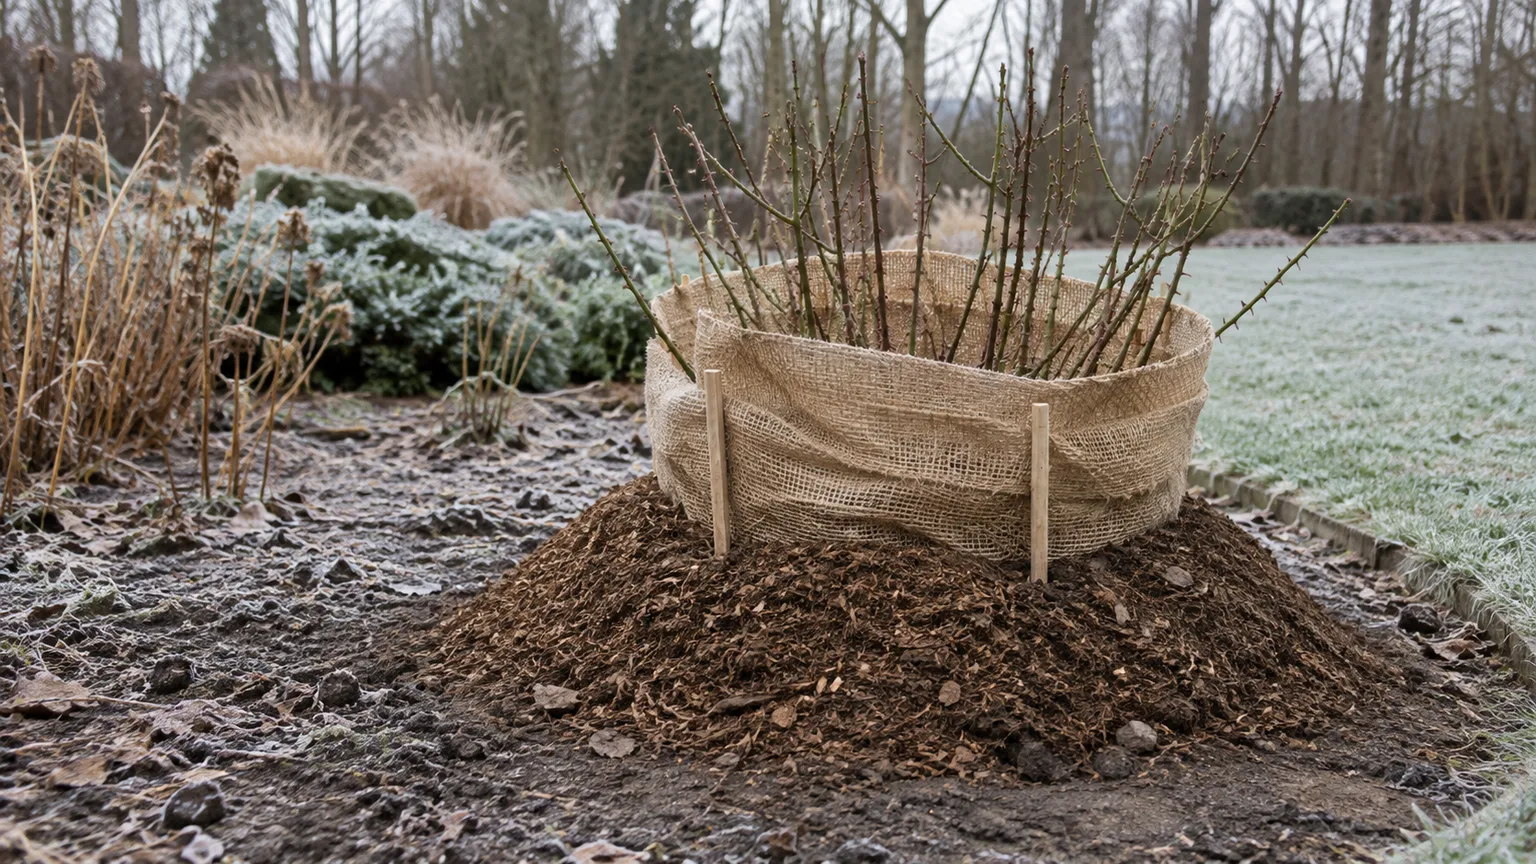
Shape the mound so water sheds away from the center. If the mound settles, top it up with loose material rather than digging into the rose bed. Add a second layer of dry leaves or straw only after the base mound is stable. A graft union just above the soil line deserves more attention than the upper tips, which may naturally die back and be replaced in spring.
Add a Cage When Wind and Cold Both Matter
A cage is useful when loose mulch would blow away or when the rose needs a larger insulated volume. Circle the plant with chicken wire or sturdy mesh, anchor the cage, and fill it with dry leaves, straw, pine needles, or a bark-and-leaf mix. Keep the cage wide enough that material is not compressed against the canes.
For a severe site, a simple solid top can keep rain and snow from collapsing the insulation, but it must not seal the structure. Leave ventilation and check the inside after sunny thaws. Burlap around the outside can reduce wind while allowing air exchange; it is a wind screen, not a substitute for covering the graft union.
If Frost Has Already Hit or Spring Is Approaching
If a freeze has already blackened flowers or soft tips, do not respond by stripping the rose or adding fertilizer. Frost often injures tender outer growth first. Wait until the worst weather has passed, then remove clearly dead flowers and tips back to live tissue while leaving uncertain older canes for later inspection.
In spring, remove heavy protection gradually. The New York Botanical Garden recommends taking off most winter protection about six weeks before the last frost date, leaving a small amount around the canes, then clearing the remainder roughly two weeks later as the rose adjusts. Treat that as a sequence rather than a rigid date: a late freeze forecast means you may need to keep frost cloth nearby.
Start by removing the burlap, cage top, or loose upper insulation. Reduce the mound in stages once the ground is thawing and the rose is still dormant or just beginning to wake. When new shoots are expanding, do not leave a dense, warm, wet layer packed around the crown. Spread the remaining mulch back across the root zone at its normal depth.
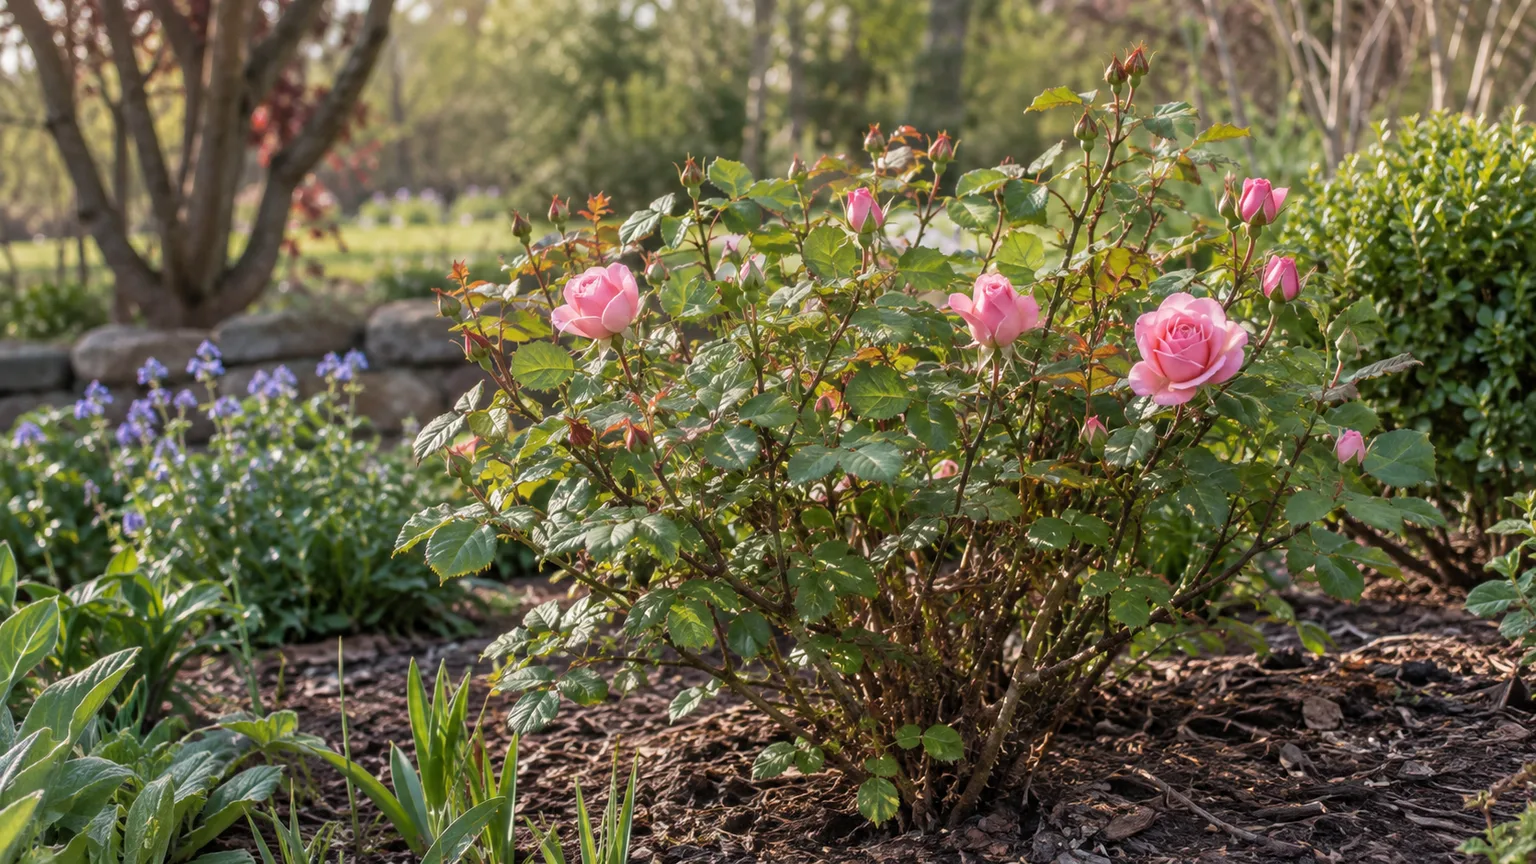
Wait to make major pruning cuts until you can distinguish live and dead wood. Scratch a small area on a questionable cane rather than cutting several inches at once. A slow start after winter is not proof that the graft or roots failed; give the plant a reasonable spring growth window before replacing it.
Conclusion
Mulch roses for winter by protecting the part of the plant most likely to fail, not by burying every rose under the same pile. A hardy in-ground shrub may need only a loose root-zone layer, while a tender grafted rose benefits from a deeper mound over the bud union. Climbers, tree roses, raised beds, and containers need separate decisions because their canes, high grafts, or exposed roots change the risk.
Wait for dormancy and cooling soil, clean up diseased debris, water only when the root zone is dry, and avoid late nitrogen and unnecessary fall pruning. Use bark, compost, dry leaves, straw, or pine needles according to how well each material stays loose and anchored. In spring, remove heavy protection in stages and keep a light frost cover available until new growth is past the most vulnerable stage.



