How to Propagate Succulents From Leaves or Stems
Learn how to propagate succulents from leaves or stems, choose a method by plant type, callus cuttings, and get watering and potting-up timing right.
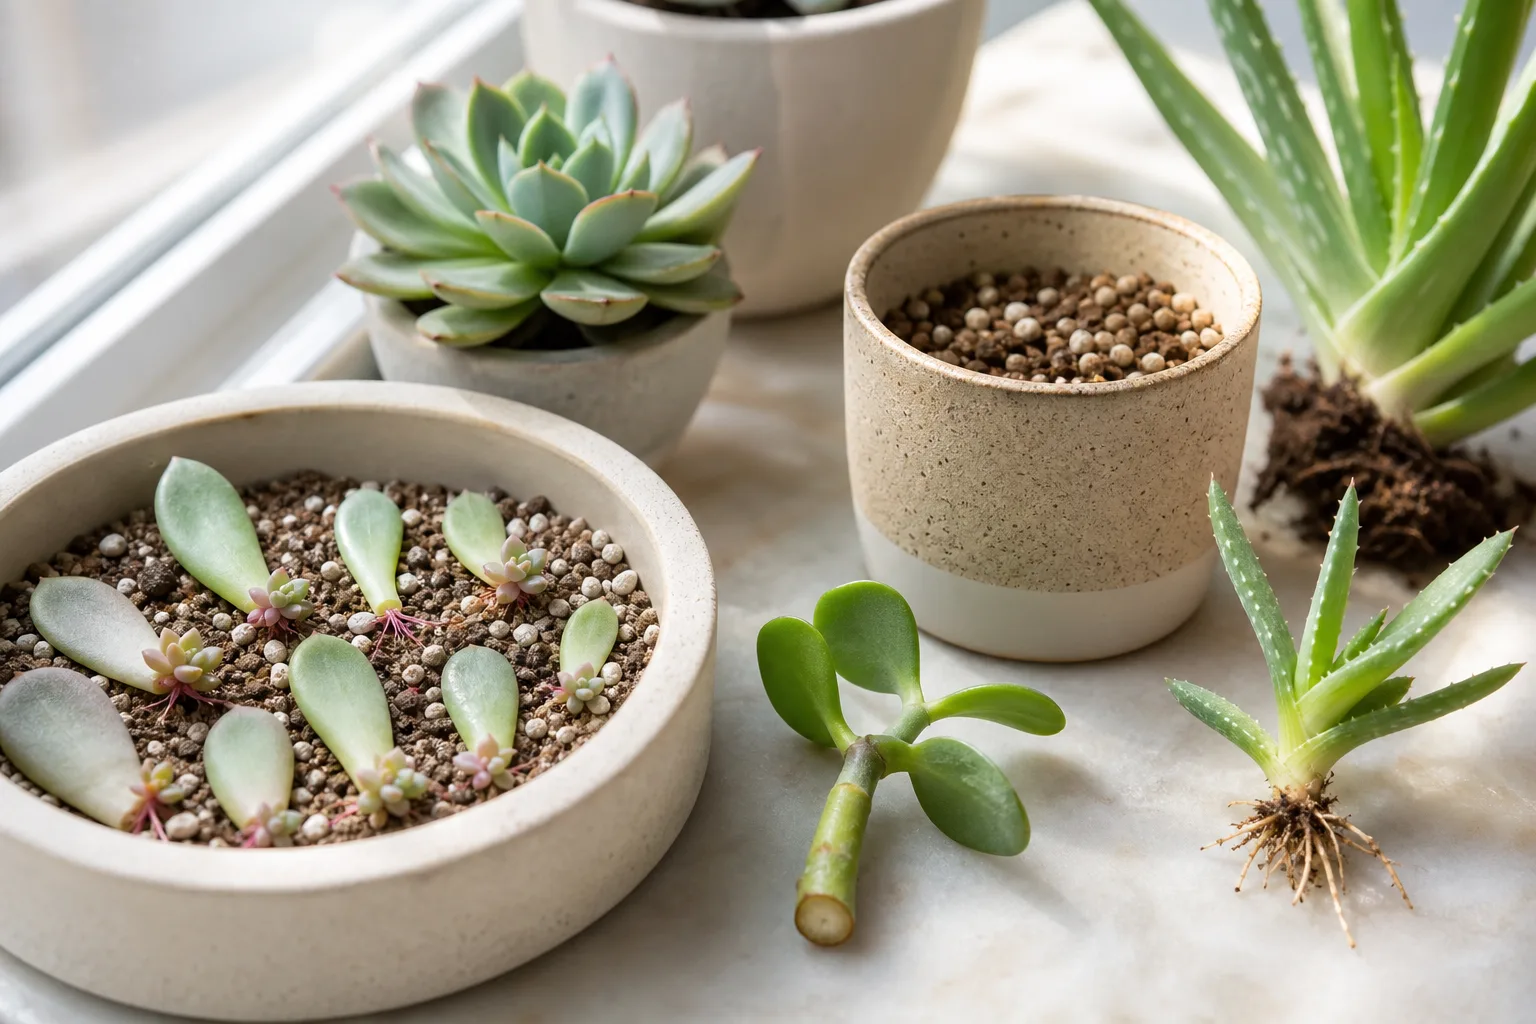
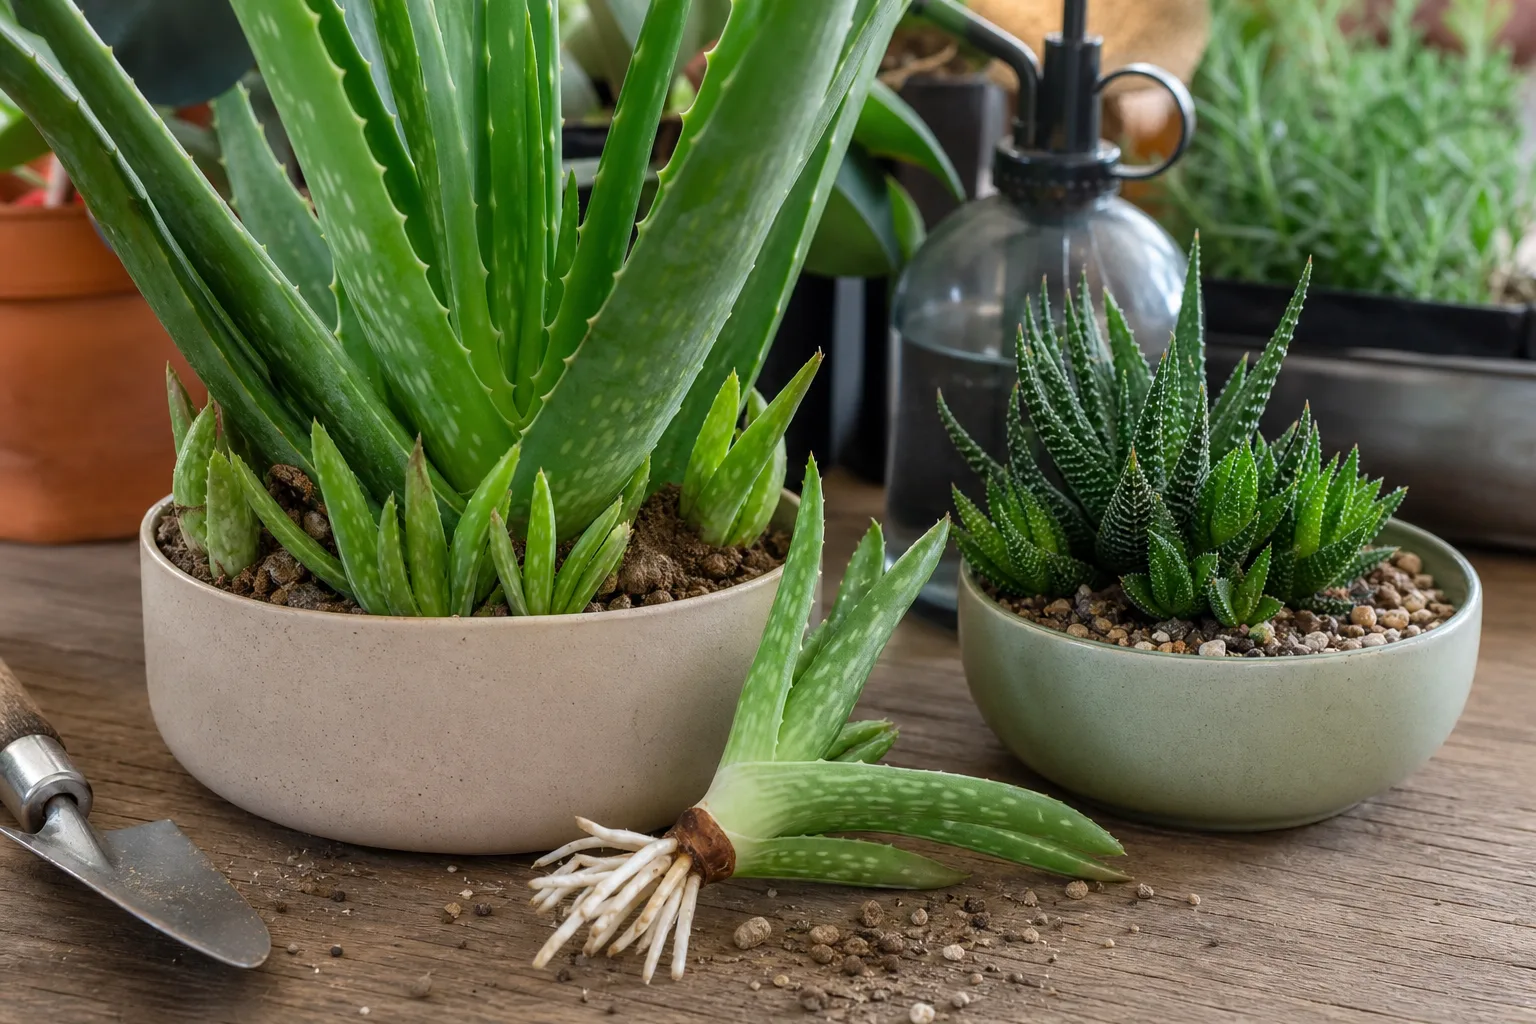
A plump leaf or a short piece of stem can become a new succulent, but the right starting piece depends on the plant. Echeveria, many Sedum, and Graptopetalum are good candidates for leaf propagation; jade and Aeonium are often simpler to start from stem cuttings. Aloe and many Haworthia are usually more dependable from offsets, so a fallen leaf is not automatically a viable cutting.
The reliable sequence is straightforward: choose a healthy parent, remove the piece cleanly, let the wound dry, place it in a fast-draining mix, and adjust moisture only as roots develop. West Virginia University Extension describes leaf cuttings, stem cuttings, and offsets as common ways to vegetatively propagate succulents; the sections below help you match one of those methods to the plant in front of you (WVU Extension). For broader coverage of pups and other methods, see our succulent propagation guide.
Choose a method that suits the succulent
Start by looking at the plant’s shape. A compact rosette with plump leaves you can remove whole may offer several leaf cuttings, while a branching or trailing plant with a clear stem is usually easier to propagate from a stem section. If a plant mainly makes offsets, separating a rooted pup can be more reliable than trying to force either method.
| What you have | Method to try first | Examples |
|---|---|---|
| A plump leaf that separates cleanly at its base | Leaf propagation | Echeveria, many Sedum, Graptopetalum, jade |
| A visible stem, especially a leggy or branching one | Stem cutting | Jade, Aeonium, string succulents |
| A rooted baby plant at the base or on a runner | Offset or pup | Aloe, many Haworthia, Sempervivum |
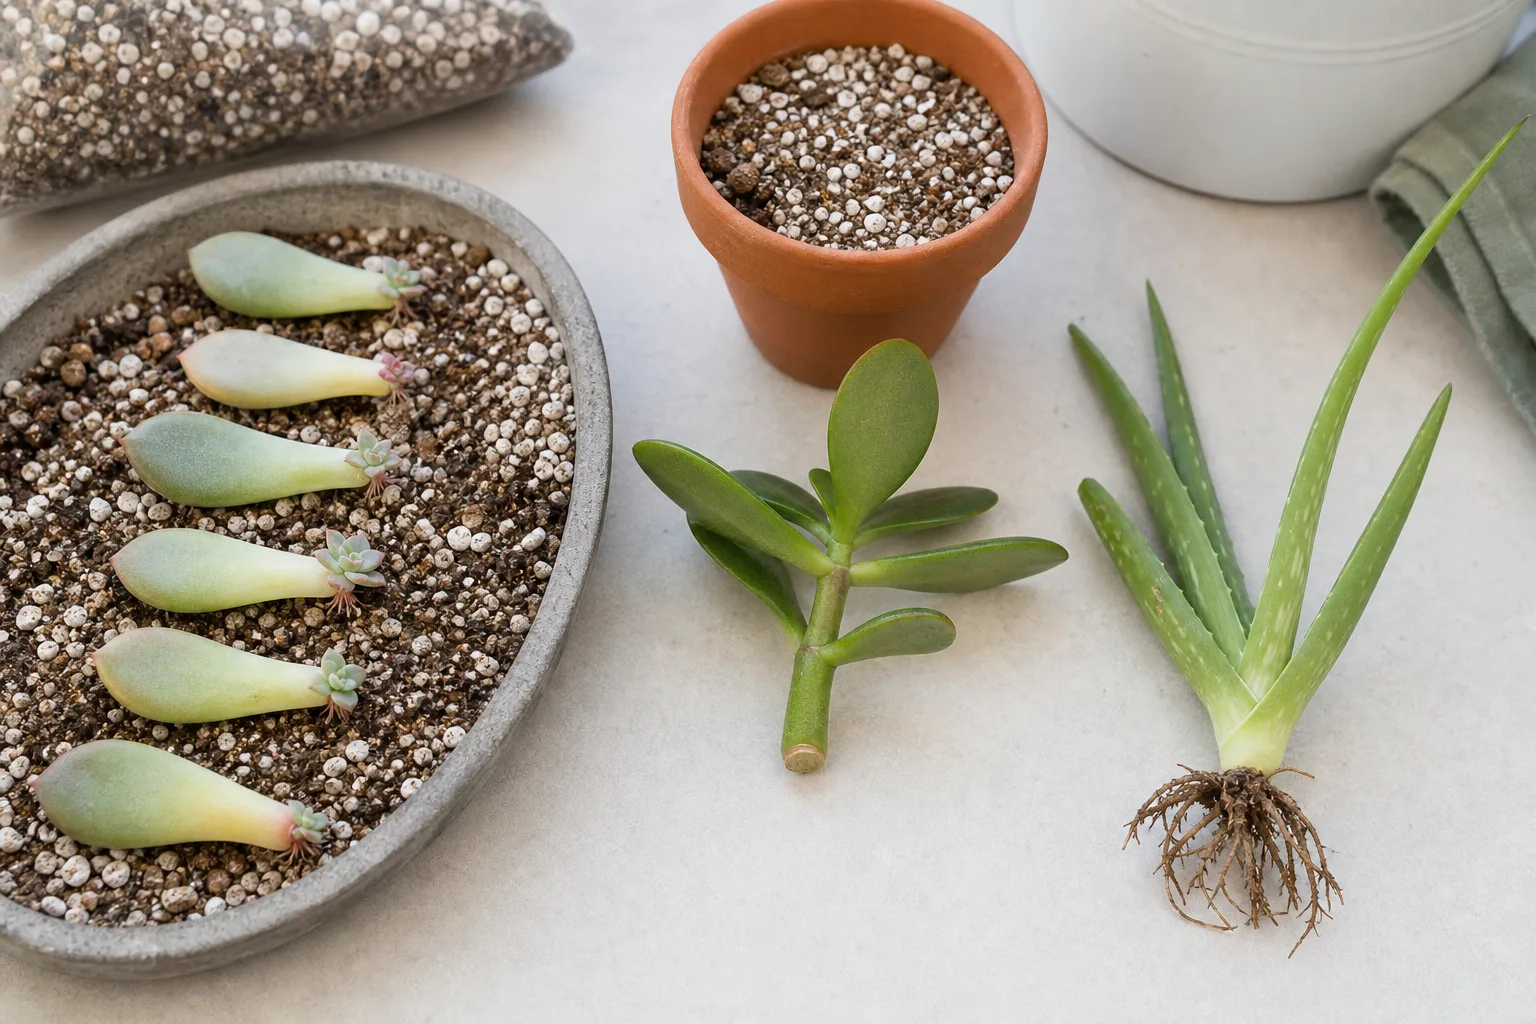 |
These are practical starting points, not guarantees for every cultivar. Gardening Know How lists Echeveria, Sedum, and burro’s tail among succulents that can grow from leaves, while WVU Extension documents leaf and stem cuttings across a broad range of varieties (Gardening Know How, WVU Extension). Haworthia is a useful exception: some can be started from a carefully cut leaf, but a rooted offset is often a simpler home method (Gardening Know How’s Haworthia propagation guide).
If the label gives you a species name, check its propagation habit before taking a leaf. A leaf that comes away with a torn or incomplete base may remain green for days and still never make a plantlet, so starting with the right method saves both time and damage to the parent.
Start with healthy stock and active growth
Choose a parent plant with firm, normal-colored leaves and stems. Skip sections that are mushy, translucent, pest-damaged, or already collapsing; a cutting cannot recover from rot simply because it is placed in new soil. If the plant is severely dehydrated or actively declining, stabilize it first instead of removing tissue.
Propagation usually moves faster when the parent is actively growing and temperatures are warm. Montana State University Extension recommends taking succulent cuttings in spring after dormancy, while Epic Gardening notes that warm conditions can support propagation at other times and that active growth generally produces quicker results (Montana State University Extension, Epic Gardening). Use the season that corresponds to active growth where you live; a bright, warm room can keep indoor propagation moving, but a dormant plant in a cool, dim winter room may root slowly.
Avoid taking so many leaves that the parent is stripped bare. A few well-placed leaves or one sensible stem cutting are usually enough for a first batch, and leaving most foliage on the parent preserves its ability to photosynthesize and recover.
Set up the medium, pot, and light
Use a small pot or shallow tray with drainage and a fast-draining succulent mix. A commercial cactus-and-succulent blend can work; if it stays wet for a long time, blend in coarse perlite or pumice so air can reach the new roots. Montana State and WVU Extension both emphasize drainage and a mineral-rich medium for succulents, and WVU gives a simple option of mixing equal parts potting mix and perlite (Montana State University Extension, WVU Extension).
A leaf tray can be shallow because leaves sit on the surface, but stem cuttings need enough depth to stay upright without burying their foliage. Do not use garden soil or a decorative container with no way for excess water to drain; a shallow layer of gravel at the bottom does not replace a drainage hole.
Set the tray somewhere bright and warm with good air movement, out of harsh afternoon sun. New cuttings do not yet have roots to replace water lost through heat, so strong direct sun can shrivel or scorch them before they establish. If all you have is a sunny window, move the tray back from the glass or filter the light until roots and new growth are underway.
Propagate a succulent from a leaf
Leaf propagation is useful when a succulent has several fleshy leaves that detach without tearing. The most important detail is the basal end—the small part of the leaf that attached to the stem—because that tissue is where roots and the new rosette form. Epic Gardening’s step-by-step guidance also stresses choosing a healthy leaf and preserving its entire base during removal (Epic Gardening).
Remove a leaf with its base intact
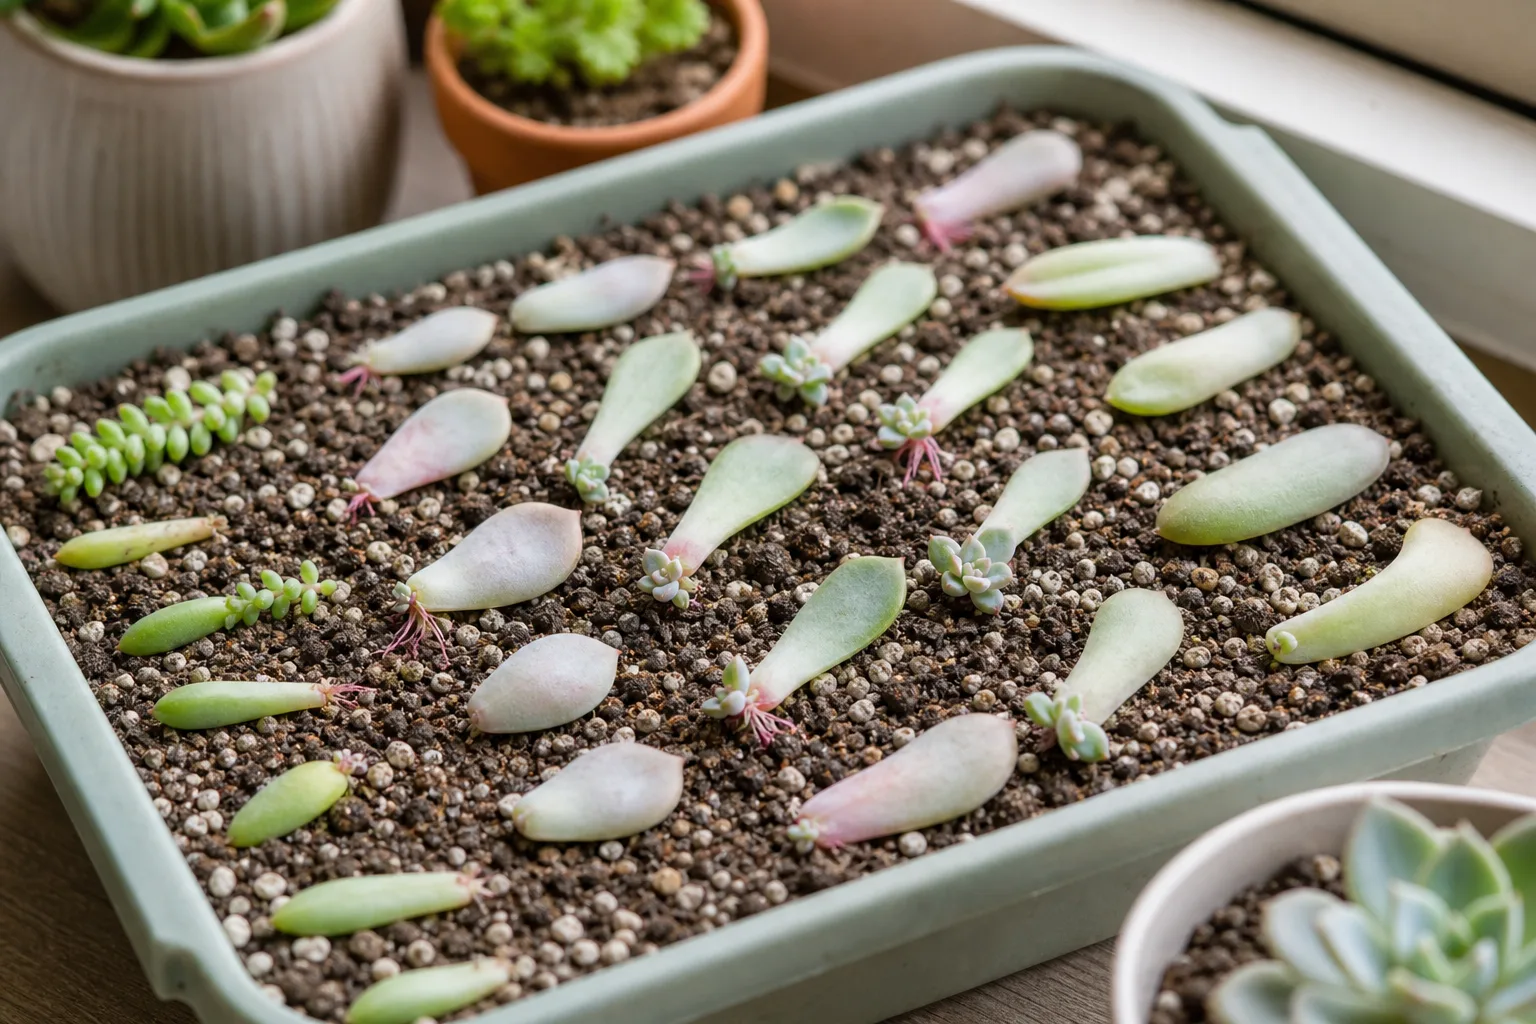
Choose a full-sized, firm leaf rather than one that is very young, shriveled, yellowing, or damaged. Hold the leaf close to its base, then gently twist or rock it from side to side until it separates. The aim is a clean break that removes the whole leaf, including its attachment point; if the base stays on the plant or tears away, use another leaf instead of trying to repair it.
For tightly packed rosettes, work carefully from the lower outside leaves rather than pulling at the crown. Do not tug hard enough to loosen the whole plant or break neighboring leaves, and do not take a large share of the foliage at once. If a leaf resists, rotate the plant for a clearer angle rather than levering it upward and snapping it across the middle.
Let the leaf callus, then set it on mix
Place the detached leaf on a clean, dry surface out of direct sun until the base looks dry and matte instead of wet or glossy. Published timing varies: WVU Extension gives four to seven days for cuttings, while Fine Gardening says a stem can be ready after about a day or once a dry callus forms; the visible condition of the wound matters more than a fixed count (WVU Extension, Fine Gardening). A larger or juicier piece, a cool room, or humid air can all lengthen the drying period.
Lay the callused leaf flat on the mix with the basal end touching the surface; do not bury it or press it into wet soil. Leave space around each leaf so roots and tiny rosettes are visible and so air can move across the tray. If you need the pot to anchor the leaf, use a small amount of dry grit around—not over—the base.
The first-watering advice differs across practical guides because indoor humidity, mix, and leaf thickness differ. Montana State and WVU Extension recommend slightly moistened rooting media and sparse watering, while Epic Gardening describes leaving leaves dry in humid conditions and adding moisture only when the climate calls for it (Montana State University Extension, WVU Extension, Epic Gardening). A safe home rule is to keep the medium dry to barely damp—not soggy—and never spray the leaf itself; if visible roots emerge into very dry air, lightly moisten the mix beside them.
Watch for roots, a baby rosette, and mother-leaf decline
Roots may appear before the new plant is obvious. Once the leaf produces a small rosette, those roots can be guided onto the mix, but avoid picking the cutting up repeatedly to check; fine new roots tear easily. A firm leaf with roots but no visible rosette is not automatically a failure, especially if the species is slow or the room is cool.
The parent leaf feeds the developing plant for a time, so leave it attached while it is still plump or supporting a small rosette. As the new succulent grows, the original leaf gradually shrivels and dries. Remove it only when it comes away easily and the young plant has its own roots; pulling a still-attached leaf can damage the base of the new rosette.
Propagate a succulent from a stem cutting
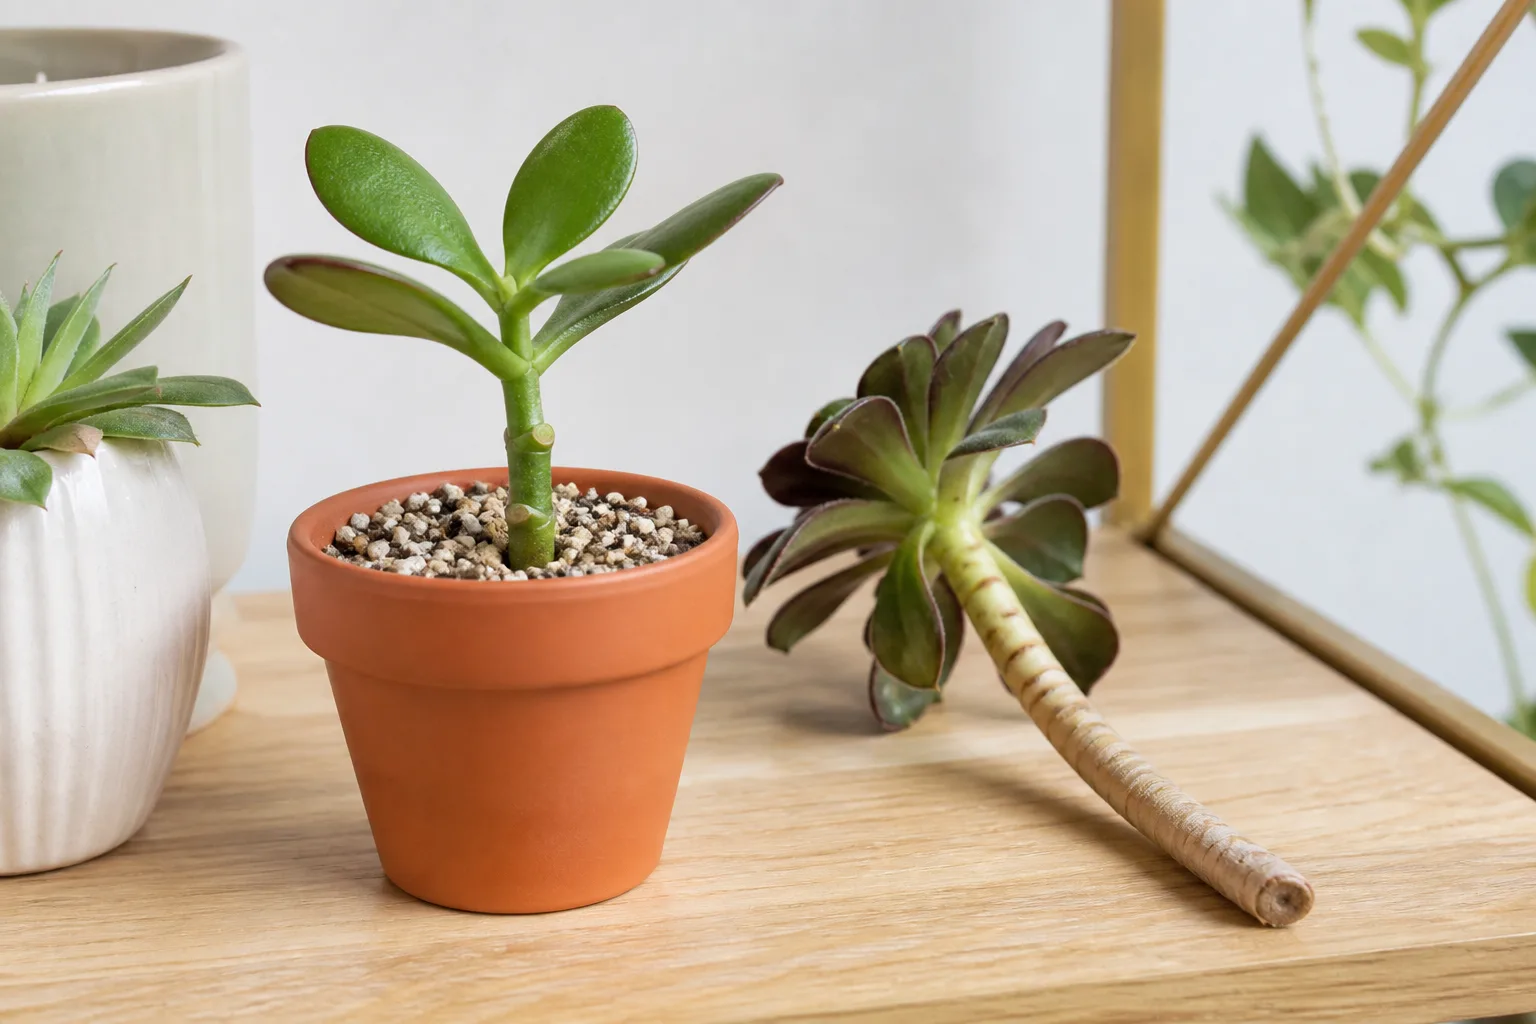
Choose a stem cutting when the plant has a visible branch, when you want a larger start than a tiny leaf rosette, or when pruning a leggy succulent. A stem section already has a growing tip and several nodes, so it can become a recognizable plant sooner than a leaf cutting. Fine Gardening describes clean stem cuts followed by a dry callus and a very free-draining rooting medium; WVU Extension also identifies stem cuttings as a common succulent method (Fine Gardening, WVU Extension).
Take a clean cutting with useful nodes
Use a sharp knife or pruners that are clean and dry. Cut a healthy stem below a leaf joint or node, leaving a piece with a few leaf sets and enough bare stem to anchor in the pot. Three to four inches is a reasonable starting size for many stemmed succulents, but a small plant may need less and a long, thin stem may need more support; WVU Extension describes a three- to four-inch cutting as one workable range, not a universal measurement.
Remove the lowest leaves that would otherwise be buried, but leave the top foliage intact. Set aside any healthy leaves that detach cleanly and can be propagated separately. If you are correcting a stretched rosette, cut below the head but leave enough healthy stem on the parent for it to keep growing; the cutting and the rooted stump are separate plants to monitor.
Let the cut dry, plant shallowly, and anchor it
Let the cut end dry until a firm, dry callus forms. For a stem, the wound is larger than a leaf base, so it may need longer; Gardening Know How advises at least three days in a dry place, while WVU Extension recommends four to seven days for cuttings (Gardening Know How, WVU Extension). Keep the cutting upright in bright indirect light as it dries, not in a sealed bag or damp container.
Make a narrow hole in the mix and set the bare stem in just deeply enough to stand. Do not bury the lowest leaves, which can stay wet and rot against the medium. Press the mix gently around the stem, or use a skewer for support rather than planting it deeper than it needs.
Start with mix that is dry or only faintly moist. Guides vary on whether to add a little water soon after planting; Montana State and WVU Extension both favor sparing moisture in a well-drained medium, while some practical methods wait until root growth is visible (Montana State University Extension, WVU Extension, Gardening Know How). If you are unsure, leave a newly planted cutting alone for several days, then add a small amount of water to the mix only when it is dry and the cutting is still firm; never keep the pot wet while the stem has no roots to use that water.
Should you propagate succulents in water?
A succulent stem can sometimes be rooted in water, but this is an experiment rather than the simplest default. Specialist succulent guides describe suspending a callused stem end at or just above water, yet recommendations differ and the cutting still has to transition to gritty soil afterward (Succulent City). Do not submerge a fresh wound, and do not treat leaf propagation as a water-rooting method; loose leaves are easier to keep dry on a well-drained surface.
For most readers, soil or a sterile gritty rooting mix is the more practical first attempt because the cutting can grow into the medium it will later live in. If you want to compare methods, test water on one spare stem while keeping the parent plant and a second cutting safe in mix. Move a water-rooted cutting once roots are visible, handling them gently and keeping the new soil only lightly moist during the transition.
Care for new roots and young rosettes
As roots form, water the medium near the roots rather than pouring water over a leaf or rosette. Let excess water drain, then wait for the mix to dry before watering again; the newly rooted plant needs some moisture to expand its root system but does not need a constantly wet tray. Fine Gardening notes that getting this balance right is the tricky part, and Montana State University Extension emphasizes watering succulents only when the substrate has dried (Fine Gardening, Montana State University Extension).
Keep new growth in bright indirect light at first. Once the plant has visible roots and is holding itself in the mix, move it gradually toward the brighter light its mature type prefers. A cutting raised indoors can scorch if shifted straight into strong outdoor or midday sun, so increase exposure over several days and back off if the leaves blanch, wrinkle, or develop dry patches.
You do not need rooting hormone to begin. Montana State and WVU Extension both describe it as optional rather than essential for succulent cuttings (Montana State University Extension, WVU Extension). Instead of fertilizing a rootless piece, wait for established roots and new growth; fertilizer cannot compensate for a wrong method, poor drainage, or insufficient light.
Pot the new plant separately once it has a visible root system and is large enough to handle without pinching its crown. A leaf-grown rosette can remain on the tray while its roots lengthen, and a stem cutting is ready when it resists a very gentle movement or shows steady new growth. Use a small pot with a drainage hole rather than a large container that stays wet around a tiny root ball.
Troubleshoot rot, shriveling, and stalled growth
Succulent propagation is not a pass-or-fail test of your skill. Some pieces never root, and a single batch may contain successful and unsuccessful cuttings because each leaf has different stored reserves and growth tissue. Focus on the condition of the piece: a firm cutting with a dry wound can wait, while a mushy base needs a reset.
Rot at the base means reset
A soft, translucent, brown, or black base usually means the cutting stayed too wet before it sealed, the medium is holding water, or the cut was buried. Remove the failed piece and any affected damp material, let the tray dry, and start again with a healthy leaf or stem. Gardenia Organic also identifies incomplete callusing and overwatering as common causes of cuttings turning mushy at the base (Gardenia Organic).
Do not keep adding fungicide or more water to a cutting that has turned to mush. Rotting tissue is not a slow root; it will not recover when moved to a sunnier spot. The useful correction is to change the starting material, callusing conditions, or medium before trying again.
Roots without a rosette may need time
If roots appear but a leaf does not make a baby plant, first check whether that succulent is known to produce a plantlet from a leaf. If it is a suitable type and the leaf is still firm, wait and keep it in bright indirect light; root growth can come ahead of top growth. If months pass with no plantlet and the leaf is exhausted, the species or the leaf base may not have been right for this method.
A stem cutting that has not rooted after several weeks may simply be moving slowly during cool or dormant conditions. Check that the mix is not saturated and the cutting is not buried too deeply, then leave it undisturbed in warm, bright indirect light. A brief, gentle resistance test can indicate roots, but repeated tugging damages the new ones.
Stretching points to light
A pale, elongated rosette or stem usually indicates that the new plant needs brighter light. Move it closer to a bright window or use a grow light, but make that change gradually; an abrupt shift from shade to intense sun can burn the same tender leaves you are trying to save. Once a plant is stretching, the existing section may not become compact again, but new growth can be healthier under improved light.
If cuttings repeatedly shrivel before roots form, compare the air and the medium rather than watering automatically. A hot, dry windowsill may dry exposed roots, while a cool, humid corner can keep wounds wet and slow callusing. Move the tray to a warmer, brighter place with airflow, then adjust moisture in small increments instead of misting the leaves on a schedule.
Conclusion
To propagate succulents, start by matching the plant to a viable cutting: use a clean, complete leaf for leaf-friendly rosette types, a stem cutting for branching or leggy types, and an offset when the plant naturally makes rooted pups. Let every fresh wound dry, use fast-draining mix, provide bright indirect light, and keep moisture modest until roots can use it.
Success is easier to judge by visible progress than by a calendar. A dry callus, firm tissue, new roots, and a plantlet that can stand on its own are better signals than an exact number of days; give healthy cuttings time, and reset only the ones that have actually rotted.