How to Repot a Plant in 7 Simple Steps
Learn how to repot a plant in seven steps, from choosing a drainable pot and fresh mix to loosening roots and adjusting aftercare for succulents and orchids.
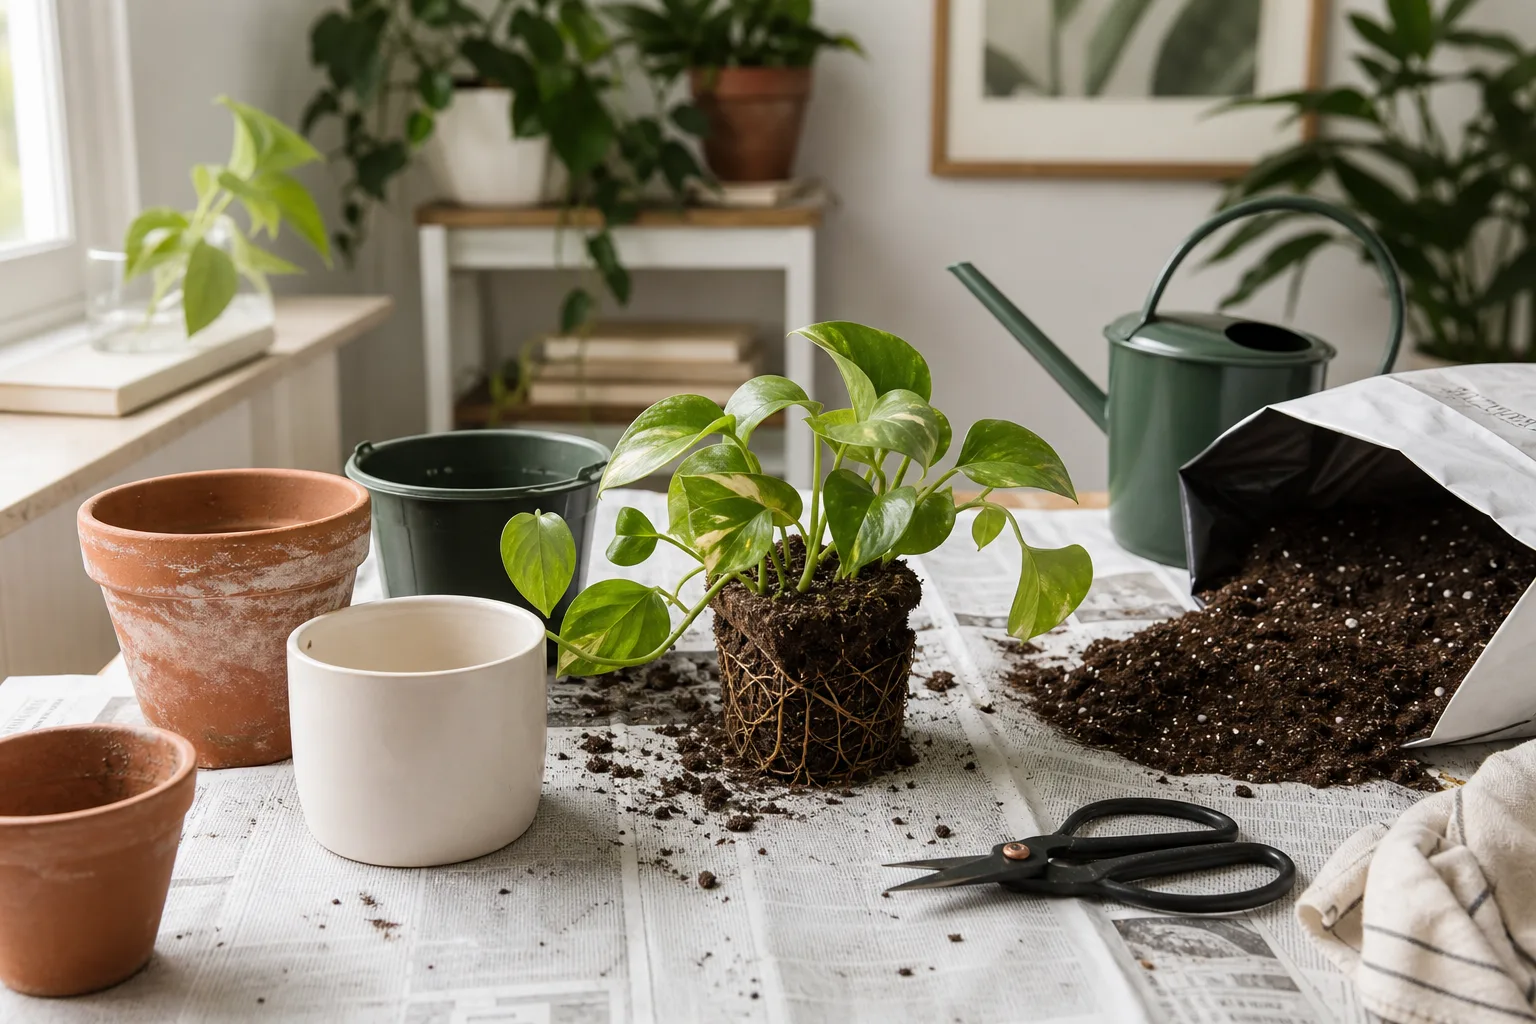
Repotting is a small root-zone renovation, not a routine upgrade to the biggest pot on the shelf. The job goes smoothly when you match the new container to the roots, keep the plant at its original soil level, and choose a growing mix that holds enough moisture without staying soggy.
Most plants do not need their roots washed bare or every old bit of mix removed. A healthy root ball usually needs gentle loosening at the edges; root rot, a badly collapsed mix, or a plant that has outgrown its pot calls for more intervention. The steps below show how to tell those cases apart and make the move with the least disturbance that will solve the problem.
Before You Start: Does Your Plant Need a Repot?
Start with the plant’s behavior, then confirm by checking its roots. Roots emerging from drainage holes, circling densely around the root ball, or forming a thick mat at the soil surface are strong signs that the container is full. The mix may also dry much faster than it used to, water may run straight through a shrunken root ball, or growth may slow despite suitable light and normal seasonal care. One clue alone is not a diagnosis: fast drying can come from heat, a porous clay pot, or a dry, water-repellent mix rather than root crowding.
Slide the root ball out only if the plant is stable enough to handle and you can do it without pulling on the stems. If roots are spread through the mix but not circling tightly, and water still wets the root ball evenly, put it back. A little root showing at a drain hole does not automatically mean the plant needs a bigger home; look for a dense, pot-shaped root mass or a persistent change in watering needs. Penn State Extension recommends checking the root ball directly and weighing the plant’s desired final size before choosing a larger pot (Penn State Extension).
Repotting can mean three different things: moving into a slightly larger pot, refreshing old medium in the same pot, or correcting a root or drainage problem. If the plant has enough space and the mix still drains and re-wets well, leave it alone. If you want to keep a mature plant at its current size, a careful same-pot refresh or modest root prune may be more sensible than increasing the container every time roots reach the edge.
Spring or early active growth is a convenient time for routine repotting because roots can grow into the new medium. But a plant with soft, dark roots, a sour-smelling, persistently wet mix, or a container that traps water may need corrective attention regardless of the calendar. The RHS repotting guide treats potting-on, same-pot renewal, and root pruning as different options; choosing the least disruptive one is often the better first decision.
Step 1: Choose a Good Time and Set Up
For routine work, pick a day when the plant is not already wilted, recently moved, flowering under stress, or recovering from pests. A moist but not waterlogged root ball is easier to handle than bone-dry, crumbly mix or saturated mud. If the plant is very dry, water it the day before and let it drain; if it is already wet, wait until the mix is workable unless a root problem needs urgent attention. Avoid treating “water before repotting” as a universal rule—the goal is a cohesive root ball, not more moisture than the plant can use.
Set out a tarp or newspaper, a pot with an open drainage hole, fresh mix, a small scoop, and clean scissors or pruners for damaged roots. Wash a reused container and remove old soil or salt crusts. Extension guidance varies on sanitizer strength; if the old plant had disease or pests, use a product and dilution recommended by a university extension or label, keep it off the plant, and rinse the pot thoroughly. Do not mix household chemicals or use bleach casually around plants.
Moisten dry potting mix in a tub until it feels evenly damp and holds together loosely when squeezed, but no water drips from it. This makes it easier to settle around roots and reduces the chance that very dry mix will repel the first watering. Have the replacement pot ready before removing the plant so exposed roots spend as little time in open air as practical.
Step 2: Pick a Pot That Fits the Root Ball
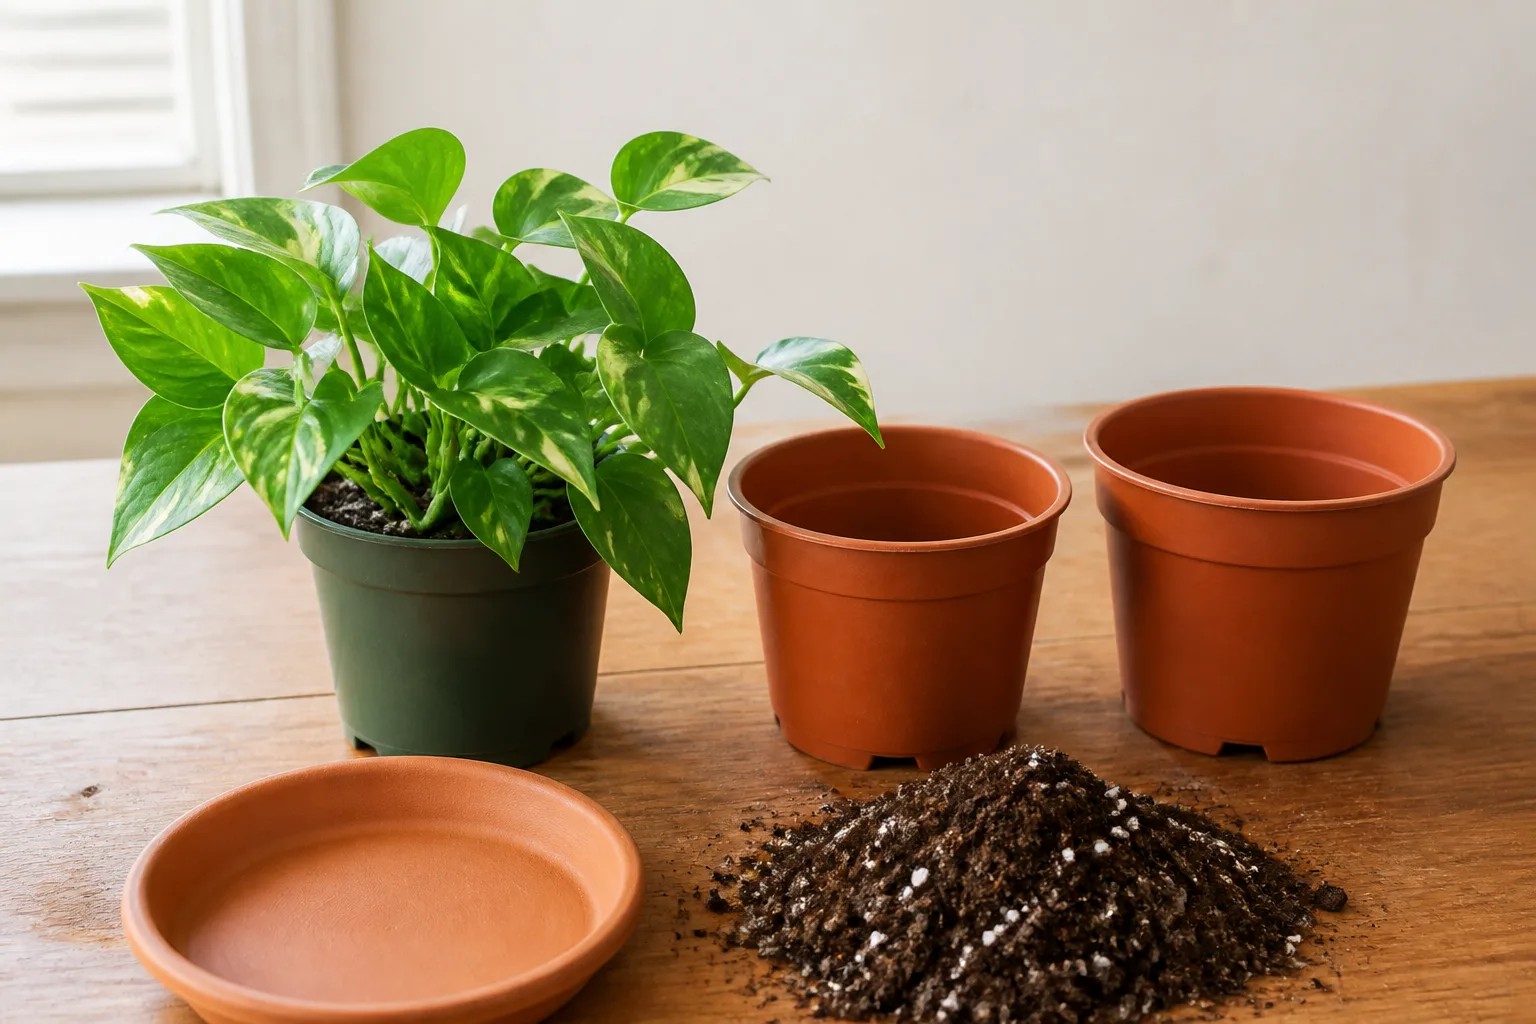
For a plant that needs more room, choose a pot about 1–2 inches (2.5–5 cm) wider than the current one for most small and medium houseplants. The new container should give the roots space to extend, not surround a small root ball with a deep reservoir of unused wet mix. If a plant is in a 6-inch pot and its root ball is compact, a pot roughly 7–8 inches across is usually a more measured step than jumping to a 12-inch planter. Penn State and Colorado State guidance both recommend modest increases; the root ball’s actual size should settle close calls.
The pot needs at least one unobstructed hole at the bottom. If you want a decorative container without a hole, keep the plant in a nursery pot that drains and use the decorative one as a cachepot; lift the inner pot out to water and empty standing water afterward. A layer of gravel cannot turn a sealed vessel into a draining pot. For an oversized opening that lets mix escape, cover only the hole with a piece of mesh or screen that still lets water pass.
Material changes how quickly a pot loses moisture. Unglazed terracotta breathes through its walls and dries more quickly, which can suit drought-tolerant plants or a grower who tends to water too often. Plastic and glazed ceramic lose less water through the sides, so they can be useful for plants that prefer a more even moisture level, though the mix and room conditions still matter more than the label on the pot. Pick a stable pot for a top-heavy plant and a shape that leaves enough depth for its roots; do not choose a container solely by matching the width of the leaves.
Step 3: Prepare the Right Potting Mix
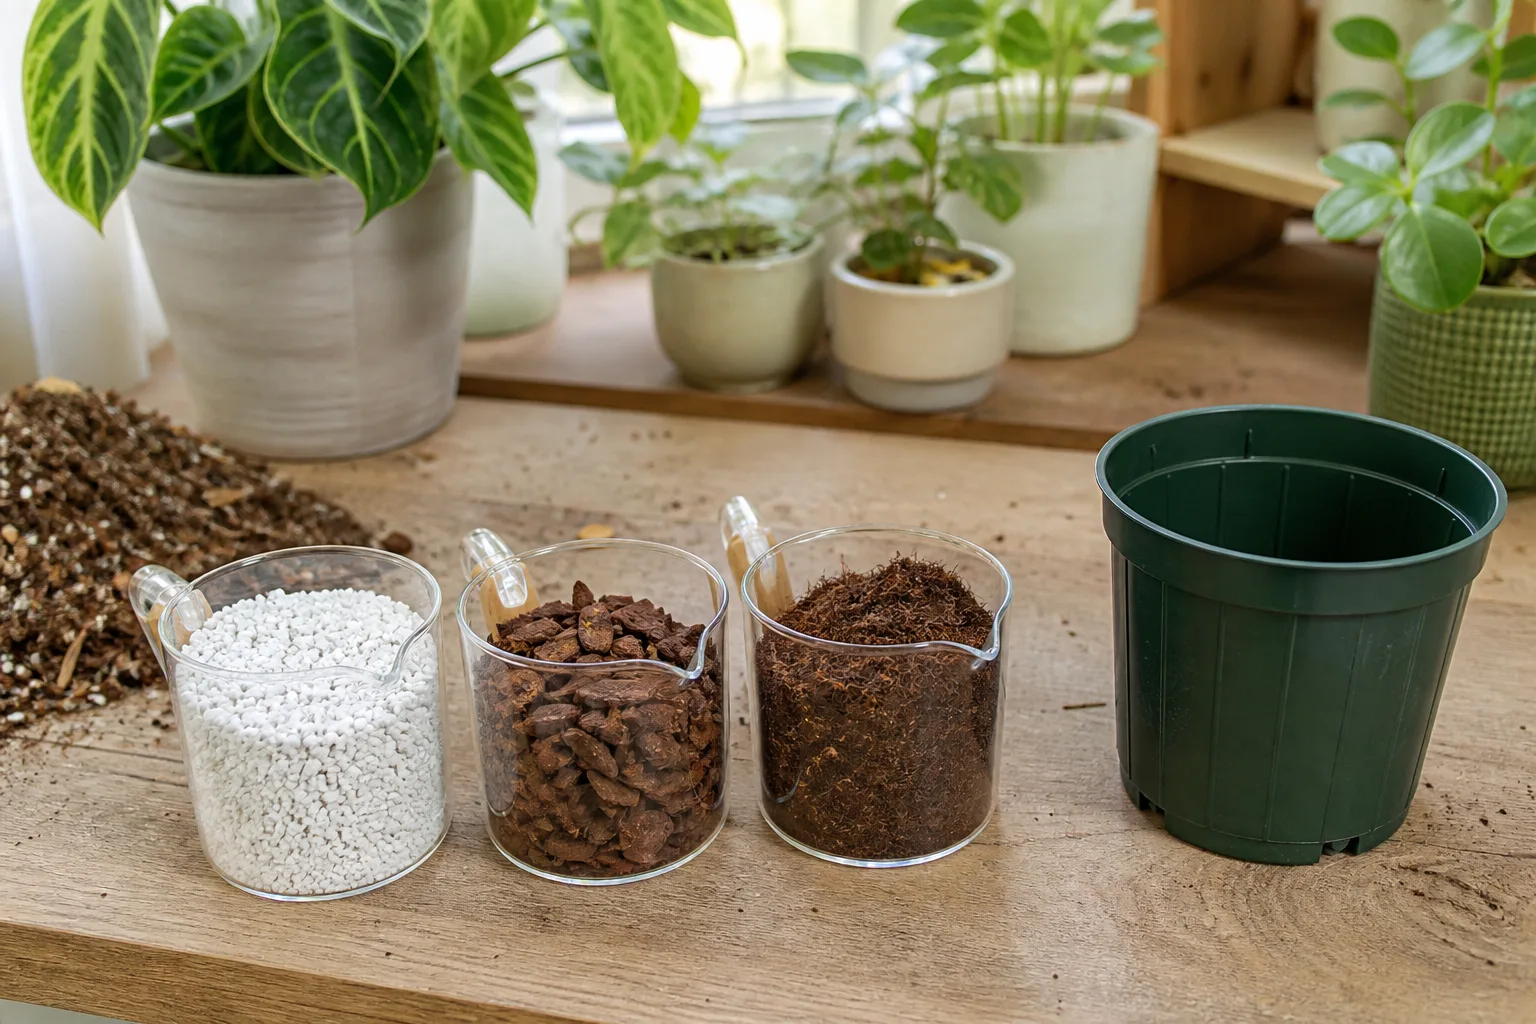
Use a fresh, packaged potting mix or a plant-specific growing medium, not soil dug from the garden. Garden soil can compact in a container, drain poorly, and carry weed seeds or organisms that cause disease. Most tropical foliage plants do well in a general indoor mix that retains some water but includes airy material such as perlite, pumice, bark, or coarse coir. Choose by the plant’s roots and your watering conditions rather than assuming every “indoor plant” mix is identical.
Succulents and cacti need a faster-draining medium than a moisture-loving fern; orchids such as Phalaenopsis usually grow in coarse bark-based orchid media rather than ordinary potting soil. A mix that dries in two days on a sunny, warm balcony may stay wet for a week in a cool, dim room. If your mix stays wet for too long, adjust the medium, pot size, light, and watering together instead of burying gravel under the root ball.
Read the bag for added fertilizer. Some mixes contain starter nutrients or slow-release fertilizer; others do not. This matters for aftercare: fresh mix is not necessarily “nutrient-free,” but it also is not proof that every plant can go for a fixed number of months without feeding. Penn State Extension describes common mix ingredients such as coir, peat, perlite, and vermiculite and notes that different plant groups may need specialized formulas (Penn State Extension: Potting Media).
Step 4: Slide the Plant Out Without Pulling
Tip a small pot on its side, support the plant at the soil surface with your fingers, and squeeze or tap the sides of a flexible pot. For a heavier plant, lay the container on its side on a protected surface and rotate it while easing the root ball free. If roots have grown through a drainage hole, free them gently or cut the container if it is inexpensive; pulling hard can tear healthy roots or snap a stem. Never yank the plant upward by its leaves or stems.
If the plant will not release, run a blunt tool around the inside edge of the pot or press the bottom drainage hole carefully to loosen the root ball. A pot that narrows sharply at the top may hold the root ball like a wedge; cutting a disposable nursery pot is safer than forcing the plant through the narrow opening. A slight drying period can help some plants release cleanly, but do not let thin-rooted or already stressed plants dehydrate just to make the task tidier.
You do not need to rinse the roots or strip away every trace of old mix. Brush off loose material with your fingers so you can see the root structure. Keep a larger portion of the original medium intact if the plant is healthy and the old mix is still serviceable; remove more only when it is compacted, contaminated, waterlogged, or hiding rot. Colorado State University PlantTalk describes firm, pale roots as healthy and advises cleaning and reusing containers carefully (PlantTalk Colorado).
Step 5: Inspect and Tidy the Roots
Look for firm roots that are cream, tan, or pale brown—color varies by species and by the medium they grew in. Healthy roots are not always bright white. Rotted roots tend to be soft, mushy, hollow, or foul-smelling; they may slough when lightly touched. A dark but firm root is not automatically dead, so test texture before cutting. If only a few roots are damaged, remove just those sections with clean, sharp scissors, cutting back to firm tissue.
When healthy roots circle the outside of the root ball, tease the outer layer apart with your fingers so some roots point outward into the new mix. Do this gently, especially with fine, brittle roots. If the mass is a tight felted shell and gentle loosening does nothing, make two or three shallow vertical cuts through the outer roots or trim a thin slice from the bottom, then spread the cut ends outward. A few deliberate openings encourage roots to enter fresh medium; shredding the whole root ball can set the plant back.
Cutting healthy roots is not required every time you repot. Reserve pruning for badly circling roots, dead or rotten tissue, a plant whose size must be restrained, or a plant that must return to the same pot. The RHS notes that some container plants can stay in the same-size pot with periodic root pruning and fresh compost; for a valued mature plant, small and staged reductions are safer than removing a large share of the roots at once. Disinfect the blade between diseased plants and discard rotten material rather than mixing it into another pot.

Step 6: Set the Plant at the Right Height and Backfill
Add enough damp mix to the new pot so the plant sits at the same depth it did before. Set the root ball in the center and check the height before filling the sides: the old soil line should remain at the surface, with a small watering gap between the mix and pot rim. Keep the crown, stem bases, and leaf petioles above the mix unless the plant’s normal growth habit specifically calls for covering them. Burying a stem to make a plant look shorter can trap moisture against tissue that was meant to stay exposed.
Fill the open space around the root ball in small handfuls, guiding mix into the gaps with your fingers or a chopstick. Tap the pot gently on the work surface to settle the medium; press only enough to stabilize the plant. Do not stamp or compact the mix. Roots need both water and oxygen, and squeezing out the air spaces can make the container stay wet and slow new root growth.
Lift the pot once or twice as you fill to check that the root ball remains level. If the plant leans, add mix to the low side and steady it with a temporary stake rather than forcing the stem upright by packing soil hard around it. Leave the top of the root ball visible at its former level, replace any shallow surface roots with a light cover of mix, and wipe soil from leaves before returning the plant to its place.
Step 7: Water the Mix and Let It Drain
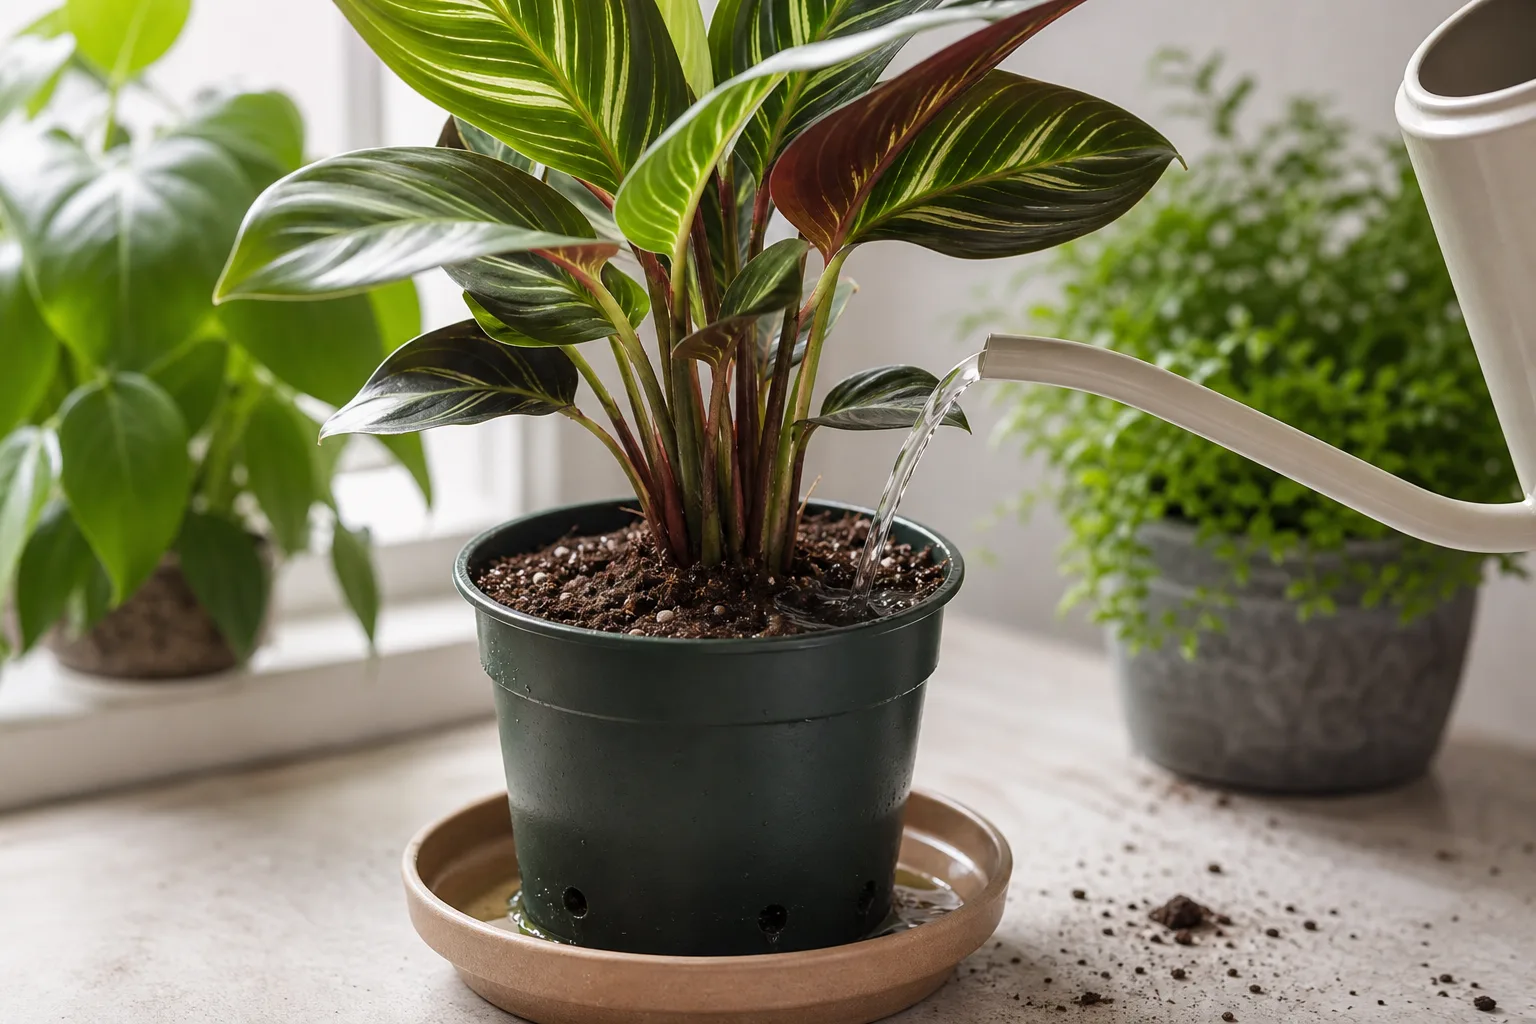
For most foliage plants, water slowly across the whole surface until excess begins to leave the drainage holes. This wets the new mix evenly and helps it settle around the roots; a few small pours with a pause between them work better than one fast splash that runs down a gap at the pot wall. Empty the saucer or cachepot after the water stops draining so the base does not sit in a reservoir.
Do not follow a rigid “lightly water, then wait exactly one day” rule. Fresh mix may be drier or wetter than the old mix, and the first watering should be guided by the species and the medium. For a cactus or succulent, avoid soaking freshly cut roots; let the wounds dry and return to the plant’s usual dry-down pattern before watering. Orchids in bark need their normal watering cycle, not the schedule used for a fern in a moisture-retentive mix.
If water pools on the surface or refuses to pass through, check that the hole is open and the mix is not packed tightly. If it exits immediately but the root ball remains dry, the old medium may be hydrophobic; water in stages or briefly bottom-water a nursery pot, then drain it completely. After this first thorough watering, decide when to water again by checking the root zone, pot weight, and the plant’s normal needs—not by the fact that it was just repotted.
Aftercare: Keep Conditions Steady
Put the plant back in its usual light and temperature unless that location is now unusually harsh. A familiar spot avoids stacking several changes—new soil, a new pot, direct afternoon sun, and a temperature swing—on roots that are adjusting. If the leaves are limp after the move, provide bright but gentle light and stable warmth; do not automatically move the plant into a dark corner or soak it again. A brief droop can follow root disturbance, but worsening collapse in wet mix needs investigation.
For the first few weeks, check moisture more often than usual because the new mix may drain and dry at a different rate from the old one. Use a finger or wooden skewer near the root ball, feel the pot’s weight, and compare those cues with the plant’s normal watering threshold. A larger pot can take longer to dry even when the top looks dry. Water thoroughly when the plant’s needs call for it, then let excess escape; repeated small sips can leave the center dry while the outer mix stays wet.
Hold off on fertilizer while damaged roots recover, especially if the new mix contains a starter charge or slow-release granules. Fertilizer does not cure transplant stress, and concentrated salts can irritate roots that have just been cut or handled. Resume feeding when the plant is stable and beginning active growth, following the product label and the plant’s normal seasonal routine. If the mix contains no fertilizer and the plant is a heavy feeder, use a modest, label-directed dose once it has settled rather than waiting an arbitrary season.
One or two older leaves yellowing after a move can be normal, but do not dismiss persistent wilt, a sour smell, blackening at the soil line, or mix that stays saturated. Check whether the drainage hole is blocked, whether water is sitting inside a cachepot, whether the plant was buried too deep, and whether you cut more roots than it could replace. If rot is present, isolate the plant, remove dead roots and contaminated medium, and repot into a clean, properly sized container with fresh mix.
Adjust the Method for Orchids, Succulents, and Mature Plants
The seven steps work for most potted foliage plants, but they are not a license to put every species into the same potting soil. Some roots need coarse bark and air spaces, some prefer a faster dry-down, and some plants are easier to manage when their existing container remains the same size. Let the root type and moisture needs set the exception.
Orchids
Many common moth orchids (Phalaenopsis) are epiphytes: in nature their roots attach to surfaces rather than growing in dense garden soil. Use a purpose-made orchid medium, often based on bark, and a pot that allows the medium to drain and air to reach the roots. A clear pot can make root and moisture checks easier for Phalaenopsis, but it is not a requirement for every orchid. Do not pack ordinary houseplant mix around orchid roots or bury the crown.
Remove loose, exhausted bark and cut roots that are clearly dead or mushy, while keeping firm roots even if they look silvery when dry. Reuse the current pot if it still fits; orchids often need a medium refresh rather than a much larger container. BBC Gardeners’ World’s moth-orchid guide also uses specialist bark medium and cautions against breaking up the root ball unnecessarily (BBC Gardeners’ World).
Cacti and Succulents
Use a gritty, fast-draining mix designed for cacti and succulents, and choose a pot only a little wider than the roots. Unglazed terracotta can help the mix dry faster, but it also means you may need to check moisture more frequently. Many succulents have shallow root systems; a wide, shallow pot can be a better fit than a deep container holding several inches of wet soil below the roots.
Handle spines with folded newspaper, tongs, or thick gloves, and support the plant at its base rather than gripping fleshy leaves. Remove rotten roots, but avoid tearing healthy fine roots just to bare-root the plant. If you cut roots, wait until the cuts are dry before watering; then return to the species’ usual wet-and-dry rhythm instead of keeping the mix constantly damp. A healthy, dry-rooted succulent may not need an immediate soak after the move.
Large or Mature Plants
When a floor plant is too heavy to lift or should not grow larger, do not force it into an ever-bigger pot. Ask someone to steady the plant, lay it on its side on a tarp, or remove only the top few inches of old medium if root inspection is not necessary. For a mature plant, same-pot repotting can mean trimming a modest amount of congested outer roots, returning the plant to its cleaned container, and filling gaps with fresh mix.
Root pruning reduces the plant’s ability to take up water, so prune conservatively and in stages. The RHS suggests that light root trimming can be enough for some container plants; the safe amount varies with species, season, health, and the plant’s root structure. Do not apply bonsai-level root pruning to an ordinary houseplant without knowing the species can tolerate it. If you must remove a substantial amount of root, reduce top growth only when species-specific guidance supports it and give the plant stable aftercare.
Repotting Mistakes That Cause Trouble
The most common avoidable errors are sizing up too far, burying the original soil line, tearing apart a healthy root ball, and watering again before the new mix needs it. A very large pot does not make a small plant grow faster; it can leave a broad volume of medium wet for longer than the roots can use. Match the container to the root ball, retain the original depth, and change one variable at a time.
Do not replace potting mix with outdoor garden soil, cram roots into a narrow pot, or fertilize immediately to “help” the plant recover. A cachepot is useful for appearance, but remove standing water after irrigation. Do not diagnose root rot from leaf color alone: yellow leaves also result from light, age, drought, pests, or normal seasonal change, so inspect the mix and roots before taking corrective action.
Gravel at the Bottom Does Not Replace a Drainage Hole
For years, gardeners were told both that gravel improves drainage and that a coarse layer creates a perched-water barrier. New evidence makes that simple either-or answer less reliable. A 2025 peer-reviewed PLOS ONE experiment tested three potting media with four drainage materials at two layer depths; it found that the layers generally reduced or did not change total water retained in those containers, with results depending on the medium and layer. The study measured water retention, not plant growth or root rot, so it does not prove that adding gravel benefits a particular plant or pot (Rowe, PLOS ONE).
The practical correction is narrower: do not use gravel as a substitute for an open drainage hole, and do not assume a gravel layer will fix an oversized pot, compacted mix, or overwatering. The experiment did not show that a layer is a universal plant-care treatment, and gravel also displaces mix and root space. For an ordinary repot, put the plant in a drainable pot filled with one suitable mix; cover a large hole with mesh if needed. This keeps the recommendation focused on the conditions that actually let excess water leave the pot.
Conclusion
To repot a plant successfully, confirm that it needs the move, choose a pot sized to its roots, use a species-appropriate mix, preserve as many healthy roots as possible, and keep the plant at its original depth. Water the new medium thoroughly for most foliage plants, let excess drain, and then adjust to the plant’s actual moisture needs. Routine repotting can wait for active growth; rot or a failed container setup deserves prompt correction.



