How to Store Iris Bulbs or Rhizomes for Replanting
Learn how to store iris bulbs and rhizomes by type, prevent rot or shriveling, and replant them at the right time for your climate and growing season.
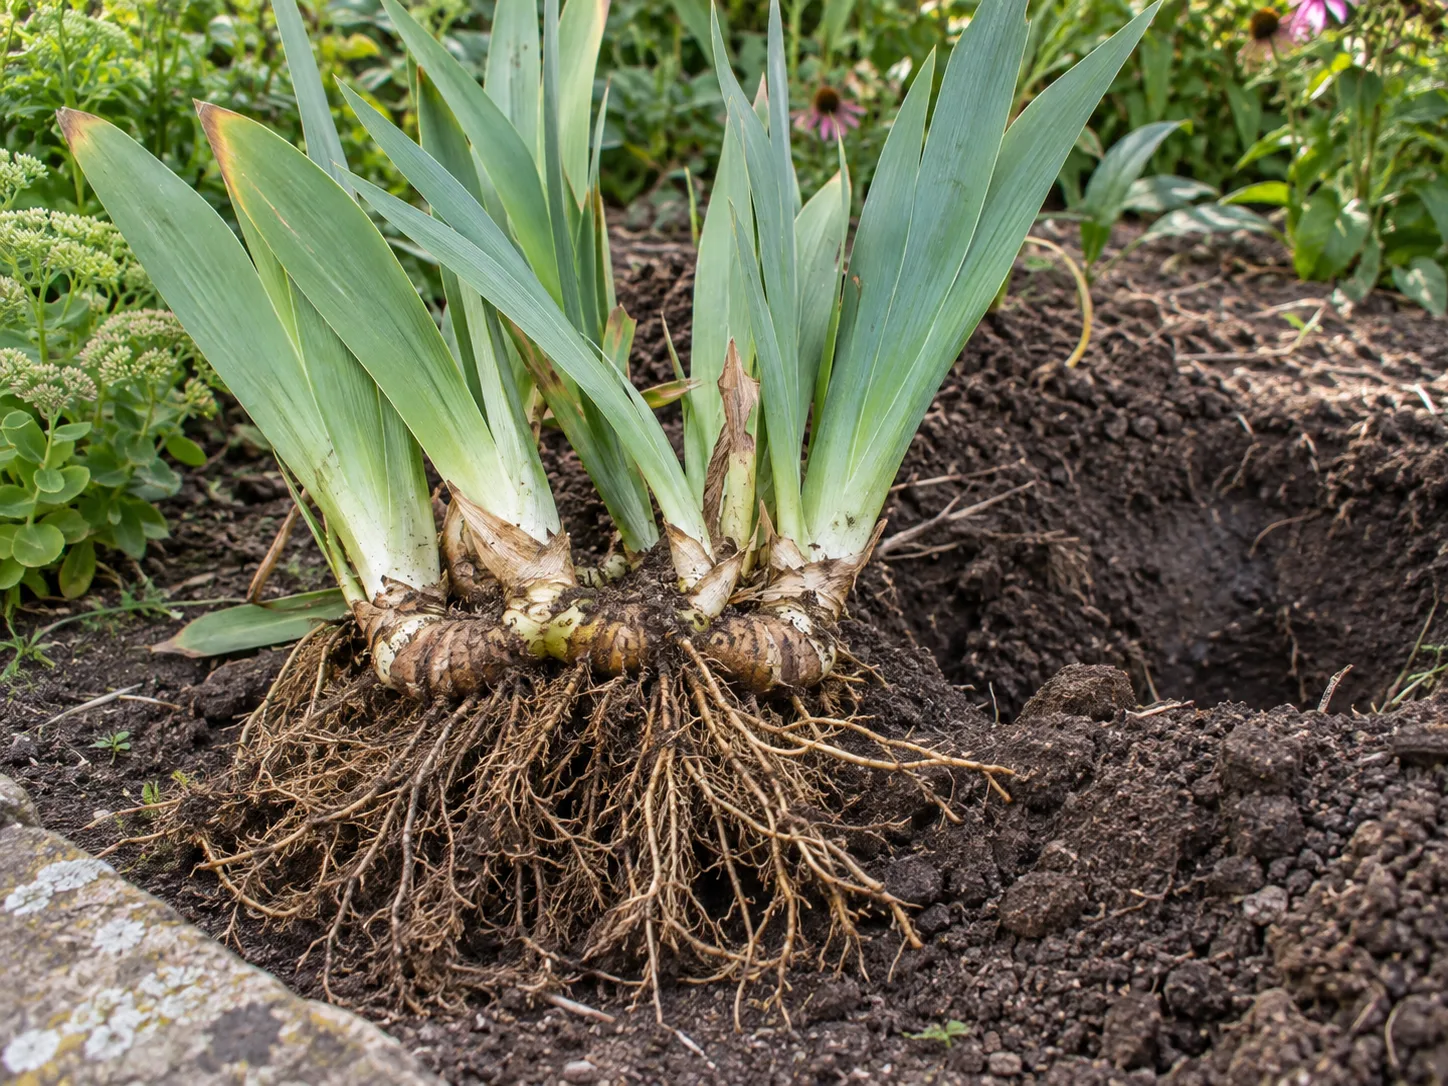
If you have dug up an iris and cannot plant it right away, first identify what you have. The word “bulb” is often used for any underground plant part, but many garden irises grow from a thick, horizontal rhizome, while others have a true bulb or a dense fibrous root system. Those structures do not all handle drying and storage the same way.
Most hardy irises do not need to come out of the ground for winter. Leave a healthy, established plant in place unless you are moving, dividing a crowded clump, rescuing a plant from waterlogged soil, or holding a late division until a safe planting window opens. When you do have to lift one, aim to replant promptly; treat storage as a bridge, not a routine annual chore.
The short answer: store only when planting is delayed
For a healthy iris that is growing in a suitable site, overwintering in the ground is usually the simplest option. Digging it up adds handling, drying, and rot risks without giving a hardy plant an automatic advantage. Many rhizomatous irises overwinter outdoors successfully when their soil and drainage suit the species.
Storage makes sense when a move, construction project, garden redesign, division, or bad planting weather has separated the iris from its bed. If the delay is only a few days, keep the plant labeled, shaded, and out of drying wind while you prepare its new site. For a longer pause, decide whether the particular iris should be held dry, potted, or heeled into a temporary bed; “store iris bulbs” is not one method that fits every iris.
A useful order of preference is: plant in the right place now; pot or heel in a living plant if planting must wait; use dry storage only for an iris type and situation that can tolerate it. If the label is missing, the roots are dense and fibrous, or the plant’s identity is uncertain, protect the roots from drying instead of assuming it is a bearded iris rhizome.
Identify what is under the soil
Look at the underground part and the way the leaves attach before trimming or packing anything. If you have a plant label or purchase record, use it alongside the structure: common names such as “Dutch iris” or “Japanese iris” are more useful than the generic word iris because their growing cycles differ.
A true iris bulb is compact and layered
A true bulb is short and rounded or teardrop-shaped, with a basal plate and fleshy layers or scales inside a papery outer tunic. It resembles a small onion more than a long knobbly root. Reticulated iris, including Iris reticulata, is a bulbous perennial; the Royal Horticultural Society’s plant profile identifies it as an early bulbous iris and says its bulbs can be lifted and separated in early autumn.
Dutch iris and other bulbous types are also sold as bulbs, but their planting and dormancy timing can differ from reticulated iris. Read the label and follow the supplier or a regional horticultural source for that group. Do not assume that a bulb dug up while its leaves are still green is ready for storage: foliage often needs to finish its natural cycle so the bulb can replenish itself for the next season.
A rhizome is a horizontal stem, not a bulb
A rhizome is an enlarged stem that grows sideways, with roots underneath and shoots or leaf fans emerging from joints along the top. Bearded iris rhizomes are usually thick, segmented, and close to the soil surface. They may look rootlike, but they are not true roots and should not be handled as if all iris bulbs have the same shape.
Siberian and Japanese irises are commonly described as rhizomatous, yet their root systems and moisture preferences are different from the exposed, fleshy rhizomes of bearded iris. Some also have a dense mat of fibrous roots. Gardening Know How’s division guide emphasizes that bearded and Siberian irises have different needs. That distinction matters during a delay: an unplanted bearded-iris division may tolerate a brief dry, ventilated hold, while a root-heavy, moisture-loving iris is often safer kept alive in soil or a suitable pot.
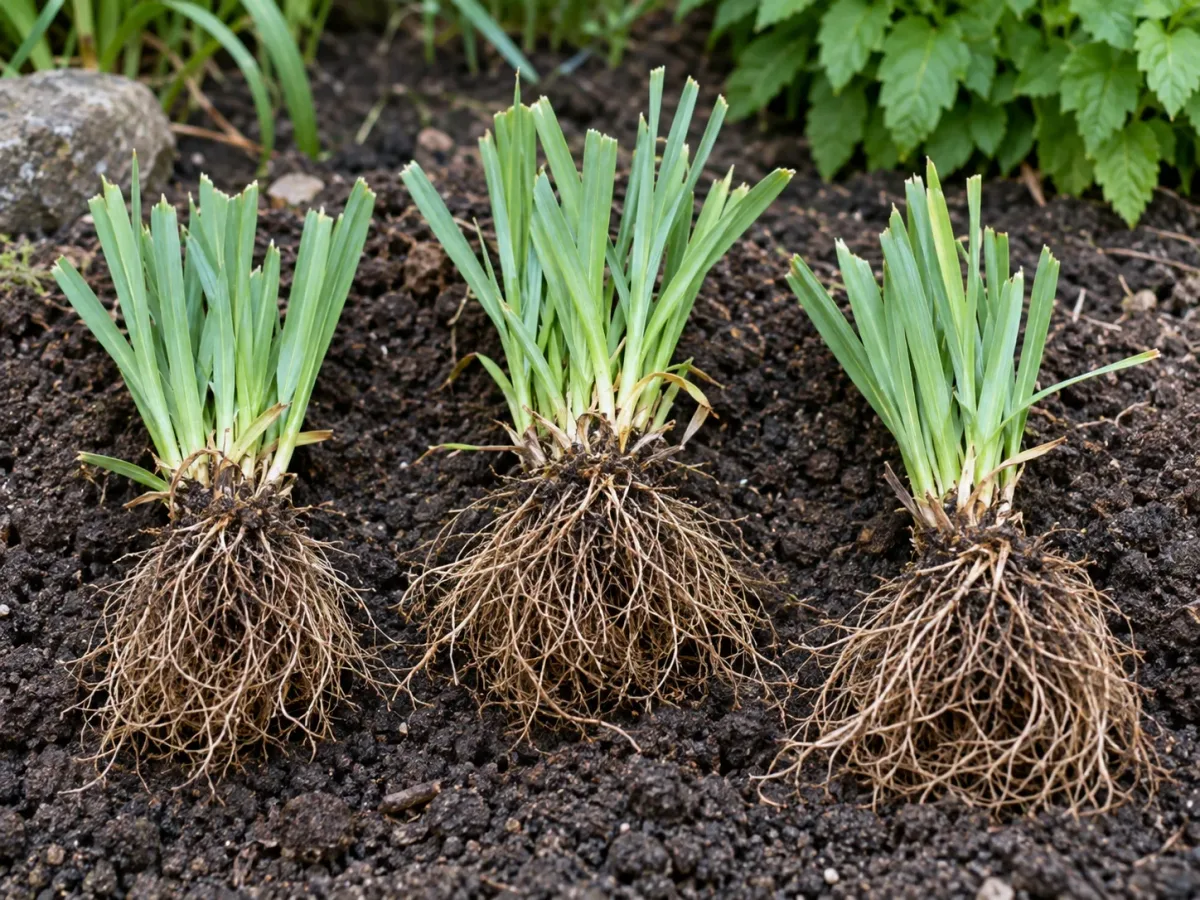
If the underground structure is unfamiliar, keep the leaves, roots, and any attached soil together until you can identify the plant. Mark the top and orientation of each piece before separating it. A clear label now can prevent a dry-stored, moisture-loving iris from being treated like a dormant bulb later.
Decide whether to store, pot, or replant
The right holding method depends on three things: iris type, how long the delay will last, and the conditions you can provide. A short interruption on a cool, shaded potting bench is different from holding divisions through a hot month or a hard winter. Choose the least stressful option that solves the actual timing problem.
| Situation | Better next step | Why |
|---|---|---|
| Established, hardy iris in a suitable bed | Leave it in the ground | Lifting is unnecessary and can stress roots |
| Firm bearded iris division, short delay | Keep it dry on the surface and in a breathable container | Airflow helps limit wet, stagnant conditions |
| Fibrous-rooted or moisture-loving iris | Pot or heel in with roots protected | Prolonged drying can injure roots that normally grow in moist soil |
| True bulb lifted after foliage has died back | Cure the outer surface and store briefly in a breathable, dry place if needed | A dry dormant bulb can be held until its proper planting window |
| Unidentified, damaged, or actively growing iris | Identify and stabilize before storing | A generic dry-storage recipe can worsen the wrong condition |
When the delay is brief, don’t over-process the plant. Shade the exposed material, keep it out of a hot car or direct afternoon sun, and put it into soil as soon as you can. If weather has made planting impossible for weeks, a pot with drainage or a temporary nursery bed usually gives roots a more forgiving environment than a box.
Choose the right time to lift an iris
Lift an iris only when there is a reason. For bearded irises, division is commonly done after the main bloom, once the plant has had time to grow and the weather still leaves a reasonable establishment window. Mid- to late summer is common in many temperate gardens, but the exact date shifts with cultivar, climate, heat, and local frost patterns. Use the plant’s growth stage and local guidance rather than treating a calendar month as universal.
Bulbous irises have their own cycle. Let the foliage yellow and die back naturally before lifting a bulb for summer holding unless an urgent move makes that impossible. The RHS notes early-autumn lifting and separation for Iris reticulata; other bulbous kinds may have different schedules. Keep the label with the bulb so the replanting time is not guessed months later.
If a storm, construction job, or move forces you to lift a plant outside the ideal window, do not wait for a perfect date before protecting it. Lift a generous root area, keep the material cool and shaded during the job, and plant or pot it as soon as conditions allow. If the soil around an iris stays saturated, the priority may be moving it to a better-drained place rather than returning it to the same spot simply because it is the normal season.
Avoid dividing a plant just because it is available to dig. Healthy green leaves still support the plant, and roots are easier to maintain when you have a prepared destination. Set out labels, tools, containers, and the new bed before lifting so the iris is not left exposed while you make decisions.
Prepare healthy bulbs and rhizomes for a short hold
Begin with a clean work surface and a label for every cultivar or clump. Record the name if known, flower color, garden location, date lifted, and whether the piece is a bulb or rhizome. If you are keeping multiple divisions, mark which end carried the leaf fan; that makes it easier to orient each rhizome when planting again.
Use a garden fork or spade outside the clump, then loosen soil from below instead of pulling the plant by its leaves. Bearded iris rhizomes are near the surface but can branch under neighboring fans, so work around the clump and lift a wider section than you think you need. Shake or brush away loose soil gently. If the rhizome is healthy, there is no need to scrub it clean or rinse it just for storage.
Inspect before packing. Keep firm, sound bulbs or rhizomes with intact growth points. Remove only broken or dead roots and foliage. Cut away pieces that are soft, mushy, hollow, foul-smelling, or visibly tunneled, and keep those separate from healthy divisions. A soft, wet base can indicate rot; an insect tunnel or damaged interior is not improved by wrapping it in newspaper. Clean the knife or pruners between suspect and healthy pieces, and discard diseased material rather than putting it in a home compost pile.
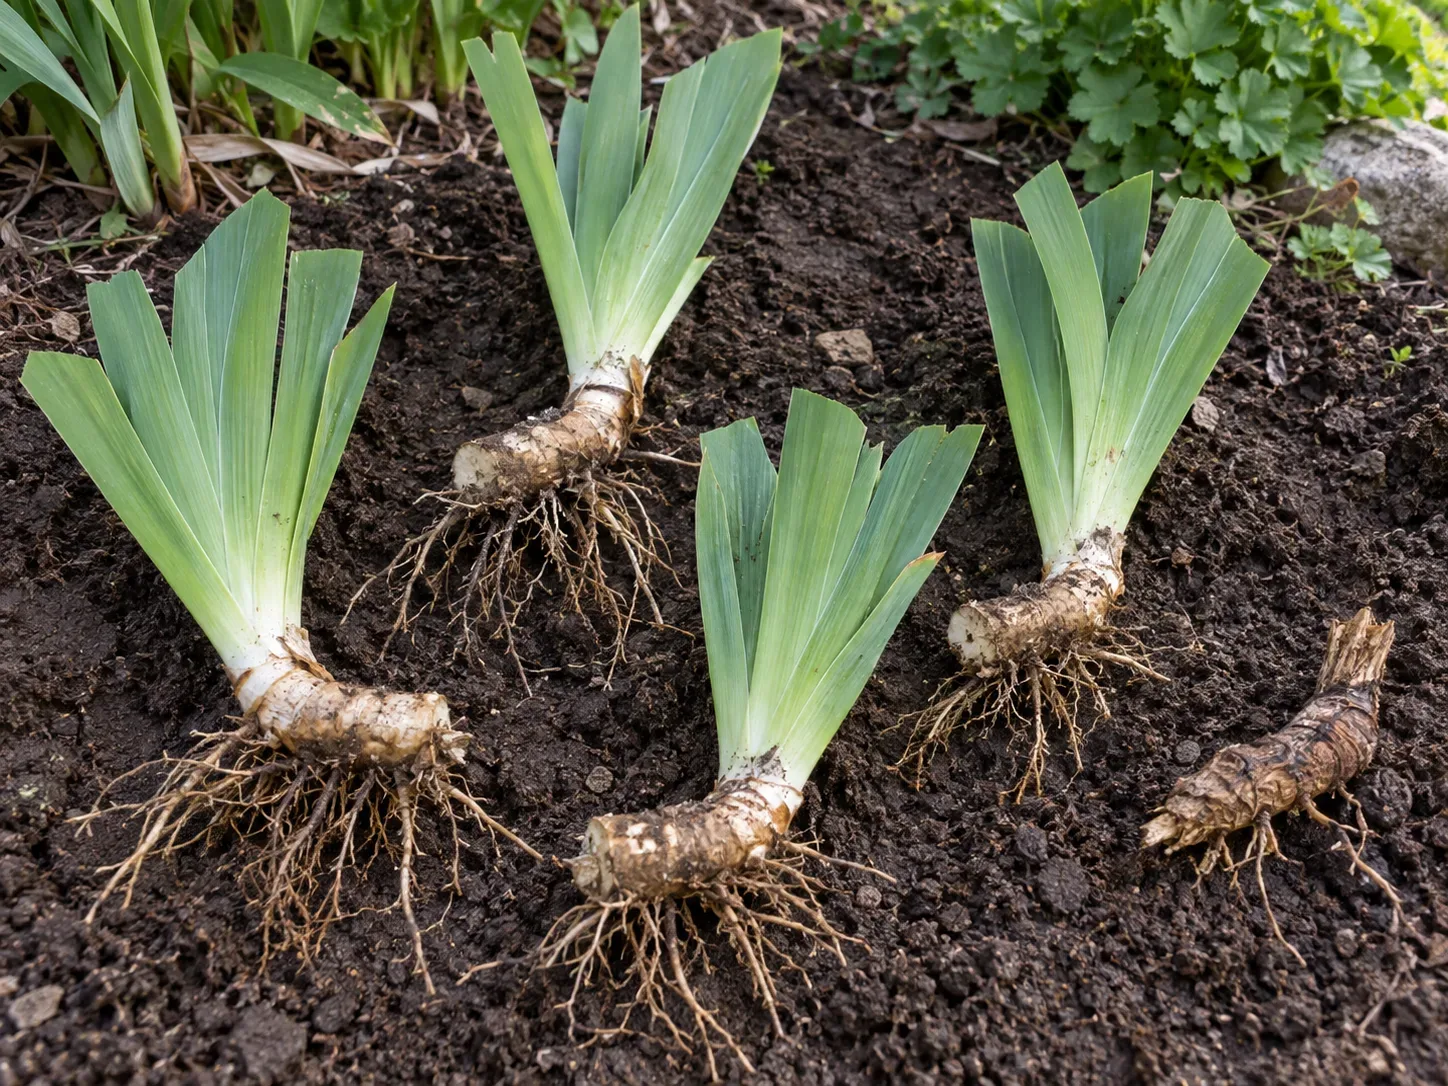
For a bearded iris rhizome, shorten a long leaf fan enough to make the piece manageable while leaving the growth point clear. Storage recommendations vary: Texas A&M AgriLife Extension’s county Master Gardener article trims foliage to about two inches, while Gardening Know How’s storage guide recommends three to four inches. The useful common point is a compact fan that is easy to label and handle; neither measurement is a universal biological threshold. If you can plant the division right away, follow the appropriate planting guidance instead of trimming further just for storage.
True bulbs usually need less cutting. Remove only loose, dead foliage once it has dried, and leave the papery tunic intact. Do not peel away healthy scales or cut into the basal plate. For a fibrous-rooted iris that you plan to pot or heel in, preserve as much of the root mass as practical and trim only broken or decaying portions.
Let the surface dry without desiccating the plant
The goal is to remove free surface moisture, not to dry a living storage organ until it shrivels. Spread freshly lifted bearded rhizomes in a single layer in a shaded, airy place protected from rain. Let mud crumble and the exterior become dry to the touch, then brush off remaining loose soil. Avoid baking them in strong sun, placing them near a heater, or leaving them exposed to drying wind for days.
A true bulb lifted after its foliage has died back may also need a brief dry-down so its outer surface and tunic are not wet when packed. Do not wash a sound bulb before storage. If you had to wash soil away to inspect a problem, allow more ventilation and wait until the bulb’s surface is fully dry before it goes into a container.
Published advice differs on how warm a rhizome should be while it cures and how cool it should be during longer storage. Gardening Know How’s storage guide describes curing iris rhizomes in a dark, airy place around 70°F, while Gardener’s Path’s winter-storage method recommends a cooler range. Texas A&M AgriLife Extension instead emphasizes a cool, dry place with air circulation without prescribing a number. These recommendations describe different methods and contexts, not a single proven set point for every iris.
For that reason, do not put every iris into a refrigerator or assume a particular Fahrenheit range applies to all species. Keep the plant identified, use the supplier’s or local extension’s advice for its group, protect stored material from freezing and hot, stagnant conditions, and shorten the holding period. There is no dependable maximum duration that applies to every iris and storage setup. Texas A&M’s county Master Gardener article reports that stored rhizomes can last a year when held properly, but that is not a guarantee for an unknown cultivar or a reason to plan a year of storage; aim to replant in the next suitable window. If you cannot confidently control conditions, a draining pot or temporary bed is usually easier to manage.
Pack for airflow and choose a stable location
Use a shallow cardboard box, a paper bag, a mesh tray, or another clean container that lets air move. Texas A&M AgriLife Extension’s iris-storage guidance recommends a ventilated cardboard box, and the practical reason is straightforward: a closed, damp package traps moisture around plant tissue. Leave space between pieces when possible. If you must stack them, separate layers loosely with dry paper rather than compressing the material.
Do not seal bulbs or rhizomes in an airtight plastic bag. Plastic is useful for a short trip only if the plant is not left warm and condensation is prevented; it is a poor long-term storage container. Skip damp peat, wet potting mix, and heavy layers of packing material for dry-held rhizomes or dormant bulbs. Those materials can keep surfaces wet and hide early rot. For an iris that needs moist roots, pot it instead of trying to make a dry box humid.
Choose a location that is dark or shaded, dry, ventilated, and reasonably stable. A garage, shed, or indoor utility area may work if it does not become hot, freezing, or damp. A basement can be too humid; an attic or sunny porch can swing too warm; a refrigerator can create condensation or expose the plant to unsuitable cold. Feel the location at different times of day rather than relying on its name. A box in a “cool garage” is not cool if afternoon sun heats it for hours.
Avoid stacking the container directly on a concrete floor that gets wet or very cold. Raise it on a shelf or dry board and keep it away from chemical spills, produce, and rodent access. The purpose of a container is to protect and organize the iris while allowing air exchange—not to create a sealed chamber with a perfectly controlled number on a thermometer.
Inspect stored irises and respond to trouble
Put a recurring reminder on your calendar to inspect the container. For a short hold, check weekly; if your storage area is humid, warm, or prone to temperature swings, check more often. Look for condensation, soft spots, mold, a bad odor, pests, and excessive shriveling. Make sure the label remains legible and that pieces have not become buried under debris.
A firm rhizome with a dry surface is generally a better candidate than one that feels spongy or collapses under light pressure. If one piece rots, remove it promptly with the paper around it and inspect any neighboring pieces. Clean the surface where it rested and improve airflow. Do not keep a soft or foul-smelling rhizome in the box in the hope that it will recover after planting.
A little surface wrinkling can be hard to interpret, especially on an old or dormant piece. Do not mist a box full of stored bulbs or rhizomes to solve it; added water can create a much bigger rot problem. If a still-firm bearded rhizome is drying rapidly, shorten the storage period and plant it or pot it in a well-drained medium. If the piece is badly shriveled, hollow, or has no viable bud, discard it rather than expecting it to rebuild itself.
For fibrous-rooted irises, the appropriate response to drying is different: move the plant into a pot or temporary bed with roots covered and the medium kept appropriately moist, not saturated. If the species is unknown, that conservative route is safer than applying the dry-storage method to a living root mass.
Adjust the plan for bulbous and beardless irises
“Beardless” covers more than one kind of iris. Siberian irises generally form dense clumps with fibrous roots and narrow leaves; Japanese and Louisiana irises also have different moisture requirements from the familiar dry-site bearded iris. Their rhizomes may be less visibly exposed, and their roots can be damaged by a dry-storage routine intended for a thick bearded rhizome. Keep the roots intact and use a pot or temporary soil holding place if you cannot replant promptly.
For reticulated and Dutch irises, confirm the bulb type and let the plant complete its natural foliage cycle when possible. The RHS profile specifically describes Iris reticulata as bulbous and supports lifting and separating its bulbs in early autumn. That is a useful example, not a date for every garden: the season in the Northern Hemisphere differs from the Southern Hemisphere, and local growing conditions shape the best planting window.
Avoid treating a bulb and a rhizome as interchangeable merely because both store energy underground. A dry dormant bulb is protected by layers; a rhizome is a stem with exposed growing points; a fibrous-rooted iris depends on a network of fine roots. When identity is uncertain, take a photo, keep the label, and look for the cultivar or species name before choosing how long to hold it.
Replant by structure and iris group
Prepare the receiving bed or container before you open the storage box. Choose a site with the light and drainage the specific iris needs, remove weeds, and make sure the soil is workable. Do not let a plant sit in direct sun while you dig a hole. Inspect it once more, discard any piece that has softened in storage, and separate clean, healthy pieces from anything questionable.
A stored iris may need time to re-establish before it blooms well. Planting into the right soil at the appropriate depth matters more than trying to force an immediate flower display. Water the newly planted material according to its group: bearded irises need establishment moisture but not a permanently soggy rhizome, while moisture-loving types should not be left to dry out after planting.
Set rhizomes shallowly with roots spread below
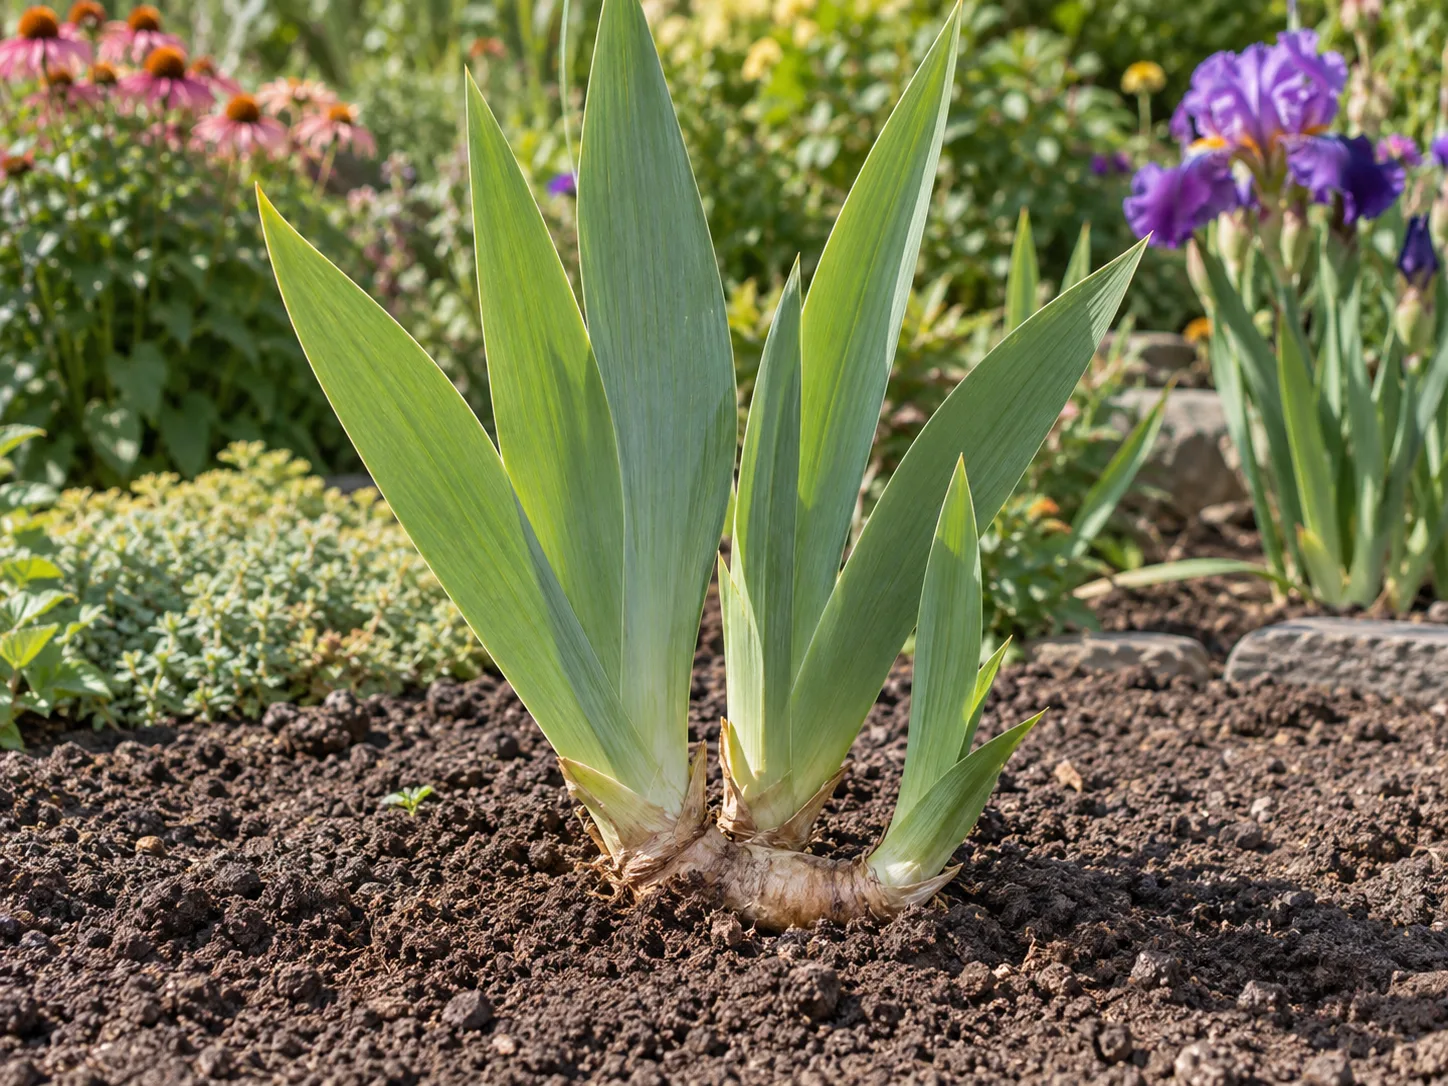
For a bearded iris, place the rhizome horizontally with its roots spread downward and the leaf fan upright. Keep the upper surface at soil level or only lightly covered, especially in a damp climate. A rhizome buried deeply in heavy, wet soil is more vulnerable to rot than one planted shallowly in a free-draining bed. Do not bury it like a tulip bulb.
Set the division so its fan has room to grow outward, and avoid crowding several pieces into one small hole. Backfill around the roots, firm the soil gently, and water to settle the soil. Thereafter, let the soil condition guide watering. The rhizome should be supported, not sitting in a persistently waterlogged pocket.
For Siberian, Japanese, Louisiana, and other beardless irises, do not copy the exposed-rhizome planting depth without checking the group. Preserve the roots and plant at the depth and moisture level recommended for that iris. If the piece has been potted temporarily, acclimate it to the bed without breaking the root ball apart again.
Replant true bulbs at their species-specific depth
Plant a true iris bulb with its pointed end or shoot tip upward and its basal plate down. Use the planting depth and spacing given for the exact type, bulb size, soil, and climate. Reticulated iris bulbs are not necessarily handled at the same depth or time as Dutch iris bulbs, and a package label or regional plant profile is more useful than a single generic measurement.
If the ground is frozen or waterlogged when the bulbs are ready, keep them in a breathable container only briefly while you wait for workable soil, or plant them in a draining pot if that better fits the species. Do not leave them in a warm room until they sprout and then expect an easy return to the garden. Once planted, water enough to settle the soil, then follow that iris’s normal seasonal care rather than keeping the bulb wet in storage conditions.
Storage mistakes that cost irises their vigor
The most common mistake is digging up a hardy iris without a reason and then making storage harder than leaving it in the bed. The next is failing to identify the structure: a true bulb, a dry-tolerant bearded-iris division, and a fibrous-rooted moisture-loving iris do not have identical needs. A plant label is a small thing that can prevent a season of guesswork.
Other avoidable problems include packing wet material in a sealed bag, leaving lifted plants in full sun, washing healthy bulbs before storage, trimming into a growth point, stacking pieces so tightly that air cannot move, and forgetting to inspect the box. Routine fungicide powder is not a substitute for removing rotten tissue, clean tools, and dry surfaces. Use a pesticide or fungicide only when a reliable source identifies a need and the product label allows that use.
A fixed storage temperature is another trap. Writers and horticulture sources give different temperature ranges for curing or holding, and those recommendations may be intended for different iris groups, stages, or climates. Use species-specific advice and stable conditions; do not treat one temperature as a universal guarantee. Most of all, do not store longer than necessary. A viable iris still needs the right planting time, soil, and moisture balance to re-establish.
If you are moving house, make storage a logistics plan rather than a long winter project: label each clump, protect it during transport, pot moisture-sensitive irises if the new bed is not ready, and plant into the garden at the next suitable window. This keeps the main goal in view—getting a healthy iris back into a place where its roots can grow.
Conclusion
Most established irises can stay in the ground, and the ones you lift do not all belong in the same kind of storage. Identify a true bulb, bearded rhizome, or fibrous-rooted iris first; then replant promptly, pot moisture-loving roots, or use a short, breathable dry hold only when it suits the plant.
Keep stored material labeled, protected from damp and temperature extremes, and easy to inspect. Discard anything soft or foul-smelling, and replant by the iris group’s natural season and local conditions. That type-first approach gives your iris a better chance of returning to the garden firm, healthy, and ready to establish.



