7 Reasons Hydrangea Leaves Turn Yellow—and What to Do
Hydrangea leaves turning yellow? Use leaf age, green veins, spots, and soil moisture to narrow the cause before watering, fertilizing, or changing the soil.
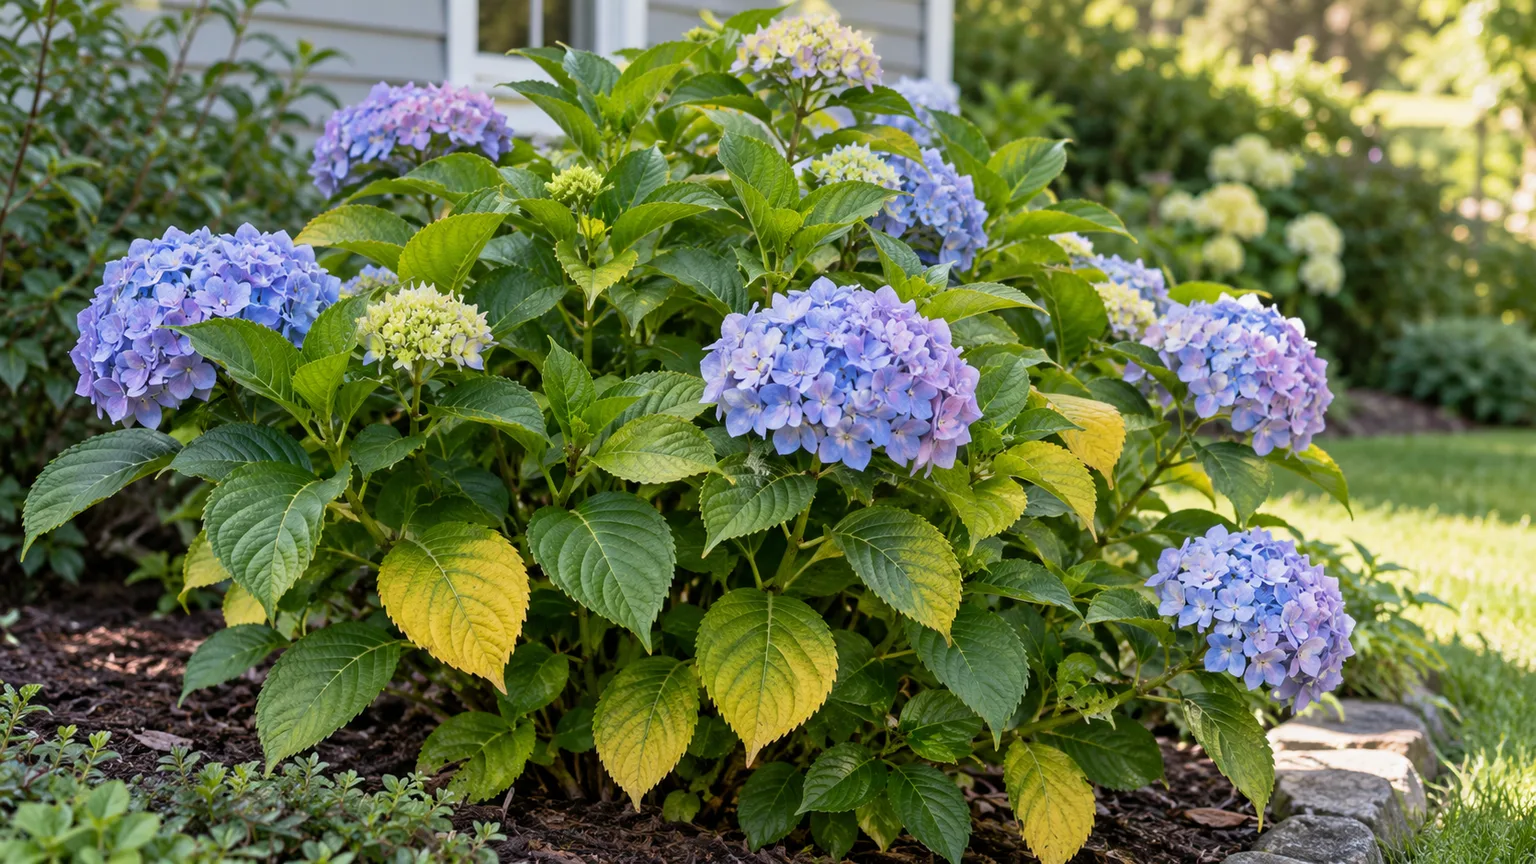
A yellow hydrangea leaf is a clue, not a diagnosis. The same color change can follow dry roots, soil that stays saturated, intense afternoon sun, nutrient availability, leaf disease, or the shrub’s normal seasonal cycle. The fastest way to narrow it down is to note which leaves changed first, what the yellowing looks like, and whether the soil is dry or wet several inches down.
Before adding water or fertilizer, look at the whole shrub and the leaf itself. One aging leaf near the base is a different signal from a flush of pale new leaves, a sun-facing branch with crisp edges, or leaves marked by spots and webbing. Use the seven causes below to choose one evidence-based next step rather than changing several conditions at once.
Read the leaf pattern before treating it
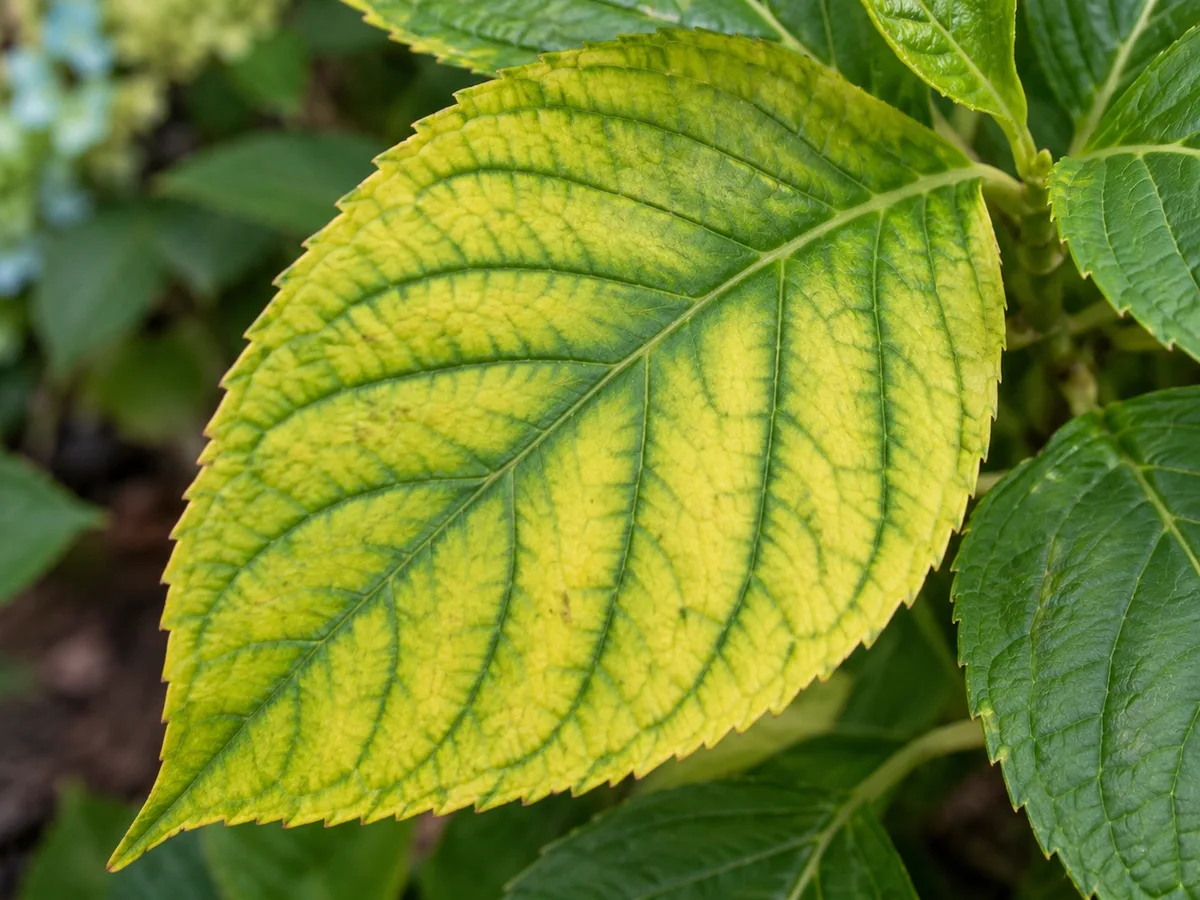
Look at three things: leaf age, the part of the leaf that changed, and how much of the shrub is affected. Yellowing that begins on old inner leaves often points in a different direction from yellow tissue between green veins on the newest growth. Brown margins, expanding spots, distortion, or fine stippling are additional clues; they should not be collapsed into “the plant needs fertilizer.”
Where yellow starts narrows the possibilities
If only a few older leaves inside the canopy are fading gradually, seasonal turnover or shade within a dense shrub may be involved. If new leaves are yellow between green veins, check soil pH and root function. When yellowing follows the exposed side of the shrub, consider afternoon sun, reflected heat, or drought before assuming a nutrient shortage.
Spots, rings, webbing, sticky residue, or distorted leaves change the diagnosis. They make a disease or pest more plausible, especially when several leaves show the same pattern, but they still do not identify the organism by themselves. Turn leaves over, check multiple stems, and note whether symptoms are spreading.
Check the soil below the mulch
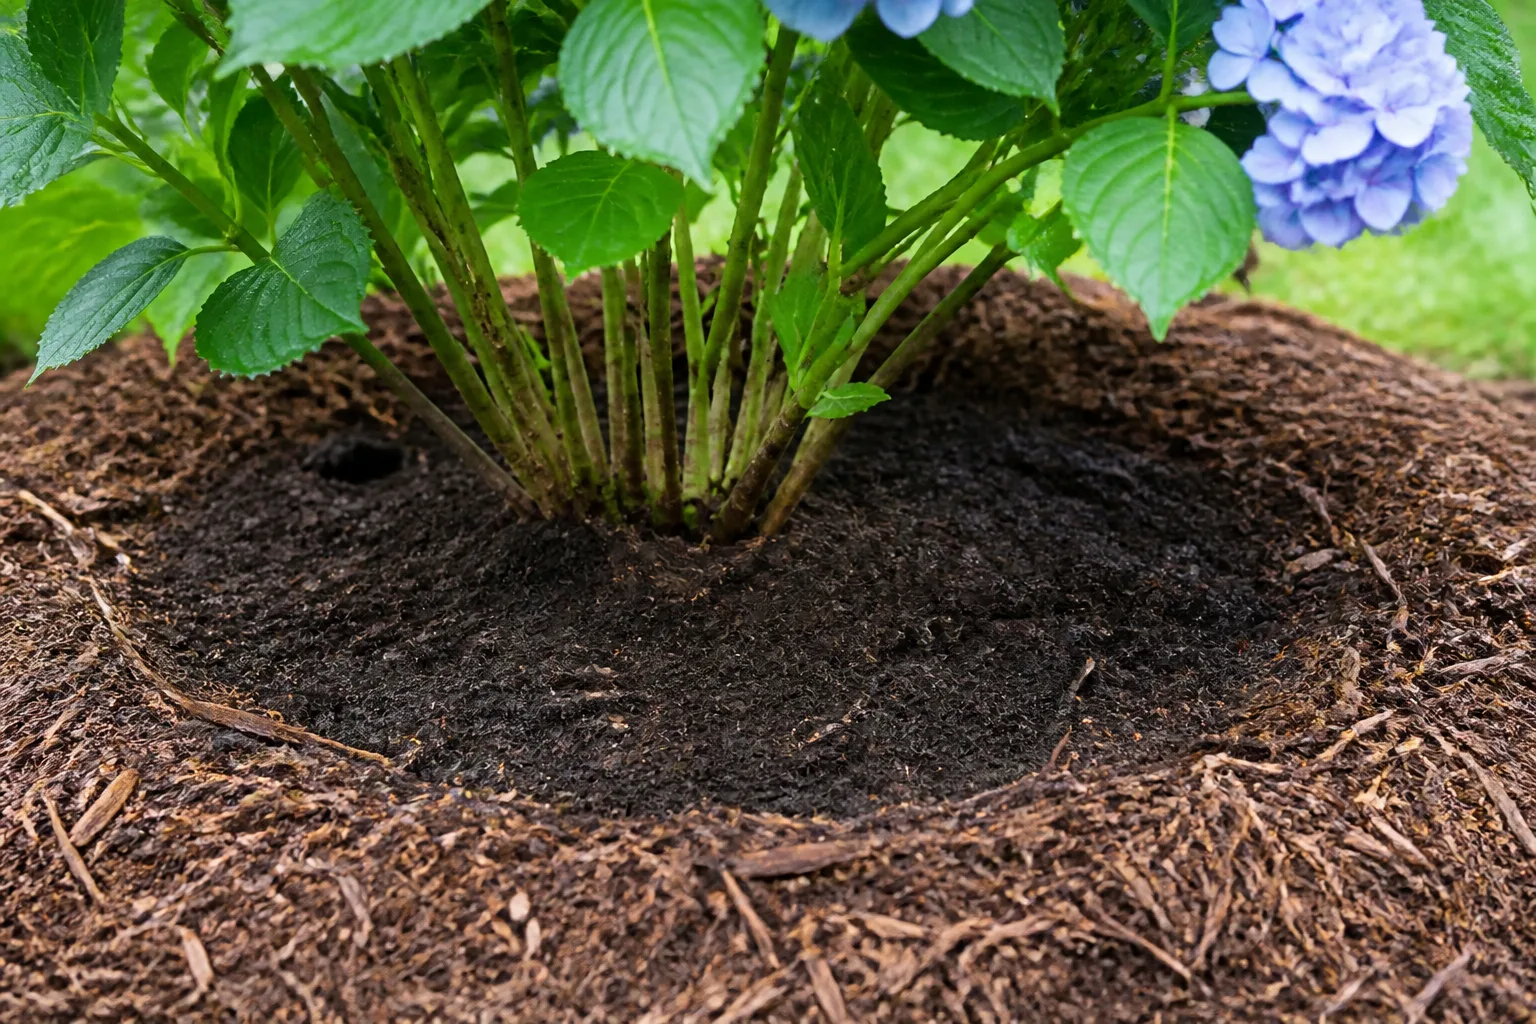
Move mulch aside and feel or probe the soil in two or three places around the root zone. A dry surface does not prove the roots are thirsty, and a recent rain does not prove the center of a new plant’s root ball is wet. Use a narrow trowel or wooden stake several inches down, then compare the soil’s moisture and texture with the leaf pattern.
Also review the recent timeline: rainfall, irrigation, a heat wave, transplanting, fertilizer, herbicide drift, or a sudden change in shade. Yellowing that began soon after one of those events makes it worth checking that factor first. Avoid digging through the whole root system or applying a treatment until a low-impact inspection points to a likely cause.
1. Seasonal leaf aging
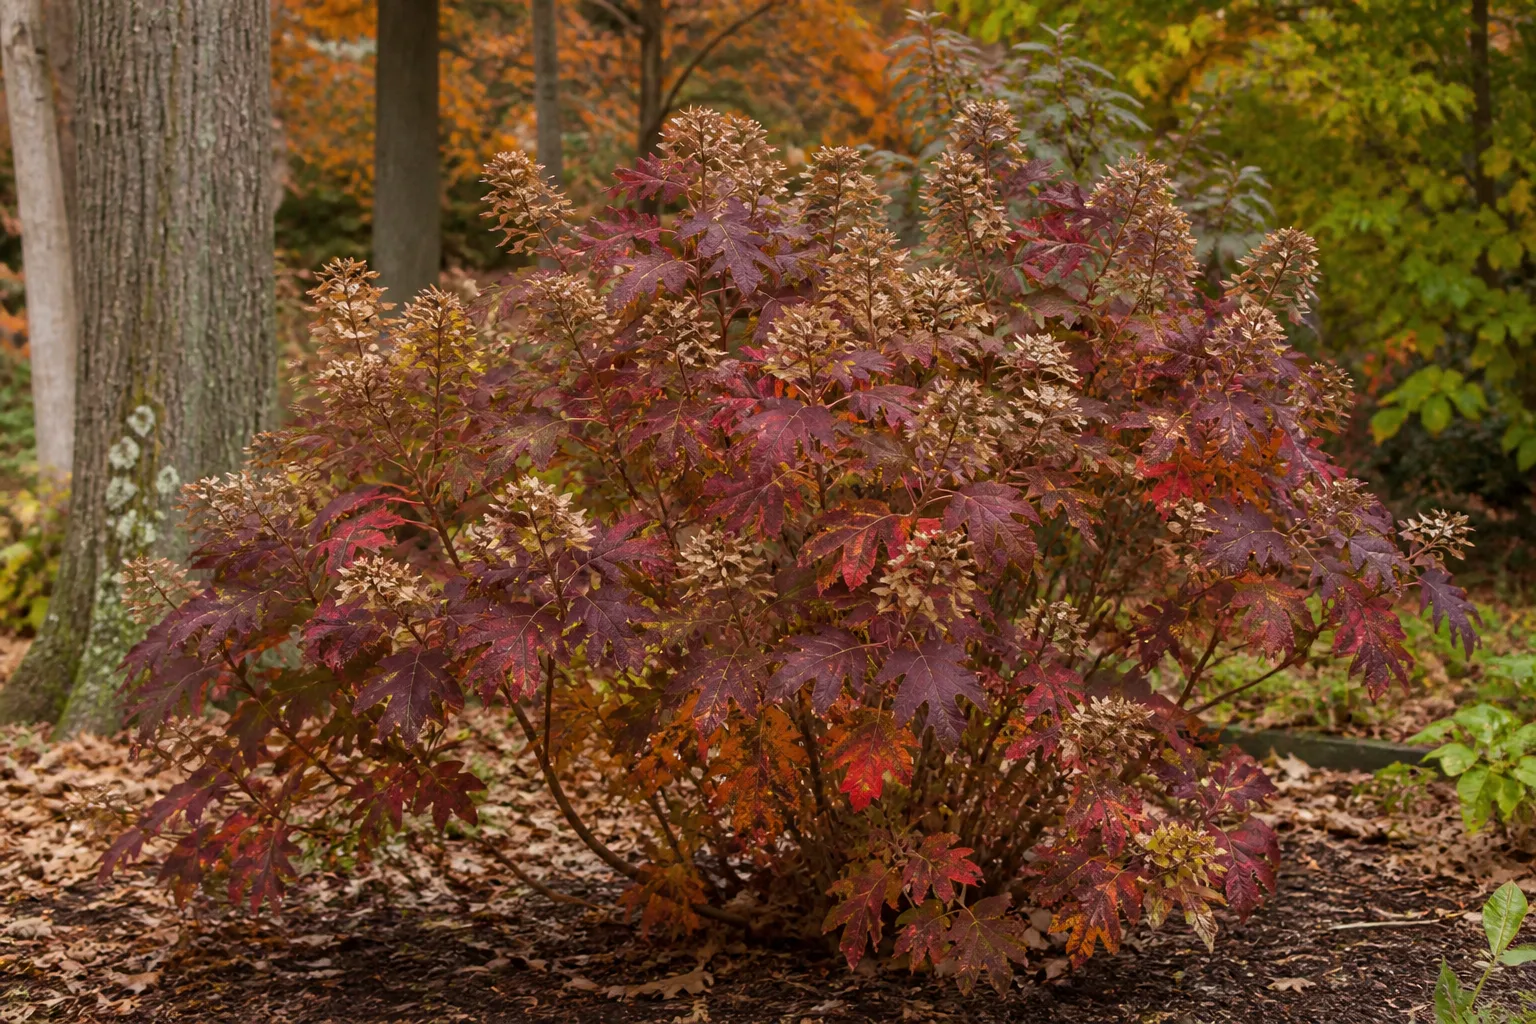
Hydrangeas are deciduous shrubs, so they naturally lose their foliage as the growing season ends. Depending on species, cultivar, climate, and fall weather, leaves may turn yellow, bronze, burgundy, or red before dropping. North Carolina State Extension notes that oakleaf hydrangea can develop wine-red autumn color; the exact fall display is not the same on every hydrangea.
Normal aging is more likely when the change happens in autumn, affects older leaves gradually, and the shrub otherwise looks vigorous. A few yellow leaves inside a shaded canopy can also be less concerning if the rest of the plant is healthy and new growth is normal. Do not respond to a predictable fall color change with a dose of fertilizer or an extra watering routine.
Timing matters. Widespread yellowing in midsummer, pale new leaves, persistent wilt, dieback, or spots that expand from leaf to leaf are not explained by ordinary dormancy alone. The RHS describes yellowing as a symptom with several possible causes, including natural growth cycles, cultural stress, pests, and disease; use the accompanying clues to decide whether the pattern fits seasonal shedding (RHS guidance on chlorosis).
If you are unsure, photograph the same branches every week or two and compare old and new leaves. If the shrub is entering dormancy and the change is limited to older foliage, let the leaves fall naturally. If symptoms continue into fresh growth or the shrub loses vigor, move on to the checks below.
2. Soil stays wet and roots lack oxygen
Hydrangeas like soil that holds some moisture, but roots still need air. When soil remains saturated because of frequent irrigation, compacted clay, a blocked container drain, or water collecting in a low spot, root function declines. The leaves may yellow and wilt at the same time, which is why adding water to a drooping hydrangea can make a wet-root problem worse.
Check the root zone before the next watering. If the soil is slick, muddy, sour-smelling, or still wet well below the surface after several dry days, stop adding water until it begins to drain. For a potted hydrangea, confirm that drainage holes are open and empty the saucer. For a garden shrub, watch what happens after rain and see whether runoff flows toward the crown or water stands near the planting site.
Persistent wilt in wet soil, weak growth, yellow leaves across several branches, or dark and soft roots raises concern about root damage. You can inspect a small amount of soil near the edge of the root zone; avoid excavating the crown or severing major roots as a first step. If a container plant has a healthy portion of roots, correcting drainage and using fresh, well-draining potting mix may help. A mature shrub in a badly drained bed may need a site-level drainage fix or relocation at an appropriate time, not sand mixed into a small hole around its roots.
North Carolina State Extension lists hydrangeas as plants that may need additional water in all-day sun, while RHS guidance warns that waterlogged soil can displace air from soil spaces and harm roots. Those points are compatible: a hydrangea can need more water in a hot exposed site and still suffer when its soil cannot drain. Judge the root zone, not the plant name or a fixed weekly schedule.
3. The root zone is too dry
Dry soil can also make hydrangea leaves yellow, often with curled or crispy edges, limp stems, and flowers that flag during hot weather. Newly planted shrubs are vulnerable because their original root ball may dry out faster than the surrounding bed. Containers and hydrangeas competing with tree roots can dry quickly as well.
Check below the surface in the original root ball and in the soil around it. If one area is dry and the other is damp, water slowly across both zones so the moisture reaches the roots instead of running down a crack or around a dry root ball. A long, gentle soak is more useful than repeatedly sprinkling the leaves or wetting only the top inch.
After the soil has been watered, let excess drain and recheck later rather than watering again immediately. Apply an organic mulch layer to moderate evaporation, keeping it away from stems and the crown. Increase how often you check during hot, windy weather, but choose when to water based on the root zone’s condition. “Hydrangeas need water” is not a reason to keep already-wet soil wet.
A drought-stressed shrub may take time to recover its posture, and leaves already browned at the edge will not become pristine again. Watch for the next flush of leaves and whether new yellowing slows. If the soil is damp but the plant remains wilted, revisit drainage, root injury, and sun exposure instead of increasing irrigation.
4. Sun or reflected heat scorches the foliage
A hydrangea planted where it receives more hot afternoon sun than it can manage may develop pale, dry, or brown patches on the most exposed leaves. The damage often concentrates on the south- or west-facing side, along outer leaf margins, or on foliage beside a hot wall, pavement, or reflective surface. Heat can also make leaves droop temporarily even when the soil is not dry.
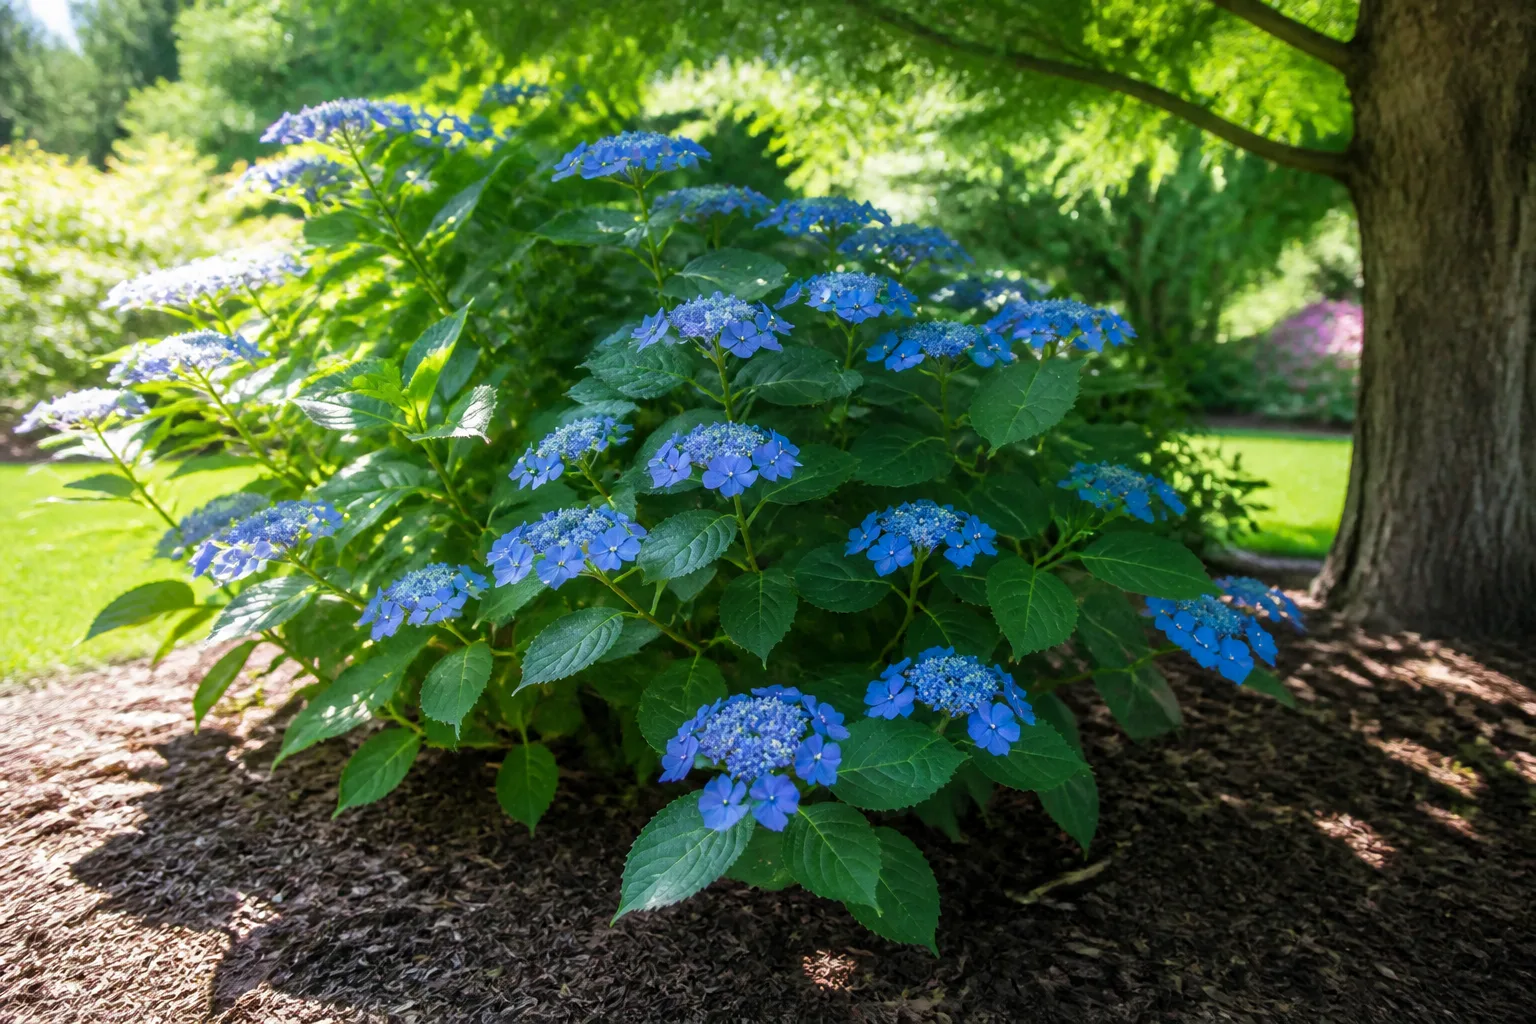
Hydrangea species and cultivars do not all have identical sun tolerance, and local climate changes how much afternoon exposure a plant can handle. NC State Extension notes that hydrangeas in direct sun all day may need additional watering. That does not mean every yellow leaf calls for more water: check the soil, then compare the damaged leaves with the shrub’s shade-facing side and the timing of the scorch.
If the problem tracks a heat wave, give the root zone a deep drink only if it is actually dry, and use temporary afternoon shade for a young or container plant if practical. Long term, consider whether the location exposes the shrub to reflected heat or too many intense afternoon hours. Relocation is a substantial intervention for an established hydrangea, so first confirm that the pattern and site history support sun stress.
5. High soil pH limits iron uptake
Yellow new leaves with a network of greener veins suggest interveinal chlorosis. In an iron-availability problem, symptoms usually show first on young leaves because iron does not move readily from older tissue to new growth. The leaf may become increasingly pale while the vein pattern remains visible. The RHS notes that iron-related chlorosis tends to start on young leaves, while magnesium or manganese patterns more often begin on older leaves (RHS guidance on chlorosis).
The cause may be soil chemistry rather than a lack of iron in the soil. In alkaline or lime-rich ground, iron can be present but less available to roots; saturated or damaged roots can also have trouble taking up nutrients. So a leaf that resembles iron deficiency does not prove that the ground needs iron. Check root conditions and get a soil test before applying an amendment.
Hydrangea flower color can confuse this issue. Some bigleaf and mountain hydrangea cultivars change flower color with soil pH and aluminum availability, but a blue or pink bloom is not a direct diagnostic test for iron nutrition. Do not try to fix yellow leaves by adding aluminum sulfate, lime, sulfur, or a homemade acidifier based only on flower color. Soil pH changes depend on the starting soil, product, amount, and local conditions, and a poorly chosen amendment can create a second problem.
Green veins are a clue, not a complete diagnosis
Compare several young leaves, not just one. A repeated pattern of yellow tissue between green veins on new growth makes iron unavailability more plausible; generalized pale foliage, spots, drought injury, or yellowing paired with wet-root wilt points elsewhere. A soil test can check pH and nutrient levels, while a local Extension office can help interpret results for the shrub and region.
When a soil test and diagnosis support an iron treatment, follow the product directions and local recommendations. A foliar or chelated product may improve the appearance of new growth in some situations, but it will not correct persistent waterlogging or an unsuitable soil pH by itself. The lasting fix is to address the condition that prevents roots from taking up iron, and to judge improvement by healthy leaves produced later.
6. Nutrient imbalance or fertilizer salts damage leaves
Nutrient problems are possible, but yellow foliage alone cannot tell you which element is short. Nitrogen deficiency often causes a more general paling that begins on older leaves and may coincide with weak growth. Magnesium-related interveinal yellowing also tends to start on older leaves, unlike the young-leaf pattern more typical of iron. The RHS uses leaf age and the distribution of yellow tissue as diagnostic clues, not as a substitute for checking the growing conditions.
Too much fertilizer can be just as unhelpful as too little. Heavy or repeated feeding may injure roots or leave salts concentrated in the root zone, and a plant with stressed roots can show yellowing even when nutrients are present. Fertilizer applied during a drought, to a newly transplanted shrub, or on top of an unresolved drainage problem adds another stress rather than solving the first one.
Do not apply a general-purpose or acid-loving fertilizer just because leaves are yellow. First review what was applied, when it was applied, and whether the plant has made healthy growth. If the history and leaf pattern still point to nutrition, use a soil test and apply only the nutrient and rate recommended for the site. Epsom salts supply magnesium, not iron, so they are not a general treatment for yellow hydrangea leaves.
If fertilizer was recently spilled or used heavily, follow the label and local horticultural guidance for what to do next; do not improvise a strong flush of water if the soil already drains poorly. In a container, free drainage and removal of accumulated runoff matter. In a landscape bed, avoid disturbing shallow roots while trying to wash away a product. Stop feeding until the plant shows stable growth or a soil test identifies a need.
7. Leaf disease or sap-feeding pests leave a pattern
Disease is more likely when yellowing occurs with lesions, rings, a coating, distorted growth, or rapid leaf drop. Hydrangea leaf spots may start as small brown or dark lesions and expand; surrounding tissue can yellow as affected leaves decline. Homes & Gardens describes leaf spot as a cause of yellowing and leaf drop, while Epic Gardening also notes that spots can enlarge and lead to yellow foliage. Those patterns are more informative than a uniform yellow leaf by itself (Homes & Gardens’ hydrangea disease guide; Epic Gardening’s hydrangea disease guide).
Look closely before using a fungicide. Check both surfaces of several leaves for expanding spots, reddish or purple borders, orange rust-colored pustules underneath, powdery growth, or mosaic-like yellow patterns. A virus-like mosaic or yellow rings, particularly with distorted leaves and declining growth, calls for confirmation and careful tool sanitation; sprays will not restore infected tissue. A new outbreak of spots after prolonged wet weather may fit leaf disease more than a nutrient shortage.
Spider mites and other sap-feeding pests can leave fine pale stippling, bronzing, webbing, or sticky residue. Turn over leaves and inspect tender shoots, since the insects may be difficult to see from above. A small amount of old cosmetic damage is not enough to justify a broad insecticide; first confirm that pests are present and that their feeding matches the injury.
Remove leaves only when they are badly damaged, clearly infected, or likely to spread debris around the shrub. Keep irrigation at the soil line, improve airflow without pruning at the wrong time for the hydrangea type, and dispose of suspect disease debris according to local guidance. If treatment is necessary, use only a product labeled for the plant and the diagnosed pest or disease, following its label. A general yellowing symptom is not a diagnosis for a spray.
Match the yellowing pattern to the first check
Use this table to choose an inspection, not to declare a final diagnosis. Several causes overlap, and a single leaf can be misleading. When two rows seem to fit, start with the least disruptive check—usually soil moisture and a close look at both sides of the leaves.
| What you notice | More likely possibilities | Check first |
|---|---|---|
| A few older inner leaves yellow in autumn; shrub otherwise looks sound | Seasonal leaf aging or shade inside the canopy | Timing, leaf age, and whether the change spreads to new growth |
| Yellow leaves plus wilt while soil stays wet | Poor drainage, root stress, possible root damage | Soil several inches down, drainage after rain, and container holes |
| Crispy margins or curling after dry, hot weather | Dry root zone, heat stress, or both | Moisture in the root ball and surrounding soil |
| Damage strongest on the hot or sun-facing side | Sun scorch or reflected heat | Exposure by time of day, nearby paving or walls, and soil moisture |
| Young leaves yellow between greener veins | Iron availability or root uptake issue | Root-zone drainage and a soil pH test |
| Older leaves pale broadly or between veins | Nutrient issue, aging, or root stress | Growth vigor, fertilizer history, and soil test results |
| Yellow leaves with dark spots, rings, stippling, webbing, or distortion | Leaf disease or sap-feeding pests | Leaf undersides, progression, recent wet weather, and affected stems |
An observation becomes more useful when it is repeated. Photograph the full shrub and a close-up of affected leaves in the same light, then note rain, irrigation, and any treatment. A second photo after a week or two can show whether new symptoms are still appearing; old yellow leaves may stay yellow after the underlying stress has been corrected.
Correct the cause in the least disruptive order
Start with checks that do not injure the plant. Confirm soil moisture below the surface, inspect leaf undersides and stems, and compare affected leaves with healthy foliage elsewhere on the shrub. Look at the plant’s recent conditions before deciding that its soil lacks a nutrient. The RHS’s chlorosis guidance emphasizes that yellowing can result from cultural conditions, pests, disease, or normal growth as well as nutrition.
Then change one supported factor. If the root zone is genuinely dry, water slowly and deeply; if it is saturated, pause irrigation and correct the drainage issue. If scorch tracks the afternoon sun, reduce heat exposure where feasible. If several young leaves show interveinal chlorosis, test the soil and address a confirmed pH or nutrient issue rather than trying multiple amendments at once.
For spotted or distorted leaves, prioritize observation, sanitation, and keeping foliage dry during irrigation. Do not remove a large share of healthy canopy, dig out roots, or spray a product just to see whether it works. Record the intervention and give the shrub time to produce new growth before deciding that it failed. This makes it easier to tell whether the change helped and prevents compounding the original stress.
Should you remove yellow leaves?
A fully yellow leaf will not turn green again, but you do not have to remove every yellow leaf immediately. If it is simply old foliage and the plant is entering dormancy, let it fall or remove it when it detaches easily. Partly green leaves can still contribute energy, so avoid stripping them from a stressed shrub for cosmetic reasons.
Remove leaves with clear, spreading disease signs or heavy pest activity when doing so will not leave the plant bare. Collect fallen suspect foliage, clean pruners before moving to another shrub, and avoid composting material you believe is infected unless your local guidance says the compost process will handle it. Removing a leaf is cleanup, not a cure for wet roots, poor drainage, or high soil pH.
When to ask for a local diagnosis
Contact a cooperative Extension office or plant diagnostic service if the shrub declines rapidly, several branches die back, the root zone remains wet but the plant keeps wilting, or yellow rings and distorted growth suggest a virus. Also seek help before applying soil amendments when a pH test is unclear, the planting site has a history of drainage problems, or the hydrangea is too valuable to risk with trial-and-error treatment.
A useful sample includes photos of the whole shrub, both sides of affected leaves, and the base of the plant. Note the hydrangea type if known, when the symptoms began, recent weather, irrigation, fertilizer or pesticide applications, and whether the soil drains after rain. Those details help a diagnostician distinguish environmental stress from disease and make any soil test easier to interpret.
Conclusion
Hydrangea leaves turn yellow for several reasons, and the pattern points toward the right next check. Compare old and new leaves, look for green veins or spots, and test moisture below the mulch before watering or feeding again. If the cause is seasonal, leave the shrub alone; if the pattern suggests root stress, chlorosis, disease, or pests, correct that specific problem and judge recovery by the new leaves.