How to Find and Identify a Mouse Nest Safely
Learn how to find a mouse nest, tell fresh signs from old ones, clean it safely, trace entry points, and keep mice from nesting again.
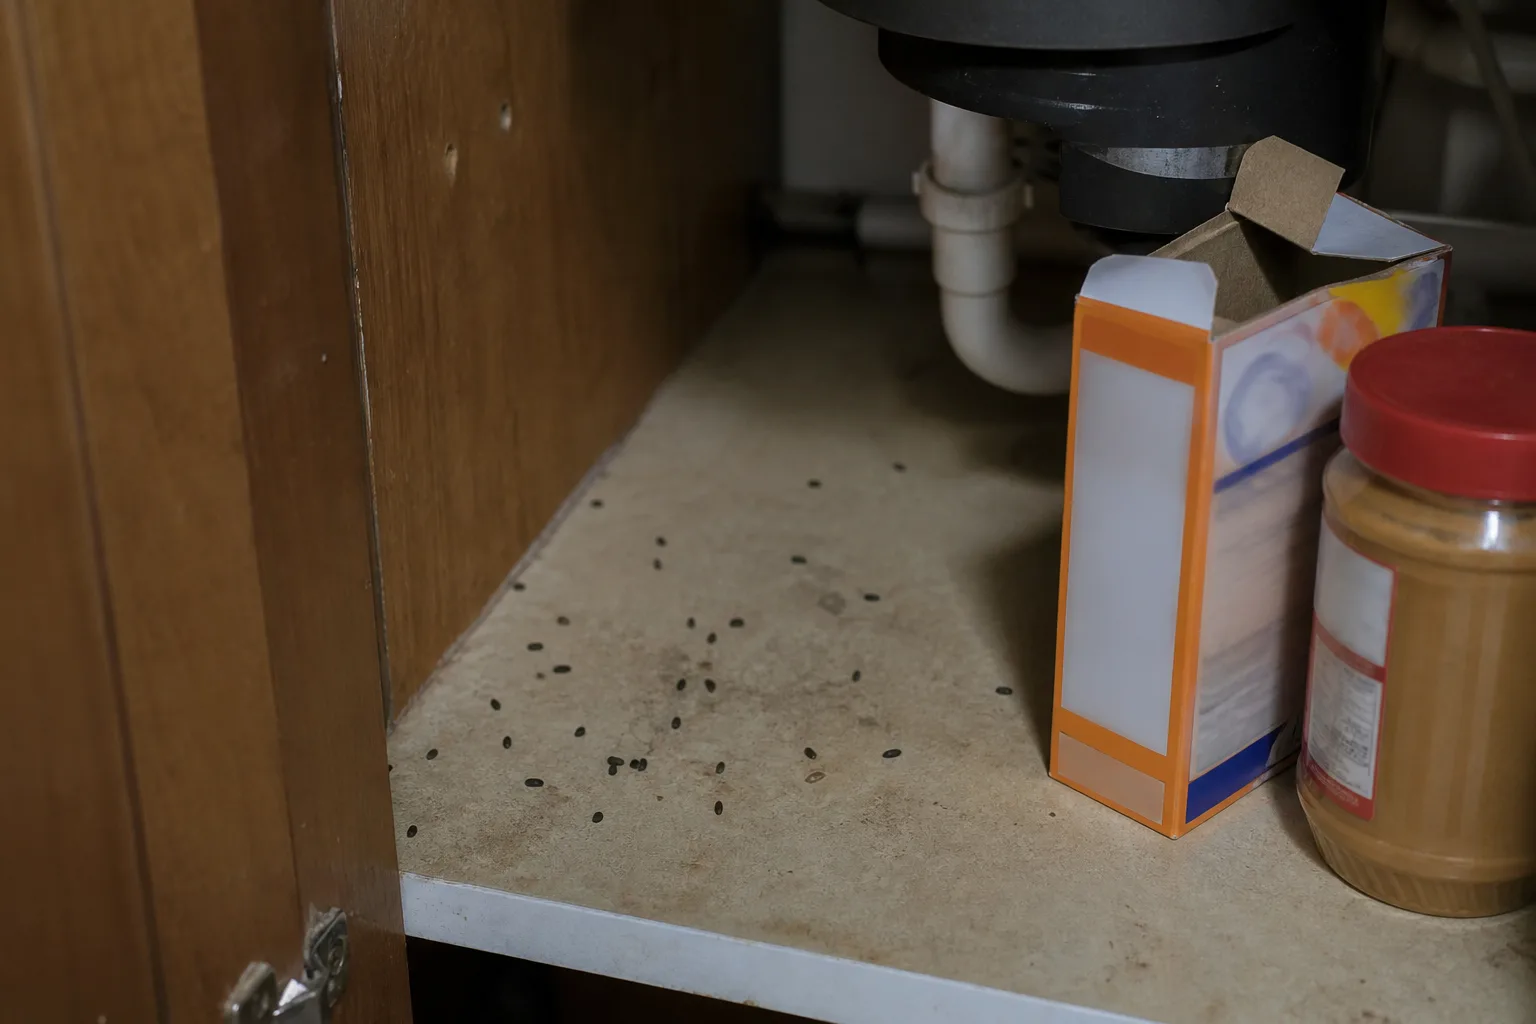
A mouse nest is usually a small, rough bundle of shredded paper, cardboard, fabric, insulation, string, or dry plant material tucked into a quiet space. The nest matters, but it is only one piece of evidence. Droppings, gnaw marks, tracks, urine odor, chewed food packaging, and the direction of nighttime activity are what help you decide whether the nest is active and where the mouse is entering.
Do not pick up a dry nest, sweep around it, or run a vacuum over nearby droppings. Put on gloves, photograph the location, and treat the material as contaminated until you have safely wet it with disinfectant. The Centers for Disease Control and Prevention’s rodent-control guidance recommends a sequence of safe cleanup, exclusion, and trapping because removing a nest without addressing the route and food source usually leaves the problem in place.
Start With Four Signals, Not the Nest Alone
It is easy to overread a wad of torn paper in a dark corner. A mouse may have made it, but the same kind of loose material can collect under a cabinet, fall from insulation, or be moved by another animal. The strongest identification comes from several clues appearing together in a protected area: nesting material plus small droppings, gnawing, a narrow travel lane, or a persistent musky smell.
Fresh Versus Old Evidence
Fresh droppings are generally darker and softer-looking than old, dry, dusty pellets, but color alone is not a dependable clock. Lighting, the surface, humidity, and the age of the material all change how waste looks. Treat apparent age as a clue, not a diagnosis.
The better home test is to clean the evidence safely, note the exact spot, and inspect again. The CDC explains that droppings appearing after an area is cleaned indicate an active rodent presence. If the area stays clean and there are no new gnaw marks, disturbed food, urine spots, or tracks for a full week, the nest may be abandoned—or the active route may be somewhere you have not yet checked.
That distinction changes your next move. An old nest in a sealed garage is mainly a cleanup and prevention job; an old-looking nest beside fresh droppings under the stove is part of an active control problem. Do not let a tidy-looking bundle persuade you to skip the inspection around it.
If you are not sure whether the evidence is new, compare it with the broader signs you may have mice and use the cleanup-and-monitor test below. The goal is to replace guessing with a dated observation.
Mouse, Rat, or Something Else?
You cannot identify a rodent reliably from the nest alone. House mice often build with finely shredded paper or other fibrous material, while rats may use a larger, rougher collection of paper, leaves, sticks, cardboard, or fabric. A nest with a nearby large burrow, heavy gnawing, or substantially larger droppings deserves a rat assessment rather than a mouse-size trap plan.
House mice are small, usually gray to light brown, with relatively large ears and a lightly furred tail. UC IPM describes an adult house mouse as roughly 5 to 7 inches long including the tail, but a glimpse is rarely enough to separate a house mouse from a young rat, deer mouse, vole, or shrew. UC IPM’s house-mouse profile is useful for comparing the house mouse with other small rodents found around buildings.
Droppings can narrow the possibilities, but do not handle them to compare texture. Small tapered pellets along a baseboard are consistent with mouse activity; larger blunt-ended pellets, broad greasy runs, or a sizable outdoor burrow point in another direction. A bat, squirrel, bird, or insect can also explain some debris, so use the whole scene and call a professional if the signs do not fit.
What a Mouse Nest Looks Like
A true mouse nest is not usually a neat woven ball. It is more often a loose, compacted pocket of material with an uneven exterior and a protected hollow or center. You may find a complete bundle, but you may just as often find a shallow cup of shredded fibers pressed into insulation or a handful of paper strips tucked behind a drawer.
Materials, Shape, and Size
Mice choose materials that are light enough to carry and soft enough to pull apart. Look for shredded tissues, paper towels, newspaper, cardboard edges, fabric fibers, cotton, dryer lint, twine, insulation, foam, dried grass, leaves, or stuffing from upholstered furniture. A nest can contain one material or a mixture, depending on what the mouse can reach along its route.
The finished structure is usually only a few inches across, although that measurement is not a rule. A nest hidden in wall insulation can spread through a cavity and look much larger once exposed; a nest behind a toaster may be a tight wad no bigger than a fist. Shape and placement are more useful than trying to match an exact diameter.
Look for an entrance or travel gap nearby rather than assuming the nest itself is the entry point. Mice often build in a warm, safe pocket and travel along a baseboard, pipe, cable, or the back edge of a cabinet to reach food. Torn material may be scattered along that route, especially where the mouse carried fibers from a paper bag, storage box, or potted plant.
Active and Abandoned Nests
An active nest is more likely to be paired with fresh droppings, new shreds, a greasy rub mark, chewed packaging, a urine smell, or scratching after dark. You may also find food fragments nearby because house mice make many small feeding trips and do not need to travel far from a reliable shelter. Those clues are more valuable than whether the nest looks clean or dirty.
An abandoned nest can remain intact for a long time. It may be flattened, dusty, webbed over, damp, or partly collapsed, with no new material around it. Still, an old nest proves that the location once offered enough warmth, cover, or food access to be attractive, so inspect the same room and exterior wall for the reason it worked.
Do not pull apart a nest to look for babies. If you see hairless pups, hear active squeaking, or see an adult mouse repeatedly entering a gap, stop the inspection. Disturbing the bundle can scatter contaminated material, separate young from the adult, and push the animal into a less accessible part of the structure.
Where to Search First
Search by conditions, not by room labels. Mice favor dark, quiet shelter close to food, water, and a protected travel edge. A thorough search is a slow, methodical inspection with a flashlight and a camera—not a destructive hunt through every wall.
Kitchen and Living Areas
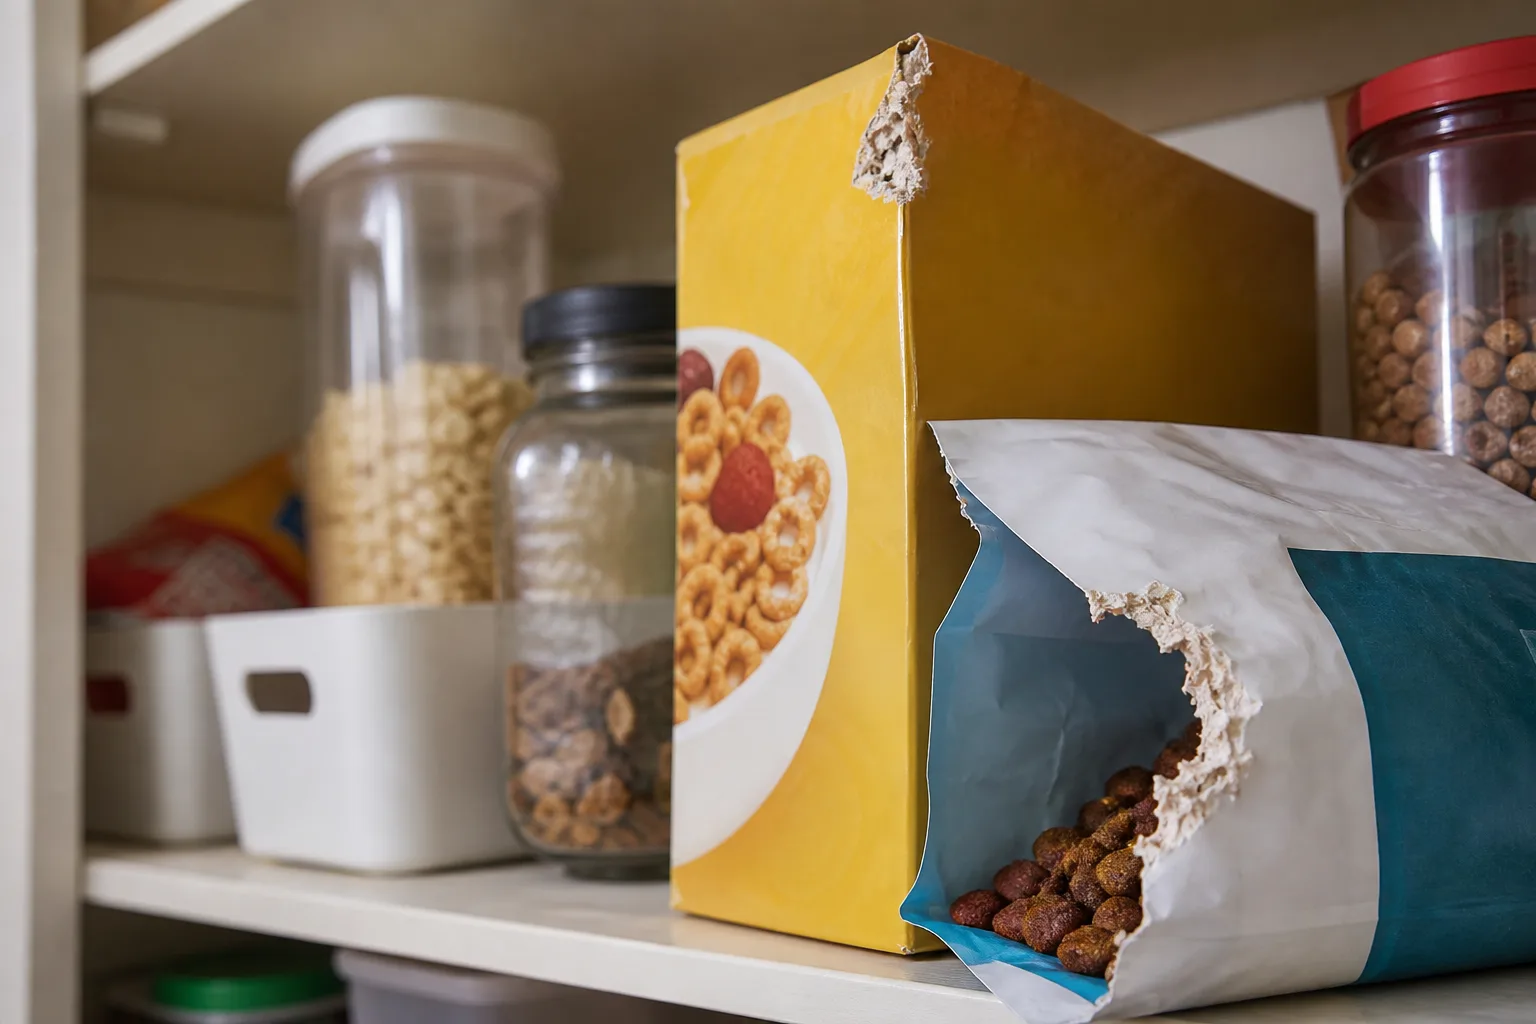
Start where food is stored, prepared, or dropped. Check behind and beneath the refrigerator, stove, dishwasher, and lower cabinets; the corners of pantry shelves; the back of drawers; cabinet toe-kicks; and the space around recycling and garbage bins. Pay attention to chewed cereal boxes, seed bags, pet-food bags, and paper grocery sacks because they can supply both food and nesting fibers.
Move appliances only if you can do so safely and without straining gas lines, electrical cords, water connections, or flooring. You do not need to pull a built-in appliance apart to prove that a mouse is present. Fresh droppings beside an appliance, a gap at the wall, and a nearby nest fragment give you enough information to place traps and inspect the corresponding exterior route.
In bedrooms and living rooms, check unused drawers, the backs and undersides of furniture, storage baskets, linen closets, cardboard boxes, and upholstered items that sit against walls. A mouse may shred fabric from a rarely used chair or take cotton, paper, and stuffing back to a nest hidden in a box. Pets can also carry food into these spaces, making a room with no obvious pantry access worth checking.
Hidden, Utility, and Outdoor Zones
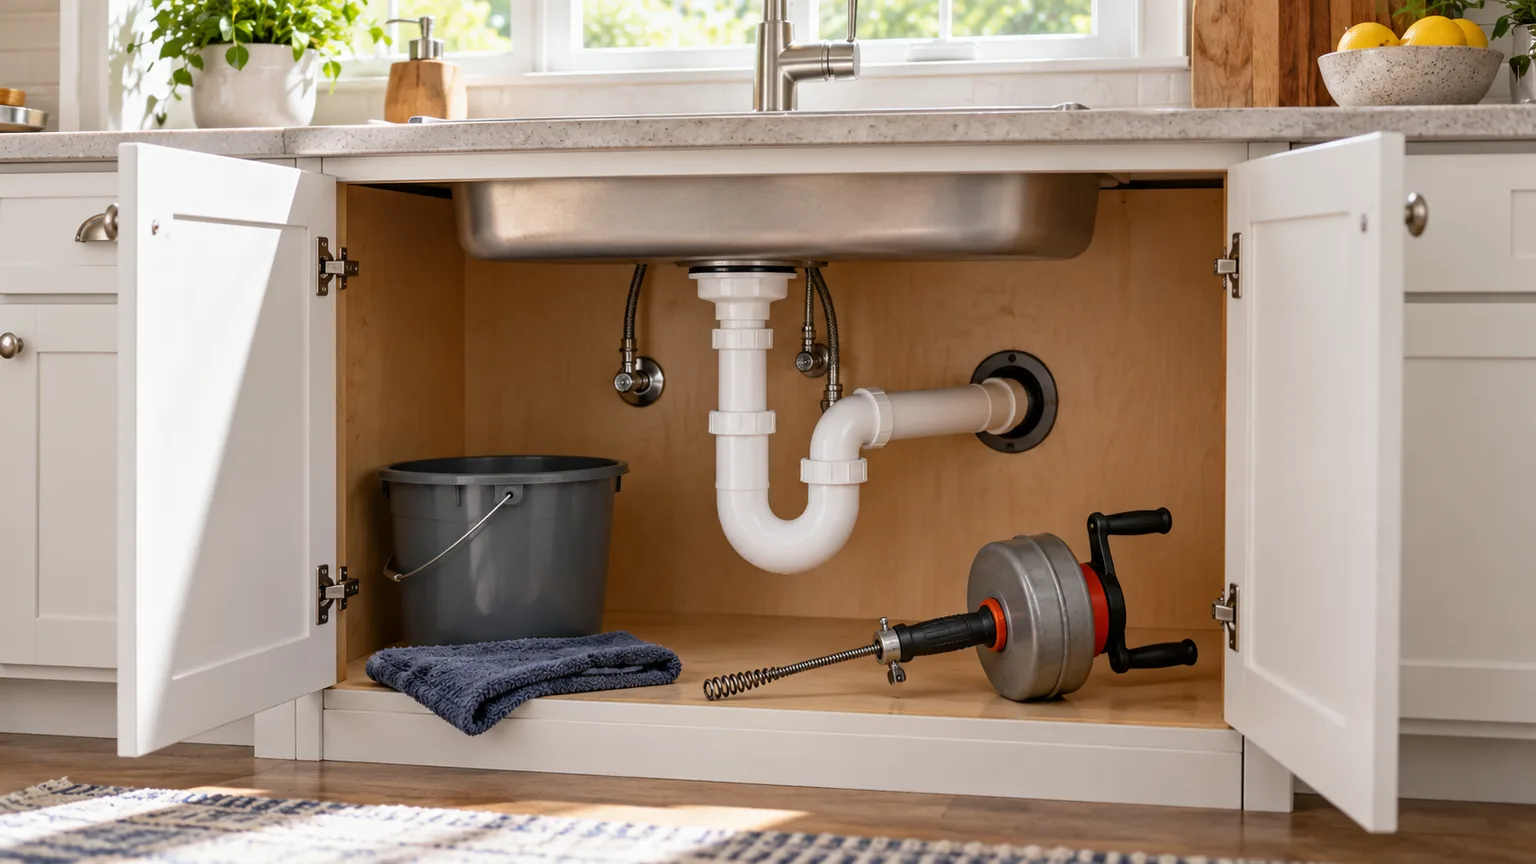
The next places to check are the spaces where a house meets its utilities. Look under sinks, around washing-machine hoses, at floor and wall joints, around heating and cooling vents, beside water heaters and furnaces, and near electrical, cable, gas, and plumbing penetrations. Check attic edges, basement corners, crawl-space access doors, and the seams around doors and windows.
Vehicles, campers, sheds, and garages deserve their own search. An infrequently used car can offer warmth and undisturbed shelter around the engine compartment, air intake, cabin filter, or stored upholstery; a garage can offer cardboard, birdseed, pet food, potting materials, and a gap under the door. If you find a nest inside a vehicle, ventilate it, avoid starting the engine until wiring and air-intake areas are assessed, and consider a qualified mechanic.
Outdoor shelter can feed an indoor problem. Thick mulch, leaf piles, brush, stacked lumber, compost, spilled birdseed, and loosely stored animal feed can support rodents near the foundation even when the house itself is clean. Gardening Know How’s discussion of mice in mulch and BBC Gardeners’ World guidance on garden rodents both emphasize the practical connection between cover, stored food, garden buildings, and rodent activity.
How to Trace a Nest Without Tearing Up the House
The aim is not to find every shred of paper. The aim is to connect the nest to a travel lane and an entry point, then decide which part of the route is accessible for safe action. Mice often stay near their nest and food, so a cluster of signs can tell you more than a single sighting across the room.
Follow the Freshest Sign
Begin with the newest-looking droppings or gnaw marks, not the most dramatic nest. Work outward in both directions: toward the nearest food or water source and toward the nearest wall, floor joint, pipe, vent, door, or exterior opening. Look for a repeating edge route rather than footprints across the center of a room.
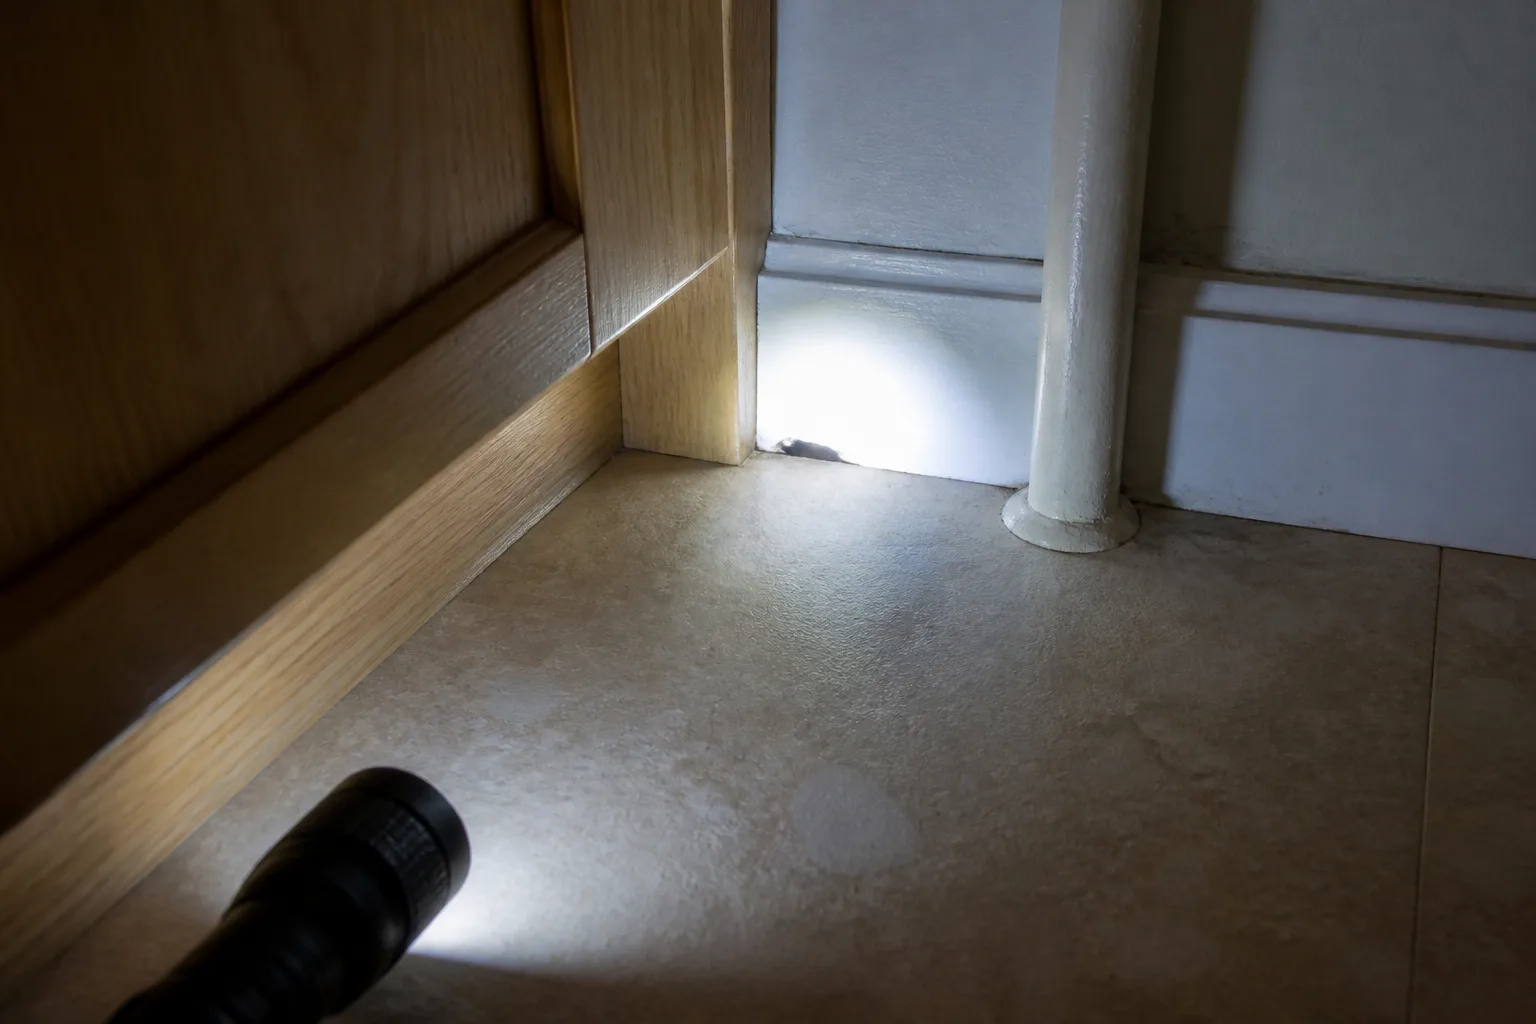
Use a flashlight held low to the floor. A low beam makes droppings, rub marks, loose fibers, and tiny openings easier to see than a ceiling light does. Check the underside of shelves and the back edge of cabinets because mice can travel in narrow shadowed spaces that look empty from standing height.
Do not scatter flour, powders, or scented products to “track” a mouse. Powders can become airborne, contaminate surfaces, or create a false trail, while strong repellents may shift the mouse deeper into a wall before you have placed traps. If you need confirmation, photograph the signs, clean them safely, and use a small number of properly placed traps in protected locations.
Make a Simple Evidence Map
A hand-drawn map makes the search much more useful. Mark the nest, every patch of droppings, each gnawed item, the direction of scratching, nearby food, and openings larger than a pencil width. Add the exterior side of that wall if you can inspect it safely.
Then mark what is new after cleaning. A line of fresh droppings from the nest toward the pantry suggests a route; new signs under a different appliance suggest either a second route or a nest you have not found. This record also gives a pest professional something concrete to inspect instead of a general report that “there may be mice somewhere.”
If you hear scratching inside a wall, do not automatically open the drywall. The noise may travel along framing, pipes, or ductwork, so the apparent spot can be several feet from the animal. First inspect accessible edges on both sides of the wall and place traps where the mouse is likely to emerge; opening a cavity is a last-resort repair decision, not a diagnostic shortcut.
Inspect and Clean Safely
Rodent waste is a contamination issue even when the nest looks small. The CDC advises that people can be exposed through contaminated air, food, surfaces, urine, droppings, saliva, and nesting material, so treat the cleanup as a wet-disinfection job rather than ordinary dusting.
Before You Move Anything
Keep children and pets away from the area. Put on rubber or plastic gloves, gather paper towels, sealable plastic bags, and either an EPA-registered household disinfectant or a freshly prepared bleach solution according to the CDC’s cleanup instructions. Read the product label, provide ventilation as appropriate, and never improvise a stronger mixture.
Do not vacuum or sweep dry droppings, urine, or nesting material. The mechanical action can put contaminated particles into the air, where they are easier to inhale. If you already vacuumed, do not panic or keep cleaning dry; stop, ventilate the space if appropriate, and follow the CDC cleanup process from that point.
For a shed, garage, cabin, or other closed outbuilding, open doors and windows for 30 minutes and leave the area before cleaning, as the CDC recommends. Heavy infestations, contaminated insulation, air ducts, or extensive dust require more protection and usually professional help. People with respiratory vulnerability or a weakened immune system should ask a healthcare or public-health professional for situation-specific advice before tackling substantial contamination.
A Small Accessible Nest
If the nest is small, accessible, and clearly not occupied, wet it thoroughly with disinfectant before touching it. Let the product remain wet for five minutes or the label’s stated contact time, then use paper towels or a disposable tool to lift the nest and surrounding waste.
Place the wet material in a plastic bag, tie it closed, place that bag inside a second bag, tie the second bag, and put it in a covered garbage container that is regularly emptied. The CDC uses this double-bagging approach for dead rodents and nests; local disposal rules may differ, so check with your local health department if you are unsure.
Wipe hard surfaces with disinfectant after the material is removed. Wash the gloved hands before taking the gloves off, remove them without touching the contaminated exterior, and wash your bare hands with soap and warm water. Launder contaminated bedding or clothing with detergent and hot water; discard cardboard, loose insulation, and other porous items that cannot be cleaned thoroughly.
Do not spray a live mouse, flood a wall cavity, or pour bleach into an appliance. If the nest contains pups, an adult is entering it, or the material sits inside insulation, a duct, or a narrow void, close the area off from people and pets and get help with the removal plan. CDC guidance specifically directs people to use professional assistance when rodents have accessed heating and cooling ventilation systems.
Prevent Another Nest
Removal is only the visible part of the job. If the home still offers a pencil-width entry hole, an open bag of seed, a warm cardboard stack, and a quiet wall void, another mouse can use the same conditions. Prevention works best as a layered plan: close access, remove easy resources, trap any mouse already inside, then monitor long enough to catch the next sign.
Seal Gaps and Remove Attractants
House mice can use openings about 1/4 inch (6 millimeters) wide, roughly the width of a pencil. Inspect the foundation-to-siding joint, garage-door sweep, attic and crawl-space vents, door corners, window screens, floor drains, and every place a pipe, wire, cable, dryer vent, or air-conditioning line enters the building.
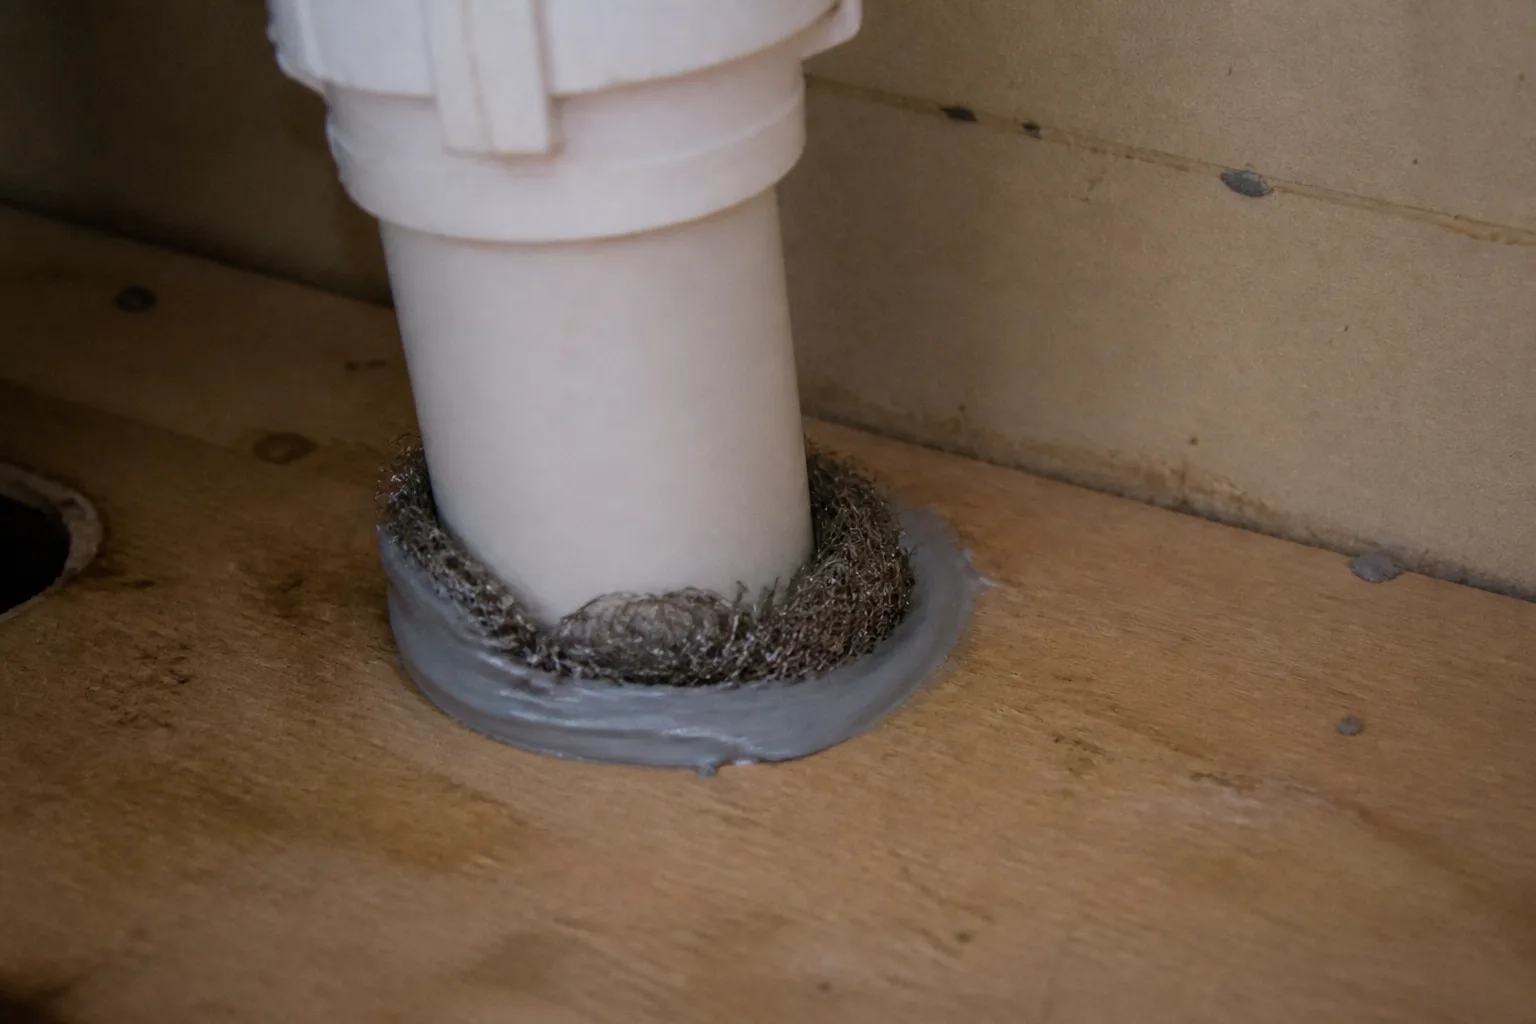
For small holes, pack coarse steel wool tightly and secure it with caulk or an appropriate sealant. For larger openings, use metal screening, hardware cloth, metal sheeting, flashing, or cement suited to the surface. Spray foam, plastic mesh, rubber, wood, and soft filler may close a hole temporarily, but mice can chew through many of these materials; CDC sealing guidance and UC IPM both emphasize gnaw-resistant repairs.
Do not seal the only accessible opening to an active wall nest before you have a removal plan. You can block an exterior gap while trapping inside when the route is understood, but blindly closing a cavity can trap an animal in the wall and leave odor, damage, or a second exit problem. If you cannot tell whether the gap is an entry route, a nest entrance, or a ventilation opening, pause and ask a professional.
Food control should be just as specific as sealing. Store cereal, flour, grains, nuts, seed, pet food, and snacks in thick plastic, metal, or glass containers with tight lids. Pick up spills under appliances, put pet food and water away after use, empty indoor garbage regularly, and check the back of shelves for small food caches.
Outside, keep feed and birdseed in rodent-resistant containers, move stored wood and clutter away from the foundation, reduce brush and leaf piles beside the house, and close gaps in sheds and garages. You do not have to strip a garden of habitat; the practical goal is a visible inspection zone around the building and fewer food and nesting materials immediately beside it.

Trap, Monitor, and Escalate
If there are fresh signs, prevention alone is too slow. Traditional mouse-size snap traps are a controllable first option for many indoor situations because you can see the result and remove the carcass instead of waiting for a poisoned animal to die inside a wall. The CDC’s trapping guidance recommends placing traps where you see evidence and keeping traps and bait away from children and pets.
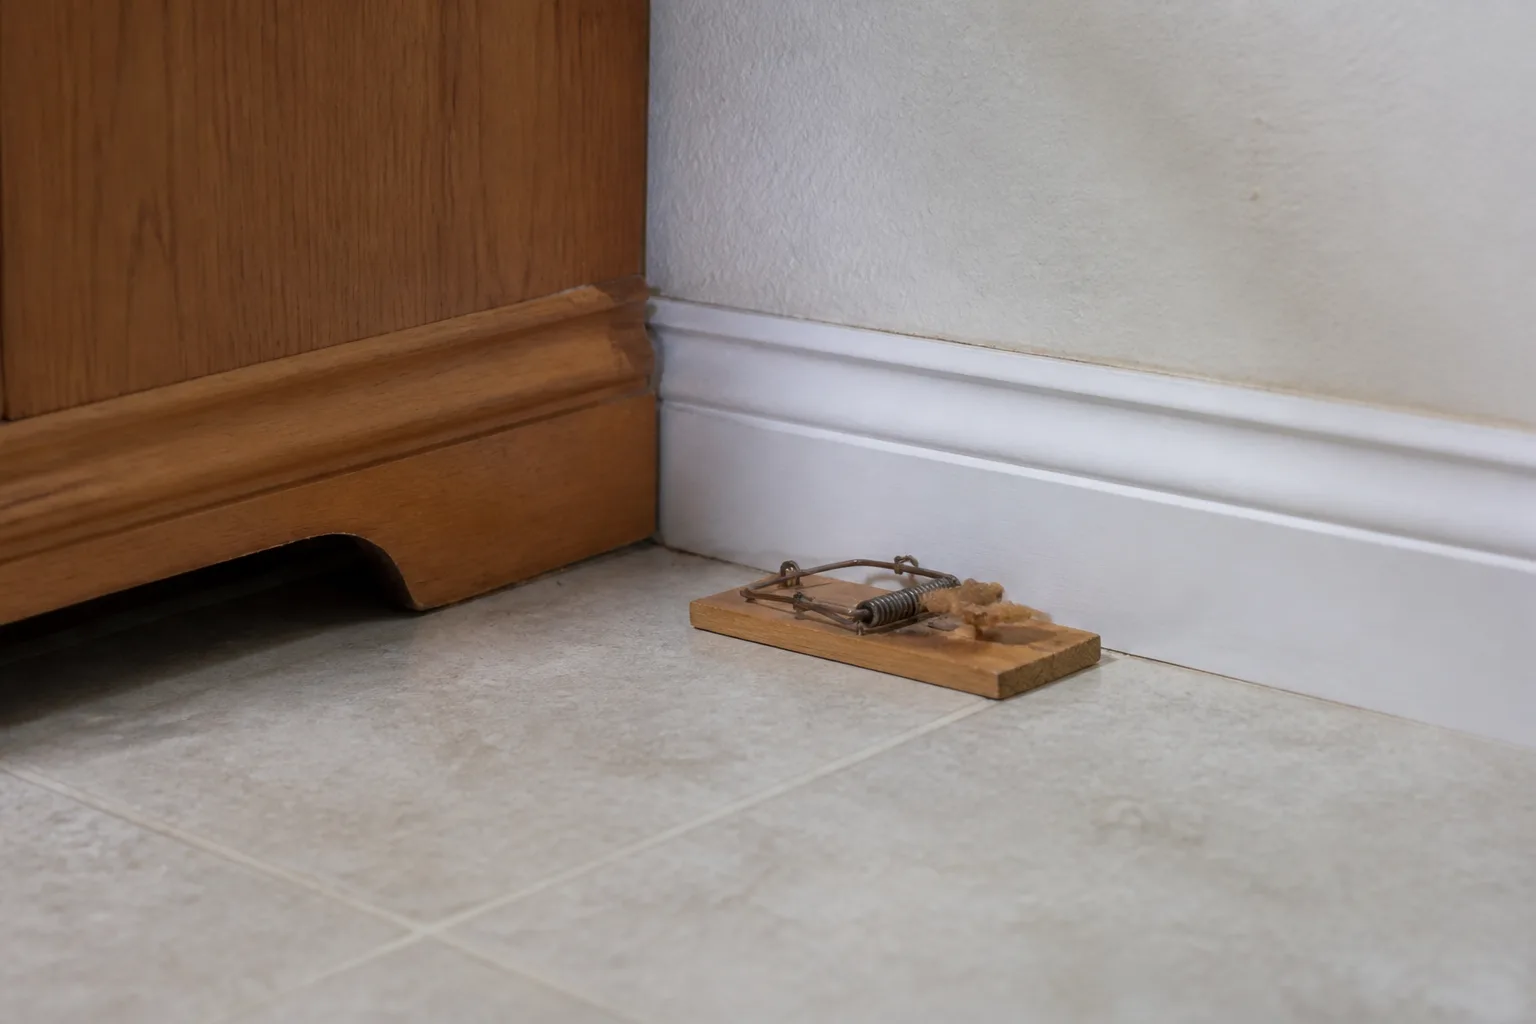
Place traps on the travel edge, with the baited end against the wall so the trap forms a T. Use a small amount of bait—the food already being eaten can outperform a novelty lure—and put traps behind appliances, in the back of cabinets, along baseboards, or in another protected location where a child, pet, or non-target animal cannot reach it. UC IPM notes that house mice usually stay near their nest and food, so several traps in the active zone are more useful than one trap in every room.
If you need help comparing designs, use the existing mouse-trap guide as a starting point, but keep placement tied to fresh evidence rather than choosing a trap by appearance alone.
Avoid glue traps and casual live-release plans. The CDC does not recommend glue or live traps because frightened rodents can urinate and increase contamination risk; local rules for relocating wildlife or house mice also vary, and a released house mouse may return or fail to survive. If a live trap is already occupied, contact local animal control, a health department, or a pest professional for the lawful and humane next step in your area.
Treat repellents and ultrasonic devices as, at most, temporary add-ons after the active mouse is controlled. A scent cannot seal a hole or remove a nest, and a strong odor may push a mouse farther into a wall. Likewise, do not use indoor poison casually: all rodenticides are toxic, and a carcass in an inaccessible cavity can create a new sanitation and odor problem.
Monitor the cleaned nest site, the mapped route, and the likely exterior entry point each day at first. Keep trapping until there are no captures and no new droppings, urine spots, gnaw marks, or disturbed food for at least a week. Escalate to a qualified pest professional when signs continue after careful trapping and sealing, wiring has been chewed, contamination is heavy, the nest is in a duct or insulation, several rooms are involved, or the evidence points to rats or wildlife.
Conclusion
To find and identify a mouse nest, look for the combination of a rough bundle of shredded material, protected placement, and nearby activity signs—not just one suspicious pile. Start with fresh droppings or gnaw marks, follow the wall edge toward food and utility openings, and photograph the area before you disturb it.
When the nest is small and accessible, wet-disinfect it, double-bag the waste, clean the hard surface, and wash up carefully. Then seal pencil-width gaps with gnaw-resistant materials, remove food and outdoor shelter close to the home, set protected snap traps for mice still inside, and monitor for a full week without new signs. If the nest is occupied, inaccessible, inside ducts or insulation, near damaged wiring, or associated with a large infestation, leave the risky part alone and bring in a qualified professional.