10 Reasons Peace Lily Leaves Turn Yellow
Learn why peace lily leaves turn yellow, how to tell overwatering from underwatering, and what to do about root rot, low light, pests, and aging leaves.
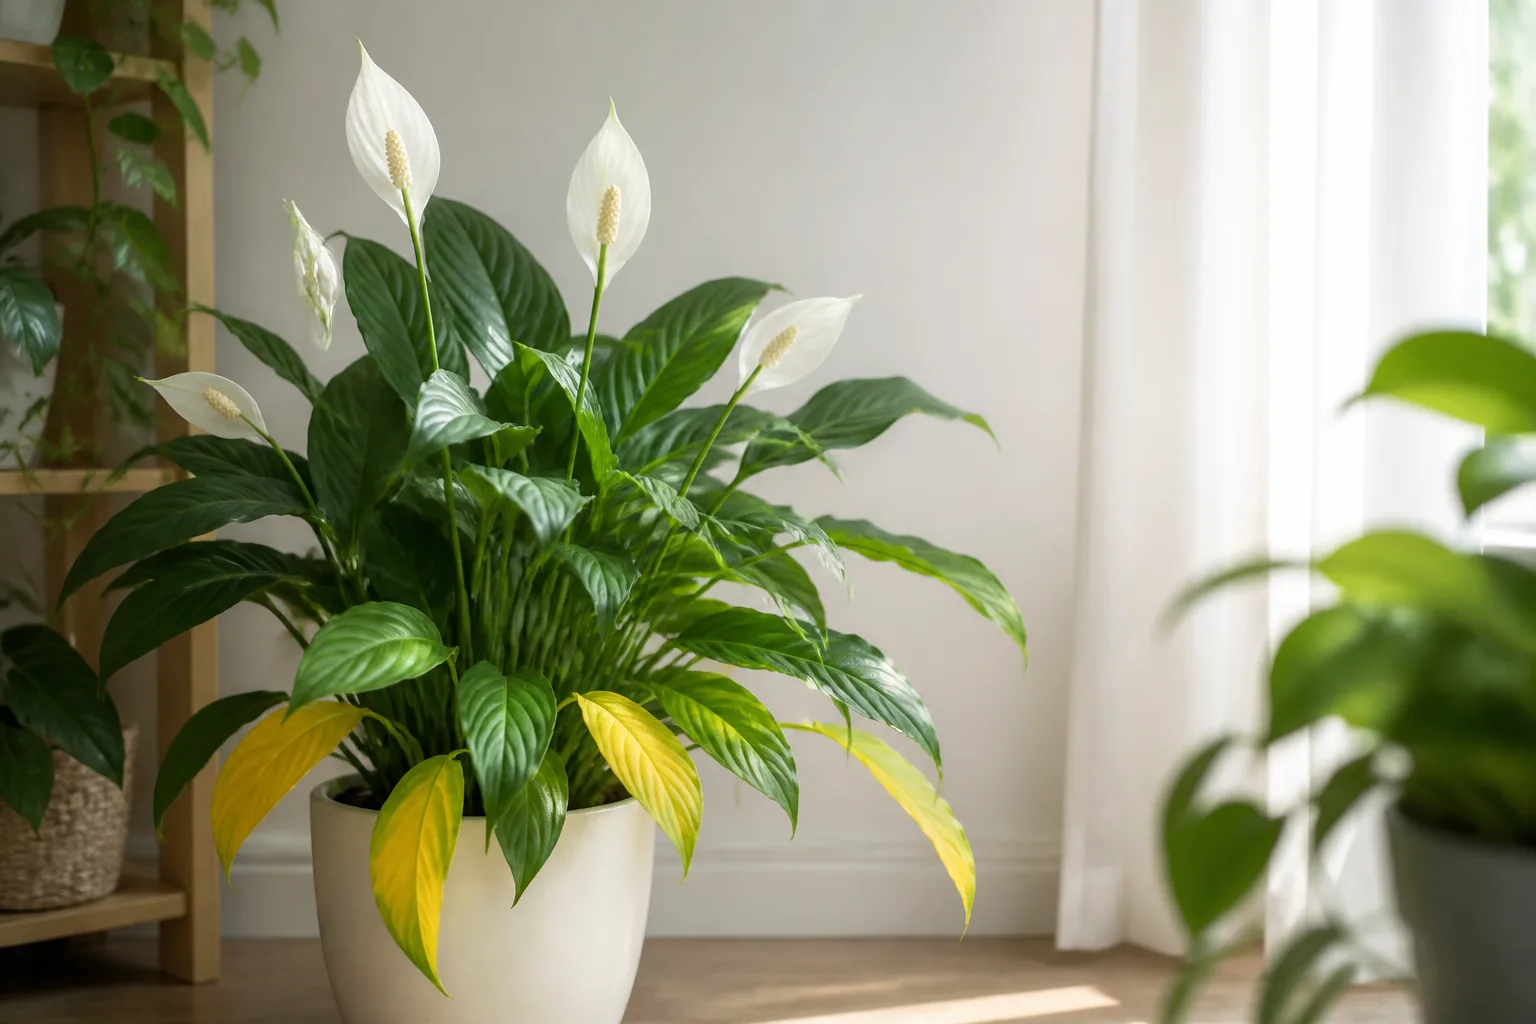
If your peace lily is yellowing, check the soil before you reach for fertilizer. A plant with a light pot and dry mix may be thirsty; one with soft leaves and wet, heavy soil may have roots that are no longer functioning properly. Those two plants can look similarly unhappy above the soil but need opposite first steps.
Yellow leaves are not a diagnosis by themselves. The useful clues are which leaves are affected, how quickly the color is spreading, whether the tissue is soft or crisp, how wet the root zone is, and what changed recently. Use those clues to narrow the cause before you water, repot, feed, or move the plant.
Yellow leaves are a symptom, not a diagnosis
Peace lilies (Spathiphyllum) are tropical aroids that prefer warmth, filtered light, and evenly moist—but not waterlogged—potting mix. NC State Extension describes them as shade-tolerant plants that should not sit in direct sun, while the Missouri Botanical Garden recommends bright filtered light, moist soil that dries between waterings, and very dilute fertilizer. (NC State Extension; Missouri Botanical Garden)
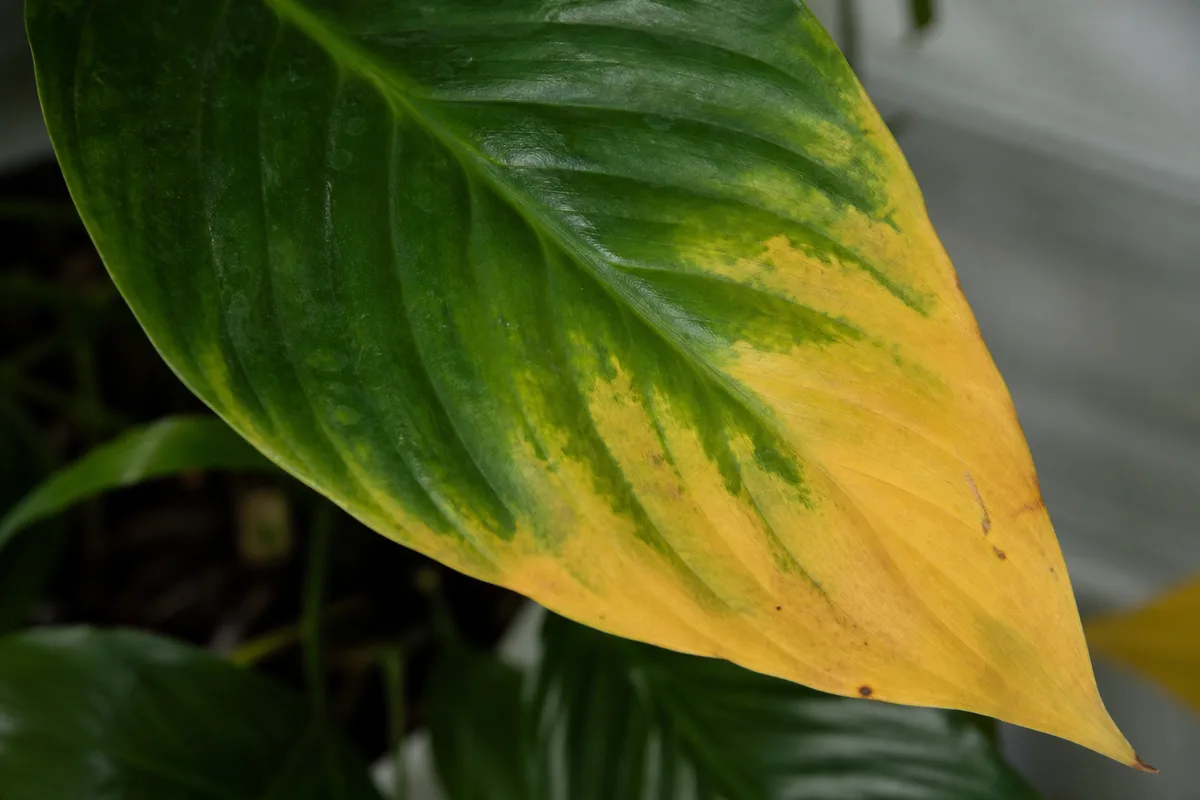
That preference explains why watering is so often involved, but it does not make every yellow leaf an overwatering problem. Poor light slows drying, a pot that is too large holds wet mix around a small root ball, salt buildup injures roots, and dry air can intensify water stress. A mature plant may also shed one old lower leaf without being sick.
Read location, texture, and soil together
Use the pattern as a set of clues rather than a single rule. Uniform yellowing across several leaves with persistently damp soil points toward a root-zone problem. A lower leaf that fades gradually while the rest of the plant is firm and producing green growth is more compatible with normal aging. Tiny yellow speckles, webbing, sticky residue, or cottony insects point toward pests rather than a watering schedule.
Leaf texture adds another layer. Soft yellow tissue often goes with excess moisture, root decline, or cold stress; dry, papery yellowing with crisp brown edges is more consistent with drought, dry air, mineral injury, or scorch. Pale patches on the window-facing side suggest too much direct light, while a pale plant with stretched stems suggests too little light.
Use this five-minute check before changing care
Start with the least disruptive inspection. Put a finger or clean wooden skewer a few centimetres into the mix near the edge of the pot, lift the container to judge its weight, and look at the drainage hole and saucer. Do not judge moisture from the surface alone: the top can feel dry while the lower half remains saturated.
| What you see | Check next | First direction |
|---|---|---|
| One oldest lower leaf yellowing; new growth is green | Confirm normal moisture and firm stems | Watch for natural aging |
| Several soft yellow leaves; pot stays heavy | Drainage, roots, and standing runoff | Pause watering and inspect |
| Yellowing with dry, crumbly mix and a light pot | Whether the root ball is fully dry or water-repellent | Rehydrate slowly and thoroughly |
| Bleached or tan patches on the window-facing side | Direct sun and heat through glass | Filter or move to bright indirect light |
| Fine yellow stippling, webbing, sticky film, or cottony spots | Leaf undersides, petioles, and new growth | Identify and isolate pests |
| Yellow between green veins, especially on new leaves | Roots, pH, feeding history, and water quality | Correct the growing system before adding nutrients |
If the mix is wet and the plant is wilting, do not water again simply because it looks thirsty. The University of Florida’s plant diagnostic guidance emphasizes that yellow leaves and wilting are nonspecific symptoms; wet soil should lead to a root inspection, while dry, crumbly soil calls for water. (University of Florida IFAS Emerging Pathogens Institute)
1. Underwatering or drought stress
Peace lilies often droop dramatically when the mix becomes too dry. If the dry spell continues, older leaves may yellow, then develop brown edges and become papery. A light container, soil pulling away from the pot wall, curling foliage, and a plant that perks up after a thorough drink all support underwatering.
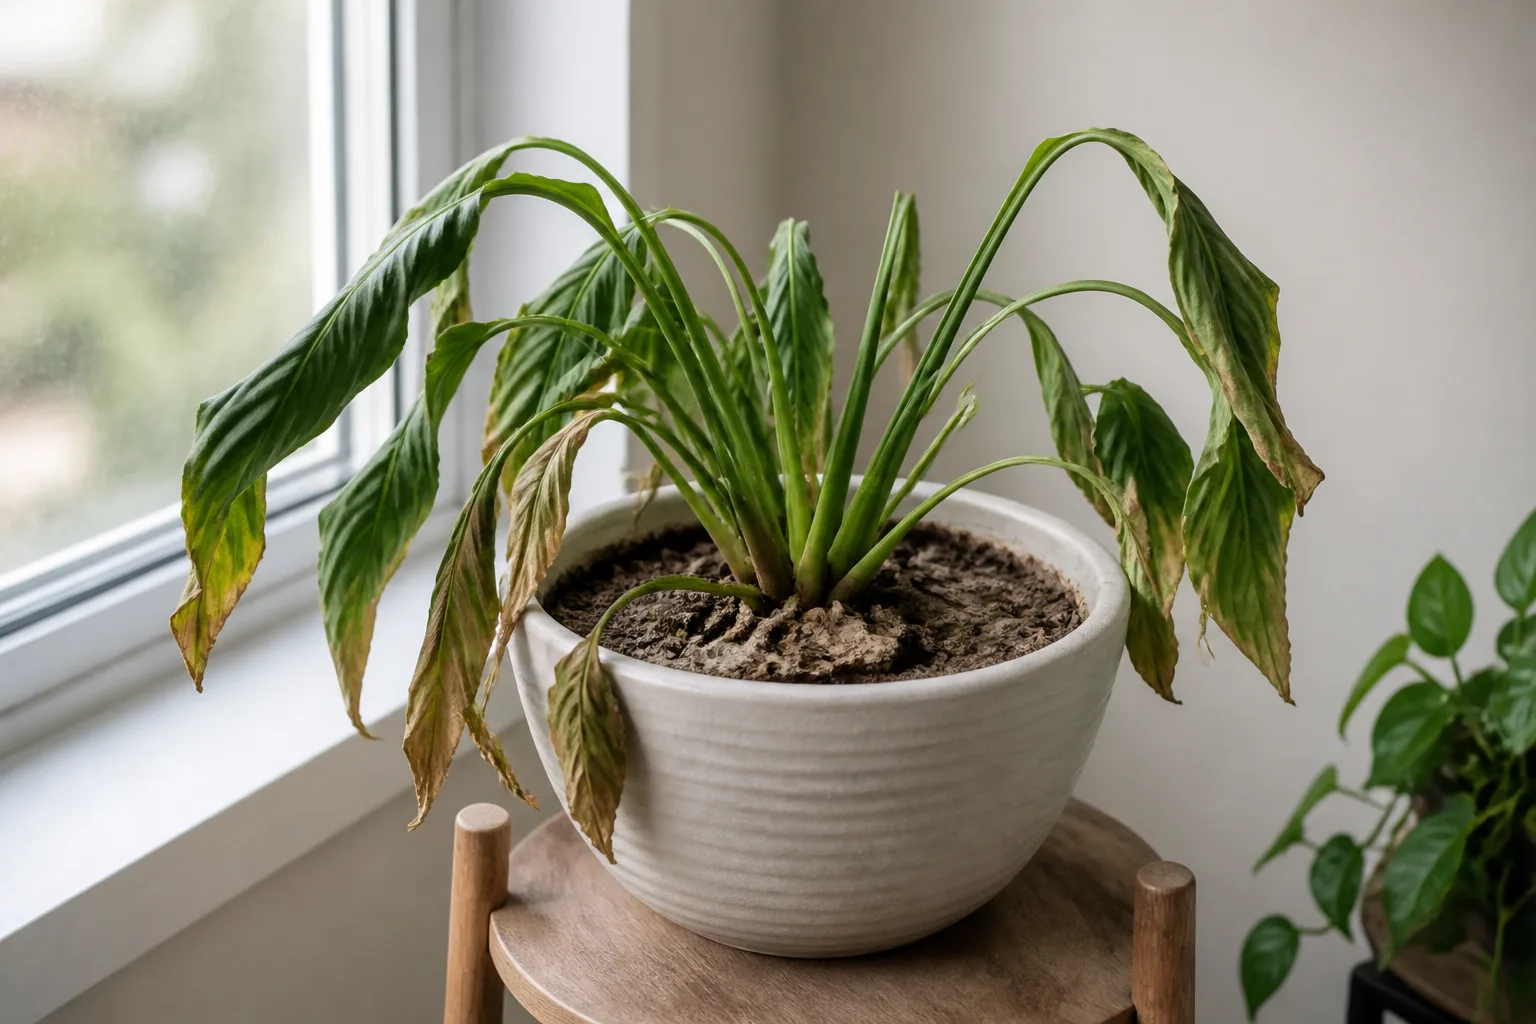
The practical fix is to wet the whole root ball, not just the top layer. Water slowly until excess exits the drainage holes, wait a few minutes, and water again if the mix was so dry that it initially repelled moisture. Empty the saucer once the pot has finished draining. If water races around the sides and out the bottom, the root ball may have shrunk away from the container or become difficult to rewet; a slow soak followed by complete drainage is safer than leaving the pot submerged.
Do not switch from drought to permanently wet soil. Clemson Extension notes that watering needs change with plant species, pot size, mix, light, temperature, and growth stage, so a calendar reminder is only a prompt to check—not proof that water is needed. (Clemson Extension)
2. Overwatering and root rot
Overwatering is usually a too-wet-for-too-long problem, not one generous watering. Roots need water and oxygen; when air spaces in the mix stay filled with water, roots can decline and stop delivering water to the leaves. The plant may then wilt and yellow even though the pot is wet, which is why adding more water can accelerate the damage.
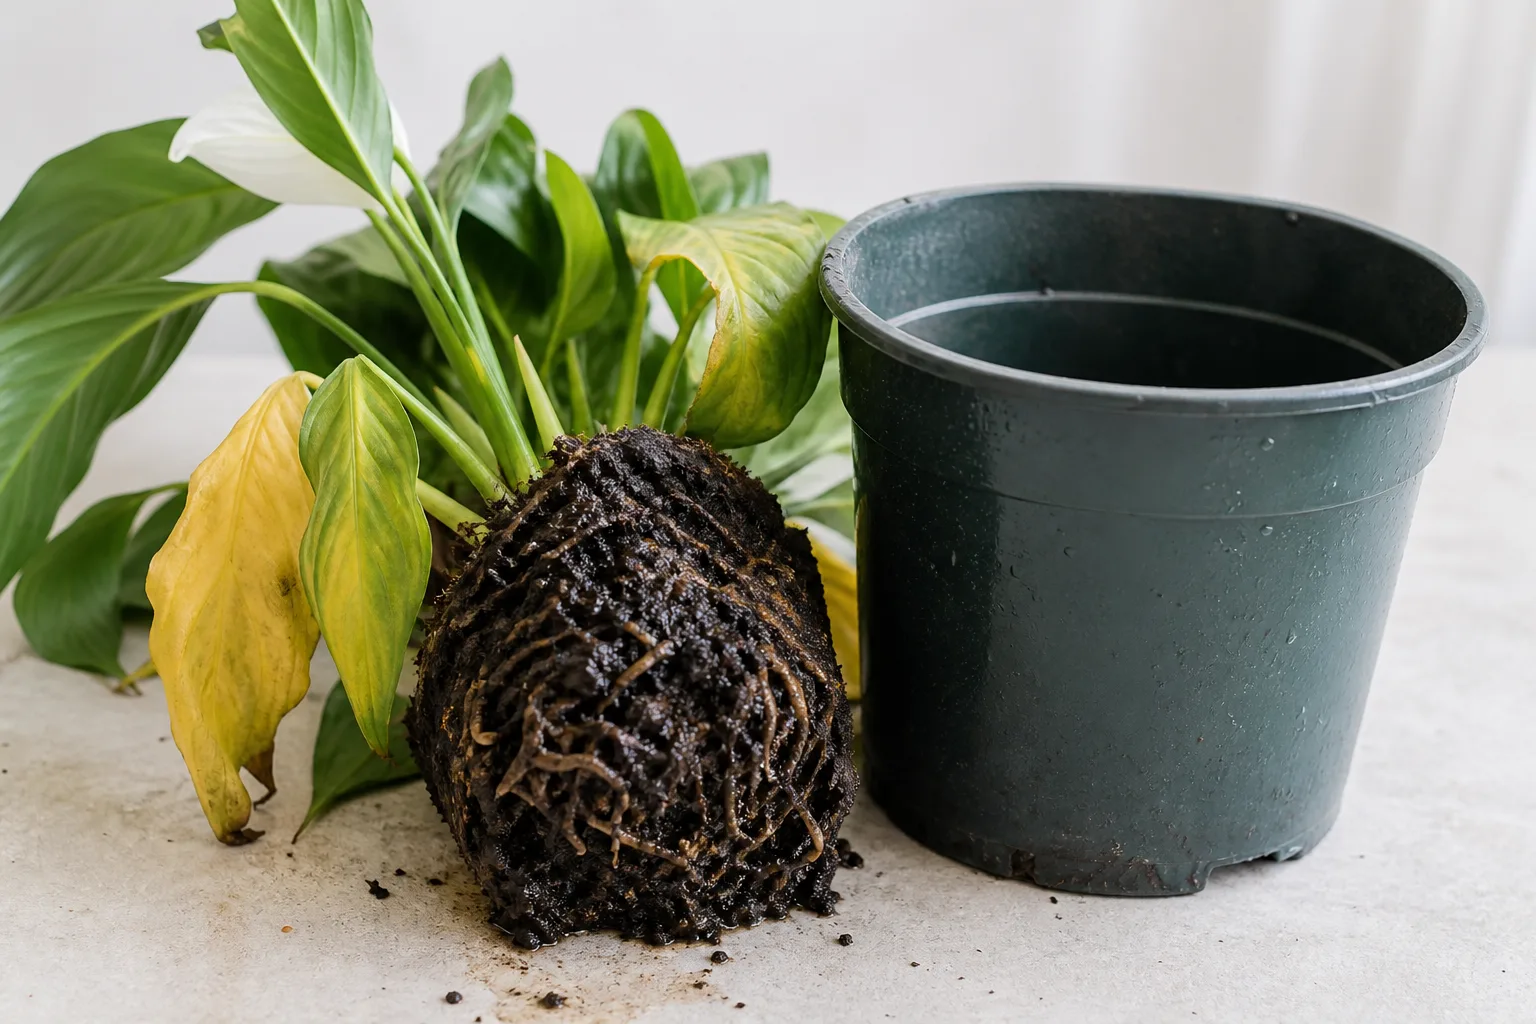
Look for several yellow leaves, new and old foliage declining together, a pot that stays heavy for days, fungus gnats, a sour smell, or a soft stem base. Slide the plant out of its pot only when these clues justify it. Healthy peace lily roots should be firm; roots affected by rot are typically brown to black, soft, or mushy. The University of Florida explains that an unpleasant smell can come from oxygen-poor wet soil, and Clemson Extension lists dark, soft roots and whole-plant yellowing among the warning signs. (University of Florida IFAS Emerging Pathogens Institute; Clemson Extension)
If only a small portion of the root system is damaged, rinse away loose mix, cut soft roots with a clean blade, and repot into fresh, airy mix in a clean drainage pot. Keep the new container close to the size of the remaining root ball. Do not put a recovering plant into a much larger pot, bury the crown, or keep the outer cachepot full of runoff. If most roots are dark and soft or the base is collapsing, recovery is uncertain; take healthy divisions or cuttings only when the plant’s structure allows it, and discard contaminated mix rather than spreading it to other pots.
3. Drainage, pot size, or compacted mix
Sometimes the watering amount is reasonable but the container system is not. A blocked drainage hole, a decorative pot that traps runoff, a dense mix, or a container much larger than the root ball can leave the lower zone wet while the top looks dry. The result is the same root stress that people often call overwatering, but the correction is to fix the system rather than simply wait longer between waterings.
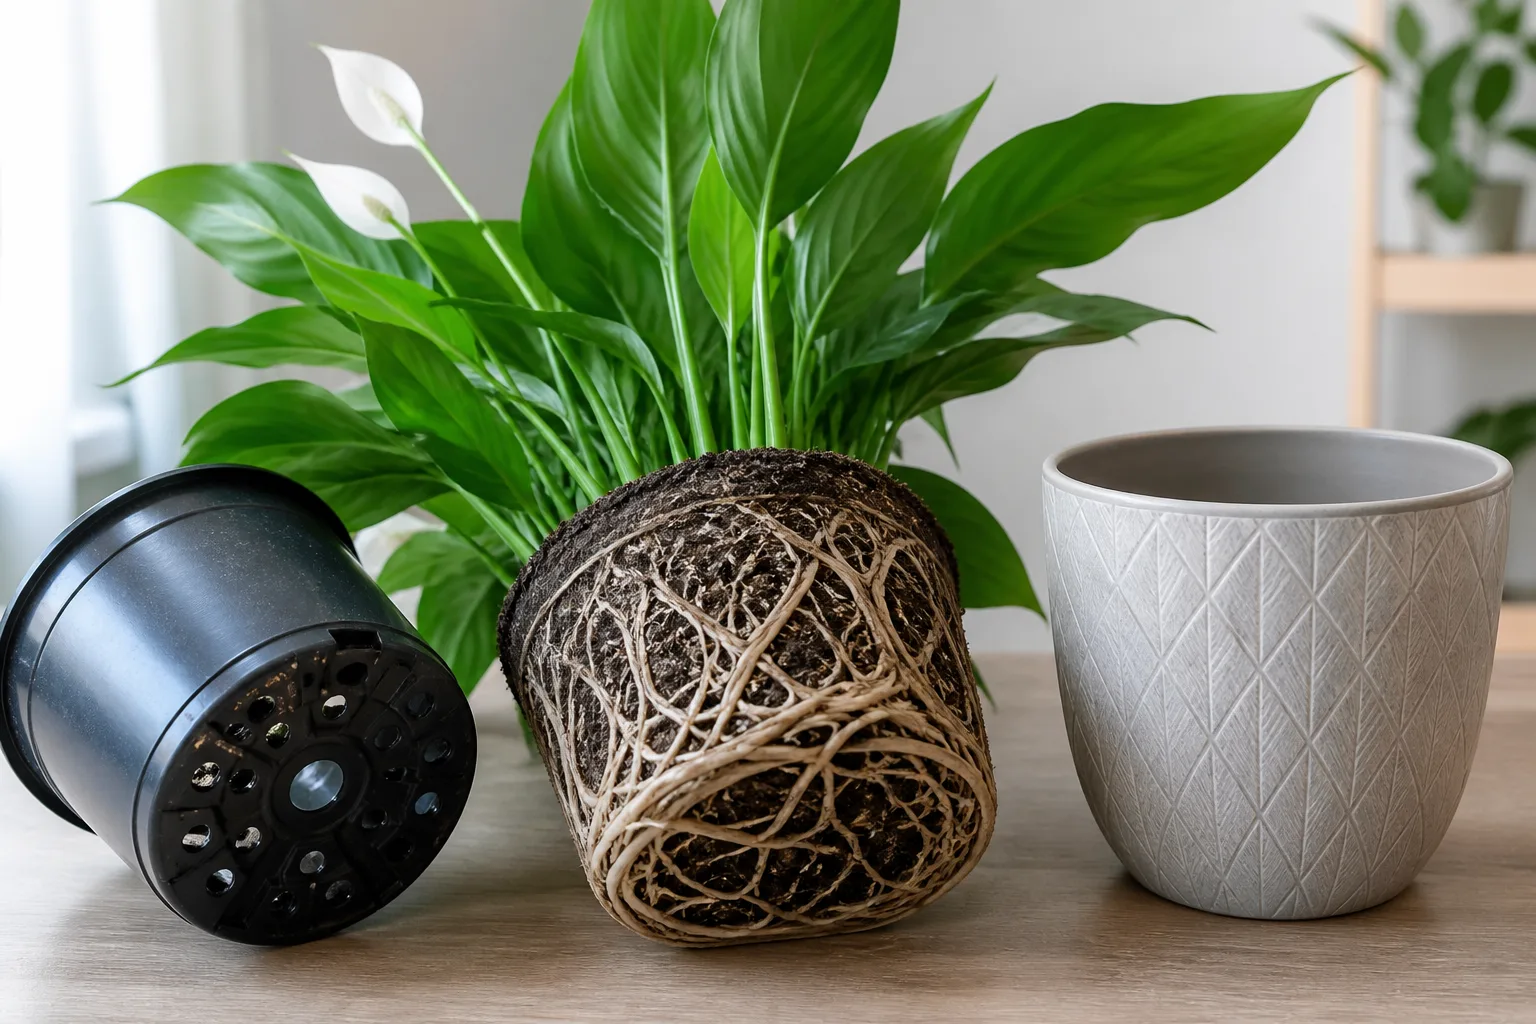
Check that the inner pot has an open drainage hole and that water can leave it freely. If the plant sits inside a cachepot, lift the nursery pot after watering and pour out any collected water. Do not rely on a gravel layer in a sealed pot to create drainage; a container without a functional outlet still gives excess water nowhere to go.
Root crowding creates the opposite pattern. If roots densely circle the container, poke from the drainage holes, and dry the mix unusually quickly, the plant may be root-bound. The RHS recommends repotting peace lilies only when roots are densely packed and moving up just a few centimetres, because excess compost around a small root ball can remain damp for too long. (RHS peace lily growing guide)
4. Natural aging of older leaves
One older lower leaf can yellow as the plant retires it. This is most likely to be normal when the change is slow, the leaf is near the base, the stem remains firm, the soil moisture is ordinary for the plant, and the centre continues to produce healthy green leaves.
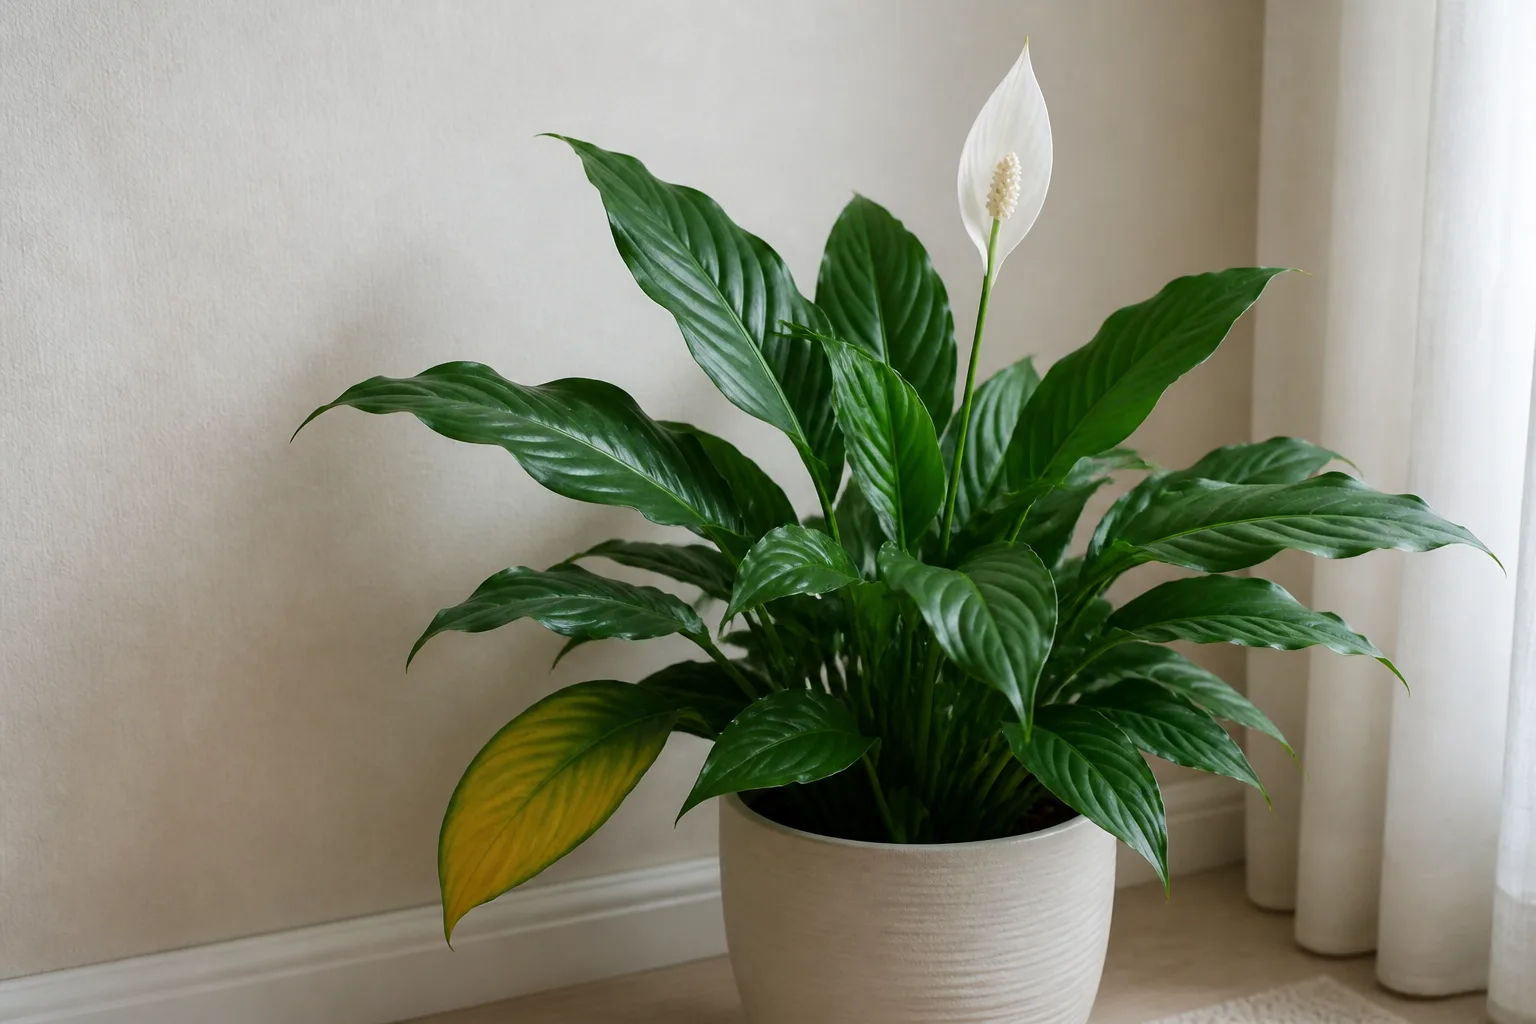
Natural aging becomes less convincing when several leaves yellow at once, the newest leaves are affected, or the plant is declining from the centre outward. Count the leaves over a week and take a quick photo from the same angle. That simple record helps separate one finished leaf from a trend that needs intervention.
Do not keep a dying leaf attached forever just because it is still slightly green, but do not strip healthy foliage in a panic either. A mostly green leaf is still contributing energy while the cause is being corrected.
5. Light that is too dim or too harsh
Peace lilies tolerate lower light than many flowering houseplants, but tolerance is not the same as ideal growth. In a very dim corner, growth slows, leaves may become paler, petioles may stretch toward a window, and the mix can stay wet longer because the plant uses less water. Over time, lower leaves may yellow and drop.
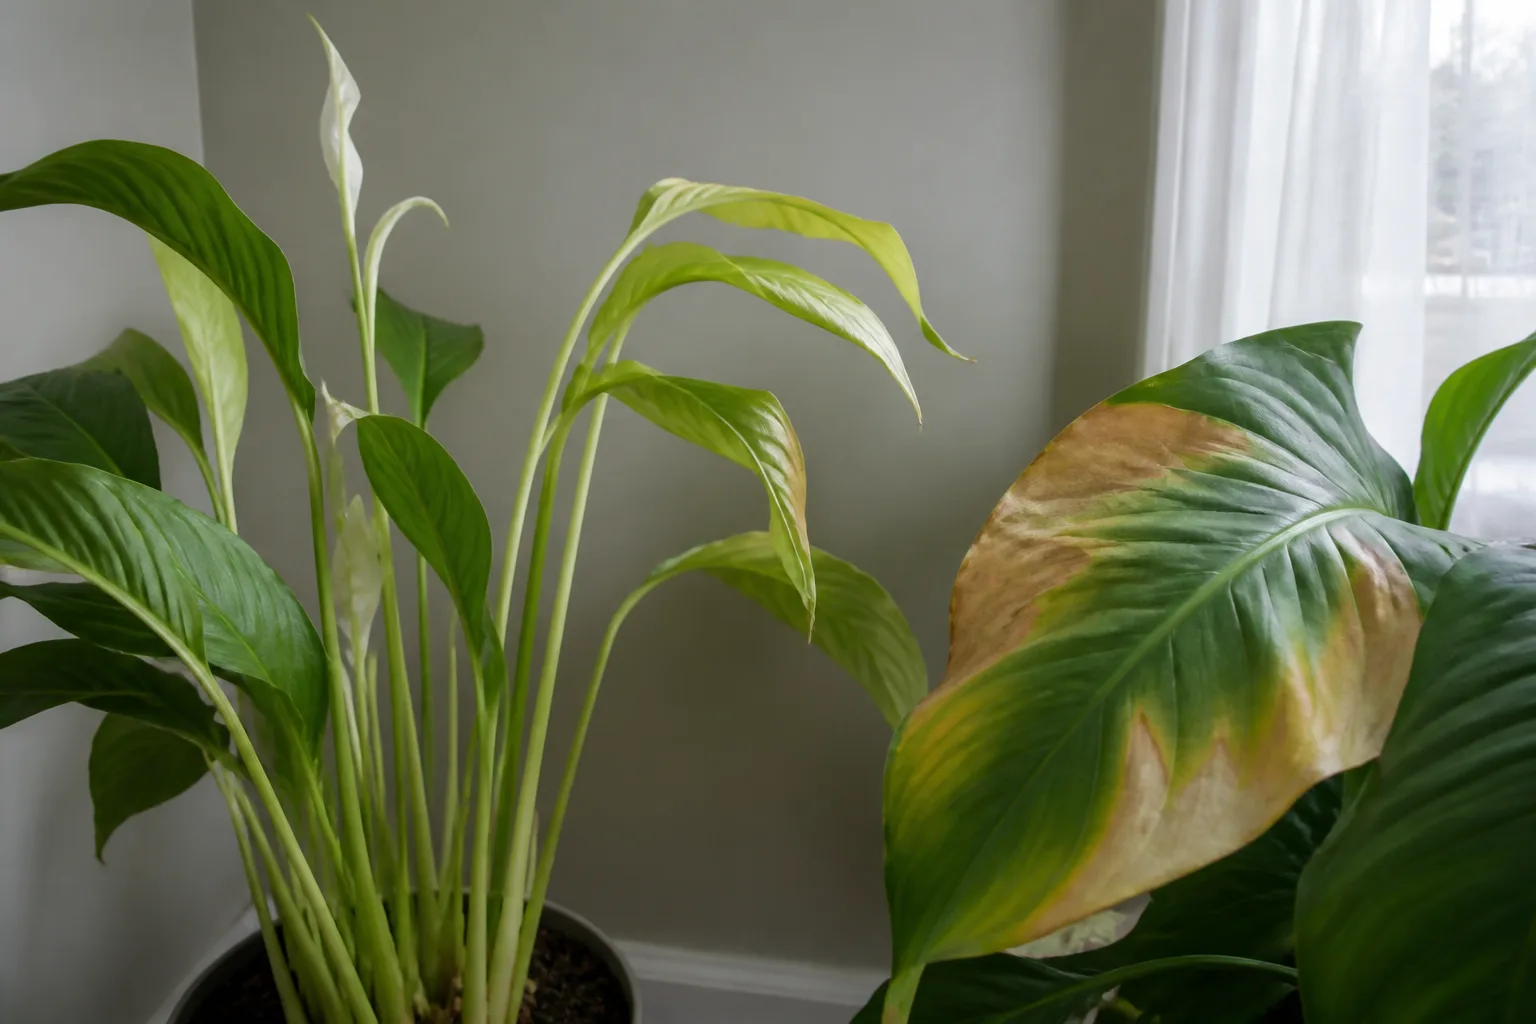
Direct sun creates a different pattern: bleached, washed-out, tan, or crisp yellow-brown patches, often strongest on the side facing the glass. NC State Extension says peace lilies prefer partial to deep shade and should not be placed in direct sun; the RHS recommends bright, indirect light near a window while avoiding strong summer rays. (NC State Extension; RHS peace lily growing guide)
Move a dim plant closer to bright filtered light in stages rather than putting it straight into hot afternoon sun. If the window is harsh, use a sheer curtain or increase the distance from the glass. Recheck moisture after changing light: a brighter location may dry the pot faster, while a darker location may make the old watering rhythm excessive.
6. Low humidity and dry air
Low humidity more often starts as crispy brown margins and tips than as smooth, uniform yellowing, but it can compound drought stress. Heated rooms, air-conditioning, hot air from a vent, and a plant placed beside a frequently opened exterior door all increase water loss or temperature fluctuation.
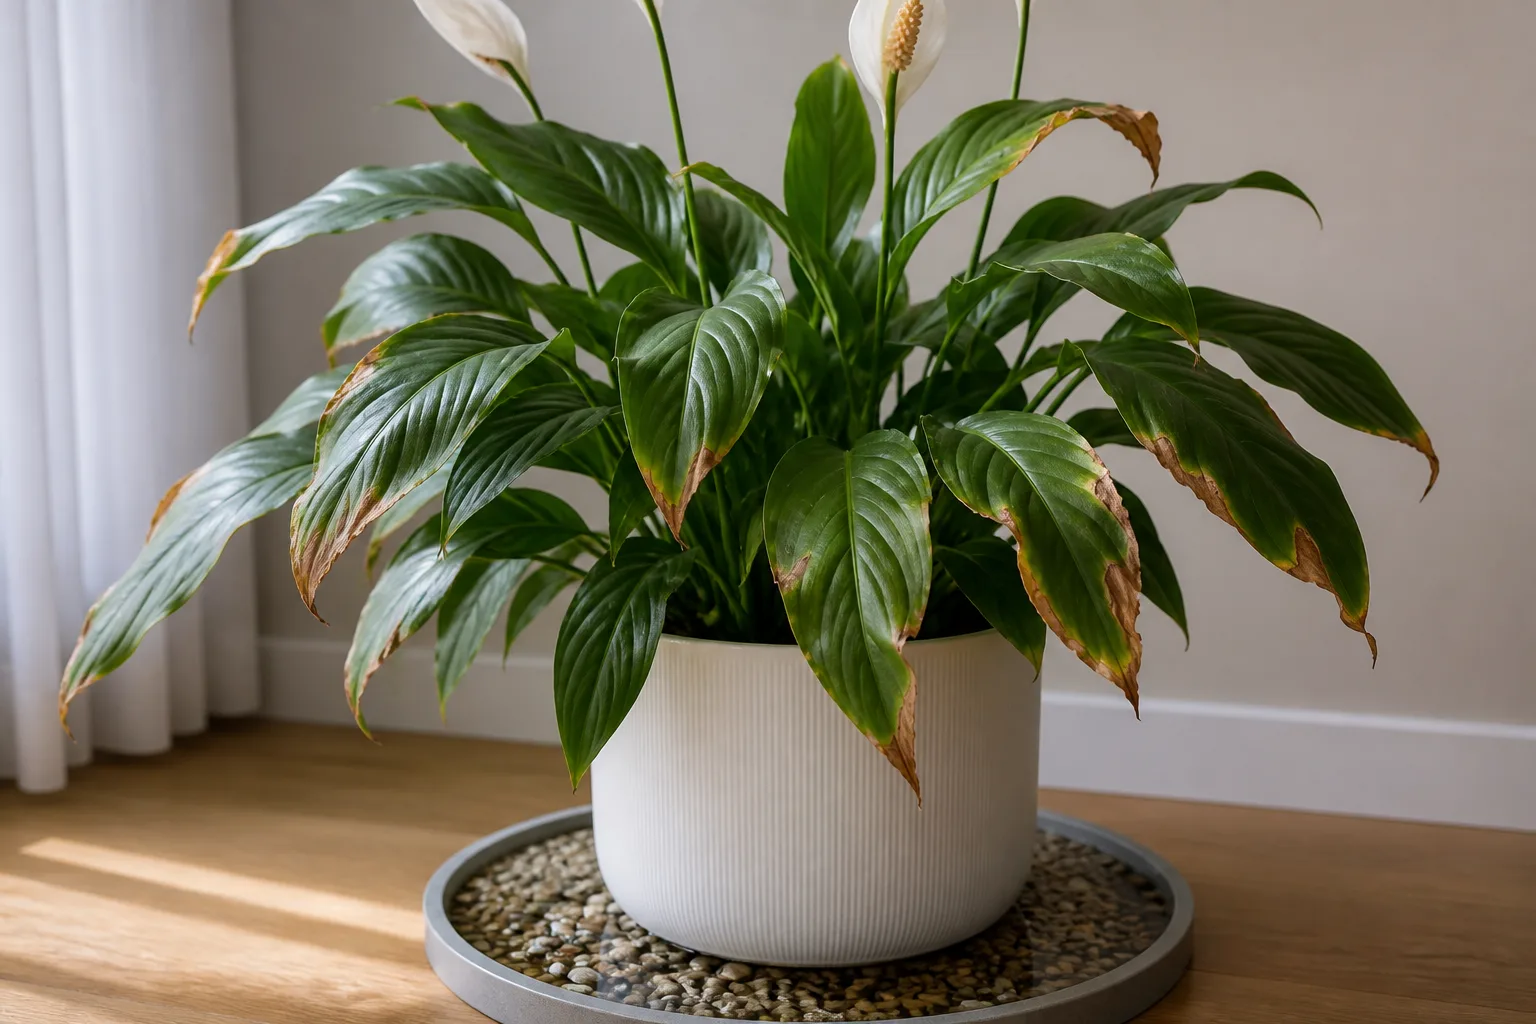
The RHS describes moderate humidity as part of peace lily care and recommends grouping plants or using a correctly arranged tray of damp gravel. (RHS peace lily growing guide) A humidifier can provide a more consistent change than occasional misting, especially in a dry room. Keep airflow moving gently around the leaves; a sealed, constantly wet corner can create new fungal and mould problems.
Humidity is not a substitute for a healthy root system. A pebble tray cannot rescue roots in standing water, and misting cannot correct a dry root ball, blocked drainage, low light, or pests. Treat dry air as the likely contributor when you also see crisp edges, a dry room, and otherwise sensible soil moisture.
7. Tap-water minerals and salt buildup
Water quality is worth investigating when yellowing is accompanied by brown tips, pale margins, a white or grey crust on the soil, or a history of softened or heavily mineralized water. Peace lilies can be sensitive to fluoride, and repeated watering plus fertilizer can concentrate soluble salts in a container. The RHS specifically advises rainwater or filtered water where possible because fluoride in tap water can damage foliage. (RHS peace lily growing guide)
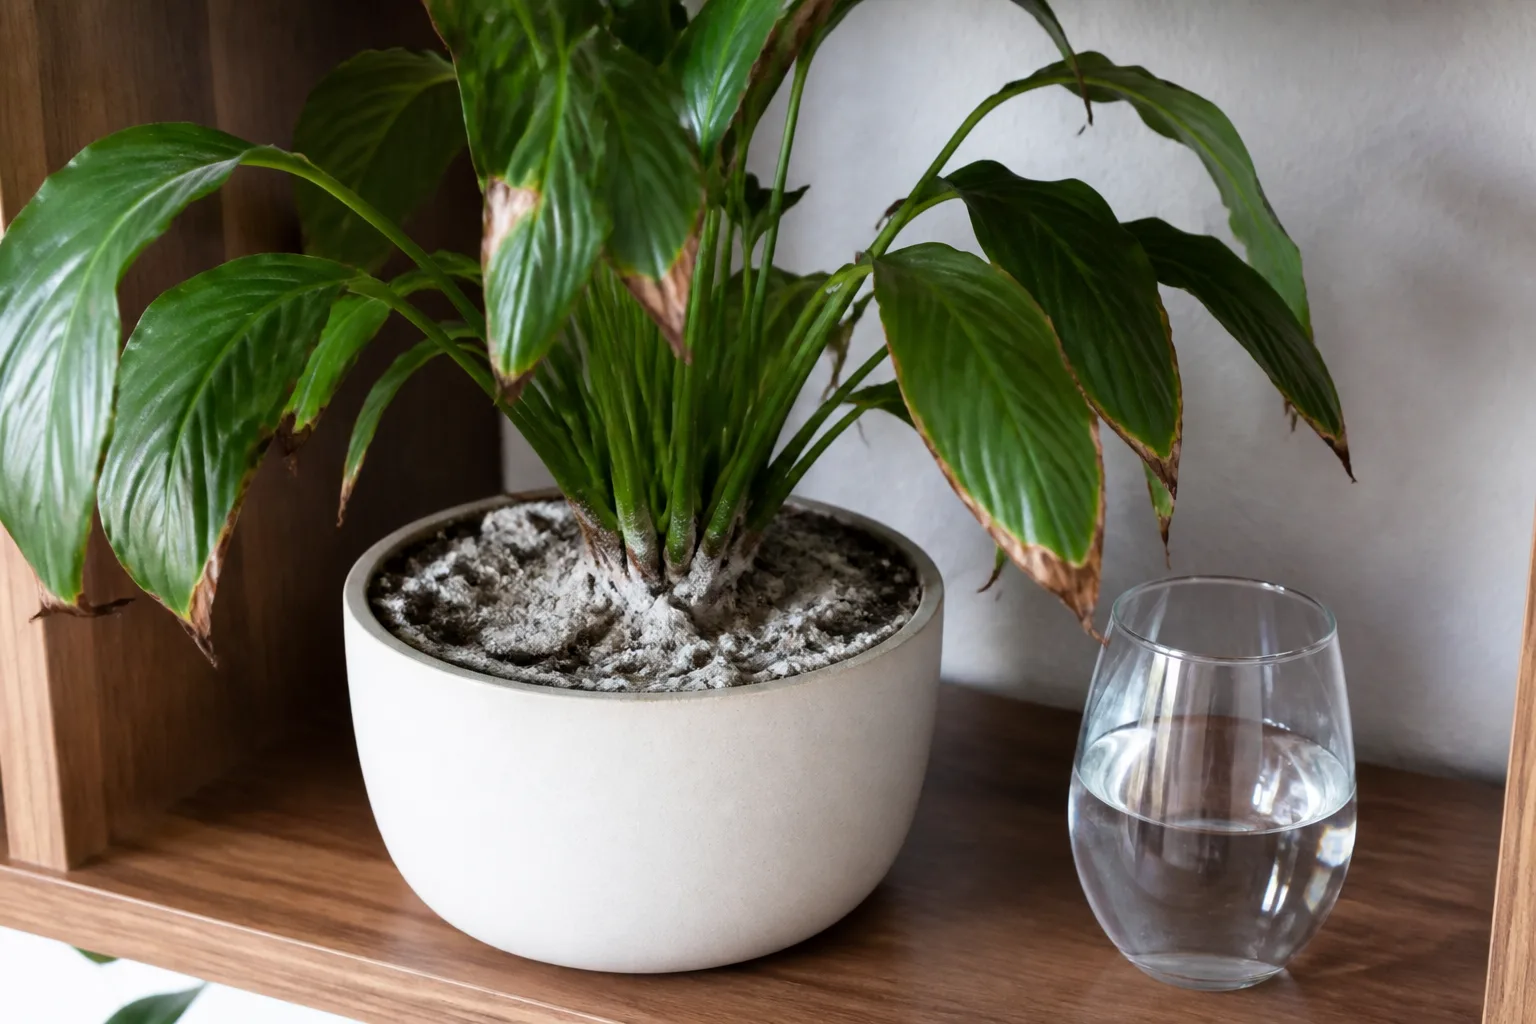
This is a reason to look for a pattern, not a reason to panic about ordinary tap water. If your plant has uniform yellow leaves and wet mix, change the root-zone diagnosis first. If the plant has crispy tips and visible crust, use room-temperature rainwater or filtered water if practical, remove loose salt deposits from the surface, and occasionally flush a drainage pot with plenty of water so the runoff leaves the container.
Never use water from a household softener as a default fix; it may add sodium or chloride. Clemson Extension also recommends room-temperature water, thorough watering, emptying the saucer, and avoiding softened water for indoor plants. (Clemson Extension)
8. Nutrient deficiency or fertilizer burn
Nutrient problems are possible, especially in an old, depleted mix, but they are easy to misdiagnose. Yellowing between green veins, uniform yellowing of older foliage, small new leaves, weak growth, and poor flowering can point in different directions—and the same pattern can result from damaged roots that cannot absorb nutrients.
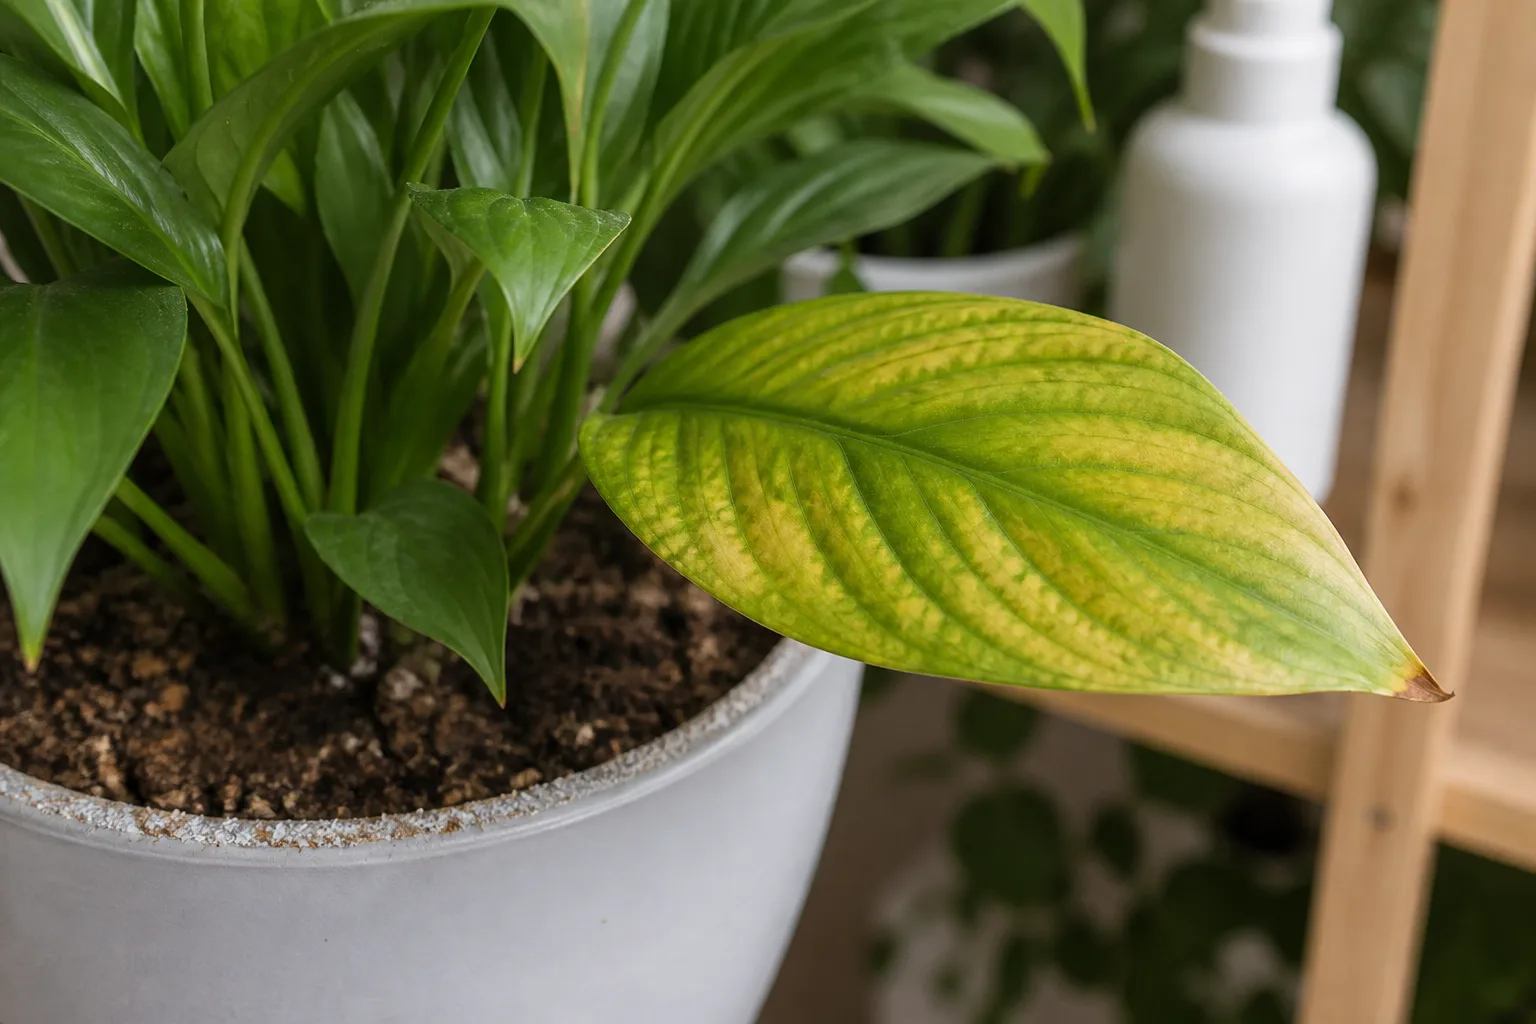
Fertilizer can also be the cause. Too much feed or a concentrated product can injure roots and leave brown tips, salt crust, wilting, and yellowing. NC State Extension recommends peace lily fertilizer at one-quarter of the label strength and says to flush the soil between applications; the Missouri Botanical Garden gives similar guidance for very low fertility needs. (NC State Extension; Missouri Botanical Garden)
Match the leaf pattern to the likely nutrient issue
Use a nutrient deficiency as a working hypothesis only after moisture, roots, light, drainage, and pests have been checked. The RHS notes that nitrogen deficiency commonly appears first on older leaves, while iron deficiency tends to affect young leaves; it also stresses that chlorosis has many possible causes. (RHS chlorosis guidance)
If the mix is waterlogged, do not fertilize it. If you have recently fed, see crusting, or suspect fertilizer burn, stop feeding and flush only if the pot drains freely; if the container has no outlet, repot into a proper drainage pot instead of pouring in more water. Resume a dilute, balanced houseplant feed only when the plant is stable and producing healthy new growth. Do not sprinkle coffee grounds, Epsom salt, or a random micronutrient on the surface without a confirmed need.
9. Temperature shock and drafts
Peace lilies dislike abrupt temperature changes. Cold glass, an exterior door, an air-conditioning stream, and a position directly beside a radiator can all stress foliage. Cold injury may show as limp, darkened, or collapsing tissue, while heat and dry air can produce bleaching, curling, and crisp edges.
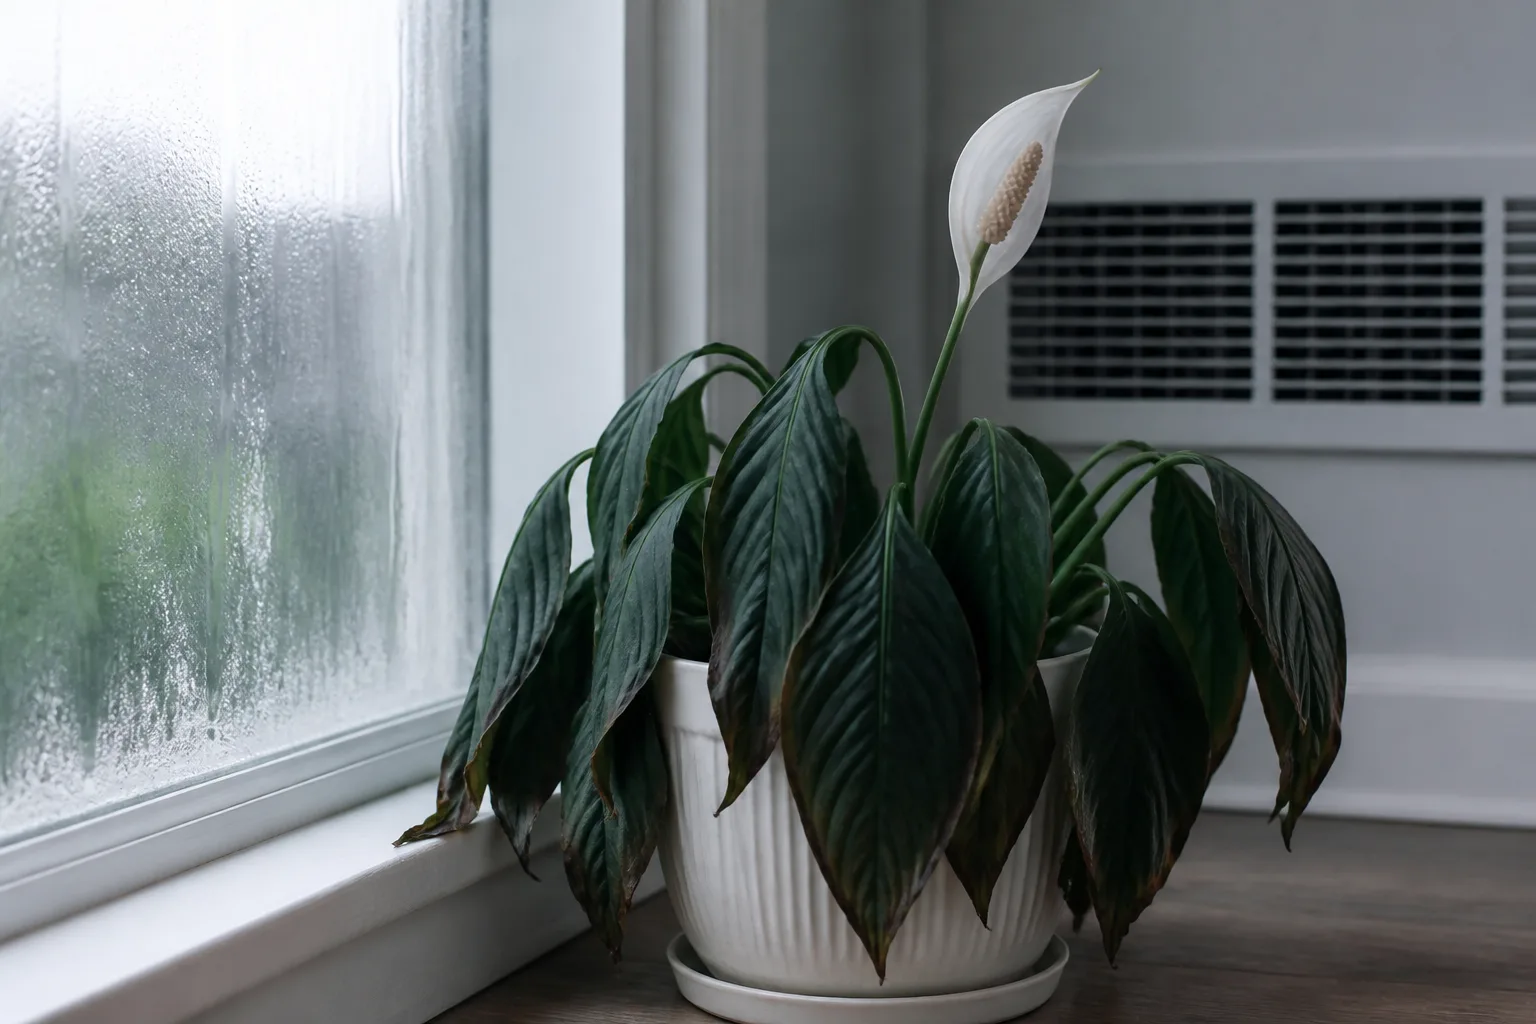
NC State Extension gives peace lilies a warm daytime range of roughly 68–85°F and warns that cold, drafty conditions slow growth, with extended exposure below 40°F capable of damaging leaves, stems, and roots. (NC State Extension) You do not need to chase an exact number in a normal home; aim for a stable position away from direct blasts and avoid letting leaves touch cold window glass.
If the yellowing followed a move, shipment, repot, or sudden weather event, stabilize the location before adding several treatments. A stressed plant can lose a leaf after a change and still recover; continued spread after conditions normalize is the reason to return to the soil and root checks.
10. Pests feeding on the foliage
Pests usually create a pattern rather than a smooth whole-leaf fade. Look beneath leaves and around petioles for tiny moving specks, fine webbing, cottony clusters, scale-like bumps, sticky residue, distorted new growth, or silvery scarring. Spider mites can produce fine yellow or translucent stippling; aphids, mealybugs, scale, and thrips can weaken foliage in other ways.
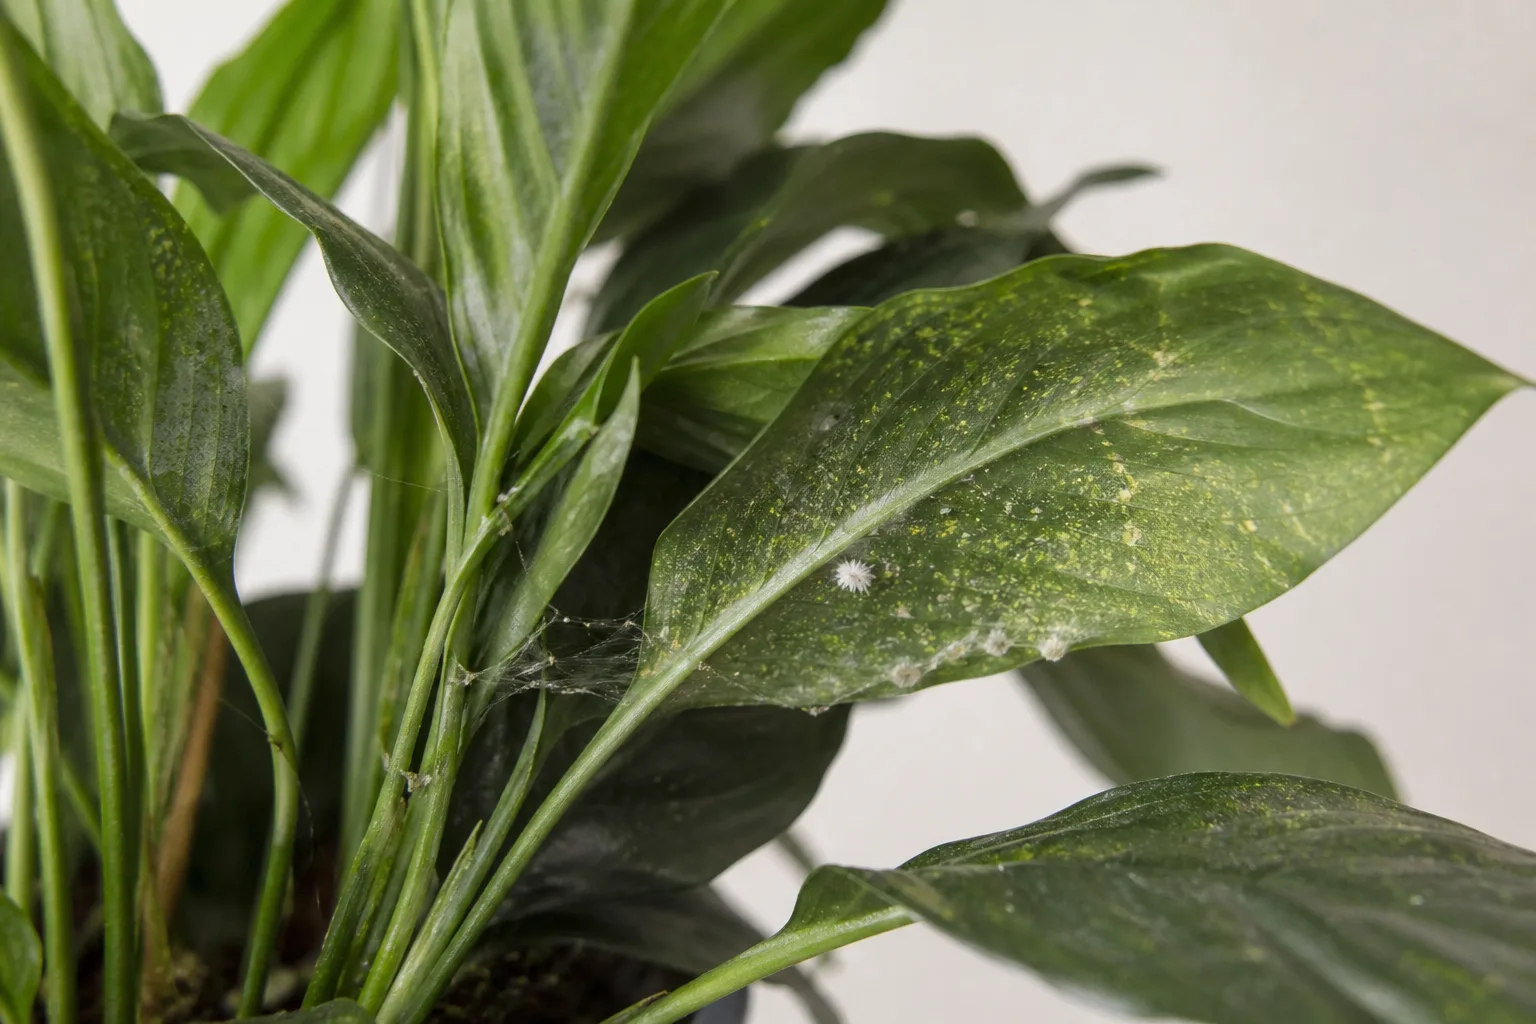
BBC Gardeners’ World Magazine identifies peace lilies among plants that can host mealybugs and spider mites, and describes mottled yellow or translucent spots plus webbing as a spider-mite clue. (BBC Gardeners’ World Magazine) Melinda Myers also lists drought stress and overwatering as more common explanations for yellowing peace lily leaves, which is a useful reminder to confirm an insect before treating. (Melinda Myers)
Isolate the plant while you inspect it. Wipe or rinse foliage when the plant and setting allow, remove visible pests, and use only a product labelled for indoor plants and the pest you identified. Repeat timing matters because one cleaning rarely reaches eggs or hidden insects. Do not spray neem oil, soap, or any pesticide as a reflex on a plant with uniform yellowing and no pest evidence; treatment can add leaf injury without addressing the root problem.
How to remove yellow leaves without slowing recovery
Fully yellow, brown, papery, or diseased leaves will not return to normal green. Once the cause is under control, cut the leaf stalk near its base with clean scissors or pruners. Wear gloves if sap irritates your skin, and clean the tool between plants when disease or pests are possible.
Leave a leaf that is still mostly green unless it is spreading a confirmed disease or you need to remove it for pest control. The RHS advises cutting completely yellow, brown, or shrivelled leaves while retaining predominantly green leaves until fresh growth appears. (RHS poorly-houseplant guidance) Removing a large amount of green foliage at once reduces the plant’s ability to rebuild roots and leaves.
Do not expect pruning to make the plant look perfect overnight. The meaningful signs of recovery are that yellowing stops, stems remain firm, the soil dries at a reasonable pace, and the next leaf opens green and properly formed.
A recovery plan for the next seven days
Today: Record how many leaves are yellow, photograph the pattern, feel the mix several centimetres down, lift the pot, and empty any standing runoff. Inspect leaf undersides before applying anything. If the soil is wet and the plant is declining, inspect roots; if it is genuinely dry, rehydrate slowly and allow complete drainage.
Days two through four: Make one main correction. Improve drainage or repot only when the root evidence supports it; move the plant to bright indirect light; protect it from drafts; or isolate and treat a confirmed pest. Do not stack a new fertilizer, water change, repot, humidifier, and sun move on the same day unless an emergency such as collapsing, rotting roots requires it.
Days five through seven: Recheck moisture, pot weight, leaf texture, and the newest growth. A yellow leaf may continue to fade after the cause is corrected because the damage already happened. Judge the treatment by whether the decline has slowed and whether the plant is holding healthy tissue, not by expecting old yellow leaves to reverse.
When a yellow leaf will not turn green again
Yellow tissue has lost much of its chlorophyll, so a fully yellow leaf normally does not green up again. The plant can still recover by producing new leaves after the root system and growing conditions improve. A partly green leaf may hold its color for a while, but that does not mean the original cause is fixed.
Seek a local extension diagnostic service or experienced plant professional if the plant continues to decline despite correct moisture and drainage, the stem base is soft, many roots are affected, or the leaves show spreading dark water-soaked lesions. A photograph cannot reliably distinguish root rot, nutrient lockout, and every leaf-spot disease.
How to prevent the next flush of yellow leaves
Build a check-based routine rather than a fixed weekly watering schedule. Before watering, check the mix at depth and lift the pot; after watering, let it drain fully and empty the saucer. Adjust the interval when light, season, pot size, temperature, or the plant’s growth rate changes.
Keep the peace lily in bright filtered light without harsh direct sun, protect it from vents and cold drafts, and clean broad leaves with a soft damp cloth so dust does not reduce the usable light. Use a drainage pot, an airy potting mix, and only a modest pot increase when roots are truly crowded. The RHS notes that older leaves naturally decline, while widespread color change deserves a review of watering, feeding, and placement. (RHS leaf-damage guidance)
Inspect new plants before bringing them near the collection and check leaf undersides during watering. If a peace lily is pet-accessible, remember that NC State lists it as having medium-severity poison characteristics; keep it out of reach and contact a veterinarian or animal poison service after a suspected ingestion. (NC State Extension)
Conclusion
The fastest way to solve yellow peace lily leaves is to start below the leaf. Check soil moisture, pot weight, drainage, root condition, and the pattern of the yellowing before changing care. Dry and crisp suggests thirst or dry air; wet and soft suggests excess moisture or root failure; bleached patches suggest light; stippling suggests pests; one old lower leaf with healthy new growth may simply be aging.
Make the smallest correction that fits the evidence, then give the plant stable conditions long enough to show new growth. The old yellow leaf may never turn green, but a pause in the spread and a healthy next leaf are strong signs that your peace lily is recovering.



