How to Plant an Acorn and Grow an Oak Tree
Grow an oak from a fresh acorn with species-aware timing, deep-pot advice, winter protection, and a clear plan for moving the seedling into your yard.
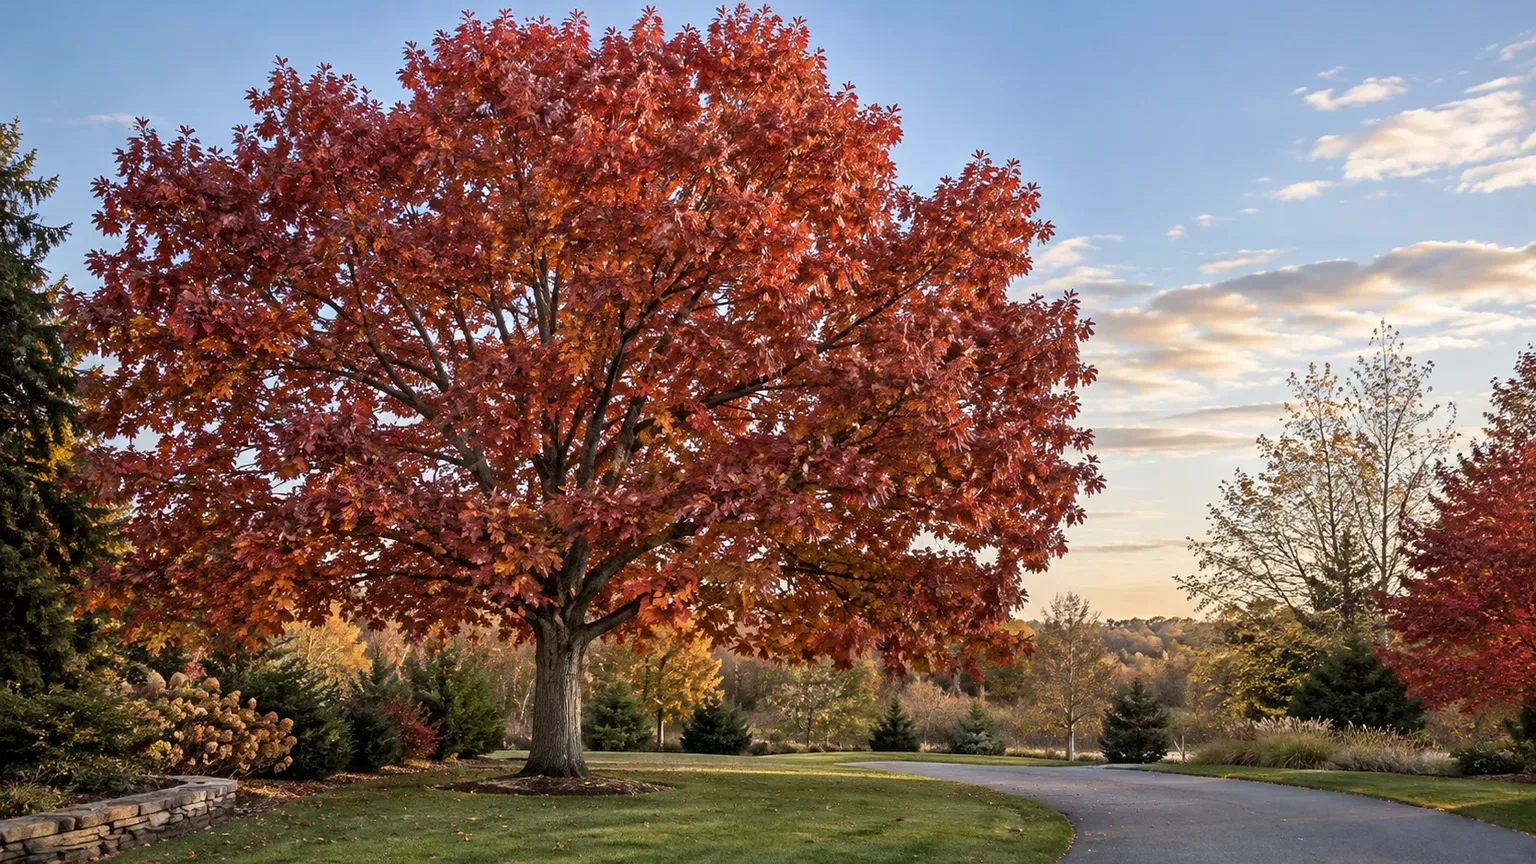
The most important choice happens before you bury the acorn: pick a locally suitable oak and learn whether its seed germinates in fall or waits for winter. After that, keep the acorn from drying out, give its first root room to grow downward, and protect the seedling from animals and drought.
An acorn-grown tree will not necessarily be identical to its parent. Oaks cross-pollinate, and a seedling can vary in mature size, shape, and other traits, so grow from seed when you want a locally adapted tree or enjoy the process—not when you need a guaranteed cultivar.
Start with the right oak for your yard
Identify the parent tree if you can. “Oak” covers many species with different mature sizes, soil preferences, and cold tolerance; a native oak from your region is usually a safer landscape choice than a species chosen only because its acorns are easy to find. Ask a local native-plant society, extension office, or arborist if you are unsure of the species.
Think about the full-grown tree before collecting. Many oaks become broad, long-lived shade trees with roots and canopies that eventually compete with buildings, paving, overhead wires, and nearby plants. Check the mature dimensions and local planting guidance, then choose an open site where the tree can stay for decades.
If you do not know the parent species, label a small batch and identify the tree before sowing if possible. Wind, animals, and overlapping crowns can make it hard to tell which tree dropped an acorn, so verify the species before committing a seedling to a permanent site.
Collect acorns when they are ripe and fresh
Collect after acorns begin falling naturally, when the crop is dropping in quantity. The calendar date shifts with oak species, weather, and region, so use the tree’s ripening pattern rather than copying a month from another climate. The RHS gives a mid-September-to-December window for its UK oak guidance, while Steve Nix’s Treehugger guide to collecting and planting acorns notes that local timing can vary by several weeks.
Pick acorns from clean ground soon after they fall. Avoid those that have sat in puddles, dried in hot sun, or been trampled into the soil; fresh acorns lose viability if allowed to dry for long. The RHS oak-growing guide likewise advises collecting sound acorns in autumn and keeping them from drying out.
Take more than you need because not every acorn will germinate and some seedlings will not make it through their first year. Collect only where you have permission, and take a modest share rather than stripping a tree or the ground beneath it; wildlife also depends on acorns.
Keep each species or parent tree in a separate labeled bag. If you cannot sow the acorns the same day, refrigerate them in a loosely closed bag with barely damp medium. Do not let them dry or freeze; check weekly for mold or a root beginning to emerge, and plant promptly if it has.
Choose acorns that are more likely to grow
Use firm, full acorns with intact shells. Reject ones with pinholes, deep cracks, soft spots, a sour smell, or visible mold; small insect holes can conceal larvae that have eaten the developing seed. A loose cap is not, by itself, a reason to discard an acorn—the cap often comes off as a mature acorn falls. A cap still tightly attached can signal an immature seed, so prioritize clean, naturally fallen acorns instead.
The seed’s weight and condition give useful clues, but no visual check guarantees a living embryo. Choose several promising acorns and sow extras rather than relying on one “perfect” specimen. Gardenia’s oak propagation guide describes both visual inspection and a water test; use the test as a quick screen, not as a substitute for sound collection and good storage.
Is the float test reliable?
A short soak can help identify obviously empty or damaged acorns: many poor seeds float while dense, intact ones sink. But floating is not a laboratory diagnosis, and sinking cannot prove that the embryo is healthy. If an acorn looks sound, do not make a single water test your only reason to discard it; sow a few extras and judge success by germination.
If you do soak a batch, use cool water for a brief check, then plant the acorns the same day. Do not store them underwater. Long soaking reduces the air available to the seed and can encourage decay, especially if the acorn is already cracked or the water is warm.
Match the acorn to its germination season
Acorn dormancy differs among oak species. Some acorns begin to germinate soon after they fall; others need a period of cold, moist conditions before they will sprout. That distinction explains why one person may see a root in autumn while another’s pot appears unchanged until spring. Learn the species group if possible, but outdoor fall sowing is often the simplest way to let local winter conditions provide the seasonal cue.
For refrigerator stratification, place the acorns in a bag with a barely damp medium and chill them above freezing. Inspect them regularly so the medium stays slightly moist without becoming soggy. The sources give different durations because requirements vary: Gardenia describes roughly one to three months depending on species, while Treehugger discusses about 1,000 hours for many red-oak-group acorns. Treat those as guidance, not a universal timer, and favor local species-specific advice when available.
White oak group vs. red oak group
White-oak-group acorns, including white oak and bur oak, often germinate soon after ripening and are best planted fresh. They may send out a root in fall, so do not wait for a warm spring day if a healthy acorn has already begun growing. Keep the root from drying or breaking during planting.
Red-oak-group acorns, such as northern red oak and pin oak, generally have a stronger dormancy and benefit from a cold, moist period before spring germination. Planting them outdoors in autumn allows natural chilling; refrigerator stratification is an option when you need to hold or manage the seed indoors. The Treehugger overview and Gardenia’s guide both distinguish immediate germinators from acorns that need dormancy, though exact needs still depend on species and storage conditions.
Choose direct sowing or a deep container
Direct sowing is simplest if you already know the permanent site and can protect it from squirrels, mice, and lawn equipment. It avoids the root disturbance that comes with moving a seedling, but you have less control over watering and may lose track of the planting spot.
A container is useful when you want to monitor germination or delay choosing the permanent spot. Use a pot with generous drainage and more depth than width: oak roots grow downward early, and a shallow pot can become restrictive while the shoot still looks tiny. The RHS recommends tall pots, and Treehugger warns against letting a taproot grow through a container into the ground beneath it.
For a small batch, sow one acorn per deep pot to avoid competing roots. If you have few pots, sow two and cut the weaker seedling at soil level after both are established; pulling it can disturb the stronger seedling’s roots.
Plant acorns at a shallow, even depth
Use clean, free-draining potting mix or loose garden soil in a prepared seedbed. Do not add a heavy dose of fertilizer or manure to the planting hole; a germinating acorn carries its own stored food, and rich, soggy soil can create more problems than it solves. The medium should hold some moisture while still letting excess water drain.
Set the acorn on its side and cover it with about one-half to one inch of mix, adjusting for acorn size. A useful rule is to cover it with roughly its own width of soil rather than burying it several inches deep. Planting sideways avoids a guess about which end should point up; the root will orient downward as it grows. Water until the mix is evenly damp and excess drains from the pot.
Do not press the surface into a hard crust. Label the pot with the oak species or parent tree and the sowing date, then place it outside in a sheltered spot. Outdoor conditions provide the seasonal cycle, while a bright indoor windowsill can be too warm and dry for acorns that need winter chilling.
Keep containers safe through winter
Check pots after rain and during dry spells. The soil should remain lightly moist, not saturated; a pot that stays waterlogged can deprive the acorn of oxygen and rot before germination. Make sure drainage holes are open, and raise the container slightly on feet or a slatted surface so water can escape.
Protect the pot from animals without sealing it in plastic. Hardware cloth or sturdy mesh over the soil blocks squirrels and rodents while allowing air and rain through. Secure the edges and leave clearance for a new shoot. If severe wind or deep freezing threatens the pot, move it to a sheltered outdoor spot rather than a heated room.
Do not discard a pot just because nothing appears above the soil in a few weeks. Depending on species and temperature, an acorn may start root growth before a shoot appears, or it may wait until spring. Keep the label, moisture, and protection in place through the appropriate season; digging it up repeatedly to check can snap the first root.
Read the first year of growth correctly
The first visible growth may be a hooked stem and seed leaves, not a miniature version of the mature tree. Early leaves may not be enough to identify the oak, so keep the label and compare later growth with a reliable local identification guide if needed.
Give the seedling bright outdoor light and steady moisture. If it germinated in a protected greenhouse or indoors, move it into outdoor conditions gradually so tender leaves do not scorch or dry out in wind. Once it is growing outside, water when the upper layer begins to dry, then soak the root zone; avoid frequent shallow sprinkling that keeps the surface wet while deeper soil dries.
Keep weeds from crowding a small seedling, but do not hoe deeply close to the stem. The acorn’s reserves support early growth, so routine fertilizer is rarely the first fix for a slow seedling. Check the basics first: is the pot draining, is the root cramped, does the plant get enough light, and has it experienced a hard change in temperature or moisture?
If two seedlings emerge, thin by cutting
When two seedlings share a pot, give them a little time to establish and then keep the sturdier one. Cut the weaker stem at soil level with clean scissors instead of pulling it out. Oak seedlings can develop a strong central root early, and pulling may tear or twist roots that are already sharing the same small volume of soil.
If both look equally healthy, choose the one with a straight stem and balanced leaves, or separate them only while the roots are still small enough to tease apart without tearing. Water after thinning and keep the remaining plant out of harsh midday sun for a day or two if it was disturbed. One well-rooted seedling is more useful than two crowded stems competing in a pot.
Pot up before the taproot becomes cramped
Watch the container, not just the height of the shoot. When roots begin to appear at drainage holes, circle tightly inside the pot, or lift the root ball as you water, move the seedling into a deeper container. The RHS says oak saplings can be potted on as roots reach the drainage holes and notes that taller pots give roots room to lengthen.
Water the seedling beforehand so the root ball holds together. Slide it out gently, supporting the soil rather than pulling on the stem, and inspect the bottom. If the main root has begun to turn sharply, choose a deeper pot and position the root downward without forcing it into a curl. Do not trim a healthy taproot just to fit a short pot; select a container that accommodates it.
Use a free-draining potting mix, firm it lightly around the root ball, and water once to settle the soil. Keep the root collar—the point where the stem meets the top roots—near the soil surface rather than burying the stem. A container-grown oak should be a temporary nursery plant, not a permanent patio tree; repeated pot restriction can create a root system poorly suited to the ground.
Pick a permanent site before planting out
Choose the site while the seedling is small. Match the oak to your climate and soil, and leave room for its mature canopy and roots. Keep it clear of utilities, foundations, septic systems, narrow planting strips, and places where future shade would be a problem; locate buried lines before digging.
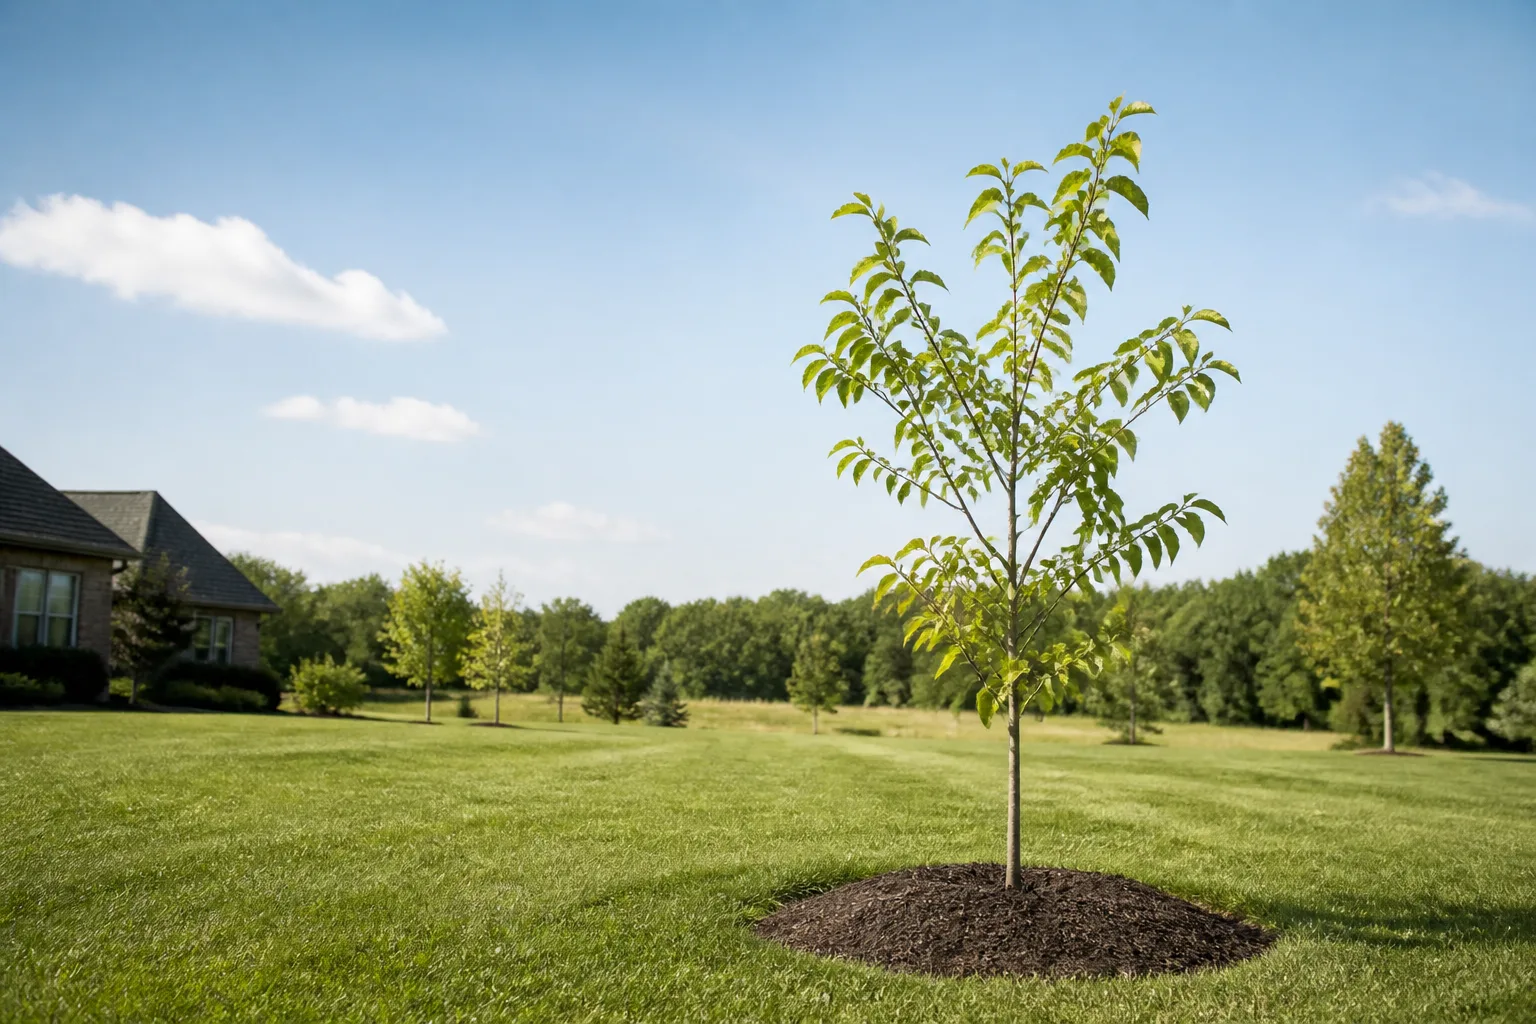
Most landscape oaks need open sky, but exact light, moisture, and soil preferences vary. Avoid flooded or compacted ground unless the species is adapted to it. If the site is too small for the oak you chose, select a smaller native tree rather than relying on pruning to keep a large oak miniature.
Transplant a young oak while it is dormant or during cool weather, before hot summer conditions add stress. Fall after leaf drop or early spring before active growth are common windows, but ground freezing, drought, and local climate can change the best timing. The goal is a moist, workable soil and mild weather, not a date on the calendar.
Transplant without bending the root
Water the pot a few hours before planting. Dig a hole no deeper than the root ball and several times wider, loosening the surrounding soil so new roots can move outward. Set the tree at the same depth it grew in the pot, with the root collar level with the finished soil; burying the stem can cause decline later.
Slide the root ball out carefully and look for circling or kinked roots. Guide the main root straight down and outward-facing roots into the loosened soil; do not fold a long taproot into the bottom of a shallow hole. If the root ball cannot sit naturally without bending, the seedling may be too large for that container or site. Treehugger’s transplanting guidance emphasizes protecting the taproot and placing the root crown at soil level.
Backfill with the soil you removed, breaking up large clods but not turning the planting hole into a pocket of rich compost. Firm the soil gently to remove large air gaps, then water slowly to settle it. Do not bury the trunk flare or pile soil against the stem. A straight, undamaged root system and correct planting depth matter more than fertilizer at planting.
Protect the young oak through its first summers
Spread a two- to three-inch layer of organic mulch in a broad ring to slow moisture loss and suppress weeds. Keep mulch several inches away from the trunk so bark stays dry and visible. A deep mulch pile against the stem can hide chewing damage, hold excess moisture, and encourage roots to grow where they should not.
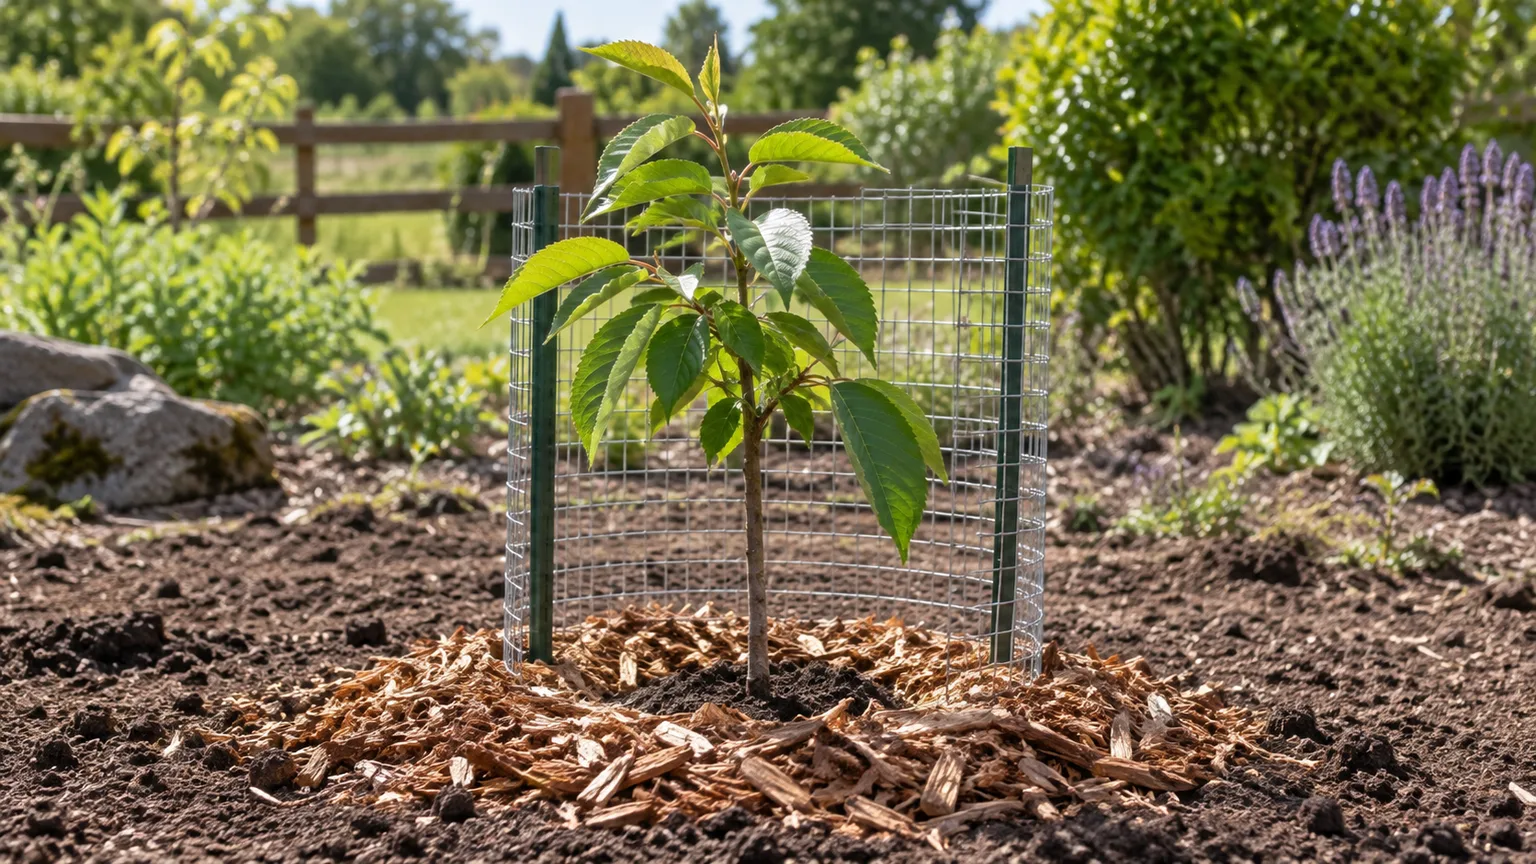
Install a sturdy wire or mesh guard if deer, rabbits, or rodents browse in your area. The barrier should stand far enough from the stem that the tree cannot grow into it, and it should be anchored so animals cannot push it over. Check it several times a year, especially after snow or fast growth; a guard that was adequate for a tiny seedling can become too tight surprisingly quickly.
During the first growing season, check soil moisture regularly and water deeply when the root zone is drying. Newly planted trees need closer attention during heat, wind, and drought than during cool rainy weather. Avoid a rigid watering schedule that ignores soil and rainfall. As the oak establishes, lengthen the interval between deep waterings rather than keeping the surface constantly wet.
Troubleshoot slow or failed germination
If no shoot appears, check the oak’s germination pattern and the season you planted it. A red-oak-group acorn may wait for cold stratification and spring warmth, while a white-oak-group acorn may start a root soon after falling. Drying, embryo damage, waterlogged soil, or a warm indoor winter can also explain failure. Keep a few labeled acorns as backups rather than excavating every pot.
If an acorn turns soft or smells rotten, the mix may be too wet or drainage may be blocked. Let the surface dry slightly, clear the holes, and remove decayed material if you can do so without disturbing healthy roots. If white mold appears on the surface but the acorn remains firm, improve airflow and reduce excess moisture before assuming the seed is lost.
If a seedling wilts, look at the root zone before adding water. A dry pot needs a thorough soak; a heavy, persistently wet pot needs better drainage and less frequent watering. Sudden leaf scorch can follow a move from shelter into sun or wind, so acclimate gradually. Chewed stems or missing acorns point to wildlife; add a mesh barrier and secure the pot or seedbed.
Conclusion
To grow an oak from an acorn, choose a locally suitable species, collect fresh undamaged seed, and keep it from drying while you prepare to sow. Let the species guide its cold treatment, plant it shallowly in a draining seedbed or deep pot, and protect it from animals while the root and shoot establish.
The long-term success comes from handling the taproot gently and choosing a permanent site with room for the mature tree. A handful of acorns may not all sprout, but a careful batch gives you a real chance to raise a strong, locally adapted oak—and teaches you exactly how slowly and deliberately a tree begins.



