How to Make Rainbow Roses with Food Coloring at Home
Learn how to make rainbow roses with food coloring, from choosing a fresh white rose to splitting the stem, setting color, and keeping the bloom fresh.
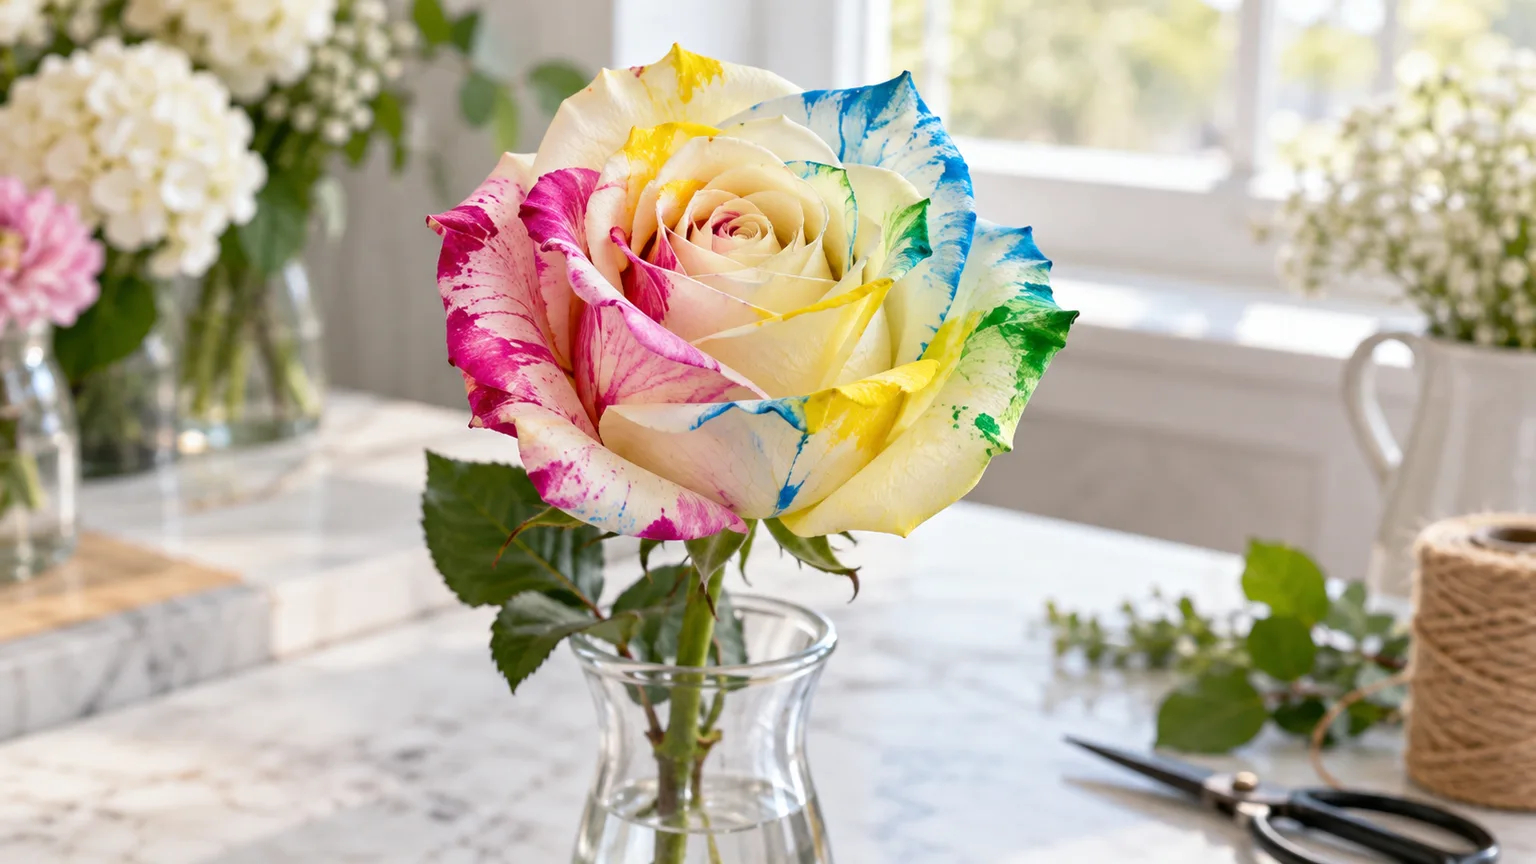
To make a rainbow rose, place the split ends of a fresh white cut rose into separate cups of colored water. The stem carries each dye upward through its water-conducting tissue, leaving irregular colored patches or streaks in different parts of the petals. It is a cut-flower craft, not a way to grow a rainbow-colored rose bush.
The result is usually more subtle and less evenly divided than a florist’s vivid rainbow rose. Use one sturdy bloom for your first attempt, start with three colors if you are worried about splitting the stem, and stop dyeing while the flower still feels firm. The goal is visible color without sacrificing the whole bloom to a long dye bath.
Are Rainbow Roses Grown or Dyed?
Rainbow roses sold as cut flowers are colored artificially. A home maker can draw dye into a cut stem; professional production can use formulated florist dyes and specialized processes. A University of California Cooperative Extension account describes one commercial technique that injects dye into a living stem before harvest, which differs from the simpler split-stem method used at home. In either case, color is added to a flower that already exists; it is not a rainbow rose variety produced by seed or cross-pollination.
Natural striped roses and dyed rainbow roses are different
Roses with natural stripes, splashes, or two-tone petals do exist, and their patterns come from the cultivar. They do not produce a full spectrum of separate colors on one bloom in the way a dyed rainbow rose does. Do not buy “rainbow rose seeds” expecting the pictured flower: a dyed cut rose cannot pass its artificial petal colors to seedlings or a rose cutting.
What to Expect From the Home Dye Method
Food coloring can produce a playful, clearly multicolored flower, but it rarely creates crisp wedges of saturated color. The rose may show colored edges, fine veins, freckles, or a few larger color fields while other petals remain cream. Even two flowers treated at the same time can look different because their stems, freshness, and petal arrangement vary.
The process is an adaptation of a floriculture technique, but the home setup does not reproduce a grower’s formulation or control. Michigan State University’s explanation of rainbow roses describes how the dyed stem is divided into sections and how different parts of the flower receive different colors; it also notes that even dye distribution takes specific know-how. That is why it is sensible to treat the finished bloom as a one-off experiment, not a color-controlled product.
Why white roses show dye more clearly
White or ivory petals give the added dye the clearest contrast. A pale pink rose can work, but its original pigment will mix visually with the new color; a red, purple, or yellow rose is likely to hide the dye or make the result look muddy. The whiter the base, the easier it is to see a faint first result.
Choose a bloom that is fresh and just beginning to open. A very tight bud may not open well after it has been stressed, while a fully open or bruised flower has less time left to display its color. A healthy stem matters as much as the bloom: the water channels need to remain intact from the cut base to the petals.
How a stem split creates separate color zones
Each split section sits in its own color bath, so each can draw up a different dye. Water moves upward through the stem’s xylem, and the cut flower continues to lose water through its petals and leaves; the color rides along that flow into the bloom. The water does not travel to a single, perfectly isolated wedge of petals, though. Rose petals follow a spiral arrangement, and dye movement through the stem and petal veins can overlap; expect a natural-looking mix of streaks and patches rather than a tidy color wheel.
More stem sections give you more color baths but make the lower stem thinner and more fragile. Three colors are a good first trial because they need only three channels. Four colors can create a broader range, but extra slits are not automatically better if they cause the stem to buckle or one section to stop taking up water.
Choose the Rose and Set Up Safe Materials
For one rose, gather a fresh white or pale rose, three or four small narrow glasses, room-temperature water, water-soluble liquid food coloring, a clean sharp knife, and a stable cutting board. Keep a clean vase and a packet of florist flower food nearby for after dyeing. Use the food preservative according to its own label; do not assume it belongs in the colored bath. Set out paper towels and a tray underneath the glasses, particularly if you are working on a wood counter or with children nearby. One rose is enough for a first trial: if the cut sections break or uptake is weak, you have not sacrificed an entire bouquet.
Food coloring is suitable for this home project because it is designed for food use and dissolves in water. That does not make the flower, vase water, or finished arrangement edible. Do not drink the dye water, eat the petals, or use fabric dye, ink, paint, or an oil-based colorant as a substitute. Food coloring can stain hands, cloth, wood, and porous counters, so cover the work surface and use glasses you do not mind tinting. Keep the blade pointed away from your fingers, and wipe spills before the dye dries; a stable board and pre-positioned cups reduce the temptation to hold the stem in one hand while cutting with the other.
Florist absorption dyes are made for coloring flowers and may give stronger or more predictable color. They are not automatically food-safe, so follow the label and keep them away from food preparation areas. If the point is a simple home activity and handling convenience, liquid food coloring is the straightforward choice; if the point is a more saturated result, use a florist product exactly as directed rather than increasing an unknown craft dye. Florist how-to guidance also recommends long-stem white or cream roses, separate colored cups, and a clean recut after the color develops. Treat its long wait as a possible range, not a promise that every rose will remain fresh for a full day or more.
Pick a fresh, partly open white rose
Look for firm petals without brown edges, a straight sturdy stem, and a bud whose outer petals are starting to loosen. If you are buying roses, choose the freshest stems you can find and avoid flowers that have been sitting in warm air or have drooping necks. A long stem gives you room to make the split while keeping the flower head above the vessels.
Let a thirsty rose rehydrate in clean water for a short period before you split it. Remove leaves that would sit below the waterline and any low thorns that could catch your fingers or block a vessel. Do not remove every leaf above the waterline; the rose’s foliage is not what you are dyeing, but keeping the stem uninjured helps it stay upright.
Choose dye and prepare the work area
Set the glasses close together so each stem section can reach its own vessel without being pulled sharply sideways. A small cluster of narrow bud vases, test tubes, or juice glasses works better than wide bowls because the openings keep the split sections separated. Put the flower head somewhere it can stand securely while the dye baths support the lower stem.
Choose colors that remain distinct if their edges overlap. Red, yellow, and blue are familiar choices, but a close mix of two neighboring colors may look more harmonious than putting two very dark or complementary dyes next to each other. If you use four baths, decide which section goes into which color before cutting; once the stem is split, you want to move it into water promptly.
How to Make a Rainbow Rose Step by Step
Prepare the color cups and work surface before making a fresh cut. Stem tissue can dry or bruise while you search for another container, and a split rose is awkward to reposition once the sections are separated. Keep the procedure simple: three baths and a short split are easier to manage than four baths and a long, delicate stem.
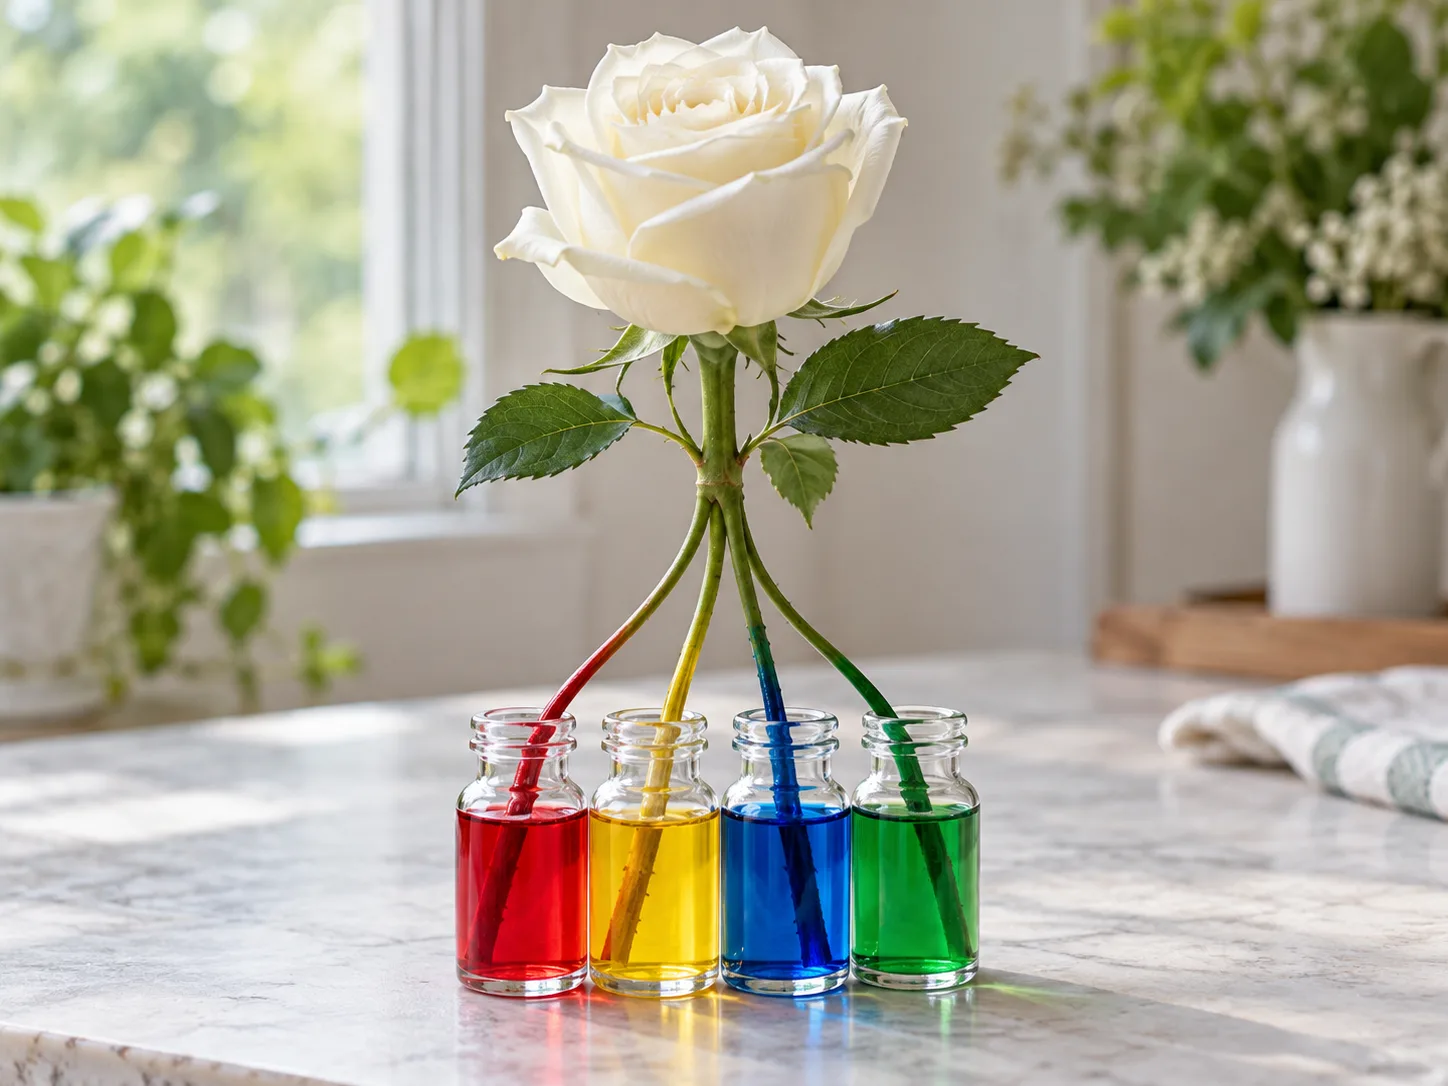
Condition and trim the rose
Wash the glasses and cutting board, then wash your hands and clean the blade. Recut roughly half an inch from the stem base with a sharp angled cut. The slanted surface helps the stem sit clear of the bottom of a vessel, but the bigger benefit is removing the old, possibly crushed end to expose fresh tissue.
Measure about 3 to 4 inches up from the stem base for the split. That is long enough for the sections to reach separate small glasses when they sit close together, while leaving the upper stem intact. If the rose is very short, make a shorter split rather than forcing the stem to stretch between distant containers.
Mix separate color baths
Add about a quarter cup (60 milliliters) of water to each glass, or enough to cover the bottom inch of each stem section. For liquid food color, begin with roughly 8 to 12 drops per cup and look at the water against a white background. The dye should appear strongly colored; add a few more drops if it looks almost clear. Brands differ in strength, so judge by the solution rather than treating the drop count as a guarantee.
Mix one color into each glass with a clean spoon or swizzle stick. Keep the baths separate and label them in your own notes if you are using similar shades. Do not add sugar, bleach, vinegar, or a flower-food packet to intensify the dye; those ingredients change the solution and are not needed for the coloring step.
Split the lower stem into channels
Lay the stem flat on the cutting board with the flower head supported. Starting at the fresh cut end, use the clean sharp knife to divide the lower 3 to 4 inches into three or four narrow sections. For three colors, first split the stem into three branches if the stem allows it; if you are not confident the stem can take that cut, use two colors instead. For four colors, halve the stem and carefully halve each half again.
Cut away from your fingertips and do not hold the stem in the air while pushing a knife toward your hand. Keep the cuts straight, shallow enough to preserve the intact stem above the split, and similar in length so all sections can stand in their glasses. If the stem cracks, bends sharply, or one section is much shorter than the others, stop and use fewer colors rather than trying to tape or force it back together.
Place each channel in its own dye bath
Immediately set one split section into each colored glass. The cups should touch or nearly touch, and the rose should rest with the flower head supported by the upright stem rather than pulling against one narrow strip. Make sure each cut section is submerged and that no two sections have slipped into the same glass.
Check the setup after a few minutes. The stem should remain upright, each colored solution should still cover its section, and the segments should not rub against sharp glass edges. If you have to move a glass, move it gently without bending the stem; do not lift the flower repeatedly to inspect the base.
Check color and stop before the bloom declines
Keep the flower in a cool place with bright indirect light, away from direct sun, warm appliances, and heating or cooling vents. Look for the first tint after a few hours, then check periodically. Some flowers show color quickly while others take longer; a visible change is not the same as a fully saturated result.
For a home rose, checking after about 6 hours and again later the same day is a practical rhythm. Interflora’s rose-dye instructions describe visible color developing over time, with brighter results requiring a longer soak; the exact result depends on the rose and the dye. If the bloom is still firm and you want more color, leave it overnight and inspect it in the morning. Avoid leaving it in the dye bath for a week simply because a stronger color seems possible: prolonged exposure gives the cut stem more time to weaken, and fresh-looking petals are more important than maximum saturation.
Use a simple stopping rule: stop when at least one color is easy to see at arm’s length and the flower still holds its shape. If you need a very saturated display piece for an event, a home food-coloring attempt is a poor substitute for ordering a professionally colored rose in advance. Dye is only one factor in how it looks; the starting bloom, cut quality, water uptake, and time until display all affect the outcome.
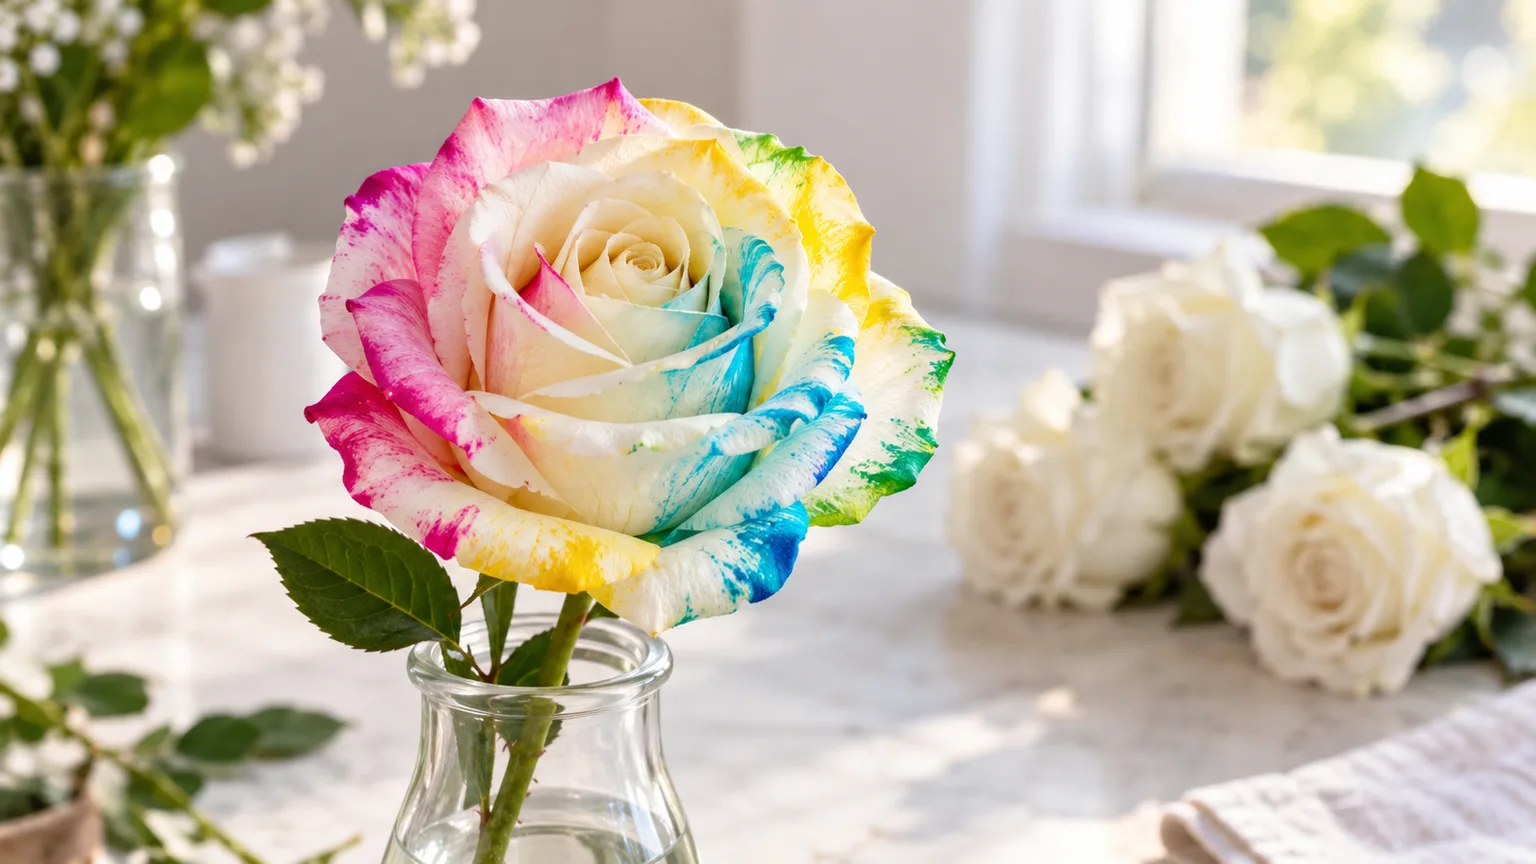
When the color looks strong enough, remove the rose from the glasses and cut above the split area with a clean blade. Do not try to save a split stem for a second round of dyeing. Move the flower directly into clean water while you finish arranging it; the next section covers how to care for it after the dye bath.
Troubleshoot Weak, Muddy, or Uneven Color
Uneven color is normal, but a completely white bloom after many hours usually points to a setup problem or a rose that is no longer moving water well. Before you add more dye or wait another day, check that every split end is actually submerged and that the stem remains firm above the split. A fresh cut and a stronger solution can help only if the flower still has enough life to draw up water.
| What you see | Likely reason | What to try |
|---|---|---|
| No color after several hours | Dye is too dilute, a split end is out of the water, or the rose was already stressed | Confirm the waterline; add a few drops to one bath; if the stem looks fresh, recut and restart once |
| Color only at petal tips | Dye has reached the petal margins first, or the bloom is taking up little water | Give it a few more hours if it is firm; do not chase full saturation for days |
| One color dominates | One channel is more open or drawing water faster than the others | Recheck that all sections reach their own baths; accept that channels do not absorb at identical rates |
| Colors look brown or muddy | Dark colors overlapped, the base rose was already colored, or baths mixed | Use a white rose and lighter, distinct hues next time; keep the cups apart and the channels separate |
| Stem droops or a channel snaps | The split is too long, too many sections were cut, or the rose was dehydrated | Stop dyeing; remove the split portion, make a clean cut above damage, and hydrate in plain clean water |
| Petal edges brown | The bloom was old, stressed, too warm, or left too long in solution | Stop, trim damaged outer petals only if needed, and move it to clean water in a cool room |
Do not respond to weak color by making deeper cuts into a rose that is already in the cups. More slits mean less support, and the stem can split above the intended line or collapse under the bloom. If the first attempt fails, use a fresher rose, fewer colors, a darker water-soluble solution, and a shorter split on the next flower.
Finish the Stem and Care for the Dyed Rose
Once you have removed the split portion, wash the vase with hot, soapy water, rinse it, and fill it with fresh water and florist preservative mixed according to the packet. Penn State Extension’s current cut-flower care guidance recommends a clean vase, flower food used at its stated dilution, removal of leaves below the waterline, and fresh angled stem cuts; it also advises changing the water every few days and keeping arrangements cool and out of direct sun. These basics matter even more after a dyeing project because the rose has had its lower stem cut and divided.
Remove any leaf that would sit underwater, but avoid stripping healthy foliage higher up the stem. Keep the arrangement away from a sunny window, stove, radiator, or fruit bowl, and check the water level daily. Replace cloudy water sooner than planned, rinse the vase, and use fresh preservative at the correct dilution rather than topping old, dirty water with extra food.
Expect the dyed rose’s display life to depend on how fresh it was before dyeing, how clean the equipment stayed, and how much the stem was damaged. Some professionally colored flowers use specialized dye and handling; a home rose has no dependable shelf-life guarantee. If the petals fade or the stem softens, enjoy the color while it lasts and compost or discard the flower rather than trying to revive it with stronger dye.
Conclusion
You can make rainbow roses at home by splitting the base of one fresh white cut rose and putting each section into a different food-coloring solution. A short split, three separate baths, a sturdy partly open bloom, and a cool place give you the best balance between visible color and a flower that can still stand upright.
The color will probably be imperfect: some petals may stay ivory, and the dye may collect in streaks or along edges. That unevenness is part of the home method, not evidence that a naturally rainbow-colored rose is growing. If you want to grow roses, choose a genuine striped or bicolor cultivar; if you want the rainbow effect, dye a cut flower and treat it as a short-lived arrangement.



