8 Reasons Indoor Plant Leaves Turn Yellow
Why do indoor plant leaves turn yellow? Learn how to read the pattern, check roots, separate watering problems from pests, and choose the right fix.
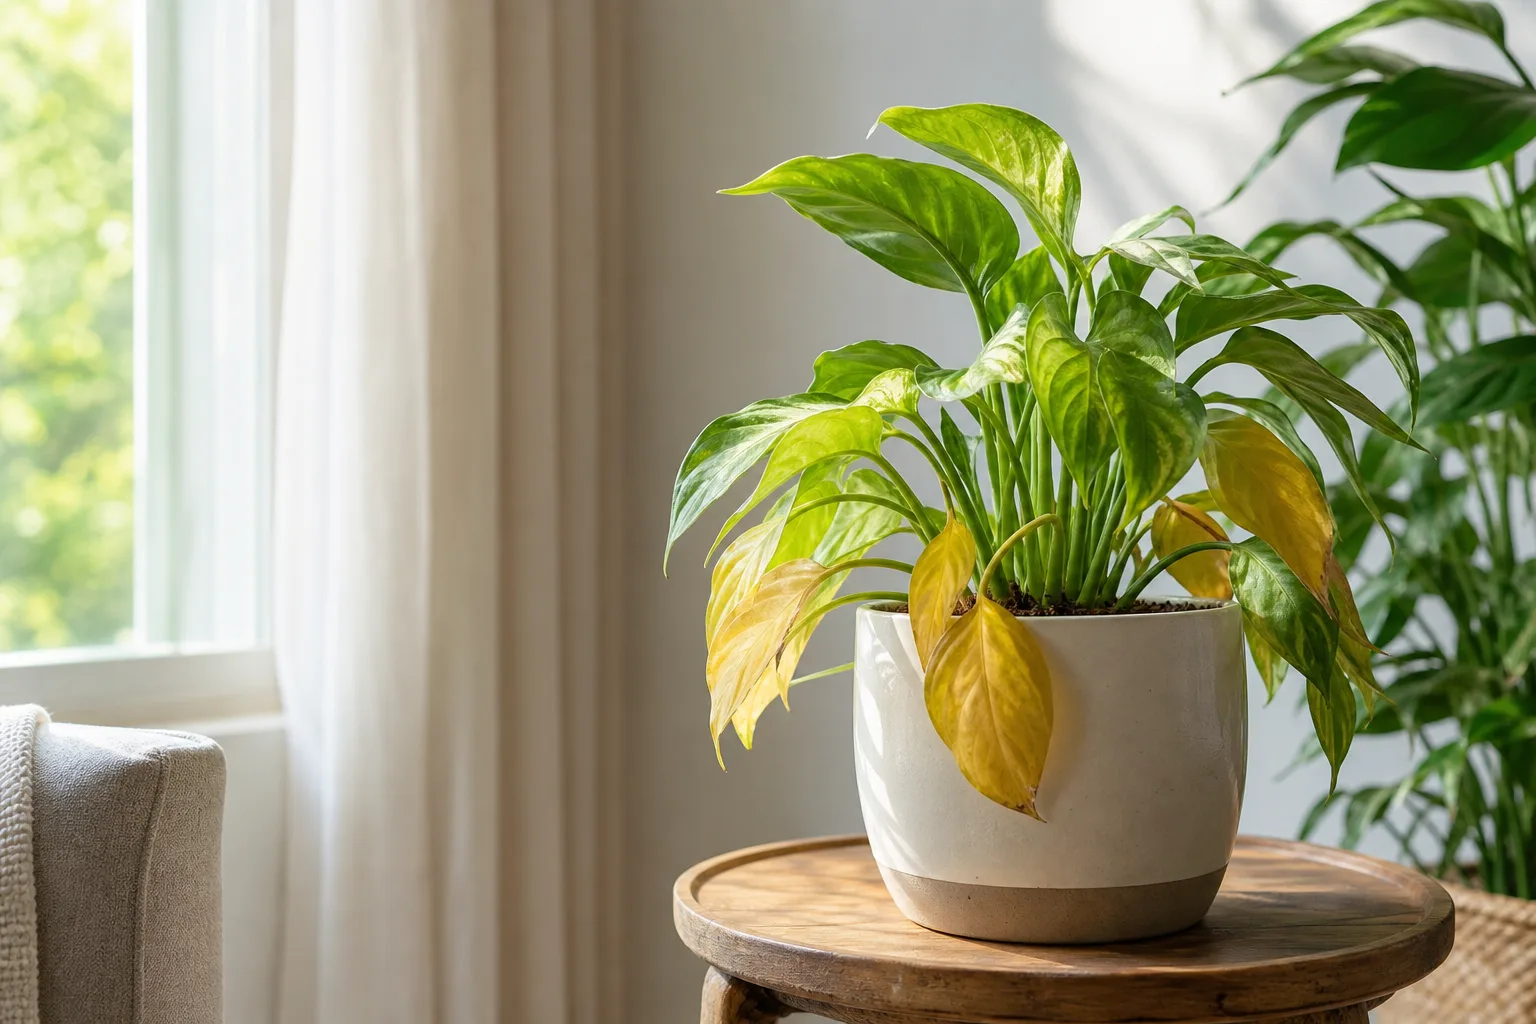
Before you water a yellowing houseplant, check whether the pot is already wet. A plant with a light container and dry mix may need a thorough drink; a plant with soft leaves and heavy, damp soil may have roots that can no longer function normally. Both can look wilted, but adding water to the second plant makes the problem worse.
Yellow leaves are a stress signal, not a diagnosis. The most useful clues are where the yellowing starts, whether the tissue is soft or crisp, how quickly the color is spreading, what the soil and roots are doing, and what changed recently. Use those clues together to choose one sensible correction instead of stacking fertilizer, repotting, extra humidity, and a new window location on the same day.
Yellow leaves are a clue, not a diagnosis
Yellowing is often called chlorosis, a loss or reduction of green chlorophyll in leaf tissue. The RHS explains that chlorosis can come from natural aging, nutrient problems, pests, diseases, waterlogging, drought, cold, or other cultural conditions; the visible color alone cannot identify which one is responsible. (Royal Horticultural Society: Chlorosis)
That is why the position of the yellowing matters. One old leaf at the base that fades gradually while the centre keeps producing healthy foliage is a very different case from several new leaves turning yellow in a week. Fine speckling, webbing, sticky residue, dark lesions, or distorted growth also change the diagnosis before you touch the watering can.
Read the pattern before you treat
Use four observations as a quick filter. Leaf position tells you whether the plant is sacrificing old tissue or struggling to support new growth. Texture separates soft, water-stressed tissue from dry, crispy injury. Distribution distinguishes uniform fading from stippling or patchy lesions. The root zone tells you whether the plant can actually take up water and nutrients.
Uniform yellowing across older leaves with wet soil points toward prolonged moisture or damaged roots. Dry mix, a very light pot, curling leaves, and crisp edges point toward drought or excessive water loss. Yellow tissue between green veins suggests chlorosis related to nutrient availability or root-zone chemistry, but it is not proof that a particular nutrient is missing. Tiny dots, webbing, cottony clusters, or sticky film make pests more likely.
The three-minute check that prevents the wrong fix
Start with the least disruptive inspection. Feel the potting mix several centimetres below the surface near the edge of the container, lift the pot to judge its weight, and look for a drainage hole and standing water in the saucer or cachepot. Surface dryness is not enough evidence; the lower half of a large pot may still be saturated.
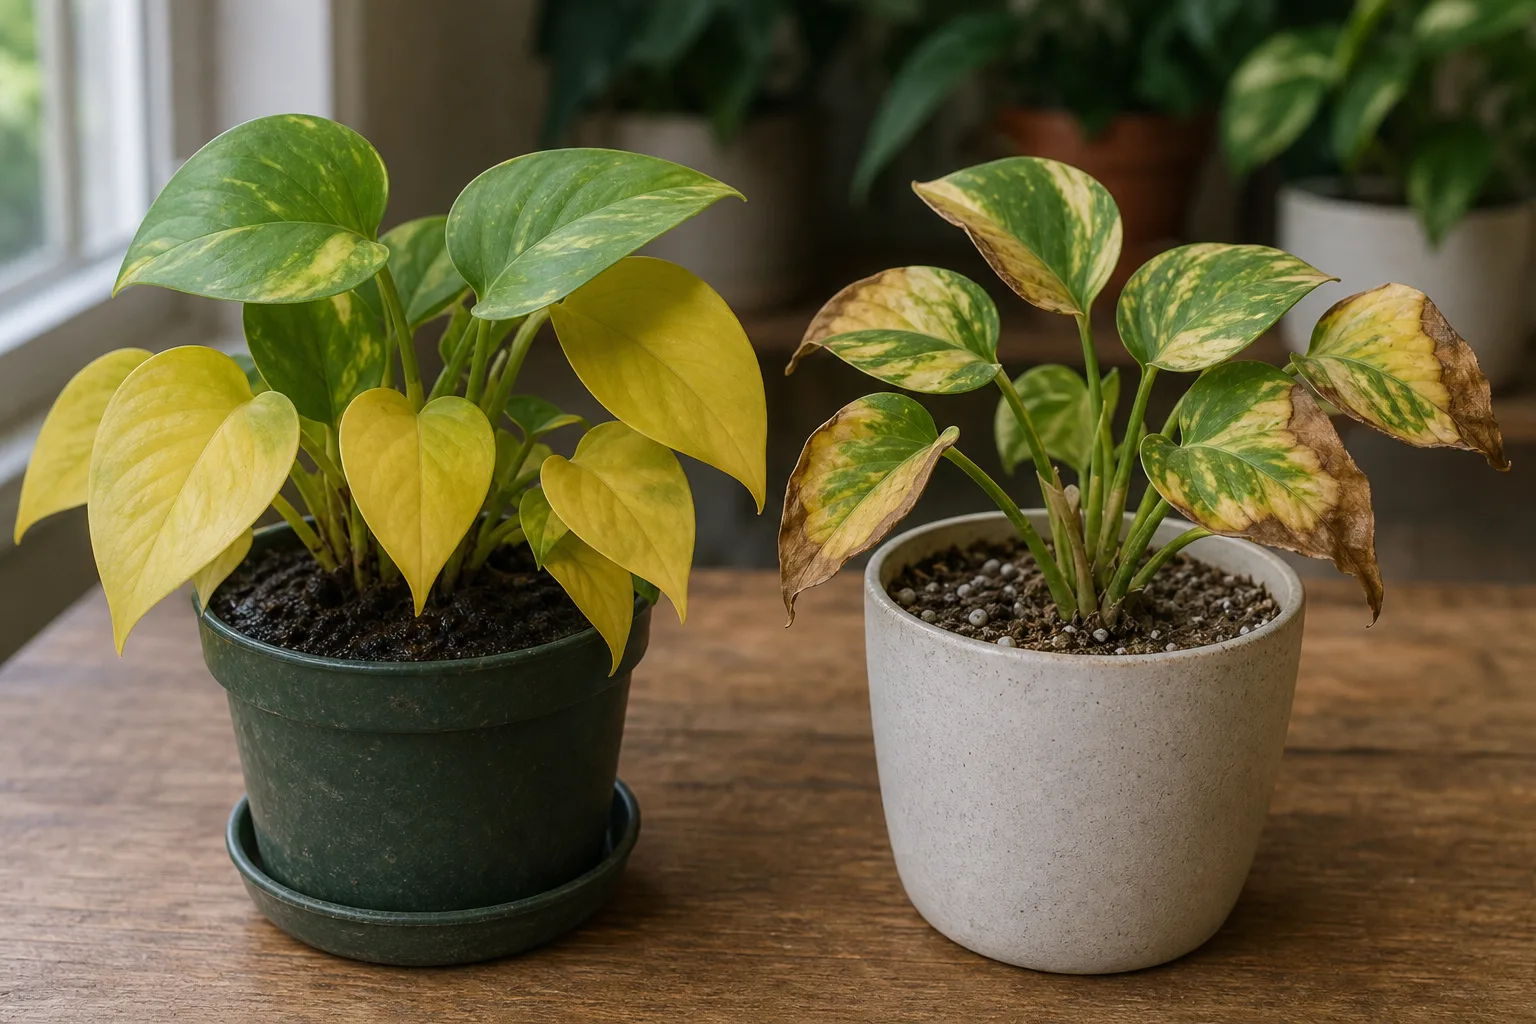
Then inspect the plant from top to bottom. Look at the newest leaves, the oldest leaves, stem bases, and leaf undersides. Use a magnifying glass or tap a suspect leaf over white paper if you see stippling. Note whether the plant is beside a heater, air-conditioner, cold window, open door, or recently moved into stronger light.
| What you see | What to check next | Safest first move |
|---|---|---|
| One oldest lower leaf yellowing; new growth is green | Normal moisture and firm stems | Watch for natural aging |
| Several soft yellow leaves; pot stays heavy | Drainage, roots, and runoff | Pause watering and inspect the root zone |
| Dry, crumbly mix; pot feels unusually light | Whether the root ball is fully dry or water-repellent | Rehydrate slowly, then let it drain completely |
| Bleached or tan areas on the window-facing side | Direct sun and heat through glass | Filter the light or move back gradually |
| Fine stippling, webbing, sticky film, or insects | Leaf undersides and new growth | Isolate the plant and identify the pest |
| Yellow tissue between green veins | Roots, pH, water quality, and feeding history | Correct the growing system before adding nutrients |
If the soil is wet and the plant is wilting, do not use wilting as proof that it needs water. Missouri Botanical Garden notes that waterlogged soil displaces oxygen, damaging roots and reducing their ability to supply water and nutrients; yellowing and loss of vigor can follow. (Missouri Botanical Garden: Overwatering)
1. Overwatering and oxygen-starved roots
Overwatering is usually a duration problem: the mix remains wet long enough that roots are deprived of air. It can happen even when you rarely water if the pot is oversized, the mix is compacted, the drainage hole is blocked, or the plant sits in runoff. The plant may then wilt because damaged roots cannot move water upward, which creates the confusing combination of wet soil and drooping yellow leaves.
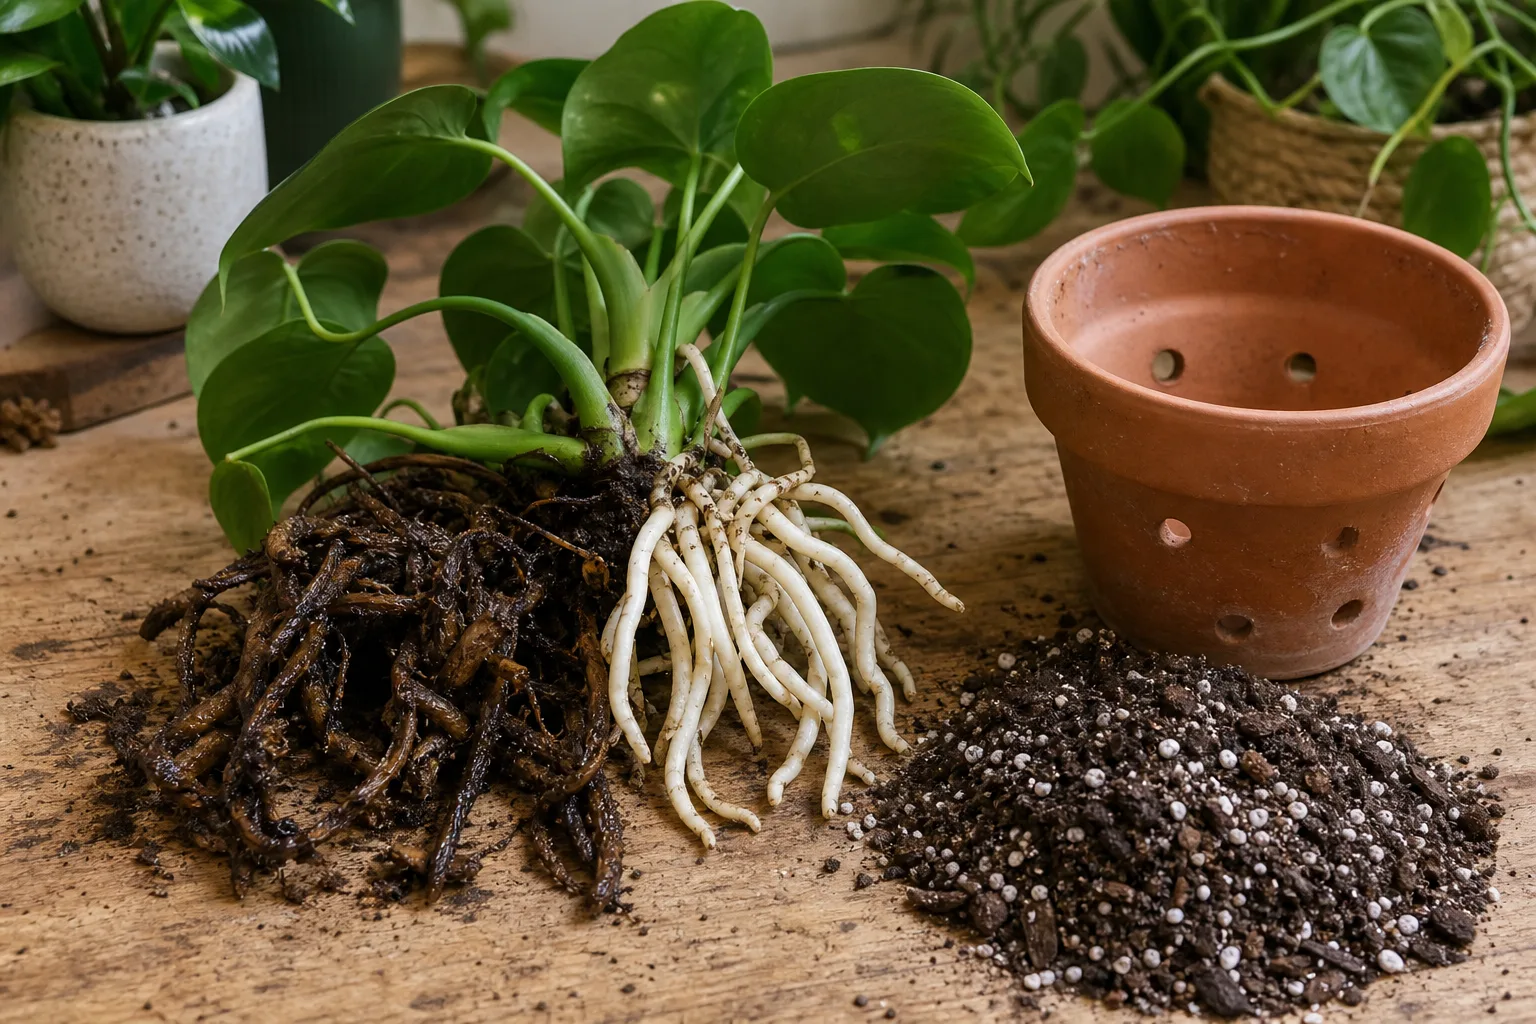
Look for several leaves declining together, a pot that stays heavy for days, slow or stalled growth, a sour smell, fungus gnats, or a soft stem base. Tip the plant from its container only when these clues justify an inspection. Firm pale roots are reassuring; brown, black, soft, or collapsing roots support a root-rot diagnosis, although a home inspection cannot identify every pathogen.
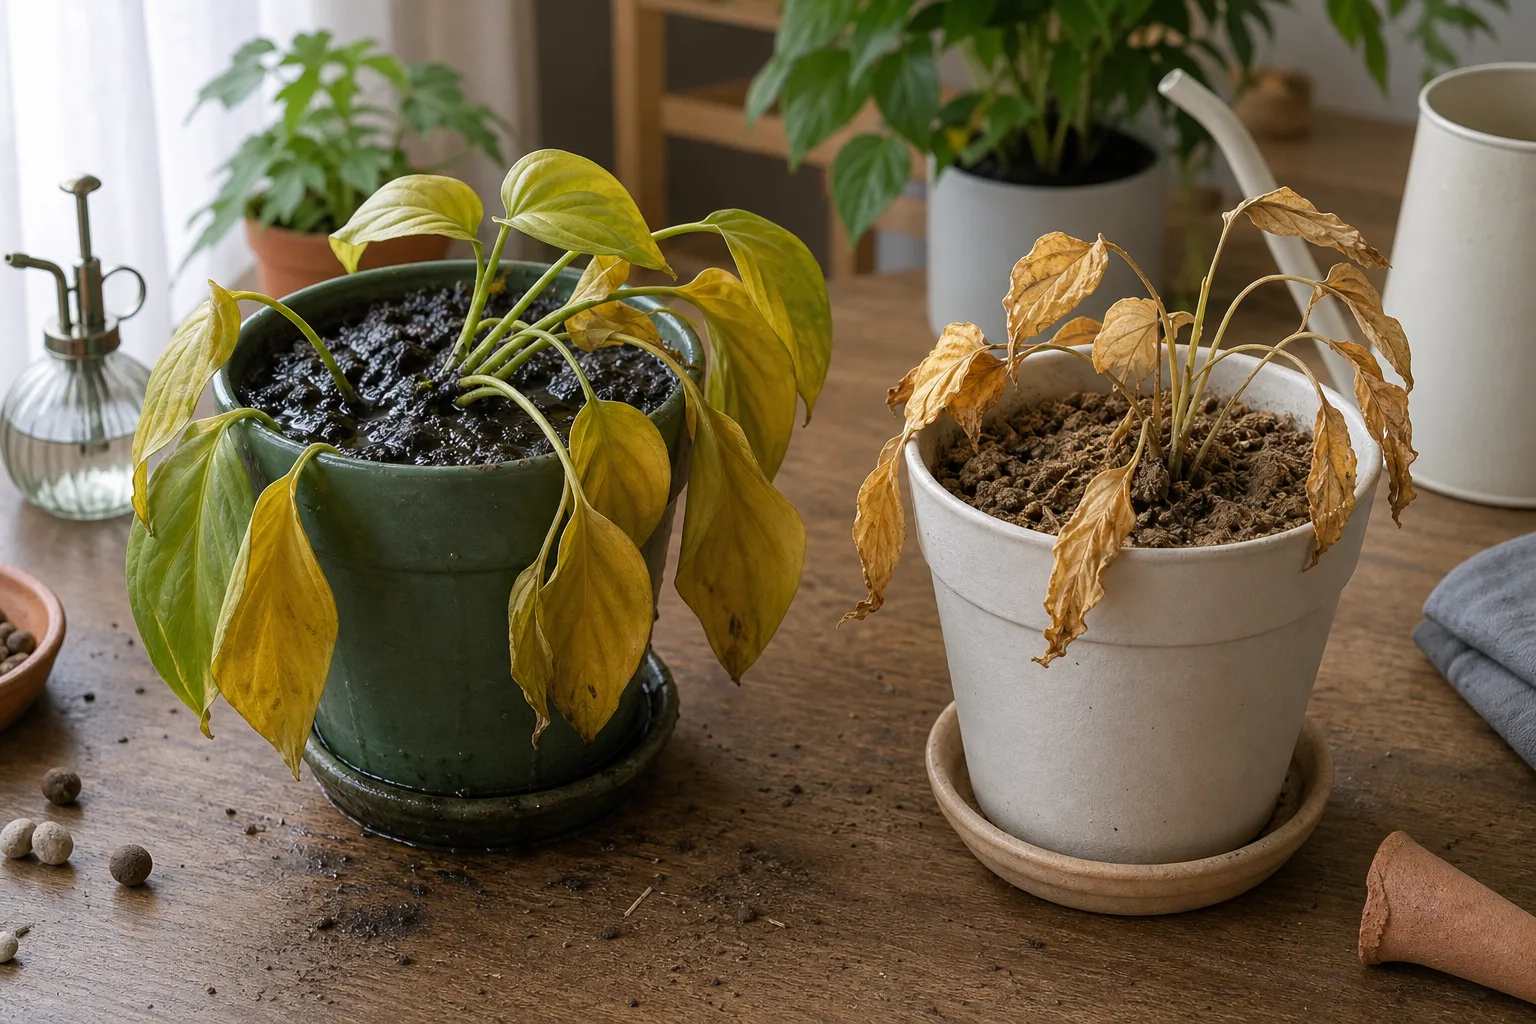
If only part of the root system is damaged, remove loose wet mix, trim soft roots with a clean blade, and repot into fresh, airy mix in a clean pot with a functional drainage hole. Keep the new pot close to the size of the remaining root ball. Do not put a small root system into a much larger container, bury the stem or crown, or leave the nursery pot standing in a full cachepot.
After repotting, water enough to settle the mix, then allow the container to drain. Avoid both extremes: a recovering plant should not be left bone dry, but it also should not be kept constantly moist because you are afraid of another wilt. Judge the interval by the mix, pot weight, light, temperature, and plant species rather than a universal weekly schedule.
2. Underwatering or a dried-out root ball
A dry root ball can cause yellow leaves, especially after a missed watering, a heat wave, a brighter window move, or a pot that has become tightly packed with roots. Leaves may curl, droop, feel thin or papery, and develop crispy brown margins. The container feels light, and the mix may pull away from the sides or become so water-repellent that water runs down the gap and exits without wetting the centre.
Rehydrate slowly. Pour water over the surface in stages, pause so it can soak in, and continue until excess exits the drainage hole. If the mix has shrunk away from the pot, set the container in a shallow basin for a short soak, then lift it out and let it drain fully. Never leave an ordinary houseplant sitting in water as a routine substitute for correcting the root ball or watering method.
The RHS associates drought-related chlorosis with later browning and leaf loss, while its houseplant guidance stresses that brown or yellow symptoms need to be interpreted with other signs of ill health. (RHS: Leaf damage on houseplants) If the plant perks up after watering but the mix becomes bone dry again unusually quickly, investigate roots, pot crowding, direct heat, and the container size rather than simply watering more often.
Do not respond to drought by keeping the soil permanently wet. A dry spell followed by a saturated pot is a common cycle: the plant loses roots during the wet phase, then becomes even less able to use water during the next dry phase. Correct the watering method and the container system together.
3. Poor drainage, oversized pots, or compacted mix
Sometimes the amount of water is reasonable but the pot system is not. A blocked outlet, a sealed decorative pot, dense peat that has collapsed, or a container much larger than the root ball can leave the lower zone wet while the surface appears dry. The correction is to restore air and drainage, not to set a longer calendar reminder.
Check that the inner pot has an open hole and that water can leave freely. After watering, lift the inner pot from its cachepot and empty collected runoff. A gravel layer at the bottom of a sealed container does not create a drainage outlet; excess water still remains in the root zone. Use a porous, appropriately sized mix and avoid packing it down so firmly that air spaces disappear.
Oversized pots deserve special attention after a repot. More compost around a small root ball holds moisture longer, making the plant look thirsty while roots decline. Repot only when roots are genuinely crowded, the mix has broken down, or the container no longer supports the plant. When you do repot, move up modestly and keep the crown at its original depth.
Root-bound plants create a different problem: water may run around a dense root cylinder, and the mix can dry quickly. Tease or loosen only roots that need it; do not aggressively shred a healthy root ball because a few roots circle the container. Follow the evidence you find rather than repotting every yellowing plant by reflex.
4. Too little light or a sudden light change
Light influences both the plant’s energy production and how quickly its potting mix dries. In a very dim corner, growth slows, new leaves may be smaller or paler, stems may stretch toward a window, and the soil can stay wet longer because the plant is using less water. Over time, lower leaves may yellow and drop.
Too much light creates a different pattern. Bleached, washed-out, tan, or crisp yellow-brown patches that are strongest on the window-facing side suggest direct sun or heat through glass. A sudden move from low light into intense afternoon sun can scorch foliage even if the plant was healthy the day before.
Move a dim plant toward brighter filtered light in stages. For harsh sun, use a sheer curtain or increase the distance from the glass. Recheck watering after the move: a brighter position may dry the pot faster, while a darker position may make the old watering rhythm excessive. Turning a pot occasionally can even out growth, but it cannot compensate for a fundamentally unsuitable light level.
Avoid using a grow light as a blanket fix before checking moisture and roots. A lamp that raises leaf temperature or runs too close can increase water loss and add another stressor. Follow the manufacturer’s distance and timing guidance, and make changes gradually.
5. Natural aging of older leaves
One old lower leaf can yellow as the plant retires it. This is most likely to be normal when the change is slow, the leaf is near the base, the plant is otherwise firm, and the centre or newest growth remains green and properly formed. Evergreen houseplants shed old leaves too; not every yellow leaf is an emergency.
The RHS distinguishes the occasional aging lower leaf from large-scale yellowing, which can signal excess or insufficient water, overpotting, shade, cold, drafts, or water-quality and nutrient issues. (RHS: Chlorosis) Count affected leaves over several days and take a photo from the same angle. A single finished leaf is a different trend from yellowing that advances upward or reaches new growth.
Do not prune healthy leaves simply because they are not perfect. A partly green leaf is still contributing energy while you investigate. If the plant is steadily producing healthy new growth and only the oldest leaf fades, let the plant finish the process or remove the leaf once it is fully yellow and easy to detach cleanly.
6. Nutrient deficiency, high pH, or salt buildup
Nutrient deficiency is possible in an old, depleted mix, but it is one of the easiest causes to misdiagnose. Roots damaged by wet soil cannot absorb nutrients normally, and high pH or accumulated soluble salts can make nutrients unavailable even when the container contains fertilizer. Adding more feed to that situation can burn roots and intensify yellowing.
Look for a consistent pattern across multiple leaves and a history that supports it: no recent feeding, exhausted or degraded mix, weak growth, and sensible moisture and light. The RHS notes that nitrogen deficiency tends to produce general yellowing on older leaves, while iron deficiency more often affects young leaves; interveinal yellowing can involve iron, manganese, or magnesium. These are clues, not a home diagnosis. (RHS: Chlorosis)
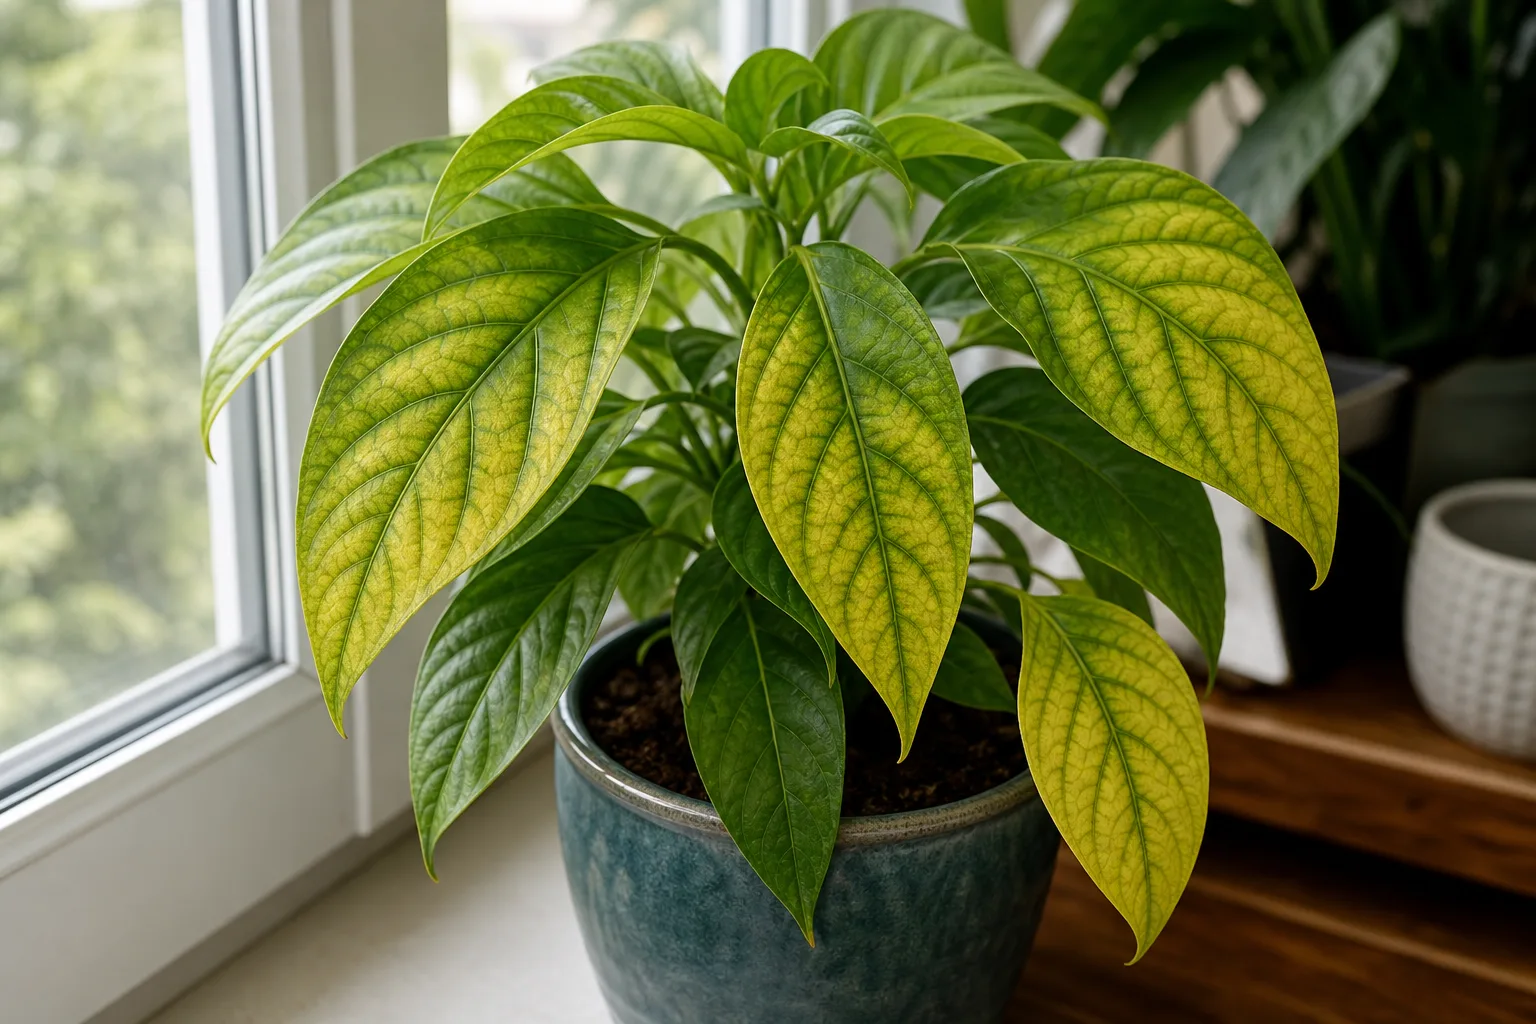
Match chlorosis pattern to the likely cause
Use the following as a decision aid only after checking roots and drainage:
- Older leaves uniformly pale: consider nitrogen availability, natural aging, low light, or root stress.
- Young leaves yellow between green veins: consider iron availability, high pH, or damaged roots that cannot take up nutrients.
- Edges yellow or later turn brown: consider potassium-related issues, salt injury, drought, or scorch.
- White crust on the mix with brown tips: consider soluble salts or mineral-heavy water.
If the plant was recently fertilized, stop feeding and check whether the pot drains freely. A freely draining pot can be flushed with plenty of clean water so excess salts leave with the runoff; empty the saucer afterward. Do not flush a sealed container and call the problem solved. Replace or repot the mix if the container has no outlet.
Use a balanced houseplant fertilizer at the label rate only when the plant is stable and actively growing. Do not add Epsom salt, coffee grounds, garden lime, or a concentrated micronutrient product because a leaf color looks unusual. Soil testing or a local extension diagnostic service is more useful than guessing when the pattern persists.
Hard water may contribute when yellowing comes with brown tips, pale margins, or crusty deposits, especially in plants known to be sensitive to mineral accumulation. Softened water is not automatically a better choice because some systems add sodium. If practical, compare room-temperature filtered or rainwater with your normal water while keeping all other care steady.
7. Pests that drain or scar leaves
Pests usually create a pattern rather than a smooth fade across an entire plant. Inspect the undersides of leaves, petioles, stems, and the newest growth for fine webbing, moving specks, cottony clusters, scale-like bumps, sticky honeydew, silvery scarring, or whiteflies that flutter when disturbed.
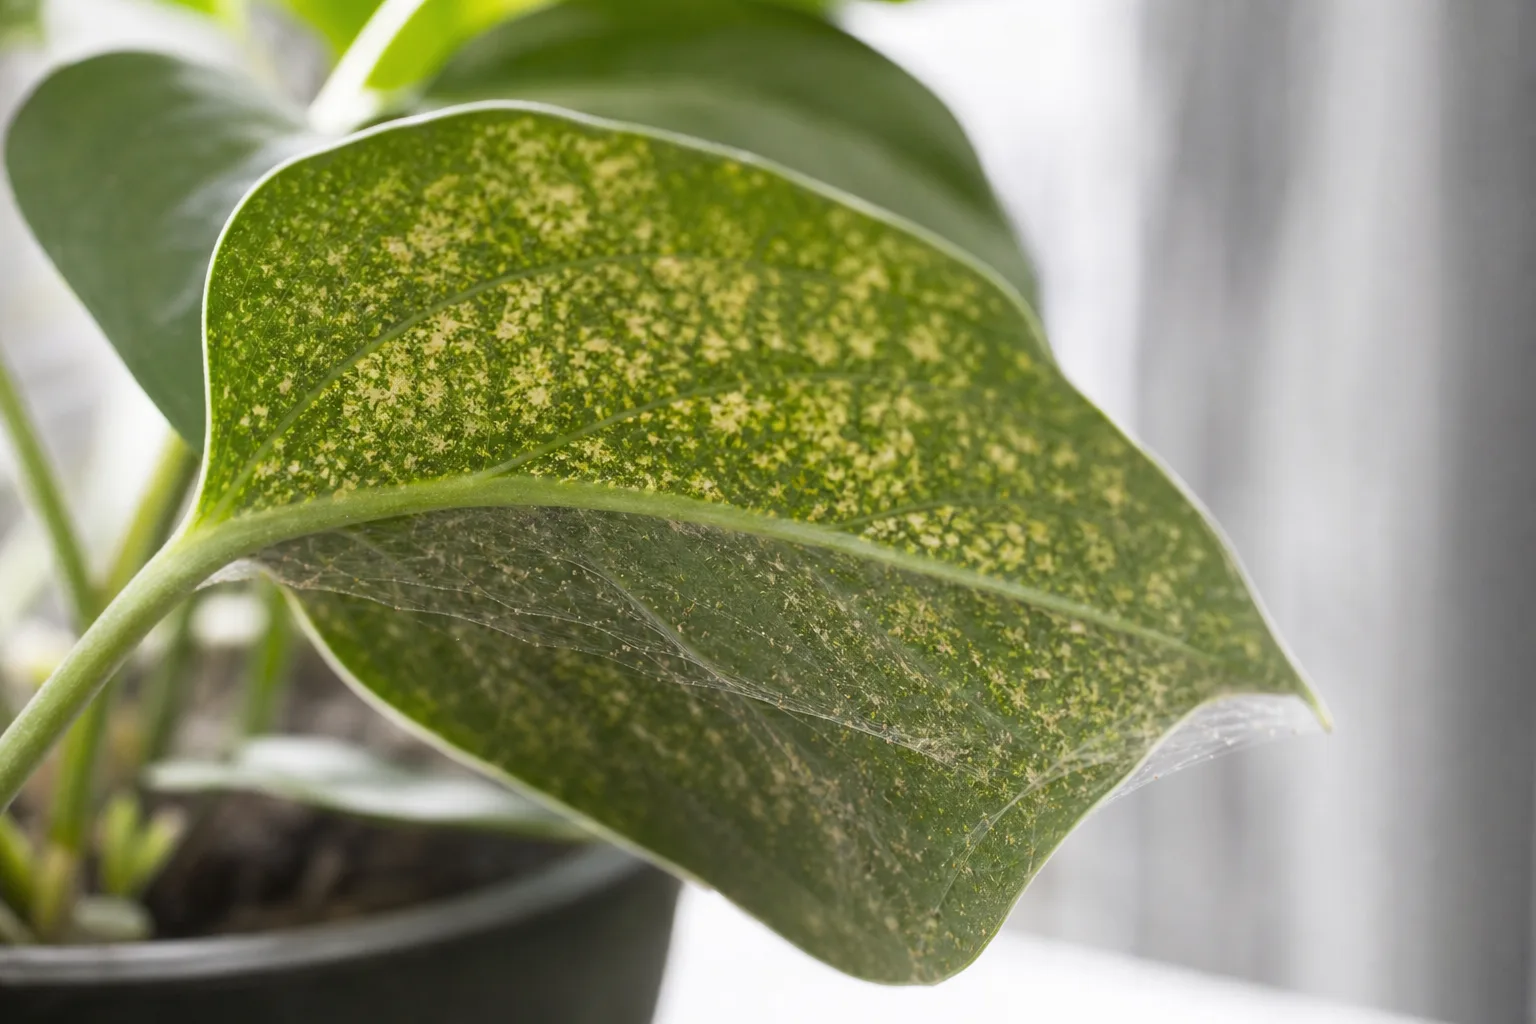
Spider mites feed on leaf undersides and can create fine yellow or translucent stippling; heavy infestations can yellow and drop leaves. Fine Gardening recommends tapping a suspect leaf over white paper to spot moving mites and emphasizes covering both upper and lower leaf surfaces when using a labelled contact treatment. (Fine Gardening: How to Handle Common Houseplant Pests)
Aphids, mealybugs, scale, thrips, and whiteflies can weaken foliage in different ways. Fungus gnats are often a clue that soil has stayed too wet; adults are a nuisance, while larvae can feed on roots and contribute to stunted growth. Epic Gardening’s houseplant-pest guidance similarly connects fungus gnat reproduction with moist soil and recommends using sticky traps for monitoring rather than treating the traps as a complete cure. (Epic Gardening: 8 Common Houseplant Pests)
Isolate a suspect plant before you start treatment. Confirm the pest, rinse or wipe foliage when the plant and setting allow, and use only a product labelled for indoor plants and the identified pest. Contact products require thorough coverage and often repeat applications because hidden stages or newly hatched pests can survive the first pass. Do not spray neem oil, soap, or any pesticide on a uniformly yellow plant with no pest evidence; chemical injury adds a second problem without fixing the first.
8. Temperature stress, low humidity, or drafts
Indoor plants can yellow after a sudden change even when their normal care is good. Cold glass, an air-conditioner stream, an exterior door, a radiator, or a hot sunny window can change leaf temperature and water loss faster than roots can adjust. Draft injury may be concentrated on the exposed side, while dry air more often appears as crisp margins and tips before broader decline.
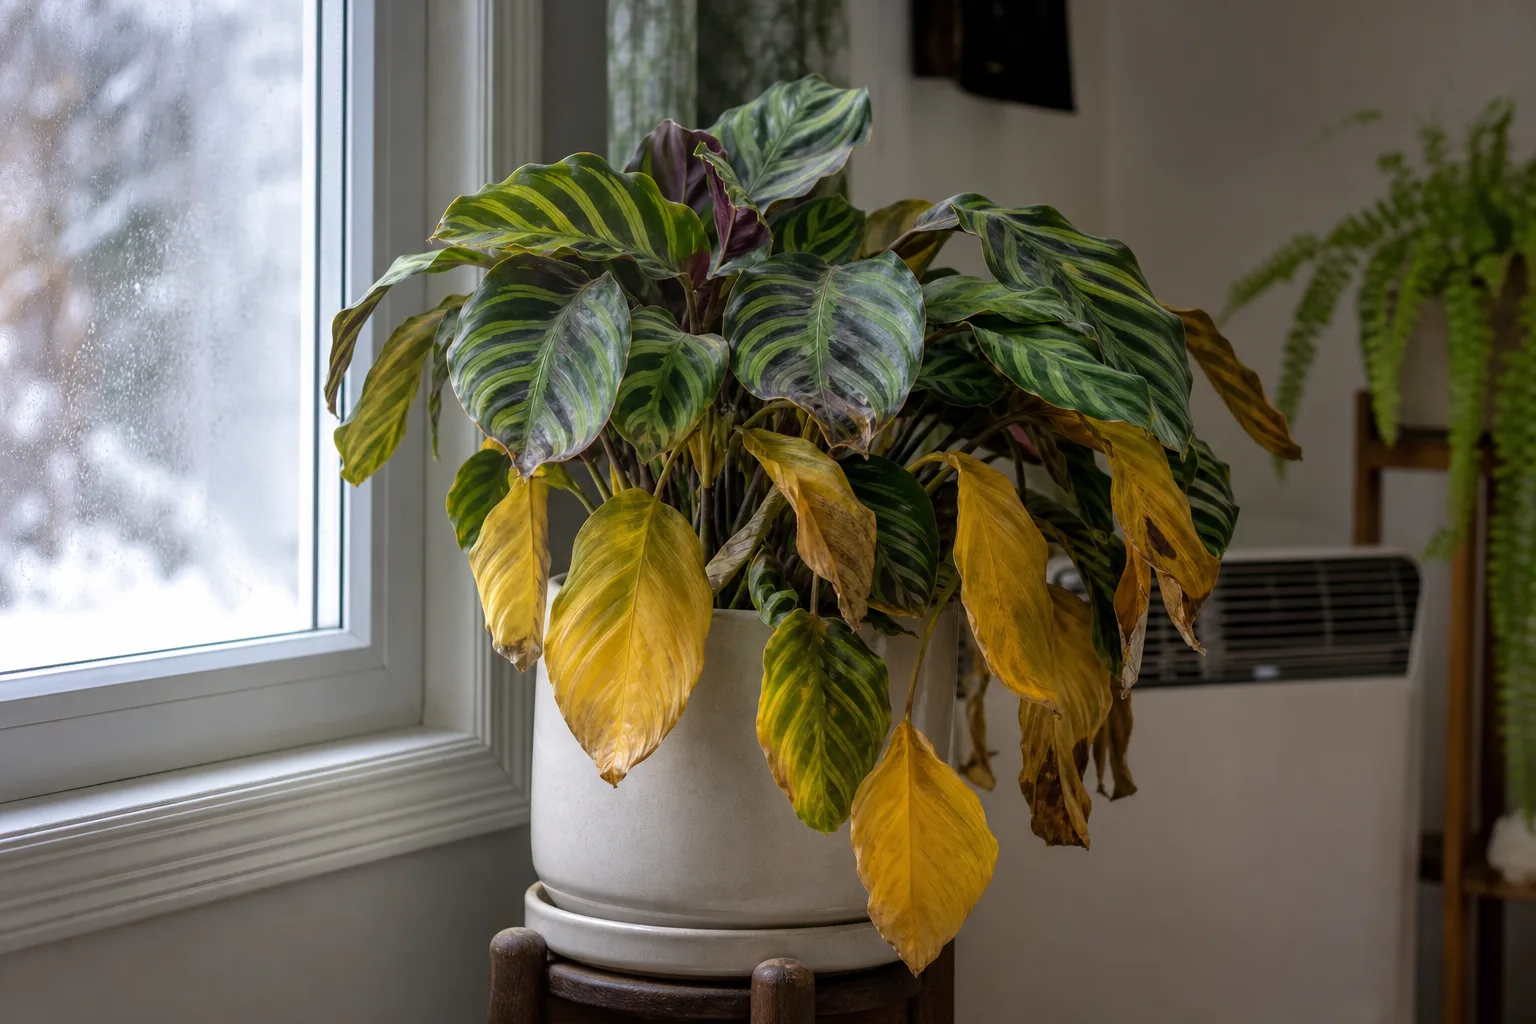
Move the plant away from direct blasts and keep leaves from touching cold glass. Grouping plants or using a properly arranged pebble tray can modestly raise local humidity; the water should sit below the pebbles, with the pot above the waterline. A humidifier is more consistent in a very dry room, but humidity cannot repair rotted roots or replace proper watering.
The RHS notes that low humidity increases transpiration and can leave plants at risk of wilting when water leaves leaves faster than roots can replace it. It also associates houseplant yellowing with cold, sudden temperature drops, drafts, shade, and watering problems. (RHS: Leaf damage on houseplants) Aim for stability rather than a perfect number: avoid abrupt moves, hot-cold swings, and permanently stagnant, wet air.
Could a virus or disease be causing yellow patches?
Yes, but disease should be considered from the pattern and accompanying signs, not assumed because a leaf is yellow. Irregular mosaics, rings, streaks, sharply bounded lesions, spreading dark spots, distorted new growth, dieback, or a collapsing stem deserve more caution than uniform fading on an old leaf.
The RHS describes viral chlorosis as variable, often showing mottles, mosaics, streaks, ringspots, or line patterns; other diseases may produce fungal growth or leaf spots near the yellow tissue. Root diseases usually come with root decay, wilting, loss of vigor, or dieback as well. (RHS: Chlorosis) A single photograph cannot distinguish a virus from chemical injury, nutrient lockout, or several environmental problems.
Quarantine a plant with a suspicious spreading pattern. Use clean tools, avoid sharing water or potting mix, and do not propagate from symptomatic tissue until you have a plausible diagnosis. If the plant continues to decline after moisture, light, and pest checks are corrected, contact a local extension diagnostic service or experienced plant professional rather than cycling through random treatments.
A recovery plan for the next seven days
Today: Count and photograph the yellow leaves, noting whether they are old or new and whether the pattern is uniform, spotted, or patchy. Check moisture below the surface, lift the pot, empty runoff, inspect drainage, and look under leaves. If the mix is wet and roots appear compromised, pause watering; if it is genuinely dry, rehydrate slowly and drain completely.
Days two through four: Make one main correction supported by your evidence. Improve drainage or repot if roots and container conditions justify it; move the plant to bright filtered light; protect it from a draft; or isolate and treat a confirmed pest. Do not change water, light, fertilizer, pot, humidity, and soil all at once because you will not know which change helped or harmed.
Days five through seven: Recheck pot weight, soil moisture, leaf texture, pest evidence, and newest growth. Existing yellow tissue may continue to fade because that damage already happened. The useful recovery signals are a slower spread, firmer stems, a root zone that dries at a reasonable pace, and new leaves that open normally.
If the stem base is soft, most roots are dark and mushy, multiple plants show the same spreading pattern, or decline continues despite correct moisture and drainage, stop experimenting. A local diagnostic service can examine roots, pathogens, or growing-medium chemistry more reliably than an online symptom match.
How to remove yellow leaves without slowing recovery
Fully yellow, brown, papery, or confirmed diseased leaves will not return to normal green. Once you have addressed the likely cause, cut the leaf stalk near its base with clean scissors or pruners. Cleaning the tool between plants matters when pests or disease are possible.
Leave a leaf that is still mostly green unless removing it is necessary for confirmed pest or disease control. Removing a large amount of green foliage at once reduces the plant’s ability to rebuild roots and leaves. Pruning changes the appearance immediately, but it does not fix the root-zone, light, or pest problem that caused the yellowing.
Do not expect old yellow leaves to reverse overnight. A stable plant may keep a damaged leaf for a while before shedding it. Judge success by the next growth cycle and by whether the decline stops, not by forcing every yellow leaf back to green.
Prevent the next round of yellowing
Build a check-based routine instead of watering on a fixed weekday. Before watering, feel the mix at a meaningful depth and lift the pot; after watering, let it drain fully and empty the saucer. Adjust the interval when the season, light level, temperature, pot size, or growth rate changes.
Keep each plant in light that matches its species, protect foliage from strong hot glass and direct vents, and leave enough space for gentle airflow. Use a pot with a working drainage hole and a mix that stays airy. Repot because roots, mix, or container conditions call for it—not because one leaf turns yellow.
Inspect new plants before placing them with the collection and look under leaves during routine watering. Savvy Gardening’s houseplant pest guidance emphasizes inspection of new arrivals and good light and watering habits as practical ways to reduce pest problems. (Savvy Gardening: Types of houseplant bugs) Wipe broad leaves when dust accumulates, but do not rub delicate or hairy leaves aggressively.
Keep a simple note of watering, feeding, repotting, and moves. That record turns a vague symptom into a pattern: yellowing after every winter move points toward light or temperature; yellowing after every watering points toward drainage or root stress; stippling that appears on several plants points toward a pest inspection. The better the record, the smaller the correction you need to make.
Conclusion
Indoor plant leaves turn yellow for many reasons, but the color is not the whole message. Read the plant from roots to newest growth: check moisture and pot weight first, then drainage, light, leaf pattern, pests, water quality, nutrients, and recent environmental changes.
When the soil is wet, protect the roots from more water. When it is truly dry, rehydrate thoroughly and change the routine that allowed the root ball to dry. Remove fully damaged leaves only after the cause is being corrected, then watch for the most reliable sign of recovery: a plant that stops losing healthy tissue and produces new growth with normal color and form.



