How to Propagate Plants Using Stem Cuttings
Learn how to propagate plants using stem cuttings: choose the right node, prepare the stem, root it in water or soil, and pot it up safely.
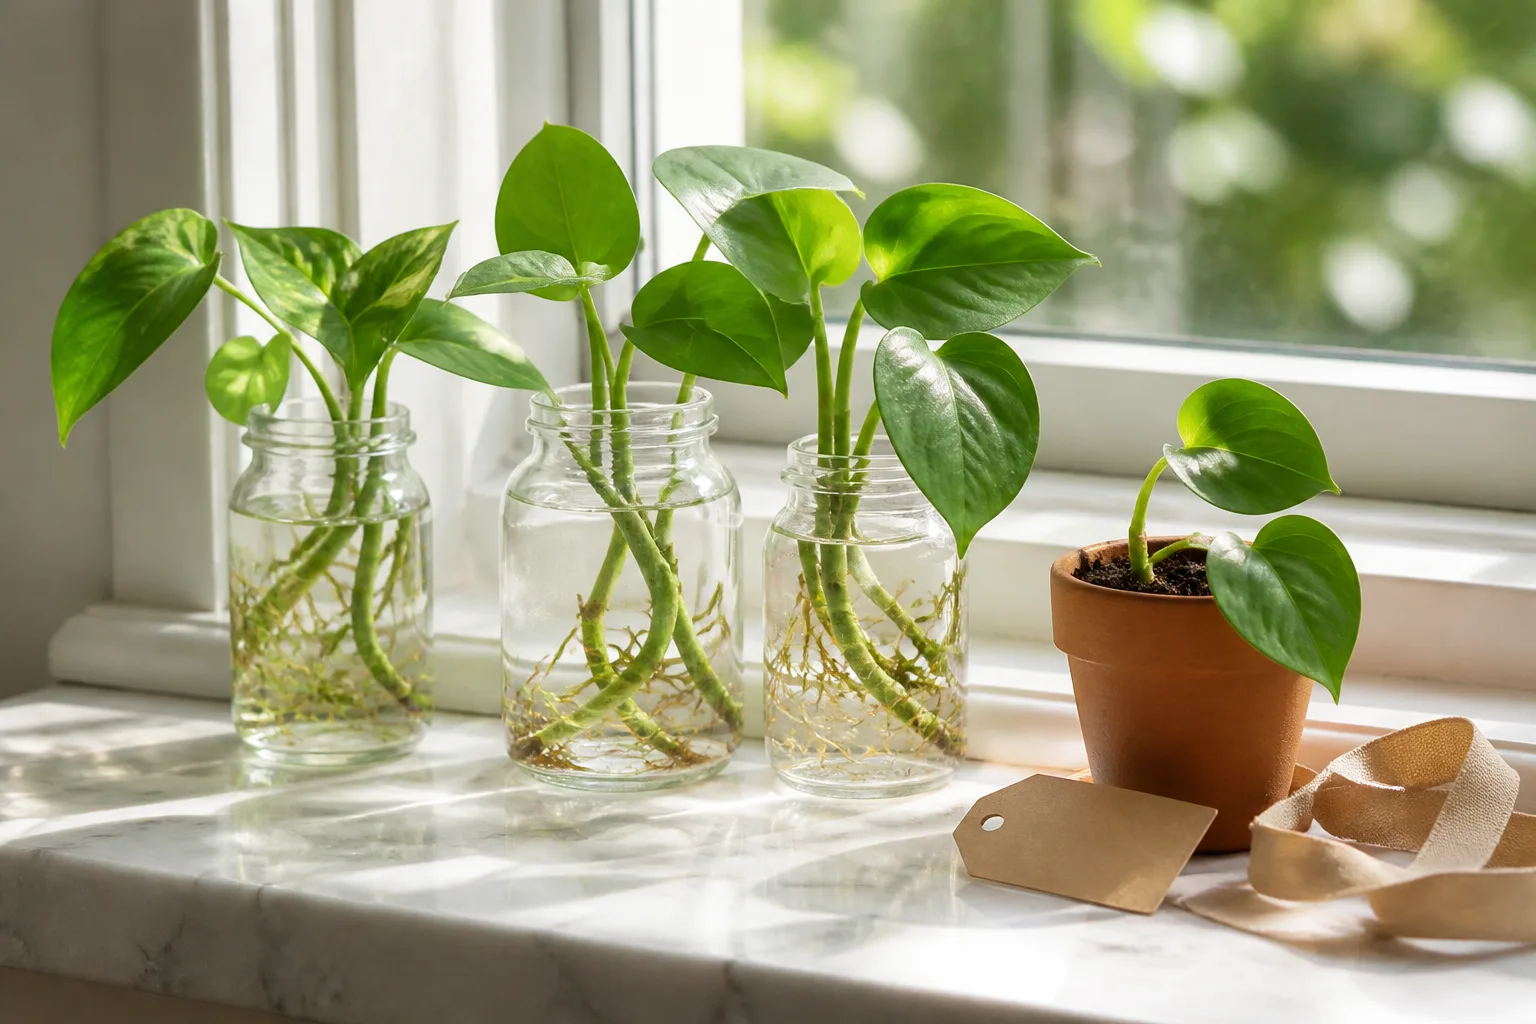
A successful stem cutting is not just a piece of stem in a glass. It is a small plant balancing two urgent jobs: holding on to enough water to stay alive and forming new roots before its stored energy runs out. Once you understand that balance, propagating becomes much less mysterious. You can choose better material, set up the right environment, and tell the difference between a cutting that needs patience and one that needs to be restarted.
Stem cuttings are a form of vegetative propagation, so the new plant is a genetic copy of the parent stem. That is useful for preserving a favorite pothos, coleus, rosemary, geranium, or named cultivar whose seed may not reproduce the same traits. Purdue Extension explains the advantages of cuttings and separates herbaceous, softwood, semi-hardwood, and hardwood material, while the Royal Horticultural Society’s houseplant guide shows how the same principle adapts to indoor plants.
The method below is a reliable starting point for many houseplants, annuals, perennials, herbs, and some shrubs. It is not a promise that every species will root from a stem. Rosette plants, palms, many bulbous plants, and plants that need division or leaf propagation require a different approach, so identify the plant before you cut a valuable specimen.
Decide whether a stem cutting is right for your plant
Use a stem cutting when the plant has a healthy stem with at least one viable node and enough stored energy to survive while roots form. Trailing vines and plants with obvious joints are especially approachable: pothos, heartleaf philodendron, tradescantia, coleus, mint, and many peperomias can often produce roots from a short section of stem. BBC Gardeners’ World’s practical examples include penstemon, salvia, fuchsia, pelargonium, clematis, dianthus, chrysanthemum, dahlia, and rosemary, although their timing and preferred cutting stage differ.
Do not cut first and research later when the plant is expensive, slow-growing, diseased, or already struggling. A cutting taken from a plant with active pests, root loss, severe dehydration, or a recent repot may carry the same problem or simply lack the reserves to recover. If your goal is to preserve a named cultivar, use a vegetative method, but remember that modern cultivars may have propagation rights that limit commercial distribution even when a small home cutting is easy to root.
Stem cutting anatomy: node, internode, and leaf
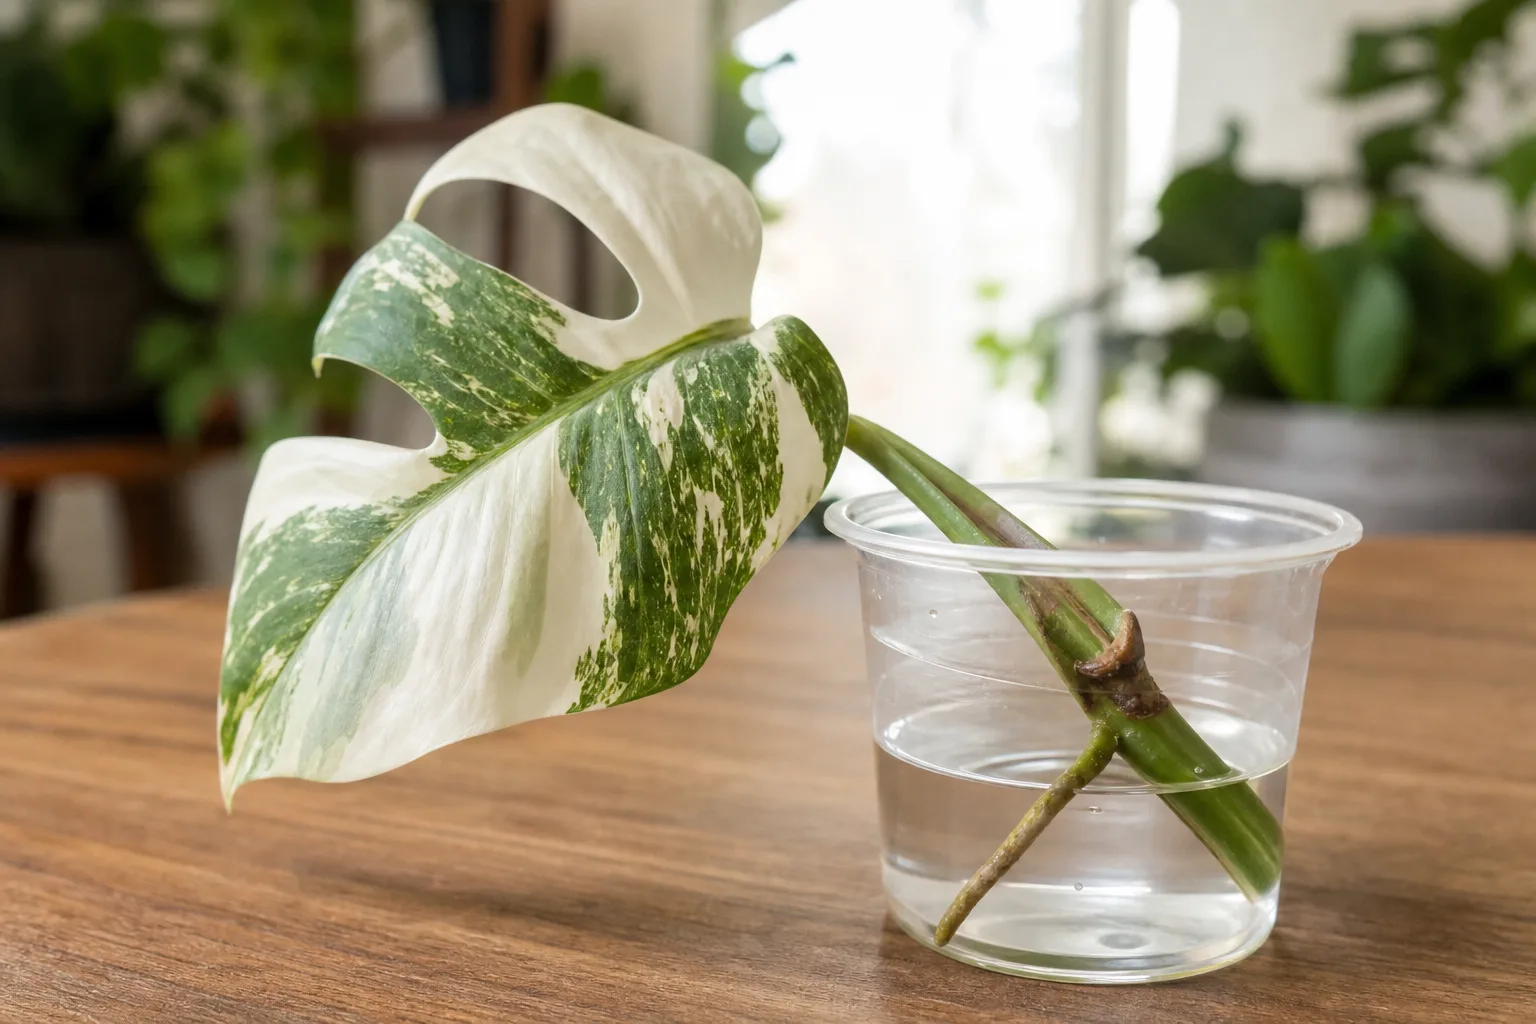
The node is the joint on the stem where a leaf, bud, side shoot, or sometimes a root can emerge. The stem section between two nodes is the internode. For most leafy houseplants, the node is the non-negotiable part: a leaf and its petiole can remain green in water but cannot reliably restart a whole plant without the stem tissue and bud associated with a node.
Look for a slight swelling, leaf joint, bud, or aerial-root bump. A cutting with one node can work, but two or three nodes give you more room to orient the piece correctly and more than one potential rooting point. Keep at least one or two healthy leaves above the rooting zone because leaves power root formation through photosynthesis; remove enough leaf area to keep the unrooted stem from losing water faster than it can replace it.
Choose the cutting type and season
The phrase “stem cutting” covers material at several stages of maturity. A soft, flexible shoot behaves differently from a firm woody one. Choosing the stage that matches the plant and season is often more important than adding another product to the pot.
Softwood and herbaceous cuttings
Herbaceous stems come from plants that do not form persistent wood. They can often be taken while the plant is actively growing. Softwood cuttings come from tender new growth on woody plants, usually in spring or early summer, just as the shoot begins to firm up. A useful field test is the bend-and-snap test: a suitable softwood shoot bends slightly and may snap cleanly rather than folding into a limp thread or resisting like a twig.
Soft tissue loses water quickly, so take it early in the day after the parent plant has been watered normally. Avoid flowering stems when you have a choice. Buds and flowers consume energy that the cutting needs for roots, and removing them after the fact is an unnecessary drain. The RHS recommends short, nonflowering softwood material and notes that many such cuttings root in roughly two to four weeks under suitable conditions in its softwood cutting guidance.
Semi-hardwood and hardwood cuttings
Semi-hardwood is current-season growth that has firmed after the flush of soft growth, often later in summer or early autumn. It is used for many broadleaf evergreens and woody shrubs. Hardwood cuttings are mature dormant shoots, generally taken from late autumn through winter or early spring. They lose less water when leafless, but they usually root more slowly and are less forgiving than softwood material.
For woody plants, do not assume the houseplant water-jar method will translate. A free-draining medium, steady moisture, and sometimes a labeled rooting hormone are more typical. Purdue Extension notes that hardwood cuttings may take two to four months to root, while some needled evergreens can take longer. RHS also distinguishes softwood, greenwood, semi-ripe, and hardwood cuttings by the season and maturity of the stem. If the shrub matters, take several cuttings and label the cultivar and date rather than judging the technique from one piece.
Gather tools and prepare a clean workspace
Prepare everything before the parent stem is cut. You need a sharp knife or bypass pruner, a clean glass or small pot, fresh propagation medium, a pencil or dibber for making planting holes, and a label. A clear bag or humidity dome is optional but useful for thin-leaved cuttings. If you are working with sap that irritates your skin or eyes, wear gloves and keep the work surface away from food preparation.
Clean tools make a neat wound and reduce the chance of moving disease from one plant to another. Wash off visible debris, then disinfect according to the product directions; Purdue Extension describes cleaning pots and tools with a dilute bleach solution, followed by rinsing and thorough drying. Never return leftover rooting hormone to its original container: place a small amount in a separate dish and discard what remains after the session.
Water the parent plant the day before if it is dry, but do not saturate an already wet pot. Have a damp paper towel or clean bag ready if you need to pause. A fresh cutting left on a hot windowsill while you search for a pot can wilt before the actual propagation begins.
Choose water, soil, or an airy rooting medium
Choose water when you want to see roots forming and the plant is known to tolerate water rooting. It is easy to inspect and useful for learning, but the eventual move into potting mix is a separate transition. Choose an airy medium when you want the cutting to form roots in the environment where it will live. Roots started in perlite, vermiculite, coco coir, sphagnum, or a clean soilless propagation mix do not need to be lifted from water later.
The best medium holds a thin film of moisture around the stem while leaving air-filled spaces between particles. A heavy garden soil or dense, already-used potting mix can stay wet around the wound and may contain pathogens. For a simple starting blend, use a fresh seed-starting or cuttings mix, or combine moisture-holding material with coarse aeration such as perlite. Purdue Extension gives a 50:50 perlite-and-vermiculite blend as one workable example; the RHS houseplant guidance also uses a peat-free compost-and-perlite mix.
Rooting hormone is optional for many easy houseplants and can improve consistency for some difficult woody cuttings. It does not correct a missing node, a diseased parent, saturated media, or poor light. Use only a commercial product labeled for the plant type and follow its label; stronger is not automatically better. Skip improvised kitchen ingredients, which add uncertainty and can keep you from noticing that the real problem is stale, wet, or contaminated medium.
Take and prepare a cutting
Start with a healthy, vigorous, nonflowering stem. For many leafy plants, a 2- to 6-inch (5- to 15-cm) piece with two or three nodes is practical, but the plant’s spacing and leaf size matter more than a magic measurement. Make the lower cut just below a node so the node stays on the cutting. Make the upper cut above a node if you are segmenting a long vine, and mark the top immediately if the pieces could be confused.
Remove the leaves from the lower portion that will sit in water or medium. Keep one or two leaves at the top, or more if they are small and the cutting is robust. Large leaves can be trimmed in half to reduce transpiration. No leaf should touch the rooting medium; leaves pressed against damp mix are a common starting point for rot. Remove flowers, buds, and fruit so stored energy is directed toward roots rather than reproduction.
Work quickly but do not rush the cut itself. A clean slice below the node is better than repeated crushing with dull scissors. If the parent stem is a vine, keep a small section of stem on both sides of each node. If it is a thick cane such as dracaena or dieffenbachia, cane sections may be rooted horizontally or vertically according to the plant’s growth buds; do not bury a cane upside down and expect its buds to correct the mistake.
Plant cuttings in a rooting medium
Pre-moisten the medium so you are not trying to water a fragile cutting into place. Fill a small pot or tray, then make a hole with a pencil or dibber. The hole prevents the medium from scraping off the cut end or rubbing away a light coating of hormone. Insert the cutting deep enough to cover at least one node, keep every leaf above the surface, and firm the mix just enough to hold the stem upright.
Several cuttings can share a pot if their leaves do not touch and you can later separate them without tearing roots. A small container is usually safer than a large one because it is easier to keep evenly moist without leaving a deep reservoir of wet mix. Water once to settle the medium, let excess drain, and then monitor moisture by touch and pot weight rather than topping it up on a schedule.
Set the pot in bright indirect light. A bright room supports photosynthesis, while direct sun through glass can heat an enclosed bag or dome until the leaves wilt. Keep the medium damp but not waterlogged. Roots need oxygen, and a cutting sitting in airless mud can rot even when the surface looks tidy.
Root cuttings in water
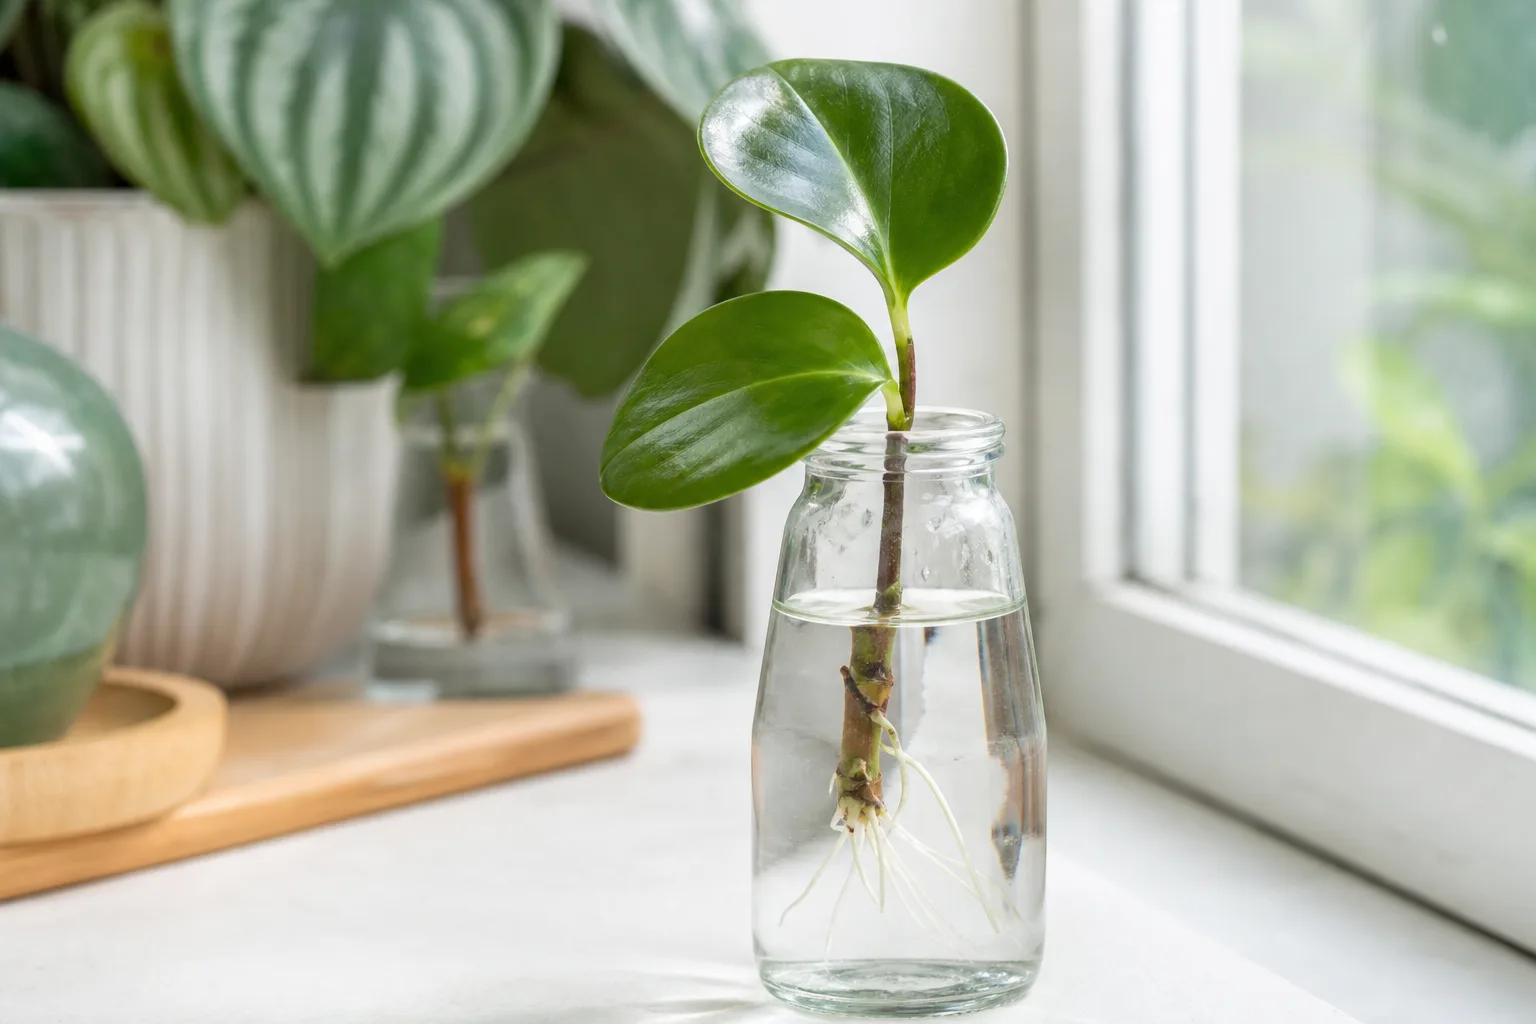
Use a clean, narrow vessel that supports the stem without forcing the leaves underwater. Fill it so the lowest node is submerged and all foliage remains above the water line. If the cutting has several nodes, one or two can be underwater, but there is no advantage to drowning the whole stem. Place the jar in bright indirect light and keep it warm but away from a hot radiator or intense afternoon glass.
Water rooting is especially satisfying for pothos, tradescantia, coleus, mint, and some peperomias. It also gives you a way to watch the node rather than disturbing a hidden root zone. Replace or refresh the water when it becomes cloudy, slimy, or noticeably depleted; a clean vessel and fresh water are more useful than adding fertilizer to a rootless cutting. The RHS advises keeping water below the leaves and potting water-rooted houseplant cuttings into small pots once roots and growth are established.
Do not wait for a dramatic tangle of roots before planning the transition. A few firm roots with side branches are a better signal than one long, fragile strand. Before potting, prepare a small container of moist, airy mix. Move the cutting gently, spread roots into the mix rather than bending them into a tight coil, and expect a short adjustment period as the roots begin working in a different environment.
Maintain light, humidity, warmth, and airflow
An unrooted cutting has no functioning root system to replace water lost through its leaves. Humidity slows that loss, but high humidity is not permission to keep the medium soaked. The practical target is a stable, warm, lightly ventilated pocket of air around the leaves and an evenly moist, aerated rooting zone beneath them.
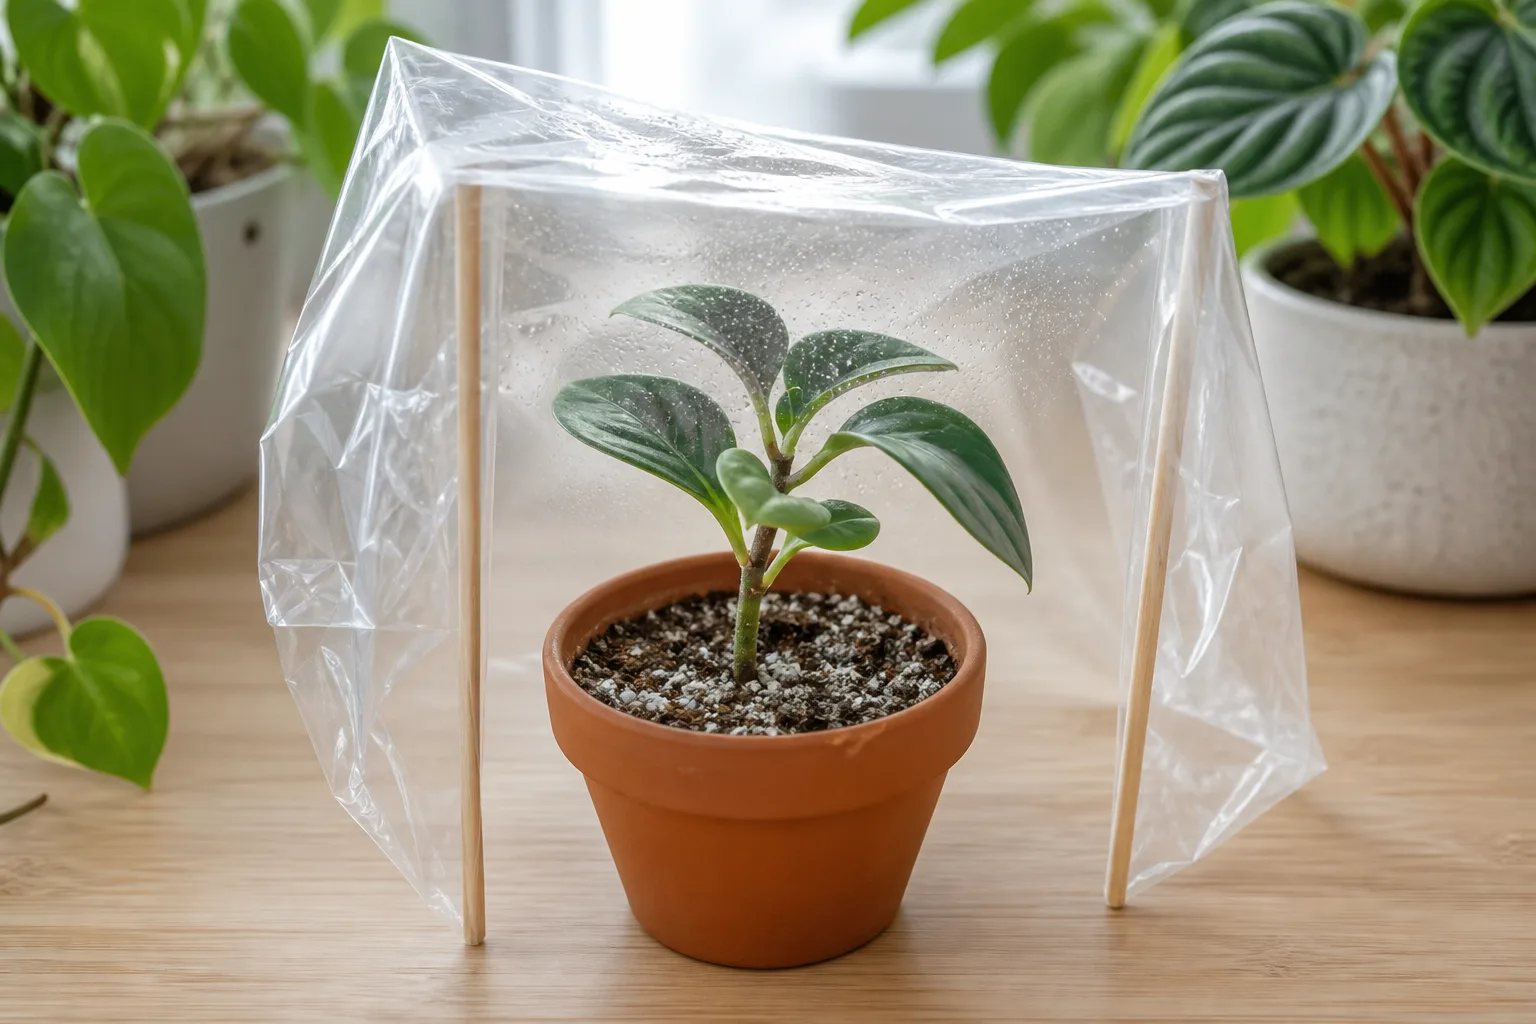
Cover a pot with a clear bag or dome if the leaves wilt easily, using sticks to keep plastic off the foliage. Open or remove the cover periodically so stale, dripping air does not become a permanent disease chamber. If condensation is heavy all day, increase ventilation before you reduce light or add more water. The RHS softwood procedure pairs high humidity with bright but indirect light, bottom heat around 18–24°C (64–75°F), and gradual ventilation after rooting.
Warmth speeds activity, but excessive heat can cook a cutting inside a covered container. Normal warm room conditions are enough for many houseplants. A propagation heat mat can help in a cool room if it is designed for that use and does not dry the medium from below. Keep the setup away from cold drafts, air-conditioning blasts, and fluctuating windowsills.
Check the cutting every few days for the actual signals that matter: a firm stem, clean water or medium, leaves that are not collapsing, and no spreading black or brown tissue. Do not tug daily. Root initials are easy to tear, and the resulting setback can look like slow rooting when the real cause is repeated disturbance.
Know when roots are ready
Rooting time varies with species, stem maturity, temperature, light, and the quality of the parent plant. Many herbaceous and softwood cuttings show roots or new growth in about two to four weeks, while semi-hardwood and hardwood cuttings can take several months. A calendar is a checkpoint, not proof. If a soft cutting is still firm and green after three weeks, leave it alone under good conditions; if its base is collapsing, more time will not repair rot.
In water, look for several firm roots rather than a single white thread. In a medium, a gentle resistance test can suggest roots, but it is not definitive and should be used sparingly. New leaf growth is encouraging, yet it can come from stored energy before a strong root system exists. The safer combination is resistance plus visible roots at drainage holes or a root ball that holds the medium together when the cutting is lifted carefully.
Rooting is complete enough for potting when the new roots can support the top growth, not merely when the first nub appears. For a small leafy cutting, a handful of branching roots is often a sensible minimum. For a woody cutting, wait for a more substantial system and avoid forcing it into a large display pot simply because the stem looks alive.
Pot up without losing new roots
Use a small pot with drainage holes and fresh mix appropriate for the plant. Pre-moisten the mix, make a hole, and lower the roots into it without pulling on the stem. Water thoroughly once the cutting is planted, allow the pot to drain, and keep it in bright indirect light while it settles. The first goal is root continuity, not rapid top growth.
If roots formed in water, keep the mix evenly moist for the first week or two, then let the surface begin to dry between waterings as the plant starts behaving like a potted specimen. A short wilt after transfer can be transplant stress. Persistent wilting in wet mix is more concerning because it can signal damaged roots or a medium that holds too little air. Do not compensate with constant watering.
Reduce humidity gradually. Untie a plastic bag or open a dome for longer periods over several days, then remove it once the cutting stays firm in room air. Newly rooted plants have tender growth and a small root system, so move them into stronger light, fertilizer, or outdoor wind in stages. Wait until the plant is making stable new growth before feeding lightly; fertilizer cannot substitute for roots.
Troubleshoot wilt, rot, and no roots
Most failures fall into a few categories: the cutting lost water too quickly, the base stayed too wet, the material was at the wrong stage, or the piece never contained a viable node. Diagnose the stem and the rooting environment together. “It looks sad” is not enough information to decide whether to water, ventilate, recut, or wait.
Match the symptom to the fix
The leaves wilt within hours. The cutting is losing water faster than it can replace it. Reduce leaf area, move it out of direct sun, increase humidity with a ventilated cover, and make sure the node and cut end are actually in water or moist medium. If the stem is limp and the base is still clean, it may recover; if it is soft and dark, recut above the damaged tissue with a disinfected blade.
The base turns brown, black, or mushy. This is usually rot rather than a sign that the cutting needs more water. Remove the damaged section, discard the old wet medium or cloudy water, clean the vessel, and restart with a fresh node-bearing piece if one remains. Improve aeration and reduce saturation. A sealed cover over dripping foliage makes the problem worse.
The cutting stays green but forms no roots. Check the basics in order: is a node present, is the base oriented correctly, is the material too woody or too soft, is the room warm enough, and is there bright indirect light? If those conditions are sound, wait rather than tugging. If the cutting is past its likely season, take a second batch from younger or better-timed growth instead of sacrificing the only piece.
Mold appears on the medium or leaf. Remove affected debris, improve airflow, and let the surface dry slightly if the plant tolerates it. Mold alongside a sour smell, soft tissue, or spreading discoloration points to excessive moisture and a possible restart. Do not simply bury the mold under more mix.
New leaves appear but the plant collapses after potting. The roots may be too few, water-adapted, damaged during transfer, or surrounded by a mix that dries abruptly. Recheck the root zone without repeatedly disturbing it, keep moisture steadier for a short transition, and protect the plant from harsh light. If roots are brown and soft, return to the rot workflow rather than increasing water.
Adapt the method to easy and difficult plants
For a first attempt, choose a plant that gives clear feedback. Pothos, heartleaf philodendron, coleus, tradescantia, mint, and some peperomias usually offer obvious nodes and flexible stems. Rosemary and geraniums are useful outdoor or windowsill examples, but they prefer a free-draining medium and can behave differently from a tropical vine. You can see how a water jar is used for rosemary propagation and how the water-versus-medium decision changes in this houseplant propagation comparison.
For thick canes such as dracaena and dieffenbachia, use short cane segments containing buds, keeping the orientation clear. For trailing plants, single-node pieces can work, but smaller cuttings lose water quickly and benefit from careful humidity. For succulents, let the species guide you: some are better from leaf cuttings or offsets, and a wet, enclosed stem is often a recipe for rot. The RHS propagation overview is a useful reminder that stem, leaf, root, division, and layering are separate techniques.
Woody shrubs need the most patience and the closest attention to stem maturity. Softwood is often the best first window because young tissue has higher rooting potential, but the correct stage is narrow: a shoot that is too tender wilts, while one that has hardened may root slowly. Gardenia’s lilac propagation analysis shows why method choice should follow the material available and the goal of preserving a cultivar: layering or a rooted sucker may be easier for some shrubs, while cuttings are valuable when you need several own-root plants without disturbing the parent.
Move rooted cuttings outdoors and harden them off
A cutting that survives on a protected shelf is not automatically ready for wind, strong sun, temperature swings, or a garden bed. First let it grow actively in its pot. Then acclimate it over roughly one to two weeks, beginning with a short period outside in bright shade during mild weather. Increase outdoor time gradually, introduce gentle morning sun before harsher afternoon exposure, and bring it indoors or under cover when nights are cold or conditions are windy.
Use the plant’s hardiness and your local weather rather than a universal temperature promise. A tender coleus and a hardy shrub do not share the same safe planting window. Delay the move if the cutting still wilts indoors, the root ball falls apart, or new growth has not stabilized. Once hardened, plant at the same depth it held in its pot, water the surrounding soil, and protect the young root system from rapid drying while it establishes.
Conclusion
The repeatable part of stem-cutting propagation is simple: choose healthy material, keep a viable node, make a clean cut below it, reduce leaf-driven water loss, and give the cutting moisture without suffocating its roots. Bright indirect light, warm conditions, clean tools, an airy medium, and controlled humidity do more for success than a crowded shelf of products.
Choose water when visibility and easy inspection matter; choose an airy medium when you want roots adapted to pot life from the beginning. Treat softwood, semi-hardwood, hardwood, cane, and succulent material as different jobs. Finally, pot up only after roots can support the top growth and harden the plant off before outdoor exposure. Take more than one cutting when the plant is valuable or the species is variable, and let the stem’s condition—not a fixed calendar—tell you whether to wait, adjust, or start again.



