How to Grow San Marzano Tomatoes Successfully
Learn how to grow San Marzano tomatoes from seed or transplant with the right sun, soil, support, watering, pruning, troubleshooting, and harvest tips.
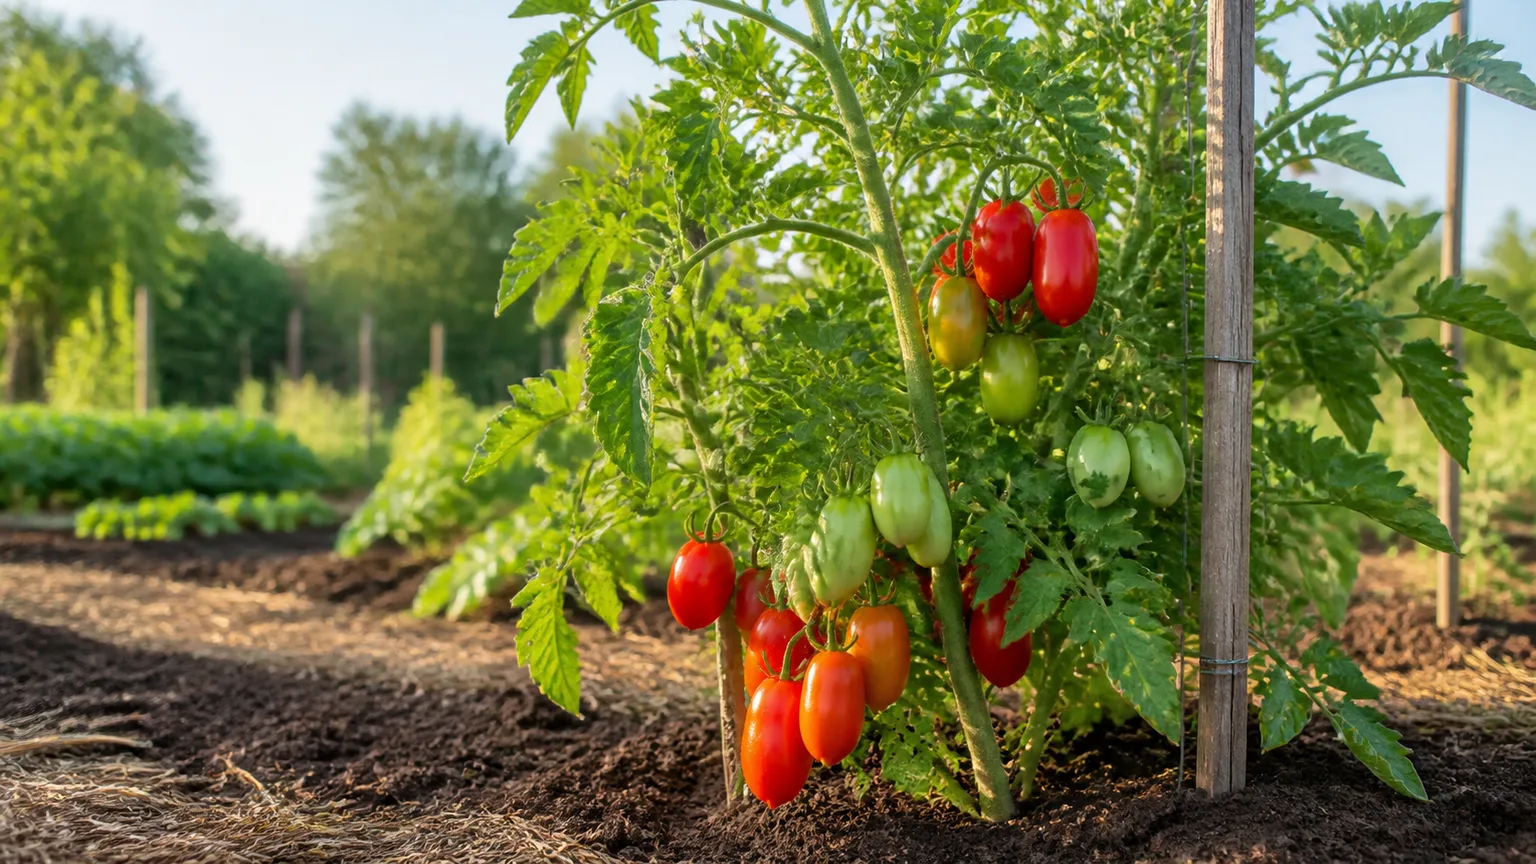
San Marzano tomatoes reward a gardener who plans for the whole season. Give the plant direct sun, warm soil, a support system that can handle a tall vine, and a root zone that never ricochets from bone-dry to flooded. The payoff is dense, meaty fruit that is especially useful for sauce, roasting, and preserving.
The name is not a guarantee of one identical plant. Seed companies sell several San Marzano lines, including open-pollinated heirlooms and hybrids, with different maturity dates, disease-resistance codes, and growth habits. Check the packet or plant tag first; then use the growing plan below to adjust support and pruning to that specific plant.
San Marzano Tomatoes at a Glance
San Marzano is a plum or paste tomato within Solanum lycopersicum, grown for elongated, thick-fleshed fruit rather than a juicy slicing texture. Many classic lines are indeterminate, which means the vine keeps extending and setting fruit until frost, but some San Marzano-named selections are compact or determinate. That distinction changes almost everything about support, pruning, spacing, and how long harvest lasts.
As a planning number, many classic seed lines mature in about 78 to 85 days from transplant, not from the day you sow the seed. That is an estimate, and cold soil, low light, heat, drought, or disease can push the first ripe fruit later. A well-informed estimate is more useful than a promise, so record your transplant date and first harvest in a garden log. Rutgers NJAES explains why “days to maturity” is counted from transplant and should be treated as a guide rather than a guarantee (Rutgers tomato culture guide).
Keep pets from chewing the foliage, stems, or unripe fruit. ASPCA lists the tomato plant as toxic to dogs, cats, and horses because of solanine, while ripe fruit is listed as non-toxic; contact a veterinarian or poison-control service if an animal may have eaten plant material (ASPCA tomato plant safety).
Choose the Right Seed or Transplant
Start with the label, not the picture on the seed packet. Look for determinate or indeterminate, days to maturity, disease-resistance letters, and whether the seed is open-pollinated or hybrid. NC State Extension recommends choosing tomatoes by disease resistance, available space, climate, sunlight, intended use, and whether you want a vine or a bush—not by fruit shape alone (NC State guide to growing tomatoes).
For a long harvest and a trellis or tall stake, choose an indeterminate line. For a shorter season, a pot, or a concentrated sauce harvest, a determinate or compact selection can be easier to manage. If a nursery plant already has tiny fruit in a small cell pack, choose a shorter, sturdier transplant without fruit when possible; the roots will have more room to establish before carrying a crop.
Avoid a tall, pale, stretched transplant. A short plant with dark green leaves and a firm stem will recover more reliably than an oversized one that has been light-starved. If you start from seed, you can also select a disease-resistant line suited to your region instead of accepting whatever variety the local garden center happens to carry.
Find Full Sun and Prepare the Soil
Choose the sunniest practical spot, ideally with eight hours of direct sun and good air movement. Tomatoes can grow with less, but filtered light or afternoon shade often produces a leafy plant with slower ripening and weaker fruit set. Rutgers also recommends a well-drained location away from competing tree and shrub roots (Rutgers tomato culture guide).
Rotate the bed when you can. If tomatoes, peppers, eggplants, or potatoes have recently suffered soil-borne disease in that spot, move the tomatoes to another bed for at least two years if space allows. This does not make disease impossible, but it reduces the chance of repeatedly planting into the same reservoir of pathogens and nematodes.
Use a soil test before adding lime, wood ash, or a large dose of fertilizer. A practical tomato pH range is about 6.0 to 6.5, and Rutgers advises incorporating amendments according to the test report rather than guessing. Add finished compost to improve structure and water-holding capacity, but do not turn the planting hole into a pocket of rich, wet material that drains differently from the surrounding soil.
Prepare the bed broadly: loosen the top several inches, mix in mature compost if needed, and remove weeds. The goal is soil that holds moisture between waterings while allowing excess water to leave. San Marzano roots need access to both water and oxygen; a constantly saturated bed is not “consistently moist.”
Start San Marzano Tomatoes from Seed
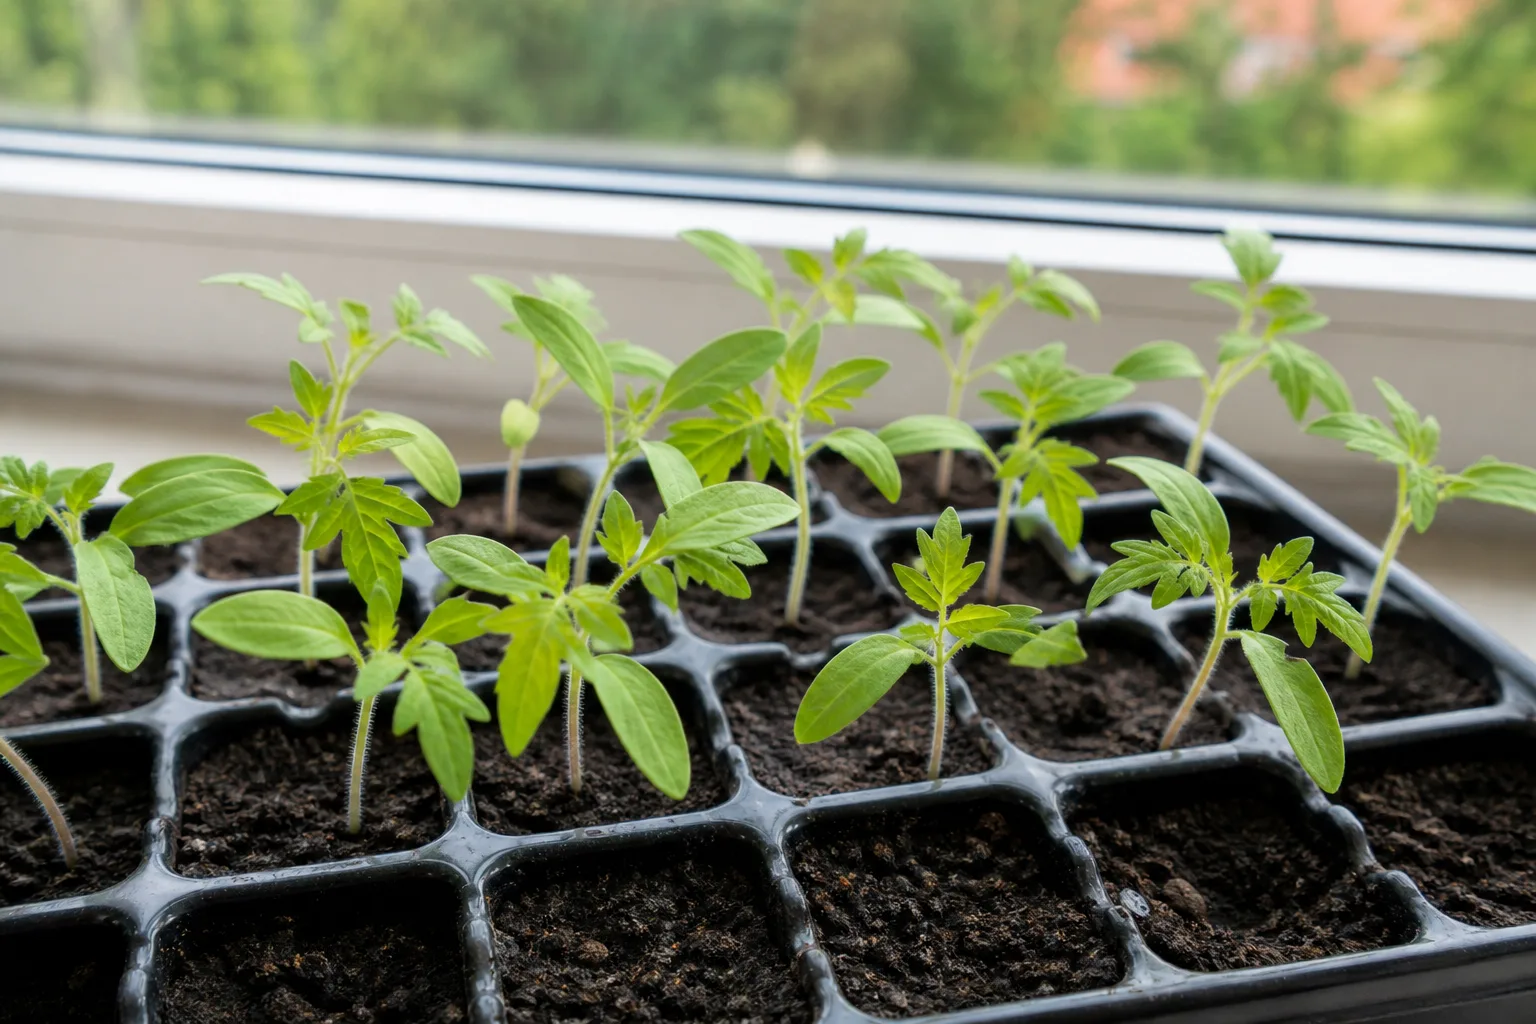
Sow indoors six to eight weeks before your average last spring frost. Use a clean seed-starting mix in containers with drainage, moisten the mix before sowing, and cover the seed according to the packet—usually shallowly rather than deeply. Rutgers recommends warm, bright seedling conditions near 70°F by day and 65°F at night, while Gardeners’ World recommends keeping newly sown mix moist without leaving it waterlogged (BBC Gardeners’ World tomato guide).
Once seedlings emerge, light becomes the limiting factor. Put them in the brightest window you have and add a grow light if they lean, stretch, or develop long bare sections between leaves. Keep the light close enough to prevent stretching without heating or bleaching the foliage. Water when the surface begins to dry, and empty any tray that leaves the cells standing in water.
Pot up seedlings once the first true leaves are developed and roots hold the mix together. Handle the root ball or leaves rather than squeezing the fragile stem. Planting the stem a little deeper in its next pot helps make a sturdier transplant, but do not bury leaves in wet mix.
Harden Off and Plant After Frost
Hardening off is a gradual change in light, wind, temperature, and watering—not a single afternoon outdoors. Begin about seven to fourteen days before planting: set the seedlings outside in bright shade for a short period, then lengthen the time and introduce gentle morning sun. Bring them in if wind, cold, or intense sun exceeds what they have experienced indoors.
Wait until the danger of frost has passed and the soil has warmed. Tomatoes are frost-tender, and a warm afternoon does not compensate for cold nights or cold soil. A plant that survives an early planting can still lose weeks of growth while its roots sit in conditions too cold to function well.
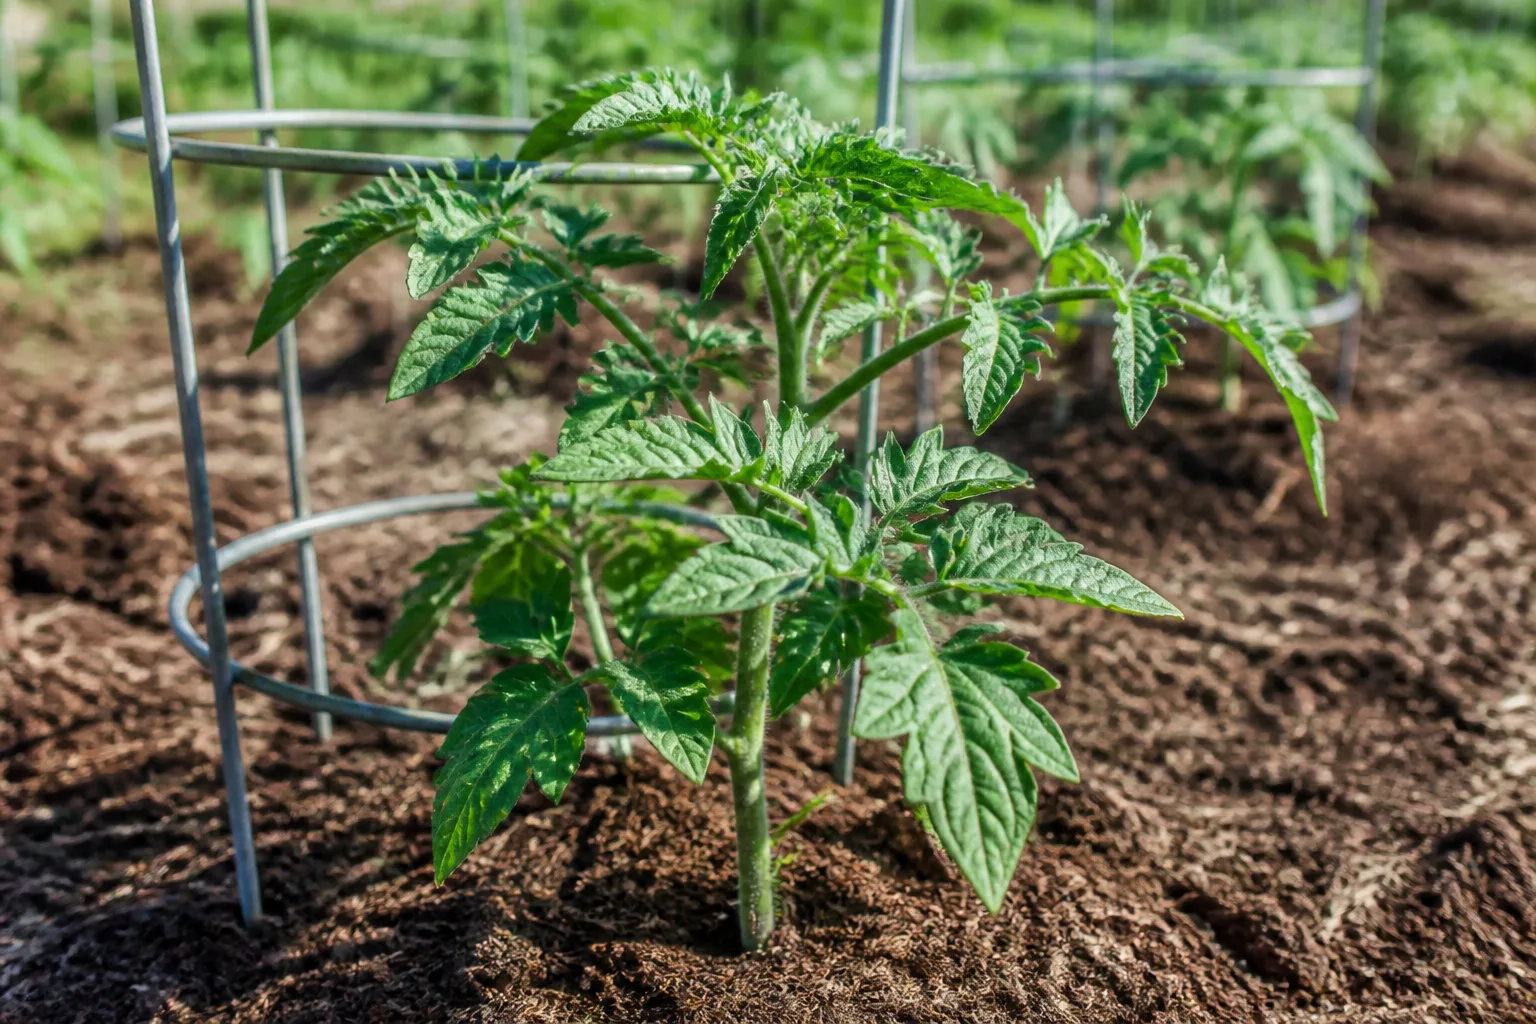
When transplanting, remove the lower leaves and set the plant so the stem is buried to just below the lowest remaining leaves. Tomatoes can form roots along a buried stem, which creates a broader anchoring system. If a seedling is very leggy, lay it in a shallow horizontal trench with the leafy top above the soil instead of digging an excessively deep, narrow hole; NC State Extension specifically recommends trench planting for tall transplants (NC State guide to growing tomatoes).
Water the new transplant slowly until the entire root ball and surrounding soil are moist. Do not fertilize a stressed plant with a strong dose on planting day. Let it establish, then begin the feeding plan that matches your soil test and fertilizer label.
Give Plants Enough Room to Breathe
Space plants 24 to 36 inches apart within a row, with roughly 3 to 4 feet between rows when using stakes or cages. Give indeterminate vines the wider end of that range if the bed is humid, the foliage stays wet after rain, or you plan to leave multiple stems. Rutgers and NC State both use spacing in this range for supported tomatoes (Rutgers tomato culture guide; NC State guide to growing tomatoes).
Spacing is a disease-management decision as much as a yield decision. Crowded foliage dries slowly and is harder to inspect, tie, and harvest. Wider spacing also gives a cage or trellis room to carry the plant without forcing leaves against a neighboring vine.
For a visual explanation of how spacing changes through a tomato’s life cycle, see the tomato plant growth timeline. The same principle applies here: early open space becomes valuable once an indeterminate San Marzano reaches the support and starts carrying heavy fruit clusters.
Install Support Before the Vine Leans
Put the stake, cage, or trellis in place at planting. Waiting until the vine is large risks cutting roots, breaking stems, or trying to lift a plant that has already sprawled across the soil. A full-size indeterminate San Marzano can become a tall, heavy plant, so use a support that stays firm in wind and reaches high enough to keep fruit off the ground.
Choose the system by growth habit:
- Tall stake or trellis: best when you want one or two main stems and are willing to tie and prune regularly.
- Heavy-duty cage: best when you want the plant to branch naturally; tuck shoots back through the mesh and prune lightly.
- Determinate or compact line: a sturdy cage or short stake is usually enough, but support fruit-laden branches before they bend to the ground.
Tie the stem loosely with soft twine or cloth, leaving room for it to thicken. A figure-eight tie keeps the stem from rubbing directly against the support. Add ties as the plant grows rather than tightening one tie until it cuts into the stem.
San Marzano’s elongated fruit can become surprisingly heavy in clusters. If the plant is on a narrow stake, support individual trusses when they begin to sag. If it is in a cage, guide branches through the openings before they become rigid. The tomato pruning and training guide shows the same support decisions in more detail.
Water Deeply and Mulch the Root Zone
The best San Marzano watering routine is one that keeps soil moisture steady without making the bed soggy. As a starting point during fruiting, aim for about 1 to 1.5 inches of water per week from rain plus irrigation, then adjust for soil, temperature, wind, plant size, and container volume. NC State Extension uses about 1.5 inches during fruiting, while Rutgers gives at least 1 inch as a general weekly minimum (NC State guide to growing tomatoes; Rutgers tomato culture guide).
Use a rain gauge when possible and check the soil several inches down before watering. If only the surface is dry but the root zone is cool and moist, wait. If the soil is dry through the root zone, water slowly at the base until moisture reaches depth. A short sprinkle that wets only the crust encourages shallow roots and leaves the plant vulnerable to the next hot afternoon.
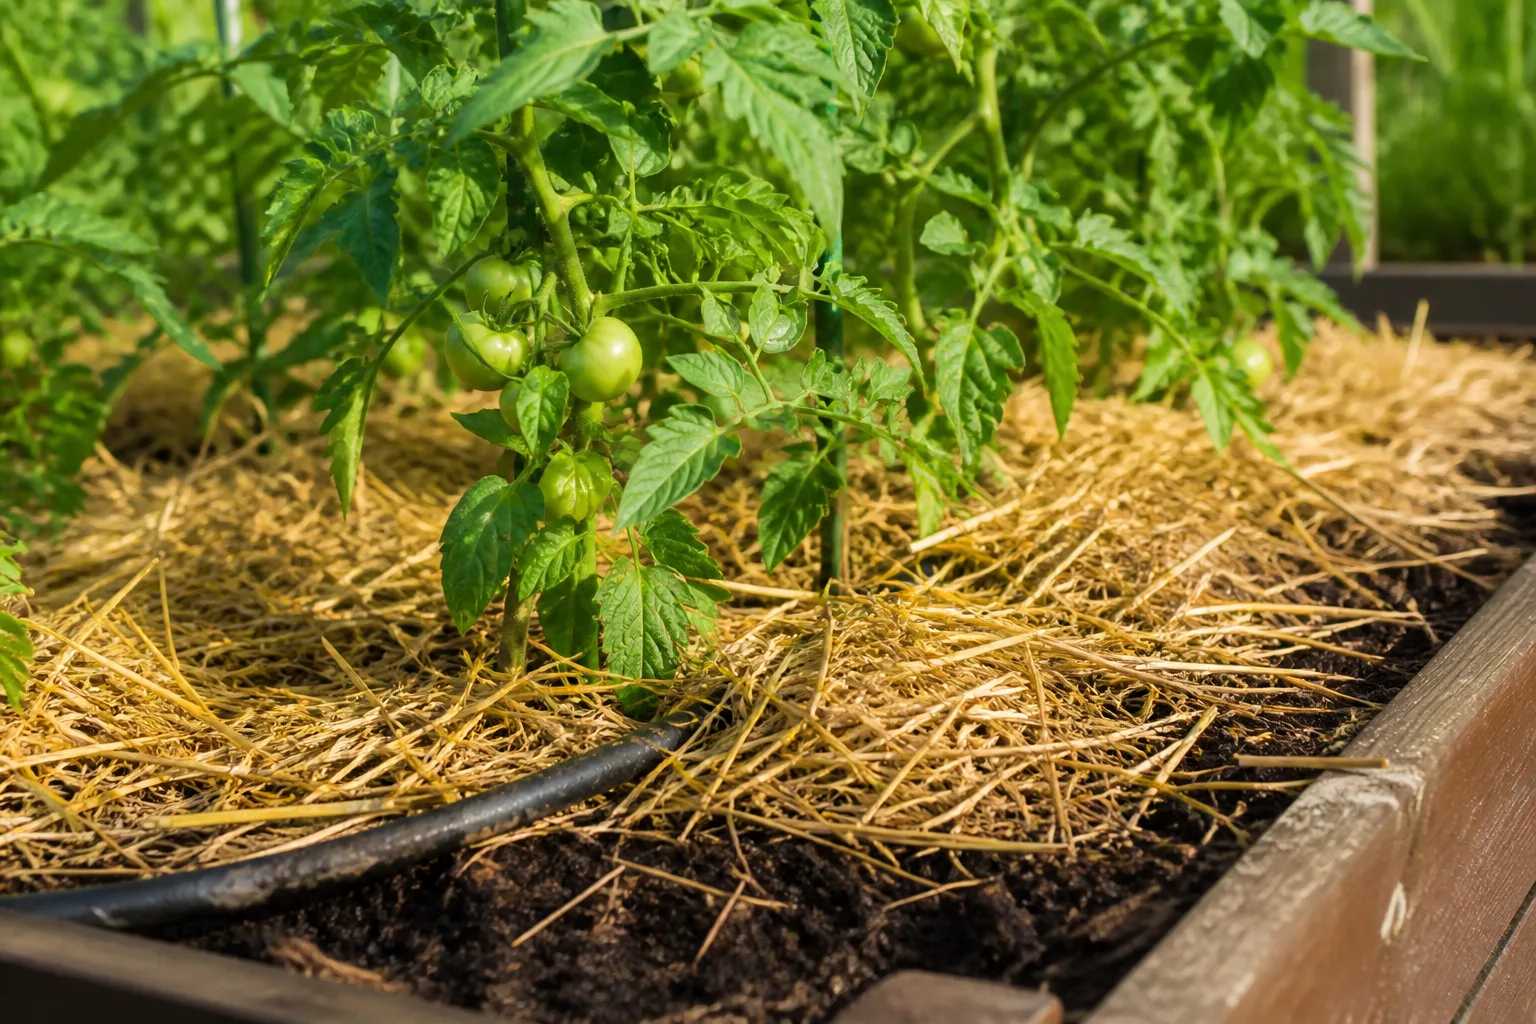
Water in the morning and keep leaves as dry as practical. A soaker hose or drip line makes steady irrigation easier, especially when the plant is tied to a trellis. Do not turn a sudden wilt into an automatic flood: check whether the soil is dry, compacted, waterlogged, or damaged by disease first.
Add a 2- to 3-inch layer of mulch after the soil has warmed, leaving a few inches bare around the stem. Straw, shredded leaves, or finished compost can slow evaporation and reduce soil splashing onto lower foliage. Stable moisture is more valuable than a perfect watering schedule because drought followed by a heavy soak is a common trigger for blossom-end rot and fruit cracking.
Feed for Fruit Without Chasing Leaves
Start with the soil test and the fertilizer label. Tomatoes are not improved by a fixed recipe applied on top of unknown soil. Too much nitrogen can produce a lush vine with delayed flowering, soft growth, and less useful fruit production; too little fertility can limit growth in a heavily cropped container.
When fruit is about an inch wide, side-dress with a complete tomato fertilizer at the label rate, keeping granular material several inches away from the stem. Rutgers recommends a 5-10-5 side-dressing at this stage and again at first harvest, while NC State recommends a smaller complete-fertilizer side-dressing after fruit set and at intervals through the season (Rutgers tomato culture guide; NC State guide to growing tomatoes). These are regional recommendations, not permission to combine both schedules.
If you are growing in a container, nutrients leach faster, but that does not mean “more is better.” Use a potting mix made for containers, a fertilizer labeled for vegetables, and the label’s schedule. Stop guessing when leaves are yellow: water stress, root damage, cold, disease, and nutrient shortage can look similar. Correct the root-zone problem before reaching for a stronger feed.
Prune According to the Support System
Pruning is a training choice, not a ritual every tomato plant must endure. On an indeterminate San Marzano tied to a single stake, remove small suckers—the shoots that emerge where a leaf meets the main stem—before they become thick. Keeping one or two stems makes the vine easier to tie and improves access to flowers and fruit.
On a roomy cage, you can leave more suckers and guide them upward. NC State Extension notes that caged tomatoes are commonly left unpruned, while staked plants are usually limited to one or two stems; pruning too heavily can reduce total yield and expose fruit to sunscald (NC State guide to growing tomatoes). A practical compromise is to remove shoots that crowd the soil, block airflow, or cannot be supported, while keeping enough mature foliage to shade developing fruit.
Do not strip all the lower leaves at once, and do not remove healthy leaves simply because fruit is green. Remove leaves that are touching the soil, yellowing naturally, or clearly diseased, and clean your hands or pruners after working on a sick plant. Determinate varieties need far less pruning; follow the label and make only the early corrections needed to keep branches off the ground.
Protect Flower Set in Heat and Cool Weather
Tomatoes self-pollinate, but they still need a workable temperature window while flowers are open. Rutgers links “all foliage, no fruit” with too much nitrogen, heavy rain, or temperatures above 90°F or below 55°F; Gardeners’ World likewise warns that heat and irregular watering can cause blossom drop (Rutgers tomato culture guide; BBC Gardeners’ World tomato guide).
If flowers open and fall without a swelling green fruit, check three things first: nighttime temperature, daytime heat, and root-zone moisture. A heat wave can pause fruit set even while the plant continues making flowers. Keep watering steady, avoid a high-nitrogen rescue feed, and wait for temperatures to moderate rather than cutting off healthy flower clusters.
In a greenhouse or sheltered corner with few air movements, gently tap the support or flower trusses around midday to help release pollen. Outdoors, the more important fixes are sun, airflow, water consistency, and patience. If every plant stops setting fruit during the same heat event, weather is a stronger suspect than a sudden nutrient deficiency.
Grow San Marzano Tomatoes in Containers
A container works when it has enough root volume, drainage, sunlight, and support. Choose a pot at least 12 inches deep and wide, with larger volume for a full-size indeterminate vine. Compact or determinate San Marzano selections are easier in pots; a full-size indeterminate plant may outgrow a small container before the first harvest.
Use fresh container mix rather than heavy garden soil. Put the pot where it will receive direct sun and where a trellis or cage can be anchored independently of the pot if wind is a concern. A top-heavy tomato can tip a light container even when the plant itself is healthy.
Containers dry faster than beds, so check moisture daily during hot weather. Water thoroughly when the root zone is dry rather than giving a small splash each afternoon. Mulch the surface, keep fertilizer doses modest and regular, and expect to water more often as the canopy and fruit load increase. Gardeners’ World notes that tomatoes need depth to root and can grow in pots or deep growing bags, but the smaller the container, the less forgiving the watering routine (BBC Gardeners’ World tomato guide).
Harvest for Flavor and Longer Storage
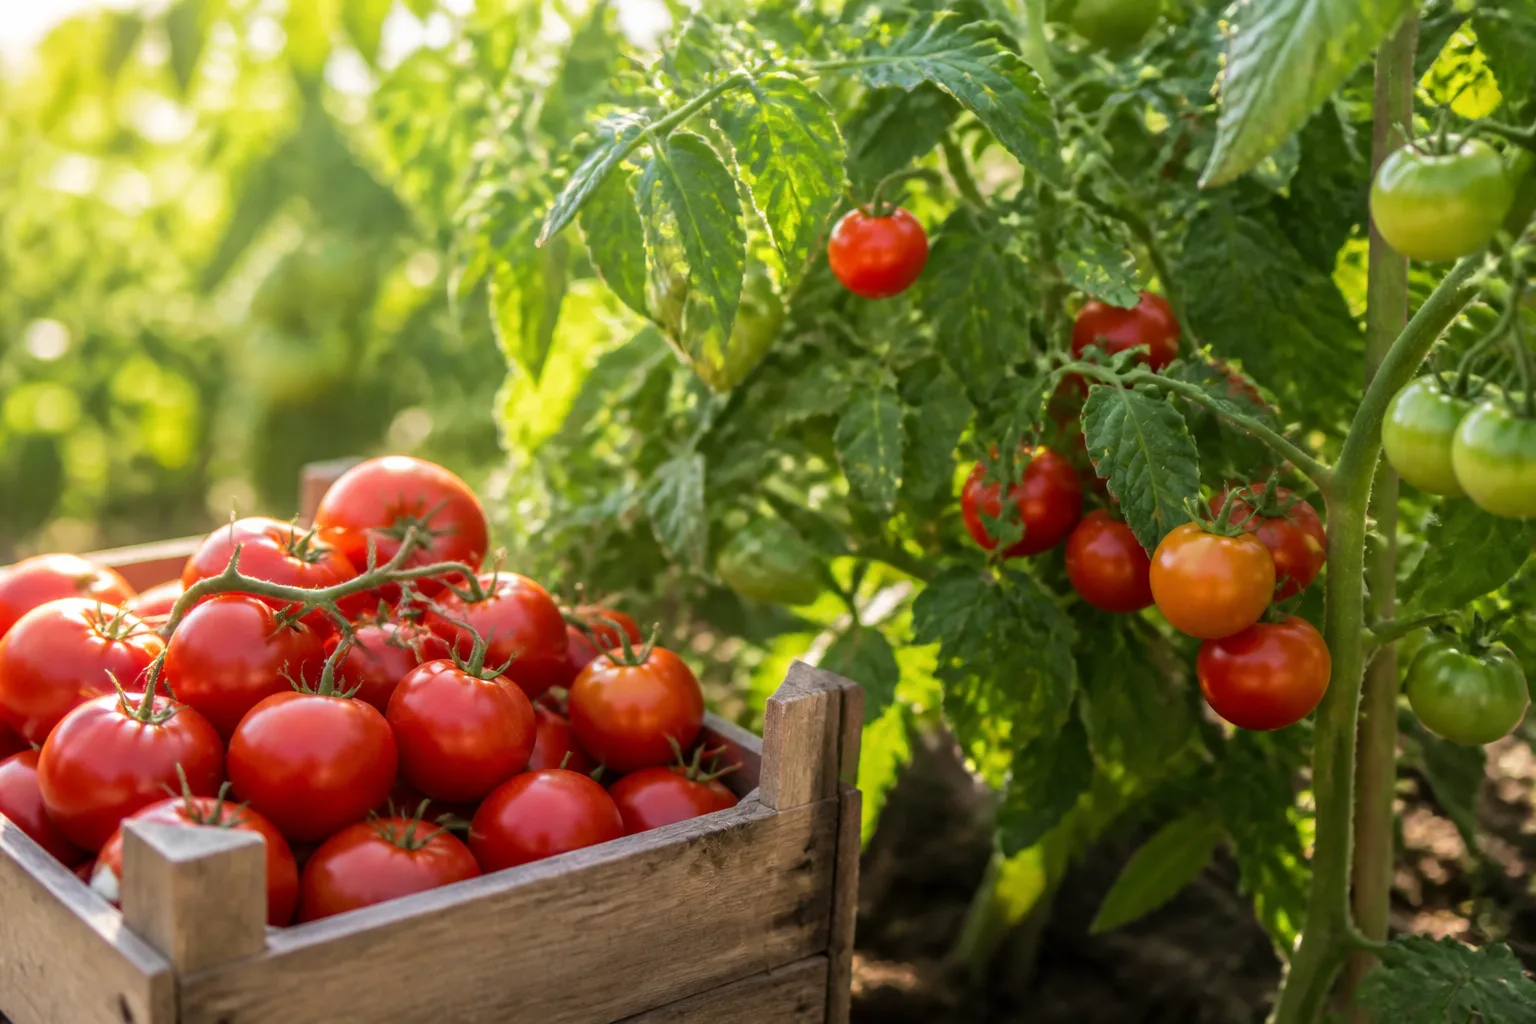
Pick San Marzano tomatoes when they have developed their normal mature color from end to end and give slightly under gentle pressure. The elongated shape can vary by line, so color and texture are more reliable than a fixed number of days. Fully colored fruit left on a healthy plant usually has the best flavor, but ripe fruit also becomes more vulnerable to splitting, birds, and rot.
Harvest every few days once ripening begins. Twist the fruit gently or use clean snips if the stem resists. If a heavy storm is coming after a dry stretch, pick fruit that has reached mature green or breaker stage and let it finish indoors; a fruit with the first blush has more ripening potential than a hard, immature green tomato.
Use cracked or bruised fruit quickly. A shallow, dry crack can sometimes be trimmed and cooked, but discard fruit that is moldy, fermented-smelling, leaking, or soft through the flesh. For more on why cracks happen and how to respond before rain, see the tomato splitting guide. Store sound ripe tomatoes at room temperature for the best flavor; preserve an abundant paste harvest as sauce, roasted tomatoes, or properly processed canned food.
Troubleshoot Before You Treat
When a San Marzano looks wrong, start with the pattern and the root zone. Ask whether the symptom affects old leaves or new growth, one fruit or many, the whole plant or one side, and whether the soil is dry, saturated, or normal. A symptom label such as “yellow leaves” is not a diagnosis.
Yellow Leaves or Slow Growth
Lower leaves that yellow after transplant can reflect ordinary establishment or aging, especially if new growth is healthy. Yellowing across the whole plant, weak stems, and slow growth call for a soil-moisture and root check before fertilizer. Look for compacted or waterlogged soil, damaged roots, cold weather, and a bed where tomatoes or related crops have repeatedly grown.
If a plant is stunted, yellow, and producing very few tomatoes while roots show swollen galls, root-knot nematodes are a possibility. If new leaves are mottled, twisted, or unusually narrow and the plant is stunted while nearby plants look normal, consider virus or herbicide injury. University of Minnesota Extension’s tomato diagnostic guide separates these patterns from simple nutrient problems (UMN tomato symptom guide; UMN tomato leaf-discoloration guide). Do not keep adding nitrogen to a plant with distorted new growth.
Black Bottoms, Cracks, or Split Fruit
A dry, sunken, tan-to-black patch on the blossom end is blossom-end rot, a physiological disorder associated with uneven moisture and poor calcium uptake into the developing fruit. It is not proof that the soil has no calcium, and it is not fixed by scattering eggshells around an already fruiting plant. Stabilize watering, mulch the root zone, avoid root damage, and use a soil test before adding lime or calcium. NC State Extension identifies moisture extremes as a central cause and recommends about 1.5 inches of weekly water during fruiting (NC State guide to growing tomatoes).
Cracks are different. Radial splits run outward from the stem, while concentric cracks form rings around the shoulder. Both are common after drought or dry soil is followed by heavy rain or irrigation, and they are more likely while fruit is swelling quickly. University of Minnesota Extension describes variable water levels and rapid development in hot, humid weather as typical conditions for tomato growth cracks (UMN tomato fruit-crack guide). Pick open or wet cracks promptly so insects and secondary rots have less time to enter.
Soft, sunken spots away from the blossom end, fuzzy growth, or fruit that rots while ripe suggests a disease or fruit rot rather than blossom-end rot. The tomato disease identification guide can help you compare symptoms before choosing a treatment.
Wilting, Leaf Spots, or No Fruit
If leaves wilt only in the hottest part of the day and recover overnight, check soil moisture and root damage before assuming disease. If the entire plant remains wilted after the soil is moist, or one side collapses while the rest stays green, inspect the stem base and consider a soil-borne wilt. Do not respond to permanent wilt by flooding the bed; waterlogged roots can lose function just as dry roots can.
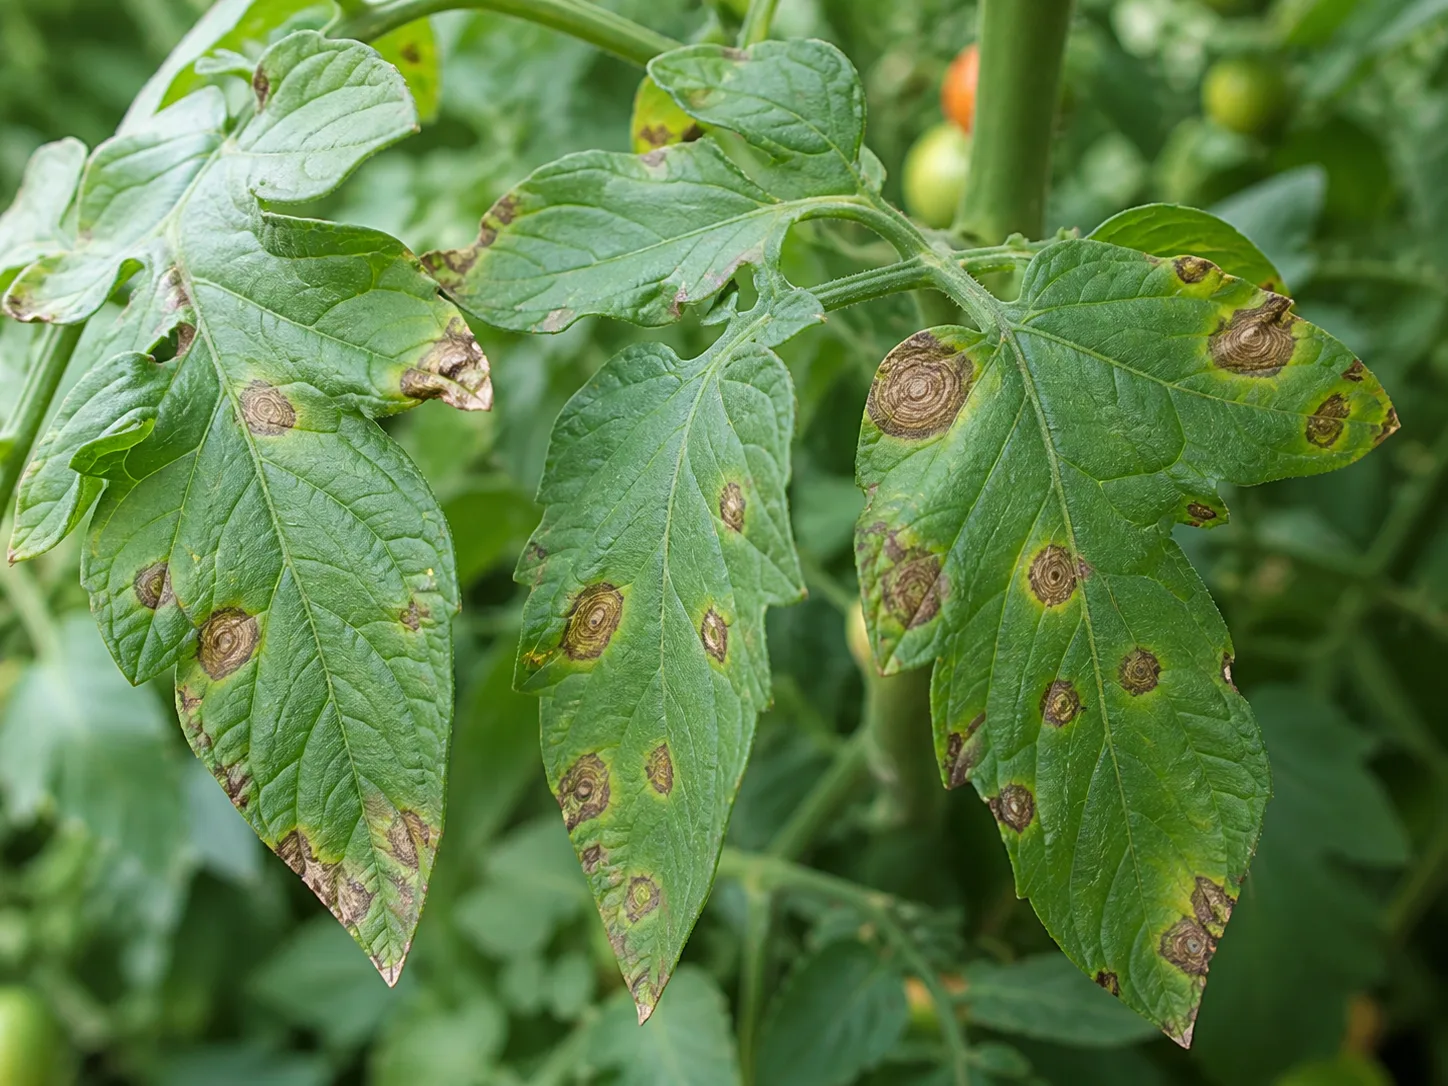
Leaf spots that begin low on the plant and move upward are a reason to improve airflow, keep irrigation off the foliage, mulch to reduce soil splash, and remove clearly diseased leaves. Avoid composting heavily diseased tomato vines in a home pile. NC State recommends early intervention, sanitation, removal of symptomatic plants, and rotating tomato-family crops to reduce recurring disease pressure (NC State guide to growing tomatoes).
No fruit can result from inadequate direct sun, excess nitrogen, drought, heavy rain, or temperatures that abort flowers. If the plant is green and vigorous but barren, inspect the flowers and recent weather before feeding again. If the plant has no flowers at all, the problem is more likely light, temperature, maturity, or excessive vegetative growth than a pollination failure.
Close the Season and Save Seed Carefully
Pull healthy plants after the final harvest and remove fallen fruit and leaves from the bed. Do not compost vines that carried serious blight, wilt, or other disease in a small home pile; discard them according to local yard-waste rules. Clean stakes, cages, snips, and ties before storing them, especially if you handled symptomatic plants.
Rotate tomatoes and their relatives when possible, and refresh the mulch next season rather than leaving a mat of diseased debris in place. In a short-season climate, note the first frost, first flower, first set fruit, and first ripe tomato. Those four dates will help you decide whether to start earlier, choose a faster line, or use a temporary season extender next year.
Save seed only when the packet identifies the plant as open-pollinated and you want seedlings with similar traits. Seeds saved from an F1 hybrid may grow, but the next generation is not expected to reproduce the parent’s combination of fruit, habit, and disease resistance. NC State explains the difference between hybrid and open-pollinated seed and why seed saving is more predictable from open-pollinated plants (NC State guide to growing tomatoes).
Conclusion
To grow San Marzano tomatoes well, treat the plant as a long-season, warm-weather crop that needs a stable root zone and a serious support plan. Read the label to learn whether your line is determinate or indeterminate, start seed six to eight weeks before the last frost, plant deeply after the soil warms, and give each plant full sun with room for airflow.
Keep moisture even, mulch after the soil warms, fertilize from the soil test and label rather than guesswork, and prune only as much as your support system requires. When trouble appears, diagnose the pattern before adding fertilizer or calcium: black bottoms usually point to moisture-linked blossom-end rot, cracks follow water swings, and persistent wilt or distorted growth deserves a disease or root check. Harvest fully colored fruit regularly, and record what happened this season. That small record is how a good San Marzano harvest becomes a more reliable one next year.



