Tomato Plant Growth Timeline: 7 Stages (With Pictures)
Follow tomato plants through seven growth stages—from seedling to senescence—with photos, day ranges, and what to do at each phase.
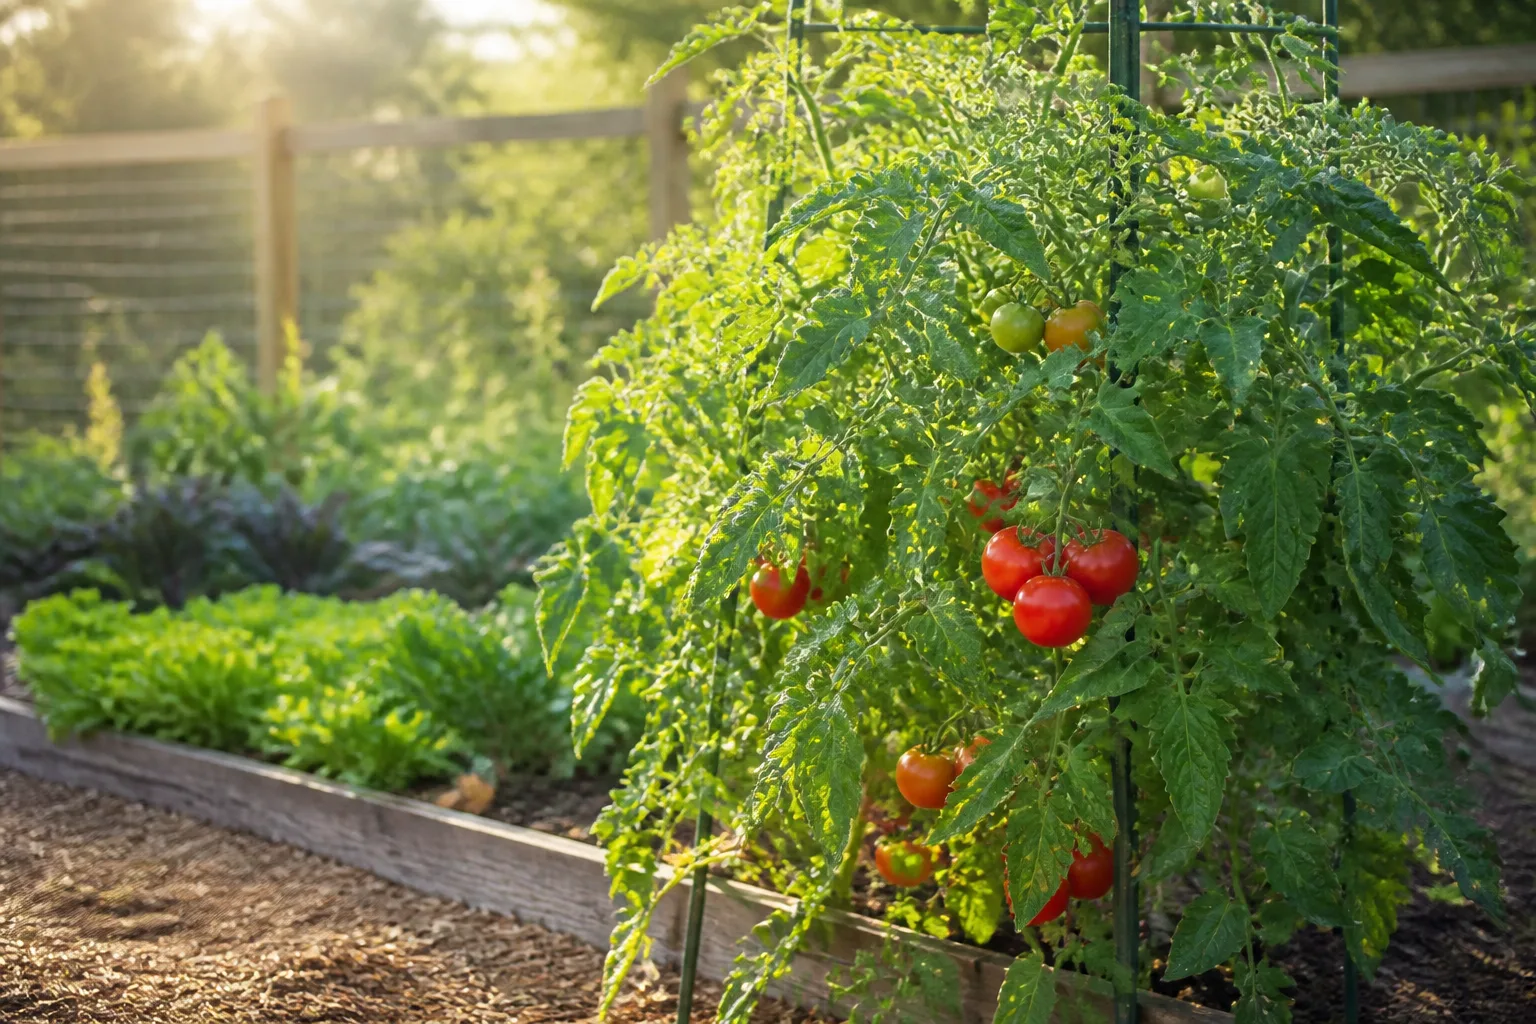
Tomato plants move through seven recognizable growth stages—seedling, vegetative, flowering, fruit set, ripening, harvest, and senescence—and matching what you see in the garden to the right stage tells you exactly when to transplant, feed, water less, pick, or pull the plant. Most home gardeners lose tomatoes not from one catastrophic mistake but from mistiming care: transplanting into cold soil, feeding nitrogen when fruit should swell, or harvesting too early and leaving flavor on the vine.
This timeline walks through each phase with identification cues, approximate day ranges, temperature thresholds, and the one task that matters most before the plant moves on. For year-round watering, soil, and pest guidance on the same crop, see the tomato plant hub.
Why Tracking Growth Stages Saves Your Harvest
A tomato (Solanum lycopersicum) is an annual that completes its life cycle in one warm season. From the day you sow seed—or buy a six-pack at the nursery—you are watching a clock that runs on heat, light, and moisture. When you know which stage the plant is in, you stop guessing whether yellow flowers are normal (they are, in stage 3) or whether marble-sized green fruit should already be red (not until stage 5).
| Stage | Approximate timing from sowing | What you should see |
|---|---|---|
| Seedling | Days 0–35 | Cotyledons, then true leaves; roots filling cells |
| Vegetative | Days 25–55 after sowing; starts after transplant | Rapid vine/leaf growth; plant 12–24 in. tall |
| Flowering | Overlaps late vegetative phase | Yellow star-shaped blooms on branching clusters |
| Fruit set | 7–14 days after open flowers | Tiny green fruits where flowers were |
| Ripening | 15–45+ days after fruit set | Color break from green to red, orange, or yellow |
| Harvest | Repeated through ripening | Fully colored, slightly soft fruit on the vine |
| Senescence | After final harvest or first hard frost | Yellowing leaves, declining fruit, plant exhaustion |
Day counts are ranges, not promises. A cherry tomato on a long southern season may flower six weeks after sowing; a beefsteak in a short northern summer may still be vegetative at day 40. Weather compresses or stretches every stage.
Determinate vs Indeterminate Timelines
Determinate (bush) tomatoes grow to a genetically set height, flower heavily in a concentrated window, set fruit in one main flush, and ripen over a few weeks. They are the choice for containers, small beds, and canning batches where you want most fruit at once. Indeterminate (vining) tomatoes keep growing, flowering, and setting fruit until frost or disease stops them—the timeline loops through stages 3–6 repeatedly all summer.
The RHS notes that cordon (indeterminate) types need tall supports and side-shoot removal, while bush types stay compact and need little pruning beyond optional staking when laden (RHS Grow Your Own Tomatoes). UF/IFAS adds that indeterminate varieties produce over several months, whereas determinates deliver a single crop before senescence arrives quickly (UF/IFAS Gardening Solutions). Plan your calendar around which type you planted before you interpret “why is my plant still growing leaves instead of fruit.”
Stage 1: Seedling (Germination Through First True Leaves)
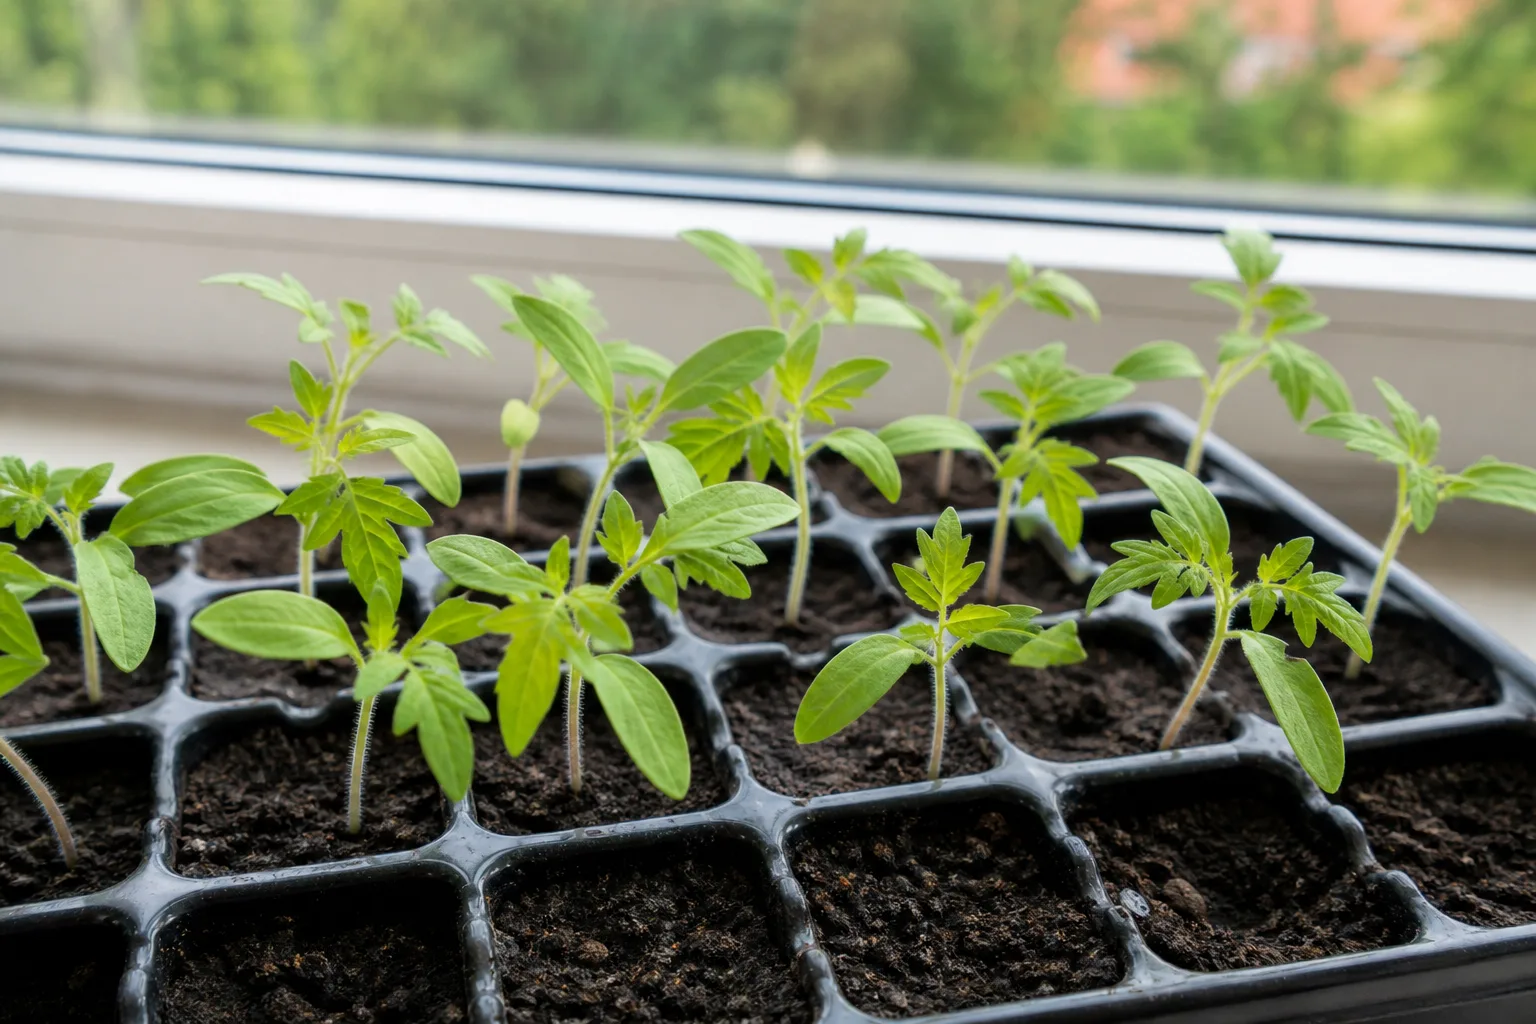
The seedling stage spans germination—the moment the radicle breaks soil—through the development of the first true leaves (the serrated, tomato-scented foliage that follows the smooth cotyledons). Indoors, this usually covers weeks 0–5 after sowing; outdoors direct-sown seed may spend longer in stage 1 if soil is cool.
Sow tomato seed 6–8 weeks before your average last spring frost so seedlings are stocky, not root-bound, when transplant time arrives. Seeds germinate fastest at about 64–70°F (18–21°C); the RHS recommends a heated propagator near 18°C (64°F) for reliable sprouting (RHS Grow Your Own Tomatoes). Most varieties emerge in 5–10 days in warm, moist mix—often 6–8 days under ideal conditions.
What Healthy Seedlings Look Like
Immediately after emergence you see two rounded cotyledons—seed leaves that do not look like mature tomato foliage. Within a week or two, the first true leaf appears between them, with the characteristic jagged edge and faint tomato smell when rubbed. A healthy seedling is stout, not leggy: stem thickness matters more than height. Deep green color without purple edging (cold stress) or pale yellow (nitrogen lack) signals good progress.
Roots should fill the cell or pot before you rush to the garden. When water disappears within hours and you see roots at drainage holes, the plant is transitioning toward vegetative growth and needs a larger container—or the garden—within a week.
Indoor Seedling Care Checklist
Keep seedlings under bright light for 14–16 hours daily—a sunny south window plus supplemental LED if stems stretch toward the glass. Water when the top centimeter of mix dries; soggy mix invites damping-off. Feed with a half-strength balanced liquid fertilizer only after true leaves appear, not at germination.
Harden off before any outdoor move: place plants outside in filtered shade for an hour, increasing exposure over 7–10 days until they tolerate full sun and breezes. Skipping hardening off is one of the fastest ways to stall the timeline by two weeks.
Stage 2: Vegetative Growth
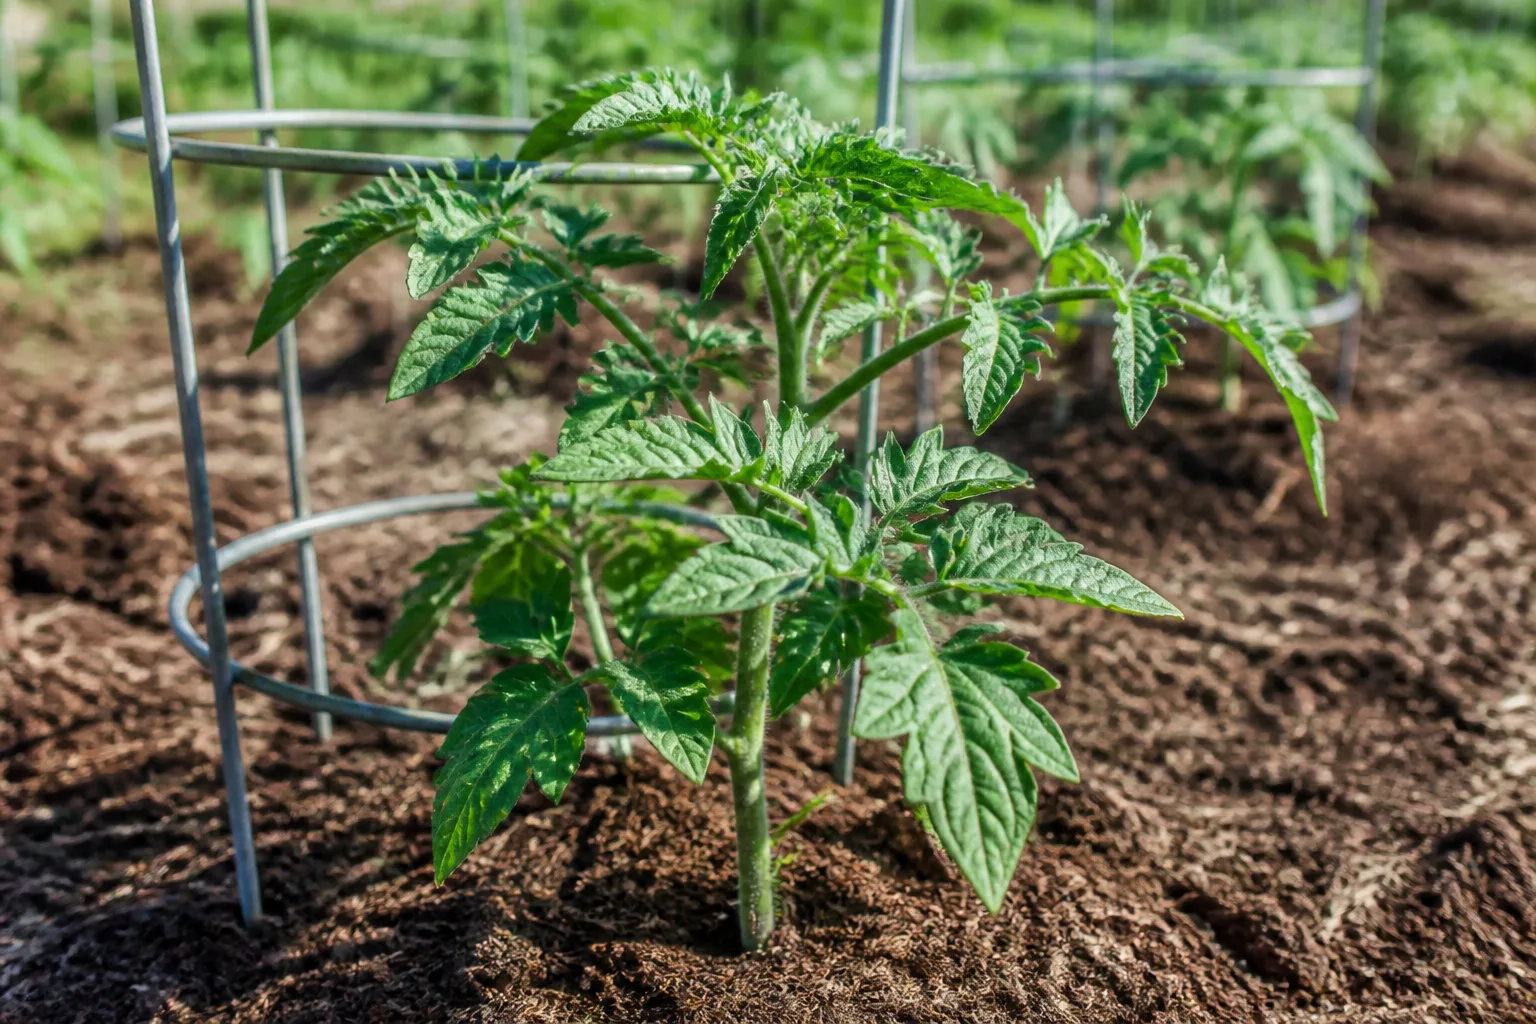
Vegetative growth is the building phase: stems lengthen, leaves multiply, and the root system expands dramatically. Outdoors, this stage begins after transplant and runs until the first flower clusters open—roughly 20–30 days in warm soil, longer if nights stay cool.
Transplant only when nighttime lows stay above 50°F (10°C) and soil temperature reaches at least 60°F (16°C)—the RHS advises waiting until temperatures are reliably above 16°C (60°F) (RHS Grow Your Own Tomatoes). Many Midwestern and northern gardeners use 65–70°F soil as a practical transplant target. Plant deeper than the pot: bury the stem to the first true leaves so adventitious roots form along the buried length—a tomato-specific advantage that stabilizes tall vines later.
When and How to Transplant Outdoors
Choose a site with 6–8 hours of direct sun and rich, well-drained soil near pH 6.0–6.8 (UF/IFAS recommends 6.2–6.5). Space determinates 24–36 inches apart; indeterminates 36–48 inches with sturdy stakes or cages in place at planting time—not after the plant flops.
The first week after transplant is establishment, not explosive growth. Some lower leaf yellowing is normal while roots recover. If plants wilt midday but perk overnight, they are likely fine; wilting around the clock means root damage or drought.
Water, Fertilizer, and Suckering During Vegetative Phase
Vegetative tomatoes need 1–2 inches of water per week from rain plus irrigation, applied at soil level to keep foliage dry. A balanced fertilizer (such as 10-10-10 or organic equivalent) at transplant supports leaf and root development. California’s CDFA tomato fertilization guidelines note that nutrient uptake stays modest until fruit set begins—heavy nitrogen late in vegetative growth can delay flowering (CDFA Tomato Fertilization Guidelines).
On indeterminate plants, remove suckers—shoots emerging from the leaf axil below the first flower cluster—when they are thumb-sized. This improves airflow and directs energy upward. Bush determinates rarely need aggressive suckering; follow your seed label.
Stage 3: Flowering
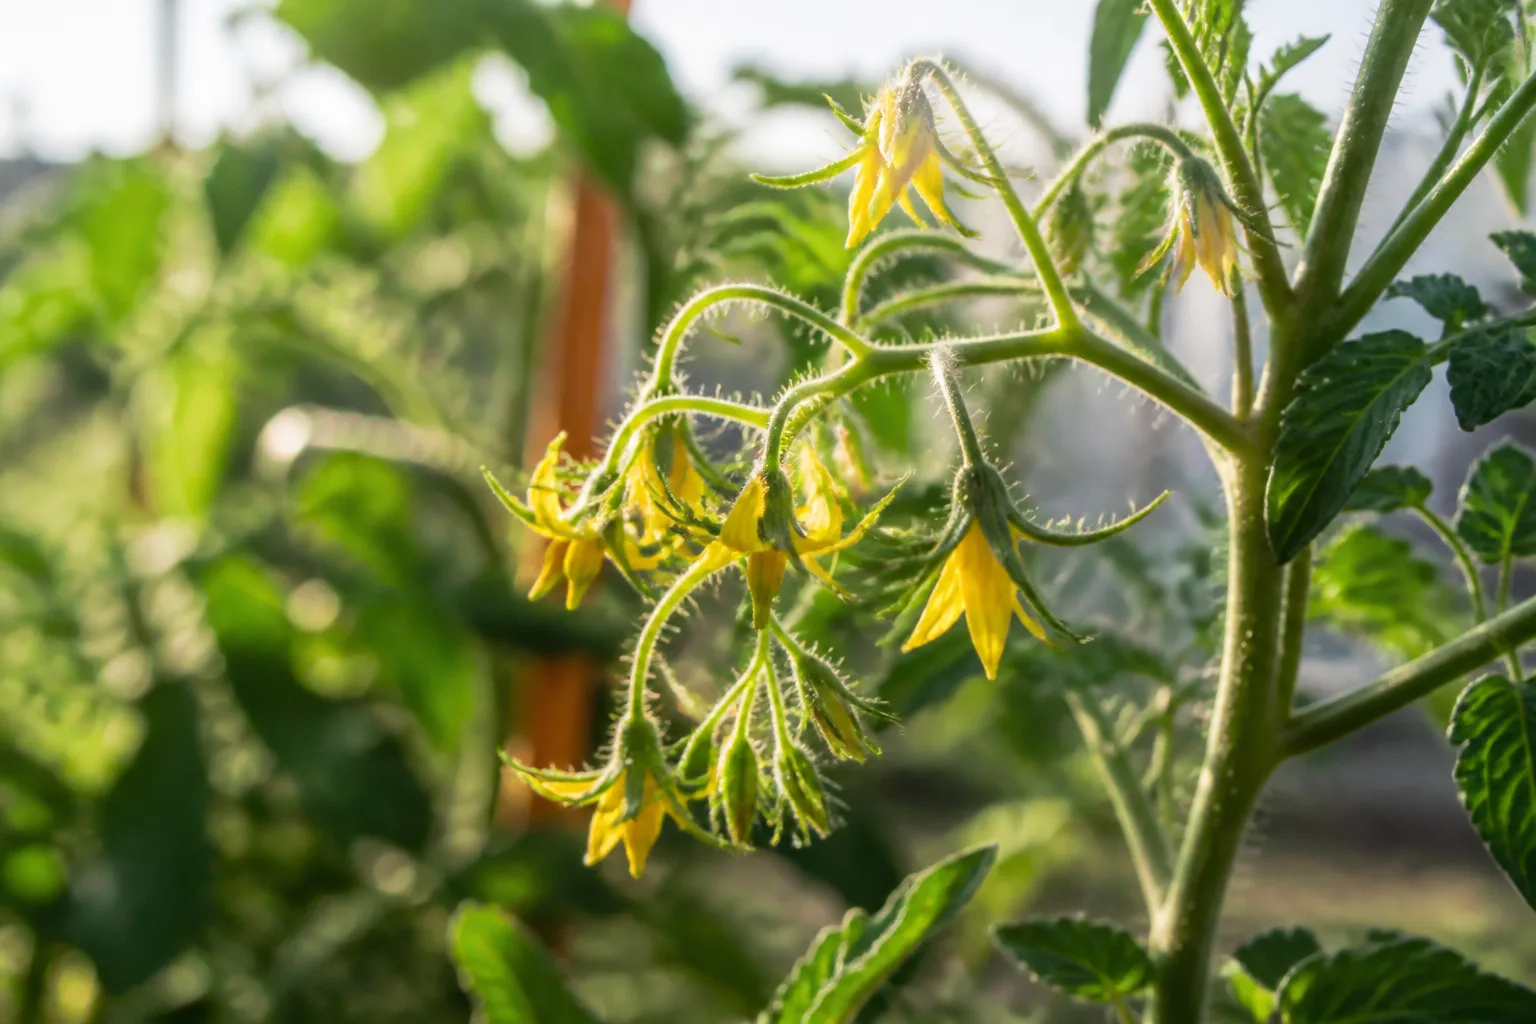
Flowering begins when yellow star-shaped blossoms appear in branched clusters (inflorescences) along the stem. On indeterminate types, new flower clusters continue all season; determinates often show a dramatic simultaneous bloom wave.
Expect flowers when plants reach roughly 12–24 inches tall, though container stress or excess nitrogen can delay them. Each flower must fully open for pollination—partially closed blooms rarely set fruit.
Temperature Limits That Cause Flower Drop
Tomatoes self-pollinate, but temperature governs success. Daytime highs above 85°F (29°C) can make pollen sticky and non-viable; nights below 55°F (13°C) disrupt hormone balance and cause blossom drop. Extended heat waves in the South and Southwest may pause fruit set even while flowers keep appearing—a common mid-summer plateau, not necessarily a disease.
Greenhouse growers improve set by venting for insect access and gently shaking open clusters midday; the RHS recommends tapping flowers when pollinators are scarce (RHS Grow Your Own Tomatoes). Outdoors, patience plus shade cloth during extreme heat often restores fruit set when nights cool.
Stage 4: Fruit Set
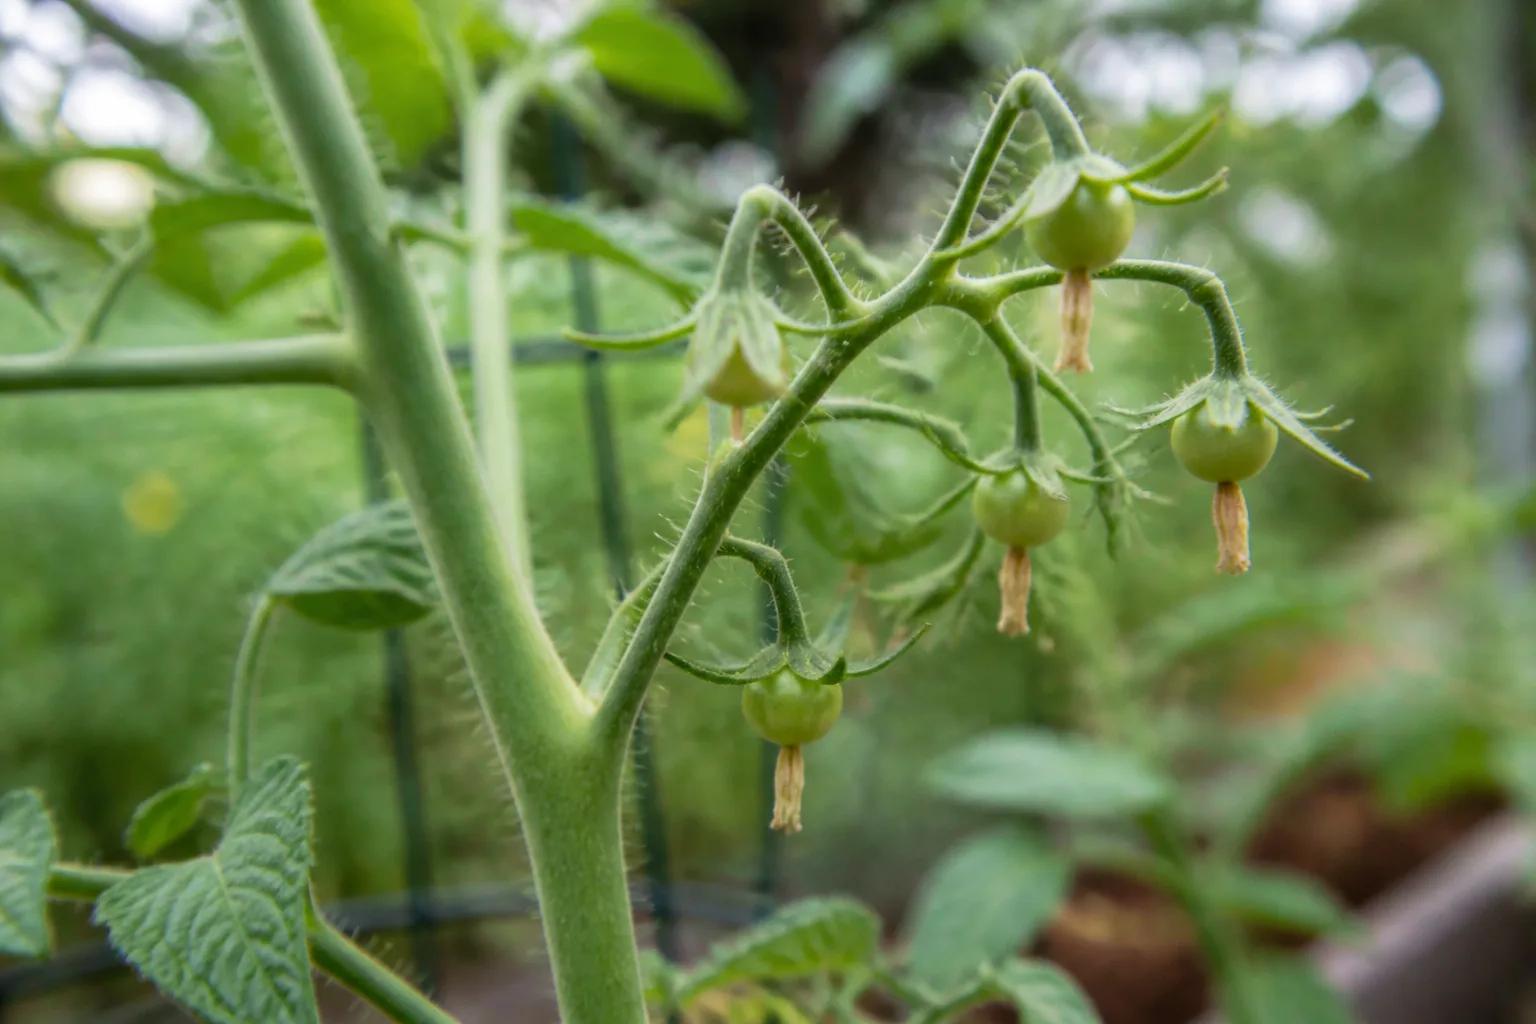
Fruit set is the bridge from flower to food: a successfully pollinated ovary swells into a tiny green fruit, usually within 7–14 days of a fully open blossom. Failed flowers dry and drop; the stem stays thin and yellow instead of thickening green.
Watch the style at the flower center. After pollination it darkens; the petals wilt and fall within about a day. The pedicel (flower stem) then thickens and turns green—that is your confirmation fruit set occurred.
Signs Pollination Succeeded—or Failed
Successful set produces a marble-sized green fruit within two weeks. Early growth feels slow; do not panic at pea-sized fruit for ten days. Failure shows as empty clusters: flowers open, brown, and vanish without swelling. If clusters are empty while neighbors set fruit, suspect heat, cold, or inconsistent watering—not always lack of bees.
Once fruit appears, shift fertilizer emphasis: lower nitrogen, higher phosphorus and potassium supports cell division in young fruit. CDFA guidelines recommend sidedressing potassium before early fruit set through early bloom because uptake accelerates sharply once fruits swell (CDFA Tomato Fertilization Guidelines). Keep soil evenly moist; drought at fruit set causes blossom end rot later—not a calcium shortage in soil so much as inconsistent water delivery.
Stage 5: Ripening
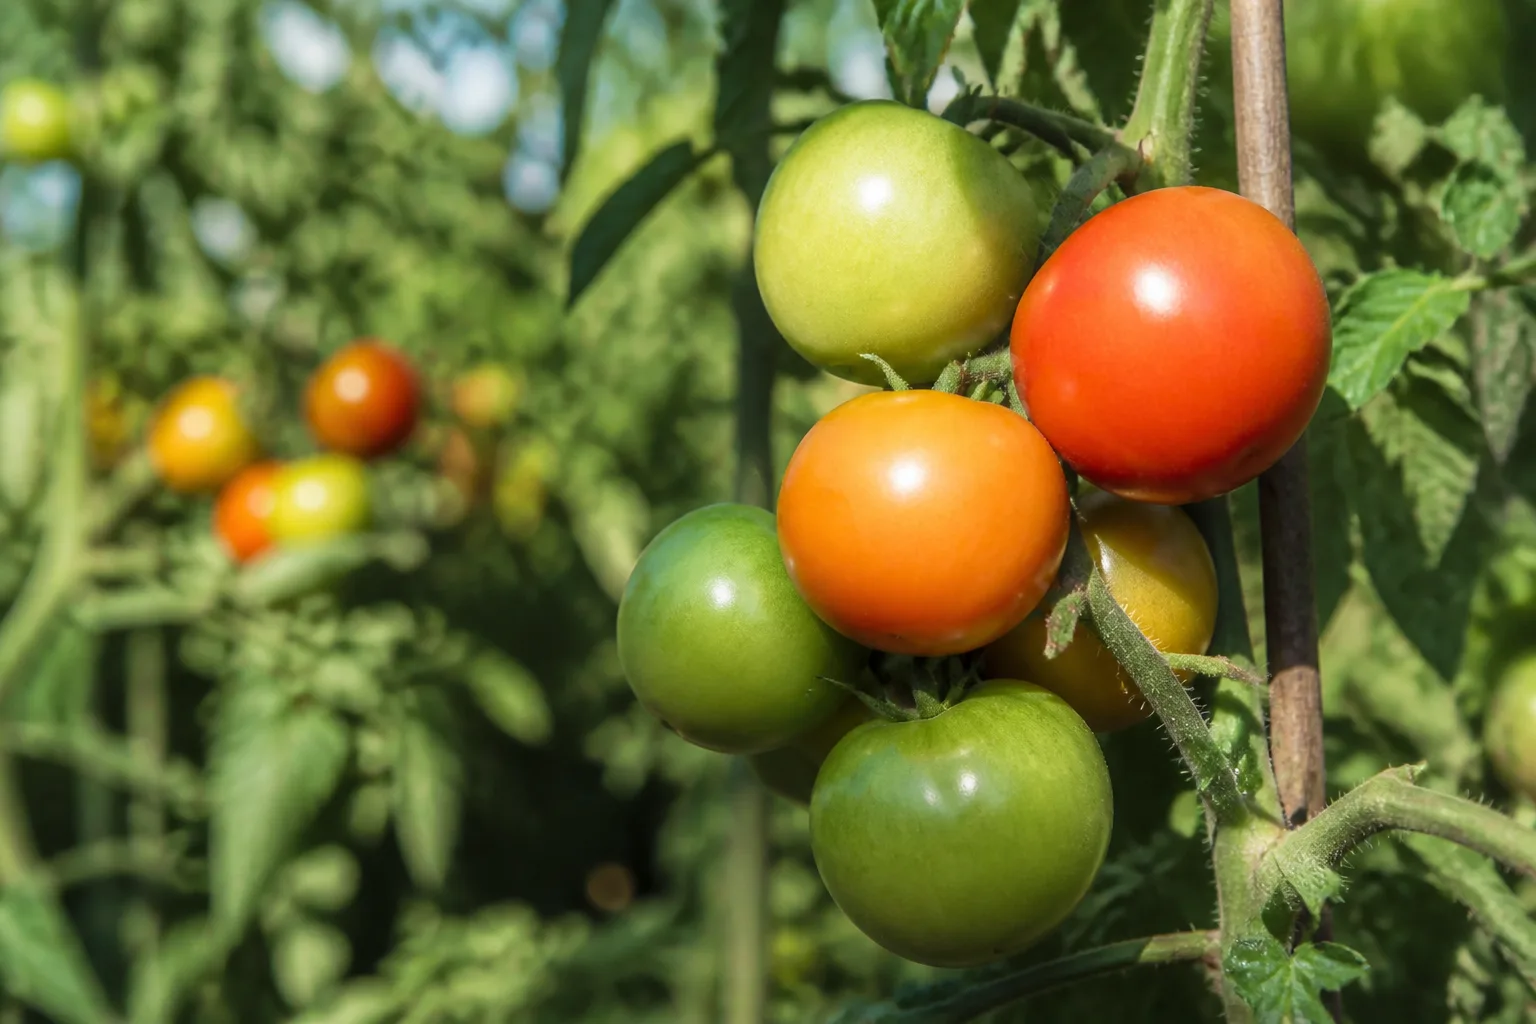
Ripening transforms mature green fruit into colored, aromatic tomatoes. After fruits reach full size—the mature green stage internally—they need roughly 15–45 days to develop final color and flavor, depending on cultivar and weather.
Purdue Extension explains that ripening is driven by temperature and ethylene. The optimum range is 68–77°F (20–25°C); outside that band, ripening slows (Purdue: Tomatoes Not Ripening). Above 85°F, tomatoes may stop producing lycopene and carotene, leaving fruits yellowish-green even when physiologically mature—a frustrating mid-summer stall in hot climates.
Color, Flavor, and Heat Delays
Color break starts at the ** blossom end** (bottom) on most red types, then spreads toward the stem. Heirlooms may show green shoulders while the base reddens; uniform color depends on cultivar. Flavor compounds accumulate during ripening on the vine; pulling fruit too early trades sweetness for shelf life.
When the first blush appears, reduce watering slightly—not drought stress, but a modest cut encourages pigment concentration and can improve taste. Avoid removing foliage so aggressively that fruits sunscald (pale leathery patches on the sun-facing shoulder). Heat, not light intensity, is the main ripening throttle in summer.
Stage 6: Harvest
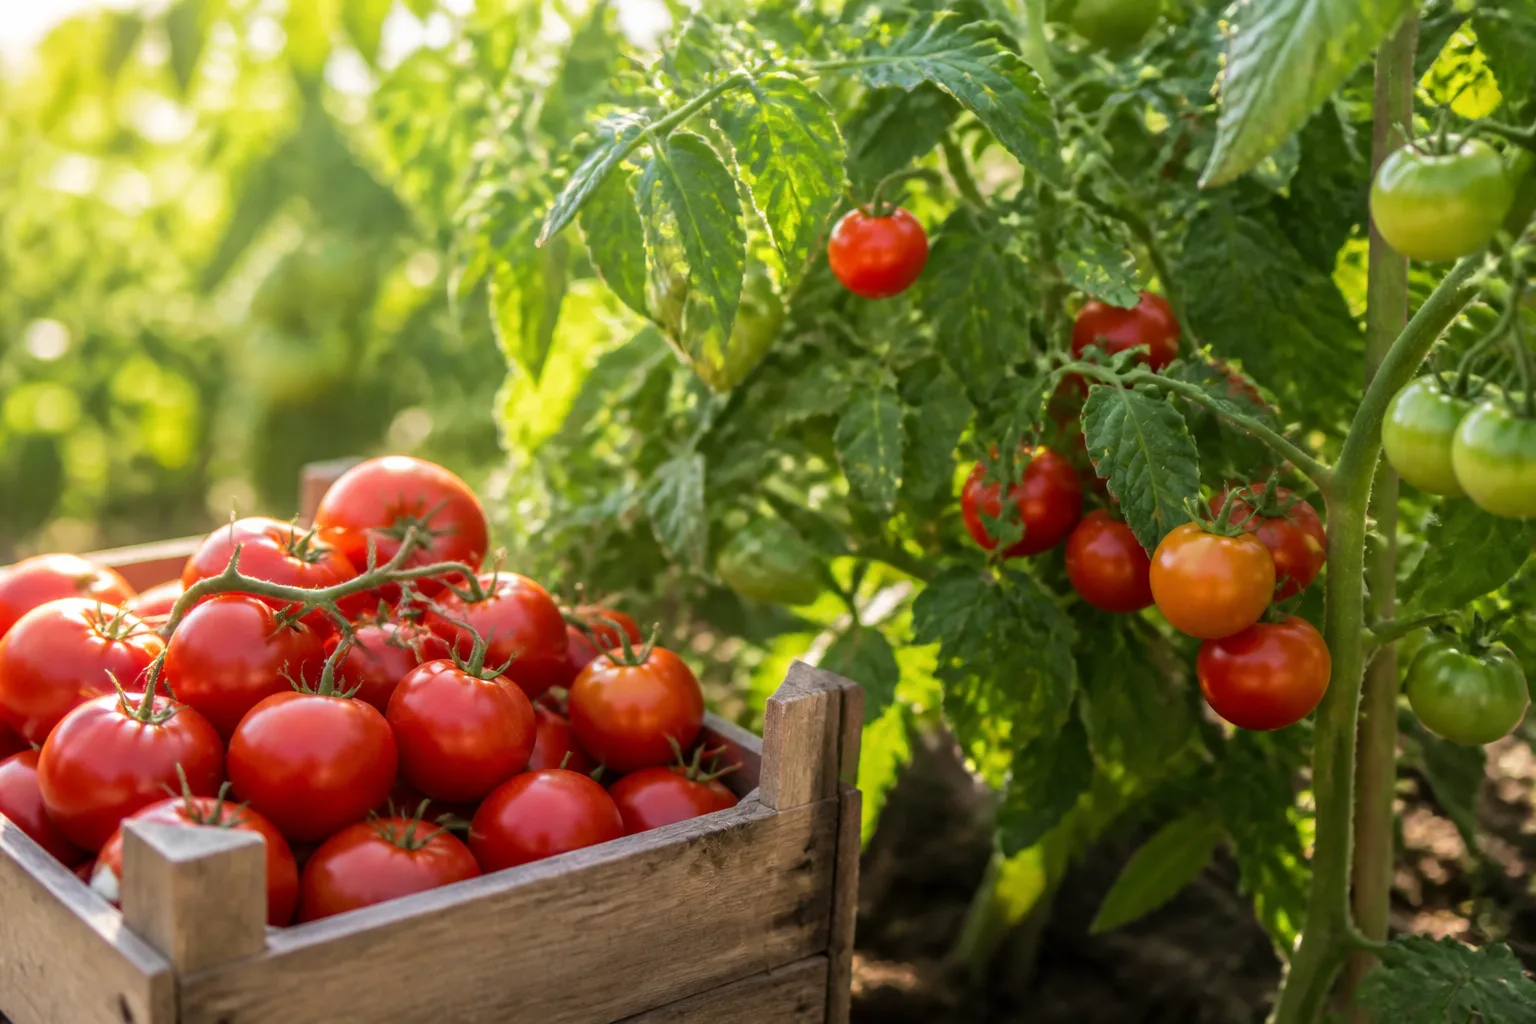
Harvest is the stage gardeners work toward—but it is not a single day. Indeterminate plants enter repeated harvest cycles as new clusters ripen across weeks; determinates deliver a concentrated pick window.
Ripe tomatoes show even color for their variety (red, orange, yellow, purple, or striped), a tangy tomato fragrance at the stem scar, and a firm skin with slight give when gently squeezed. They should twist off cleanly without tearing the plant. Pick cherry types every two to three days to prevent splitting; larger slicers can hang an extra day for peak flavor if pests and heat allow.
Harvest in the morning after dew dries for best texture. Store ripe fruit at 55–70°F—not the refrigerator, which dulls flavor below about 50°F (Purdue recommends avoiding typical fridge temps for ripe tomatoes). If frost threatens, harvest mature green fruit with a slight blush and ripen indoors at 60–65°F; solid dark-green immature fruit will not ripen off the vine.
Stage 7: Senescence (End of Season)
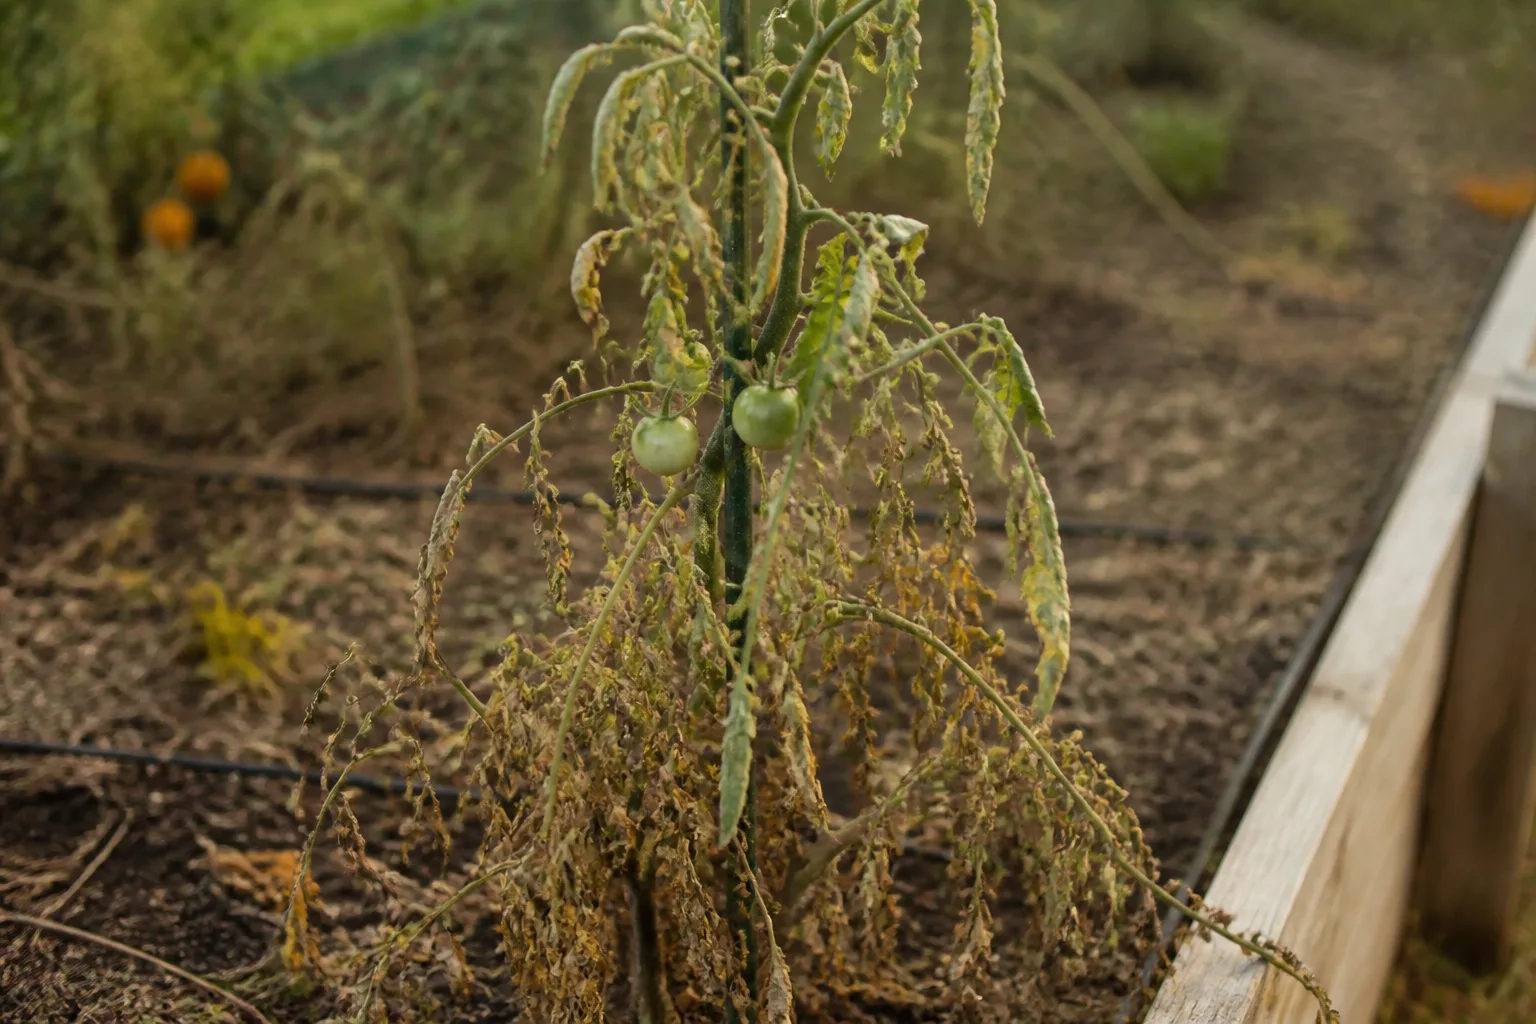
Senescence is the natural decline after the plant finishes its reproductive work—or when frost, disease, or exhaustion ends the season. Leaves yellow from the bottom upward, new flowers produce smaller fruit or none at all, and stems brown at the base.
Determinate plants senesce quickly after the main crop; indeterminates may limp through autumn until first killing frost. When nights fall below 50°F consistently, growth and ripening nearly stop even if plants look alive.
When to Pull Plants and What to Compost
Pull disease-free plants after final harvest and compost them only if you did not battle late blight, septoria, or wilt—those pathogens survive compost in home piles. Diseased material belongs in municipal yard waste or the trash.
In mild-winter zones, tomatoes are still treated as annuals; overwintering outdoors rarely yields worthwhile spring fruit. Clear beds, plant a cover crop or mulch, and plan next year’s timeline from your frost calendar. Saving seed from open-pollinated heirlooms is optional at senescence if fruit was fully ripe and isolated from other tomato varieties.
Conclusion
The tomato plant growth timeline is your diagnostic map: seedlings need light and patience, vegetative plants need deep transplanting and steady water, flowers need moderate temperatures, fruit set needs even moisture and balanced feed, ripening needs 68–77°F days, harvest needs daily attention on indeterminate vines, and senescence tells you when to clear the bed. Match the stage you see to the task that stage demands, and the same plant that confused you in June will make sense by August.
Keep a simple garden log—sow date, transplant date, first flower, first ripe fruit—and next season your day ranges will be customized to your yard, not a generic chart. That is how good gardeners turn a seven-stage biology lesson into a reliable dinner schedule.



