5 Signs of Carpenter Bees Around Your Home
Learn the five signs of carpenter bees, how to tell active holes from old damage, and what to do before tunnels weaken decks, fascia, or trim.
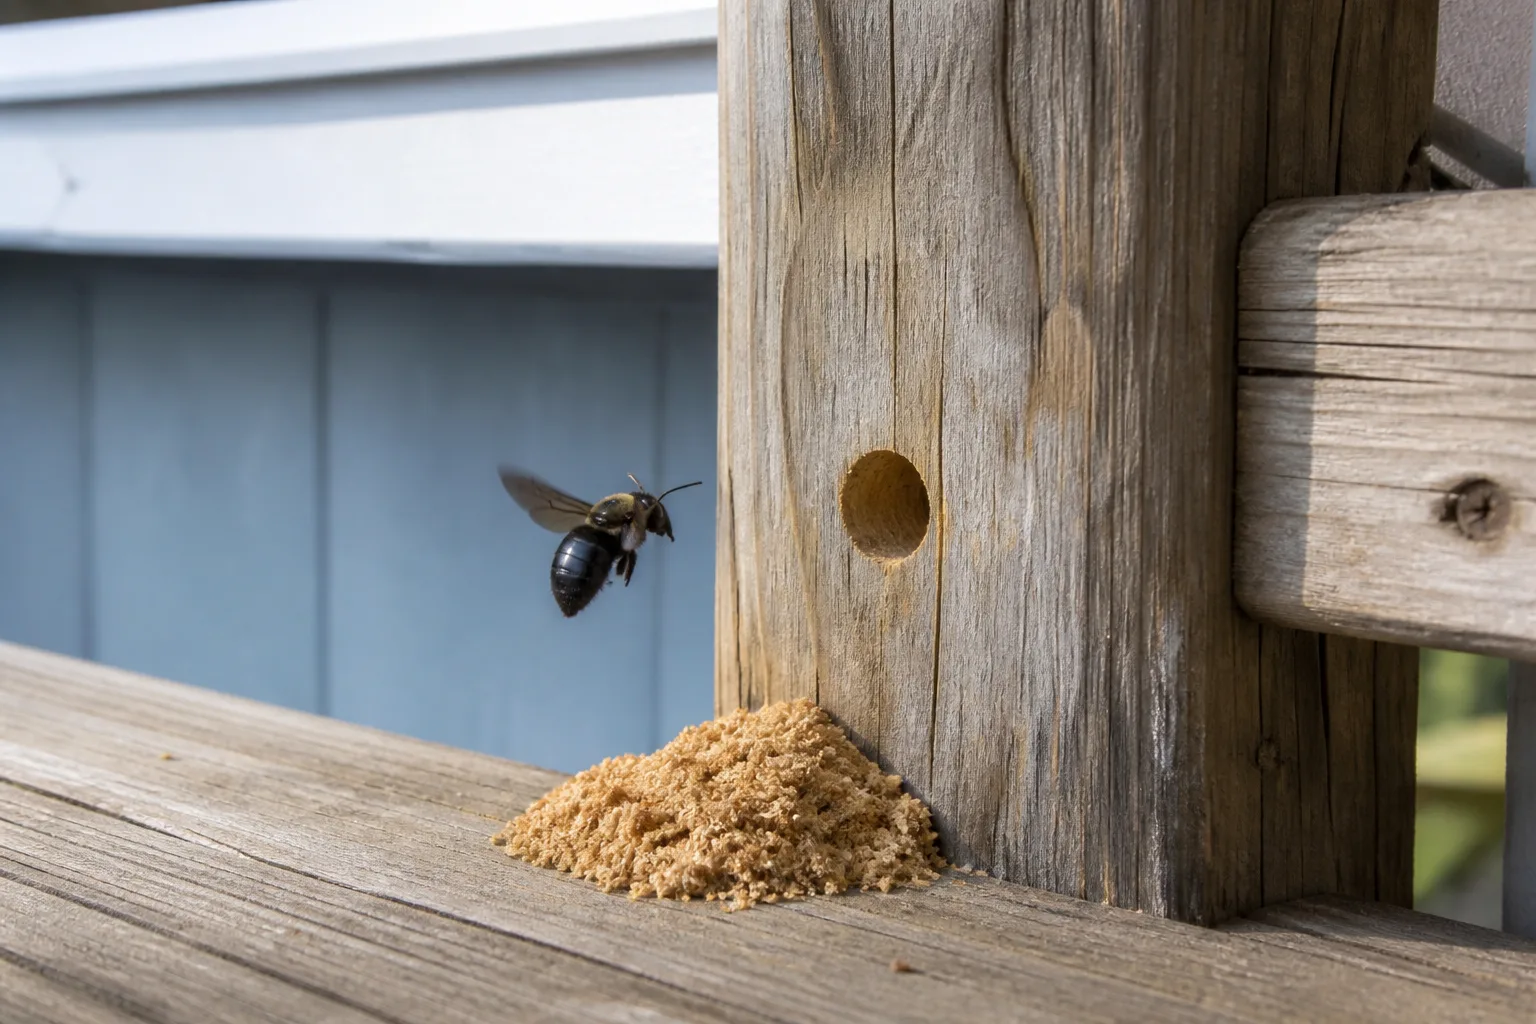
The first clue is often not a bee. It is a neat, round hole in a deck rail, fascia board, porch ceiling, fence, or piece of outdoor furniture. Look closer and you may find coarse sawdust below it, a yellow-brown streak on the surface, or a large bee hovering nearby.
Those clues matter because carpenter bees do not eat wood. Female bees excavate it to create nest galleries for their young, while the bees themselves feed on pollen and nectar. Ohio State University Extension describes the bees as important pollinators whose repeated gallery use can still damage exposed wood over time. A single new gallery is usually a modest repair issue; repeated use by several generations, plus woodpecker damage, can turn the same area into a serious maintenance problem. The practical goal is to confirm activity, protect the wood, and avoid treating every bee in the yard as a pest.
Start with a 60-second inspection
Begin in daylight, when you can see the structure and observe bee traffic. Walk the outside of the building and scan the sunny, weathered wood first: deck rails and undersides, porch ceilings, fascia and eaves, fence tops, pergola beams, shed trim, window surrounds, and outdoor furniture. Look at the end grain, exposed saw cuts, old nail holes, and the backs or undersides of boards rather than only the obvious front faces.
Use your phone to photograph each suspicious opening and place a small piece of removable tape a few inches away—not over the hole—to mark its location. Note whether the wood is painted, stained, bare, cracked, or soft; whether fresh debris sits below it; and whether bees enter or leave. A photograph and a simple count are more useful than a vague impression that “there are lots of bees.”
The five signs below are strongest when they occur together. A large bee near flowers is not enough to diagnose a wood problem, and an old hole without fresh evidence may only need sealing and surface maintenance. Treat the pattern, not one isolated clue.
Sign 1: Large bees patrol wooden structures
Carpenter bees are robust insects, often roughly three-quarters of an inch to an inch long. In spring and early summer, males may hover near a deck, eave, fence, or porch and dart at people, pets, or other flying insects that enter their territory. The display looks aggressive, but the male has no stinger.
That hovering is a location clue, not proof that the bee is the one drilling. Females excavate the galleries, and they may work quietly while males patrol the entrance. If the bees repeatedly hold position beside one piece of bare or weathered wood—and you can find one of the other signs nearby—the case for carpenter bee activity becomes much stronger. If they are only visiting flowers, leave them alone and keep looking for evidence before reaching for a spray.
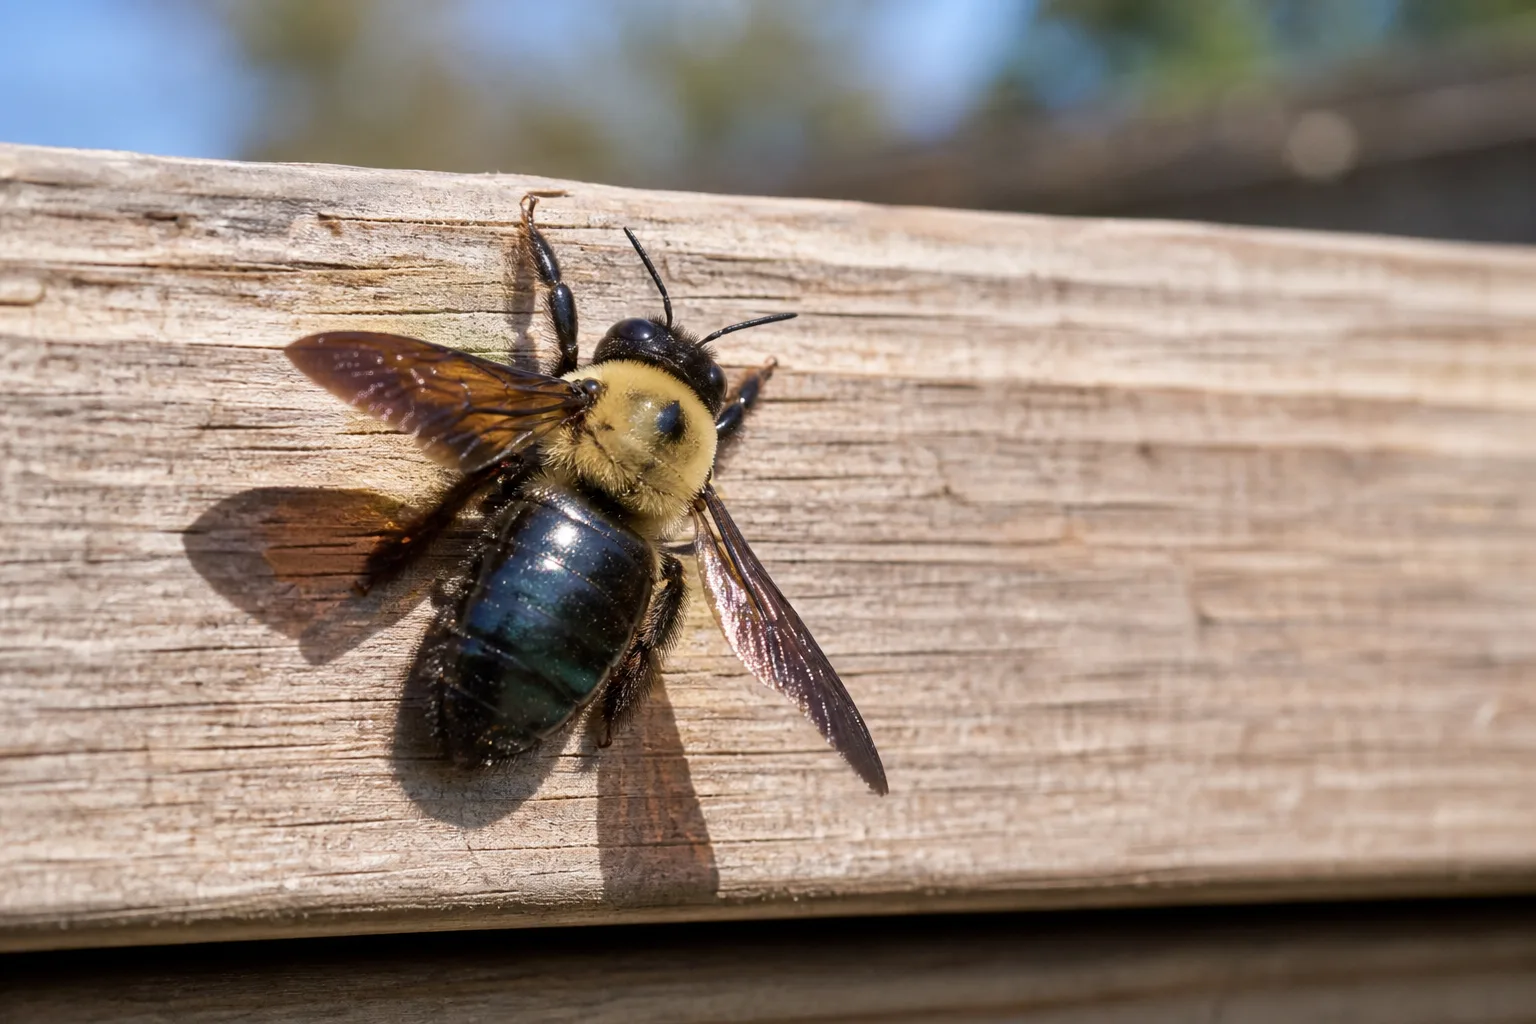
Tell carpenter bees from bumble bees
The fastest visual check is the abdomen. Carpenter bees have a largely bare, smooth, shiny black abdomen, while bumble bees have a fuzzy abdomen with yellow or other bands. Carpenter bees are solitary and nest in wood; bumble bees are social and commonly nest in the ground. Their size and buzzing can be similar, so looking at the abdomen and the nest site is safer than identifying them by color alone.
| Feature | Carpenter bee | Bumble bee |
|---|---|---|
| Abdomen | Mostly bare and shiny | Fuzzy, often banded |
| Nest site | A tunnel in wood | Usually a ground nest |
| Social behavior | Solitary females use separate galleries | Social colonies share a nest |
| Common structure clue | Round entrance, sawdust, staining | No drilled wood entrance |
In much of the eastern United States, the large carpenter bee encountered around homes is Xylocopa virginica, but species vary by region. Penn State Extension also uses the smooth, shiny abdomen and wood-nesting behavior as the practical distinction from bumble bees. If the insect does not match this general description, or if the nest site is underground, pause before deciding that a carpenter bee is responsible.
Sign 2: Clean, round holes appear in wood
The signature entrance is a smooth, nearly circular opening about the diameter of the bee—often close to one-half inch. It can look as if someone used a drill bit, but the tunnel is chewed into the wood. The female typically cuts across the grain for about an inch, then turns roughly 90 degrees and follows the grain into a longer gallery.
The hole itself tells you that a bee has used or begun to use the wood; it does not tell you whether the gallery is occupied today or how much of the board’s strength has been lost. A new opening may be shallow. An old entrance may lead to branches made by later bees, especially if the same site has been available for several seasons.
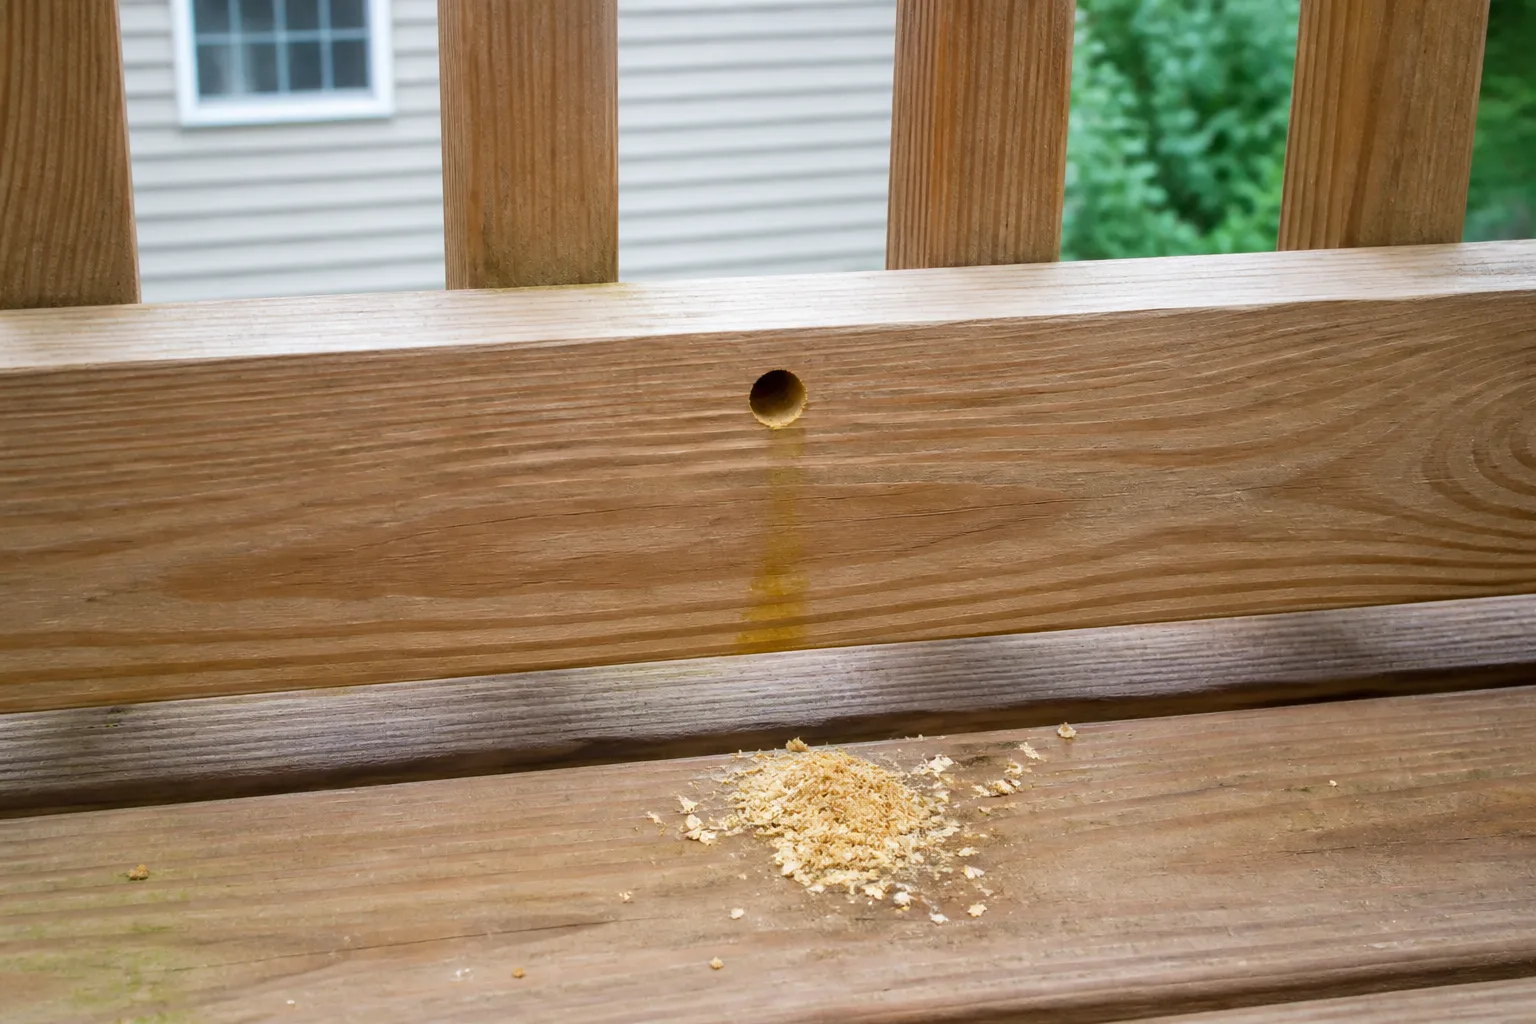
Where hidden nest entrances are easiest to miss
Carpenter bees favor dry, weathered, unfinished wood, but the entrance may not be on the most visible side. Inspect the underside of rails, the inner face of fascia, the back of trim, porch ceilings, roof eaves, fence caps, and the end grain of boards. Exposed saw cuts and old nail holes can make convenient starting points. A small hole on the protected side of a board may be more important than a larger cosmetic mark on the front.
Use a stable ground position and binoculars for high areas. Do not climb onto a roof, lean a ladder sideways over a railing, or poke an active hole with a finger. If the suspected entrance is above a stairway, over a porch, or on a structural beam, move directly to the professional-inspection guidance below.
Sign 3: Coarse sawdust collects below a hole
Fresh carpenter bee boring produces coarse wood shavings, not a fine powder spread evenly across an entire room. The debris may form a small pile on a lower rail, window ledge, patio surface, or the ground below the entrance. Wind and rain can remove it, so an empty spot does not prove that the hole is old.
Sawdust becomes more convincing when it is directly beneath a clean round opening and when you see a bee entering or leaving. It is less conclusive when the pile is far from the hole, mixed with leaves, or associated with a rotten board. Carpenter ants and wood-boring beetles can also leave wood debris, but their insects, hole sizes, and patterns differ. If the hole is irregular or the debris is a very fine powder coming from many tiny exit holes, do not assume a carpenter bee.
The time of year changes how you read the clue. Spring emergence and nest construction can make fresh debris easier to spot. Later in the season, adults may be inside existing galleries and the surface may look quiet. Check again after dry weather and watch the marked area for several minutes before you decide that activity has stopped.
Sign 4: Yellow-brown staining or pollen dust marks the surface
A yellowish, brownish, or sometimes darker streak below a wood hole can be carpenter bee waste deposited on the surface. Dislodged pollen may also collect beneath or around a hidden entrance. The pattern is especially useful on a painted wall, brick, or trim where the color stands out more than the opening itself.
Staining is a supporting clue, not a chemical fingerprint. Rain, sap, rust, mildew, and decaying wood can create similar marks. Photograph the stain before washing it and compare it with the hole above, the sawdust below, and any bee traffic. A fan-shaped scatter of coarse debris plus a fresh-looking streak is more persuasive than a lone discoloration.
If the stain has turned dark or developed mold, the wood may have stayed damp. That does not mean mold caused the bee activity, but moisture and weathering can make a surface easier to damage. Correct the water problem when you repair the wood; a new coat of paint over a wet or soft board will not solve the underlying failure.
Sign 5: Woodpecker damage or boring sounds reveal a gallery
On a quiet day, you may hear faint chewing or a rasping sound inside the board near a suspected opening. Sound is difficult to interpret outdoors, so use it as a reason to inspect—not as a diagnosis by itself. Outdoor noise, wind, and other insects can mislead you.
Woodpecker or flicker damage is a more visible secondary sign. Birds may tear into wood while searching for carpenter bee larvae or adults in the galleries, leaving ragged holes, shredded edges, and a much larger damaged area than the original entrance. This can weaken a board faster than the neat bee opening suggests and may require both pest treatment and carpentry repair.
When you find pecking around a deck ledger, post, beam end, fascia, or other load-bearing member, stop treating it as a cosmetic pest issue. Photograph the damage, keep people away from the compromised area, and have the wood assessed. A bird-created cavity can hide how much material has been removed.
How to tell whether a hole is active
An old hole is not the same as an active infestation. Before you seal anything, combine four observations: fresh coarse sawdust, new staining or pollen, bee traffic, and the condition of the entrance. You do not need to see all four, but a clean hole with no debris or traffic deserves a different response from a hole that receives a bee every few minutes.
Watch from a distance during a warm, calm part of the day and compare the marked spot with a photograph taken 24 to 48 hours later. If new debris appears, activity is continuing. If no new evidence appears after several checks, the gallery may be inactive—or simply occupied at a different time. Weather, temperature, and the bee’s daily schedule can change what you see.
Do not insert wire, a screwdriver, or a stick to “test” the depth. That can damage the wood, disturb a female, or push debris deeper into the gallery. A professional can inspect inaccessible or structurally important wood with the right equipment.
Fresh evidence versus old damage
Fresh evidence is usually loose, clean-edged, and located at the opening: coarse shavings on the surface below, a newly brightened entrance, or a bee repeatedly entering. Historic damage may have weathered gray, lost its debris, collected dirt, or been covered by an old patch. Neither appearance is perfect, particularly after rain or repainting.
The most useful question is not “Does this hole look new?” but “Is the wood still being used, and what is the consequence if it is?” A quiet hole in a nonstructural fence cap can be scheduled for repair. A quiet hole in a porch beam still deserves an inspection because old galleries may have branched inside the member.
What carpenter bees are doing inside the wood
Female carpenter bees excavate a tunnel as a nursery. After entering the wood, a female turns with the grain and builds separate brood cells, provisioning each with a pollen-and-nectar food mass for a developing larva. The wood is construction material and shelter; it is not the bee’s food.
That behavior explains why the damage can outlast the visible bee activity. Young adults develop inside the gallery, and adults may return to the same protected tunnel to overwinter or reuse it. Ohio State University Extension notes that females often refurbish old nests because starting a new gallery takes time and energy. A hole that survived one season can therefore become the starting point for more activity next year.
This also explains why spraying only the bee flying past the deck is usually an incomplete plan. The visible adult is outside the gallery, while eggs, larvae, pupae, or overwintering adults may be protected inside. An effective response has to address the entrance and the wood surface, not only the insects you can see in the air.
Is the damage structural or mostly cosmetic?
One carpenter bee’s first tunnel is often a limited repair concern, especially in thick, sound wood. The risk rises when many bees reuse the same entrance, branch galleries through a board, or return to the same structure year after year. Repeated excavation can reduce the wood’s effective cross-section and create paths for moisture or secondary organisms.
Do not estimate structural risk from hole count alone. Five holes in a thin fascia board may matter more than five holes in a thick decorative fence cap; a single gallery in a post, beam, rafter, stair rail, or ledger may deserve more attention than several in a replaceable furniture slat. Soft, rotten, split, or water-damaged wood is already compromised before the bees arrive.
Look for sagging, flexing, cracks that extend from the entrance, soft spots, shredded wood, loose rail connections, or galleries close together. These are reasons to call a carpenter or qualified inspector. The extension guidance from Ohio State and Alabama emphasizes that extensive, repeated damage—and woodpeckers searching for larvae—can ultimately make replacement necessary, even though a single gallery is not automatically a structural emergency.
What to do today if you find active holes
First, photograph and count the holes, then identify which ones show fresh evidence. Keep children and pets away from the work area. If anyone in the household has a serious sting allergy, if the holes are high or hard to reach, or if the wood is structural, skip DIY treatment and contact a licensed pest-management professional.
For a small number of reachable holes, the extension-recommended sequence is treat the gallery with a product specifically labeled for carpenter bees, allow the entrance to remain accessible for the period directed by the label or local extension guidance, then plug and finish the wood. Ohio State University Extension and Penn State Extension both describe insecticidal dust applied directly into the entrance as a targeted option; Penn State advises treatment after dark, when bees are less active, and delaying closure so adults can contact and distribute the dust inside the gallery.
If you use a pesticide, read the current label before opening the container. Wear the protective clothing, gloves, eye protection, and respiratory protection the label requires; avoid flowers and areas where pollinators are foraging; keep people and pets out; and never increase the rate because the hole looks deep. Product registrations and directions vary by location, so a product name from an old article is not a substitute for the label in your state.
Treat, wait, then plug and paint
After the treatment window has passed and activity has stopped, plug the entrance with a suitable exterior repair material such as a wooden dowel or exterior-grade filler, following the repair product’s directions. The goal is to close the route into the gallery, not to smear a surface patch over a deep, active tunnel. If several entrances connect, a carpenter or pest professional may need to recommend a fuller repair.
Let the repair cure, sand only as needed, and coat the surrounding exposed wood. A sound exterior paint or polyurethane film makes the surface less attractive than bare, weathered wood. Paint the repaired area and vulnerable end grain rather than creating a single bright dot on an otherwise unprotected board. Penn State Extension and Ohio State University Extension both caution that stain is generally less protective than paint for discouraging carpenter bee attack.
If you prefer not to use insecticide, do not improvise by pouring household oils, fuel, solvents, or unregistered substances into the gallery. A mechanical seal may be appropriate for an inactive opening, but a live nest and a structural member require a more careful decision. A full carpenter bee control guide covers the treatment-and-repair sequence in more detail.
What not to do when carpenter bees are using a structure
Do not plug an active hole immediately. A live adult or developing bee may remain inside, and sealing the entrance before treatment can leave the gallery unresolved. Some guidance also describes mechanical sealing as a non-insecticidal approach, but the timing and construction matter; do not trap an active nest accidentally when you could first get local extension or professional advice.
Do not spray every bee in the yard. Carpenter bees pollinate plants, and males that hover near people cannot sting. Target the holes and the wood that needs protection, especially when the bees are nesting in a sound, nonstructural location where monitoring and surface maintenance may be enough.
Do not rely on essential oils, traps, or surface sprays as a complete cure. A strong scent may discourage landing for a short time, but it does not prove that larvae or adults inside the gallery were reached. A trap can intercept some females looking for a nest site, yet it cannot repair existing tunnels. Surface insecticides can lose effectiveness as weather removes or degrades the residue, and they are difficult to apply to every possible nesting surface.
Do not climb into a risky position to reach one hole. A fall from a ladder can be more serious than the bee damage. Use a professional when the entrance is over stairs, above a roofline, on a second-story fascia, or within a beam you cannot safely inspect.
When to call pest control or a carpenter
Call a licensed pest professional when you find numerous active entrances, activity that returns after treatment, holes in high or inaccessible areas, or a location where safe pesticide application is difficult. Alabama Cooperative Extension System likewise recommends professional help when holes are difficult to reach or activity keeps returning. A good inspection should identify active galleries, separate carpenter bee evidence from termites or carpenter ants, and explain what will happen to the holes after treatment.
Call a carpenter or structural professional when the damage is in a post, beam, rafter, stair rail, ledger, header, or other member that carries weight. Add that step when woodpeckers have opened a ragged cavity, the board feels soft, connections are loose, or the same section has been tunneled for several seasons. Pest treatment cannot restore lost wood strength.
If you are worried about stings, remember that the hovering males most people notice cannot sting, while females generally sting only when handled or directly provoked. That does not make an active nest a place to touch. Wear protective clothing, keep your distance, and outsource the work if an allergy or medical concern makes exposure unacceptable.
A prevention plan for next spring
Prevention begins after the immediate problem is resolved. In late winter or early spring—earlier in warm climates and later in colder ones—walk the same inspection route and compare the wood with last season’s photographs. Recheck deck undersides, fascia, eaves, porch ceilings, fence tops, pergolas, sheds, and outdoor furniture before the bees begin heavy nesting activity.
Remove or replace boards that are soft, split, rotten, or heavily tunneled. Seal exposed end grain after cutting new lumber. If a structure is repeatedly targeted, consider whether composite, vinyl, aluminum, or another nonwood component can replace a vulnerable trim piece without compromising the design or repairability of the structure.
Keep firewood and untreated scrap wood away from the building where practical. The goal is not to remove every piece of dead wood from a pollinator-friendly yard; it is to give bees less reason to choose a high-value structural surface and to make damage easier to find when it begins.
Paint and maintain vulnerable surfaces
A well-maintained paint film is one of the most useful preventative measures for exposed wood. Carpenter bees tend to prefer bare, weathered, or unfinished surfaces, while painted wood is less attractive. Gardening Know How also notes that the protection wears as paint weathers, so paint is not a guarantee: cracks, chipped edges, worn end grain, and uncoated backs or undersides can still expose suitable wood.
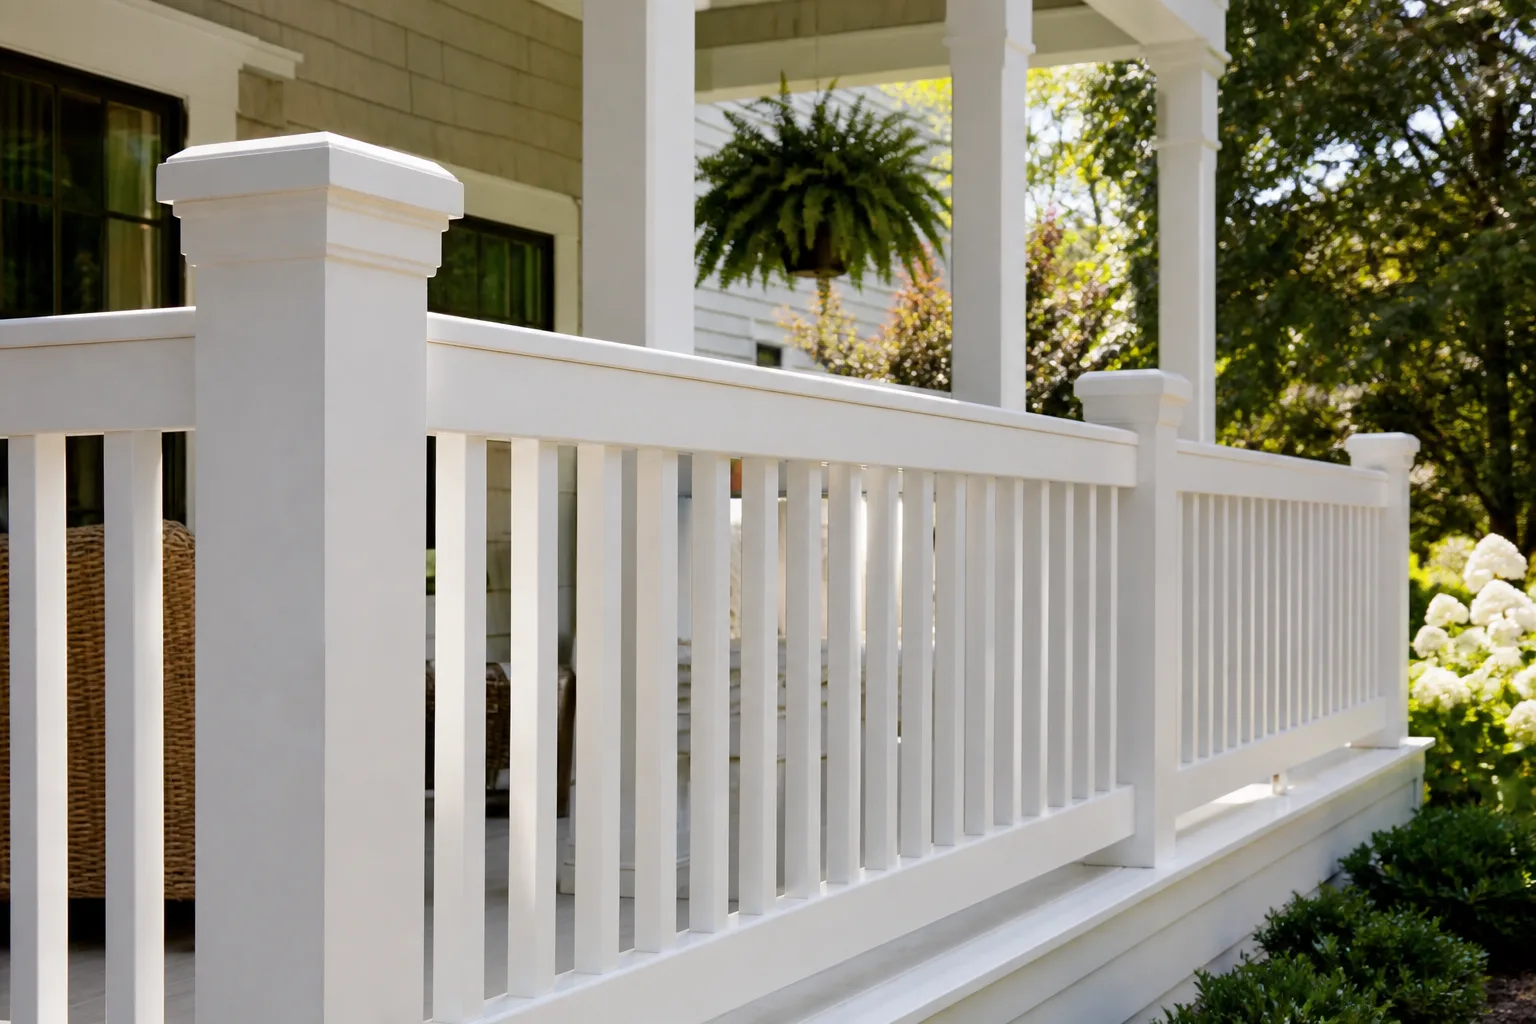
Inspect the coating instead of assuming the original paint is still doing its job. Touch up peeling areas after the surface is dry and sound, and pay special attention to the horizontal caps and cut ends that collect water and weather fastest. If you use stain or a clear finish for appearance, understand that it may not deter nesting as well as a continuous paint film; plan to monitor those areas more closely.
Finally, keep the garden itself bee-friendly. Carpenter bees are useful pollinators, and the presence of a few around flowers is not a house infestation. Protect the parts of the property that matter, maintain the wood before it becomes weathered, and reserve targeted treatment for active galleries that threaten a structure or create an unavoidable safety concern.
Conclusion
The five strongest signs of a carpenter bee problem are large bees patrolling wood, clean round entrance holes, coarse sawdust, yellow-brown staining or pollen dust, and woodpecker damage or boring sounds. Together, they point to a nest gallery more reliably than any single bee sighting.
Start by photographing and marking the evidence, then decide whether the hole is active and whether the wood is structural. For reachable, limited damage, the safer sequence is targeted, label-directed treatment followed by the appropriate wait, plugging, and full-surface repair. Do not seal an active gallery blindly, flood it with household chemicals, or risk a ladder fall for a small hole. Maintain a sound paint film and inspect the same vulnerable surfaces each spring so a pollinator in the yard does not become a hidden wood problem.



