How to Get Rid of Slugs in the Garden and Protect Seedlings
Learn how to get rid of slugs in the garden with a practical plan: confirm damage, reduce hiding spots, use traps, and protect seedlings without salt now.
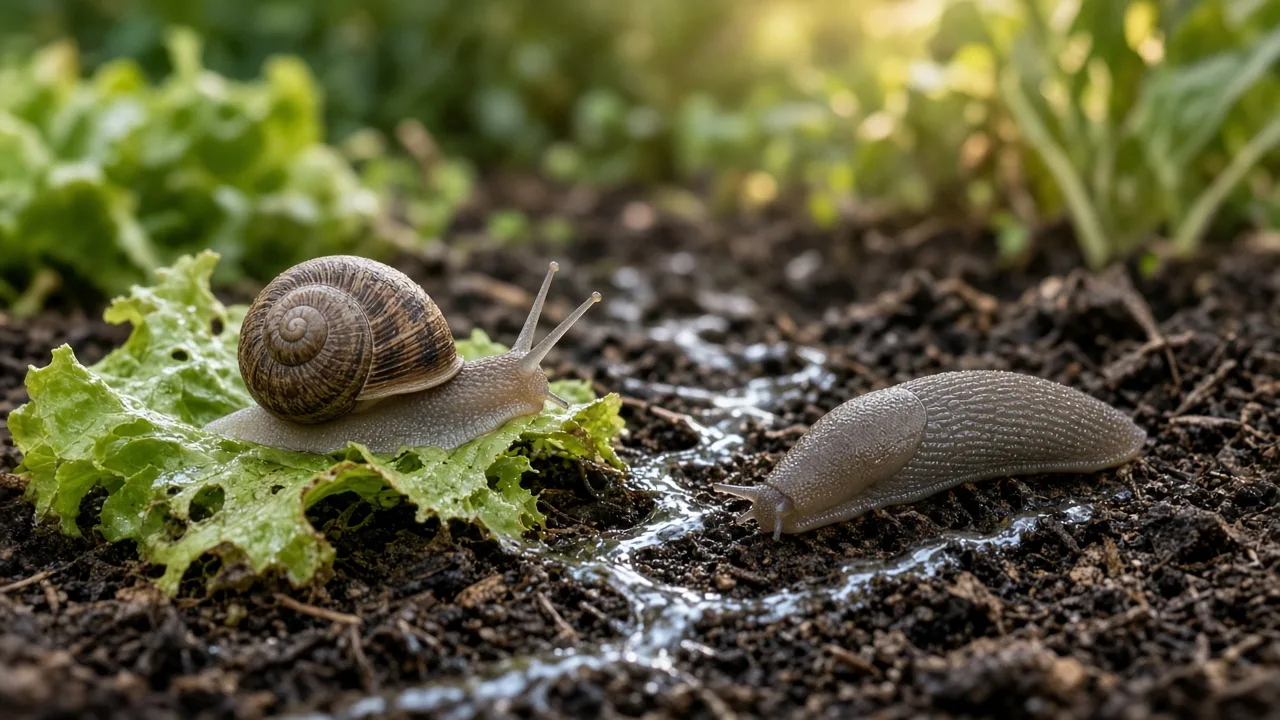
If tender leaves are disappearing overnight, start by confirming the culprit rather than treating every hole as slug damage. Slugs are most active in darkness and damp weather, and a plan that combines evening checks, less daytime shelter near vulnerable plants, direct removal, and targeted protection usually works better than a single homemade remedy.
You do not need to make a garden slug-free. Many slugs feed on dead plant material and support other wildlife; the goal is to protect seedlings, leafy crops, berries, or particular ornamentals from repeated damage. A useful control plan focuses on where the feeding is happening and adjusts after you check whether new damage has slowed.
Confirm slug activity before you act
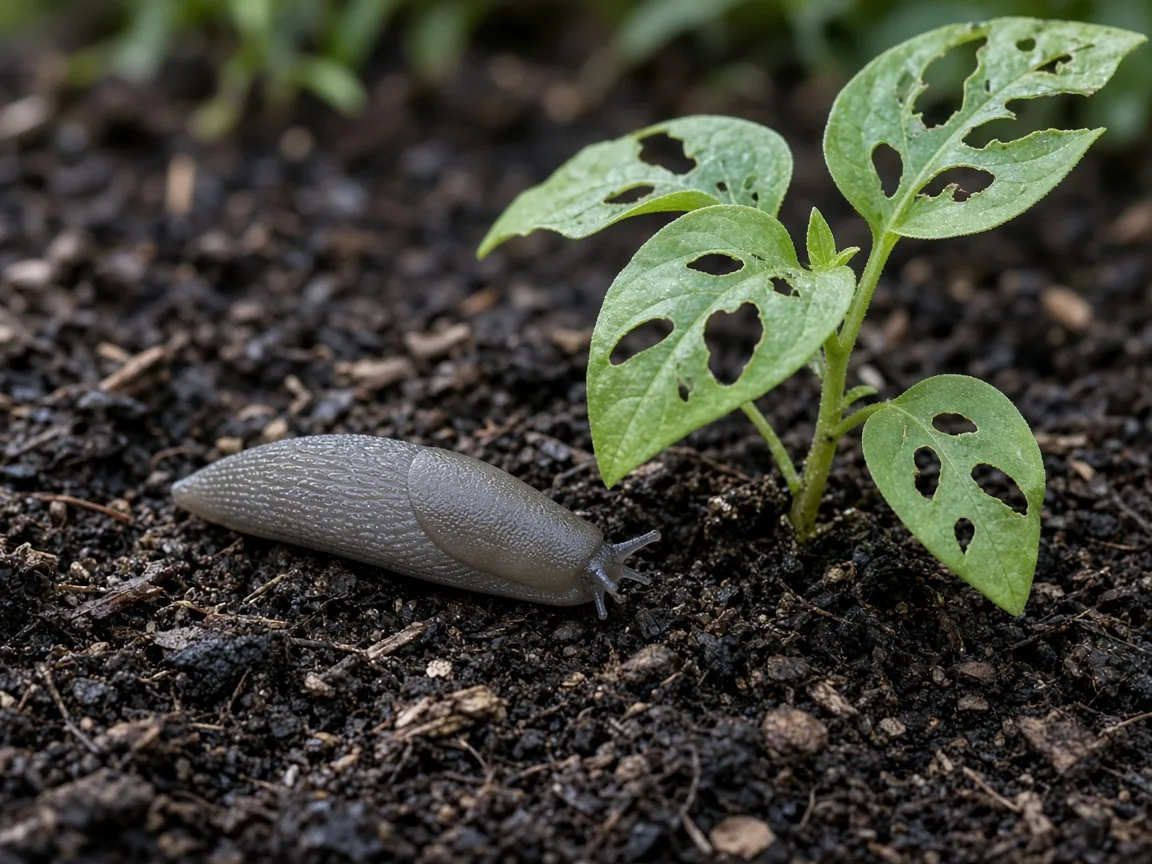
Ragged holes are a clue, not a diagnosis. Slugs and snails scrape irregular holes in leaves and flowers, often leaving a silvery trail of dried mucus; caterpillars, earwigs, beetles, birds, and mammals can also damage foliage. UC IPM recommends looking for the trail as well as the plant injury, especially when the pest itself is hidden by day (UC IPM’s guide to snails and slugs).
The pattern helps. Slugs often attack soft, low foliage, seedlings, strawberries, and other fruit close to soil. A missing leaf with no slime, no slug, and no fresh feeding after a damp night should make you check for other causes before you scatter bait or change irrigation.
Check after dark, not just for holes
Take a flashlight into the garden one to three hours after dusk, especially after rain or on a mild, cloudy evening. Look under leaves, along the soil line, beneath pot rims, at the shady side of boards and stones, and where low branches touch the ground. Slugs also move during damp, overcast days, so a daytime inspection after rain can reveal them when nighttime checks are impractical.
Mark a few damaged leaves or take a quick phone photo before you begin. Revisit the same plants the next morning. Fresh holes or new slime trails provide a baseline; old damage cannot show whether a remedy worked. If you find eggs, note the location before disturbing the bed so you can remove only the likely nursery area instead of turning over the whole garden.
Start with the plants that need protection most
Prioritize small transplants, seedlings, lettuce and other tender greens, strawberries, hostas, and any plant whose growing tip has been chewed. A mature shrub with a few holes can often tolerate light feeding, while a seedling may lose its only growing point in one night. If damage is limited to one corner, protect that corner first rather than treating every bed.
Choose a threshold that fits the plant. For a seedling row or food crop, fresh feeding on consecutive nights is enough reason to intervene. For an established ornamental, a few old holes may not justify killing wildlife or applying a pesticide. This distinction keeps control focused and prevents a few harmless grazers from triggering a whole-yard treatment. On an established plant, judge the trend across several nights, not the worst-looking leaf. On a new transplant, protect it sooner because its small amount of foliage leaves little room to recover.
When planting a new bed, place highly susceptible crops away from the most persistent refuges if you can. Slugs often shelter in dense groundcover, tall weeds, stacked boards, edging gaps, and piles of debris. A planting plan that leaves access for inspection and keeps seedlings away from those hiding places can reduce future work without relying on a claim that any companion plant will repel slugs. Where repeated slug damage makes a plant impractical, choose less palatable alternatives for the most exposed spots. UC IPM notes that stiff or strongly scented foliage, including rosemary, sage, and lavender, often receives less damage than succulent leaves. This is a relative advantage, not immunity: newly planted specimens and seedlings can still be eaten, and the less-palatable plant will not drive slugs away from nearby lettuce.
Make the bed less hospitable without stripping its soil
Remove the shelters that sit directly beside plants receiving repeated damage: loose boards, overturned pots, weeds, fallen leaves touching seedlings, and dense dead foliage. Trim lower leaves only when it is safe for the plant, and move stored pots or bricks away from the bed edge. You are concentrating slugs into fewer places where you can inspect or trap them, not trying to eliminate every cool, damp refuge in the landscape.
Keep the soil covered where plants need mulch, but avoid a thick, continuously wet mat pressed against vulnerable crowns. Pull mulch back a few inches from a seedling stem, clear decaying leaves from the immediate plant base, and check beneath the mulch before adding more. In dry climates, removing all mulch can stress roots and waste water; improve access and airflow locally instead of leaving the soil bare across the whole bed.
Manage water, mulch, and shelter strategically
Water in the morning when your schedule and plant needs allow, so foliage and the soil surface have more time to dry before nighttime feeding. Direct water to the root zone with a soaker hose or drip line rather than wetting leaves and pathways with a late sprinkler cycle. Do not withhold the water a crop needs: the aim is to avoid unnecessary evening wetness and standing water, not to drought-stress plants.
UC IPM recommends reducing moisture and shelter as part of a combined program, including switching from sprinklers to drip irrigation or watering near sunrise (UC IPM). That will not make a rainy garden dry, and it will not stop slugs already hiding beneath a raised-bed lip. It can shorten the time that surfaces stay wet and make the bed easier to inspect.
RHS also emphasizes that slugs and snails are part of garden biodiversity: many eat decomposing matter, and they feed birds, frogs, toads, hedgehogs, and ground beetles (RHS advice on slugs and snails). Leave some habitat away from the plants you are protecting, such as leaf litter under a shrub or a compost area, while keeping the immediate seedling zone open enough to monitor. That balance is more realistic than clearing every natural refuge.
Remove slugs and eggs where you find them
Hand-picking works best when you repeat it. After dusk, wear garden gloves or use tongs to lift slugs from the plants and hiding spots you identified. Place them in a sealed container for disposal according to local guidance; do not toss live slugs into a neighboring garden or compost heap where they can return. For a small patch, checking every evening for several nights can reduce the active feeding population quickly.
To draw slugs into the open, UC IPM suggests lightly watering an infested area in late afternoon, then searching after dark with a flashlight. This is a targeted, short-term step: wet just the affected patch, not the entire garden every night. Penn State Extension notes that slugs shelter under boards, stones, loose bark, and plant debris and are more active in mild, damp conditions (Penn State Extension).
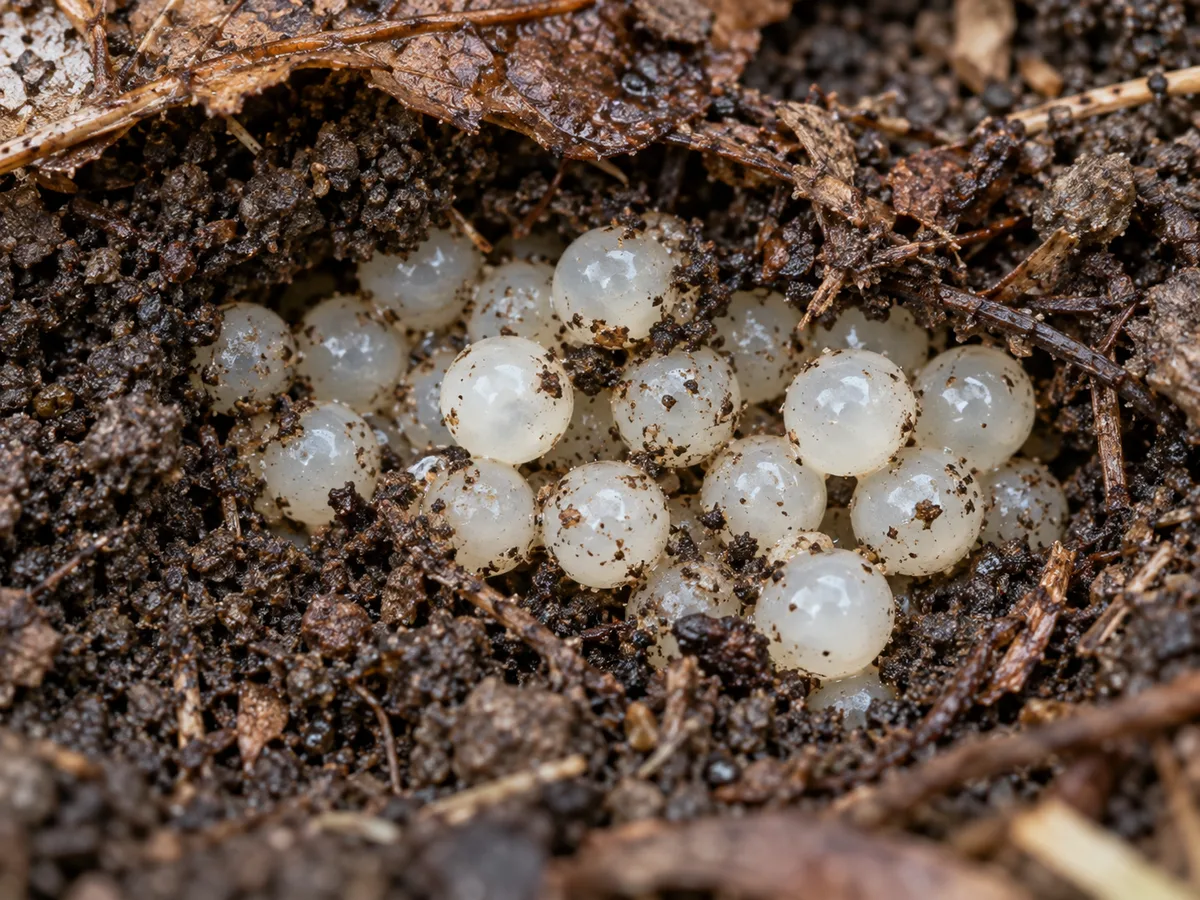
Look for eggs in sheltered, moist places such as soil cracks, beneath leaf litter, under boards, and around container edges. Clusters are often round or oval and pale, translucent, or pearly; their color changes as they age, so do not rely on color alone. If you find a small cluster in loose soil, scoop it into a bag for disposal rather than scattering it through the bed. Avoid broad digging around established roots: disturbing the entire soil surface can damage plants and beneficial soil structure for an uncertain reduction in slugs.
Use traps for monitoring and spot control
Traps are most useful when you place them near the damage, inspect them consistently, and remove what they catch. They tell you where slugs are traveling and can reduce a local group, but they do not protect every plant or stop new slugs from entering the garden. If a trap stays empty while leaves keep disappearing, revisit your diagnosis and look for another pest.
Board and shelter traps
Set a small, flat board or an upside-down pot on low spacers near the affected bed, leaving a narrow shaded gap underneath. In the evening, lightly dampen the ground under the trap if the soil is dry. Check it in the morning, remove any slugs, and reset it. UC IPM describes board traps as a way to gather slugs in a predictable place for daily removal; the method is cheap but only works if you keep checking.
Do not place a permanent board directly against a seedling row and forget it. That can create exactly the damp refuge you are trying to control. Put it at the bed edge, label or remember the location, and lift it every morning. If the same trap catches slugs repeatedly, that spot is a daytime refuge or travel route; thin nearby cover or move a pot so you can inspect it more easily. If it catches nothing for several mornings, shift it closer to fresh damage rather than adding more boards. Birds & Blooms also describes board and inverted rind traps as a practical way to collect slugs from shady garden areas (Birds & Blooms).
Beer or yeast-baited traps
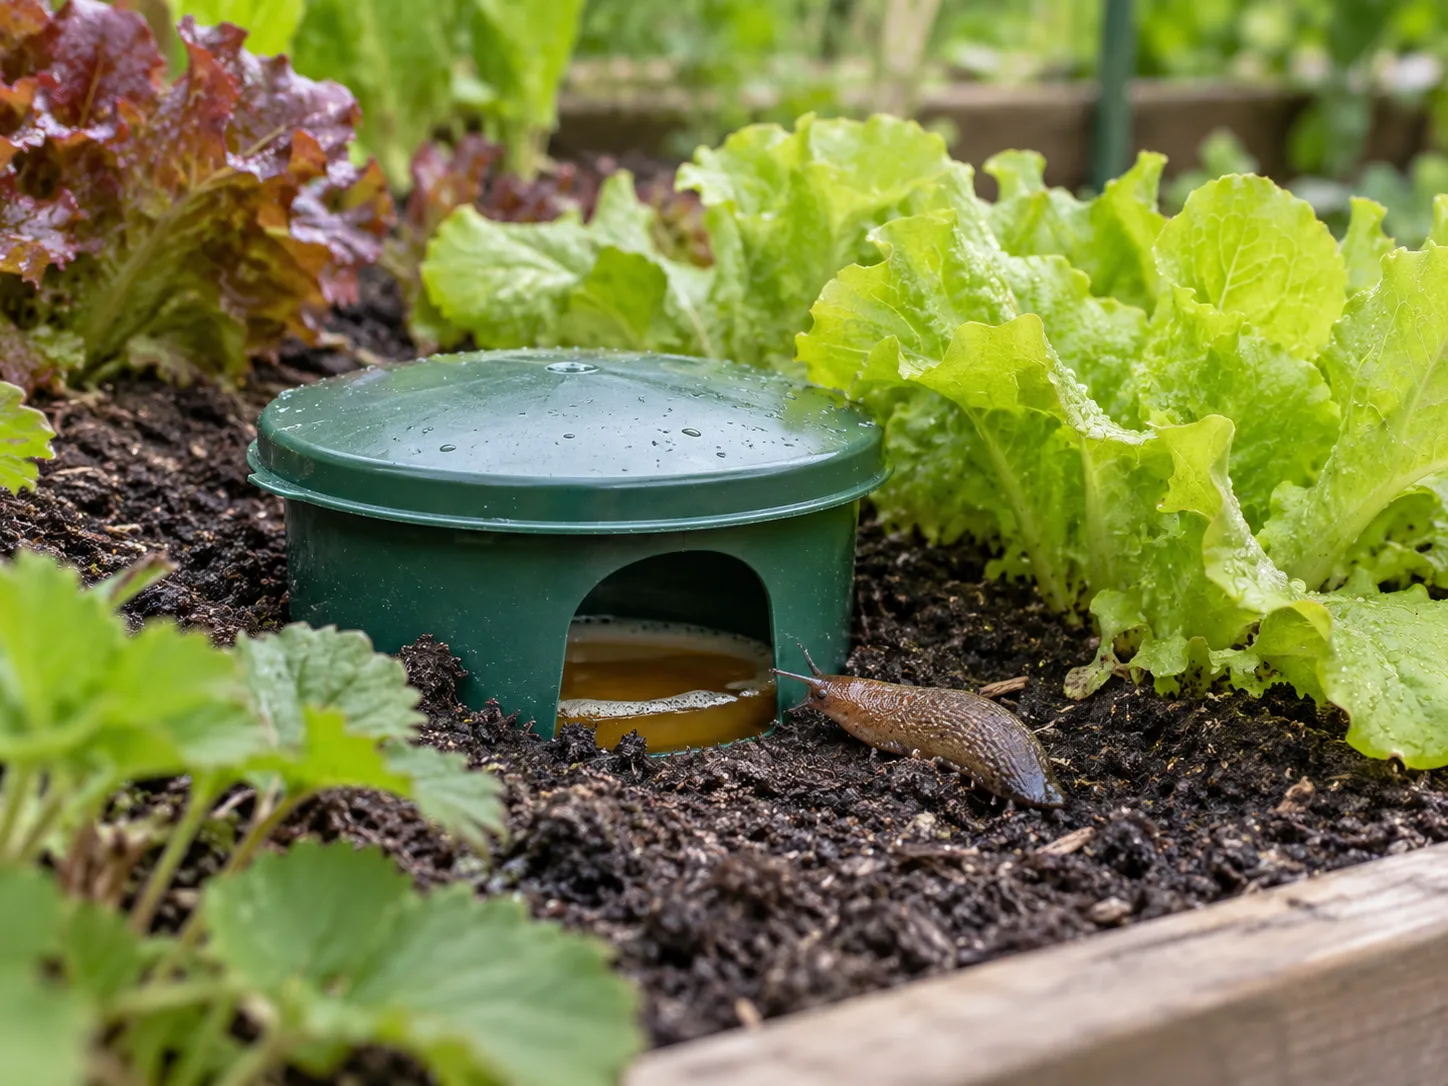
A shallow container sunk so its rim sits close to soil level can catch slugs attracted to fermented bait. Keep the opening low, but use a lid or cover with entry gaps so rain, leaves, pets, and small wildlife are less likely to get into it. Empty and clean it daily, and refill as needed. A yeast-and-sugar mixture can substitute for beer; the attraction comes from fermentation rather than a special property of one brand.
Set only a few traps near the worst damage instead of lining the whole garden. UC IPM notes that beer or yeast traps draw slugs from only a few feet, need frequent replenishment, and should have steep sides that prevent escape. Epic Gardening and Birds & Blooms also describe beer traps as a local collection method, but they cannot prevent new arrivals or replace habitat cleanup (Epic Gardening, Birds & Blooms). Do not use an open container where a curious pet or child can reach it. Traps also collect snails and other non-target mollusks, so use them only beside plants that need protection and empty them on schedule. A trap left full can become a stagnant, smelly container rather than a control method.
Use barriers only where they can be maintained
A barrier can help protect a single pot, raised bed, or seedling station, but every gap is an entrance. Copper tape around a clean container may deter some slugs, yet it will fail if leaves, mulch, stakes, or weeds form a bridge over it. Keep the strip continuous and above the soil line, clear debris from it, and check the protected area first so you do not trap slugs inside.
Treat copper as a trial, not a guarantee. Some studies show effects, but RHS reports that a garden-realistic test found no reduction in slug damage from copper tape and several other commonly used barriers. A barrier is worth trying around a small, high-value target if you can inspect it; it is a weak choice for a large open bed with many entry routes.
Dry diatomaceous earth can lose effectiveness once damp, and dust should not be inhaled. Since gardens are watered and rained on, it needs repeated replacement and is rarely a durable perimeter. Crushed eggshells, coffee grounds, ash, hair, and sharp grit are often promoted as no-cost barriers, but evidence is inconsistent; UC IPM says coffee grounds and eggshells have not been shown to deter slugs. Do not spend time building a thick ring that can become a crust or alter the soil while slug activity continues.
When a labeled slug bait makes sense
Consider a bait only when you have confirmed active slugs, vulnerable plants continue to receive fresh damage, and sanitation, hand-picking, and targeted traps have not brought the injury down. Bait is one part of integrated pest management, not a substitute for reducing shelter and moisture. UC IPM cautions that baits alone do not provide long-term control in gardens with abundant food, moisture, and hiding places.
Read the entire label before buying or applying a product. Iron phosphate products are generally a more favorable choice around pets and wildlife than metaldehyde, but “organic” or “safer” does not mean harmless. The bait is intended to kill mollusks, including beneficial slugs and snails, and some formulations combine iron phosphate with another pesticide such as spinosad. Choose only a product labeled for your crop and site, follow the rate and placement directions, keep it away from children and animals as the label directs, and never sprinkle it on edible leaves.
The University of California’s IPM guidance explains that iron phosphate can stop feeding before the slug dies and that it may take several days; the animal may retreat to cover, so the lack of visible bodies is not proof the bait failed. The same guide warns that metaldehyde can be particularly poisonous to dogs and cats and that bait should be scattered rather than piled. If pets, children, wildlife, or edible crops make the label precautions impractical, skip bait and continue with physical controls or seek local extension advice.
Follow a seven-day plan and measure fresh damage
A simple schedule helps separate a working method from a hopeful guess. Keep a short note of the plant, date, weather, fresh damage, and what you changed. You do not need a formal pest count; the question is whether new injury is declining on the plants you decided to protect.
- Day 1: Photograph or mark damaged leaves, inspect after dark, and confirm a slug or fresh slime trail. Identify the two or three most vulnerable plants.
- Days 1–2: Remove slugs by hand, clear loose debris beside those plants, and adjust watering to the morning or root zone where practical. Keep needed mulch, but open a small inspection zone at each plant base.
- Days 2–4: Add one board trap or a few covered beer traps near the damage. Empty them every morning. Remove any egg clusters you find in loose soil or beneath debris.
- Days 4–7: Compare fresh holes with your Day 1 baseline. If feeding has slowed, continue the low-impact routine and check traps less often. If fresh damage continues, inspect for an alternate pest, close barrier gaps, or consider a labeled bait only if you can follow its precautions.
Do not change five things at once if you can avoid it. When you make one or two changes and record what happened, you can keep the steps that help and stop spending time on methods that do not.
Remedies that disappoint or can backfire
Salt is not a garden-safe slug treatment. It can dehydrate a slug, but sprinkling salt or saltwater in a bed risks harming plant tissue and increasing soil salinity. UC IPM specifically advises against using salt to destroy slugs because it raises soil salinity. If you find a slug, remove it directly instead of spraying a salt solution over foliage and washing the residue into the soil.
Beer traps do not clear a whole garden. Their range is local, bait dries or dilutes, and the trap must be emptied. Copper tape does not seal an open bed if plants or mulch bridge it, and real-garden performance is mixed. Diatomaceous earth is not rainproof, so a dry-day application may stop working after watering or rain. These methods can still have a role when their limitations fit the specific spot, but none is a one-time cure.
Do not assume every organic product is safe for everything. Read active ingredients and label warnings, especially for products with multiple active ingredients. Broad spraying is rarely a sensible first response to a mollusk problem, and indiscriminate pesticide use can harm predators that help keep garden pests in check. Focus first on inspection, targeted removal, and the smallest protected area that solves the problem.
Adjust for season, weather, and garden type
Expect activity to rise after rain, during mild damp spells, and in spring or fall in many temperate gardens. In warm regions with mild winters, slugs may remain active for much of the year; in hot, dry weather they retreat into cool, protected places. Penn State Extension notes that slugs can overwinter in several life stages and become active in damp spring and fall weather. Use weather and fresh damage as your cue rather than relying on a single calendar month. Eggs and young slugs can persist in protected soil or debris, so one cleanup will not necessarily end the problem. After you remove a cluster or shelter, make a second flashlight check a few nights later; repeated low-effort checks often matter more than one dramatic garden-wide cleanup.
Vegetable beds need fast protection for seedlings and crops close to the soil, especially strawberries and leafy greens. A container garden is easier to inspect, but check beneath pots, saucers, and benches, and make sure leaves do not bridge from the ground to a protected rim. In a wildlife-friendly ornamental bed, tolerate light feeding where plants can recover and reserve removal or bait for repeated damage to a specific plant.
RHS recommends targeted management rather than trying to eradicate slugs and snails, because they have ecological roles and will remain part of most gardens. That advice also saves effort: if the damage is no longer increasing, there is little benefit in escalating control. Recheck after rain, when you add mulch, and when new seedlings go in; a small early intervention is usually easier than responding after an entire row has been stripped.
Conclusion
To get rid of slugs in the garden, first verify fresh feeding with a nighttime check and a slime trail. Protect seedlings and other high-value plants, reduce damp hiding places right beside them, hand-pick or trap the slugs you find, and use barriers or a labeled bait only when the location and risks make sense.
Avoid salt, do not expect beer or copper to solve a large infestation alone, and keep a simple record of new damage for a week. Slugs will remain in many gardens, but a targeted plan can keep their feeding below the level that threatens your plants while leaving room for the wildlife and soil processes a healthy garden depends on.



