How to Transplant Asparagus: A Step-by-Step Guide
Learn when to move established asparagus, how to lift and divide crowns with less root damage, and how to care for the bed while it reestablishes.
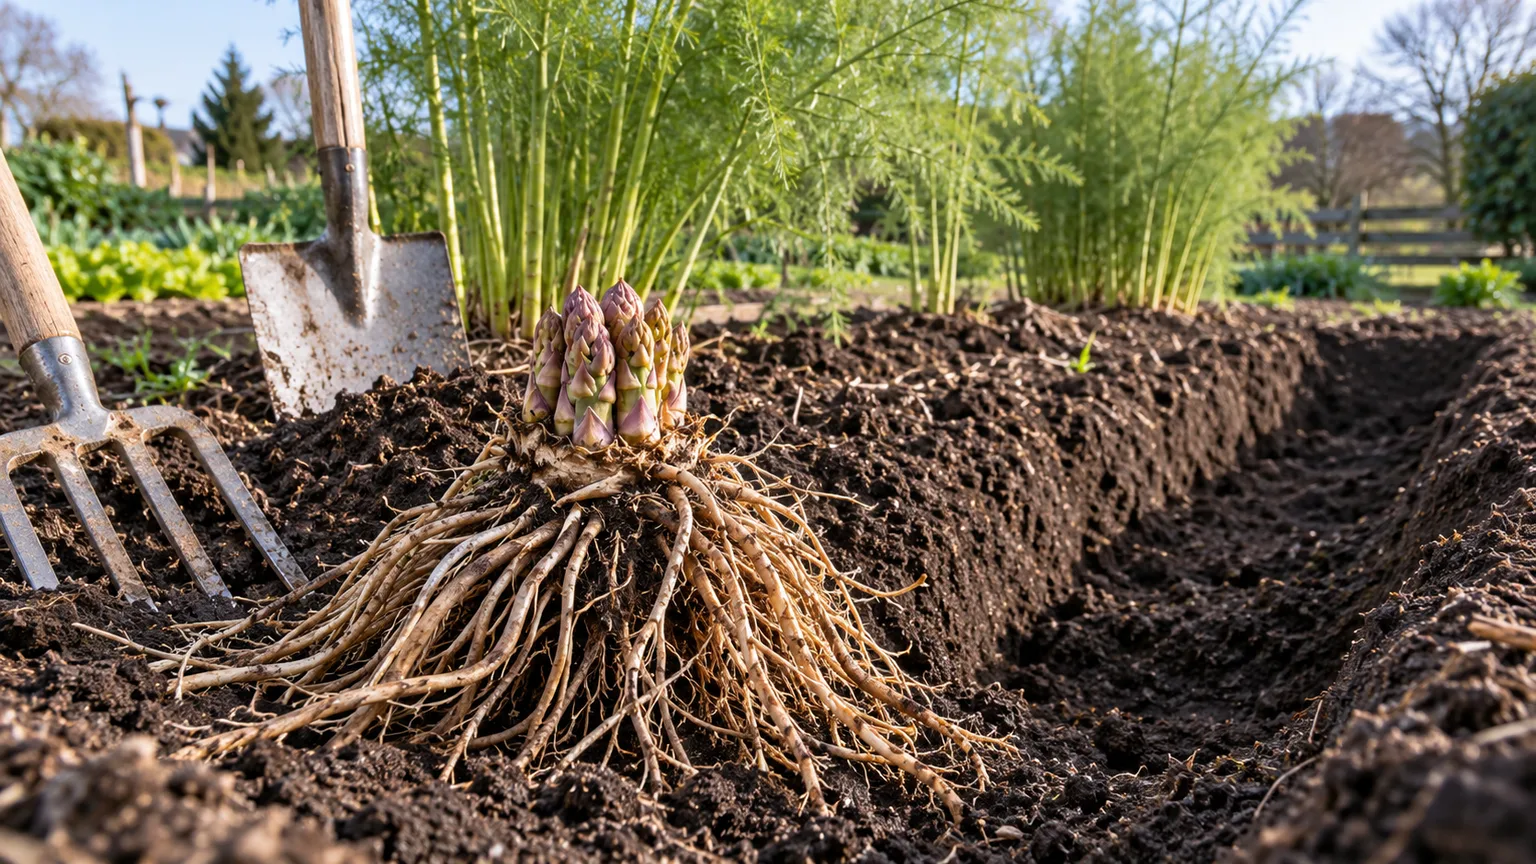
Yes, you can transplant established asparagus. Move it while the crown is dormant, prepare the new bed before you dig, lift as much of the large root system as you can, and replant the crown promptly. Expect to skip at least one harvest season while the plant rebuilds roots and fern.
Asparagus is a long-lived perennial, so moving it is a bigger decision than shifting an annual vegetable. Transplant when a bed is overcrowded, shaded, poorly drained, or in the way of construction; do not dig up a healthy bed just to divide it on a schedule. The best results come from matching the timing to dormancy and soil conditions, then giving the moved crown an undisturbed growing season.
First, decide whether to move the bed
Before reaching for a spade, identify what has changed. A healthy asparagus bed can remain productive for many years—North Carolina State Extension says 15 years or more is possible with proper management—so declining spears do not automatically mean the crowns need splitting (North Carolina State Extension). The issue could be shade, summer drought, weeds, poor drainage, overharvesting, or a fern canopy that was cut down before it could replenish the roots.
Walk the bed during the growing season and look at the pattern. If nearly the whole planting has declined at once, consider a site or care problem; if a few tight clumps are producing many thin spears while other areas remain vigorous, crowding is more plausible. Record which plants are weak and where water pools, then decide whether a move will actually correct the cause.
When transplanting solves the real problem
Move asparagus when the bed has become unsuitable or cannot stay where it is. Examples include a tree that has grown over the planting, a new structure that blocks sun, persistent standing water after rain, a bed that must be relocated, or mature crowns packed together so closely that the spears are consistently thin and the patch cannot be managed well.
There is a particularly important exception when choosing the destination: avoid replanting in soil where asparagus has grown before. Penn State Extension explains that asparagus can release compounds that suppress new crowns and that the fungus causing Fusarium root rot can survive in infected soil for years. Choose a fresh bed, especially if the old planting had weak, yellowing, or dying crowns (Penn State Extension).
When to leave the bed alone
If the only concern is one light harvest or a year of smaller spears, check the fern, weeds, water, and sun before moving a mature clump. Asparagus uses its fern after harvest to store energy for the next spring; cutting the green fern early, harvesting too heavily, or allowing summer drought can reduce the following crop. Correcting those issues is less disruptive than lifting deep roots.
Do not divide a vigorous crown just because it has been in place for three or four years. Asparagus is naturally long-lived, and every division creates wounds and reduces the amount of stored root tissue each new piece can use. If you want to expand the planting but the old bed is healthy, start a separate bed with purchased crowns or seedlings rather than repeatedly breaking apart productive clumps.
Best time to move asparagus crowns
The right time is when the ferns have died back and the crown is dormant, but the soil is workable. In most cold-winter areas this means very early spring, before buds or spears emerge; in regions with a mild autumn and enough time before hard freezes, late fall can also work. Dormancy limits water loss from foliage and lets the crown settle before active spear growth begins.
Do not use a calendar date from another climate as your signal. A warm spring can bring shoots up before you expect them, while a wet, cold bed may stay unworkable after the calendar says planting season has started. If the crowns have already sent up spears, leave them in place until the next dormant window unless the bed must be moved immediately.
Early spring or late fall?
Early spring is the safer default where the ground freezes hard or winter is long. Wait until the soil is thawed and crumbly enough to dig without smearing or compacting it, but finish before new growth pushes through. University of North Carolina Extension describes planting crowns after the danger of hard freezes and before growth starts; that timing is a useful cue for moving established crowns in a cold region as well (North Carolina State Extension).
Late fall can be a good choice where the soil remains workable and winters are not likely to heave newly moved crowns. Wait until the fern has yellowed and died naturally; then move the crowns before the ground freezes. Mother Earth News describes transplanting during dormancy in either autumn or early spring, while noting that fall moves may resume bearing earlier in its author’s experience (Mother Earth News). Treat that as practical experience, not a guarantee: a damaged crown may still need a full season of recovery.
Use plant and soil cues, not a fixed calendar
Look for dormant crowns with no green fern and no new spear tips. If old fern remains, let it turn yellow or brown first so the plant can finish moving energy into its crown; remove dead fern only when it has naturally finished. Mark the clumps while the old stems are still visible, because dormant crowns can be difficult to locate after the bed is cleared.
Check the soil before digging. It should hold together lightly when squeezed but break apart when pressed, rather than shine, smear, or cling in heavy wet clods. Working saturated soil damages its structure and makes it harder to expose roots gently; frozen soil is equally unsuitable. If the weather turns hot or windy during an otherwise good window, wait for a cool, calm day if the plants can remain in the ground.
Choose and prepare the new asparagus bed
Prepare the destination before you lift anything. The exposed roots can dry quickly, and having a trench ready means the crowns spend less time out of soil. Clear the planting area, loosen the bed, and set out labels or a simple map if you are moving several clumps with different vigor.
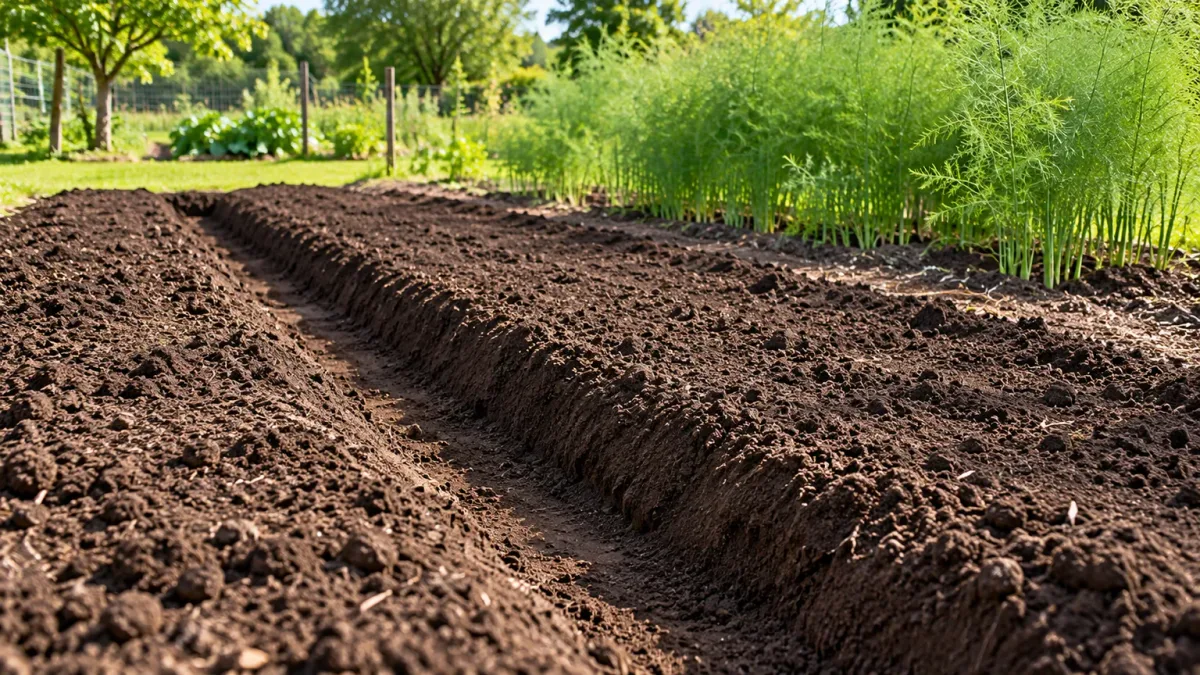
Find a permanent, sunny, well-drained site
Choose a permanent spot in full sun with soil that drains freely after rain but does not dry to dust between waterings, conditions recommended for asparagus by North Carolina State Extension. Asparagus occupies the space for years, so avoid a corner that may later be shaded by trees, crowded by a hedge, or disturbed by a path or utility project. Leave access for weeding and for the tall fern canopy, which can shade nearby low crops once it matures.
Drainage is a priority. Low spots that stay saturated put crowns at risk of root problems; if the only available ground is heavy clay or slow to drain, consider a raised bed or a different location rather than trying to cure persistent waterlogging with a small amount of compost. Also avoid planting into the same asparagus ground because of the disease and growth-suppression concerns described above.
Test soil and control persistent weeds first
A soil test is more useful than guessing at lime or fertilizer. Extension recommendations for asparagus soil pH vary slightly by region: North Carolina State Extension gives a target of 6.0 to 6.7, while Penn State Extension lists 6.2 to 7.0. Those ranges overlap around mildly acidic to near-neutral soil, but follow your local lab’s result rather than adding lime or fertilizer by habit. A test can also show whether phosphorus or other nutrients are actually needed.
Remove perennial grasses and difficult weeds before planting; they are much harder to control once asparagus crowns are established. Blend mature compost through the bed if the soil needs organic matter, but do not pack fresh manure or a concentrated fertilizer dose directly against a crown. Utah State University Extension recommends testing soil and following the report when preparing an asparagus bed, rather than applying a one-size fertilizer rate (Utah State University Extension).
Gather tools and protect the crowns
Have a sharp spade, a sturdy garden fork, a clean knife for any necessary division, a tarp, and damp cloth or a shallow tub ready. A fork loosens soil between roots with less cutting than repeated spade strokes; a sharp spade is useful for making a clean perimeter cut or separating an oversized crown. Clean soil from the tools before moving between beds, especially if any plant in the old patch showed rot.
Water the donor bed the day before only if it is dry; the goal is workable soil, not mud. Dig on a cool day and work one clump at a time. Set each lifted crown in shade and cover its roots with damp cloth while you prepare the next hole, then move it straight to the new bed. Do not soak the crown in water or leave it in sun and wind while you finish the entire row.
Dig established asparagus with the roots intact
Asparagus roots can extend much farther than the visible stems suggest. Do not try to pull a crown out by its fern stubs, and do not drive a spade straight down beside the central cluster where it can slice through the bud crown. Start outside the clump and loosen soil gradually, using the old fern stems or your planting map to estimate where the crown sits.
A practical sequence is:
- Use the garden fork to probe a ring around the outer stems, beginning at least 6 to 12 inches beyond the visible clump. If resistance is immediate, move farther out rather than forcing the tines through the roots.
- Cut a wider circle with the spade, then work the fork underneath the root mass from several sides. Lift gently a little at a time; do not lever hard from one point or jerk the clump free.
- Support the whole mass on a tarp as it comes out. Preserve the thick, fleshy storage roots and the buds at the crown; losing some fine feeder roots is less serious than chopping through the crown or leaving most storage roots behind.
- Shake off loose soil gently so you can see natural divisions. If sticky clay hides the crown, rinse lightly with a hose rather than scraping or tearing at the roots.
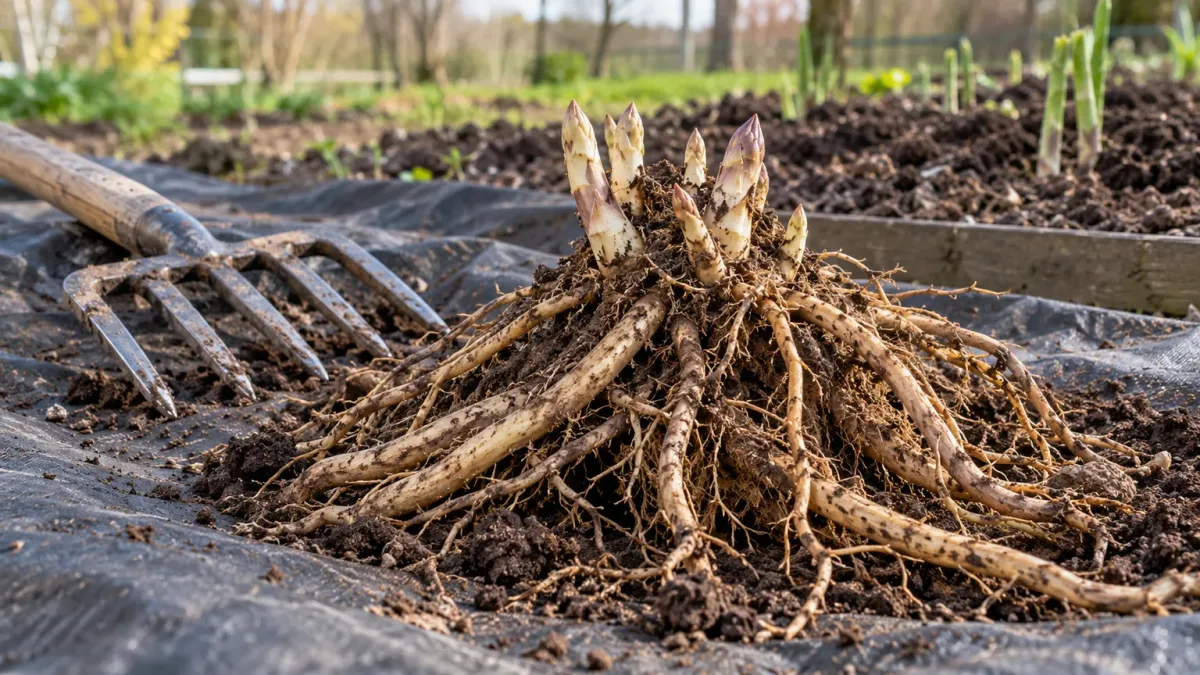
An older plant may be too large to lift perfectly intact. That is not a reason to cut randomly through its center. Work under the crown and accept a few broken root ends if needed; the priority is to keep each retained crown attached to enough substantial, healthy roots to support new fern. The same careful edge-to-center approach is recommended in the practical transplanting guidance from Mother Earth News (Mother Earth News).
Divide crowns only when the clump needs it
If a crown comes up as a manageable unit and the bed has room, replant it whole. Divide only when a clump is genuinely congested, when you need to remove a damaged section, or when separating the crown is necessary to fit the new layout. Avoid turning one strong crown into many small pieces; a larger division with sound roots and several healthy buds is more likely to reestablish than a thin sliver with little stored energy.
Look for natural seams between bud clusters. Use a clean, sharp knife or spade to separate them with as few cuts as possible, and make sure every section has both visible buds and substantial roots. Discard soft, foul-smelling, or visibly rotting tissue instead of planting it. Homes & Gardens’ asparagus-division guidance also stresses that division can stress the plant and that each section needs healthy roots and buds (Homes & Gardens).
You do not need to scrub every root bare or trim the root system into a tidy shape. Remove only broken, dead, or rotten portions with a clean cut. Keep healthy roots damp and shaded, and finish replanting promptly so the crown is not left exposed while you decide how many divisions to make.
Replant at the original depth, with room for roots
Make the prepared trench or hole wide enough for each root system to spread naturally. Space established clumps about 18 to 24 inches apart in a row, with roughly 3 to 5 feet between rows if you are laying out a multirow bed; increase the spacing if the divisions are large or you want easier access for weeding.
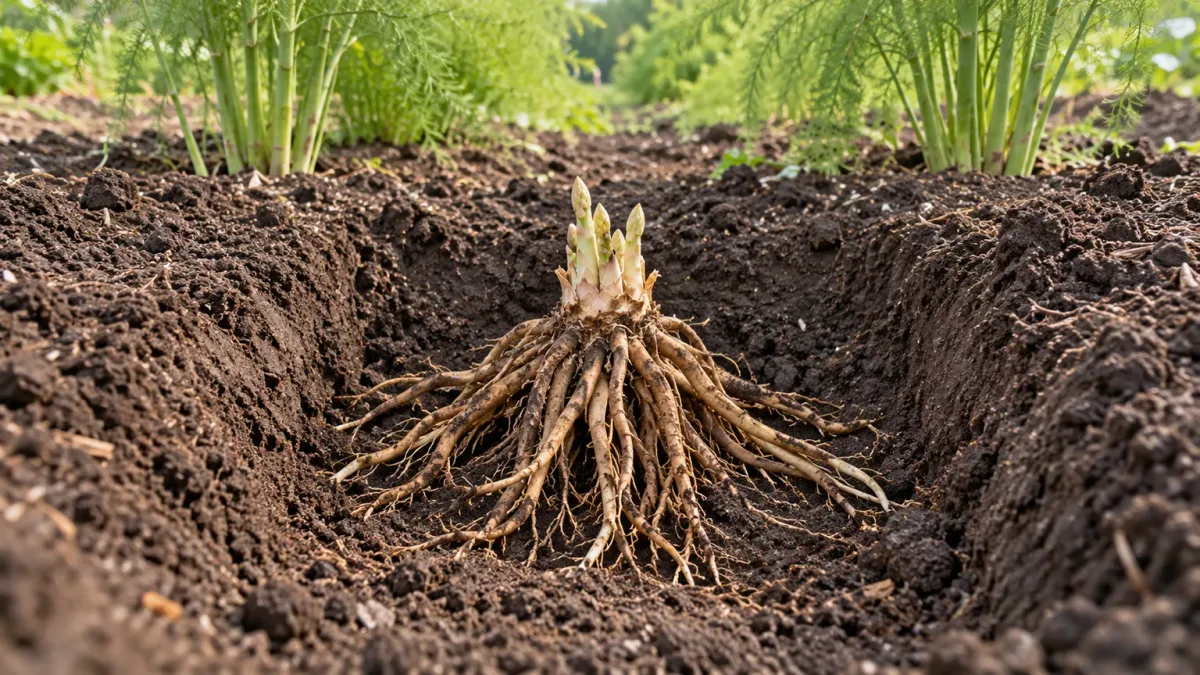
Mother Earth News gives a broad 18- to 30-inch range between plants, and Homes & Gardens recommends at least 18 inches for divided crowns, so 18 inches is a sensible minimum for most home beds rather than a target to crowd toward.
Set the crown at approximately the depth where it was growing before, with buds pointing upward and roots spread outward and downward. Do not bend long roots into a tight circle or fold them under the crown just to fit a small hole; widen or deepen the planting space instead. If the clump has lost its original soil line, use your local extension method for asparagus crowns. North Carolina State and Utah State describe new crowns in a deep trench, initially covered by a few inches of soil and gradually backfilled as growth develops; that method is for establishing crowns, so do not bury a mature crown far deeper than it grew simply to copy a trench dimension.
Backfill with the soil you prepared, working it between the roots without packing hard. Gently firm the surface so the plant stands in place, but do not stomp the bed. Label the old planting location and the new crown positions if you expect to monitor which divisions resume growth first.
Water, mulch, and settle the bed
Water slowly after planting so soil settles around the roots and air pockets close. If water runs off or stands on the surface, pause and let it soak in; repeated flooding is not a substitute for good soil contact. For the first few weeks, check moisture below the mulch with a finger or trowel, and water when the root zone begins to dry rather than following a rigid daily schedule.
Add about 2 to 3 inches of clean organic mulch, such as weed-free straw or shredded leaves, to conserve moisture and suppress weeds. Keep the mulch loose rather than matted, and leave a small open ring around any emerging buds so damp material does not bury new growth. Pull weeds by hand or cultivate very shallowly near the row; asparagus roots spread near the surface and can be injured by deep hoeing.
First-year care: let fern rebuild the crown
Skip harvest for the first growing season after moving the crown. A mature transplant may send up spears, but those shoots are the plant’s first chance to reestablish its root system in the new location. Let every spear grow into fern, keep the bed evenly moist, and protect it from weeds so the new crown can store energy. Extension guidance for newly planted asparagus consistently prioritizes establishment before regular harvest; North Carolina State recommends no harvest in the first growing season after crown planting (North Carolina State Extension).
Do not cut the fern while it is still green. The fern is the plant’s working canopy, not a weed, and it feeds the crown that will make future spears. Wait until it turns yellow or brown and dies back naturally in fall; then remove the dead growth if that is your usual bed practice. Leave healthy foliage intact through summer even if it looks untidy.
Fertilize from a soil test, not from a blanket recipe. If the test calls for nutrients, apply them at the recommended rate and timing; if it does not, extra fertilizer will not repair root damage. Utah State Extension emphasizes maintaining water and fern growth through establishment, while Penn State Extension recommends basing fertilizer decisions on soil tests (Utah State University Extension; Penn State Extension).
In the following spring, judge each plant by its vigor. If it produced strong fern through the prior season and the crown appears well established, you can consider a short, light harvest; leave thin or late-emerging spears to grow. If the plant struggled, skip another harvest season. Moving a crown does not reset it to the age of a seedling, but the roots still need time to recover from disturbance.
Troubleshoot a weak or slow recovery
No spears in the first spring: Do not assume the crown is dead or dig it back up. A dormant crown may wake later than the old bed, particularly after a cold spring or a rough move. Keep the location marked, maintain reasonable moisture, and wait through the fern-growing season before judging the result.
Thin spears or fewer shoots: This can reflect transplant stress, divisions that were too small, dry soil during the previous summer, too much shade, heavy weed competition, or an overly long harvest. Let the ferns grow uninterrupted, check sunlight and moisture, and avoid dividing the same plants again during their recovery. Utah State notes that spear size can reflect water or heat stress from the prior growing season, so the problem may have begun well before the shoots appeared (Utah State University Extension).
Fern yellows early or dies in patches: Check both extremes of soil moisture. A moved crown can dry out if the root zone is not being reached by water, but persistently saturated soil is also a poor setting and raises concern for root disease. Clear weeds that compete for water, correct drainage problems where possible, and remove a crown only if it is clearly soft or rotten; do not add more water to an already soggy bed.
Crowns push up or roots are exposed: This can happen after frost heaving or if the planting was too shallow. Once the soil is workable and the plant is dormant, gently cover exposed roots and stabilize the crown; do not bury growing fern. Add a light winter mulch in cold regions, but pull it back as shoots emerge in spring.
Several divisions fail while one survives: The donor clump may have been cut into pieces that were too small, or the exposed roots may have dried during the move. Next time, keep fewer, larger divisions with healthy buds and thick roots, prepare the new site first, and transplant during a cool dormant window. If the remaining crowns are healthy, give them a full season before making another change.
Conclusion
The safest way to transplant asparagus is to move a dormant crown into a prepared, sunny bed with good drainage, preserving as much of its root system as possible. Divide only when crowding or damage makes it necessary, and choose fresh ground rather than reusing an old asparagus bed. Water in, mulch lightly, keep weeds out, and let the fern grow for a full season before harvesting again. That patient reset gives the roots time to settle and puts the plant in a better position to produce future spears.



